|
|
|
Porsche, and the Porsche crest are registered trademarks of Dr. Ing. h.c. F. Porsche AG.
This site is not affiliated with Porsche in any way. Its only purpose is to provide an online forum for car enthusiasts. All other trademarks are property of their respective owners. |
|
|

  |

| Harpo |
 Dec 24 2014, 09:42 AM Dec 24 2014, 09:42 AM
Post
#181
|
|
Senior Member  Group: Members Posts: 1,304 Joined: 21-August 11 From: Motor City aka Detroit Member No.: 13,469 Region Association: None |
(IMG:style_emoticons/default/agree.gif)
Aeroquip or Earls the parts are readily available. I believe it was -04 line & fittings David |
   |

 
|
| Bulldog9 |
Jan 1 2015, 01:27 PM
Post
#182
|
|
Senior Member Group: Members Posts: 706 Joined: 21-August 13 From: United States Member No.: 16,283 Region Association: MidAtlantic Region |
Look what I took home yesterday (IMG:style_emoticons/default/drunk.gif) Just in time for the New Year, just waiting on the bumpers and valences. Really looks great, Thanks to Scotty B!
Diddnt have much time to do more than pick up and drop off at my storage garage, had to get back home for the NYE borefest at some snobby wine & cheese place (EHEM, I mean a wonderful NYE celebration (IMG:style_emoticons/default/evilgrin.gif) ). Now its time to start sorting out the wiring, interior gauges, etc. On the trailers at Scotty B's 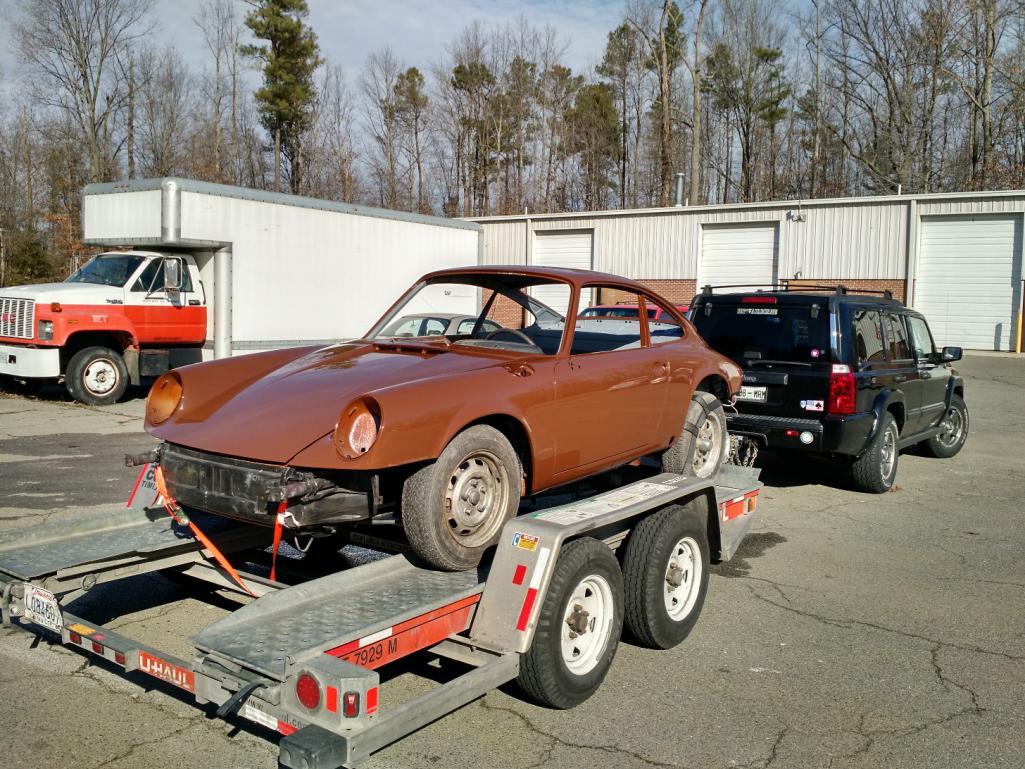 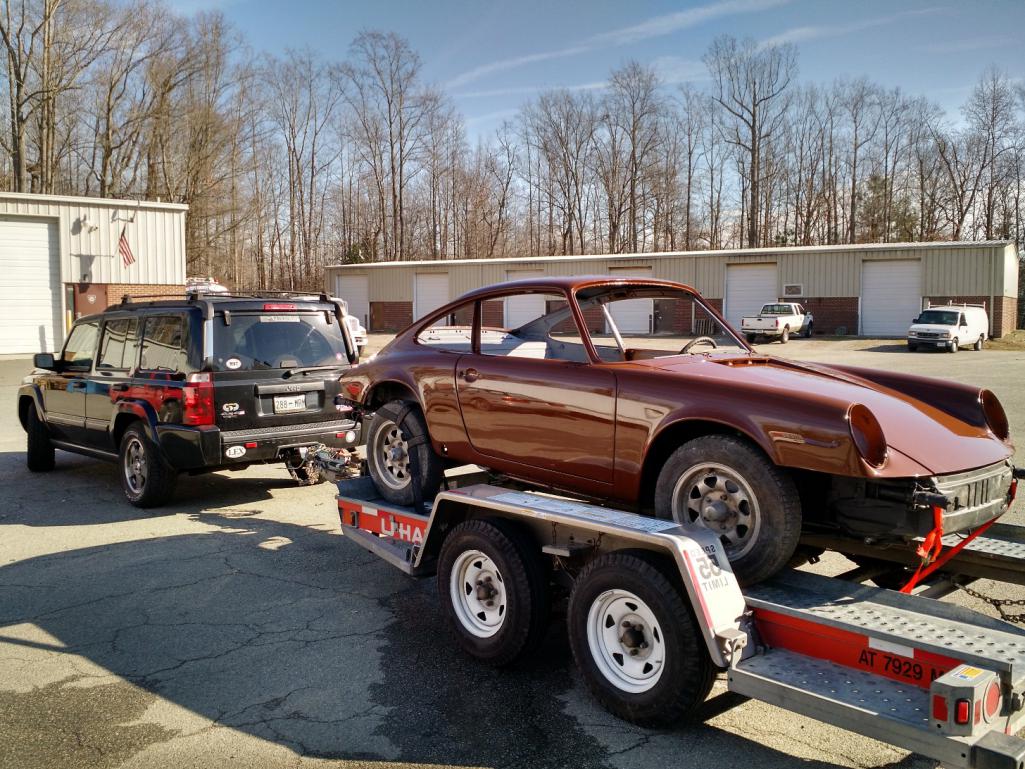 At a gas stop. 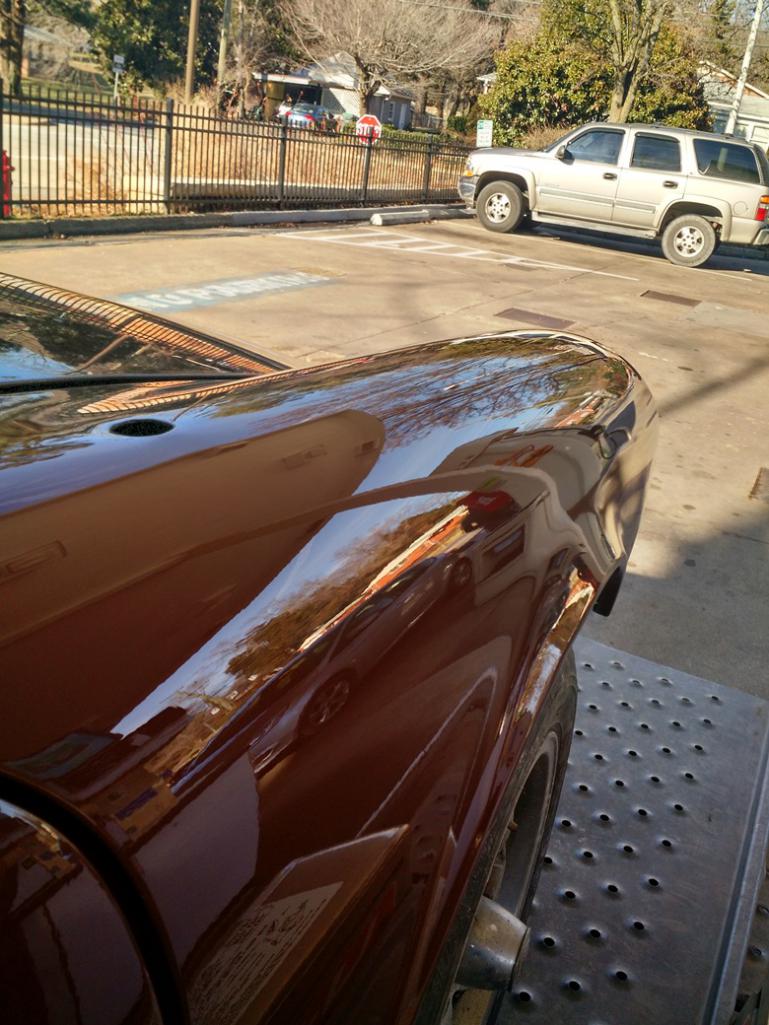 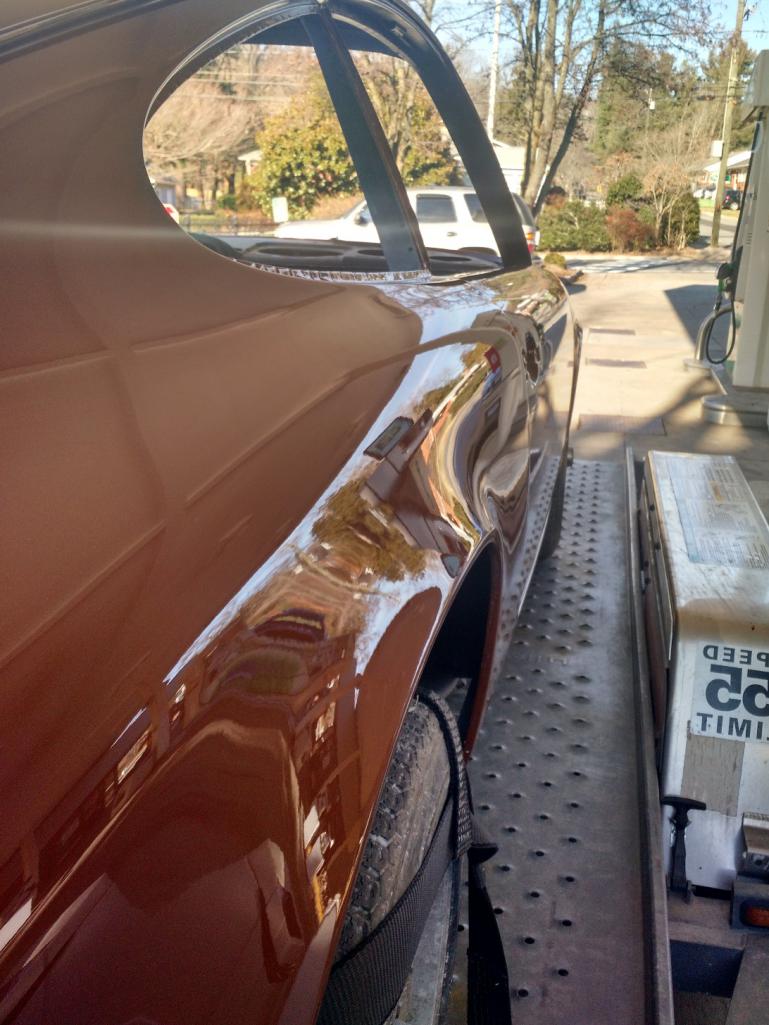 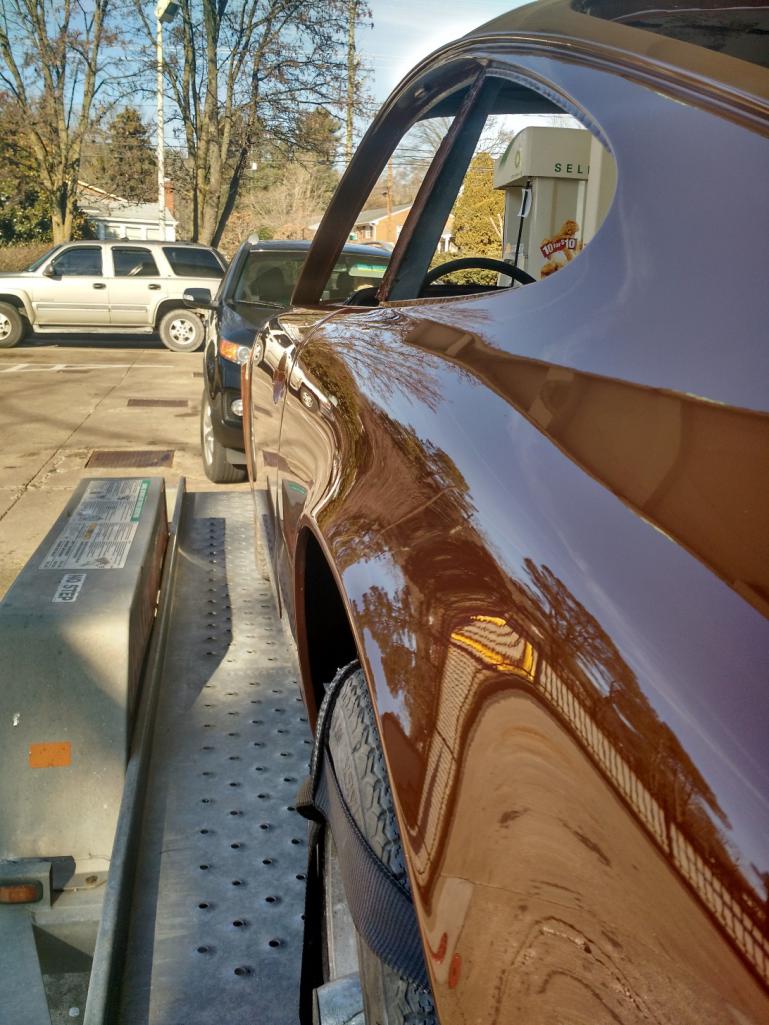 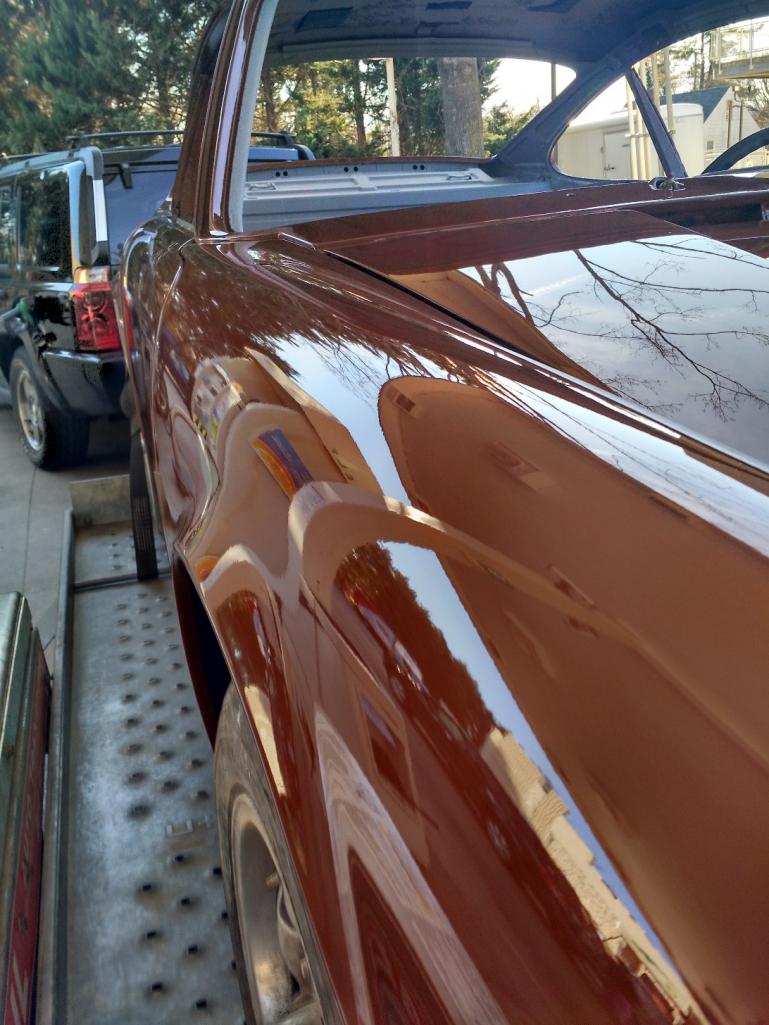 Progress! |
|
|
|
| Bulldog9 |
Jan 6 2015, 06:12 PM
Post
#183
|
|
Senior Member Group: Members Posts: 706 Joined: 21-August 13 From: United States Member No.: 16,283 Region Association: MidAtlantic Region |
Finally have the Long Block mostly assembled, things are going well. Next up is pushrod tubes and a few more accessories. Still have to finish the temp sender wire. Hopefully the machine shop will finish my pushrods by the weekend. If so, I will be able to button up the motor. I've already mocked up the intakes, carbs, etc, and all looks good.
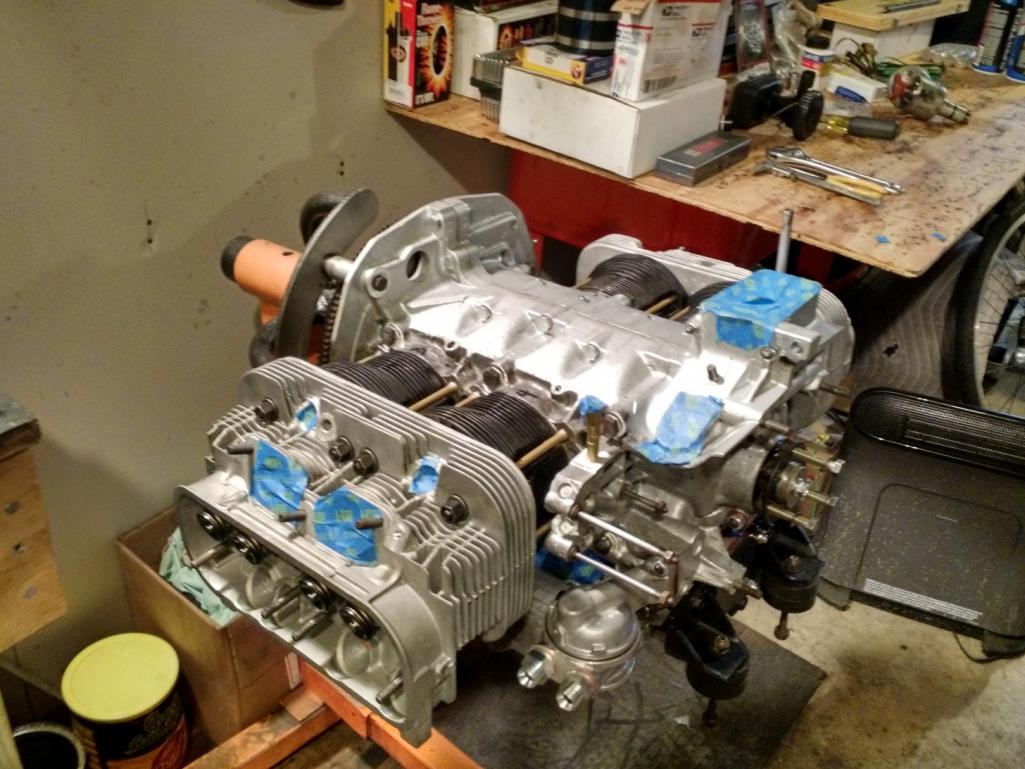  Under cyl tin fit perfectly 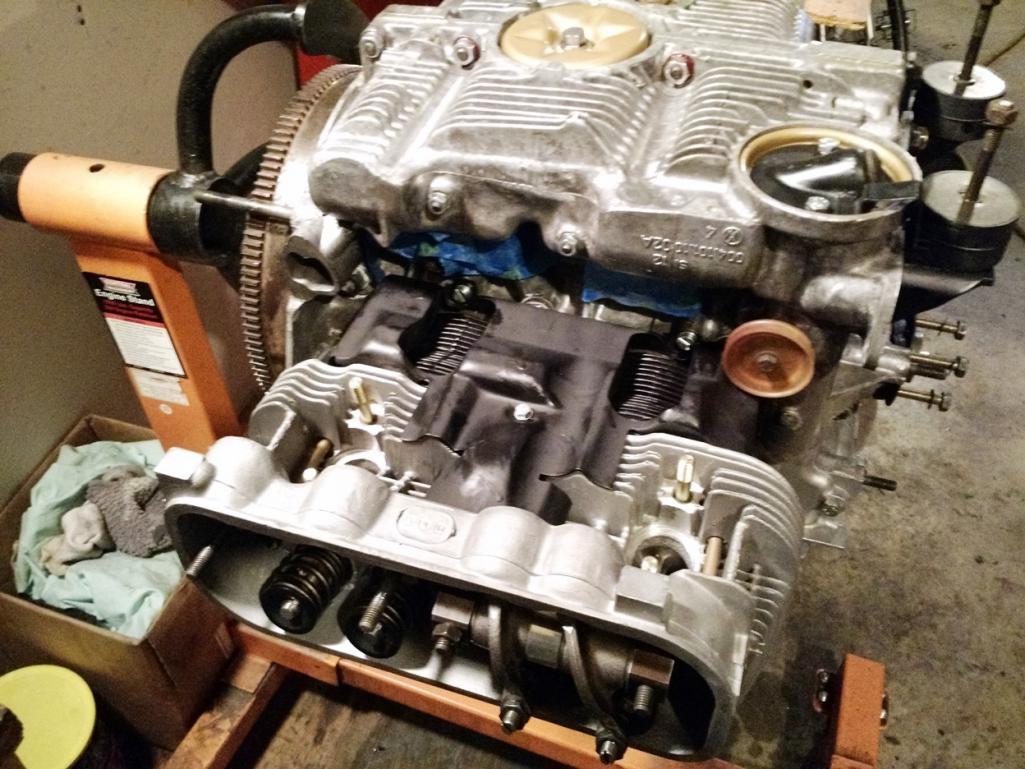 Attached thumbnail(s) 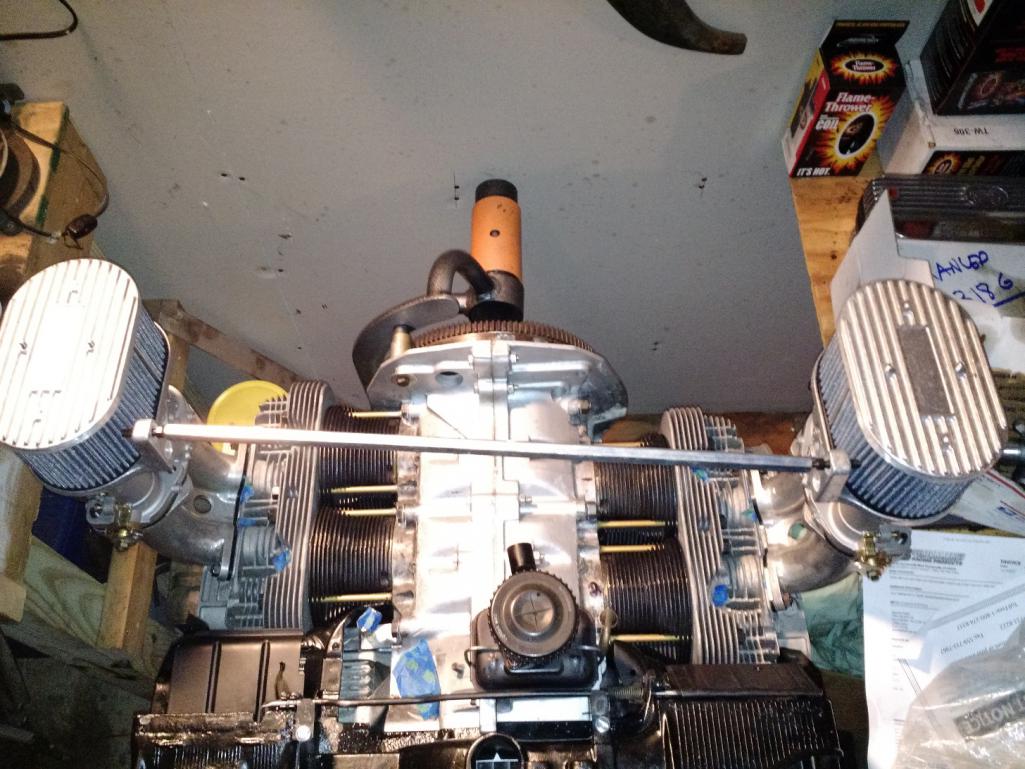 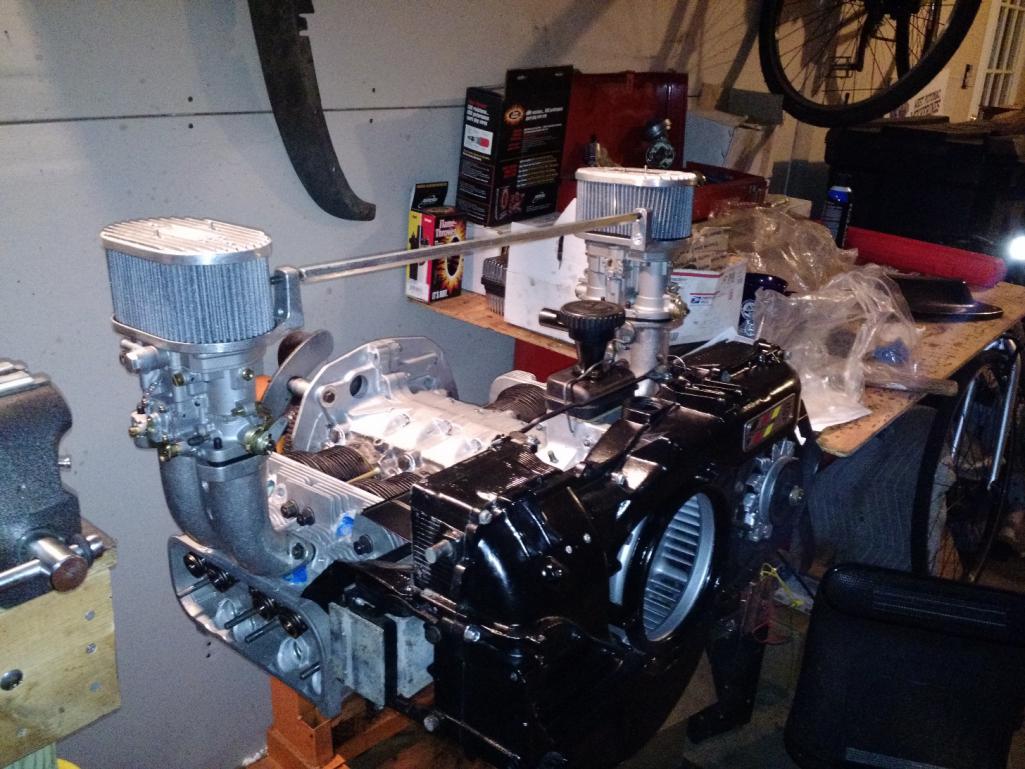
|
|
|
|
| saigon71 |
Jan 6 2015, 09:19 PM
Post
#184
|
|
Advanced Member Group: Members Posts: 2,026 Joined: 1-June 09 From: Dillsburg, PA Member No.: 10,428 Region Association: MidAtlantic Region |
Great progress Steve - should be ready for Hershey right? (IMG:style_emoticons/default/biggrin.gif)
That paint job looks sweet ScottyB! |
 |
|
| Bulldog9 |
Jan 9 2015, 11:24 AM
Post
#185
|
|
Senior Member Group: Members Posts: 706 Joined: 21-August 13 From: United States Member No.: 16,283 Region Association: MidAtlantic Region |
QUOTE(saigon71 @ Jan 6 2015, 10:19 PM)  Great progress Steve - should be ready for Hershey right? (IMG:style_emoticons/default/biggrin.gif) That paint job looks sweet ScottyB! If all the stars align.... I should have the body complete and engine in and running, but not sure if I will have the interior finished or all the kinks and and issues sorted out.... I'd love to, as I think this will be my last chance for several years. I will PCS this spring no idea where yet, find out in Feb.... If I get the East Coast, FT Bragg, Benning, Stewart, Drum, will definately be there in 2016, but who knows. |
|
|
|
| Bulldog9 |
Jan 14 2015, 07:27 PM
Post
#186
|
|
Senior Member Group: Members Posts: 706 Joined: 21-August 13 From: United States Member No.: 16,283 Region Association: MidAtlantic Region |
As my Italian forbears would say................ SHEET SOMMA A BEECH
I have a local machine shop, two man shop, been in the same location since they built the place 43 years ago. And it looks it.......... Old School everywhere, the kind of place you just want to hang out in..... They do impeccable work.... Meticulous, to the point of obsession, literally had to look up my engine in a book to see and visualize what it was.......... etc, bet they'd get along great with Jake (sorry bud (IMG:style_emoticons/default/rolleyes.gif) ) The More I tried to say 'look, I just need you to cut it to this length, then press this end on, the more in-depth and demanding he was.......... He called me over the weekend after he did his first one, left a 5 minute voice mail because he couldn't get it to a 50 thousands of an inch.......... I kid you not..... I had to cut him off and ask "Is 50 thousanths .0005 of an inch????" He says yes. I say "I think that's fine. He wants to be precise............ So I muster all my 'respect your elder military discipline' and a chuckle, knowing that they will be exact at least. So I get a call today, he is done, come pick them up.............. After the 5 minute tail of what he did, how he did it, how much pressure he had to use to press the ends in after the cut............... He says "I spent 8 hours doing them, and $80 an hour, but your military so I'll charge you for 6 hours................ (SILENCE FROM ME) "Hello, sir? hello?? ME KEEPING CALM...... "Yeah, I'm not sure I heard you right, did you say 8 hours??" Yes, but I'll only charge you for 6, and remember, I only take cash........... ME " So one hour per rod?????????" He senses my frustration, and makes no apology, "hey. I'm only charging you for 6, and I wanted to get them right for you, and they are perfect........" ME "OK, I'll be by, need to warm up the printing press, make sure my plates are precise when they print the bills..... " He doesn't appreciate my humor.... I tell him that my humor is far preferable to the alternative and that I think 6 hours is unreasonable. I'll be by with $200. Take it or keep the parts....... He tells me to (IMG:style_emoticons/default/KMA.gif) but takes the $200 and gives me the rods. I dont even want to look at them........... Am I crazy to assume 2-3 hours MAX for this job? I figured 30 minutes to set up the lathe/jig to cut, an hour to cut and debur the edges, check measurements/file as needed and MAYBE another hour to press the new fitting on the cut end??? I maintained my cool, but barely........... (IMG:style_emoticons/default/dry.gif) (IMG:style_emoticons/default/sad.gif) (IMG:style_emoticons/default/barf.gif) (IMG:style_emoticons/default/confused24.gif) (IMG:style_emoticons/default/confused24.gif) (IMG:style_emoticons/default/confused24.gif) (IMG:style_emoticons/default/ar15.gif) OK, its not the weekend, but I need (IMG:style_emoticons/default/beer.gif) ............ eh make that a Tullemore Dew neat please.... |
|
|
|
| billh1963 |
Jan 14 2015, 07:55 PM
Post
#187
|
|
Car Hoarder! Group: Members Posts: 3,433 Joined: 28-March 11 From: North Carolina Member No.: 12,871 Region Association: South East States |
Looks like Scotty will be shooting a lot of Brown this Spring!
BTW....'76 Chocolate Browns rule! (IMG:style_emoticons/default/beer.gif) 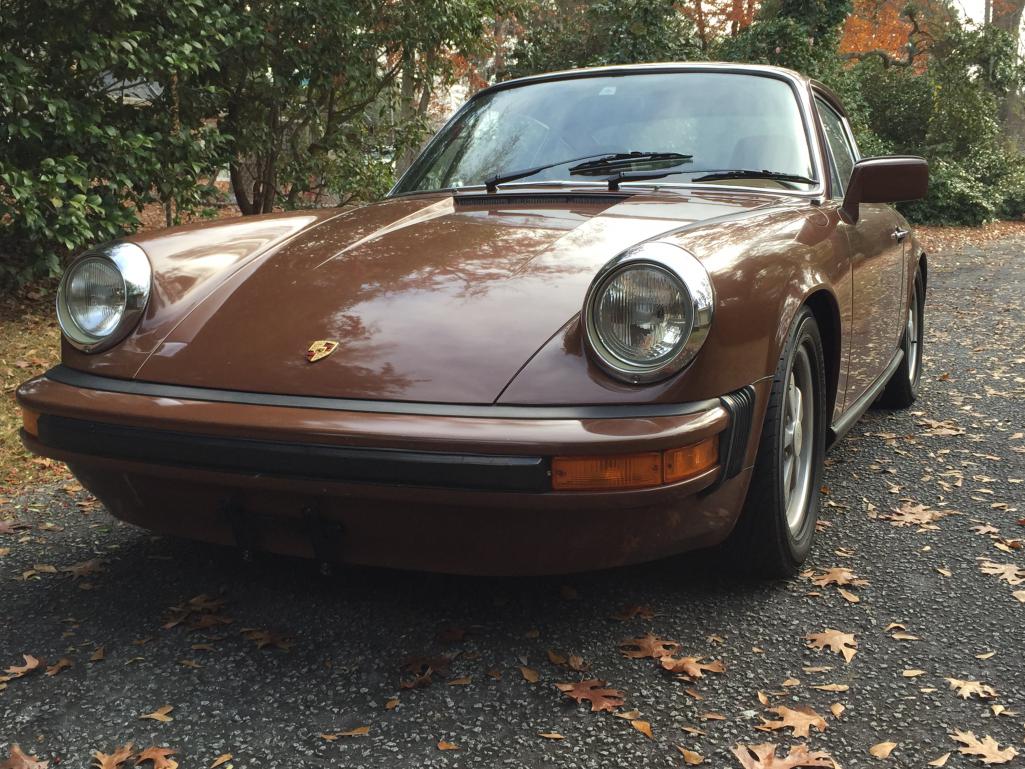 |
|
|
|
| '73-914kid |
Jan 14 2015, 07:59 PM
Post
#188
|
|
Senior Member Group: Members Posts: 1,473 Joined: 1-November 08 From: Vista, CA Member No.: 9,714 Region Association: Southern California |
When I cut mine on a lathe, it took 20 minutes to physically cut all 8 of them.. maybe 10 minutes of setup to make sure things were going to be the correct length.
You need to remind your machinist that there is such thing as the law of diminishing returns... as soon as you start/ break in the motor, the pushrod ends will seat further, shortening the overall length a miniscule amount.... A small pipe cutter for copper house plumbing works just as well (IMG:style_emoticons/default/poke.gif) |
|
|
|
| rick 918-S |
Jan 14 2015, 08:15 PM
Post
#189
|
|
Hey nice rack! -Celette Group: Members Posts: 21,272 Joined: 30-December 02 From: Now in Superior WI Member No.: 43 Region Association: Northstar Region |
Sounds like he wants you to pay him to talk to every other customer he BS'd that day. I hate that shit. I had a similar experience. But not only was the bill massively inflated he cut one of my euro spec heads "S" unobtainium heads like a wedge. (IMG:style_emoticons/default/jerkit.gif)
Another machinist, specialized on 15k and up race engines, brought him a 121 head for a BMW 2002, E12 valves, cut the head like a wedge. 23 years ago and the head work was $ 500.00. By the time the head was recut straight it was .111 over the max cut. The head was ruined. (IMG:style_emoticons/default/jerkit.gif) (IMG:style_emoticons/default/dead horse.gif) Guy went on and on about how good he was with chevy's. Like it really made a difference what head he was working one. Another specialty "Heads Only" shop, Brought them a second set of 928 euro heads. Asked about a price. Without even looking at the heads he quotes $ 900.00 each. I ask him if he knows how to measure the heads to determine how much he can cut them or if they are within spec. He says.... you measure them? I say, ya, There is a casting on the head you use to measure them, he say's where? I smiled, picked up the heads and walked out. |
|
|
|
| Bulldog9 |
Jan 15 2015, 04:51 AM
Post
#190
|
|
Senior Member Group: Members Posts: 706 Joined: 21-August 13 From: United States Member No.: 16,283 Region Association: MidAtlantic Region |
QUOTE(billh1963 @ Jan 14 2015, 08:55 PM) Looks like Scotty will be shooting a lot of Brown this Spring! BTW....'76 Chocolate Browns rule! (IMG:style_emoticons/default/beer.gif) Yeah, seems this color is coming back. I bounced between several colors, dark forest Green (like the 912 in Spy Games), Ivory, that 80's Mahogany Metallic Brown, but Bitter Chocolate was the factory color, so it seemed the right thing to do. My all time favorite color is the slate grey on black from the Movie Lemans (with McQueen) Saw it in the movies when I was a kid (maybe 73? was instantly in love with the 911.... That would have meant a complete interior color change too. |
|
|
|
| ChrisFoley |
Jan 15 2015, 07:24 AM
Post
#191
|
|
I am Tangerine Racing Group: Members Posts: 8,024 Joined: 29-January 03 From: Bolton, CT Member No.: 209 Region Association: None |
QUOTE(Steve Pratel @ Jan 14 2015, 08:27 PM) ... Am I crazy to assume 2-3 hours MAX for this job? ... Even my anal retentive machinist could do that job in less than 2 hours. An hour should be more than enough for someone who's done it before and has the right tools. You would have been better off telling him to kiss your ass (sorry chaplain) and buying a fresh set to take somewhere else. |
|
|
|
| Bulldog9 |
Feb 1 2015, 09:42 PM
Post
#192
|
|
Senior Member Group: Members Posts: 706 Joined: 21-August 13 From: United States Member No.: 16,283 Region Association: MidAtlantic Region |
I've been super busy at work and progress, but no time to post.
Engine: Not much progress on the engine, but did accomplish: - Finally got my pushrods back from the machinist, after a huge fight over his fee..... Wanted to charge me for 8 HOURS OF LABOR..... I paid him for 2 hours...... It got very ugly. In the end I told him take it or leave it. He thought he had me over a barrel till I told him to take the $200 or I was going to buy a new set, send them to California to be machined, overnight them to me and STILL take my wife out to dinner with teh $200 I had in hand. He took it without another word, handed me me the pushrods and I went on my merry way.... - Installed flaps and test fit all the tins, but need to change my engine mount to stop sag before I do much more. - Mocked up the Carbs and intakes, waiting on a Throttle cable bracket. - Still playing with the pertronix distributor fitment...... will probably have to re-index the drive to keep the lead/lug away from the cooling flap bar. I'm about to call it quits and go with a Bosch style distributor with Pertronix guts. MTF... Body Reassembly: Lots of progress: Will do some breakout posts on the projects sometime in the future. As I just got the car back from the bodyshop (Scotty B) and had to install the windshield washer bottle, and fuel filler, etc. I took the drivers fender off, and kept it off. HIGHLY recommend this as there is much work to do at this site when working on the brake, fuel and electrical systems. - Finished brake system, installed front pads, and hardware, and bled/filled the brake circuits. NO LEAKS! I expected some kind of leak due to the amount of heat I had to put on the old stock lines to get everything apart. I have new rubber lines and the final hard line to caliper at each wheel, but the rest is all stock. Biggest surprise was no leak at the master cyl feed grommets. - Installed the Gas filler door latch - ** If you are taking off the fender, and cant get the little clamp undone to remove cable, JUST CUT IT, and order a new cable. It is much easier with the fender off, turned upside down and you can see everything. I cant imagine doing it while on car, would have been difficult not being able to see. - Installed mirror support in passenger door. Blue tape is because I am a clutz/// - Converted the rear defogger switch to a foglight switch - The rear defogger element is toast, so why leave a switch unused and spend $ on a factory style switch or go ghetto. Cost $4. I will use the old power lead for the rear window defogger to power as needed the accessory gauges I am adding (AFM, CHT, Clock, Fuel Gauge) - Cleaned up and undercoated/painted my donor fuel tank. Fresh eastwood undercoat on bottom and chassis black/enamel on top. Really scored on this the tank is SPOTLESS inside. Most progress has been made on electrical system - Installed New/Used Heater controls - Cleaned up fuse blocks front and rear, cleaned all connections, contacts and relays. - Installed battery and grounds - Tested and verified the wiper/washer/cig lighter/horn/rear heater/blower circuit works. - Installed Relays for: - Headlights (dual 40 am relays and fused for high and low beams), - Foglights (Hella system, 15A relay and fuse powered by parking light circuit and switched by the new foglight switch) - New accessory Fuse block, 40 amp circuit switched with ignition. - Also stripped front wiring harness, pulled headlight wires out of fuse block, and wired in new leads to switch relays, added foglight power wires and re-ran/re-taped leads to each side, also re-ran horn wiring harness. Still need to wire in the relays, am waiting till I install all the lights before I power everything. The only problem so far is the front blower seems to be dead. I tested power at the plug, had it on one pin with lever all the way to right,, but nothing from the blower, will do some research and run a test wire to check the fan before I pull the motor. Anyone have a troubleshooting guide for the fresh air fan? Here are some pics, will update with 'how to/progress' pics posts later. Attached thumbnail(s) 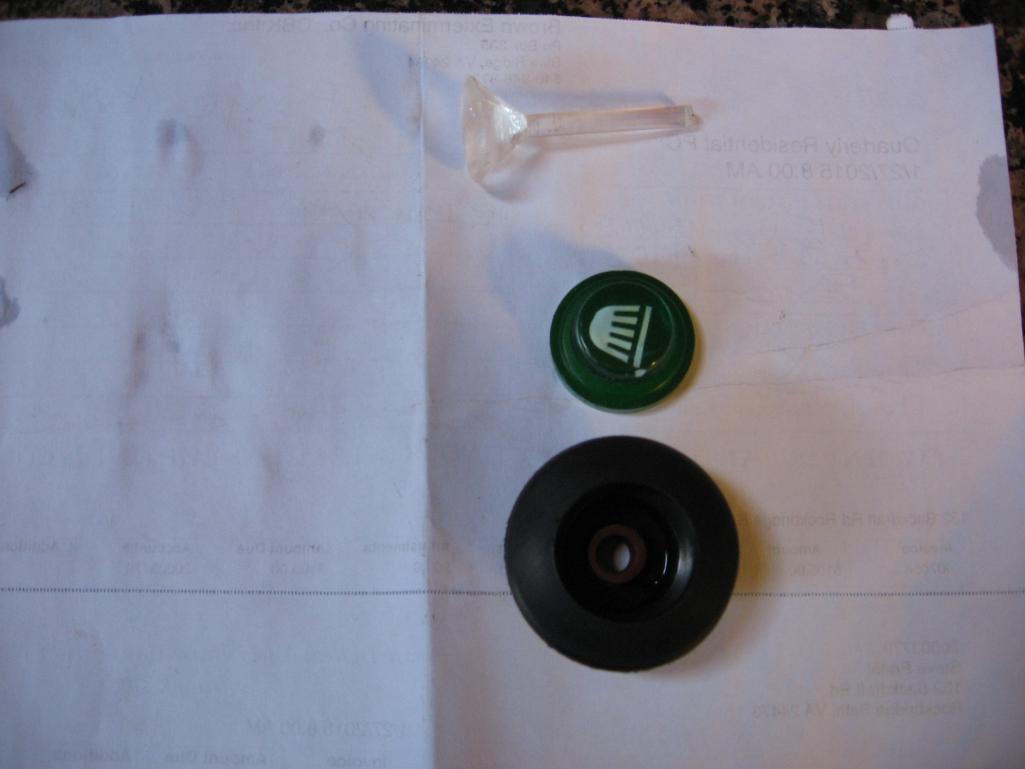 Attached image(s) 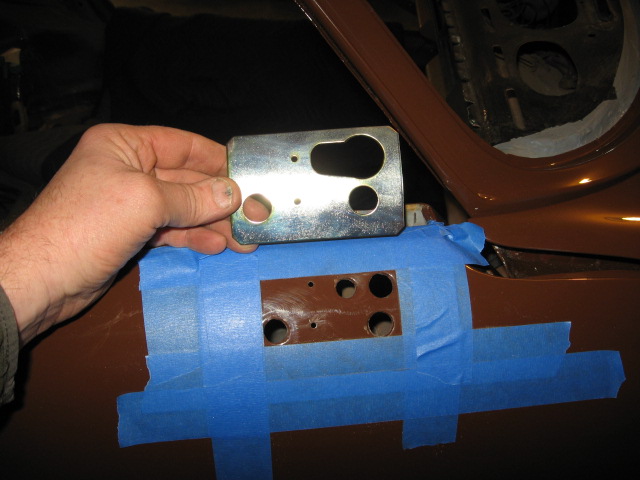 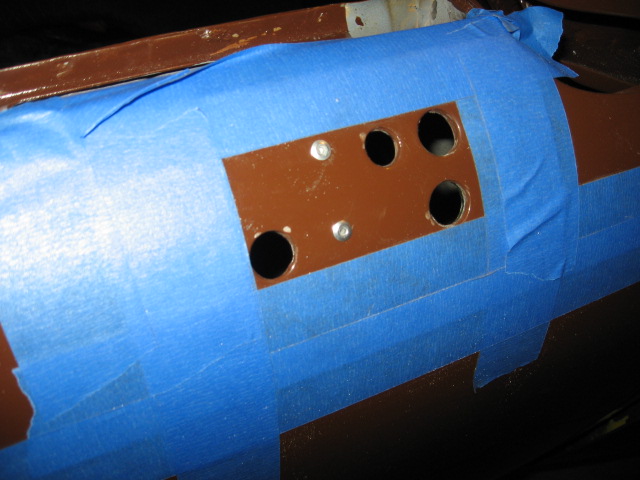 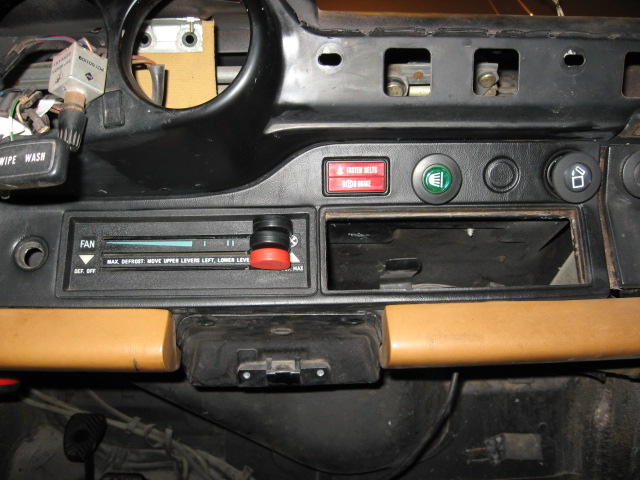 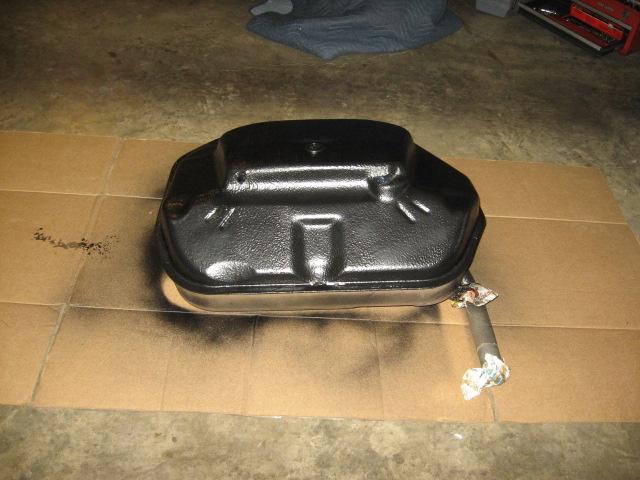 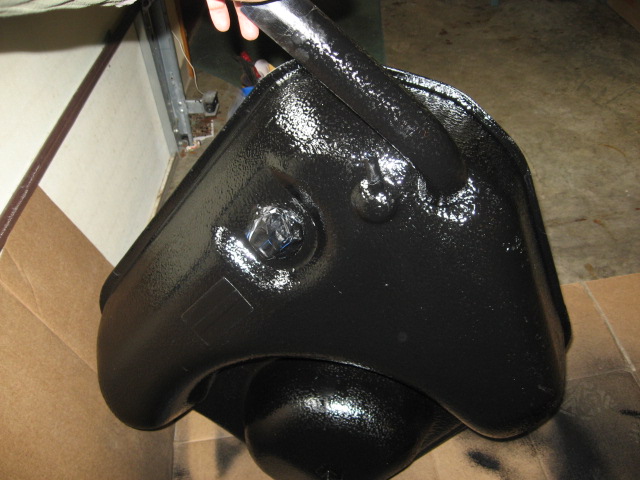 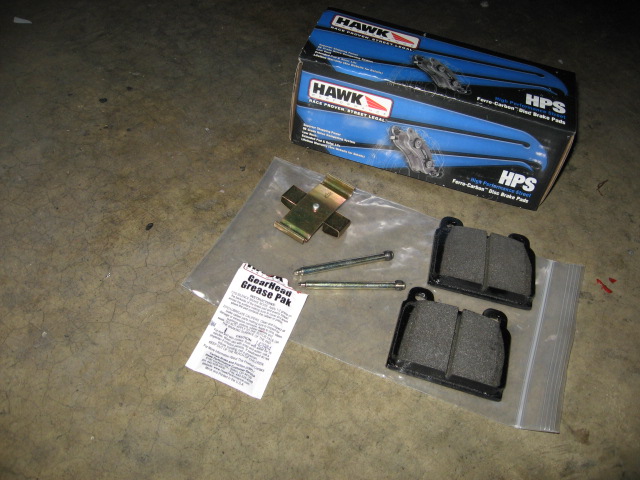 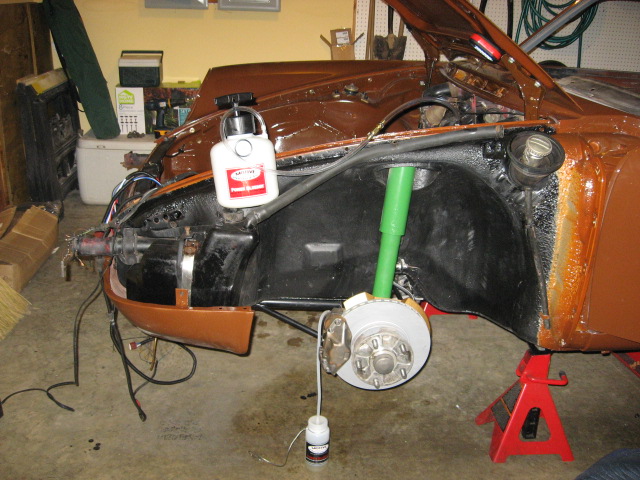 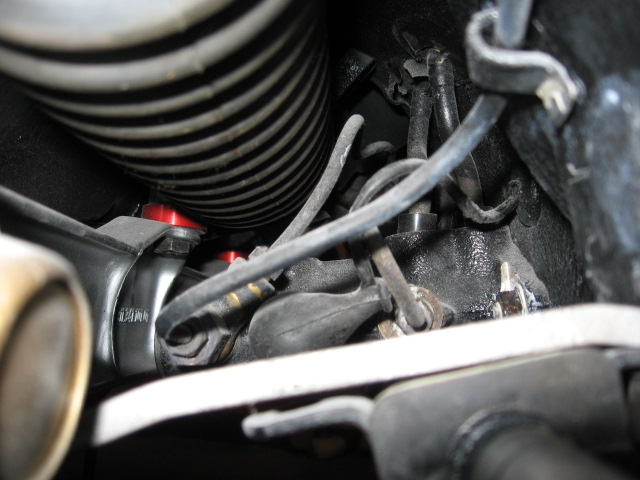 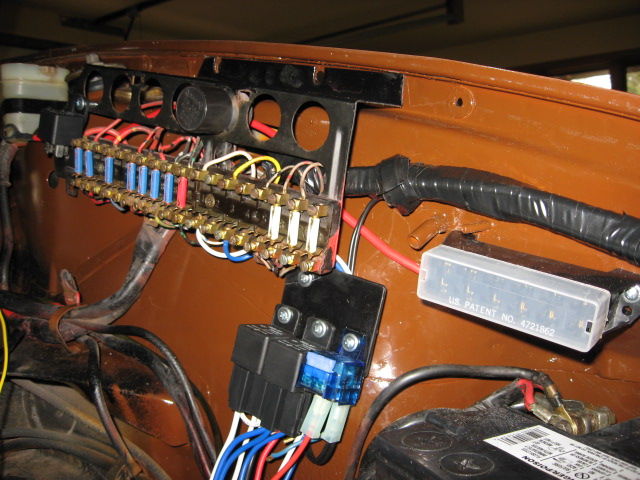 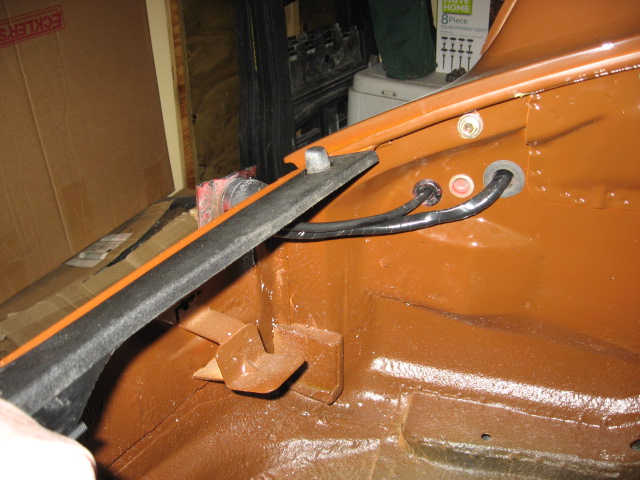 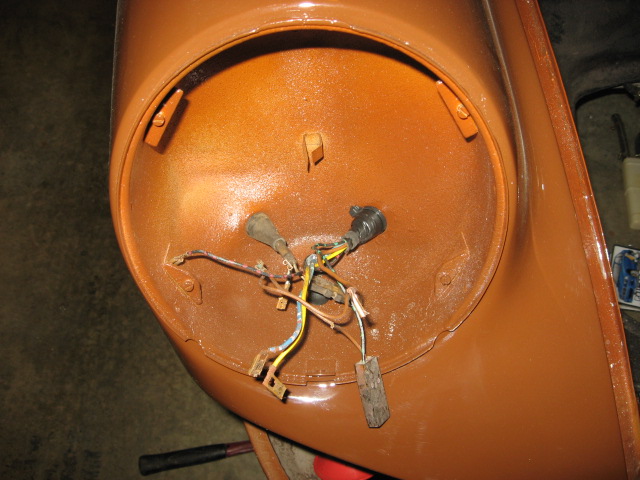 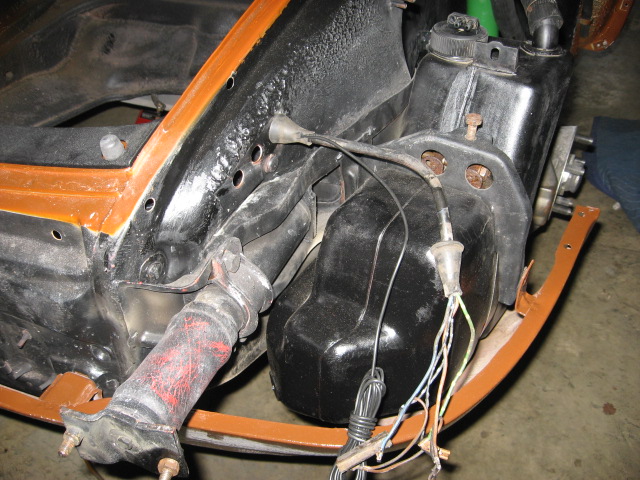 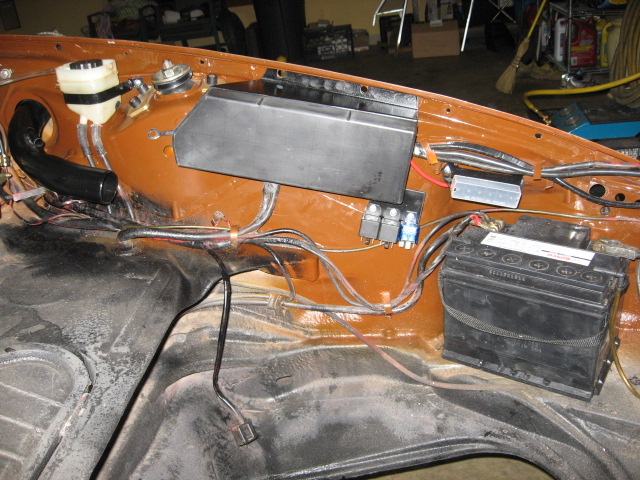
|
|
|
|
| Bulldog9 |
Feb 14 2015, 06:22 AM
Post
#193
|
|
Senior Member Group: Members Posts: 706 Joined: 21-August 13 From: United States Member No.: 16,283 Region Association: MidAtlantic Region |
Just finished sketching out the head/fog light wiring relays using standard Bosch style Relays. I wanted to use the open round relay spaces in the fuse box, but would be about $75/relay for relay and socket, so went this way. I have the relays mounted to a small steel plate. In a past life, I had an associates degree in industrial electronics, thought I was gonna be an electrical engineer at one point.
The car did not have a Fog light Circuit, so I added one by converting the rear defogger switch to a fog light switch by changing the lens. If at some point I swap out the rear glass for one with intact element I can easily reattach and address a switch for the fog lights. Because I want them to come on independent of the headlights (not just with low beam), but with the lights, I will take the feed for fog light relay from #7 license plate fuse or one of the parking lights, run a wire to the fog light switch & back to the feed side of the #8 fuse for fog lights. Not necessary as it is only powering a relay, but if the car is going to have foglights and has a dedicated fuse location for fogs, might as well use it. This will allow switched independent control of fog lights with parking lights, not just headlights. I do want to make sure it goes off with the key. After looking at the pics above, for a cleaner look, I decided to rework the relays so they are directly under the fuse panel, not shifted to the right. I know it will be covered by carpet, but if your gonna do it do it clean right? I was surprised to see that Porsche crimped/soldered little brass caps on the end of the wires in the fuse panel, an easy way to replicate this is to heat and solder the tip of wire. I have a few other schematics to draw up, for the secondary fresh air vents and accessory power strip. Attached thumbnail(s) 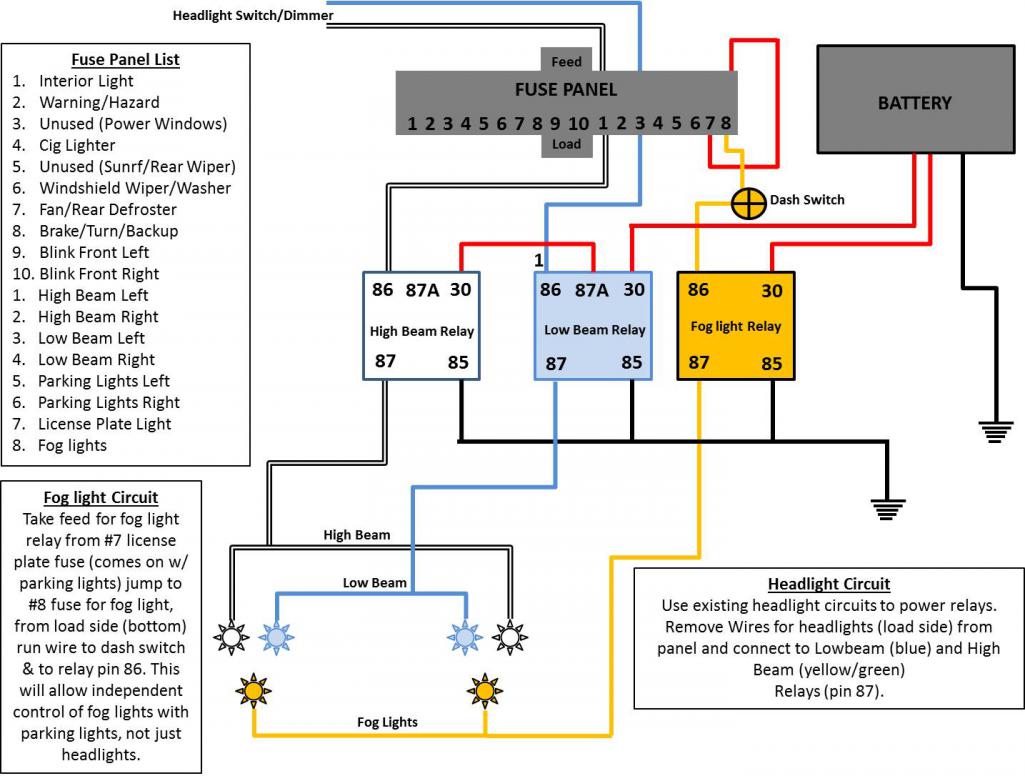
|
|
|
|
| Maltese Falcon |
Feb 14 2015, 10:48 AM
Post
#194
|
|
914 Guru Group: Members Posts: 5,267 Joined: 14-September 04 From: Mulholland SoCal Member No.: 2,755 Region Association: None |
Great restoration +recreation, I like the hot-rodding touch of carbs +cast aluminum intakes on the T4. With a lightweight 912e and a responsive 2.0 this will be a fun car in the twistes!
Hang on to the injection parts, those will be added value if you ever sell the car . Your schematic sketch is going to be helpful with wiring up my current project...thanks for sharing (IMG:style_emoticons/default/bye1.gif) Marty |
|
|
|
| 914forme |
Feb 15 2015, 08:19 AM
Post
#195
|
|
Times a wastin', get wrenchin'! Group: Members Posts: 3,899 Joined: 24-July 04 From: Dayton, Ohio Member No.: 2,388 Region Association: None |
You certainly raised the bar on project wiring diagrams, that will be great info to have latter on. What program did you use to pull these off?
|
|
|
|
| Bulldog9 |
Feb 17 2015, 08:43 PM
Post
#196
|
|
Senior Member Group: Members Posts: 706 Joined: 21-August 13 From: United States Member No.: 16,283 Region Association: MidAtlantic Region |
QUOTE(914forme @ Feb 15 2015, 09:19 AM) You certainly raised the bar on project wiring diagrams, that will be great info to have latter on. What program did you use to pull these off? Microsoft Powerpoint. Being a graduate from Command and General Staff Officers Course has its highpoints/// other than the lobotomy ;-) **Edit-addition. For those wondering about this (got a couple PM's). All field Grade officers have to go to an exciting course called the Command General Staff College. It is referred to affectionately as the 'field grade lobotomy' where once fire breathing go getting push the limits Patton style leaders come out as 'company men' lol. |
|
|
|
| Bulldog9 |
Mar 6 2015, 12:53 PM
Post
#197
|
|
Senior Member Group: Members Posts: 706 Joined: 21-August 13 From: United States Member No.: 16,283 Region Association: MidAtlantic Region |
Been super busy at work and honey do lists lately, but have been plugging away, and planning out my electrical accessories and new circuits. Below are several wiring diagrams for headlight relays, fog lights and two layouts for an accessory fuse panel.
I made a bunch of progress on the body & chassis, discovered my front fresh air fan is bad, and once again that $20 boxoparts I picked up at Hershey last year bailed me out. Plugged the new fan unit into the housing and wallah it worked! Will swap i t out and rebuild/repair the original for future use. Also installed the rear taillights and front end of the car sans the drivers fender as I want to keep it off until after I finish in the trunk fuel tank and all. SO MUCH nicer to lean in and not worry about scratching the new paint. I also put the clutch & pressure plate on and remounted the engine on the stand with spacers and to prevent sag. Hope to get to fitting the rocker arm assemblies today and buttoning up the valve train. Will take the pushrods out for the pre-start crank, but wanted to get it all in and clearances, etc. **Note to self, put lifters in before pushrod tubes.............. Pics to follow. I Amended Head/Fog Light Diagram above and did 2 more. Adding indicator lights into console for the AUX fan, and fog lights & a few other minor changes. 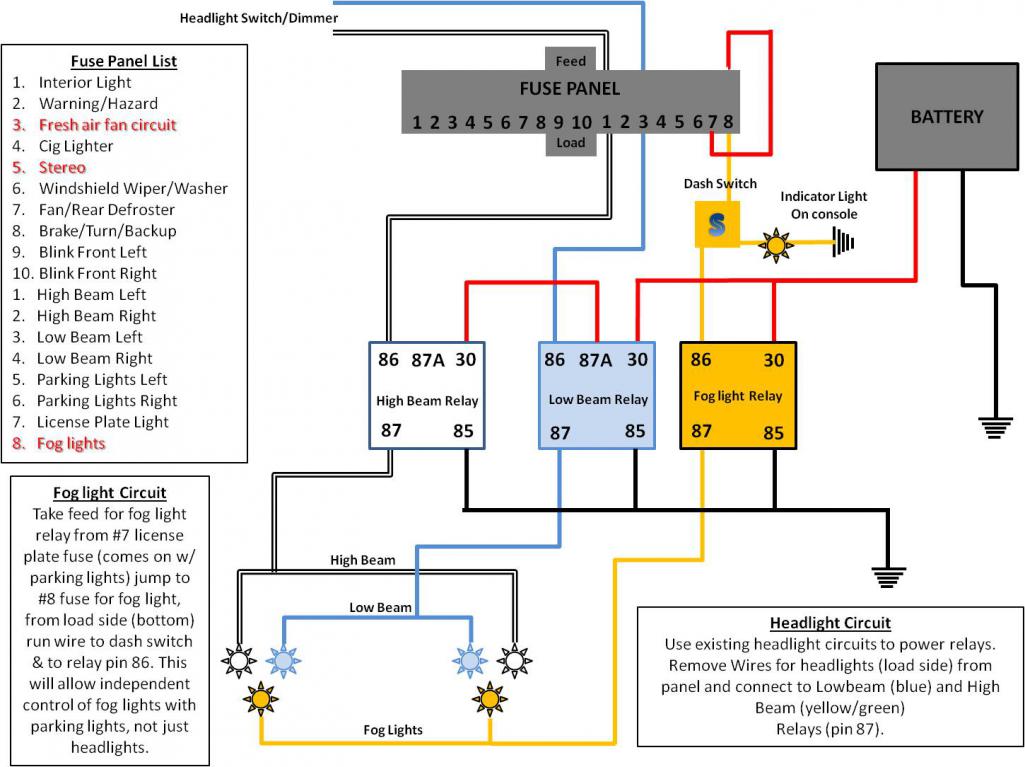 I am adding a switched accessory fuse panel for future expansion, as the stock fuse block only has two open spots. Diagram 1 has me using the switched relay to feed power to the aux fan and my stereo THROUGH the old stock fuse panel (#3 & 5) 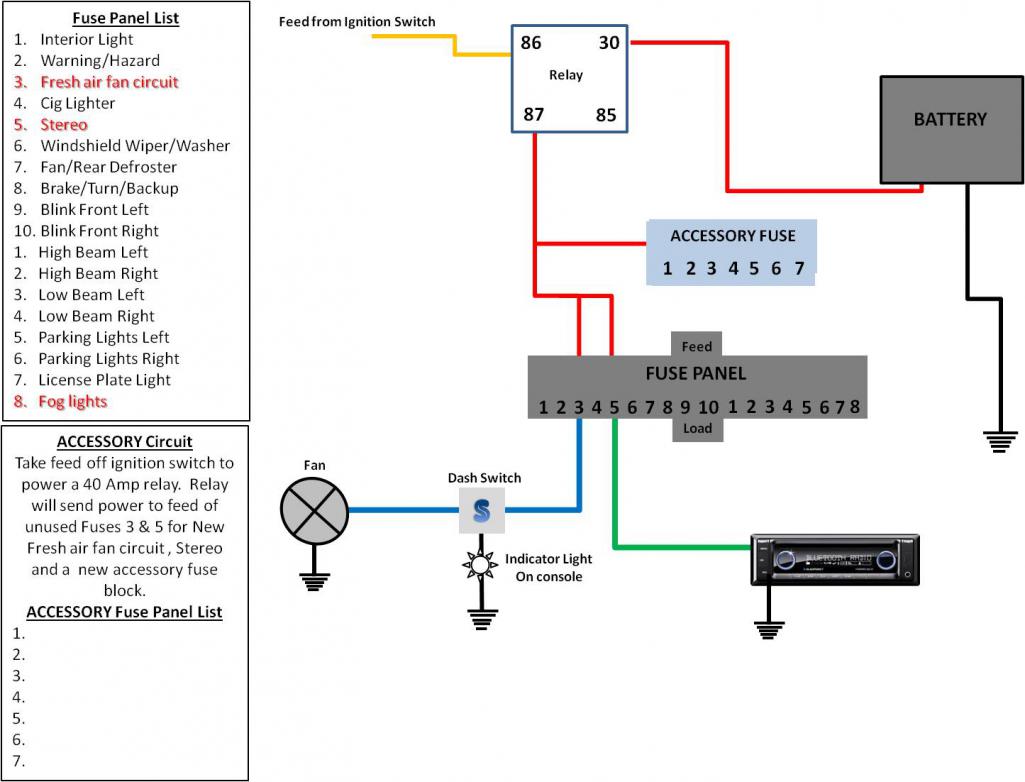 This diagram shows the same Relay and new accessory fuse block, but it powers the Radio and aux fan circuits. Haven't decided what way to go. Right now I am leaning on diagram 1 above. This leaves the accessory fuse block unused.  |
|
|
|
| Ferg |
Mar 6 2015, 02:59 PM
Post
#198
|
|
914 Guru Group: Members Posts: 5,948 Joined: 8-January 03 From: Boulder CO Member No.: 116 Region Association: None |
Attached image(s) 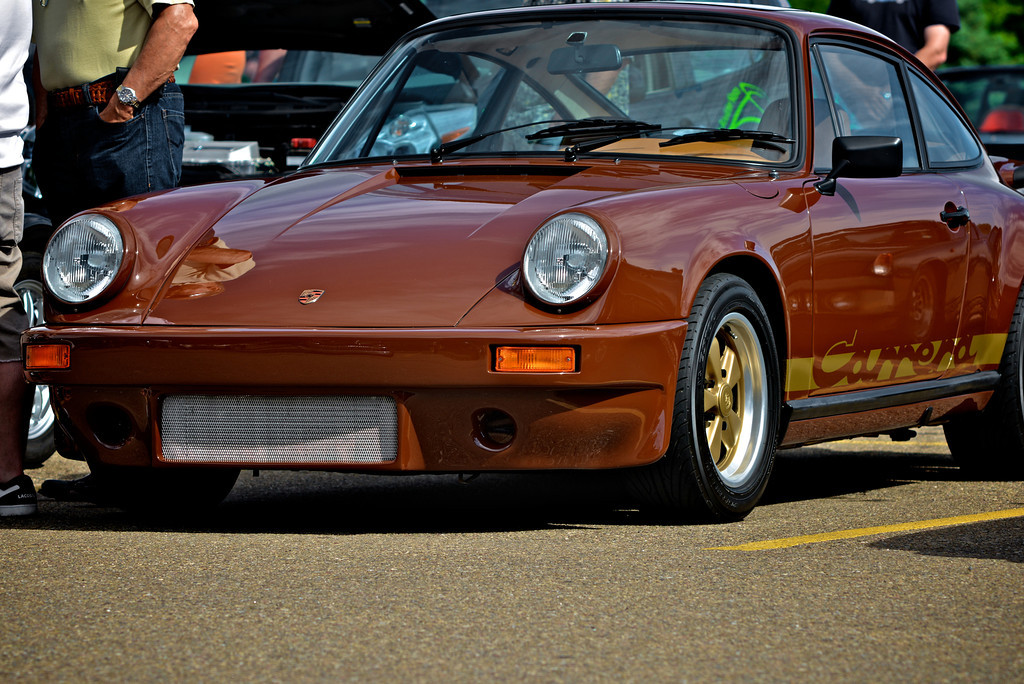
|
|
|
|
| Bulldog9 |
Mar 7 2015, 05:44 PM
Post
#199
|
|
Senior Member Group: Members Posts: 706 Joined: 21-August 13 From: United States Member No.: 16,283 Region Association: MidAtlantic Region |
QUOTE(Ferg @ Mar 6 2015, 03:59 PM) Indeed sir, indeed |
|
|
|
| Bulldog9 |
Mar 9 2015, 02:12 PM
Post
#200
|
|
Senior Member Group: Members Posts: 706 Joined: 21-August 13 From: United States Member No.: 16,283 Region Association: MidAtlantic Region |
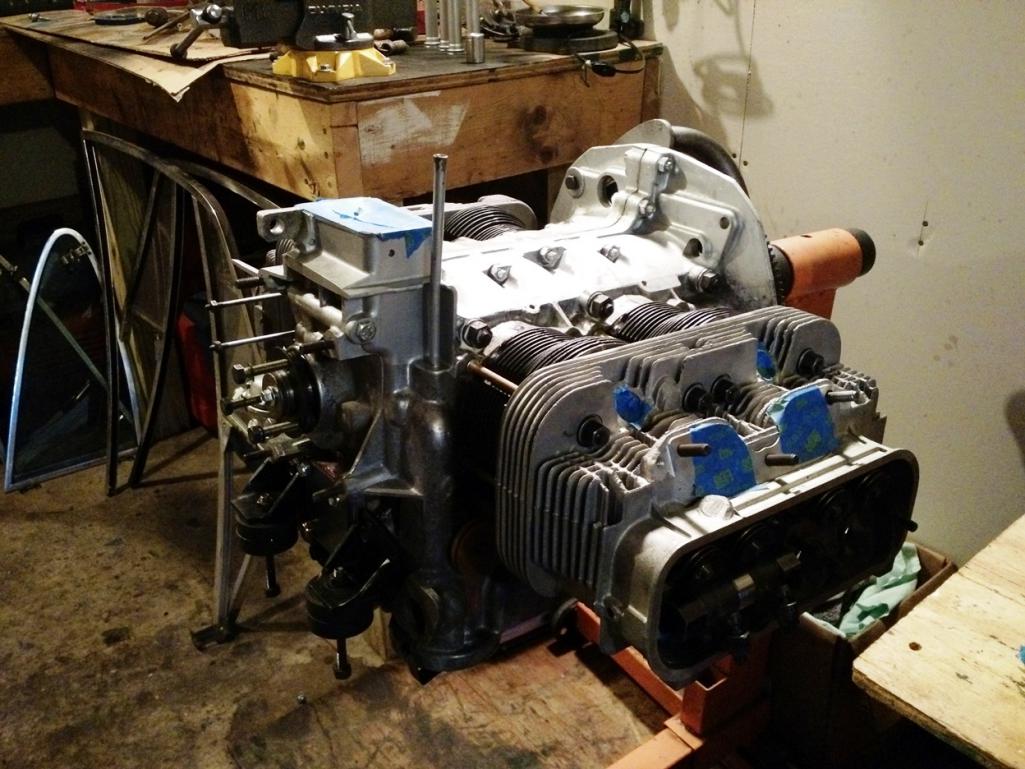
Progress on Motor Assembly.
Spent most of Saturday fitting and putting the tins on, as well as mounting the intake runners and carbs so I could test fit the throttle linkage. Took a bit of finagling, and adjustments, but the tins are all in place. I also reindexed the Distributor Gear for optimum lug placement in relation to the tin and air flapper control shaft. The engine is at TDC and when at the #1 firing point, I have about 50 degrees of clear rotation in both directions. I'm assuming that moving to 34-37D before TDC is turning the dist counter clockwise? Ah, that's for later..... lol Overall I am pretty happy EXCEPT for that CB linkage.... man it looks UGLY.... (no offense to anyone)..... I think I'm just going to close my eyes and order the Tangerine Setup..... It will be worth it..... it will be worth it...... (IMG:style_emoticons/default/hissyfit.gif) More parts to add to my 'oops dang it pile of re-sales.... I did plan to switch to this in the future when I go to this intake, but this is unnecessary at this point. 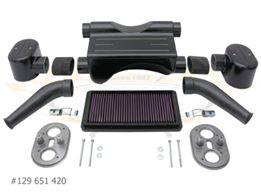 Working hard to get the body and wiring and such finished so I can get it back to Scotty B for installation of windscreens and headliner, then back up to my house to install the Motor and try to start.... All before 15 June...... yeah.... (IMG:style_emoticons/default/av-943.gif) Attached image(s) 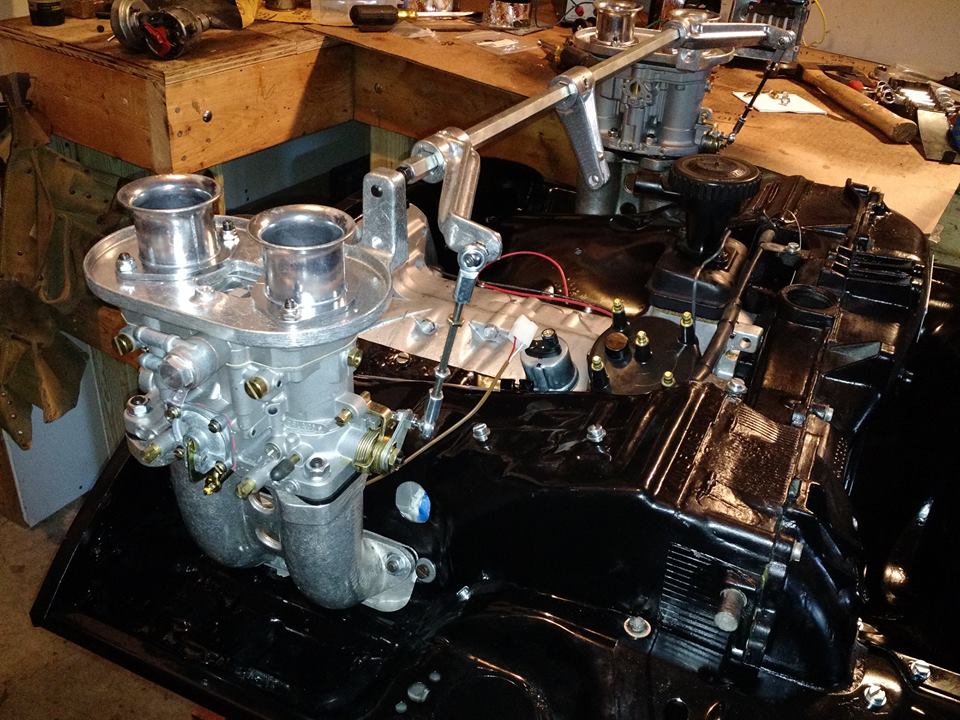 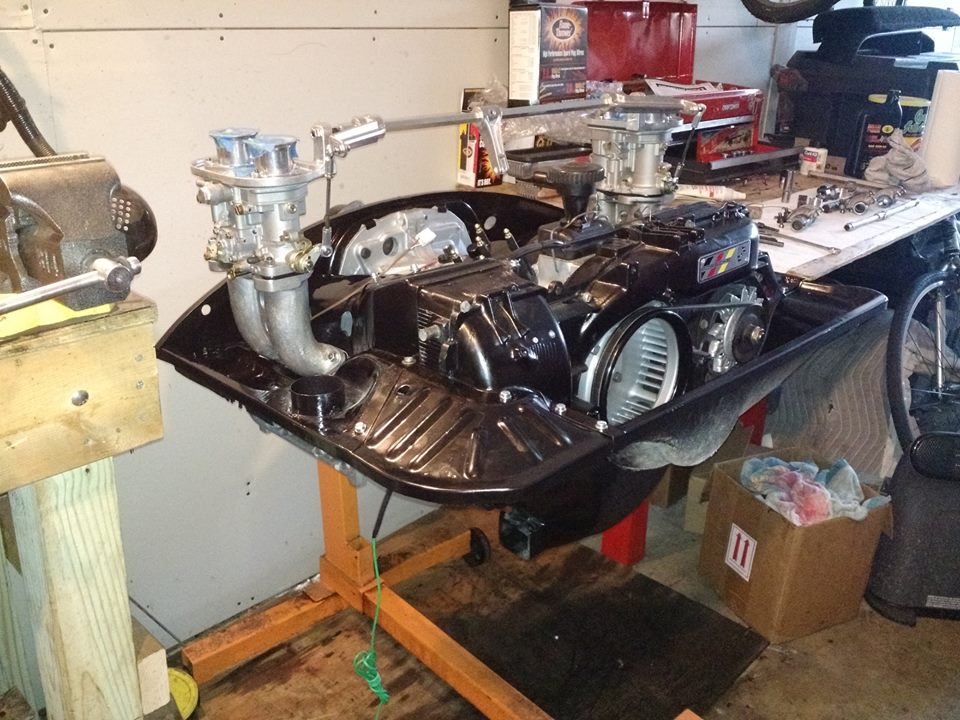 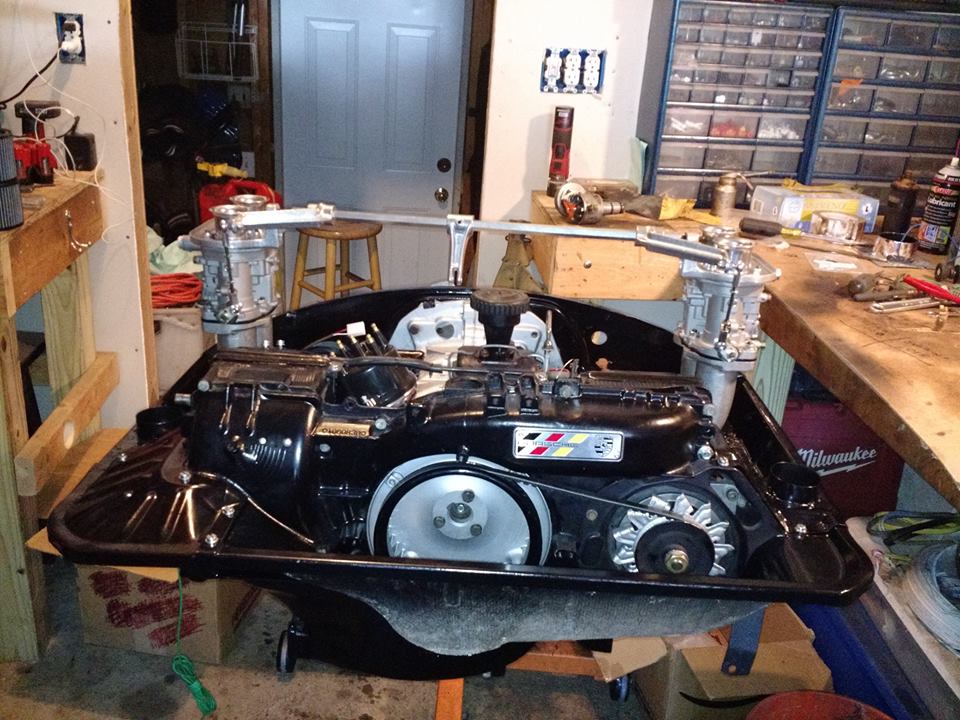
|
|
|
|
|
1 User(s) are reading this topic (1 Guests and 0 Anonymous Users)
0 Members:

|
Lo-Fi Version | Time is now: 23rd May 2026 - 01:29 PM |
Invision Power Board
v9.1.4 © 2026 IPS, Inc.