|
|
|
Porsche, and the Porsche crest are registered trademarks of Dr. Ing. h.c. F. Porsche AG.
This site is not affiliated with Porsche in any way. Its only purpose is to provide an online forum for car enthusiasts. All other trademarks are property of their respective owners. |
|
|

  |

| 914forme |
 Oct 30 2015, 09:07 AM Oct 30 2015, 09:07 AM
Post
#121
|
|
Times a wastin', get wrenchin'!  Group: Members Posts: 3,897 Joined: 24-July 04 From: Dayton, Ohio Member No.: 2,388 Region Association: None |
QUOTE(76-914 @ Oct 29 2015, 10:42 AM)  If your going with that VA unit why not go with their controllers adapted to the OEM factory heat/vent controller? (IMG:style_emoticons/default/confused24.gif) I don't like the factory controls, not sure I like the knobs either, but they are better than slide levers to me. I really like my 3 knobs setup I have in my TDI, simple easy to get a hold of. That being said the 4th knob controls the electric heater water mixing valve, so it is sort of needed. I guess I could reverse engine the VW stuff, add it to the car, and move the mixing valve control some where else, or see if the VW part could do both (IMG:style_emoticons/default/idea.gif) |
   |

 
|
| 914forme |
Oct 31 2015, 04:30 PM
Post
#122
|
|
Times a wastin', get wrenchin'! Group: Members Posts: 3,897 Joined: 24-July 04 From: Dayton, Ohio Member No.: 2,388 Region Association: None |
Todays Progress:
List of items I wanted to get do: I try to focus on three things, and go from there. Fit Hitch Fit Safety Chain Eyes Cut and flange the bumper opening. So First up Cut and flange the bumper: No pictures of it being (IMG:style_emoticons/default/smash.gif) (IMG:style_emoticons/default/smash.gif) (IMG:style_emoticons/default/smash.gif) (IMG:style_emoticons/default/smash.gif) (IMG:style_emoticons/default/smash.gif) (IMG:style_emoticons/default/smash.gif) Takes a long tome to bump this heavy of metal with out heat. Final Results, need a little touchup, but good enough for test fitting ,and working out bugs. 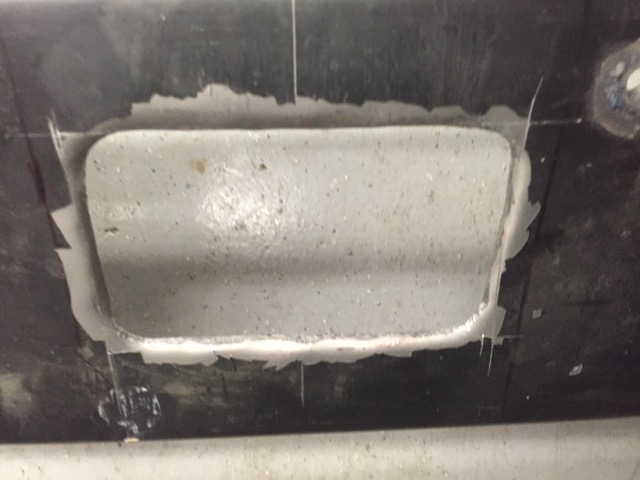 And a closer shot showing the flange 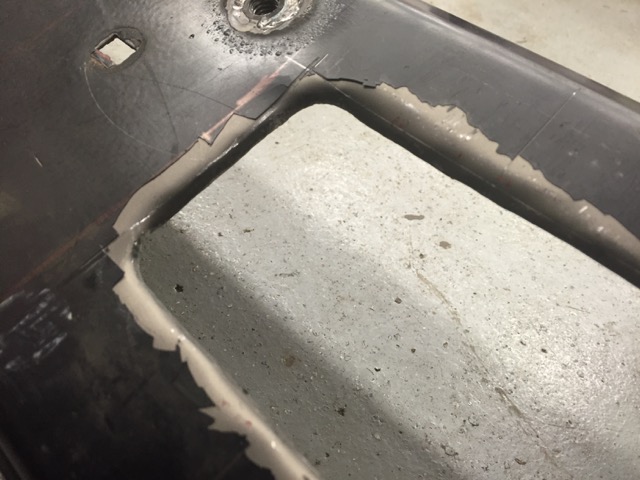 Now back to work on the hitch. Test fit with the bumper. 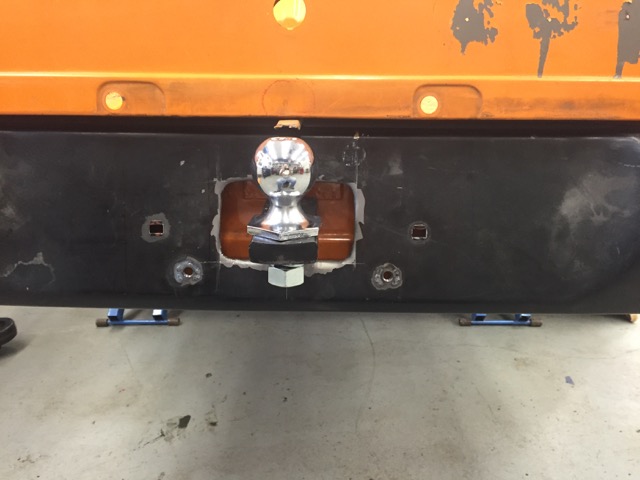 Install the flip down plate and test fit. 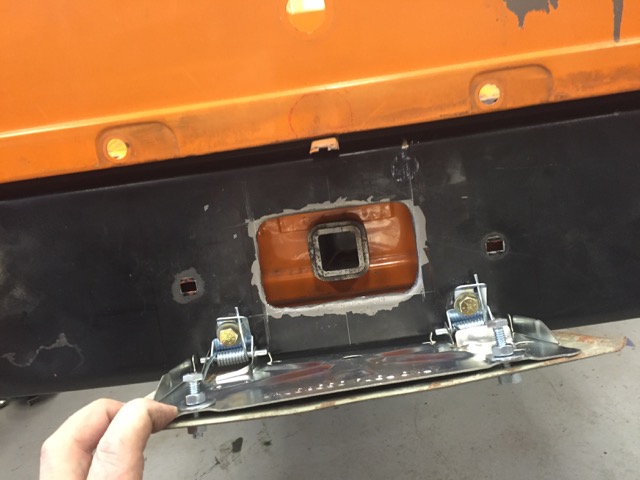 Plate flipped up 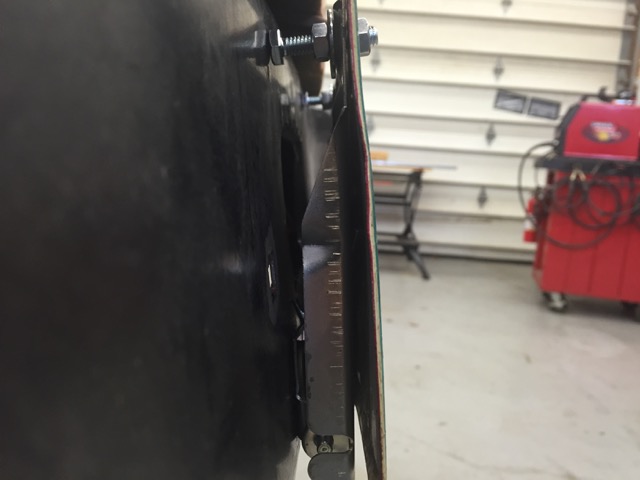 Couple of small details I'll need to figure out in the final version. Need a rubber bumper between the hitch ball shank and the back of the flip down plate. 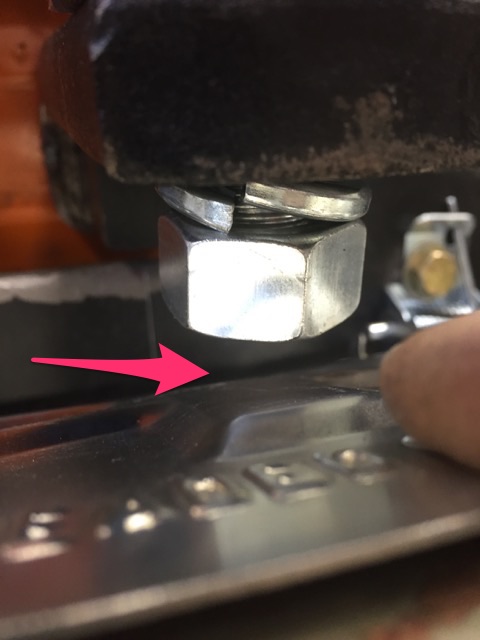 Need some spacers here also as I don't like the plate sloping back. Used these bolts to get the spacing correct. 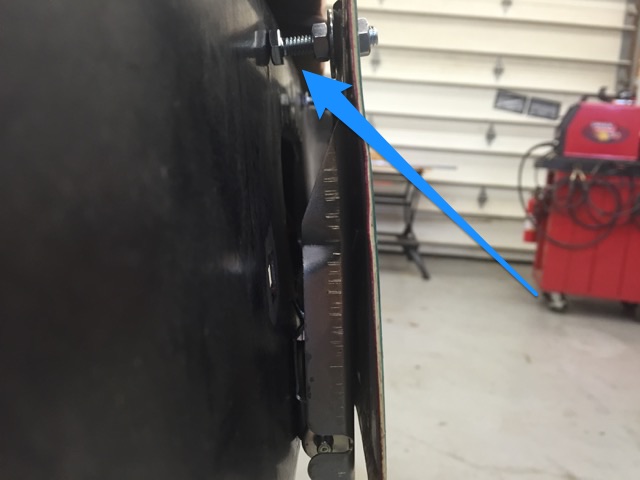 All together 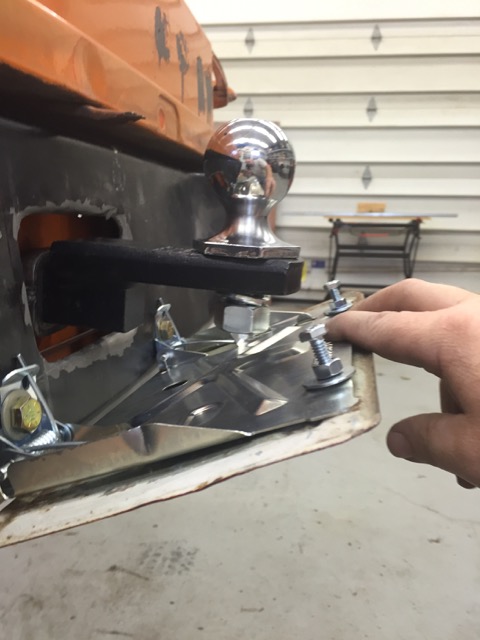 Next up get the safety chain eyelts mocked up. These forged eyelts are rated at 1200 lbs per eyelet. Not thinking a tire trailer or anything else I would want to to with the 914 would exceed that. I could pick the car up with these, and old a old school frontal collision test. 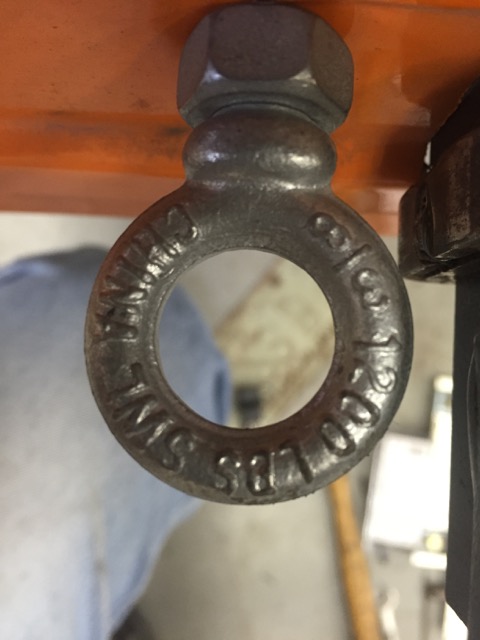 Installed 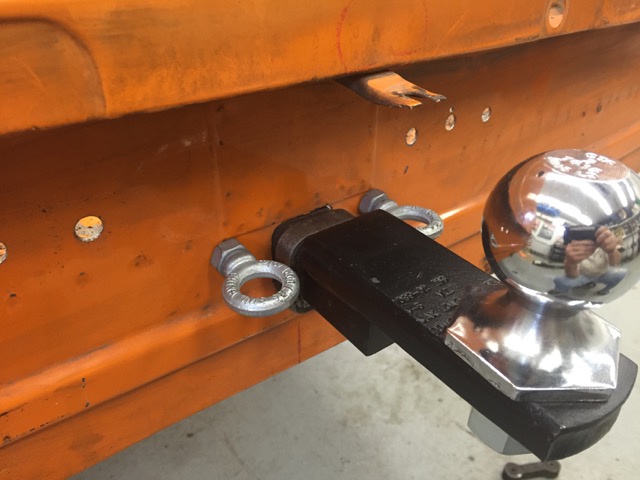 And crash test (IMG:style_emoticons/default/blink.gif) 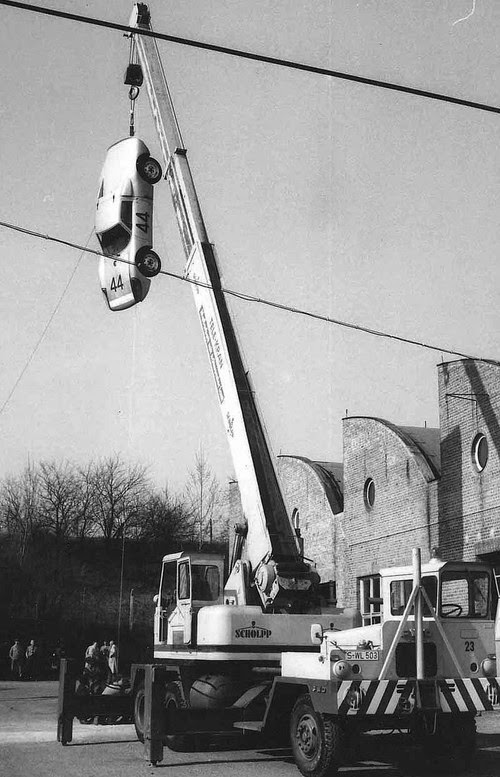 Metal Prep 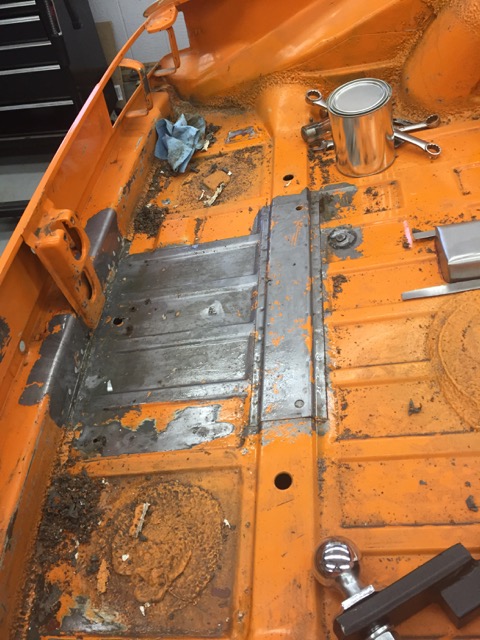 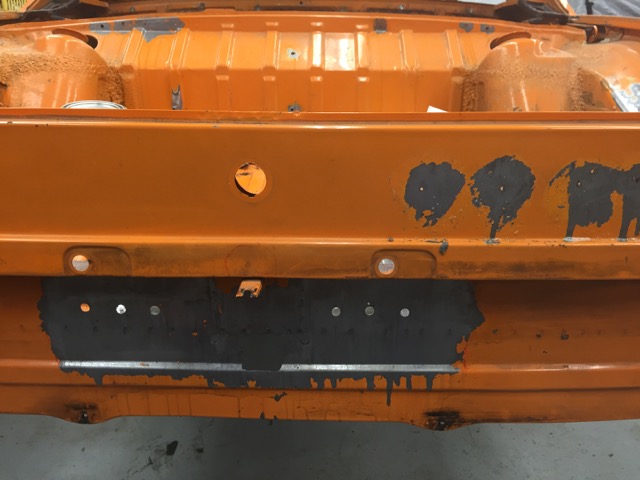 Tomorrow hopefully I'll get to spray some zinc primer on, and hopefully burn some metal. |
|
|
|
| 914forme |
Nov 9 2015, 03:50 PM
Post
#123
|
|
Times a wastin', get wrenchin'! Group: Members Posts: 3,897 Joined: 24-July 04 From: Dayton, Ohio Member No.: 2,388 Region Association: None |
SO I had a squirrel moment and started playing with LED lights. In reality I wanted to put a rear fog light in the bumper, trunk lighting that I can see whats in the trunks, and I needed reverse lights if I use the 914RS tail lights, still trying to decide on that.
So let the testing begin. LED Rear light on running light setting. 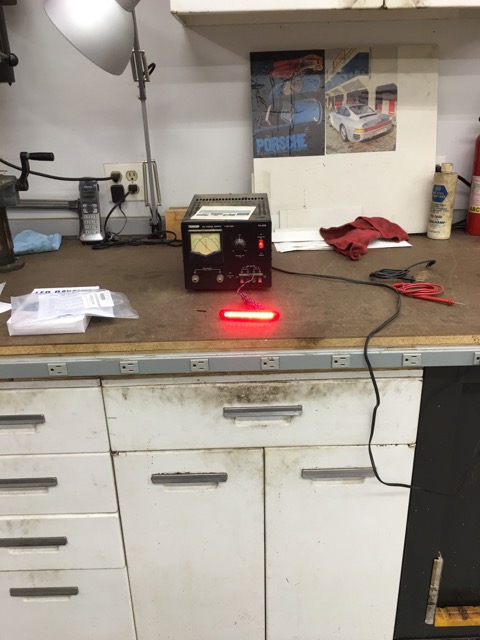 And what it illuminates in my darkened garage. 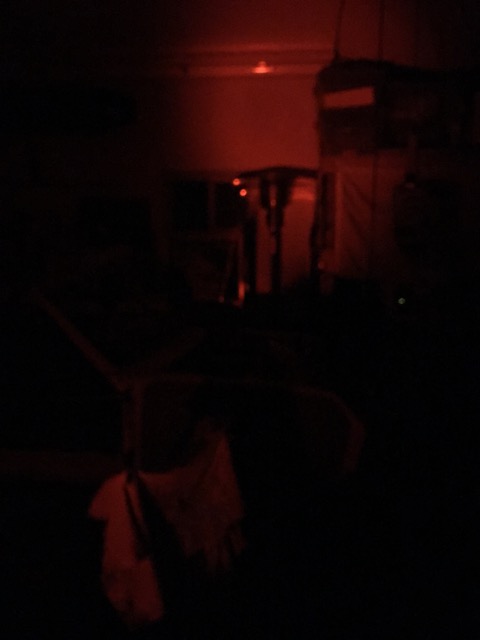 Don't think that will make a dent in fog. Wire it up for brake and turn on the bench. 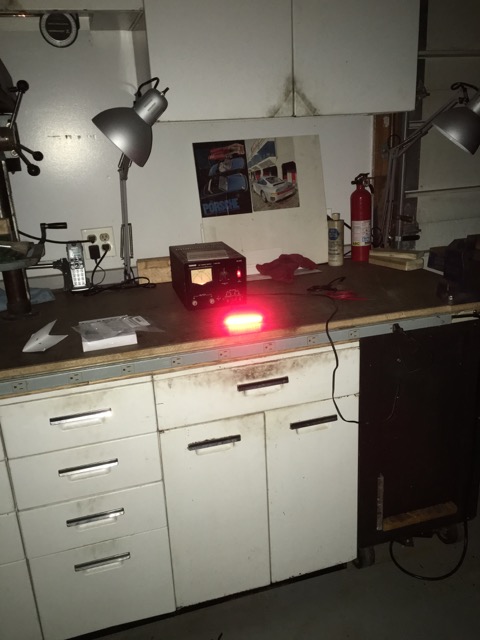 And it illuminates 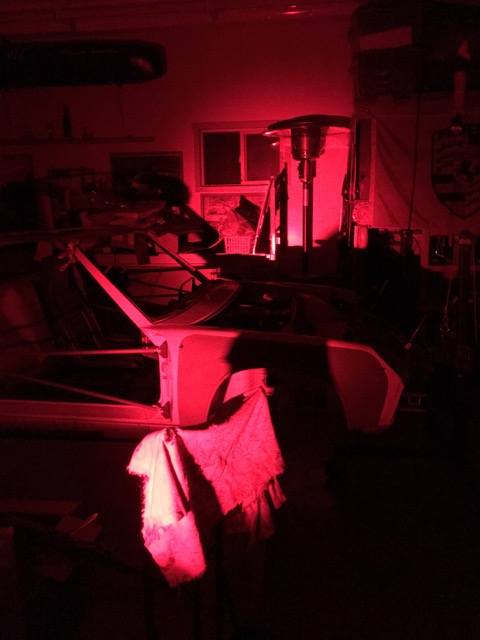 Oh that is getting a little better. Would this work as a nice third brake light also (IMG:style_emoticons/default/confused24.gif) So I got out this to see how it compared. 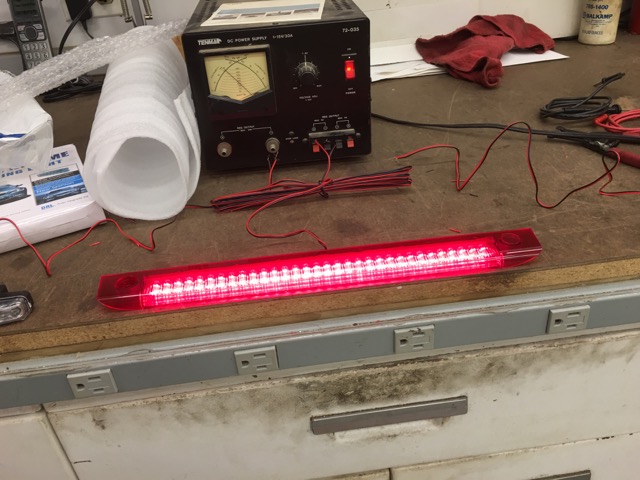 Third brake light from a Ford GT And well it is a keeper 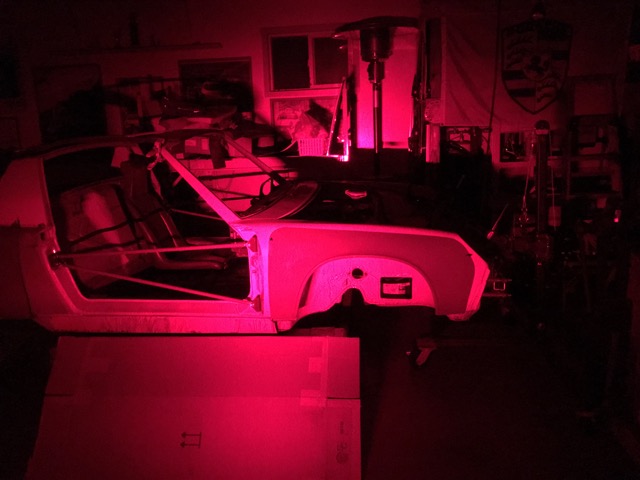 Hopefully that will get some (IMG:style_emoticons/default/yellowsleep[1].gif) non observant driver a little (IMG:style_emoticons/default/w00t.gif) If not not much else I can do. backup lights and trunk lights, not sure I like these (IMG:style_emoticons/default/sad.gif) 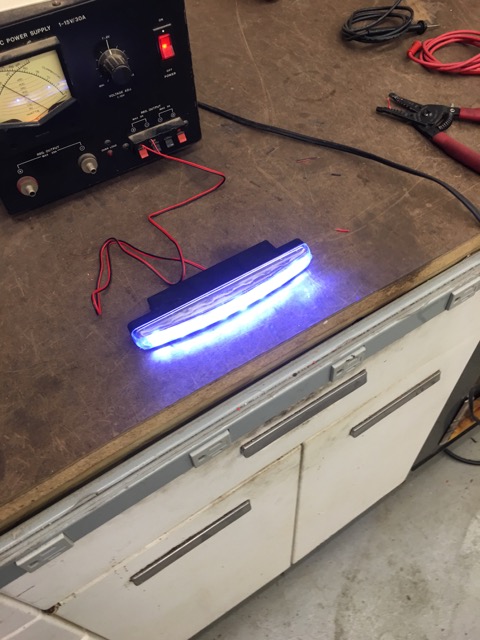 And how well they illuminate the room 1 light. 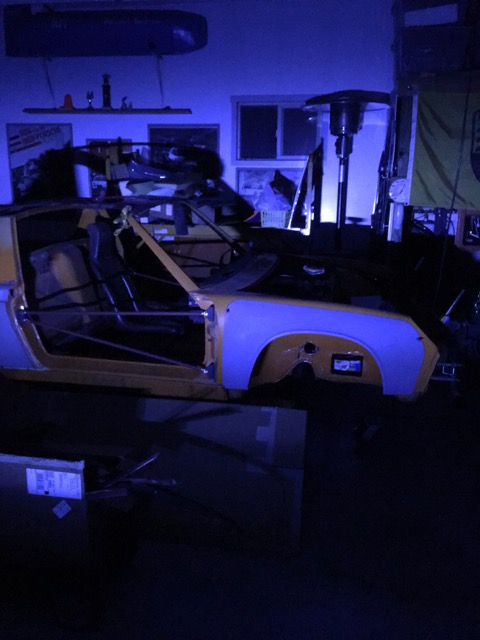 And 2x 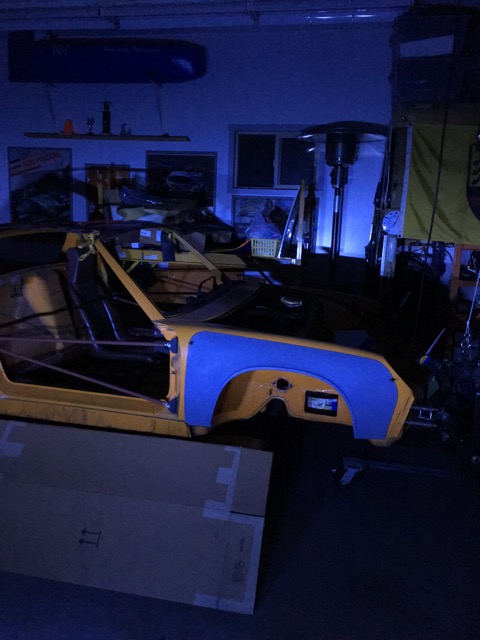 I think it is the blueness of the light that bugs me. |
|
|
|
| 914forme |
Nov 9 2015, 07:08 PM
Post
#124
|
|
Times a wastin', get wrenchin'! Group: Members Posts: 3,897 Joined: 24-July 04 From: Dayton, Ohio Member No.: 2,388 Region Association: None |
Now for some progress:
Working on the rear trunk currently: Task Items ___ Rear Deck Lid Shox - Mockup ___ Trailer Hitch - Mockup ___ Weld in all the holes ___ Cover for Clutch Slave ___ Seam Weld the shock towers ___ Add a bracket for Trailer wiring ___ Install new trunk hinge pivots ___ Mockup Trunk Lights So J West's Kit is really nice, I like it a lot, yet, I can't leave well enough alone.  So I striped the paint, and will weld nuts on the backing plates. These will get welded into the inner fender wells. All cleaned up, nuts added, and bolts have Anti-Seize added to keep the threads from galling when they are welded. 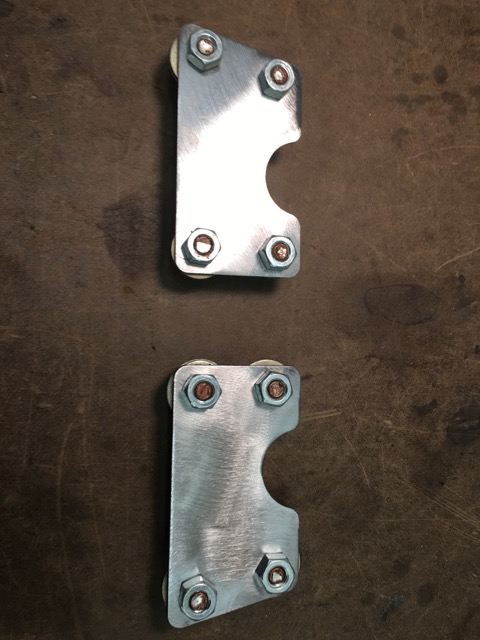 |
|
|
|
| 914forme |
Nov 9 2015, 07:19 PM
Post
#125
|
|
Times a wastin', get wrenchin'! Group: Members Posts: 3,897 Joined: 24-July 04 From: Dayton, Ohio Member No.: 2,388 Region Association: None |
Worked on the trunk show kit even though I can't find page 5 of the instructions. So I had to wing it.
I mounted the rear hinges, and locked them in the full upright position. Mounted the Shox in the upper pivot. Took the lower brake, and put the shock thee, then moved it forward to keep the shock under tension. Theory is the trunk lid will add weight and I might need the extra pressure. Not sure it ill work (IMG:style_emoticons/default/dry.gif) 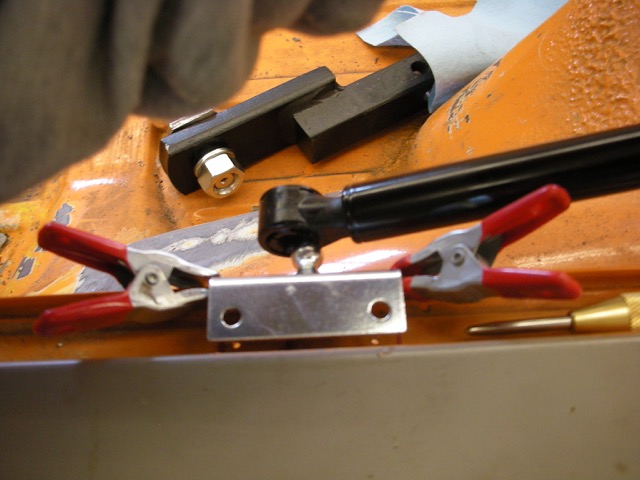 I then marked both sides. I used this trick, slip my transfer punch into a socket, and then it keeps it perpendicular to the bracket. 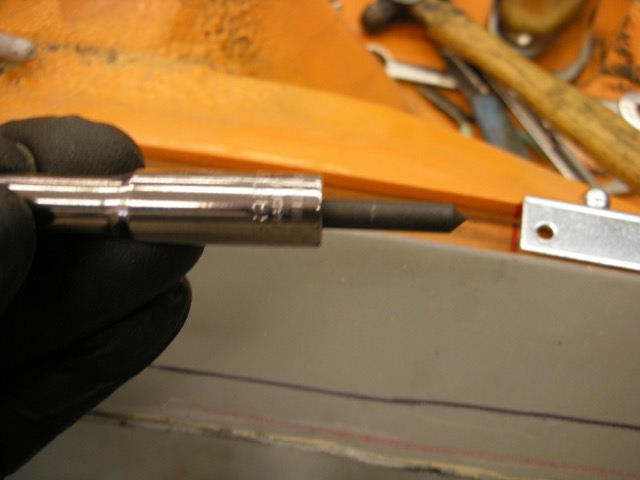 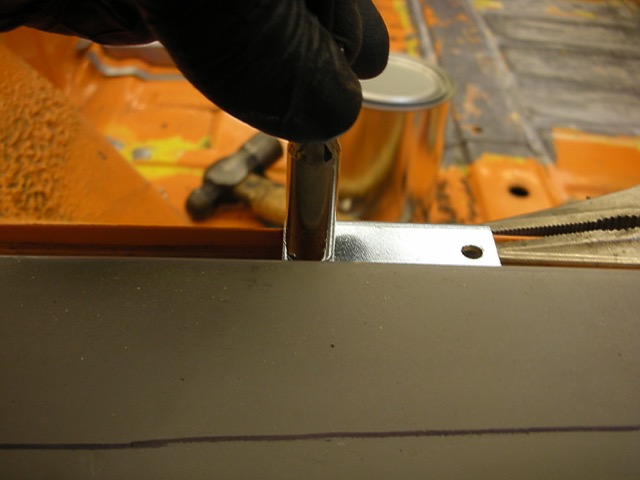 So that is one mocked up (IMG:style_emoticons/default/piratenanner.gif) I forgot to take a picture (IMG:style_emoticons/default/headbang.gif) |
|
|
|
| 914forme |
Nov 9 2015, 07:36 PM
Post
#126
|
|
Times a wastin', get wrenchin'! Group: Members Posts: 3,897 Joined: 24-July 04 From: Dayton, Ohio Member No.: 2,388 Region Association: None |
Now mocking up all the rear hitch stuff, don't mind the rust, it will be taken care of.
Cutting all the 16 ga to backup all the hitch parts. This tool is great, so glad I got it, or else my forearms might look like Popeye. 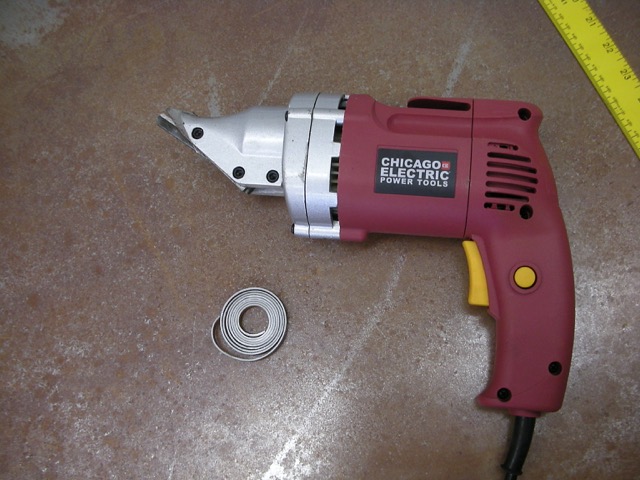 Laid it all out, and drilled hundreds of holes. 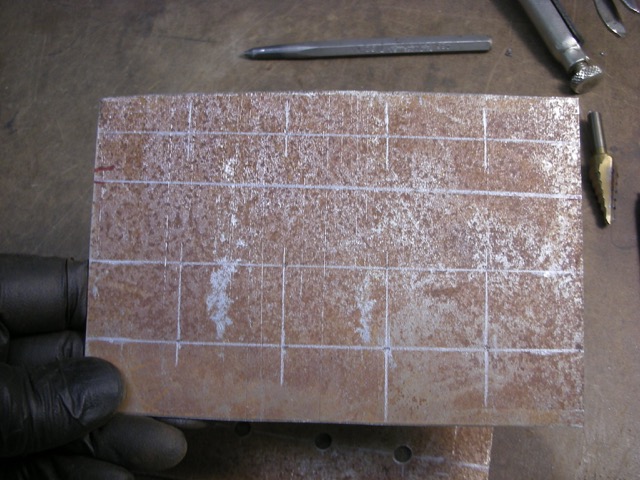 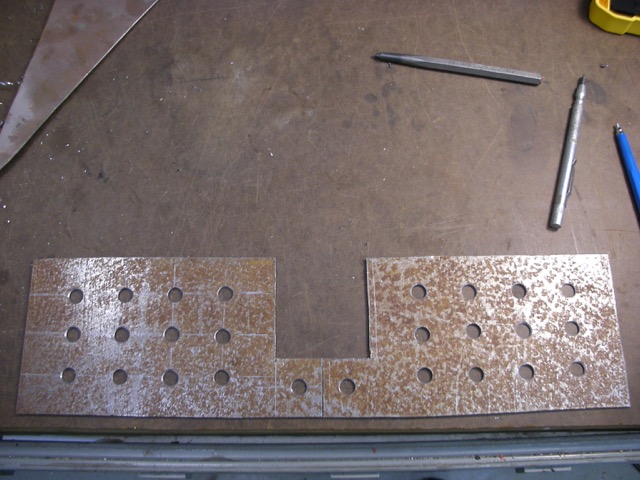 Started Fitting everything 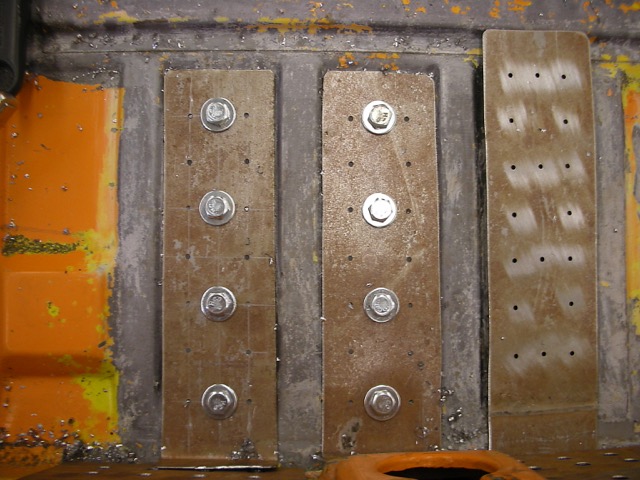 So I got my sandblaster working, added a dust depot to my harbor freight sand blaster and it works great. 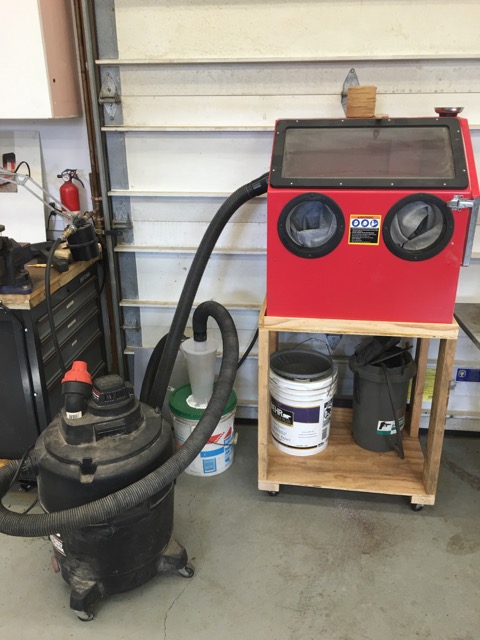 And I blasted all my pieces for the hitch, and a couple water boots that where de-coating. 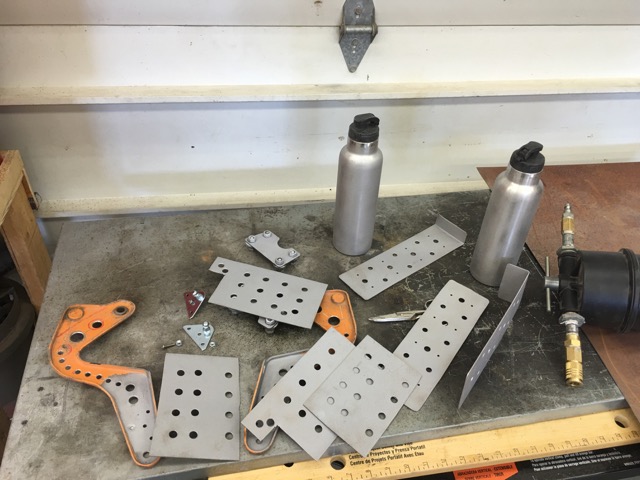 Then welded up a few items in this pile, don't have pictures, and started working on the slave cylinder cover. 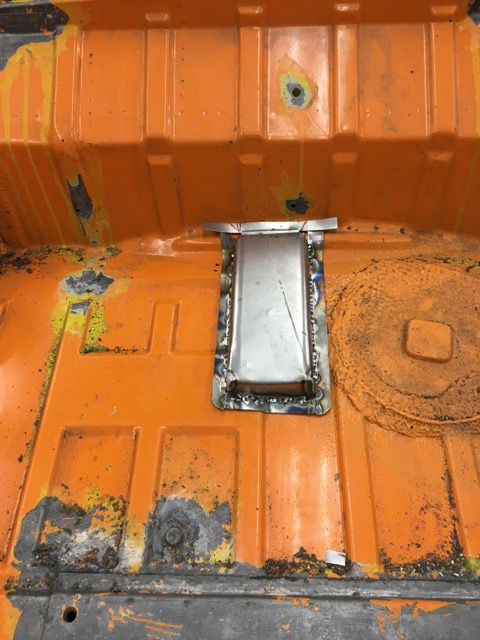 I still need to work on the flange more of that latter. |
|
|
|
| 76-914 |
Nov 9 2015, 08:58 PM
Post
#127
|
|
Repeat Offender & Resident Subaru Antagonist Group: Members Posts: 13,843 Joined: 23-January 09 From: Temecula, CA Member No.: 9,964 Region Association: Southern California |
Looking good Stephen. For the license plate, use plastic bolts. They don't scratch + they won't rust. The trunk shocks are fine if they're under a little load when fully extended. Glad you test hopped that HF electric shear. It's been winking at me last few times I was in there. (IMG:style_emoticons/default/rolleyes.gif) Let me know when you get shocked using that sand blaster. (IMG:style_emoticons/default/av-943.gif) I've got the same one and similar vent set up. I thought I was going nuts till Jake chimed in and confirmed that I was indeed receiving little jolts of static electricity thru the gloves. (IMG:style_emoticons/default/beerchug.gif)
|
|
|
|
| 914forme |
Nov 10 2015, 07:19 PM
Post
#128
|
|
Times a wastin', get wrenchin'! Group: Members Posts: 3,897 Joined: 24-July 04 From: Dayton, Ohio Member No.: 2,388 Region Association: None |
Nope no shocks, I hope not to have it happen.
|
|
|
|
| 914forme |
Dec 30 2015, 09:23 AM
Post
#129
|
|
Times a wastin', get wrenchin'! Group: Members Posts: 3,897 Joined: 24-July 04 From: Dayton, Ohio Member No.: 2,388 Region Association: None |
Well long time no update. Lets see, a whole bunch of life got in the way. (IMG:style_emoticons/default/dry.gif)
Trip to Portland ended in a ride to the ER, but I caused our plane to get emergency clearance, and we arrived 30 minutes earlier than we should, way to turn up the wick. Spent the next month trying to get clearance to drive again, that was no fun. I am back to driving, all my doctor visits have found nothing, I am in prime condition except all the crap I all ready knew was an issue. Thanksgiving, Christmas, Chanukah, Winter Solstice, etc.... Any excuse to not work on the car.... But the 914 got some progress despite all my efforts to keep me out of the work shop. No outside services used yet, lots of parts and ideas being tossed around in my head. And yes I am still screwing around with the back bumper, rear trunk area. But first things first some of the parts my 914 picked up. These will replace my Cobie Z beams, and Cobie driving lights. Yep Truck Lite 7" LEDs 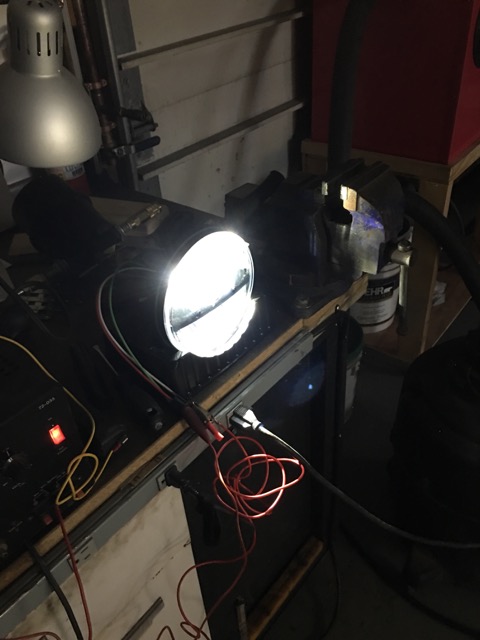 Nice Light pattern 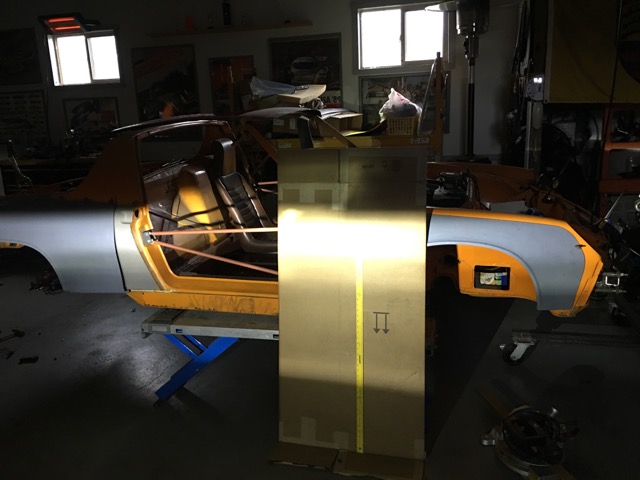 Then I also had an idea, so I ordered up one of these: 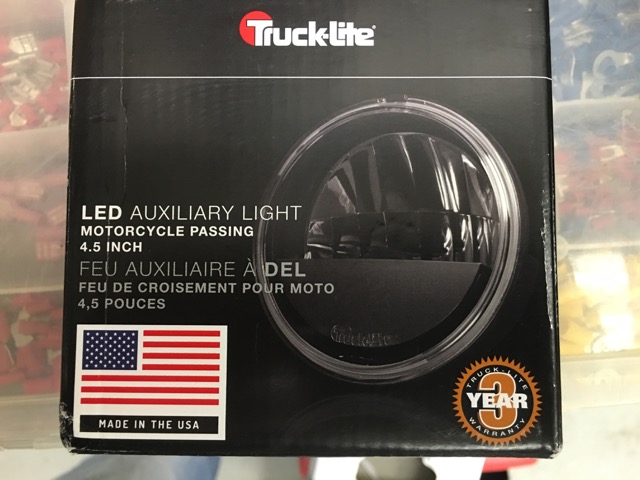 Harley LED passing light, also by Truck Light Light pattern not as nice but still adds some to fill in the dark spots, I hope. 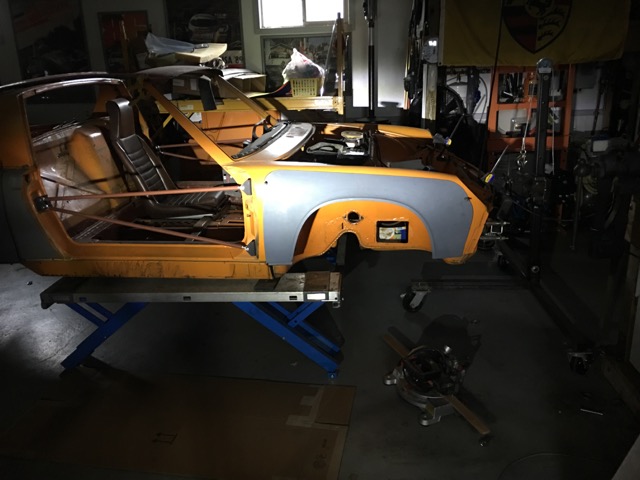 And here is my idea, stock location. Stock fog light for comparison.  And now the Truck Lite unit 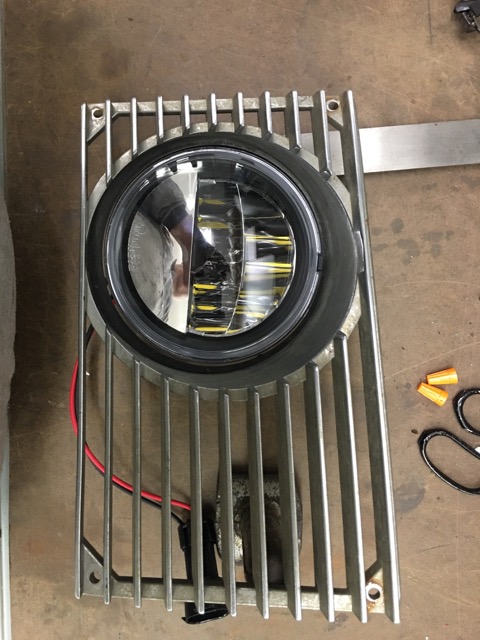 Now to figure out how to mount this things, nothing screams hey you can mount from here, and the instructions, are well nonexistent. (IMG:style_emoticons/default/screwy.gif)  You would think them little white plugs would work as a mount, but they don't seem to wanna come out. Need to do some research on the Harley forums (IMG:style_emoticons/default/dry.gif) I also ordered a second one, so you all can go out and order to yours, as I have the stock I need for the build. (IMG:style_emoticons/default/beerchug.gif) Fellow member asked about my 914-RS lights, and if I was going to use them in my build, and I said, I'm not sure. With adding backup lights, it is a road car, the extra weight might make it not worth the efforts. So I decided to weigh them against stock. Stock is 1 pound 14.4 ounces 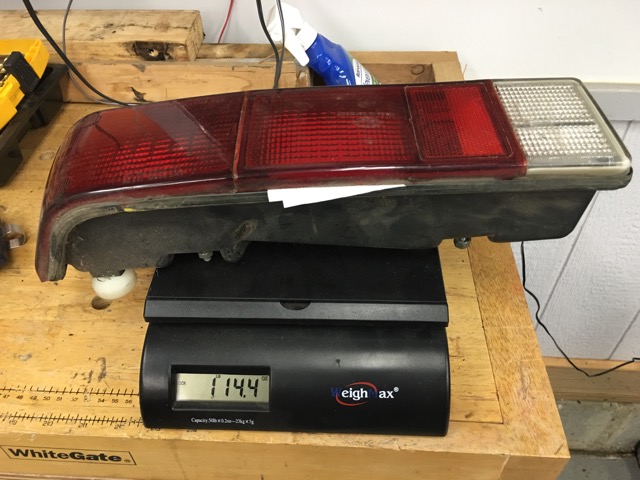 RS alone is 1 pound 0.4 ounces for a savings of 14 ounces. Or a total savings of 1 pound 12 ounces for the pair. With backup lights I pickup an extra 2 ounces or 4 ounces total. Meaning I save 1 pound 4 ounces on the pair. (IMG:style_emoticons/default/aktion035.gif) Yes every little bit helps so lets look at light output. Running light 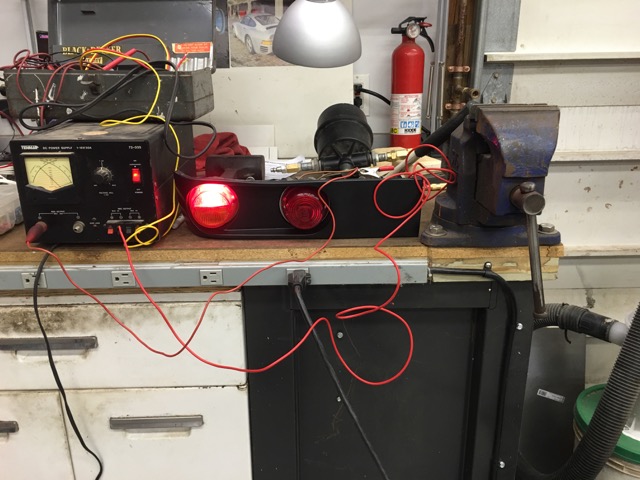 Turn signal 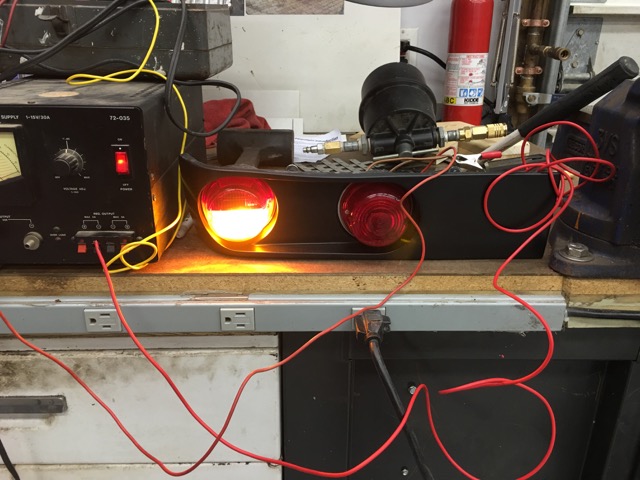 Brake Light 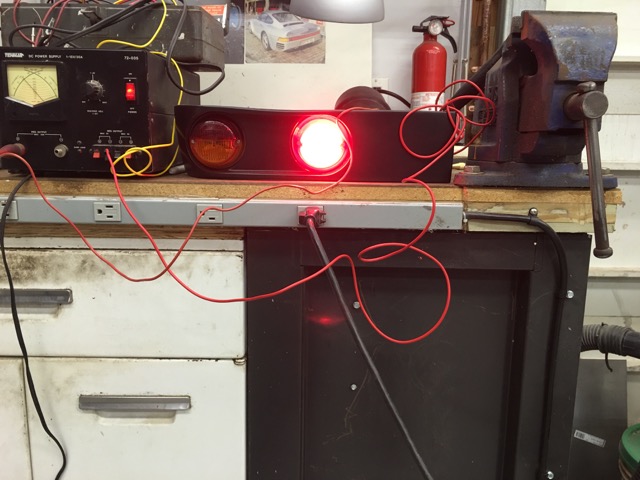 Long to the short, I have sold the RS lights, contacted Spoke about the Group Buy, waiting on the next round, and I ordered a set of euro rear lenses from AA. (IMG:style_emoticons/default/WTF.gif) George out of stock (IMG:style_emoticons/default/dry.gif) I should have know, I am on the hunt for euro lenses now. Done plying with lights, of crap I am not. Rear Fog, well now rear DLR / Fog. It forced me to make a decision, I will not be running the rear valance, I had been thinking about it, but now I won't have not run it since I owned the car. So where to put this, it needs to be low and on the drivers rear side. And I don't like the factory box. So out cones this. Two modes DLR / and Fog/Brake A zener diode will allow both to function with out flashing the front fog lights when I hit the brakes. Or the other way around, in reality it will take two zeners. 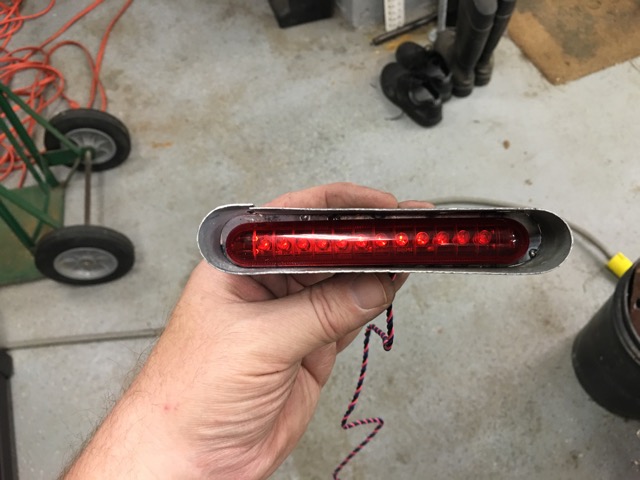 This is the bracket made to hold it. 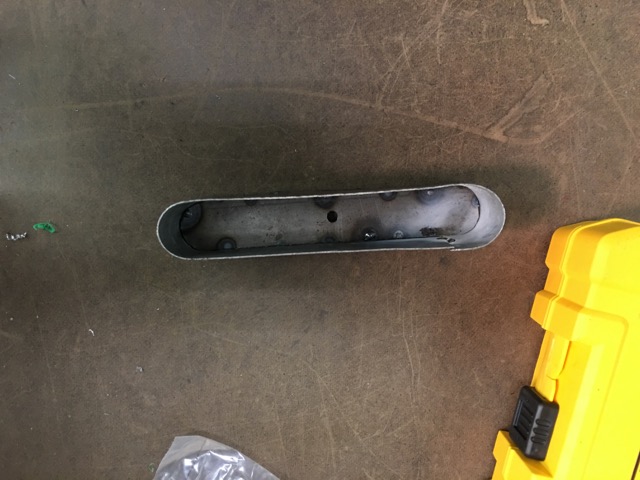 And this is it being fitted up 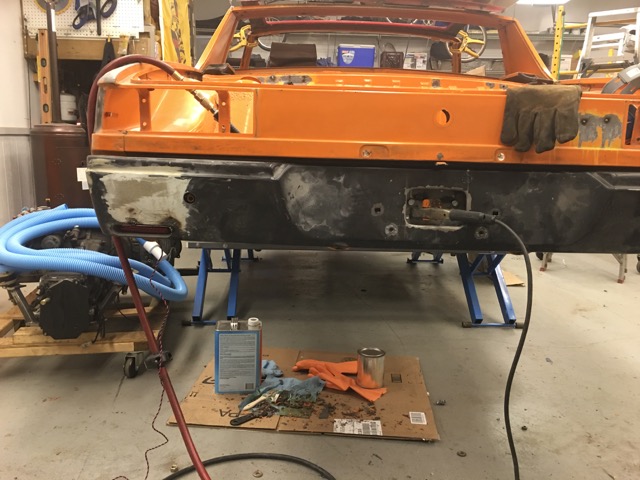 DLR mode 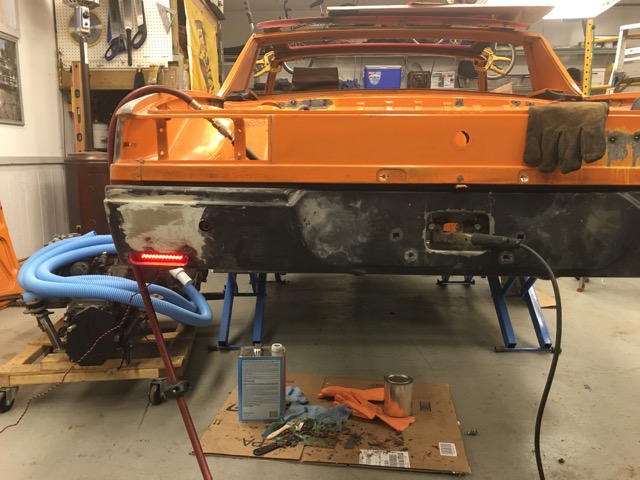 Fog / Brake Mode 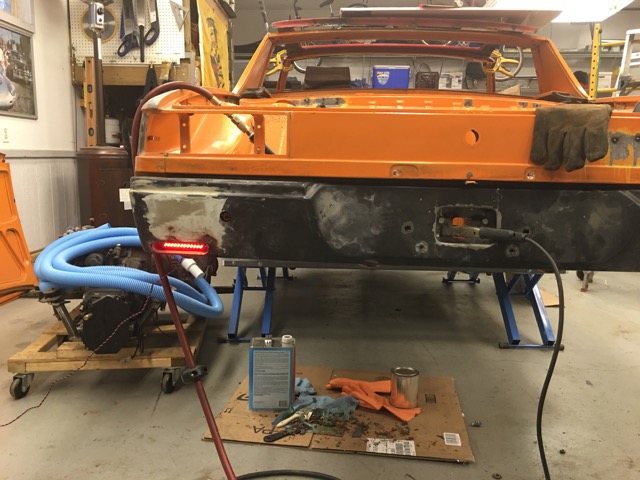 Wow camera does not show a difference in light output. And after 2 days for (IMG:style_emoticons/default/welder.gif) (IMG:style_emoticons/default/smash.gif) (IMG:style_emoticons/default/welder.gif) (IMG:style_emoticons/default/smash.gif) (IMG:style_emoticons/default/sawzall-smiley.gif) (IMG:style_emoticons/default/welder.gif) (IMG:style_emoticons/default/smash.gif) it looks like this. We need a grinder emoji 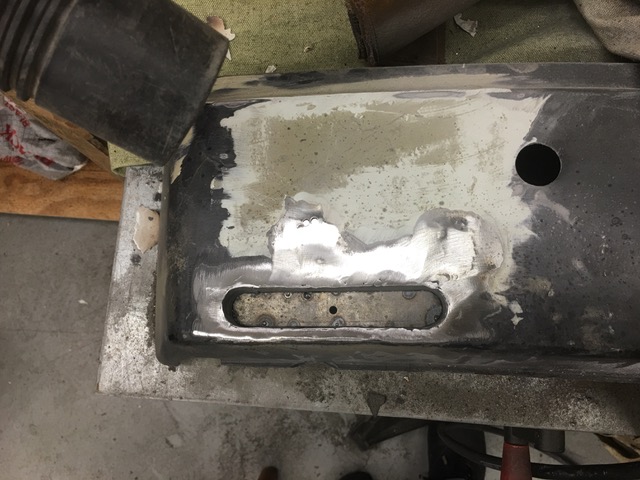 I will most likely have another few days worth of work cleaning up that bumper. Need to strip all the old filler, (IMG:style_emoticons/default/smash.gif) the dents out, and then epoxy prime, fill whats needs filled, epoxy prime/ seal, then primer, sand,primer, sand, on and on. I am no Metal Surgeon thats for sure, but I am learning a lot, in the process. (IMG:style_emoticons/default/cheer.gif) (IMG:style_emoticons/default/headbang.gif) (IMG:style_emoticons/default/confused24.gif) What is next for the bumper A plug for the trailer wiring, waiting on a step bit that goes to 1-3/8 of an inch. Bumper tops, waiting on 914Rubber to get the kinks worked out on the fiberglass bumper tops, been waiting a long time for these. (IMG:style_emoticons/default/shades.gif) And then into the trunk, and finish welding the trailer hitch, plug up all the holes I no longer need. Finish the shock mounts, waiting on my counter sink bit to show up for that. And building a mount for the trailer light conversion box. So back to the shop today, to makes some more progress, hope to get 3 more days out there this week. |
|
|
|
| Mueller |
Dec 30 2015, 09:26 AM
Post
#130
|
|
914 Freak! Group: Members Posts: 17,155 Joined: 4-January 03 From: Antioch, CA Member No.: 87 Region Association: None |
Neat custom modifications...I like!
|
|
|
|
| 914forme |
Dec 30 2015, 12:03 PM
Post
#131
|
|
Times a wastin', get wrenchin'! Group: Members Posts: 3,897 Joined: 24-July 04 From: Dayton, Ohio Member No.: 2,388 Region Association: None |
Thank you Mike:
Lunch Update: Bracket made for trailer harness adapter. 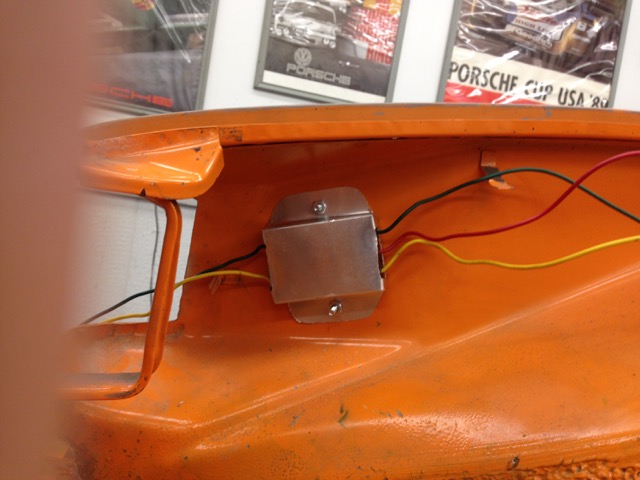 Made from Aluminum Flashing, nice and light. My AL skills need a little polishing, might redo it latter. Drilled a hole for the harness. 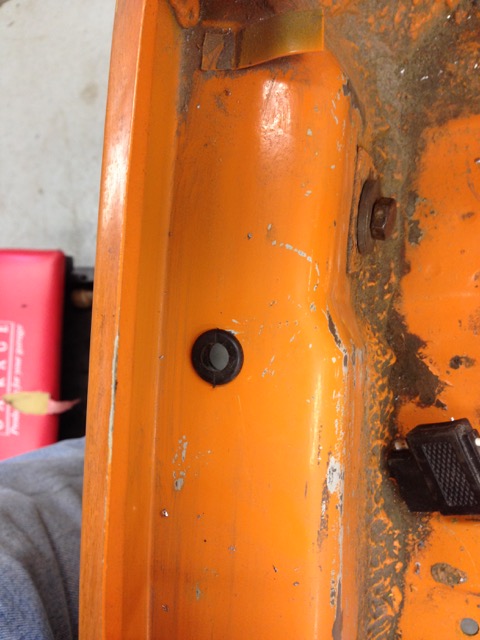 From the Bumper side 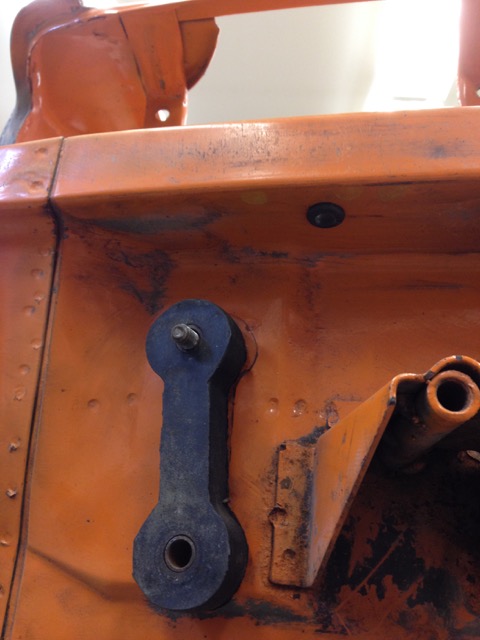 Will drop the harness down, and add a weather pack connector to it, for the trailer lights and DLR / Fog Brake. I might added these into the the setup also LED license plate lights. They hang down a little farther than I like. Might use a lighted frame, or lighted bolts instead. 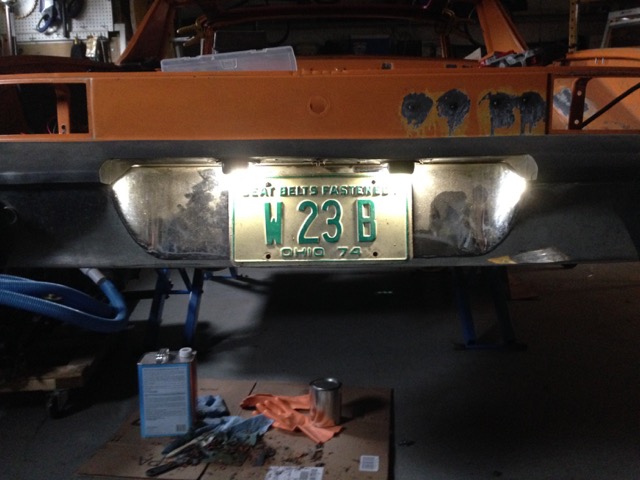 They look like an after thought, I hate that. And no your not going crazy used my old chrome bumper to test the lights on as it has a bumper top. |
|
|
|
| 914forme |
Jan 1 2016, 05:12 PM
Post
#132
|
|
Times a wastin', get wrenchin'! Group: Members Posts: 3,897 Joined: 24-July 04 From: Dayton, Ohio Member No.: 2,388 Region Association: None |
Found 3 sets of European lens, sourced one set from Germany. (IMG:style_emoticons/default/screwy.gif)
Here is what I completed yesterday, lots of (IMG:style_emoticons/default/welder.gif) Welded in a ton of studs. figurative not 2000 pounds of steel 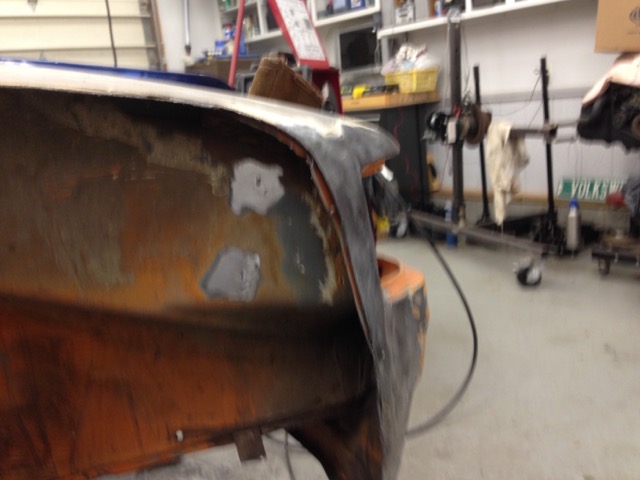 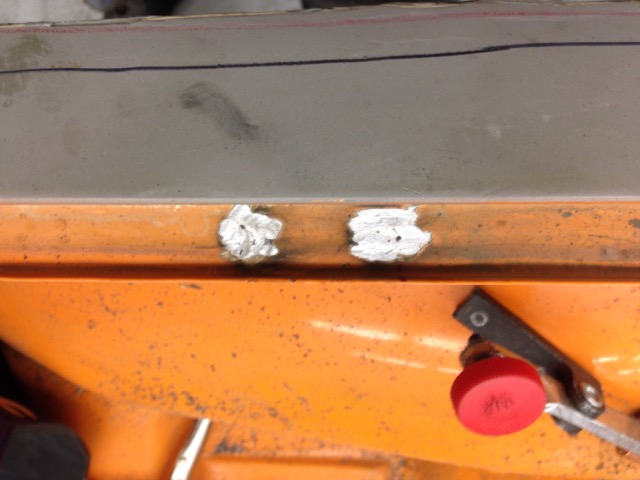 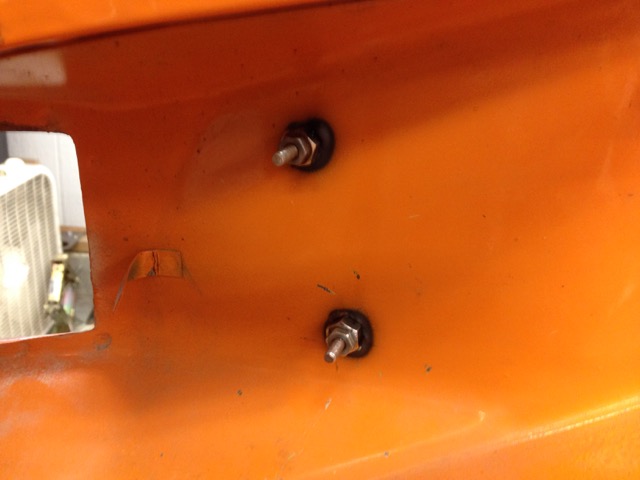 Filled holes no longer needed 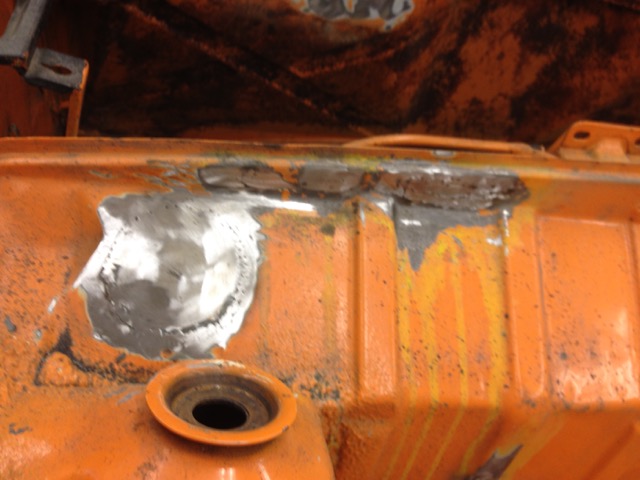 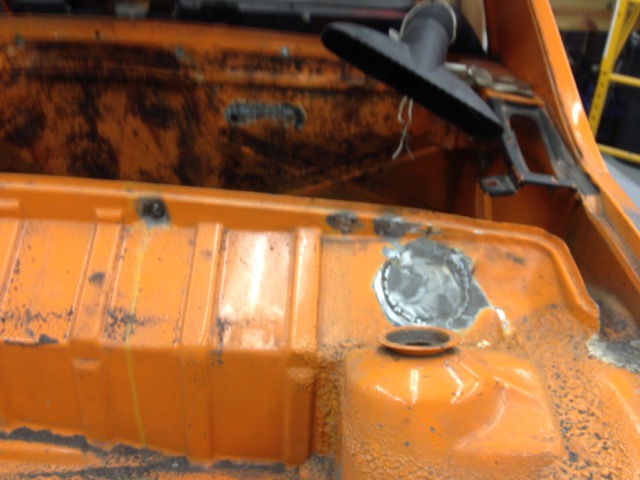 Almost done with the hitch pieces until I get the chases back on the rotisserie. 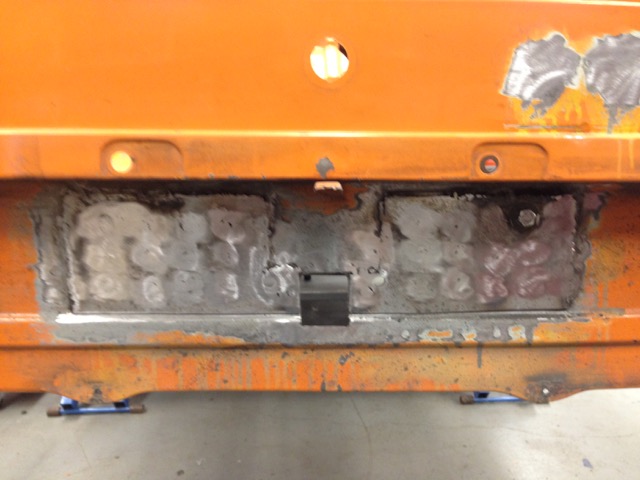  And mocked up the hitch wiring. 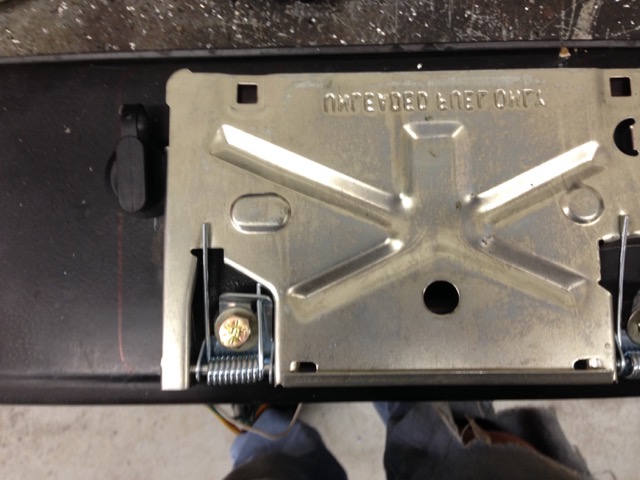 It will be hidden behind the license plate out of site out of mind, and protected from the elements. 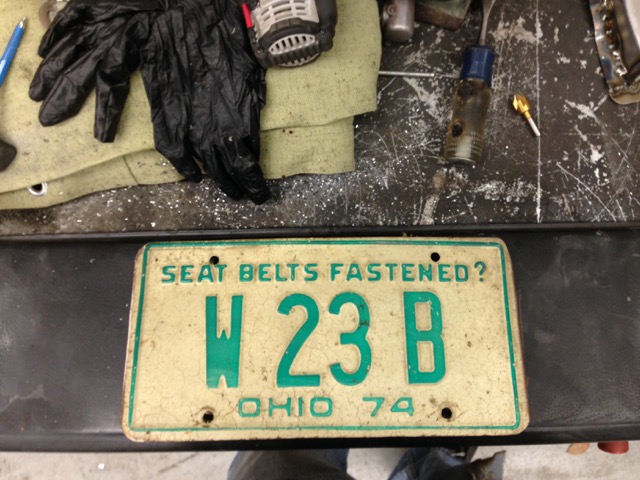 Progress made in baby steps. |
|
|
|
| 914forme |
Jan 18 2016, 01:33 PM
Post
#133
|
|
Times a wastin', get wrenchin'! Group: Members Posts: 3,897 Joined: 24-July 04 From: Dayton, Ohio Member No.: 2,388 Region Association: None |
Been a while, I have not been slacking just working on other items. A friend of the family died and left three young adults to fend for themselves. We finally got most of the items done, and cleared up. Probate papers are also done, some one took pity on them, got to love Christmas spirit. (IMG:style_emoticons/default/beer.gif)
I got drafted to do car repair work. Not sure if you have noticed but it is cold here in Ohio. And when heater fans go out, all sorts of things go wrong. So I fixed a Ford Escort fan system, corroded connectors, all rusted up. Little work and good as new. That car back on the road. Then this got brought over: 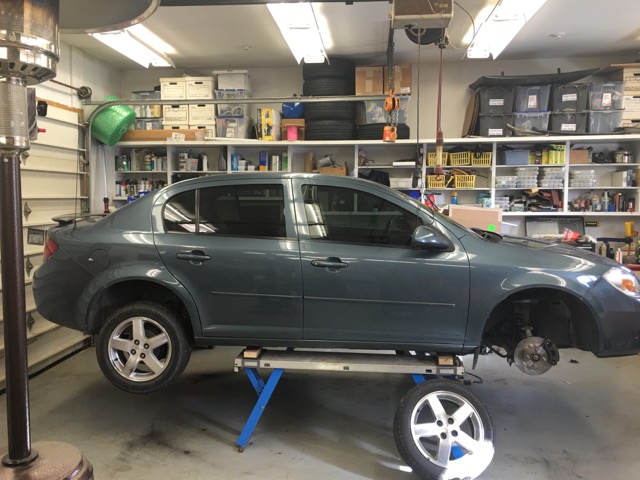 Long list of items needing fixed: Battery Replaced Wiper Blades ( who takes them off and does not replace them (IMG:style_emoticons/default/huh.gif) Front Brakes New Rotor, New Pads, lube pins, replaced all the fluid Oil Change Antifreeze flush Trans Fluid Change New Tires for the front Radio does not work - Fuse Front Right Turn Signal no work, burnt connector (IMG:style_emoticons/default/WTF.gif) Fixed now. Waiting on tires, and then mount them up, and torque the lug nuts, car will be done. Oh and the worst item, car was parked with the windows down, and cats made it their litter box. So tore the entire interior out, pressure washed it, Steamed it, washed it and extracted it. Put it all back together, and running an ozone unit in the car. No smell yet, but we ill see if the urine smell comes back, once the car heats up. So back to the 914, what happened to my pictures. Finished mock up on the bumper, all studs fitted. Also made the pieces to fill the license plate bracket inserts. Made pieces to fill the odd corner holes left in the slave cylinder cover. 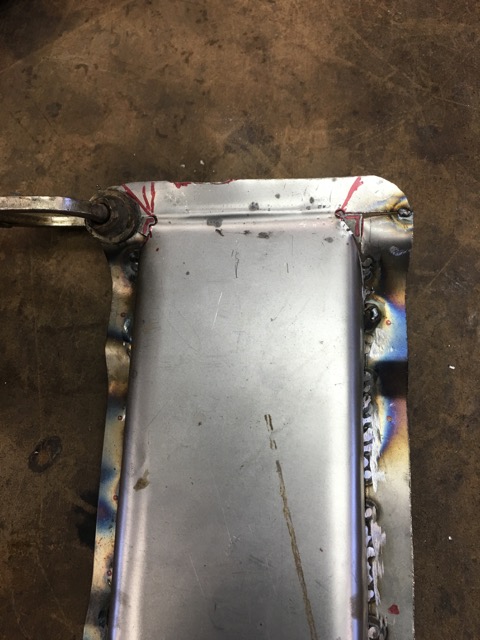 Worked on fitting up the last piece of the hitch re-enforcments on th trunk floor. Shh don't tell my wife, I took one of here purses to make a shot bag. 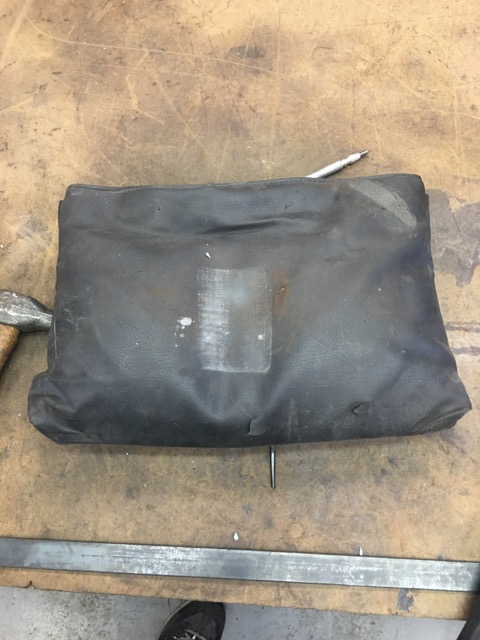 Got a decent fit once done. 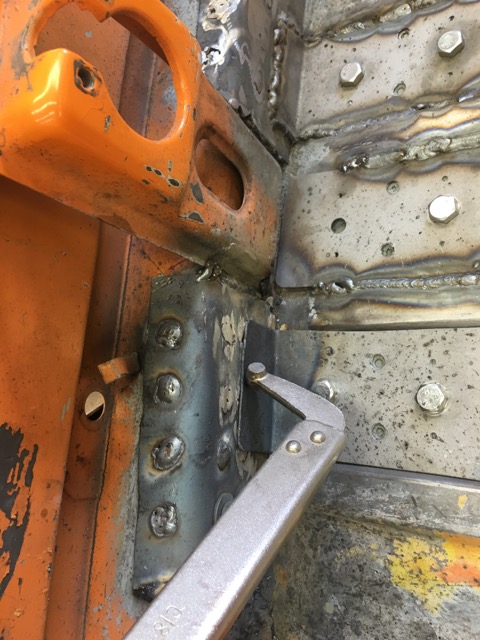 And started to work on the rad support in the front trunk! Wish I had this stuff a long time ago 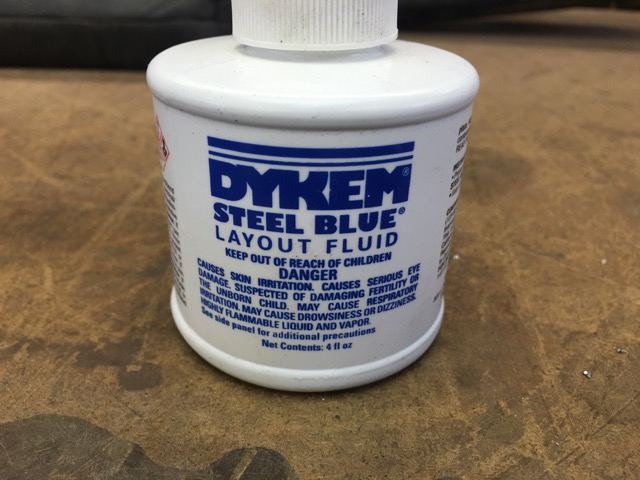 Makes it so much easier for me to see (IMG:style_emoticons/default/shades.gif) Still does not help accuracy. 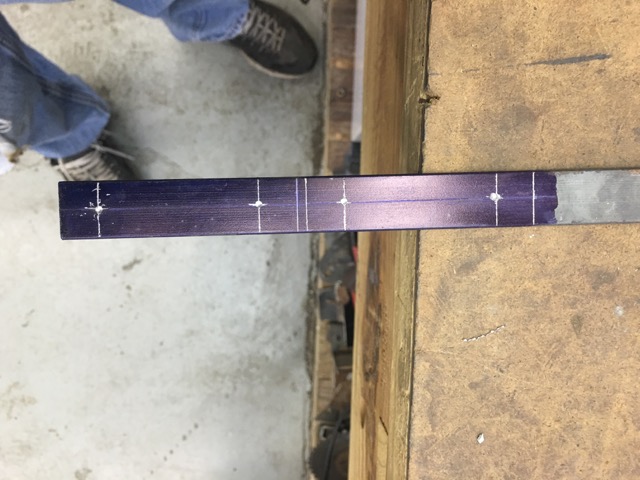 But now I can see how far off I really am (IMG:style_emoticons/default/av-943.gif) |
|
|
|
| 914forme |
Jan 24 2016, 09:31 AM
Post
#134
|
|
Times a wastin', get wrenchin'! Group: Members Posts: 3,897 Joined: 24-July 04 From: Dayton, Ohio Member No.: 2,388 Region Association: None |
Yesterdays progress, life keeps getting in the way. Wife's EOS washer pump died, you have to disassemble the entire nose of the car to change it. (IMG:style_emoticons/default/headbang.gif)
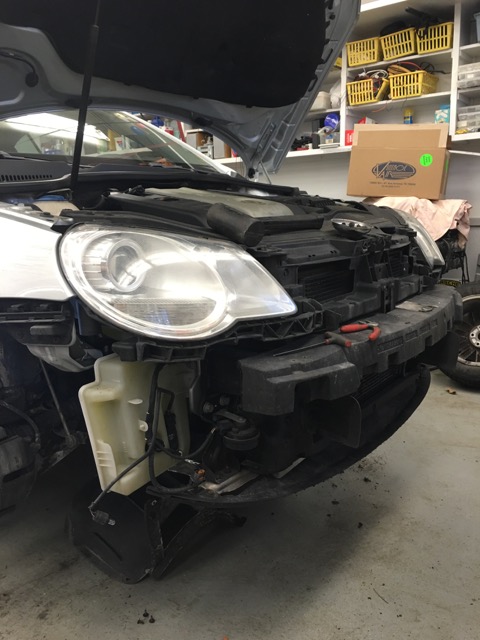 Car will be on the lift for a week or better now waiting on the pump to arrive. (IMG:style_emoticons/default/sad.gif) Couple of items came in on the brown truck Friday. Pedal Board thanks to G E O R G E (IMG:style_emoticons/default/beer.gif) 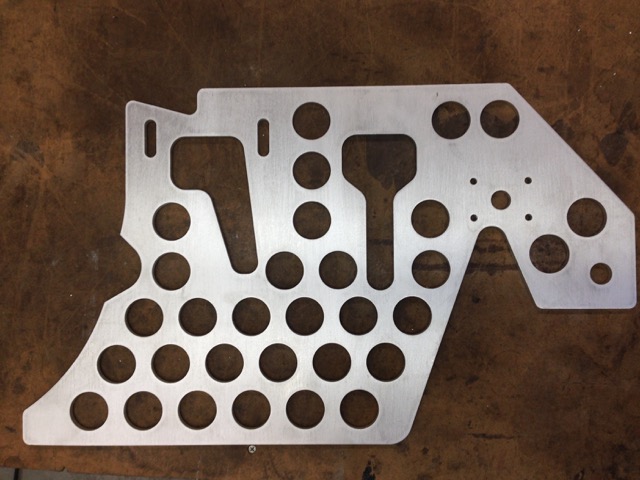 And yes I am back to working on the license plate holder will this ever been done. (IMG:style_emoticons/default/huh.gif) Plastic Nut insert, round hole in a square peg (IMG:style_emoticons/default/smash.gif) 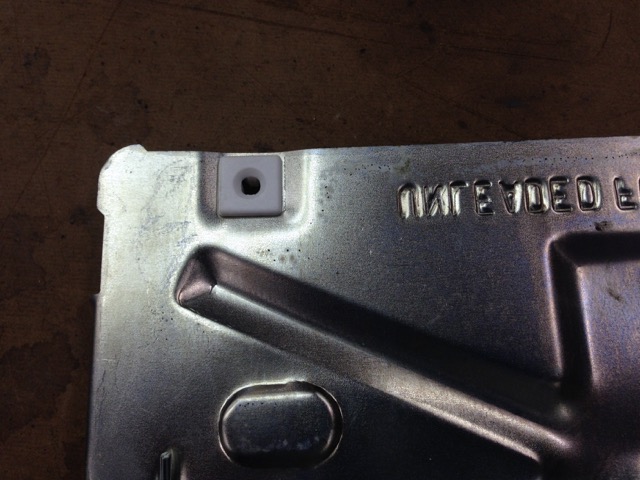 Which allowed me to install these LED License plate lights. 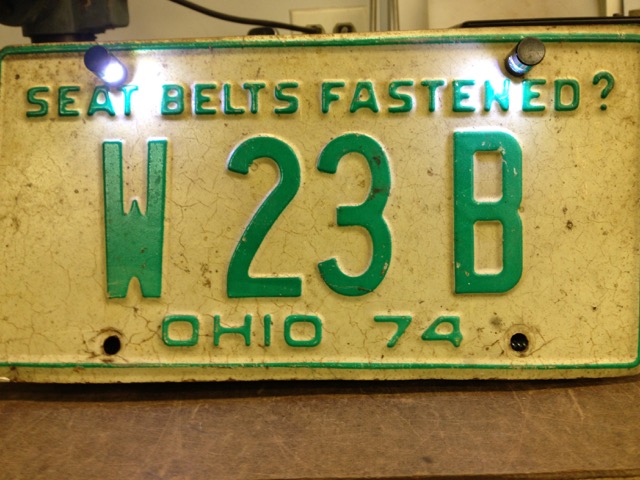 And they look like this at night 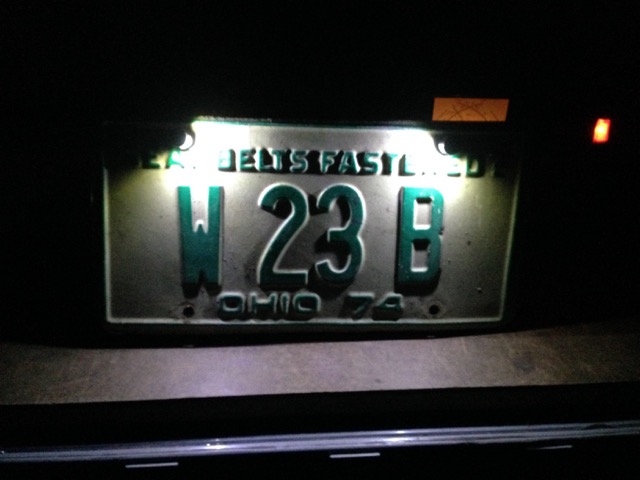 Hoping today to get some welding done, and more fab work, seeing McMarks post of quick release engine lids got me thinking. Between his and Brant's racer, I might have to make my own design. (IMG:style_emoticons/default/idea.gif) Looks like I will be starting fab work in the engine compartment next. Still have some things to eliminate. Decided I will keep my engine mount I built for the EG using the early -4 bar. Its ready to go, and does what it needs to do. I have a bunch of stuff to install in the engine bay, so this will be a long project also. If I can fab work done by April I'll be a thrilled, as it would be a good time to put it into paint. If I look at the days and obligations I have, that will be a hard target to hit. (IMG:style_emoticons/default/icon8.gif) |
|
|
|
| Garland |
Jan 24 2016, 12:23 PM
Post
#135
|
|
Restoration Fanatic Group: Members Posts: 1,426 Joined: 8-January 04 From: ......Michigan...... Member No.: 1,535 Region Association: Upper MidWest |
Appreciation for the time you have spent on the rear bumper and hitch, looks great.
|
|
|
|
| 76-914 |
Jan 24 2016, 08:44 PM
Post
#136
|
|
Repeat Offender & Resident Subaru Antagonist Group: Members Posts: 13,843 Joined: 23-January 09 From: Temecula, CA Member No.: 9,964 Region Association: Southern California |
The piece that covers the slave cylinder does have a tricky bottom, doesn't it? Keep after it. (IMG:style_emoticons/default/beerchug.gif)
|
|
|
|
| rick 918-S |
Jan 31 2016, 11:58 PM
Post
#137
|
|
Hey nice rack! -Celette Group: Members Posts: 21,179 Joined: 30-December 02 From: Now in Superior WI Member No.: 43 Region Association: Northstar Region |
Nice attention to detail.
|
|
|
|
| 914forme |
Feb 13 2016, 07:36 PM
Post
#138
|
|
Times a wastin', get wrenchin'! Group: Members Posts: 3,897 Joined: 24-July 04 From: Dayton, Ohio Member No.: 2,388 Region Association: None |
Thank you all for the nice commits (IMG:style_emoticons/default/beer.gif)
So today, shop is snowed in, what does that mean to me, I can work on the 914 (IMG:style_emoticons/default/cheer.gif) So got right to it, fired up the welder and finished the welding on the rear bumper there was much rejoicing!!!! 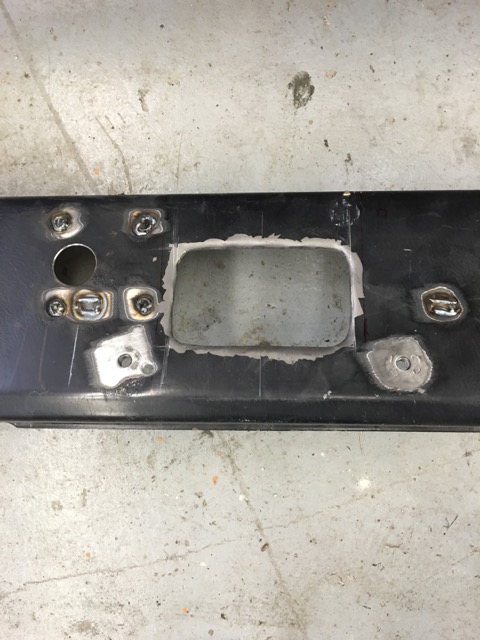 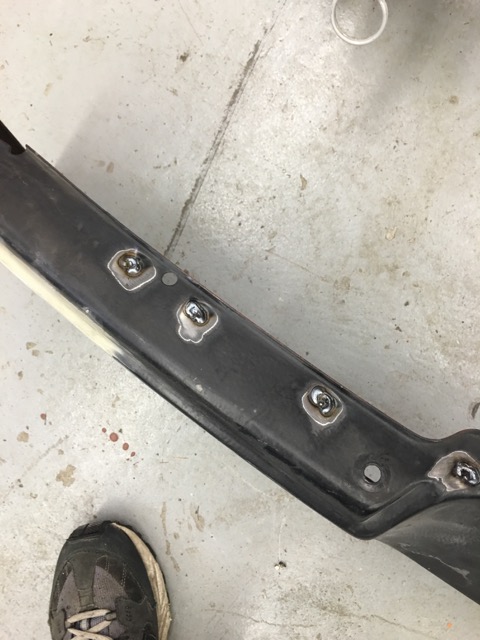 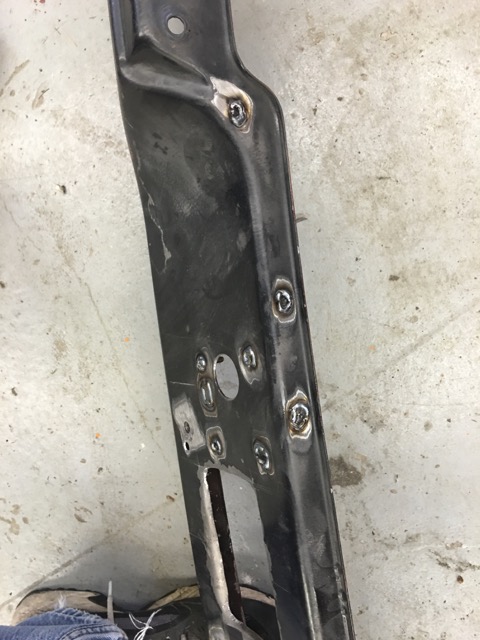 Finished the clutch slave cover. 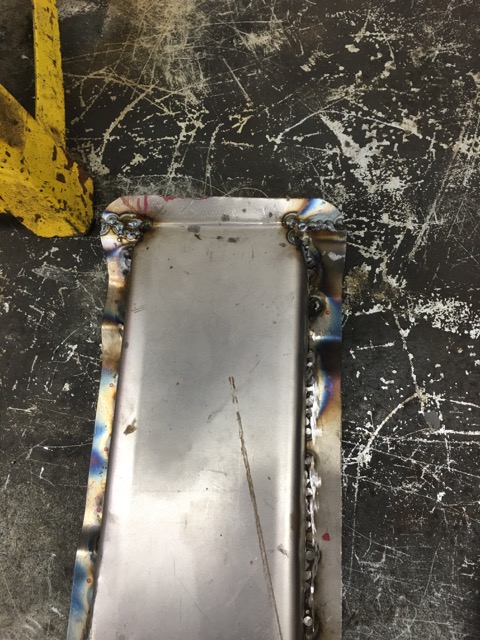 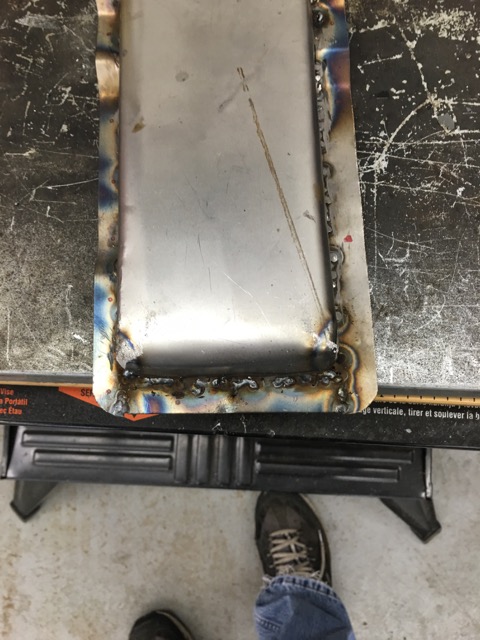  And thanks to another member here, I am going to run a rear valance now (IMG:style_emoticons/default/dry.gif) Hate the look of the mufflers. So dug out a metal one, and well I can't leave well enough alone. (IMG:style_emoticons/default/idea.gif) First fix a dent, and all the other damage. 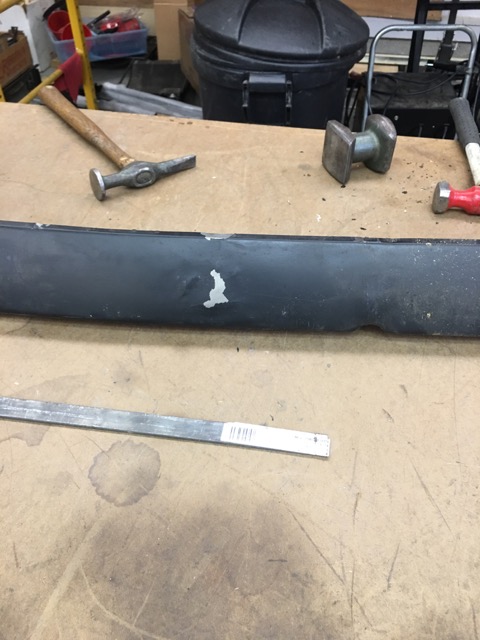 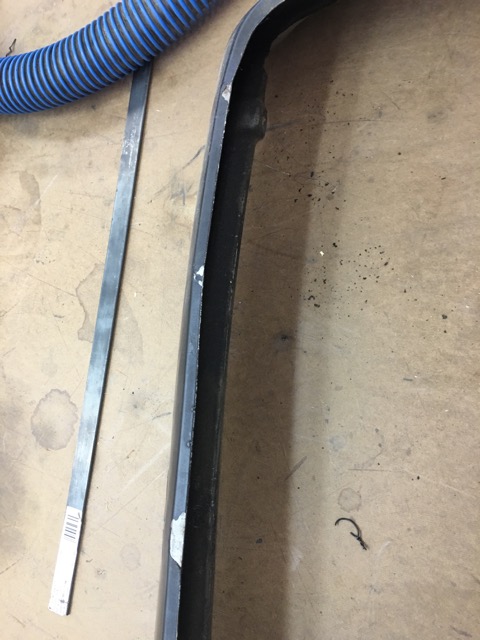 Next up file the side exhaust outlet. Man thats a compound curve (IMG:style_emoticons/default/wacko.gif) 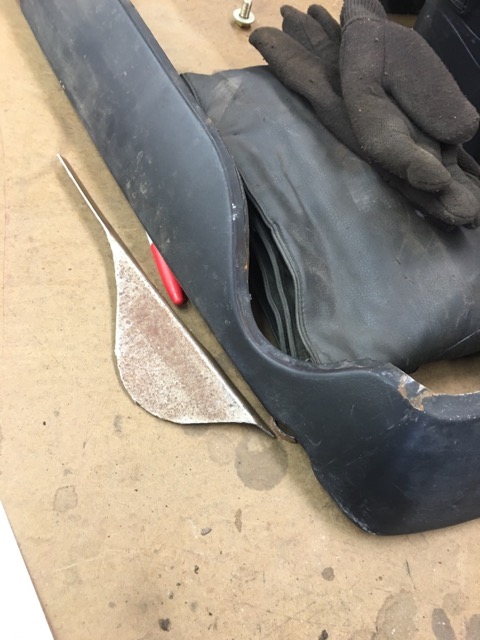 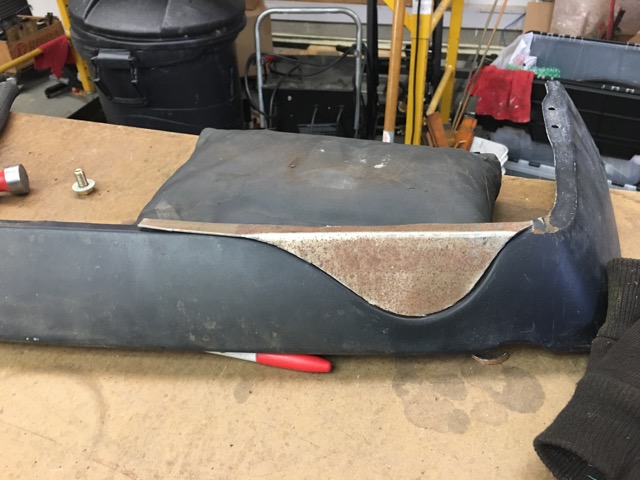 Lay out for center exhaust exit. Twin 2.5" outlets spaced an inch apart. I will most likely make it an oval pipe. Radius is 3" leaving 1/2" around the pipes to get pipes in the hole and lined up. 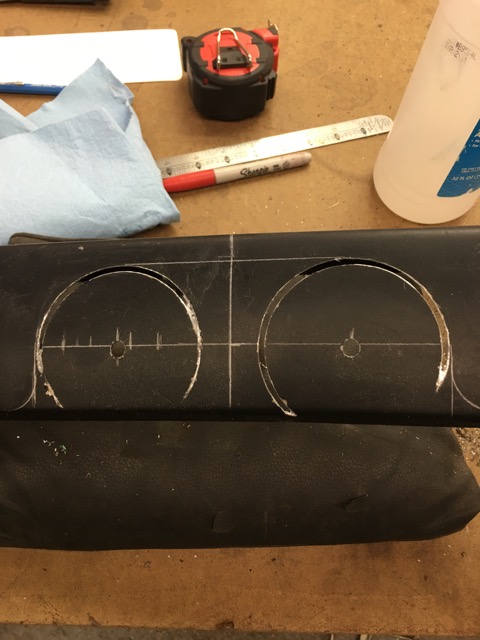 Cut Open 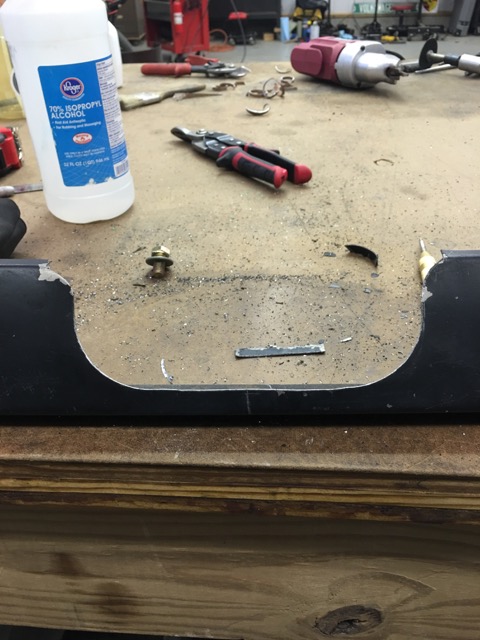 Add re-enforcmenet of the opening 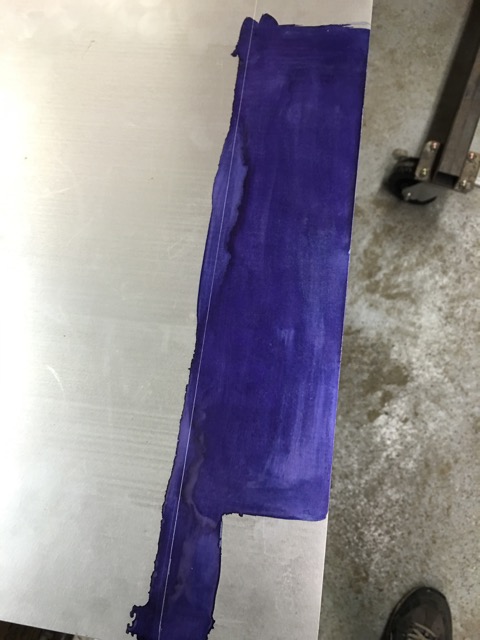 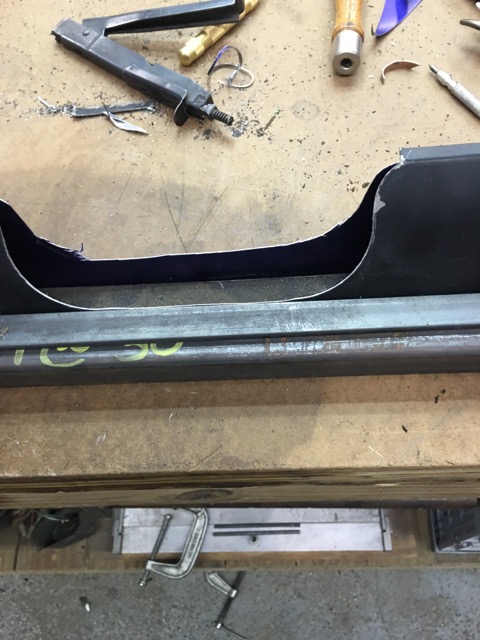 Pipes Mocked up these are 2.25" pipes so it will get better once done, did not have 2.5" in the shop, and did not want to leave to pick some up.  Sprayed some of this on the sealed up sides 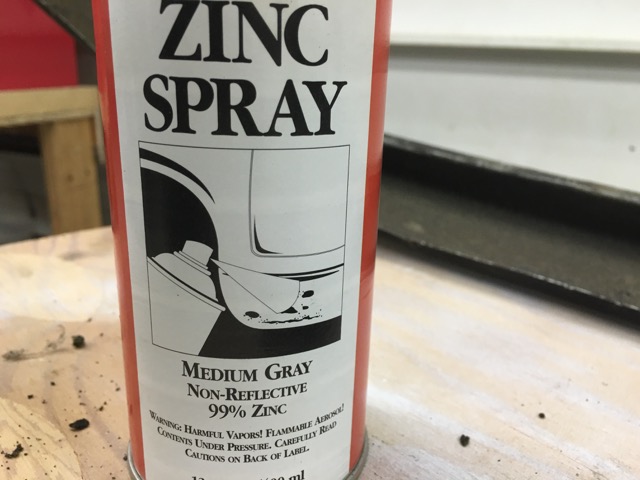 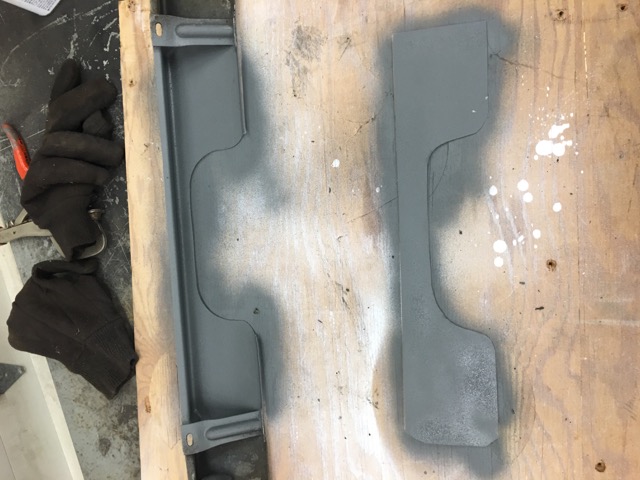 And I finished welding the hitch re-enforcements in the trunk floor. Well at least until , I get it flipped over and start on the underside of the hitch. 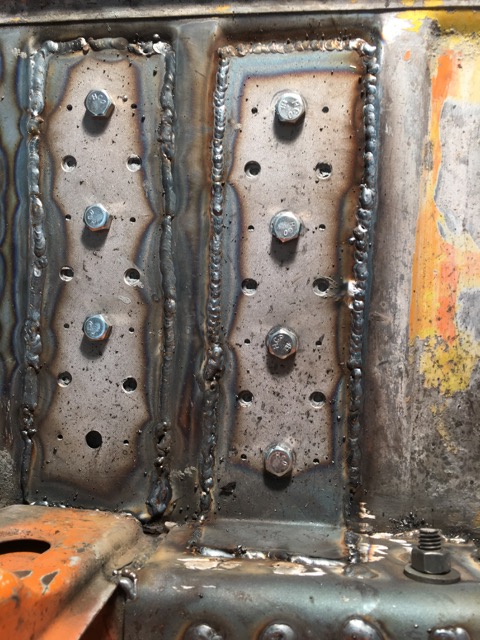 Once that is done, I'll need to come back and plug weld the bolt holes and the other holes you see. Make it nice and strong. I just figured out, I need to radius the exhaust opening, so I will do that, then weld the back piece up, and start making the filler for in-between the valance and the new re-enforcement piece at the back. |
|
|
|
| Andyrew |
Feb 14 2016, 08:29 AM
Post
#139
|
|
Spooling.... Please wait Group: Members Posts: 13,380 Joined: 20-January 03 From: Riverbank, Ca Member No.: 172 Region Association: Northern California |
Looking good! I think the center exit exhaust will look fantastc!
|
|
|
|
| 914forme |
Feb 14 2016, 12:13 PM
Post
#140
|
|
Times a wastin', get wrenchin'! Group: Members Posts: 3,897 Joined: 24-July 04 From: Dayton, Ohio Member No.: 2,388 Region Association: None |
The mornings work. Might get a couple more hours in today then I need to spend some time with my (IMG:style_emoticons/default/wub.gif)
Rounded over the opening. (IMG:style_emoticons/default/smash.gif) 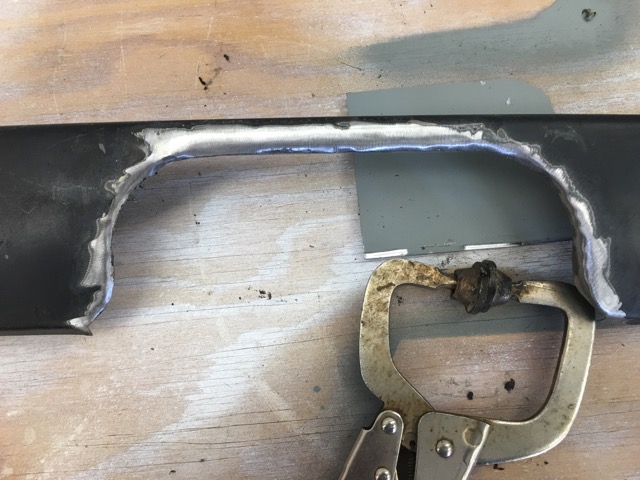 Using this home made dolly 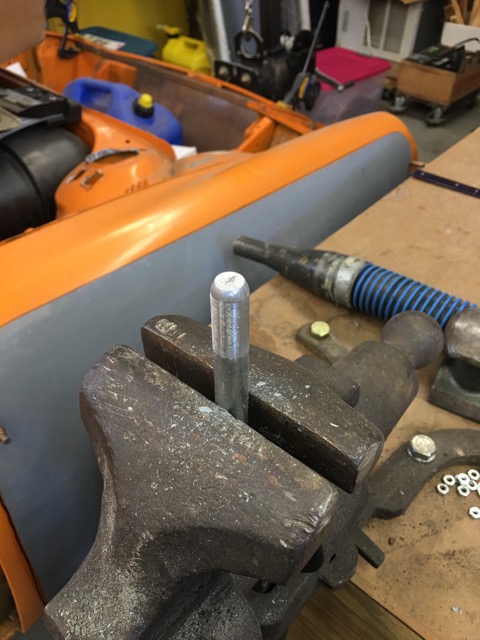 And this hammer made quick work out of it. It is only 20 gauge so it was pretty easy. 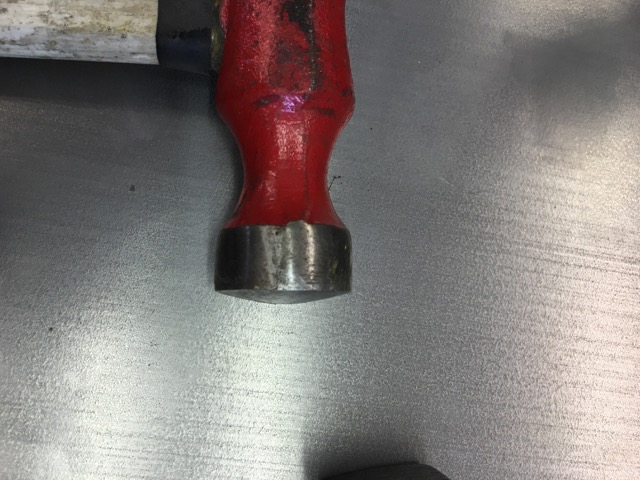 Final result of all the banging 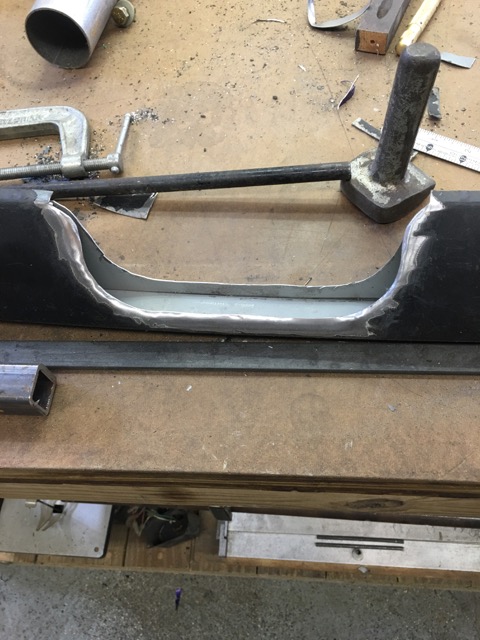 Layout the filler piece 1-1/4" strip will do the trick. Blue layout dye and a compass is all you need. Drag the point across the dye, accurate mark, cut. 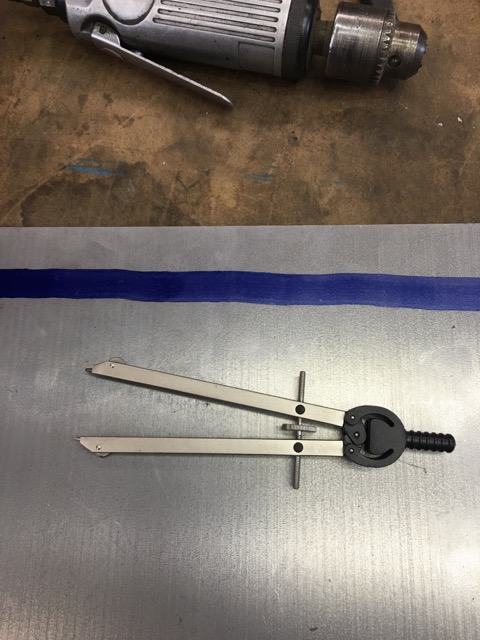 Lots of fitting, I found out I am not as good as a lot of people, so Im making it in two sections. More practice, but hey I am still learning this stuff. 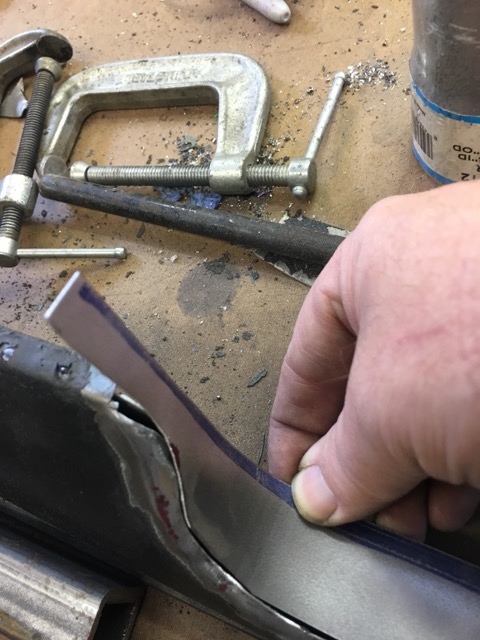 One side tacked up, get to rinse and repeat the other side finish the welding and spend lots of time with a cut off wheel. I use a cut off wheel to grind the welds down just shy of the surface. I'll finish up with sand paper, either a flapper disk, or small rolocs. 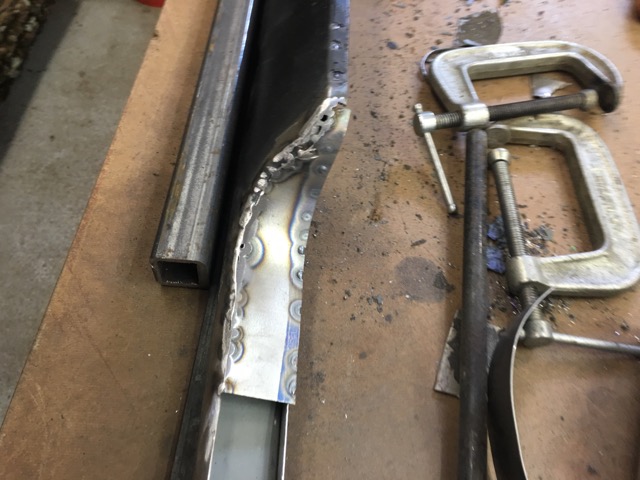 Times a wasting' better get back at it! (IMG:style_emoticons/default/poke.gif) |
|
|
|
|
1 User(s) are reading this topic (1 Guests and 0 Anonymous Users)
0 Members:

|
Lo-Fi Version | Time is now: 24th January 2026 - 04:49 AM |
Invision Power Board
v9.1.4 © 2026 IPS, Inc.