|
|
|
Porsche, and the Porsche crest are registered trademarks of Dr. Ing. h.c. F. Porsche AG.
This site is not affiliated with Porsche in any way. Its only purpose is to provide an online forum for car enthusiasts. All other trademarks are property of their respective owners. |
|
|

  |

| 914forme |
 Mar 8 2016, 07:59 PM Mar 8 2016, 07:59 PM
Post
#164
|
|
Times a wastin', get wrenchin'!  Group: Members Posts: 3,896 Joined: 24-July 04 From: Dayton, Ohio Member No.: 2,388 Region Association: None |
No Chris I did not. I might just go full MS3X so I can run sequential spark. Will be using GM LS coils. It will also do dual fuel, which I plan on running E-85, but will nee the ability to run high octane, if I can't find the corn fuel.
More progress I started laying out the various lines and systems. First up clutch as it was easy. 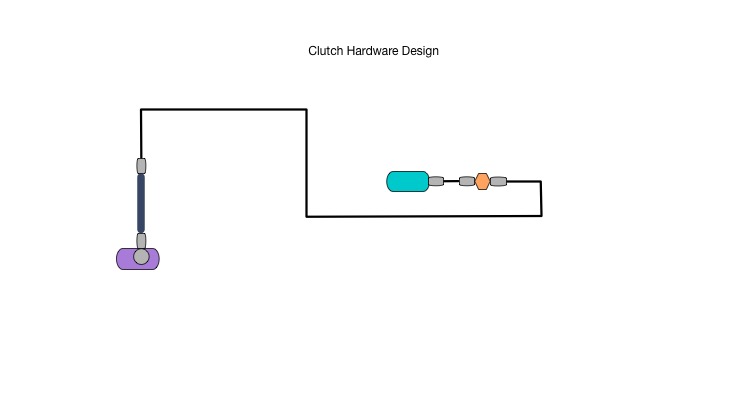 Brake Lines 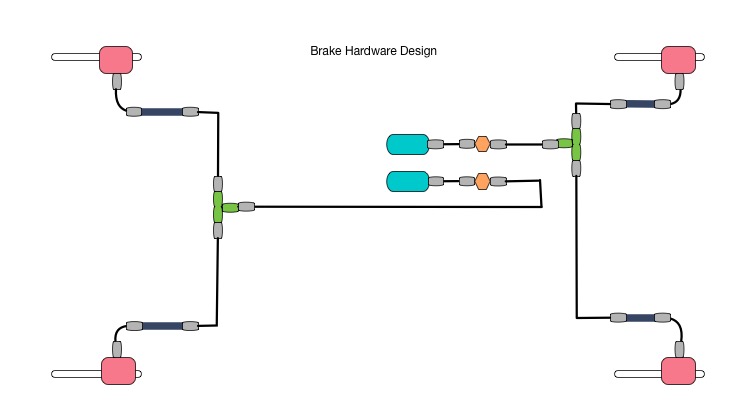 And now the key, and part numbers 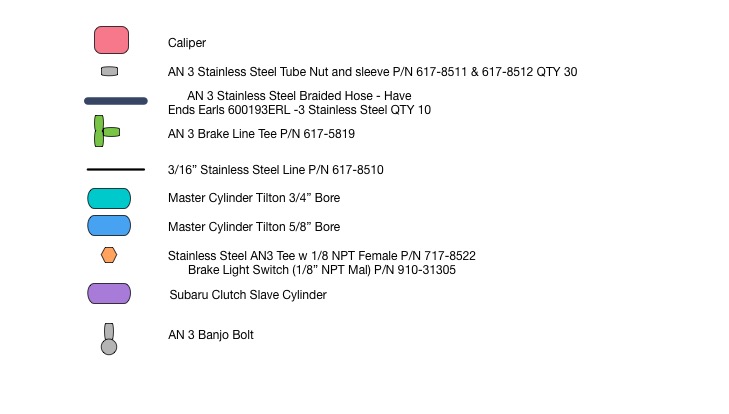 Yes I have 3 brake line switches. One for the lights, and two for the cruise control. I might need another one for the laugh control, have to think that one through. Got home, beautiful night in Mid Western Ohio 70+ degrees. So out to the shop I went. Swaged winter tires of my Daily. Which means it will snow in a few weeks. And started welding in the inner suspension console and logs on he driver side. 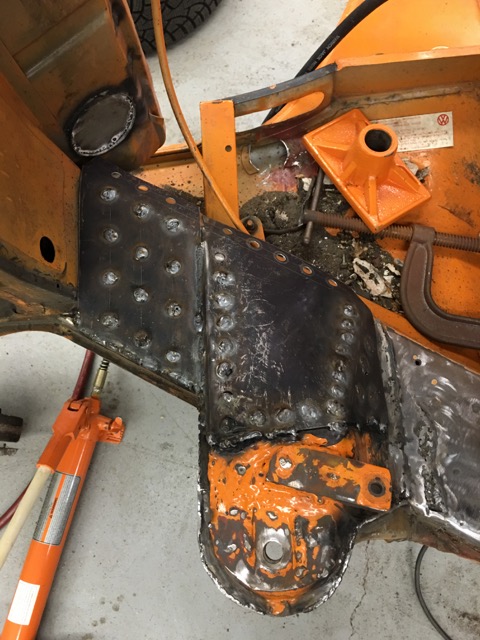 |
   |

 
|
| 914forme |
Mar 11 2016, 01:26 PM
Post
#165
|
|
Times a wastin', get wrenchin'! Group: Members Posts: 3,896 Joined: 24-July 04 From: Dayton, Ohio Member No.: 2,388 Region Association: None |
Grabbed a little welding time before work today.
Drivers side Logs almost done, the console was seam welded before I added all the extra to it. 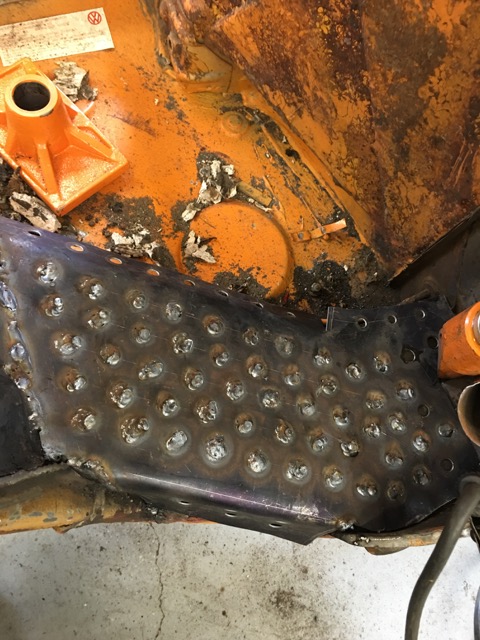 Started working on the plates to mount the oil and fuel filters. 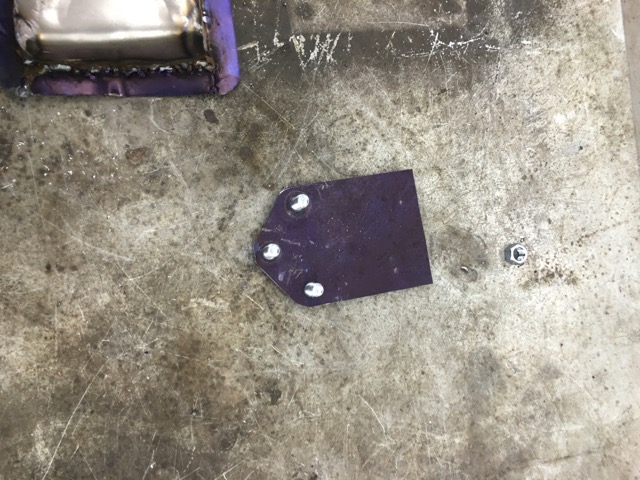 And this is the filter boss fits over the studs 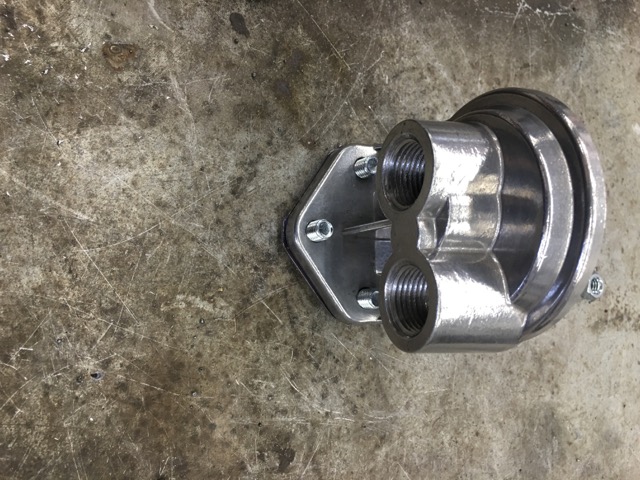 Hopefully get back to some welding tonight once I get home. Get the filter mount in place, roll over the upper sections, and then add the oil filter console, and the accusump mounts need to be fabricated. And this just got delivered, it will help keep my uni-bits a little long-lasting. 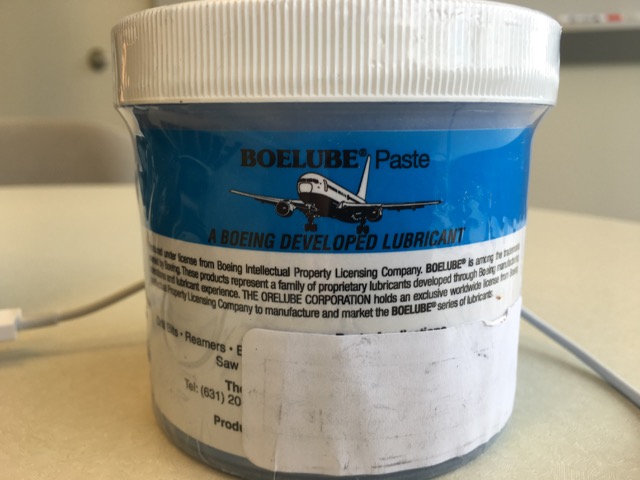 Just in time, I need to drill a few hundred more holes. I am hoping to get out of the engine compartment this weekend. (IMG:style_emoticons/default/av-943.gif) |
|
|
|
| mgp4591 |
Mar 11 2016, 01:34 PM
Post
#166
|
|
914 Guru Group: Members Posts: 5,372 Joined: 1-August 12 From: Salt Lake City Ut Member No.: 14,748 Region Association: Intermountain Region |
Are you planning on running an adjustable proportioning valve for your dual circuit brake system? Looks pretty well planned out and great progress on the build! (IMG:style_emoticons/default/popcorn[1].gif)
|
|
|
|
| 914forme |
Mar 11 2016, 01:56 PM
Post
#167
|
|
Times a wastin', get wrenchin'! Group: Members Posts: 3,896 Joined: 24-July 04 From: Dayton, Ohio Member No.: 2,388 Region Association: None |
Dual brake masters with a balance bar
|
|
|
|
| 914forme |
Mar 11 2016, 08:32 PM
Post
#168
|
|
Times a wastin', get wrenchin'! Group: Members Posts: 3,896 Joined: 24-July 04 From: Dayton, Ohio Member No.: 2,388 Region Association: None |
Made some weld bolts, cut most of the head off a bole, mount it up on the weld table, and weld them. Grind them almost flush, and you have some nice studs.
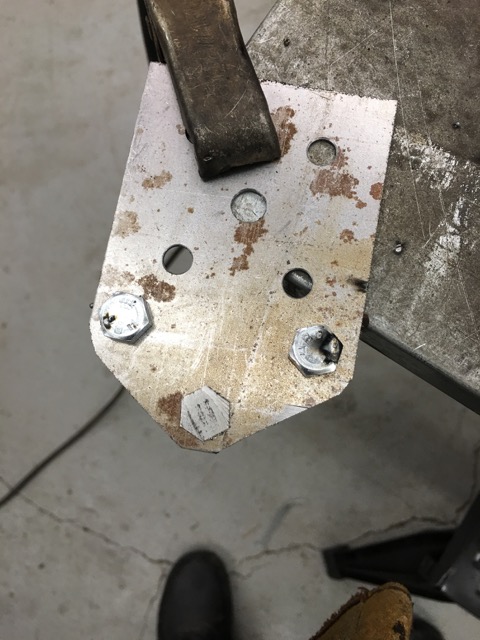 Oil filter mount welded onto the log. 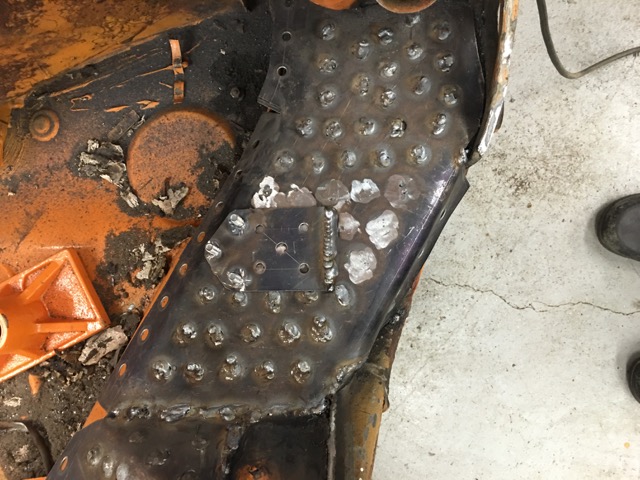 Oil filter mounted and then I needed to test to make sure my Suspension console reinforcement bar clears that big filter.  Plenty of room  Welded on the tank support 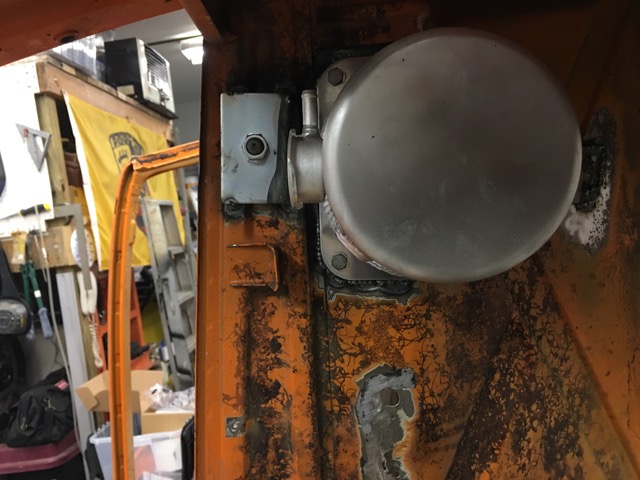 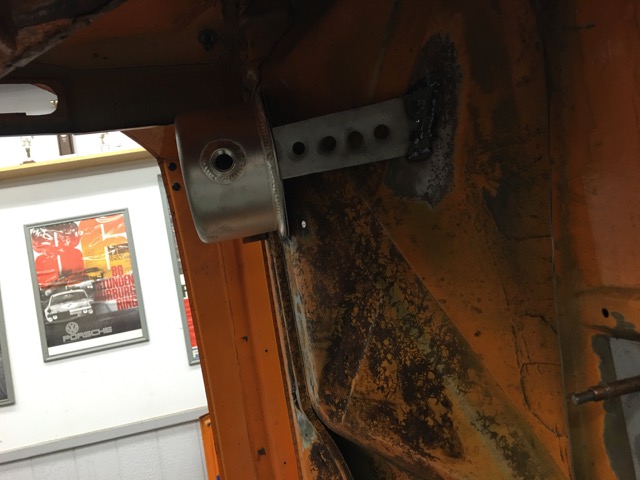 Welded in the front side washers on the harness mounts. This will help keep the tube from just running through the firewall. 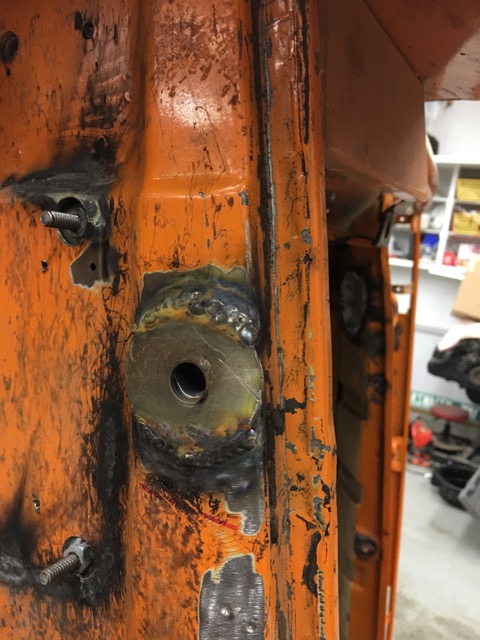 Spent the rest of the night with a dremel making a bracket fit a compound curve (IMG:style_emoticons/default/blink.gif) No pictures of that, I'll snap one when I am done. (IMG:style_emoticons/default/dry.gif) |
|
|
|
| Amenson |
Mar 11 2016, 08:58 PM
Post
#169
|
|
That's opposite lock!! Group: Members Posts: 645 Joined: 27-May 05 From: Dublin, OH Member No.: 4,154 Region Association: None |
You need to start publishing lbs of welding wire per day. Getting time behind the torch before work...bad ass. Keep up the progress.
|
|
|
|
| 914forme |
Mar 12 2016, 12:11 PM
Post
#170
|
|
Times a wastin', get wrenchin'! Group: Members Posts: 3,896 Joined: 24-July 04 From: Dayton, Ohio Member No.: 2,388 Region Association: None |
(IMG:style_emoticons/default/lol-2.gif) No I really don't want to know that number. I do weigh everything else, it will be interesting to see if I can keep the car at class weight of 2150 lbs. Still counted as a 4-Cyl 914.
I did go and get tanks refilled today so I can keep going!!! Realized I have mis-placed my oil thermostat, I hate that!!! Knew right where it was went and opened the drawer, and it is gone (IMG:style_emoticons/default/WTF.gif) That being said, tested out the one of the new gas cylinders, yes it is working, I had one place give me an empty cylinder once. I now have manifolds that show tank and outlet pressure from the regulator so I know when I am getting into the critical zone. I spent a lot of time trying to figure out that the cylinder was empty as I could not wrap my head around some one giving me an empty cylinder. I also don't go back to that gas supplier anymore. I head over to Springfield. Great older guy there, we shoot the (IMG:style_emoticons/default/stromberg.gif) for a bit each time, and he takes me to the racks and points at the cylinders. I am way younger than him, so I'll do all the heavy lifting. He treats me right ever time (IMG:style_emoticons/default/first.gif) So they have won my business. He also keeps poking me to buy a TIG, Lincoln is running a pretty good deal for a square wave AC unit, I might have to bite the bullet. I don't have a lot of Aluminum welding to do yet for they project. So little I can farm it out and still be way ahead cost wise. I still want to do some TIG, and the fender flares might just be the place I use it, after some practice on something not quite as critical. Theory is it would be easier to keep the weld under control, and hammer weld with a softer filler. |
|
|
|
| Andyrew |
Mar 12 2016, 12:40 PM
Post
#171
|
|
Spooling.... Please wait Group: Members Posts: 13,376 Joined: 20-January 03 From: Riverbank, Ca Member No.: 172 Region Association: Northern California |
I find I go through gas more than wire. Granted my gas trigger sticks but its still quite a lot. I make it a habbit to turn off the gas between welds now.
|
|
|
|
| 914forme |
Mar 12 2016, 08:08 PM
Post
#172
|
|
Times a wastin', get wrenchin'! Group: Members Posts: 3,896 Joined: 24-July 04 From: Dayton, Ohio Member No.: 2,388 Region Association: None |
Harness mounts completed, these little boxes took a lot longer than I would have liked.
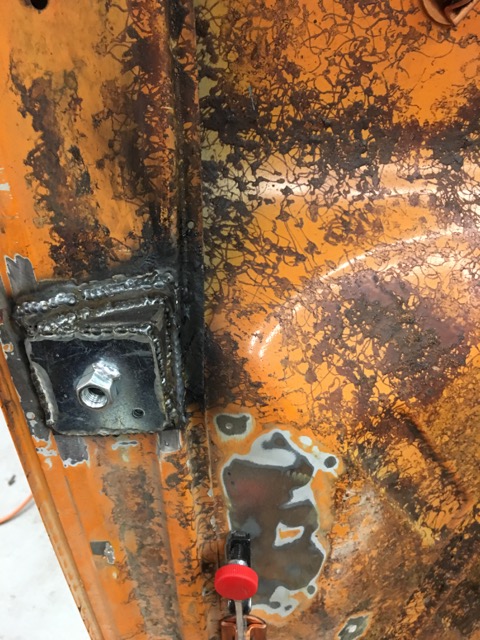  Need to do a little grinding and I'll be done with that part of the project. Started on Engine mount number 2 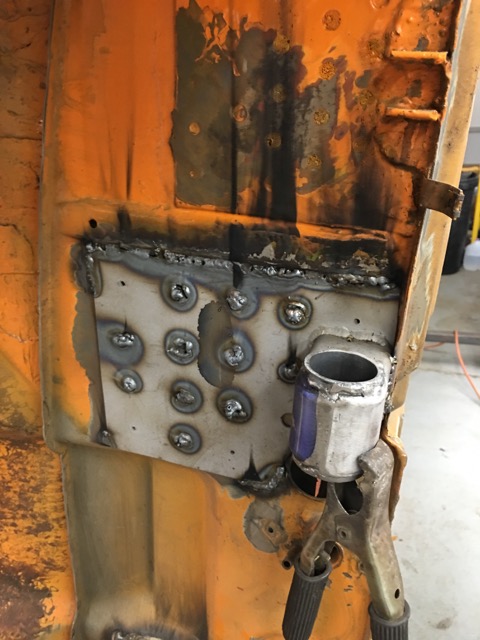 Back at it tomorrow |
|
|
|
| 914forme |
Mar 13 2016, 08:05 PM
Post
#173
|
|
Times a wastin', get wrenchin'! Group: Members Posts: 3,896 Joined: 24-July 04 From: Dayton, Ohio Member No.: 2,388 Region Association: None |
Spent the day going through boxes of parts, and selecting the items I want to keep, and what must go. Oh what fun it is then to clean up the workshop. But it must be done, other wise I get a little crabby.
I did find my accusump mounts (IMG:style_emoticons/default/piratenanner.gif) I also drilled more holes to fill the drivers log top, and well started working on passenger log items. BTW, Boeing makes some great lube, you can really tell a difference in the drilling. Steel does not push through as much. And Aluminum cuts like butter, producing long slinky like chips. |
|
|
|
| 76-914 |
Mar 14 2016, 09:07 AM
Post
#174
|
|
Repeat Offender & Resident Subaru Antagonist Group: Members Posts: 13,500 Joined: 23-January 09 From: Temecula, CA Member No.: 9,964 Region Association: Southern California |
BoeLube is great (IMG:style_emoticons/default/stromberg.gif) Not sure it's for steel but anything is better than nothing. The main thing is to find the correct speed for the bit and to keep it cutting once you begin drilling. It's a distinctive feel and sound when the bit is "cutting". Much easier w/ AL than steel. Keep on having fun. (IMG:style_emoticons/default/beerchug.gif)
|
|
|
|
| 914forme |
Mar 19 2016, 08:43 PM
Post
#175
|
|
Times a wastin', get wrenchin'! Group: Members Posts: 3,896 Joined: 24-July 04 From: Dayton, Ohio Member No.: 2,388 Region Association: None |
Well I had a Blau 80 mm cap, but I decided I would sell it, it was not going through the hood, but my hood will have a door, so I need something to grab ahold of.
So I knocked this out. 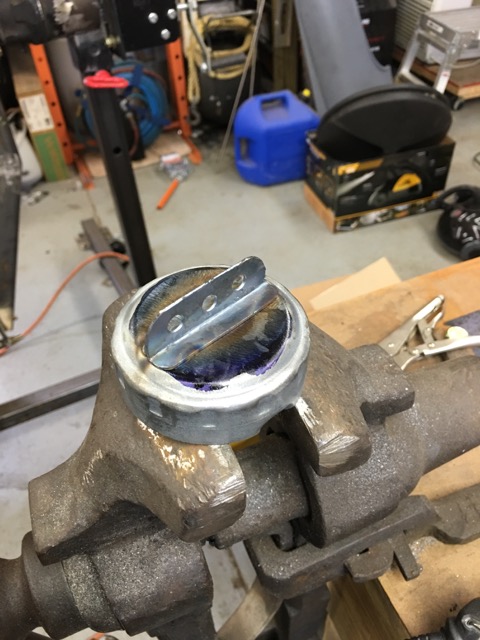 Installed on the tank, temporarily. 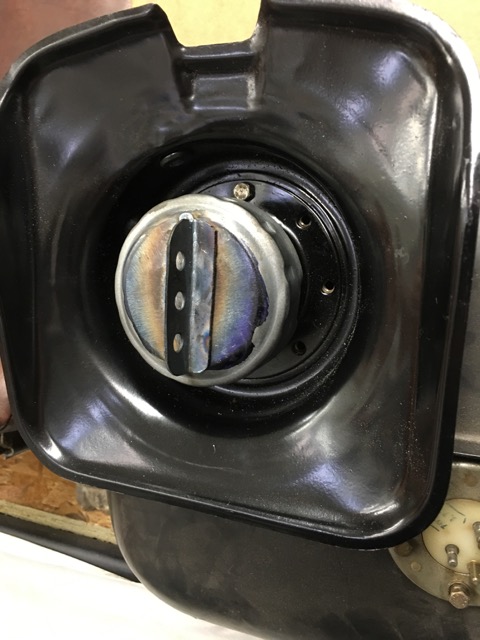 Then I started working on the oil thermostat, got a new one in. Never found my old one.  And I ran out of the proper length bolts to make my studs. Then I started working on my new engine stand to get the mockup unit under the car while the car is still on the rotisserie. So Like most things I over thought it. Started cutting metal to make a motor rotisserie. Then I figured out for what I needed todo in the near future, a drivetrain rotisserie is just over kill. Latter, it will make sense maybe, but I doubt it. So I put all the metal back in the bin, and built it out of wood. So you can see it was a success!! The engine is in, to allow me to start working on the new engine mount.  Clearance to the front firewall 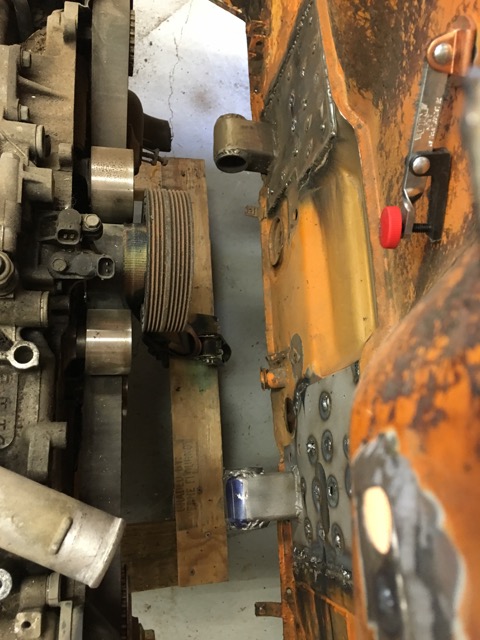 Clearance on the drivers side 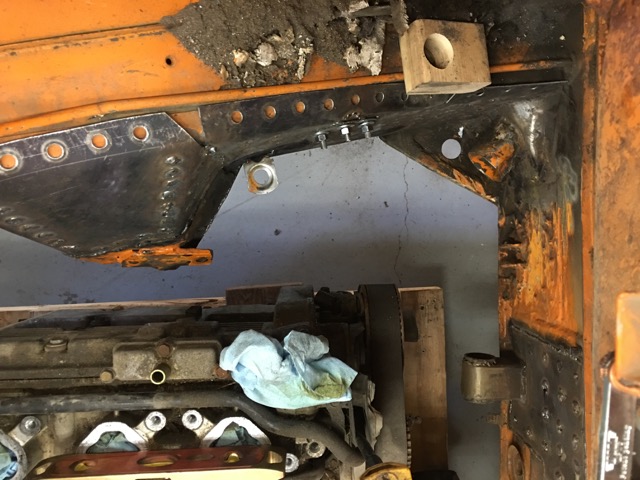 Clearance on the passenger side, -4 motor mount is still in there. need to get the (IMG:style_emoticons/default/sawzall-smiley.gif) and get that out of there. 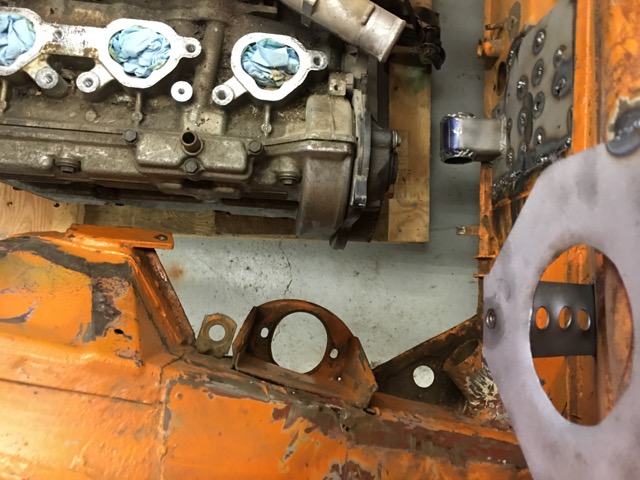 Here was the reason I needed to modify that cart. The leg on the rotisserie gets in the way. Engine is support the tranny makes it tip backward, so I have a ratchet strap on the front to keep things where they belong. 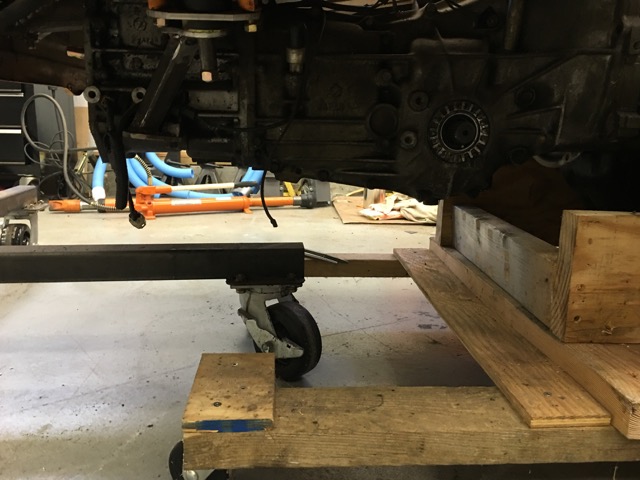 Down and dirty engine cart a few 2x4s a scrap 2x12 and a few screws. 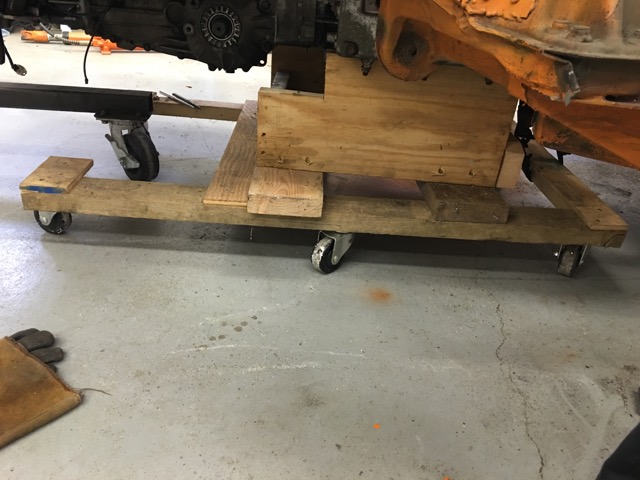 Today I ordered a few parts from the land down under, them Aussies have all the (IMG:style_emoticons/default/shades.gif) stuff. And I calculated my fuel pump requirements, I need at minimum 190lph for E85. and looking at the 914 tank, I realized you knuckle head, it has a baffle in it. As long as I can get the fuel pump pickup in that part of the tank, I will be golden. So I will keep the fuel filter before the injectors, I just won't be running the complicated setup, I have drawn out several times. Worse case I drop a Holly Hydrant in the 914 sump just to make sure I am good. Any one know where I can get some 1-3/8" green stripe or equivalent, in a larger roll, not sure how much I need? Wonder if I can get 1-1/4" to slip over the 1-3/8" inlet, some serious lube and muscles maybe. I am open to suggestions (IMG:style_emoticons/default/first.gif) Attached image(s) 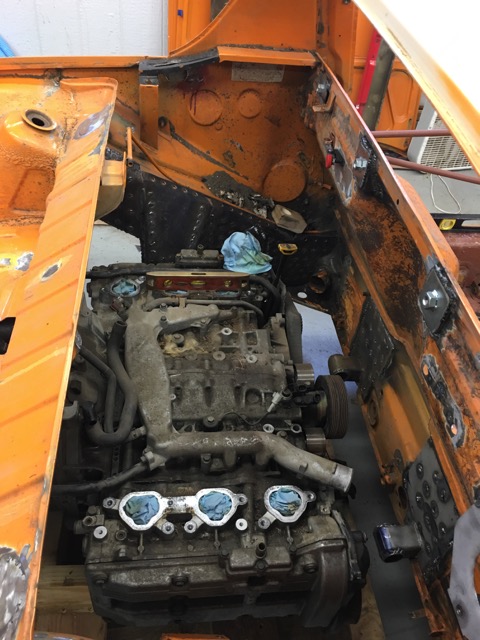
|
|
|
|
| Chris H. |
Mar 19 2016, 09:42 PM
Post
#176
|
|
Senior Member Group: Members Posts: 4,030 Joined: 2-January 03 From: Chicago 'burbs Member No.: 73 Region Association: Upper MidWest |
Steve,
Seems like the 1.25 should stretch to 1 3/8. I was able to stretch gates 7/8 heater hose to 1" by soaking the end in hot water and then using a small amount of dish soap. You need less than 25 feet but it's nice to have some extra. A roll is 50 feet which is where the price break comes in. If you can find someone to split a roll this is a good deal: Gates 1.25 Hose |
 |
|
| 914forme |
Mar 20 2016, 06:04 AM
Post
#177
|
|
Times a wastin', get wrenchin'! Group: Members Posts: 3,896 Joined: 24-July 04 From: Dayton, Ohio Member No.: 2,388 Region Association: None |
Thank you Chris, and yes that is a great Deal (IMG:style_emoticons/default/piratenanner.gif) I'll post the rest in the classified once I have completed my design.
|
|
|
|
| mepstein |
Mar 20 2016, 08:08 AM
Post
#178
|
|
914-6 GT in waiting Group: Members Posts: 19,270 Joined: 19-September 09 From: Landenberg, PA/Wilmington, DE Member No.: 10,825 Region Association: MidAtlantic Region |
QUOTE(914forme @ Mar 20 2016, 08:04 AM)  Thank you Chris, and yes that is a great Deal (IMG:style_emoticons/default/piratenanner.gif) I'll post the rest in the classified once I have completed my design. If you want to split it, I'm in |
|
|
|
| Andyrew |
Mar 20 2016, 09:46 AM
Post
#179
|
|
Spooling.... Please wait Group: Members Posts: 13,376 Joined: 20-January 03 From: Riverbank, Ca Member No.: 172 Region Association: Northern California |
QUOTE(914forme @ Mar 19 2016, 07:43 PM) Any one know where I can get some 1-3/8" green stripe or equivalent, in a larger roll, not sure how much I need? Wonder if I can get 1-1/4" to slip over the 1-3/8" inlet, some serious lube and muscles maybe. I am open to suggestions (IMG:style_emoticons/default/first.gif) The green stuff flexes really well. 1 1/4 should work well. A little oil helps a lot. I would just keep spare lines just incase it splits. |
|
|
|
| 914forme |
Mar 20 2016, 10:37 AM
Post
#180
|
|
Times a wastin', get wrenchin'! Group: Members Posts: 3,896 Joined: 24-July 04 From: Dayton, Ohio Member No.: 2,388 Region Association: None |
QUOTE(mepstein @ Mar 20 2016, 10:08 AM) QUOTE(914forme @ Mar 20 2016, 08:04 AM) Thank you Chris, and yes that is a great Deal (IMG:style_emoticons/default/piratenanner.gif) I'll post the rest in the classified once I have completed my design. If you want to split it, I'm in Sounds good, (IMG:style_emoticons/default/aktion035.gif) I'll bring the other half to Hersey with me, (IMG:style_emoticons/default/laugh.gif), your going to make me drive my truck aren't you (IMG:style_emoticons/default/confused24.gif) It is not a problem really, but if I avoid bringing the truck it makes so I am less likely to bring home a bunch of big items. |
|
|
|
| 914forme |
Mar 20 2016, 10:39 AM
Post
#181
|
|
Times a wastin', get wrenchin'! Group: Members Posts: 3,896 Joined: 24-July 04 From: Dayton, Ohio Member No.: 2,388 Region Association: None |
QUOTE(Andyrew @ Mar 20 2016, 11:46 AM) QUOTE(914forme @ Mar 19 2016, 07:43 PM) Any one know where I can get some 1-3/8" green stripe or equivalent, in a larger roll, not sure how much I need? Wonder if I can get 1-1/4" to slip over the 1-3/8" inlet, some serious lube and muscles maybe. I am open to suggestions (IMG:style_emoticons/default/first.gif) The green stuff flexes really well. 1 1/4 should work well. A little oil helps a lot. I would just keep spare lines just incase it splits. Not a bad idea there Andrew, I will eventually need to place an order with Jags that work for some adapters. Still a long way out though. |
|
|
|
| 914forme |
Mar 20 2016, 11:00 AM
Post
#182
|
|
Times a wastin', get wrenchin'! Group: Members Posts: 3,896 Joined: 24-July 04 From: Dayton, Ohio Member No.: 2,388 Region Association: None |
Got the over flow bottle and catch can for the engine mounted.
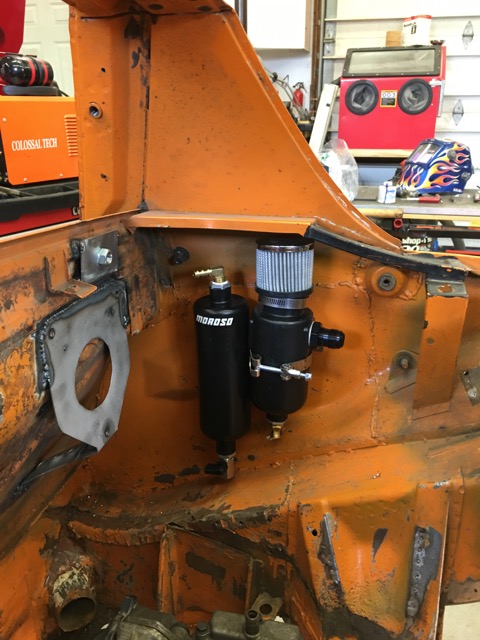 Started working on other brackets and mocking up the accusump mount. Green Stripe ordered, as was the Accusump back flow preventer. No reason to fill the oil cooler if the engine needs the oil. Cleaning up a little bit, workshop is a mess, then I will start up again. |
|
|
|
| 914forme |
Mar 25 2016, 07:27 PM
Post
#183
|
|
Times a wastin', get wrenchin'! Group: Members Posts: 3,896 Joined: 24-July 04 From: Dayton, Ohio Member No.: 2,388 Region Association: None |
Will I was out of ton for work a few more items showed up to keep this car moving forward.
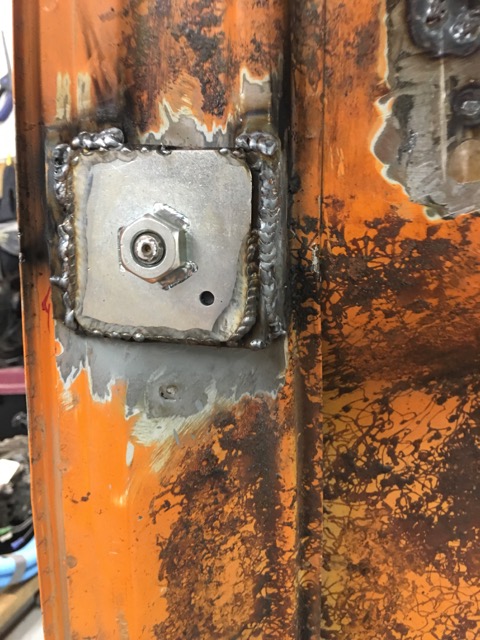
Did not take a picture but I have a huge box of Green Stripe 1-1/4" in the garage 50 feet of it. (IMG:style_emoticons/default/blink.gif) Matches another 50' roll of 7/8" Green Stripe (IMG:style_emoticons/default/confused24.gif) You would think I was collecting this stuff, I need some more but need to measure what inner diameter I need for the heater. Got this in for the land down under. 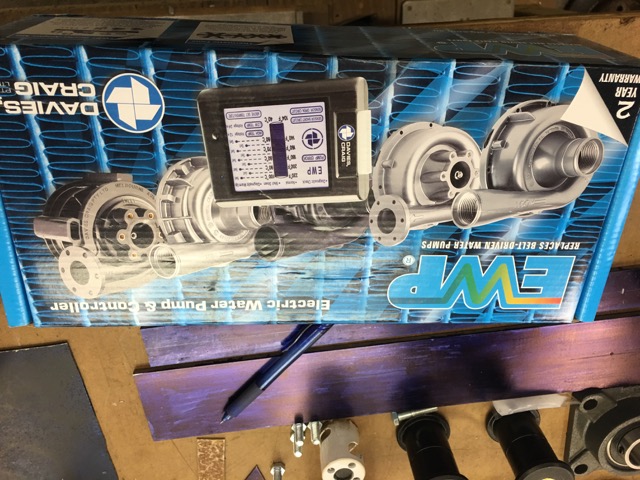 Man this thing is tiny 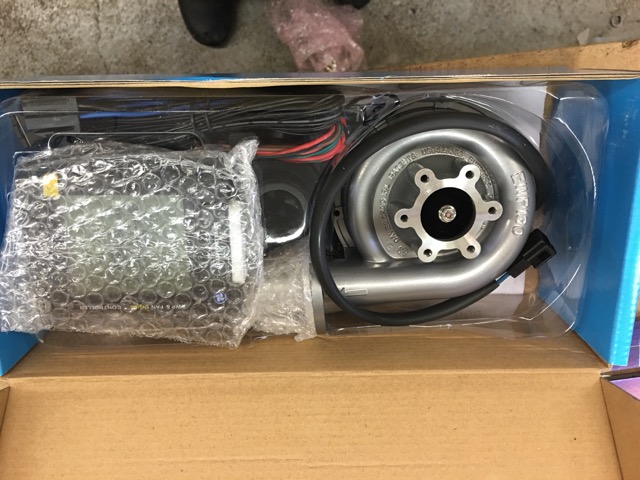 Nope not a turbo an electric water pump and controller. Spoke LED Front Euro Turnsignals (IMG:style_emoticons/default/piratenanner.gif) 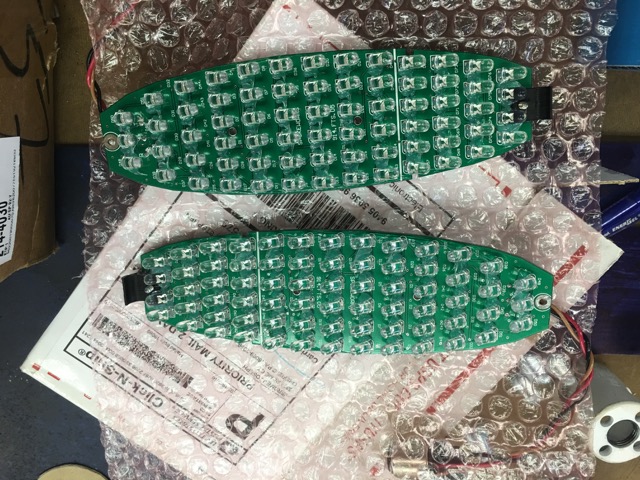 Canton Back flow valve. While working on the mount I dropped the accusump and shatter the gauge. (IMG:style_emoticons/default/headbang.gif) Need to order one of them, love it off until it is going in the final time. 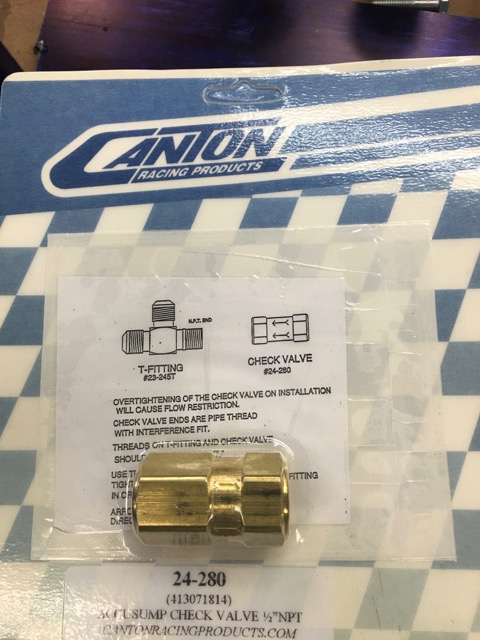 Garold sent me some A-pilars (IMG:style_emoticons/default/sawzall-smiley.gif)  I will be using these to see how they where built, and how they compare to a 944 Coupe (IMG:style_emoticons/default/happy11.gif) Garold also sent me some axle nuts and washers I misplaced some where. 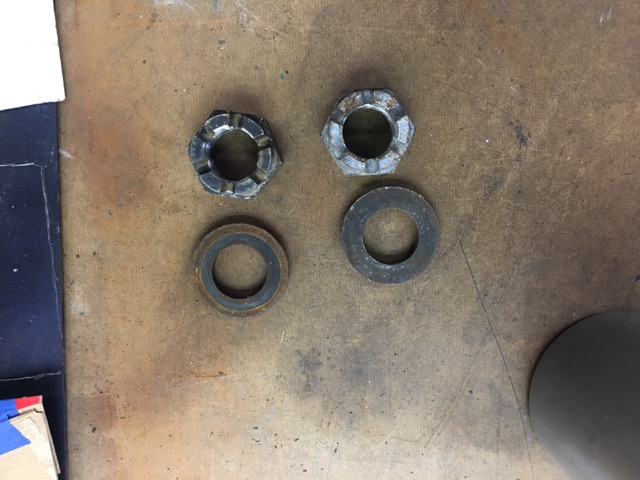 And they fit (IMG:style_emoticons/default/aktion035.gif) 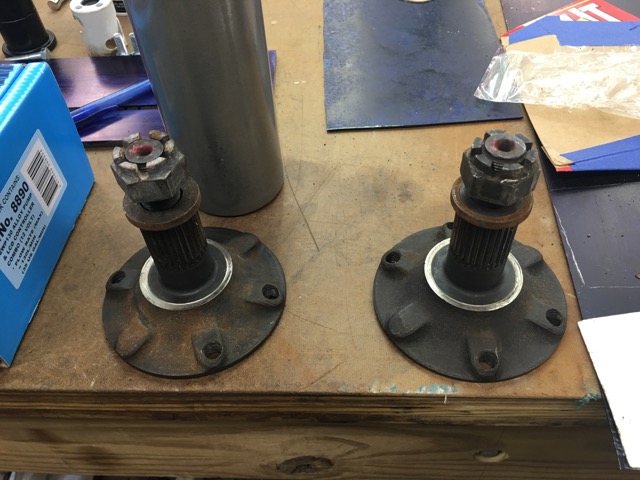 911 Hubs, proper depth so I did not need any spacers thanks to Eric and Bruce for these rare parts 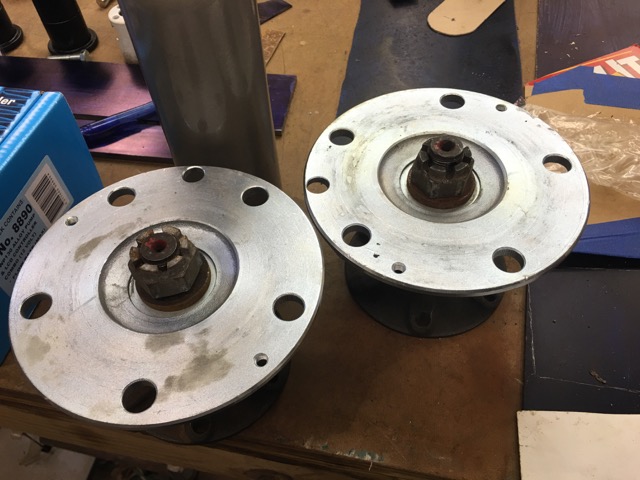 Yep they are 108mm 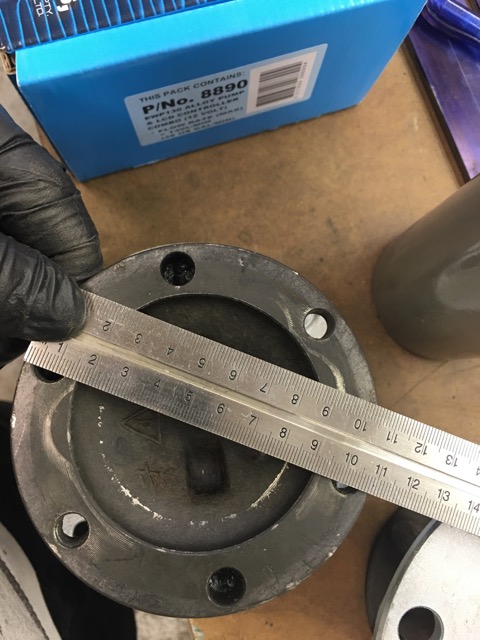 Yes I will be running 930 CVs Stated working on the front engine mount. Did not take any pictures of the inner assembly. Since I don't have a lathe I took a 1-3/8" hole saw and cut a bunch of 1/4" disks. I then took an all tread nut, and put it in-between a double stack of the hole sawed disked. I then weed the entire assemble together. Ground down the welds, and added a larger one on the outside. Drill ed holes in the tub so I could plug weld the Insert I made into the 2" DOM tube. 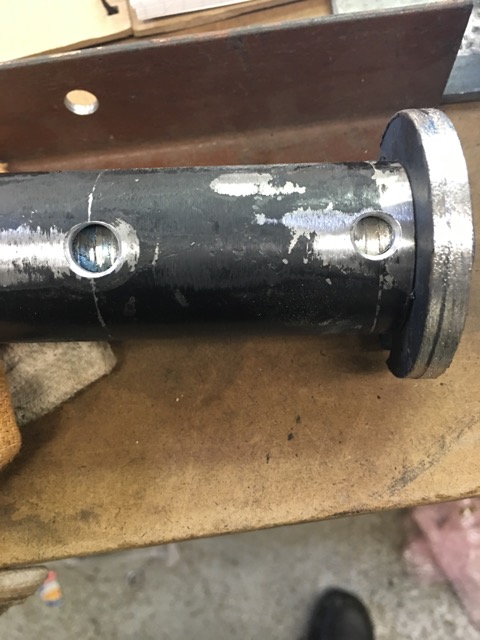 Plug welded up 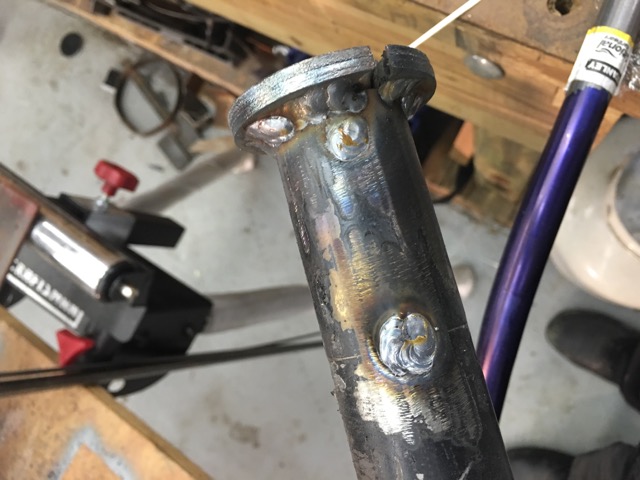 Mounted in the chassis 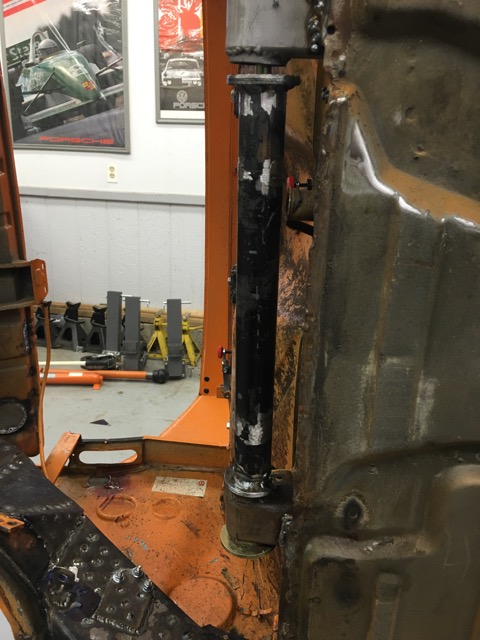 finished welding the modified small car mount. 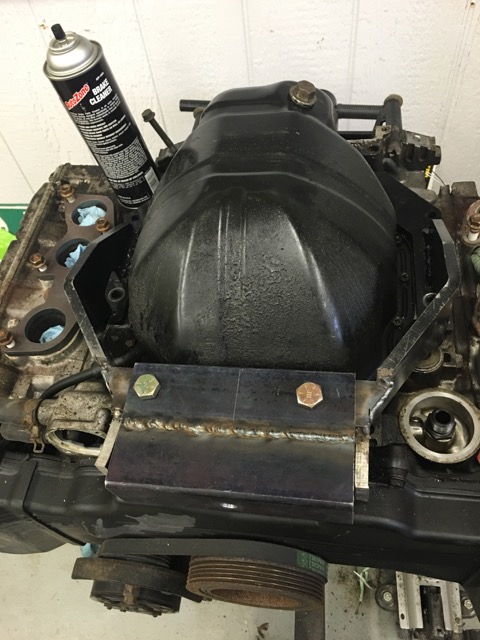 I need to go and pickup some bolts and a 1-3/4" dowel rod so I can finish mocking up the front engine mount. |
|
|
|
|
1 User(s) are reading this topic (1 Guests and 0 Anonymous Users)
0 Members:

|
Lo-Fi Version | Time is now: 14th May 2024 - 05:31 PM |
Invision Power Board
v9.1.4 © 2024 IPS, Inc.