|
|
|
Porsche, and the Porsche crest are registered trademarks of Dr. Ing. h.c. F. Porsche AG.
This site is not affiliated with Porsche in any way. Its only purpose is to provide an online forum for car enthusiasts. All other trademarks are property of their respective owners. |
|
|

  |

| 914forme |
 Mar 20 2016, 10:39 AM Mar 20 2016, 10:39 AM
Post
#181
|
|
Times a wastin', get wrenchin'!  Group: Members Posts: 3,897 Joined: 24-July 04 From: Dayton, Ohio Member No.: 2,388 Region Association: None |
QUOTE(Andyrew @ Mar 20 2016, 11:46 AM)  QUOTE(914forme @ Mar 19 2016, 07:43 PM) Any one know where I can get some 1-3/8" green stripe or equivalent, in a larger roll, not sure how much I need? Wonder if I can get 1-1/4" to slip over the 1-3/8" inlet, some serious lube and muscles maybe. I am open to suggestions (IMG:style_emoticons/default/first.gif) The green stuff flexes really well. 1 1/4 should work well. A little oil helps a lot. I would just keep spare lines just incase it splits. Not a bad idea there Andrew, I will eventually need to place an order with Jags that work for some adapters. Still a long way out though. |
   |

 
|
| 914forme |
Mar 20 2016, 11:00 AM
Post
#182
|
|
Times a wastin', get wrenchin'! Group: Members Posts: 3,897 Joined: 24-July 04 From: Dayton, Ohio Member No.: 2,388 Region Association: None |
Got the over flow bottle and catch can for the engine mounted.
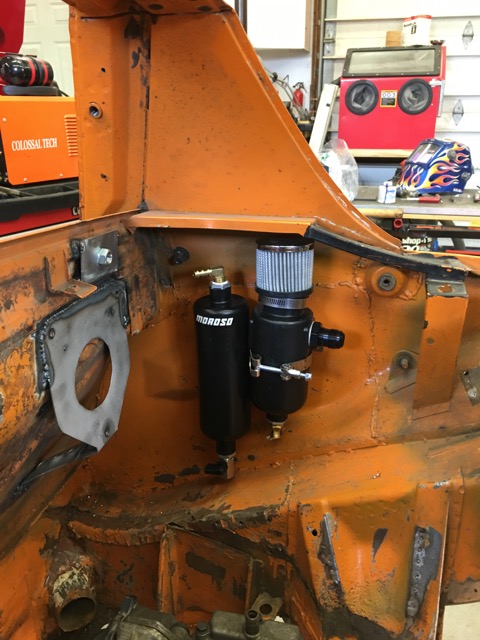 Started working on other brackets and mocking up the accusump mount. Green Stripe ordered, as was the Accusump back flow preventer. No reason to fill the oil cooler if the engine needs the oil. Cleaning up a little bit, workshop is a mess, then I will start up again. |
|
|
|
| 914forme |
Mar 25 2016, 07:27 PM
Post
#183
|
|
Times a wastin', get wrenchin'! Group: Members Posts: 3,897 Joined: 24-July 04 From: Dayton, Ohio Member No.: 2,388 Region Association: None |
Will I was out of ton for work a few more items showed up to keep this car moving forward.
Did not take a picture but I have a huge box of Green Stripe 1-1/4" in the garage 50 feet of it. (IMG:style_emoticons/default/blink.gif) Matches another 50' roll of 7/8" Green Stripe (IMG:style_emoticons/default/confused24.gif) You would think I was collecting this stuff, I need some more but need to measure what inner diameter I need for the heater. Got this in for the land down under. 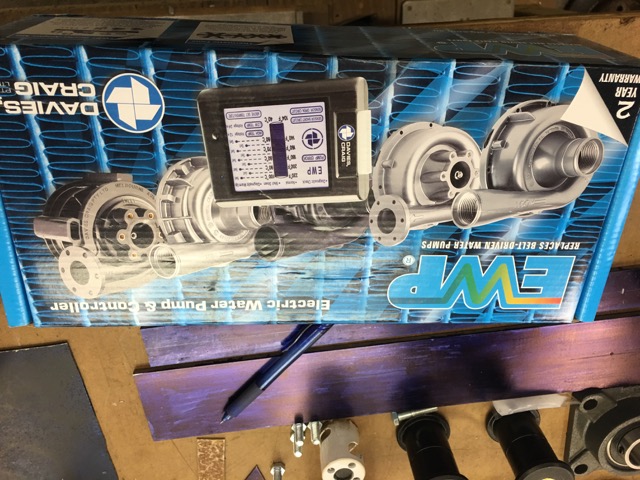 Man this thing is tiny 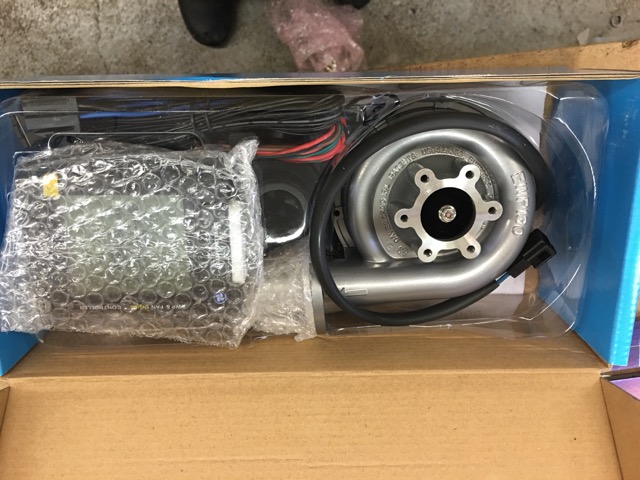 Nope not a turbo an electric water pump and controller. Spoke LED Front Euro Turnsignals (IMG:style_emoticons/default/piratenanner.gif) 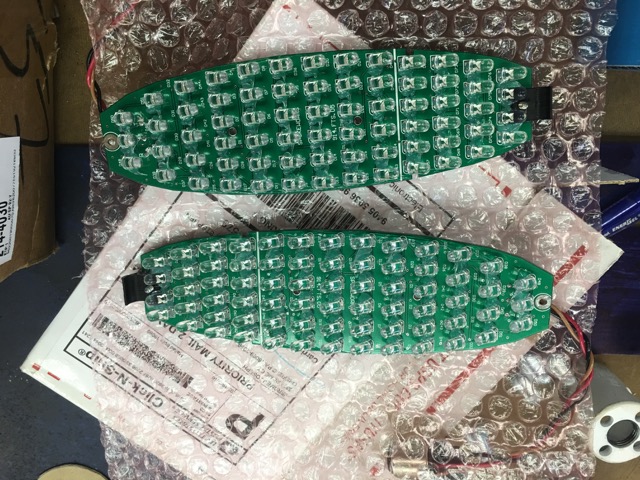 Canton Back flow valve. While working on the mount I dropped the accusump and shatter the gauge. (IMG:style_emoticons/default/headbang.gif) Need to order one of them, love it off until it is going in the final time. 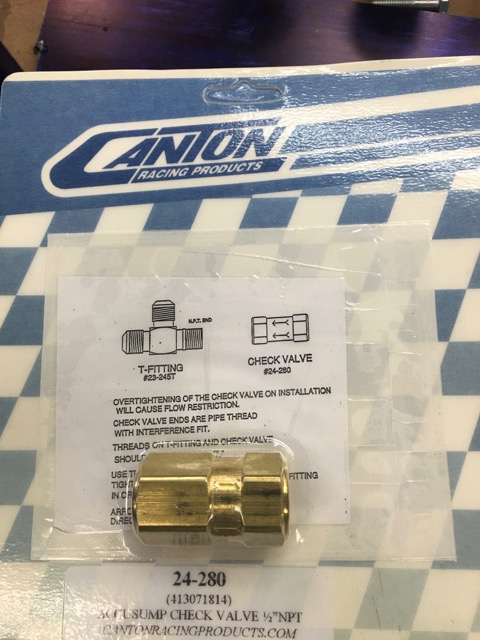 Garold sent me some A-pilars (IMG:style_emoticons/default/sawzall-smiley.gif)  I will be using these to see how they where built, and how they compare to a 944 Coupe (IMG:style_emoticons/default/happy11.gif) Garold also sent me some axle nuts and washers I misplaced some where. 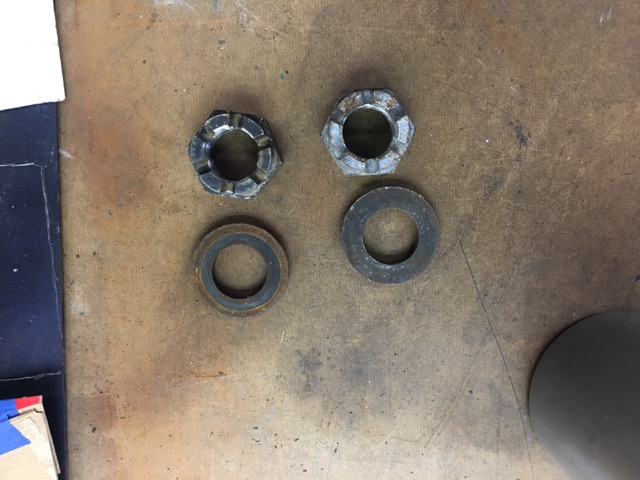 And they fit (IMG:style_emoticons/default/aktion035.gif) 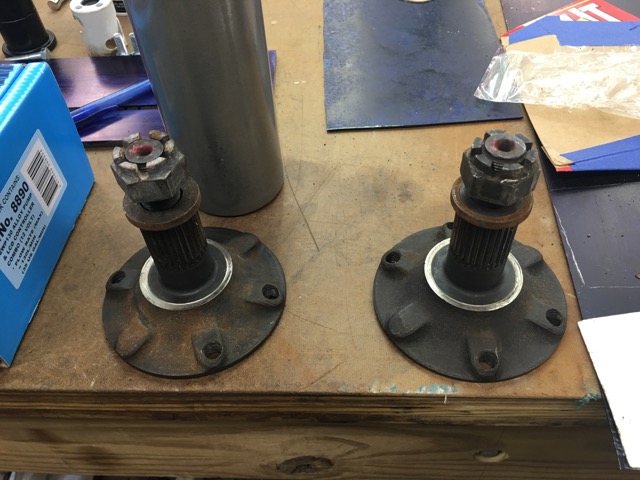 911 Hubs, proper depth so I did not need any spacers thanks to Eric and Bruce for these rare parts 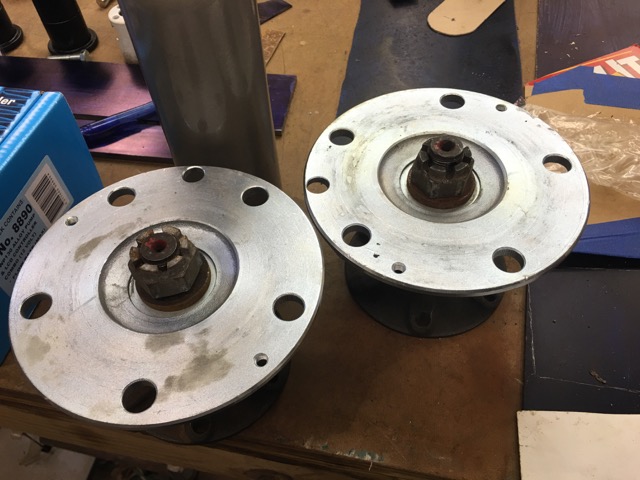 Yep they are 108mm 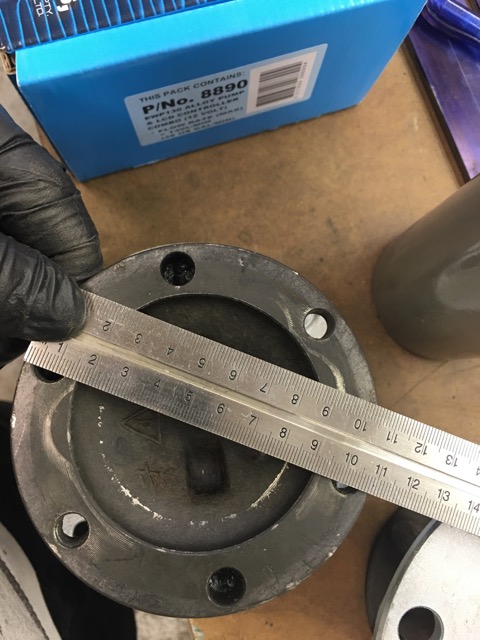 Yes I will be running 930 CVs Stated working on the front engine mount. Did not take any pictures of the inner assembly. Since I don't have a lathe I took a 1-3/8" hole saw and cut a bunch of 1/4" disks. I then took an all tread nut, and put it in-between a double stack of the hole sawed disked. I then weed the entire assemble together. Ground down the welds, and added a larger one on the outside. Drill ed holes in the tub so I could plug weld the Insert I made into the 2" DOM tube. 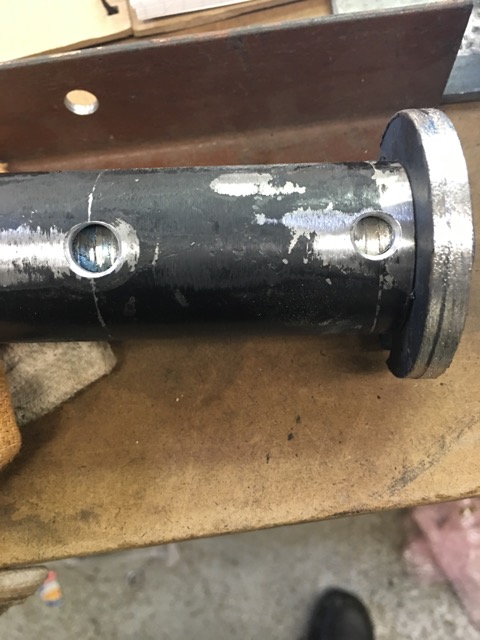 Plug welded up 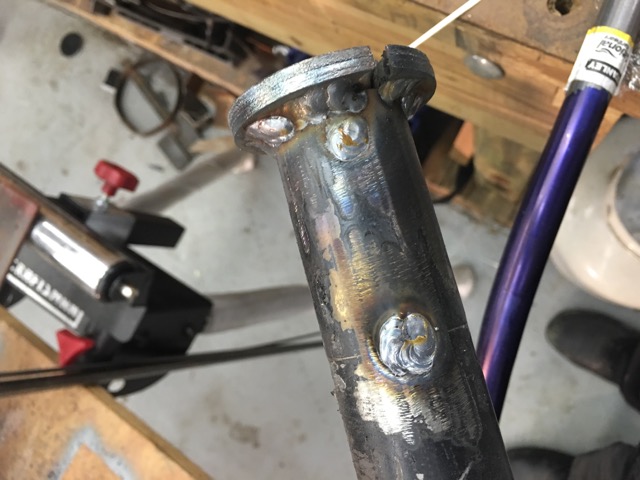 Mounted in the chassis 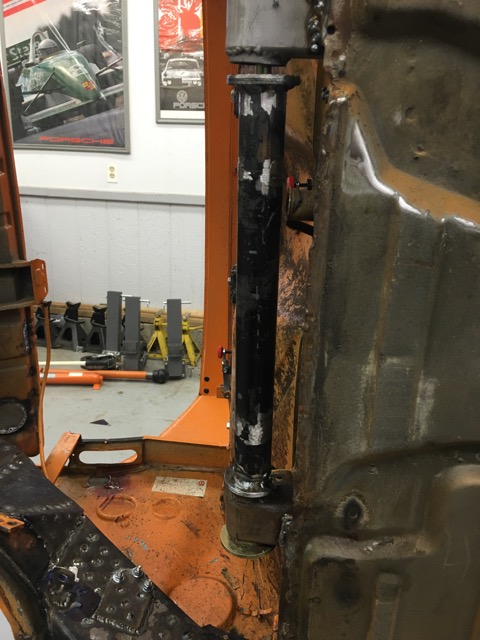 finished welding the modified small car mount. 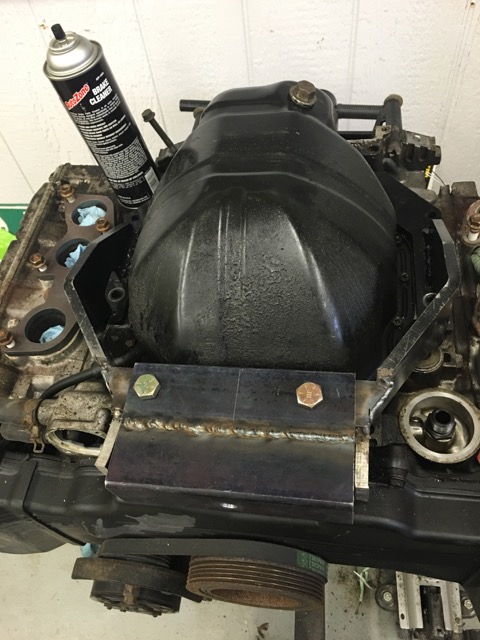 I need to go and pickup some bolts and a 1-3/4" dowel rod so I can finish mocking up the front engine mount. |
|
|
|
| Andyrew |
Mar 25 2016, 09:59 PM
Post
#184
|
|
Spooling.... Please wait Group: Members Posts: 13,380 Joined: 20-January 03 From: Riverbank, Ca Member No.: 172 Region Association: Northern California |
|
|
|
|
| Chris H. |
Mar 25 2016, 11:46 PM
Post
#185
|
|
Senior Member Group: Members Posts: 4,071 Joined: 2-January 03 From: Chicago 'burbs Member No.: 73 Region Association: Upper MidWest |
Looking good Steve. You'll be glad you did your mount that way. Leaves the exhaust options wide open.
|
|
|
|
| 914forme |
Mar 26 2016, 08:15 AM
Post
#186
|
|
Times a wastin', get wrenchin'! Group: Members Posts: 3,897 Joined: 24-July 04 From: Dayton, Ohio Member No.: 2,388 Region Association: None |
QUOTE(Chris H. @ Mar 26 2016, 01:46 AM) Looking good Steve. You'll be glad you did your mount that way. Leaves the exhaust options wide open. (IMG:style_emoticons/default/happy11.gif) Yes, it leaves the exhaust open to a lot of options. Equal length headers snaking around. Proper length for the headers where 32.5" I have a set of pool hose to bend around and try to make fit. Wit the bar I could do it, but the collector was out the back of the 914. (IMG:style_emoticons/default/laugh.gif) (IMG:style_emoticons/default/happy11.gif) Or a very simple setup with a cross over going into one of them funny little snail shaped devices (IMG:style_emoticons/default/idea.gif) I love building things so It will be a simple NA build this go around. But you will seeI am planning for the future when I get used to the engine. Going from 100HP to 230HP will be a nice bump, and make the car completely different. But evil things happen to us humans and we make the new HP normal. I sold my last TDI, it was all tricked out! It was plenty fast, got my new stock one, and forgot, I don't have that power anymore. So I downshift to pass and the first time I didn't it was like (IMG:style_emoticons/default/WTF.gif) where is the power! I have been a very good boy and have keep my new one all stock. Though I see that changing it its future. But if the turbo goes out, all hell will cut loose I am sure (IMG:style_emoticons/default/happy11.gif) First up will be suspension and brakes, tires and wheels! I always start there with all my builds. Need to be able to stop and turn before you start making it move from point a to b quicker. So if you know someone that has posed their MKVI Jetta GLI, or GTI, I would be interested in suspension and maybe the wheels some of them are (IMG:style_emoticons/default/barf.gif) to me. |
|
|
|
| 914forme |
Mar 26 2016, 08:22 AM
Post
#187
|
|
Times a wastin', get wrenchin'! Group: Members Posts: 3,897 Joined: 24-July 04 From: Dayton, Ohio Member No.: 2,388 Region Association: None |
QUOTE(Andyrew @ Mar 25 2016, 11:59 PM) (IMG:style_emoticons/default/dry.gif) yeah you started that sickness (IMG:style_emoticons/default/beer.gif) In reality I like the concept as it solves a problem the EG33 has with high revs and pump cavitation. Or at least I hope it does. (IMG:style_emoticons/default/blink.gif) Also just incase anyone needs to know what trans they are buying here is a PDF I liberated with information current to the date of publishing. I was looking for a generation 2 trans yesterday found a few, but this will help narrow down the choice. Attached File(s)  TransmissionIDChart_Public.pdf ( 151.84k )
Number of downloads: 132
TransmissionIDChart_Public.pdf ( 151.84k )
Number of downloads: 132 |
|
|
|
| 914forme |
Mar 27 2016, 06:09 AM
Post
#188
|
|
Times a wastin', get wrenchin'! Group: Members Posts: 3,897 Joined: 24-July 04 From: Dayton, Ohio Member No.: 2,388 Region Association: None |
Spent yesterday working on the engine mounts, took not one picture, sorry. I have pushed the EG forward another 2", that puts the AC unit just off the firewall. And still gives me some space for tubes. That forward movement adds some space around the rear shift rod, and allows for exist to center exit. It was a tight fit back there.
So now I get to step back and redo all the brackets I made on the trans mount also. Oh well it is a good learning experience. I need to go and get a 1-1/2" holes saw, mine old one seemed to have seen better days (IMG:style_emoticons/default/tooth.gif) |
|
|
|
| 76-914 |
Mar 27 2016, 06:42 AM
Post
#189
|
|
Repeat Offender & Resident Subaru Antagonist Group: Members Posts: 13,843 Joined: 23-January 09 From: Temecula, CA Member No.: 9,964 Region Association: Southern California |
Oh God. What would it feel like to do something and get it right the first time, Steven? (IMG:style_emoticons/default/dry.gif) I believe that's is why so many peeps wash out before completion. Takes some mental prep for the disappointments that experimentation brings. BTW, that 1.25 will slip over the 1 3/8" easily. Glycerine is your friend. Keep on keeping on. Kent (IMG:style_emoticons/default/beerchug.gif)
|
|
|
|
| Andyrew |
Mar 27 2016, 10:20 AM
Post
#190
|
|
Spooling.... Please wait Group: Members Posts: 13,380 Joined: 20-January 03 From: Riverbank, Ca Member No.: 172 Region Association: Northern California |
QUOTE Just noticed what you did here (IMG:style_emoticons/default/biggrin.gif) Nice orientation (IMG:style_emoticons/default/smile.gif) |
|
|
|
| 914forme |
Mar 28 2016, 01:23 PM
Post
#191
|
|
Times a wastin', get wrenchin'! Group: Members Posts: 3,897 Joined: 24-July 04 From: Dayton, Ohio Member No.: 2,388 Region Association: None |
Well the remanufacture of items I have done in the past continues. I got bot of the transmission hangers mocked up, one side is done. It was much easier the 2nd time around.
I used a shorter section of tube tack welded it in the location I wanted it to be in and covered it in layout dye. (IMG:style_emoticons/default/wub.gif) 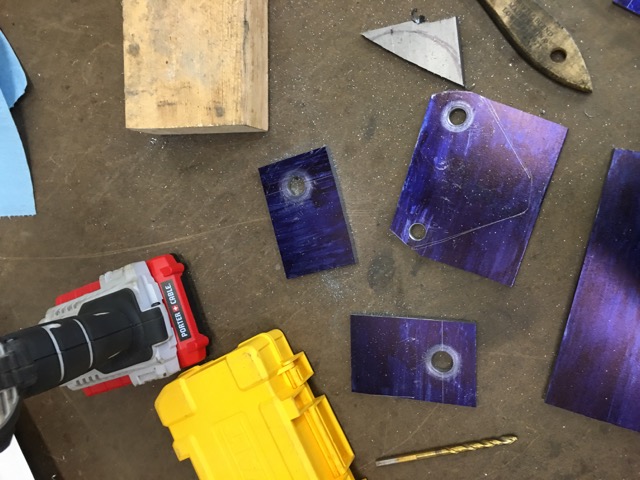 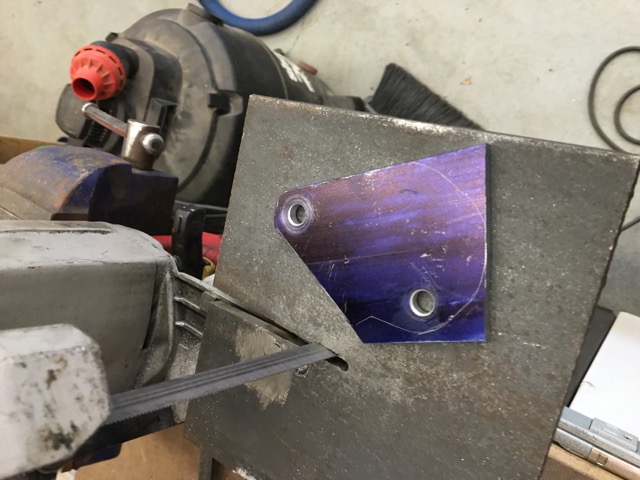 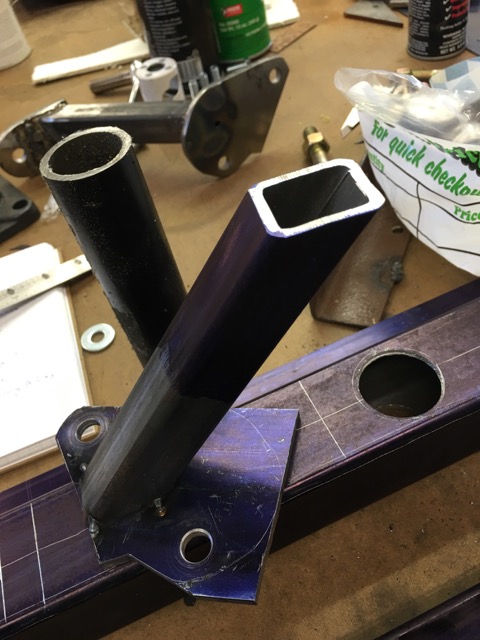 I then made this handy little scribe, point of the hardened nail is 1/2" from the surface being measured. 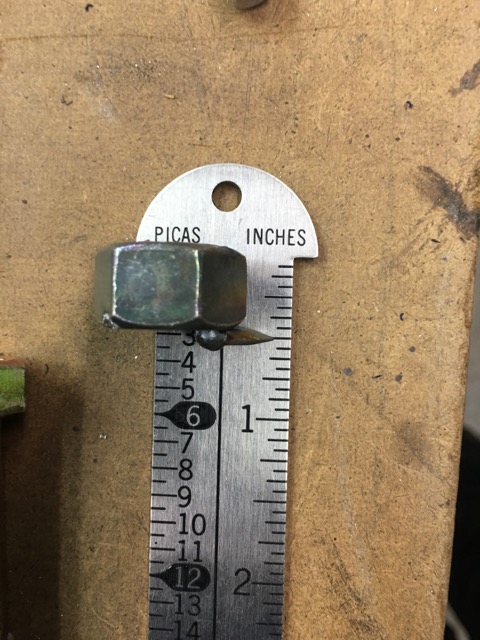 You just trace it around the surface your going the tube to and you have your exact measurements. Mark it on the final tube, add 1/2" and it fits really tight!! (IMG:style_emoticons/default/piratenanner.gif) I got into the flow of the project and took no more pictures. I love it when that happens, I just bang out stuff like it was no effort. Started working on the front Mount from the engine to the bar As I mentioned in a previous post I moved the engine forward forcing all these changes. Here it is in its final resting spot. 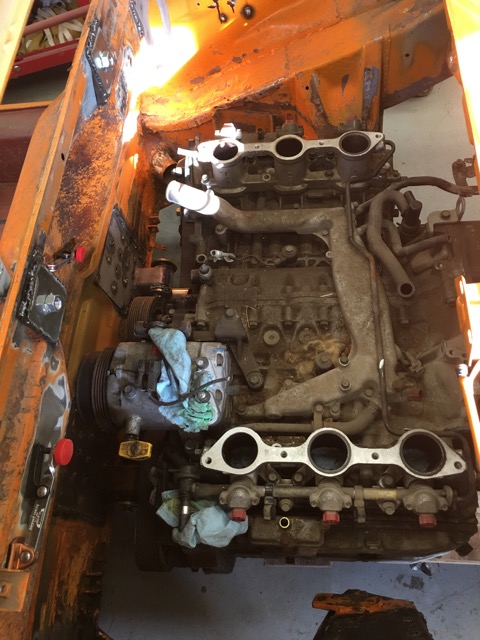 A/C compressor is tight but it fits. 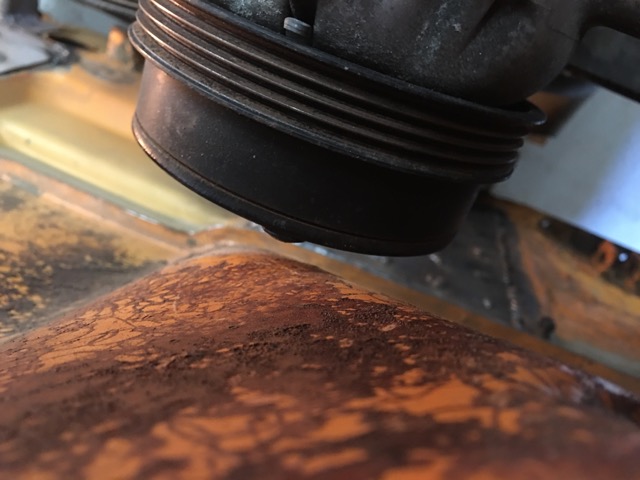 And the clutch slave is still in its hole (IMG:style_emoticons/default/aktion035.gif) 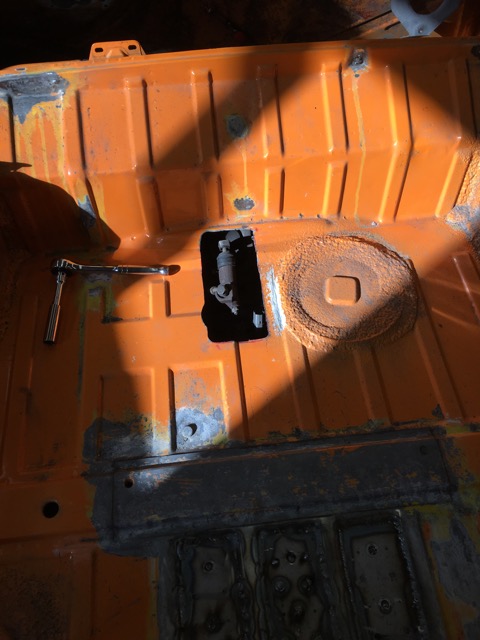 The last thing I did was lookup information on my Gen1 Trans. So it is a 4.44 Final Drive with a 3.454 1st, 2.062 2nd, 1.448 3rd, 1.088 4th, and 0.825 5th gear. At 70 in 5th I project turning just shy of 3000 RPM (IMG:style_emoticons/default/dry.gif) that will get old fast. So I started to wonder what combo I needed to get the best of all the worlds. The WRX in 06 /07 has a 3.9 final drive. All the gear ratios are the same just the final drive changed. That translates into at 70 engine is turning at 2200 RPM. Now to find a USDM WRX Trans TY754VW7AA from an 06/07 (IMG:style_emoticons/default/confused24.gif) In reality the performance is not much different between the two final drives when I run it through the simulator. |
|
|
|
| gryphon68 |
Mar 30 2016, 08:34 AM
Post
#192
|
|
Member Group: Members Posts: 61 Joined: 2-October 13 From: SE Michigan Member No.: 16,462 Region Association: Upper MidWest |
QUOTE(914forme @ Mar 28 2016, 02:23 PM) The WRX in 06 /07 has a 3.9 final drive. All the gear ratios are the same just the final drive changed. That translates into at 70 engine is turning at 2200 RPM. Now to find a USDM WRX Trans TY754VW7AA from an 06/07 (IMG:style_emoticons/default/confused24.gif) I believe the 06/07 WRX is actually 3.7 final drive. See bottom of page 4. http://www.rallispec.com/downloads/Transmi...hart_Public.pdf Also, they may have also relocated the clutch slave cylinder, that might allow you to patch the hole in the trunk floor. |
|
|
|
| 914forme |
Mar 30 2016, 01:46 PM
Post
#193
|
|
Times a wastin', get wrenchin'! Group: Members Posts: 3,897 Joined: 24-July 04 From: Dayton, Ohio Member No.: 2,388 Region Association: None |
I know it says 3.7 I am assuming it is a typo. Since the majority of them are 4.44, 4.11, and 3.9. I could not see this one tranny being the only 3.7. Patching the trunk hole would be nice. Though I have a nice solution. I worked hard on that cover then screwed it up. (IMG:style_emoticons/default/laugh.gif)
|
|
|
|
| Chris H. |
Mar 30 2016, 05:45 PM
Post
#194
|
|
Senior Member Group: Members Posts: 4,071 Joined: 2-January 03 From: Chicago 'burbs Member No.: 73 Region Association: Upper MidWest |
Hey so...before you buy an 06-07 WRX trans...straight from the 2006 5MT manual. I have the whole 2006 5MT (and 6MT) shop manual if you want it Steve.
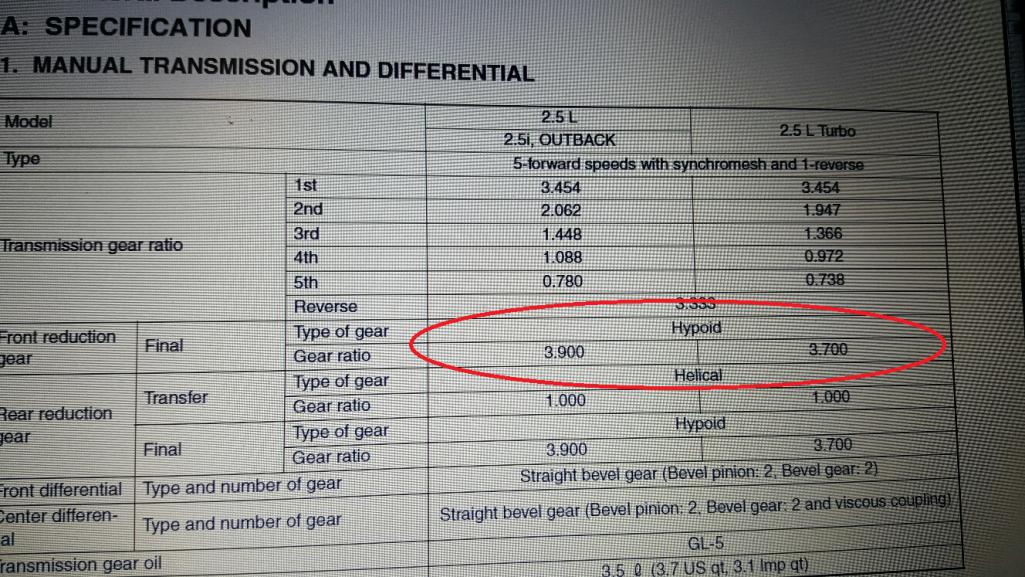 It APPEARS that the non-turbo cars are 3.90 and the turbo cars are 3.70. And it does seem like mine runs a little high RPM in 5th. Can't confirm the final drive...could be a typo but it seems right. I have a 2006 WRX (turbo car) trans. |
|
|
|
| 914forme |
Mar 31 2016, 05:50 AM
Post
#195
|
|
Times a wastin', get wrenchin'! Group: Members Posts: 3,897 Joined: 24-July 04 From: Dayton, Ohio Member No.: 2,388 Region Association: None |
Thanks for the confirmation Chris.
Also the gear ratios are different. The hunt is on, though I am a long way from deeding it officially. Update on progress, More parts are rolling in for the beast, I got my in tank fuel pump mount from Tanks, Inc. It is their Fuel Cell Pickup and return unit. Needs to be modified for fuel pump support. Once I get all these parts I will do a write up on my simple conversion to in tank fuel pump. This setup also eliminates the need for an external sump setup, making my build easier, you got to love that (IMG:style_emoticons/default/piratenanner.gif) Nice night last night in the Ohio Valley so I finished welding my last trans hanger. And started working on the new front mount. Got my mock up done, and started cutting it to shape, to get the proper tight fit, this will take a bunch of cut off wheels. Also I got a notice from AA last night that the Euro Taillights I order will finally be shipping next week. (IMG:style_emoticons/default/dry.gif) We will see how they compare to all the Hella units I have stock piled. Even the Hellas have various shade differences in the Amber section. So you have to mix and match them if you picked up multiple sets. I am also getting ready to dive off the deep end with Tangerine racing parts. Before I go to far, I need to hold back , but Chris' stuff is so (IMG:style_emoticons/default/drooley.gif) |
|
|
|
| LowBridge |
Mar 31 2016, 08:20 AM
Post
#196
|
|
Member Group: Members Posts: 370 Joined: 10-August 15 From: Lunenburg, MA Member No.: 19,045 Region Association: North East States |
|
|
|
|
| 914forme |
Apr 1 2016, 06:52 PM
Post
#197
|
|
Times a wastin', get wrenchin'! Group: Members Posts: 3,897 Joined: 24-July 04 From: Dayton, Ohio Member No.: 2,388 Region Association: None |
Well got to work a little bit tonight before my compressor bit it (IMG:style_emoticons/default/dry.gif)
No time to get to Harbor Freight tonight for a replacement pump. I would love to just buy a new compressor, but the 914 is more important. So instead of using my die grinders and other air tools, I had to use my dremel to get some tube fitting done. (IMG:style_emoticons/default/blink.gif) That being said I got a decent fit for the first front engine mount let going to the firewall. 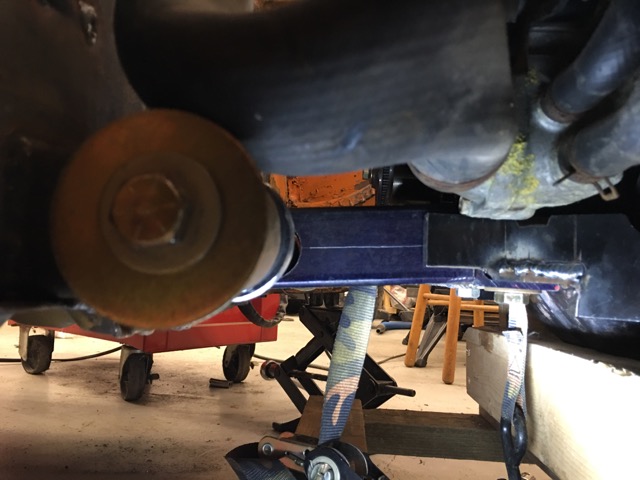 Took pictures of the rear brackets, much nicer than my first go around. 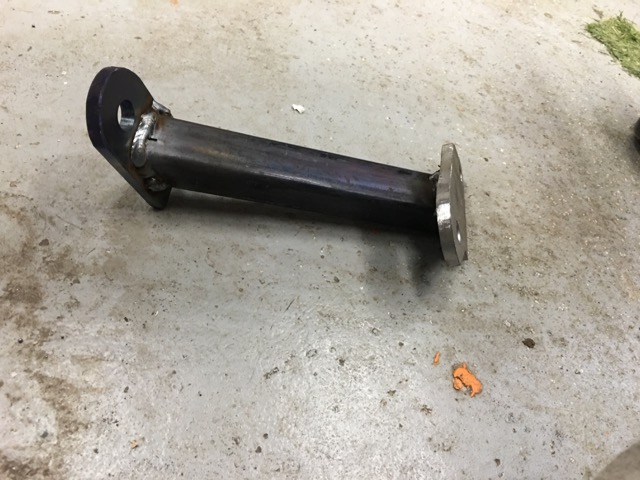 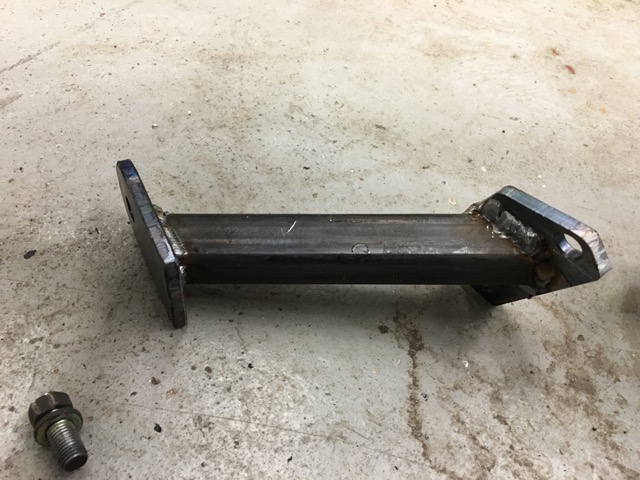 And Mounted in the car 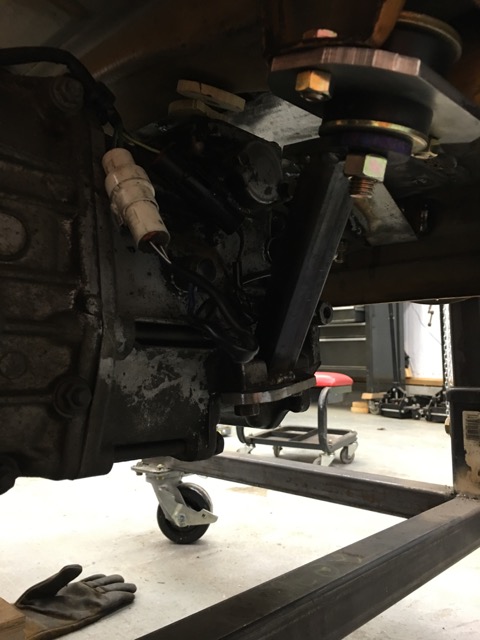 Fuel pickup came in from Tanks, Inc. 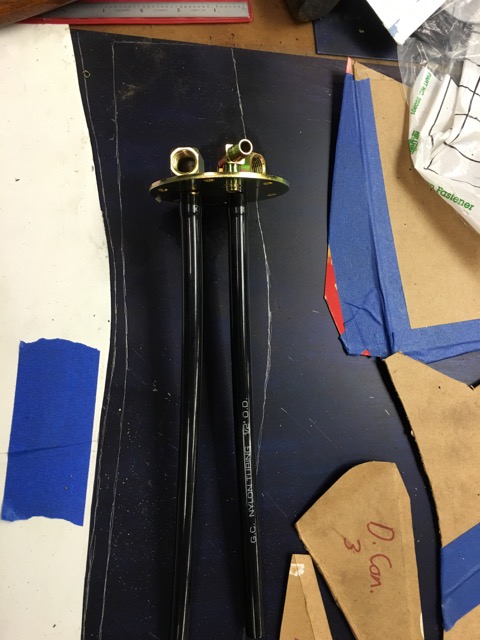 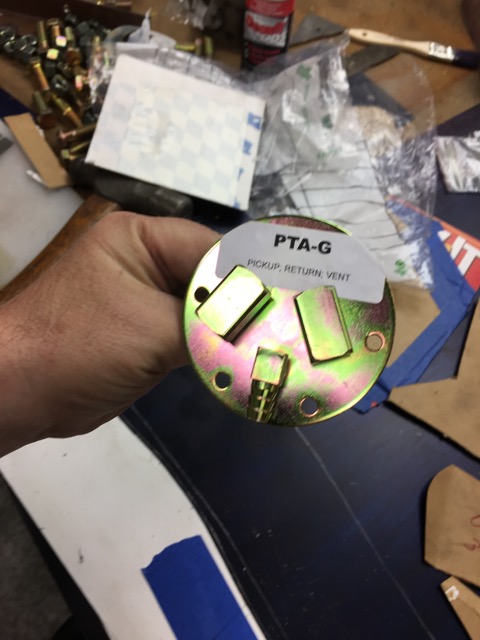 I have all the little pieces on order for the power lug to pas through this mount. The grounded side is much easier (IMG:style_emoticons/default/smile.gif) And I got my Fuel Pump E85 compatible (IMG:style_emoticons/default/shades.gif) 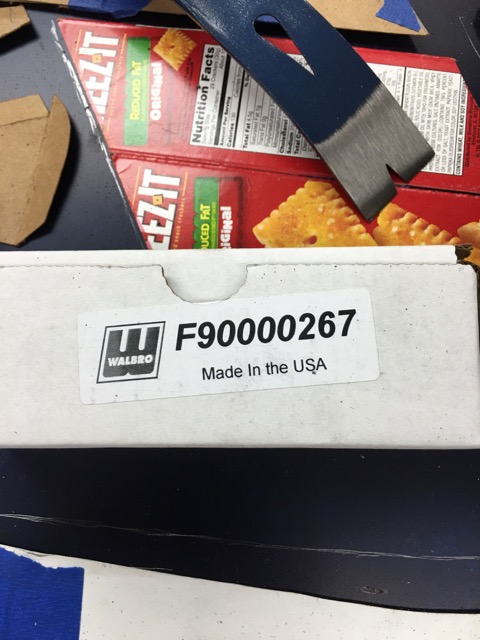 And install kit. 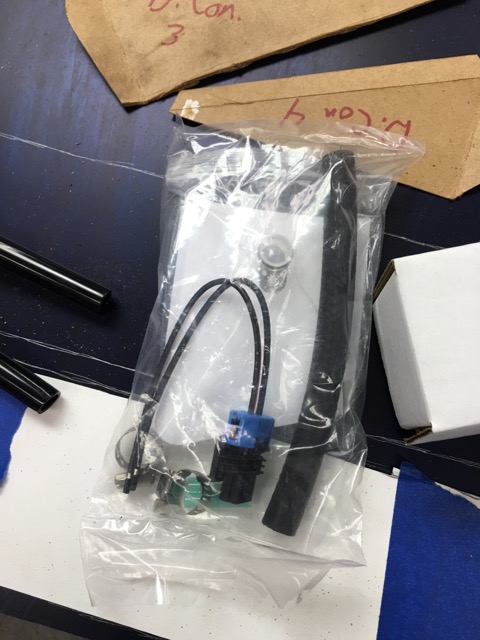 That is it for this update. Be back at it tomorrow, and modifying my old Air Compressor to except an HF unit. Running it through its break in, reviews say need to do that until cleanish oil comes out of the drain, and then change it to some good purple stuff it will hum right along. |
|
|
|
| 914forme |
Apr 2 2016, 07:10 PM
Post
#198
|
|
Times a wastin', get wrenchin'! Group: Members Posts: 3,897 Joined: 24-July 04 From: Dayton, Ohio Member No.: 2,388 Region Association: None |
Today I got something done (IMG:style_emoticons/default/piratenanner.gif)
engine mounts are done, well they need to be coated in something, paint, powder, gun blueing, etc.... 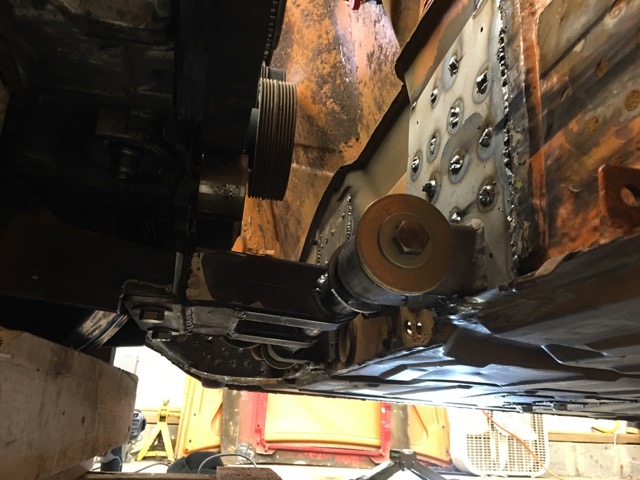 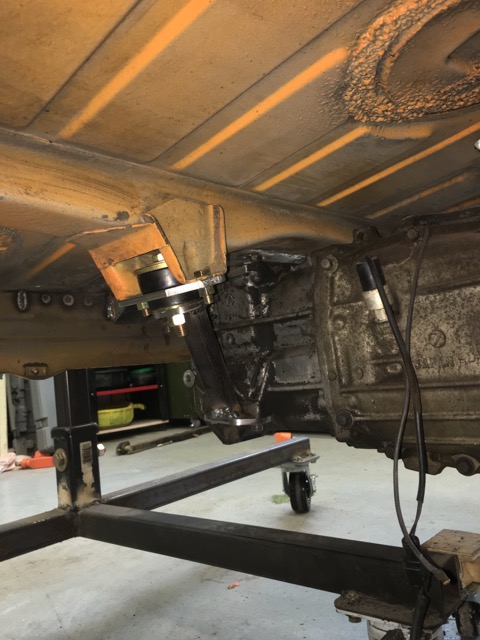 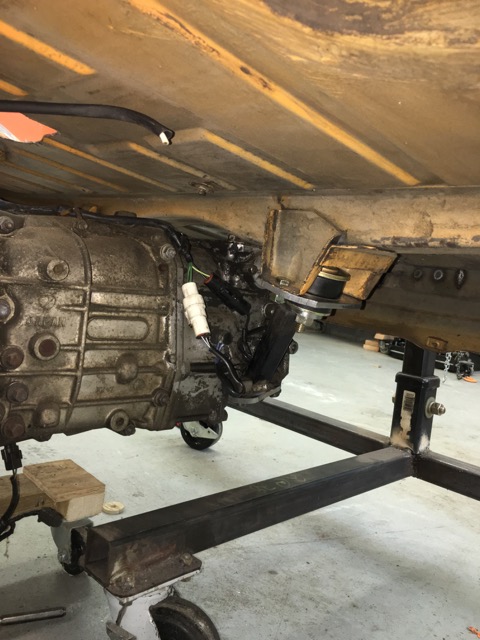 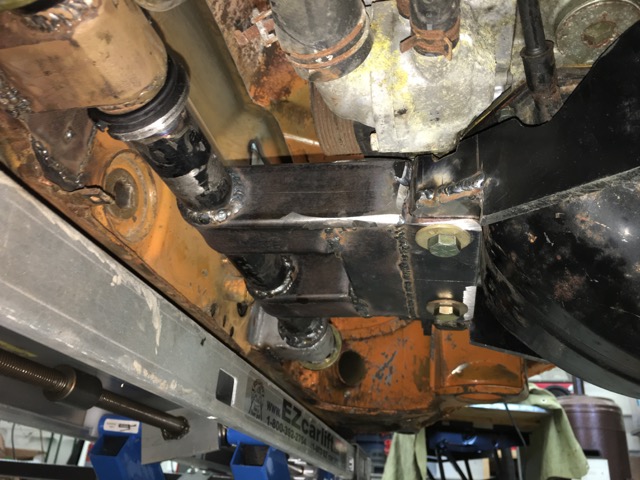 And the test, it works at least as a display piece. 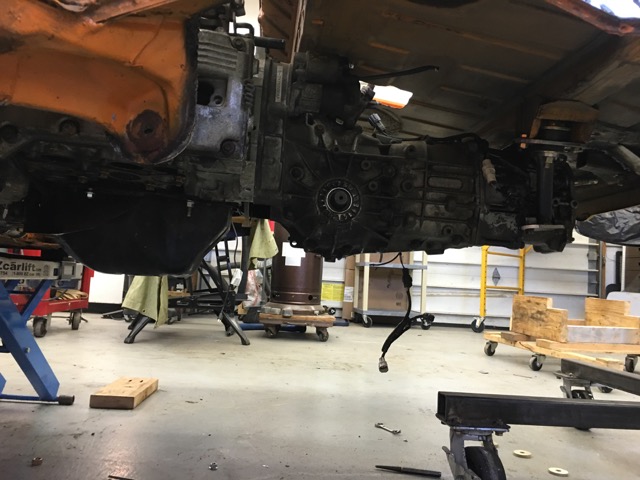 And I have started my new engine cart, my wood one was quick and dirty, and well All that wood gets in the way. Total pain in the.... So this is the start, this will sit under the cross bar at the front of the engine. Now to find some good Casters 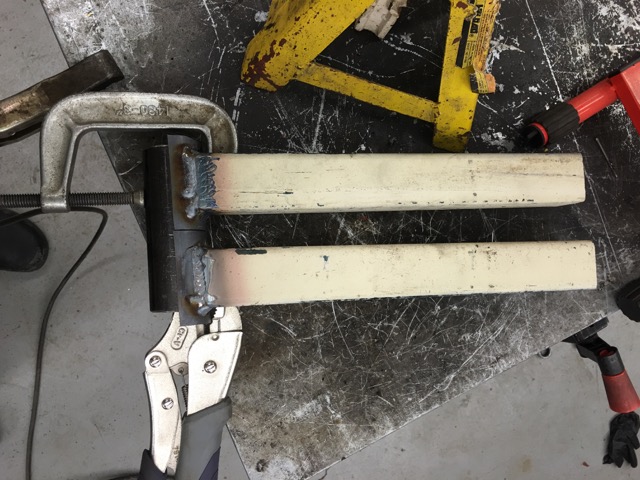 Repurposing scrap from my shop lights, I took them out of an open bay workshop and they where attached to these channels. I have used them for all sorts of stuff Compressor update, well went to Harbor Freight got a pump, and ordered my new pulley for the engine. Got the old one torn apart and tossed it in the metal pile. I get to wait so todays work was done with a Dremel and a bunch of metal cutting discs. Them little things work, but dang they get eaten up quick. But I did pickup a 12" disc sander at Harbor Freight to help me clean up metal work. And that is one solid disc sander. Oh and it eats metal like nothing else I have ever used. Sure beats my old belt sander stuck in a vice (IMG:style_emoticons/default/huh.gif) |
|
|
|
| 914forme |
Apr 3 2016, 08:23 PM
Post
#199
|
|
Times a wastin', get wrenchin'! Group: Members Posts: 3,897 Joined: 24-July 04 From: Dayton, Ohio Member No.: 2,388 Region Association: None |
Not much done on the car today.
I did make the lower part of the brackets for the engine dolly. 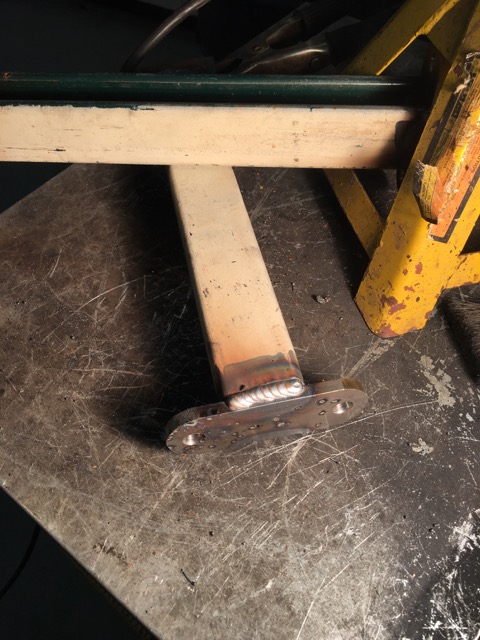 Baby steps |
|
|
|
| 914forme |
Apr 7 2016, 05:34 PM
Post
#200
|
|
Times a wastin', get wrenchin'! Group: Members Posts: 3,897 Joined: 24-July 04 From: Dayton, Ohio Member No.: 2,388 Region Association: None |
Well parts showed up today (IMG:style_emoticons/default/piratenanner.gif)
More Parts from down under (IMG:style_emoticons/default/wub.gif) 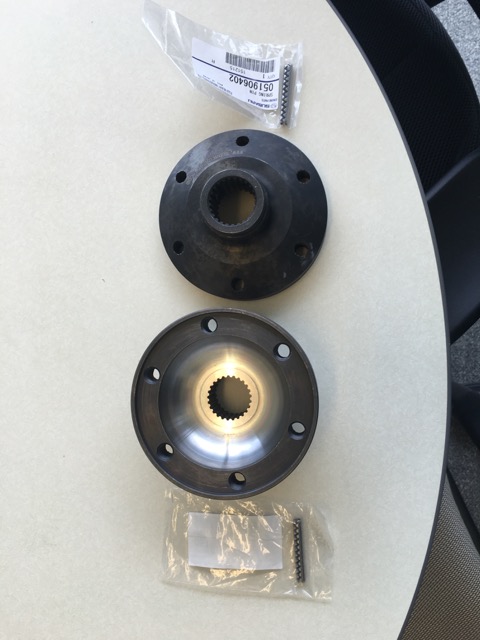 930 Hubs and roll pins for my Subaru Trans. 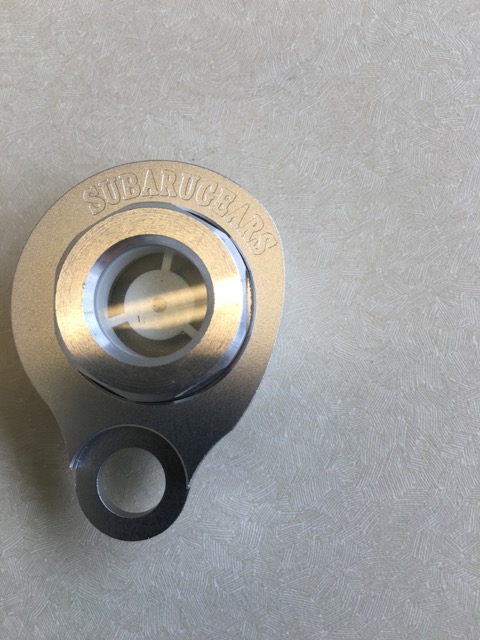 Subarugears Sight Glass for Transmission Oil level. And after waiting 4 long years for this order it finally came I was not going to say anything until I got it in my hands. 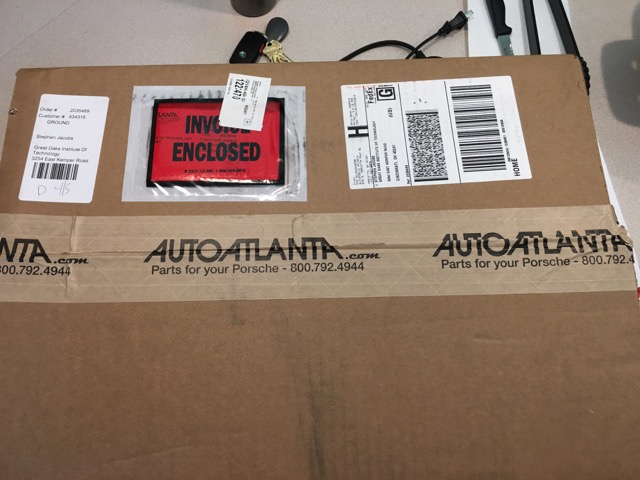 Oh they look so pretty 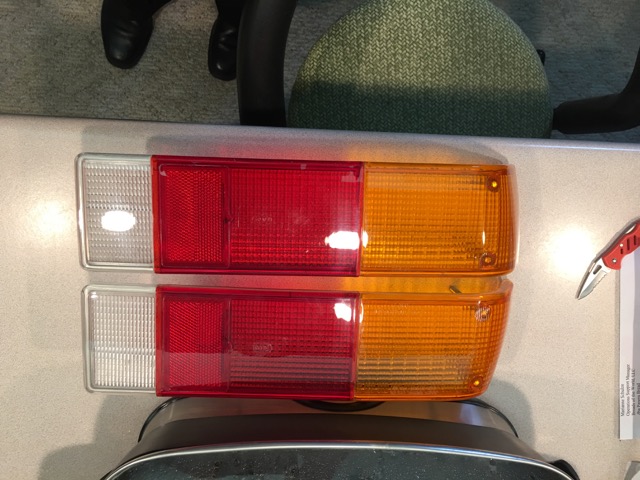 I was packing them back up in the box and (IMG:style_emoticons/default/WTF.gif) 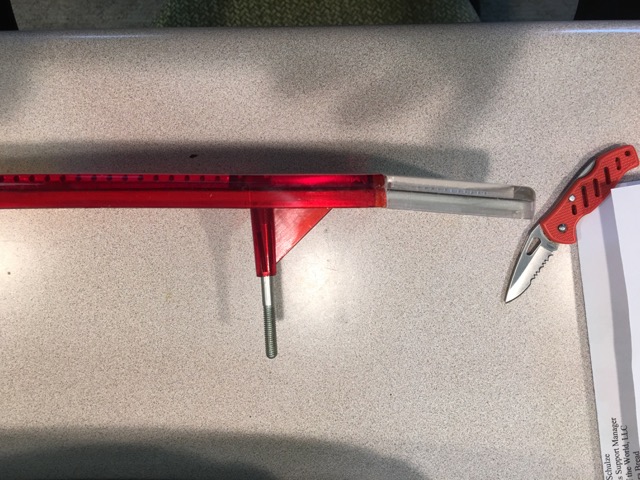 Yes the reverse lens section was glued to the rest of the lens at an angle (IMG:style_emoticons/default/dry.gif) So shot an e-mail off to customer service with a picture asking the same question. We will see if I get (IMG:style_emoticons/default/sheeplove.gif) again (IMG:style_emoticons/default/sad.gif) |
|
|
|
|
1 User(s) are reading this topic (1 Guests and 0 Anonymous Users)
0 Members:

|
Lo-Fi Version | Time is now: 24th January 2026 - 07:59 AM |
Invision Power Board
v9.1.4 © 2026 IPS, Inc.