|
|
|
Porsche, and the Porsche crest are registered trademarks of Dr. Ing. h.c. F. Porsche AG.
This site is not affiliated with Porsche in any way. Its only purpose is to provide an online forum for car enthusiasts. All other trademarks are property of their respective owners. |
|
|

  |

| jd74914 |
 Apr 7 2016, 05:44 PM Apr 7 2016, 05:44 PM
Post
#201
|
|
Its alive  Group: Members Posts: 4,864 Joined: 16-February 04 From: CT Member No.: 1,659 Region Association: North East States |
Those engine mounts look good! I really like the front pivot! It's so clean without anything totally spanning the engine bay.
Eeek, how could anyone ship lenses out like that. No QC at all. Just adding this because you have a picture of one of Andy Forrest's engine iterations posted above, but have you seen this recent interview with him? Lots of interesting stuff about the car, etc. https://www.facebook.com/HPAcademy/videos/990196814405772/ |
   |

 
|
| 76-914 |
Apr 7 2016, 05:49 PM
Post
#202
|
|
Repeat Offender & Resident Subaru Antagonist Group: Members Posts: 13,843 Joined: 23-January 09 From: Temecula, CA Member No.: 9,964 Region Association: Southern California |
QUOTE(914forme @ Apr 7 2016, 04:34 PM)  Well parts showed up today (IMG:style_emoticons/default/piratenanner.gif) More Parts from down under (IMG:style_emoticons/default/wub.gif) 930 Hubs and roll pins for my Subaru Trans. Subarugears Sight Glass for Transmission Oil level. And after waiting 4 long years for this order it finally came I was not going to say anything until I got it in my hands. Oh they look so pretty I was packing them back up in the box and (IMG:style_emoticons/default/WTF.gif) Yes the reverse lens section was glued to the rest of the lens at an angle (IMG:style_emoticons/default/dry.gif) So shot an e-mail off to customer service with a picture asking the same question. We will see if I get (IMG:style_emoticons/default/sheeplove.gif) again (IMG:style_emoticons/default/sad.gif) I'd like to placed a wager on that if it comes up! (IMG:style_emoticons/default/av-943.gif) Sorry Steven. How does someone stay in business with those practices AND reputation? (IMG:style_emoticons/default/confused24.gif) |
|
|
|
| 914forme |
Apr 8 2016, 04:25 AM
Post
#203
|
|
Times a wastin', get wrenchin'! Group: Members Posts: 3,897 Joined: 24-July 04 From: Dayton, Ohio Member No.: 2,388 Region Association: None |
(IMG:style_emoticons/default/agree.gif) it was a gamble like anything, we will see if the house wins.
Also what a great find on the Forrester interview. Thank you JD74914 Lots of detail info on how the car was built and ran. 1200 HP in that form is super nice. And it sounds like he ha the potential to get to 1400-1500 if he wanted to stress it out a bit. As he says and has been my contention, you rarely use all the HP you have. Do I need that kind of HP in my build, NO, would I want to experience it OH HELL YES (IMG:style_emoticons/default/happy11.gif) I have one GT350R sitting here and also have a GM 3.8L super charger with lots of bad ideas going through my head. The GMs are cheap bone yard items. The GT350R are a little more dollars, if you get the real thing. I have also been eyeing a Paxton unit. I don't need to do any of these right now, the thoughts and pondering just keeps me from completing the build. Countdown clock says I have 24 weeks left. Lots to get done in 24 weekends. And in reality I have less than that due to work, social plans, daughters marriage, etc... As they say Damn the Torpedoes Full Speed Ahead |
|
|
|
| 914forme |
Apr 9 2016, 05:16 PM
Post
#204
|
|
Times a wastin', get wrenchin'! Group: Members Posts: 3,897 Joined: 24-July 04 From: Dayton, Ohio Member No.: 2,388 Region Association: None |
After spending all day driving back and forth between my house and Home Depot only to have my wife change her mind again, I realize the 914 will not be completed for Okteenerfest! Realistically there is no way.
I still have the following long list to do: Engine Bay Fix the Passenger Log Reinforce the passenger log Install mount for oil filter Install Mount for Oil Thermostat Install Mount for Accusump Finish Engine Mount Install Hand Brake Tubes Fill Firewall Holes Install Coil Pack Mount Install Engine lid Latch setup Install J-West Trunk Lid Springs Rear Trunk Remove Seam Seller Install Upper Shock Mounts Fill in a couple holes I have found Lines Run Cooling System Lines Run Brake Lines Run Clutch Lines Run Fuel Lines Run Oil Cooler Lines Run Heater Lines Run A/C Lines Run Intercooler Lines - for Future usage Run Overflow / burp Line Provision for engine harness Revision for Chassis Harness Interior Sport Seats Brake Pedal Box Shifter Console A/C system Stereo Seat Heaters All the other interior bits Carpet Door Panels Pack pad carpet Headliner Sun Visors Fuel Tank area Mount for brake and clutch fluid bottle A/C system Wiper System Fuel Tank In Tank Pump Notched Corners Camber Plates Gas Strut Mounts Holes not needed filled in Fuse box Front Trunk Radiator Mount Radiator Oil Cooler Water Cooler for Intercooler A/C Condensor A/C dryer Reinforce exit vents Cooling system Shroud Front Air inlet finish body work Storage Head light motors - think Miata Pieces, smaller and several pounds lighter Body Work Fender Flares Front Bumper - GT style in Steel Front Valance 914 / 944 hard top with sunroof - already converted to manual Door fixes Hood fixes Engine EFI Intake Ignition Shorten the oil pan Electrical Tear the car down Paint Reassemble Suspension Raise front Spindles Reinforce rear arms Re-assemble everything (IMG:style_emoticons/default/blink.gif) I am sure I have forgotten lots of little details of things to do. Just so you know I am not giving up, just realizing the long row I have to hoe. Off to Home Depot again, (IMG:style_emoticons/default/headbang.gif) Need some new duct work, I love my wife. This is getting ridiculous. |
|
|
|
| 914forme |
Apr 9 2016, 08:46 PM
Post
#205
|
|
Times a wastin', get wrenchin'! Group: Members Posts: 3,897 Joined: 24-July 04 From: Dayton, Ohio Member No.: 2,388 Region Association: None |
Got my parts to install the Fuel Pump in the tank, you need a way to drop power into the tank. The ground is easy as you just need a lug.
So I grabbed one of these, because I don't need 49 more of these. 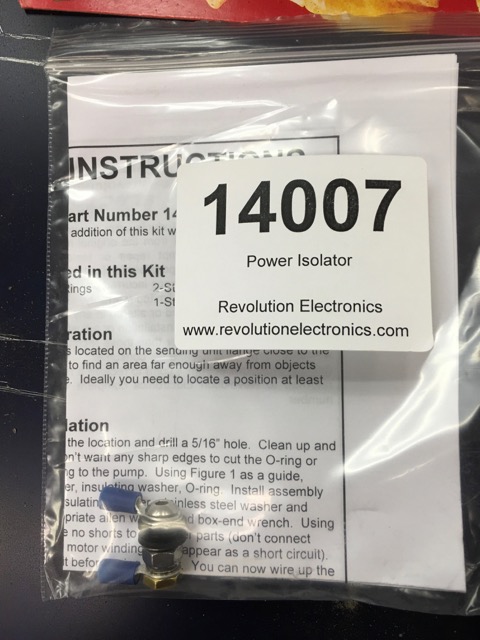 And this is what all the parts you get in the kit. 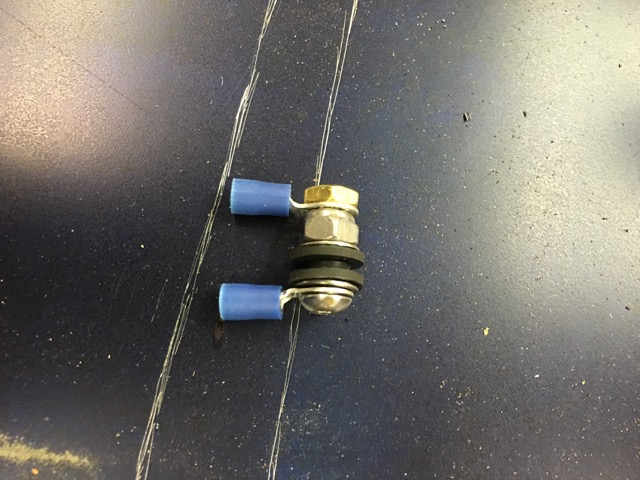 Not bad for $12 total with shipping. Thats all I got done on the car today. Still working on the new bathroom. |
|
|
|
| 914forme |
Apr 22 2016, 03:11 PM
Post
#206
|
|
Times a wastin', get wrenchin'! Group: Members Posts: 3,897 Joined: 24-July 04 From: Dayton, Ohio Member No.: 2,388 Region Association: None |
Not much done on the 914 in the last few weeks. I made the trip to Hersey, had a great time at the swap meet. Picked up a front painted bumper for GT bumper. Picked up a fe extra Centerline wheels, stupid things I can't resist them. (IMG:style_emoticons/default/blink.gif)
Before I left for Hersey I got a box from Chris at Tangerine Racing, I love Chris' work.  I picked up a wicked bug and have been sick since I came back from Hersey, totally wiped out. Hope to get something done this weekend, but the way I feel right now, I am thinking it might not happen. BTW, who's car is this? 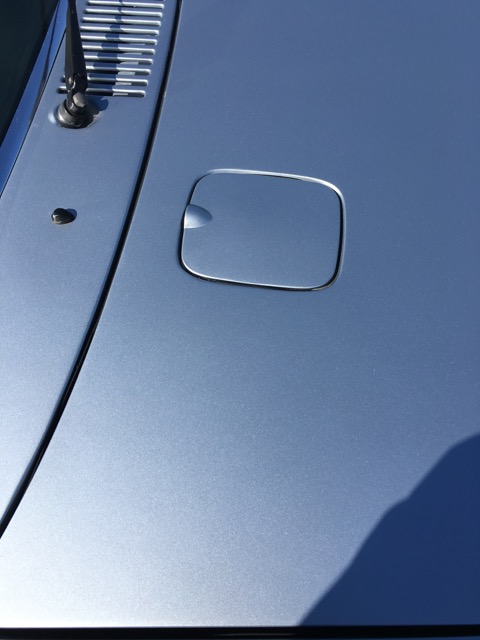 Yeah I know detail shots suck, but I feel this detail is a pretty unique item, so it should be enough for an identity. |
|
|
|
| 914forme |
May 21 2016, 08:44 AM
Post
#207
|
|
Times a wastin', get wrenchin'! Group: Members Posts: 3,897 Joined: 24-July 04 From: Dayton, Ohio Member No.: 2,388 Region Association: None |
Today is my daughters wedding and I can't seem to fall a sleep, wonder why? This was at 2 am when I started writing this post. As of now, I have butterflies in my stomach and mind is racing with speech ideas, food blessings, and hoping i don't screw something up!
So instead I went off and worked on an issue Chris Foley warned me about with his rear shock tower kit that raise the rear shock towers to increase shock travel on lowered cars. The issue is this, if you are running an aftermarket upper spring hat, it might not allow the shock bolt to make it to the bearing, as it hits the housing. This will cause the shock to bind, and eventually cause it to fail. Since I run a Coleman Racing adjustable spring preaches. And it uses a different hat to allow me to run a 2.5" standard spring I might have the issue. So lets see Ah yes I have an issue. That is the Coleman hat in Chris's extension, everything is upside down on the bench to allow gravity to do its job. 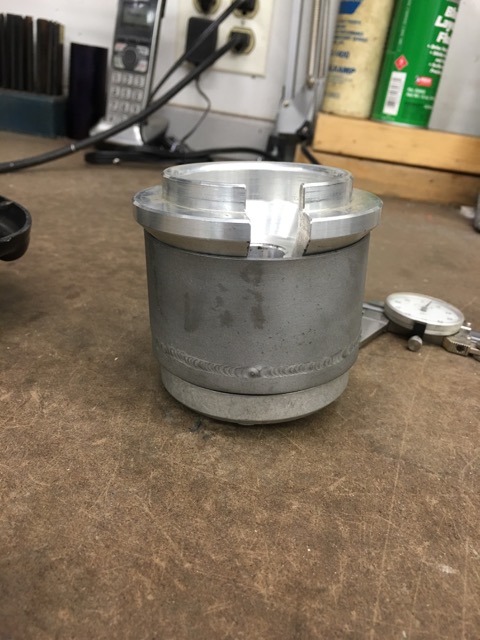 This is what Chris was talking about. The top of the hat does not meet the bearing extension. By just a so small amount. 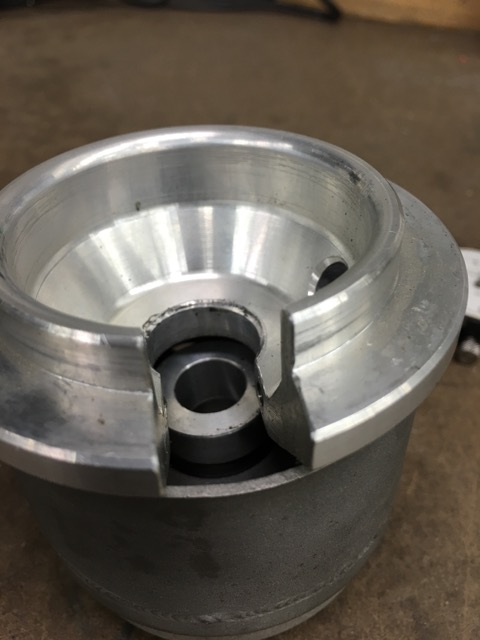 Chris's solution is use the stock spring hat.  That does solve the problem, and creates and opportunity. I would have to make or modify the stock hat so the 2.5" spring would be secured and not move around in the hat. (IMG:style_emoticons/default/idea.gif) Why not just fill in the gap between the bearing and the Coleman. So off to the parts drawers I go and I get me two extra of these, clean them up, and ad some dykem. 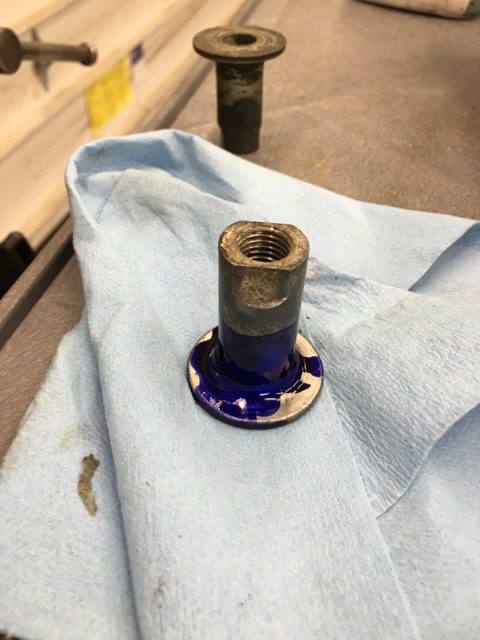 I then measure the difference in the two spring hats in height. And mark the difference on the that sleeve where I need to make the cut. So now how to make the cut. The obvious answer I need a metal lathe! So I run down the rabbit hole of small metal lathes. I love the Sherline, always wanted one since I first saw one in a friends basement we where cleaning out. You can just see the quality in the product. Yes it would do what I need but not much over 2" I can live with that right. (IMG:style_emoticons/default/screwy.gif) What is the next project you will be using it for. Modifying my crank pulleys on my EG for magnets for the hall pickup. That is a 6" Diameter . unit. Okay, a 7x10" would do that for me, cheap chines lathe. Reason being I will be on the face side of the piece an not the outside so I could spin it as I am over the bed, and don't have the cross slide in the way. No I would like more bed if I am getting into these. 7x16" Do lots of research, determine I am going down a really deep hole, and would be buying more tooling. So I look around the shop and decide enough dreaming, lets get back to doing. So I grabbed my Portaband. Chucked the sleeve in the vice. And cut it off just shy of the mark so I could true it up on my 12" sander. That made short work off it, freeing up the funds I so quickly dedicated to a Metal Lathe, for other 914 parts. Here is the spacers. 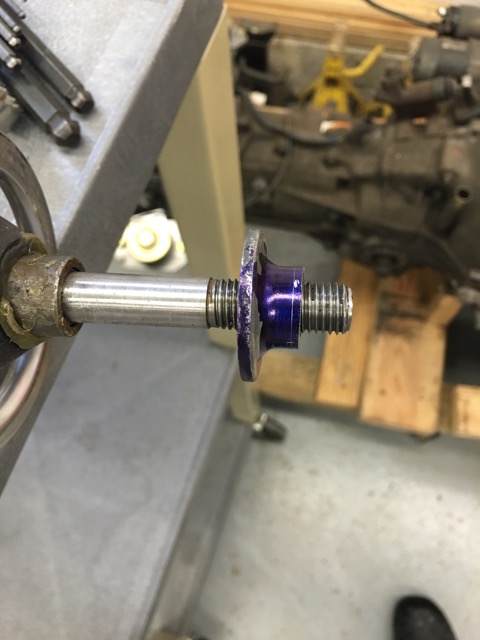 So here it is all bolted up, this was the first one.  For Reference the stock hat. 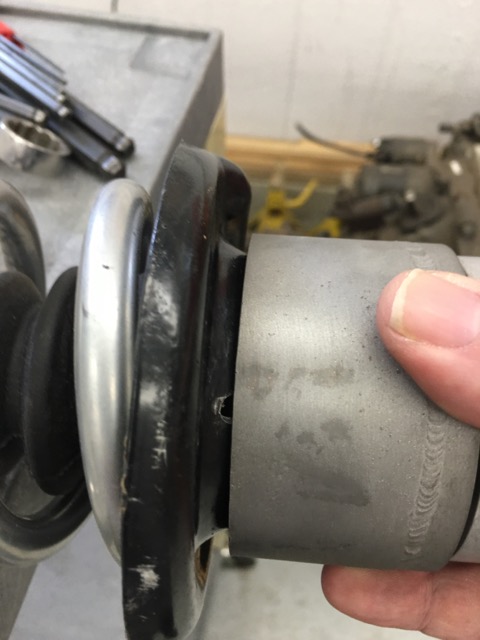 I might need to add a little length to my spacer, as the coleman hat does hit still. At least now it is not a dead stop, and good thing I have a drawer full of this upper shock bolts. Hat designs are that much different. I could modify the Coleman Hat, there is the pesky metal lathe again, or Milling machine could also do that for me. And now I am looking some tools, which I could have made on a the lathe (IMG:style_emoticons/default/headbang.gif) Dimple Dies, (IMG:style_emoticons/default/shades.gif) Hello SWAG OFFROAD (IMG:style_emoticons/default/aktion035.gif)  I moved on in the effort to increase shock travel, again, I need a Lathe (IMG:style_emoticons/default/headbang.gif)  That gives me 20mm, I think I have some wiggle room there and 22mm should do the job. 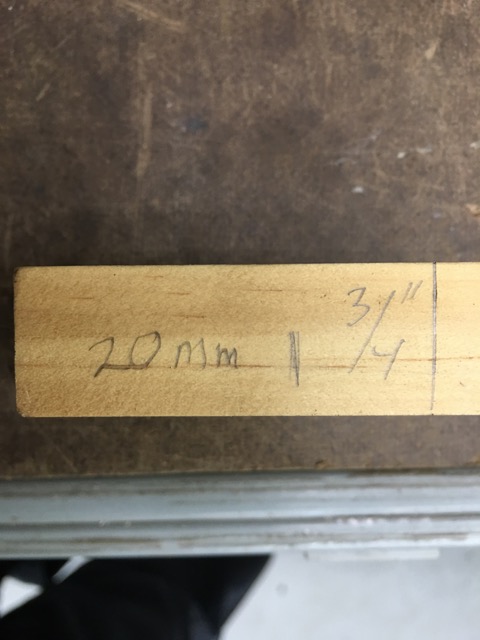 What that means I would have to run 17" wheels. What that really means currently is a wider selection of performance tires. And yes weight goes up on the wheels from 13 pounds with the Centerlines to 18 and 20 for the Carrera 10 Spokes I am running. BTW, Forgelines are not better than the Carreras. Forgeline wheels ZX3R 17x10 21.15 lbs It is very hard to find Forgeline wheel weights The 10 spoke Carrera wheel is manufactured by BBS, and is lite in its sizes. If I keep the Centerlines , I can only drop the spindle by 10mm. While we are talking wheels weights 17 Center lines are not lite in themselves. Current champ is Fiske, I can't afford them, so Carrera 10 spokes it is for me. 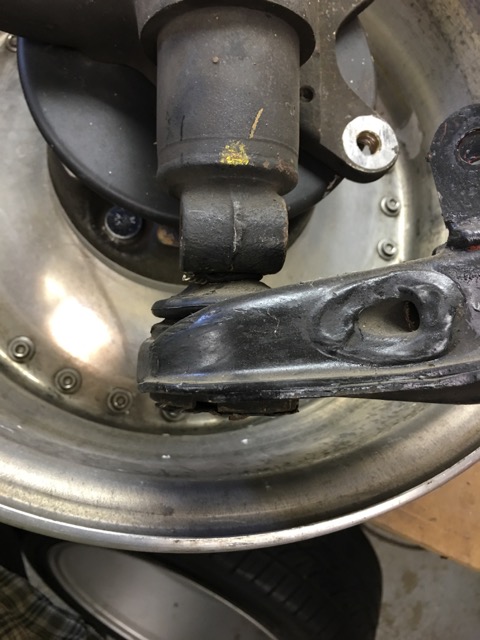 My high tech measuring device (IMG:style_emoticons/default/laugh.gif) 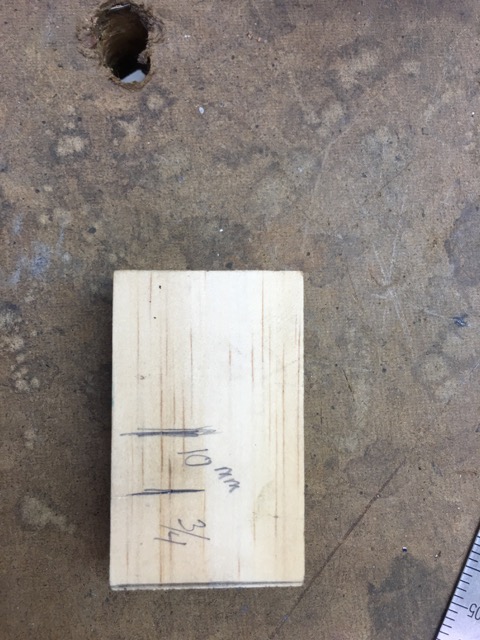 The odd thing is I had access to tons of Metal Lathes, Mills, etc... at work. And I never use them. (IMG:style_emoticons/default/screwy.gif) |
|
|
|
| 914forme |
May 25 2016, 05:24 PM
Post
#208
|
|
Times a wastin', get wrenchin'! Group: Members Posts: 3,897 Joined: 24-July 04 From: Dayton, Ohio Member No.: 2,388 Region Association: None |
todays work, took the week off of work, Monday we where just to tired from all the partying to get up and play. Tuesday I had work todo, for work, darn Federalis won't wait for little ole me.
Today I go some time, and started working on the rear shock raise. As usual I will gladly plug Chris' stuff. Chris says his hole saw fits around the shock cup no need for a centering ring. (IMG:style_emoticons/default/dry.gif) I am never that lucky. So I made a set of centering disc to keep my hole saw true. Step one clean the cup so I can weld them in.  Drop in my centering disc  Hit it with the welder 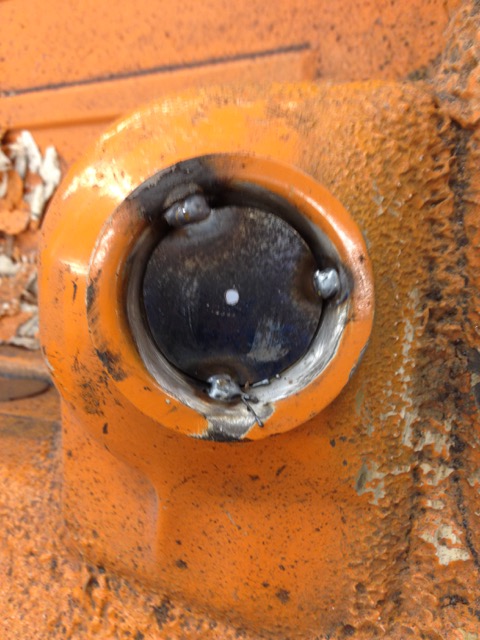 Chuck up a 3" hole saw in a 1/2" drill, when it catches it will yank your arm off. 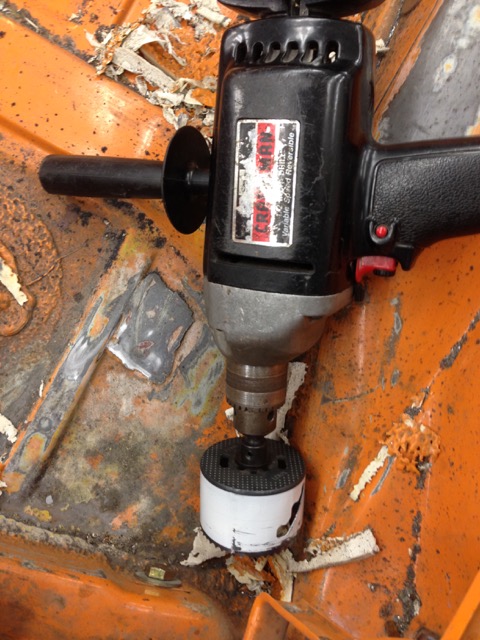 Drill a hole 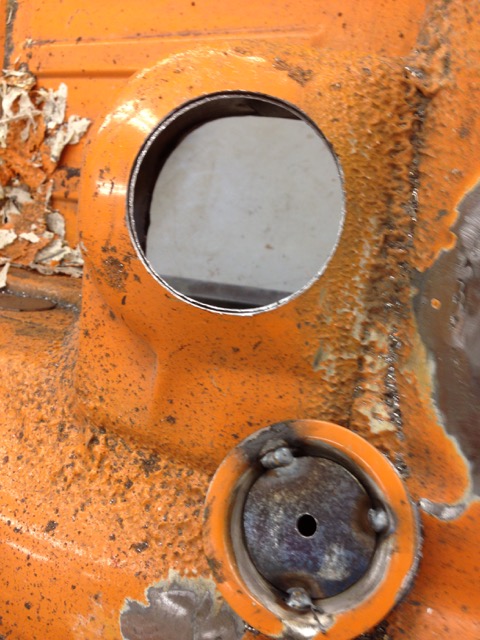 In reality it is two holes 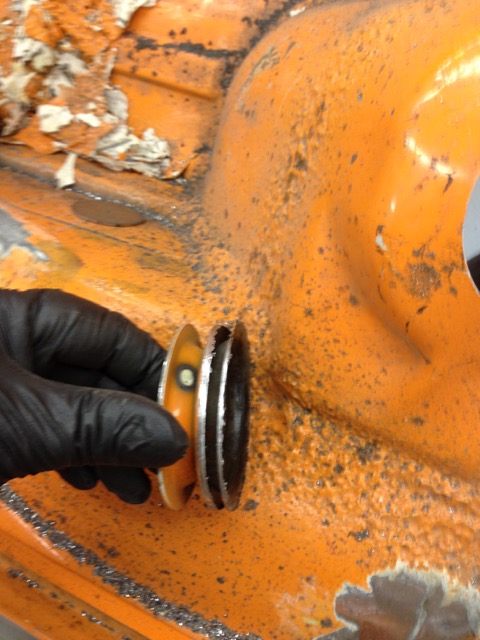 Set it in place, I scribed where I needed to file a little.  Clean all the paint around the unit, and get it ready, here it is before I started welding it in place. 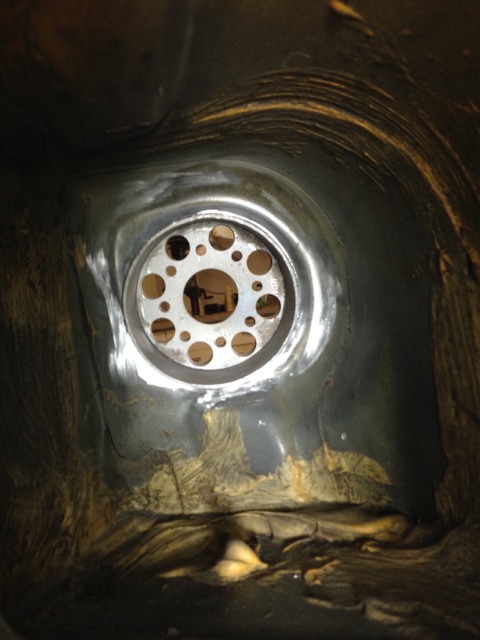 Used my calipers to get a 1/8" space off the bottom of the shock tower. 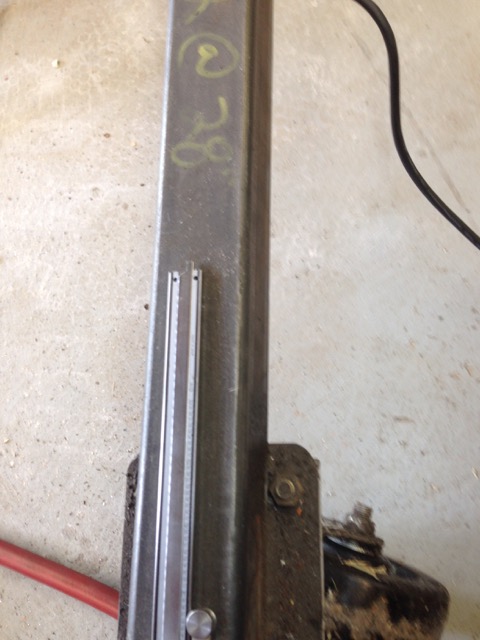 And burnt in on the topside, I forgot to take a picture of the bottom side it is all burnt in too. Mig wand is a little tight in there, glad I have it up on a rotisserie. 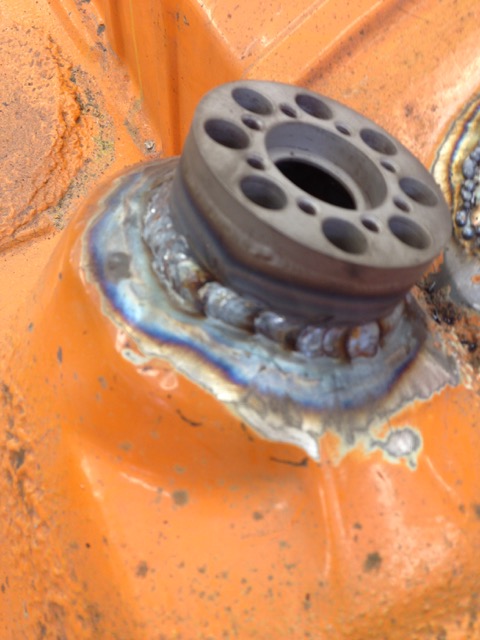 Little Idea I am toying with, I need a Lathe bad for this kind of stuff! 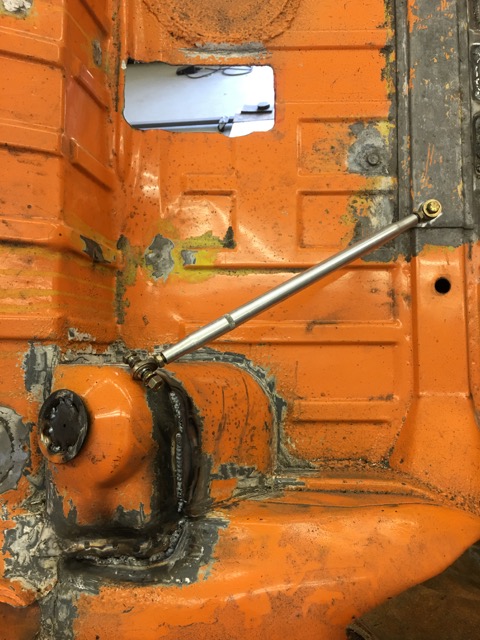 Can also see I started Seam welding the rear shock towers. That will be a much longer process. (IMG:style_emoticons/default/welder.gif) Spent the rest of the day getting stuff ready to ship to Tangerine, and pressing studs. My 20 Ton press paid for itself today. |
|
|
|
| 914forme |
May 26 2016, 08:39 PM
Post
#209
|
|
Times a wastin', get wrenchin'! Group: Members Posts: 3,897 Joined: 24-July 04 From: Dayton, Ohio Member No.: 2,388 Region Association: None |
Todays Goals
1. Air Compressor Maintenance 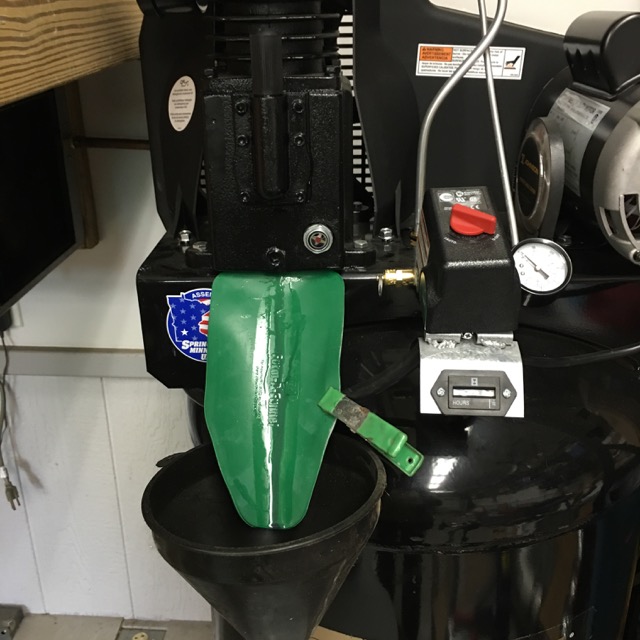 Even added an hour meter to the unit. Fabbed it up while on hold with Time Warner. 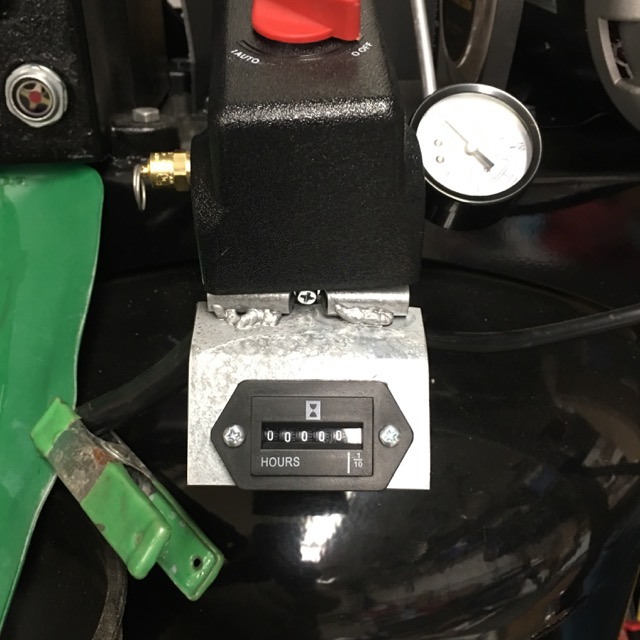 Task one DONE (IMG:style_emoticons/default/smile.gif) 2. Finish my idea for the rear shock tower bolt in brace. Needed to make the nuts longer and round to go through the hole. Welder and 12" sander to the rescue. Weld on a couple nuts onto my all thread couplers. Then turn them down on my fancy 12" abrasive lathe. 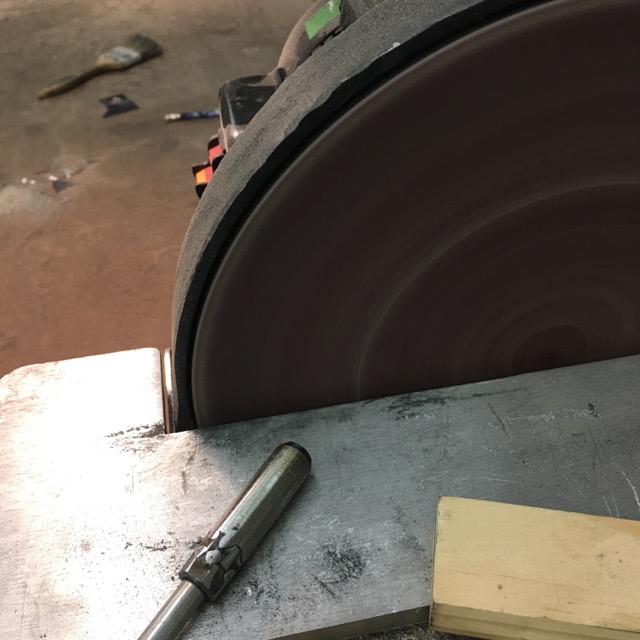 I really need a small metal lathe for this work. I even clearances the top of the mount to allow the rod end to move to its maximum angle. Installed these, and did not take pictures of the finished product. (IMG:style_emoticons/default/dry.gif) Task number two Done! (IMG:style_emoticons/default/biggrin.gif) Onto task three, finish the Drivers side Tangerine Racing shock tower extension. Since it is a rinse and repeat of the steps in the last post I will not bore you.  And it is done (IMG:style_emoticons/default/laugh.gif) So I started working on doing more seam welding of the rear drivers side shock tower. More than half way there. 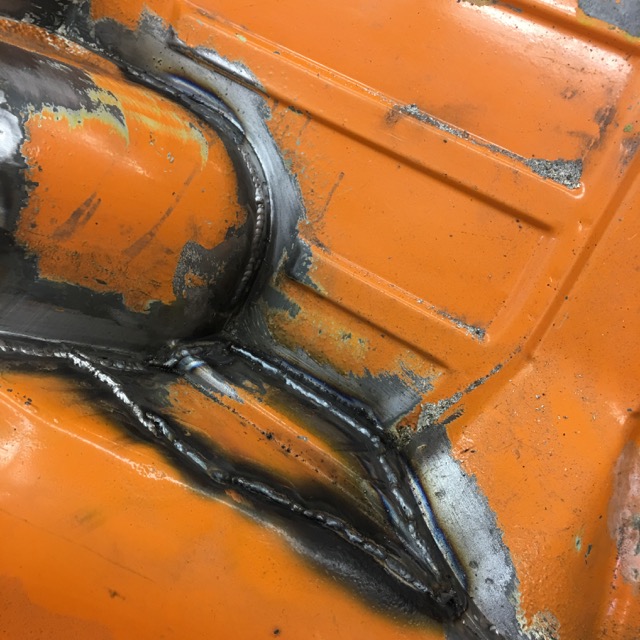 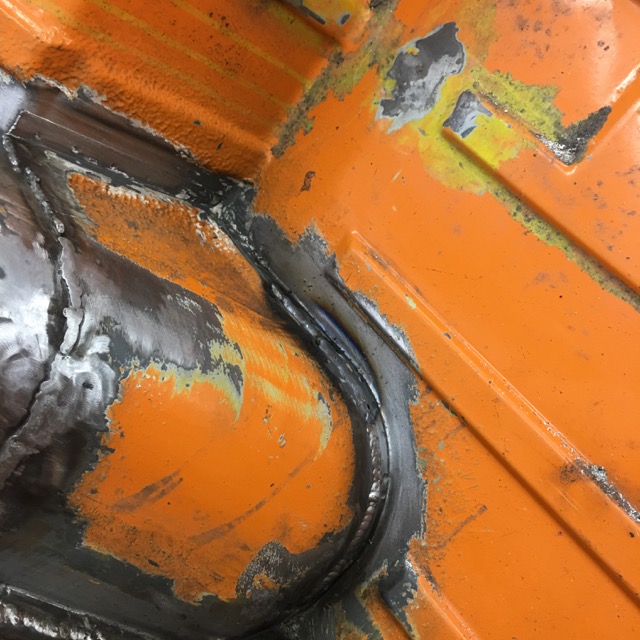 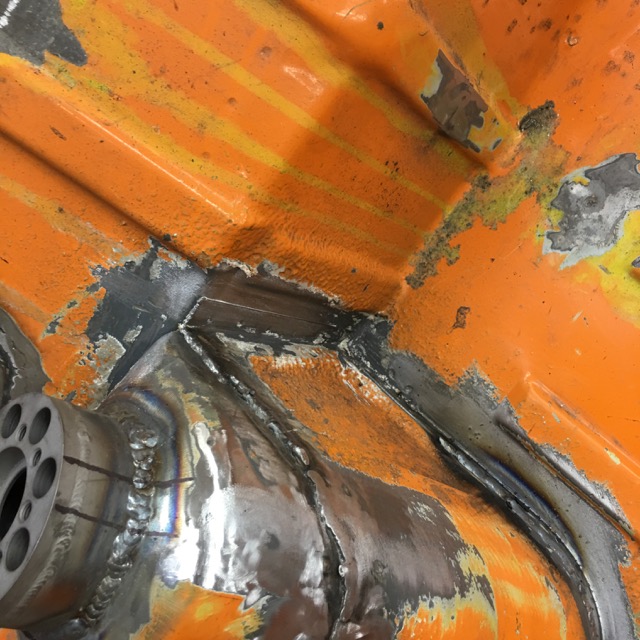 Whats left, man this is going to be a odd place to weld. 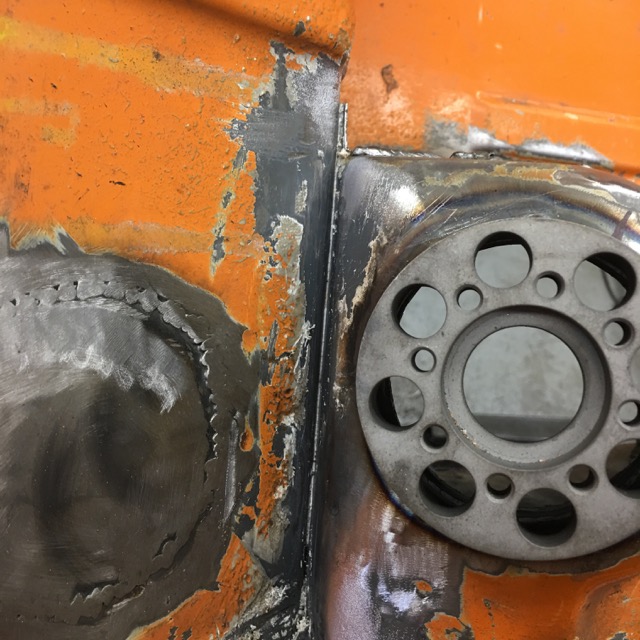 The fun is yet to come with all these welds comes lots of grinding, sanding, and cleaning. (IMG:style_emoticons/default/headbang.gif) I have a few more days to work on the 914 before I go back to work. Tomorrow is family day. Saturday, Sunday, and Monday, hopefully shop time. after that, May will come to an end, and so does my time in the shop. Month of June, I am traveling for work 16 days, and crosses 3 out of the 4 weekends in June. The fourth is fathers day weekend, and family ha me booked both days. SO I might get one day or maybe two if I grab some comp time. So how is it I am still in the rear trunk (IMG:style_emoticons/default/blink.gif) |
|
|
|
| Alphaogre |
May 27 2016, 10:31 AM
Post
#210
|
|
Member Group: Members Posts: 460 Joined: 28-May 12 From: San Diego Member No.: 14,487 Region Association: Southern California |
Tell your family that the greatest fathers day gift they can give you is to come and grind off these welds and sand... (IMG:style_emoticons/default/biggrin.gif)
|
|
|
|
| 914forme |
May 29 2016, 07:17 PM
Post
#211
|
|
Times a wastin', get wrenchin'! Group: Members Posts: 3,897 Joined: 24-July 04 From: Dayton, Ohio Member No.: 2,388 Region Association: None |
(IMG:style_emoticons/default/agree.gif)
yesterdays progress I had three things I needed to get done in the shop and I forgot all of them Service my ZTM, done, but then I decided to drop the deck (IMG:style_emoticons/default/headbang.gif) bad idea, I am still cleaning it, and painting it with some slip coating. We use it on grain wagons to make the grain flow better. Fix two holes in the trunk floor. 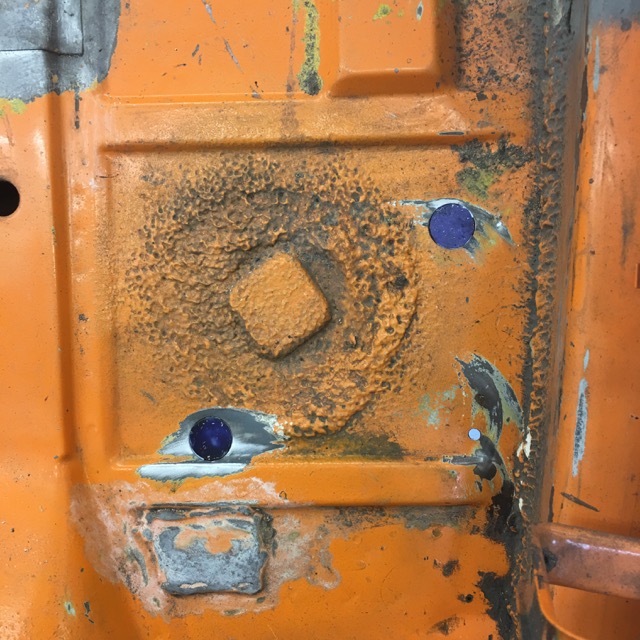 Welded in place 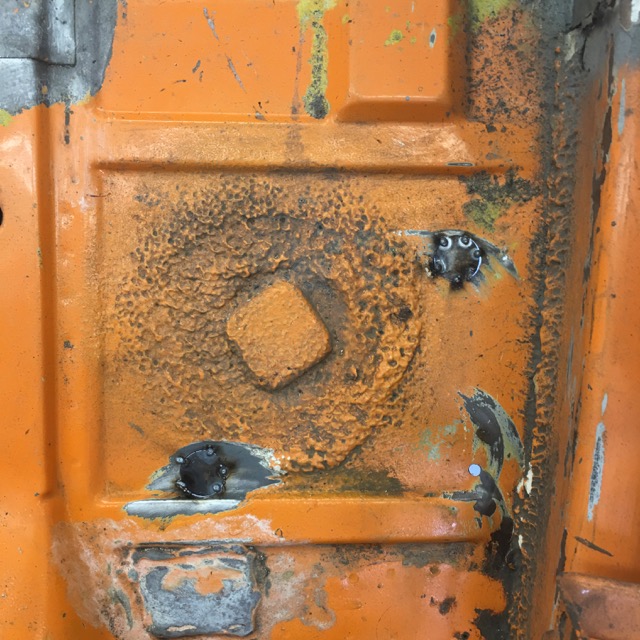 a squirrel came along and I started doing this, that was not planned, but this tool makes short work of undercoating.  The result 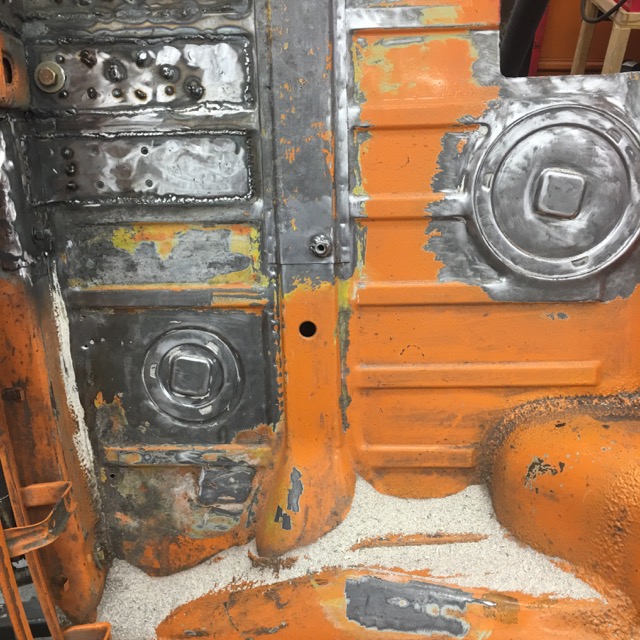 Finished seam welding Drivers side shock tower, shock towers make nice tool holds, my Mig welder goes into them a lot also.  Now for today Pulled hubs out of my trailing arms 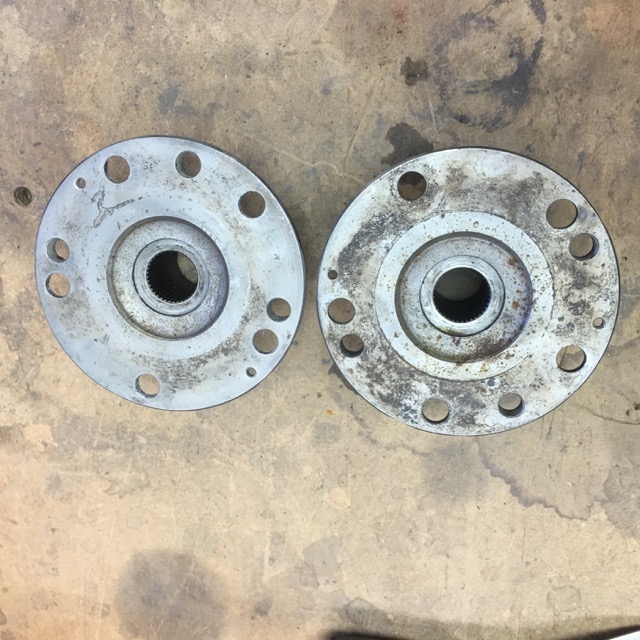 These are headed for the classified Took my Dynabrade, and removed a bunch more seam sealer, and started seam welding the pass side shock tower. 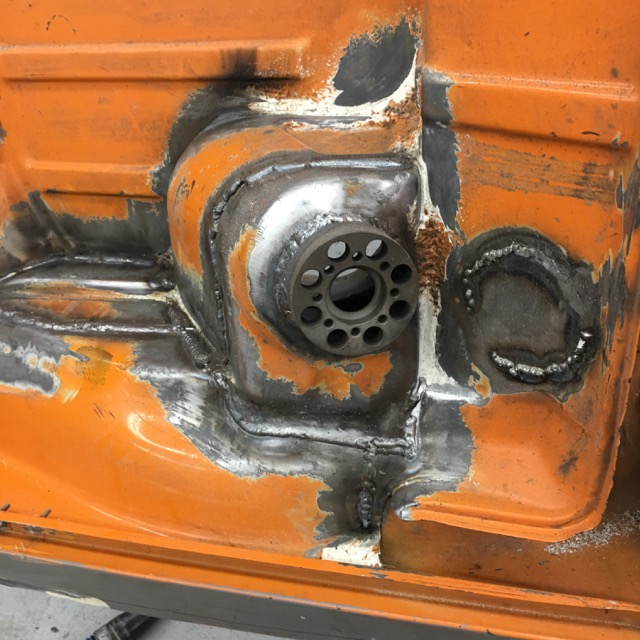 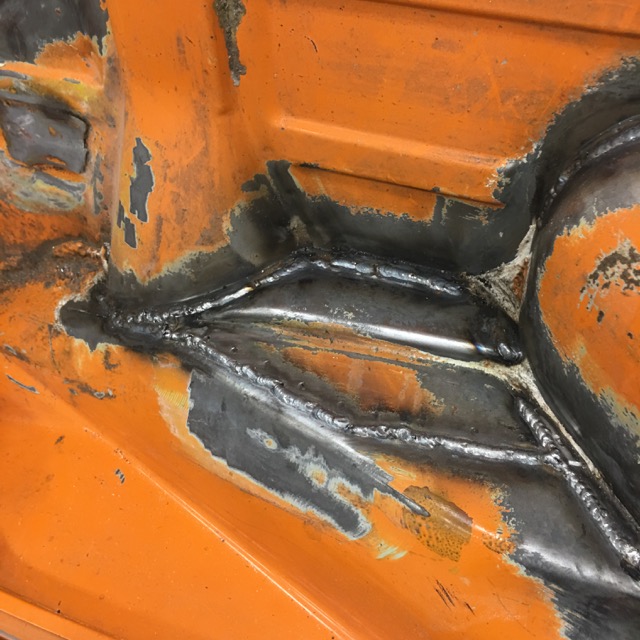 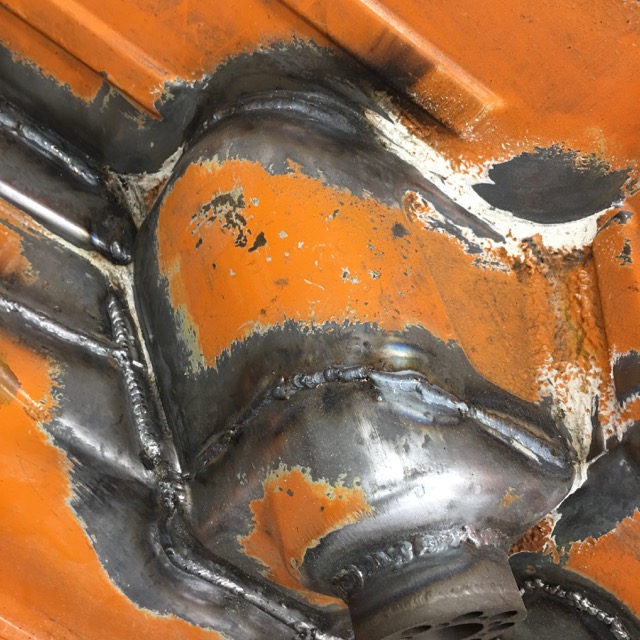 Still have some seam sealer to dig out, the Dynabrade does not quite get in there. that darn squirrel stopped by again, and I keep welding. 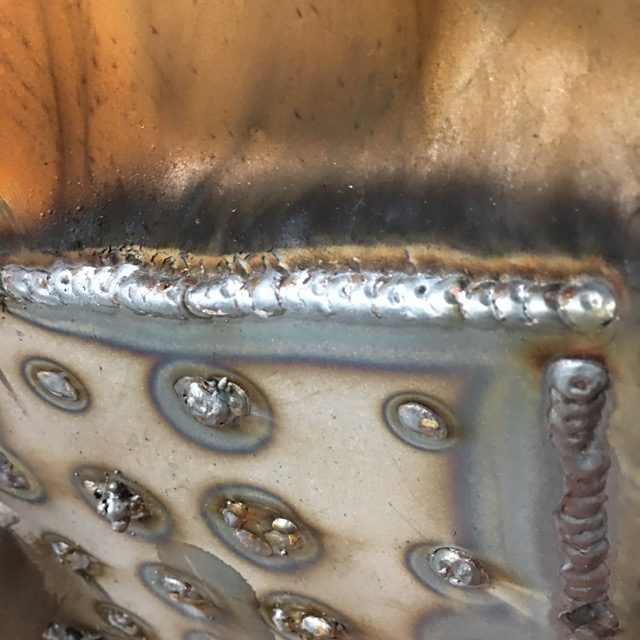 And I am getting good penetration (IMG:style_emoticons/default/sheeplove.gif) 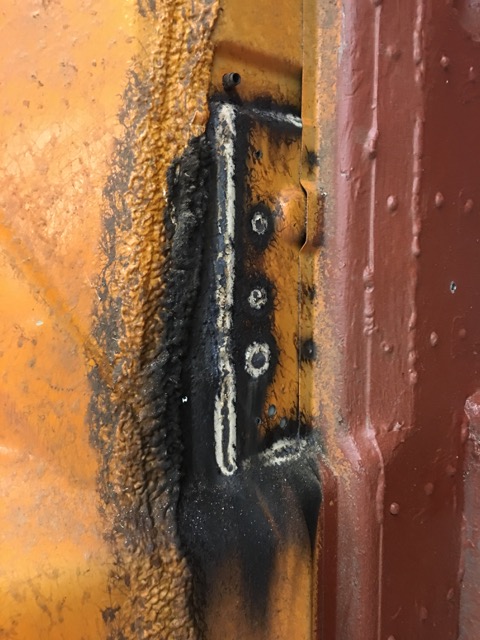 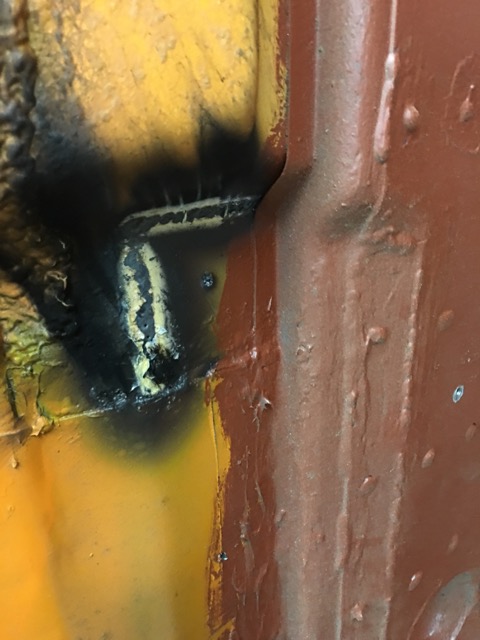 that was not all I did today, 1 step forward 2 steps back it seems. Rains came in, and washed my paint off my mower deck. Also flash rusted my trailing arms. (IMG:style_emoticons/default/headbang.gif) Get to that tomorrow. (IMG:style_emoticons/default/dry.gif) |
|
|
|
| 914forme |
Jun 19 2016, 08:18 AM
Post
#212
|
|
Times a wastin', get wrenchin'! Group: Members Posts: 3,897 Joined: 24-July 04 From: Dayton, Ohio Member No.: 2,388 Region Association: None |
In my effort to do everything on the car at least twice I got a small shoreline lathe. I got it dirt cheap when I showed the guy the cross slide did not work. (IMG:style_emoticons/default/piratenanner.gif)
Disassembled the entire lathe, lubed it up, found the cross slide thread boss which is brass had slide out of its mount. Put it all back together, tightened everything down. I had a working lathe, and a tool box full of lathe tooling, did not go through it to figure out what as what. I did find a cut off tool. (IMG:style_emoticons/default/idea.gif) Off to the parts drawer and grab a couple more shock top mounts. Chuck them in the lathe, and start my experiments. 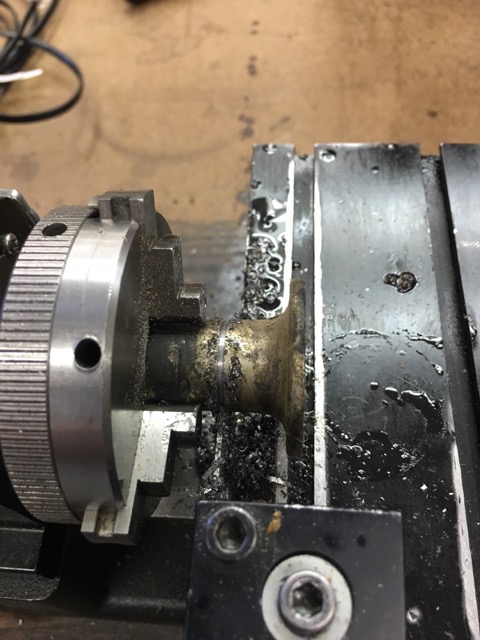 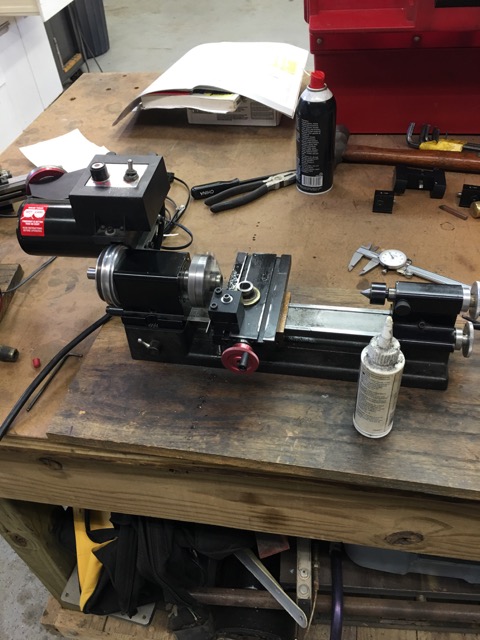 Got enough time to backup parts to send to Tangerine Racing for Chris to do his magic with them. 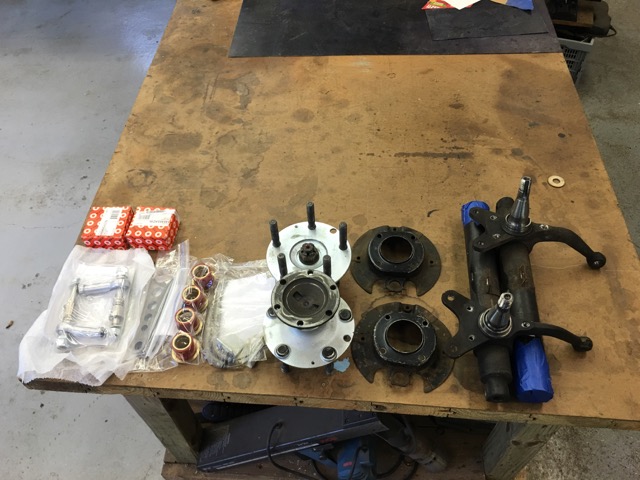 took the time to get accurate weights on the Carrera 10 spoke BBS rims. 7x17 with center cap lug nuts and balance weights still in place. 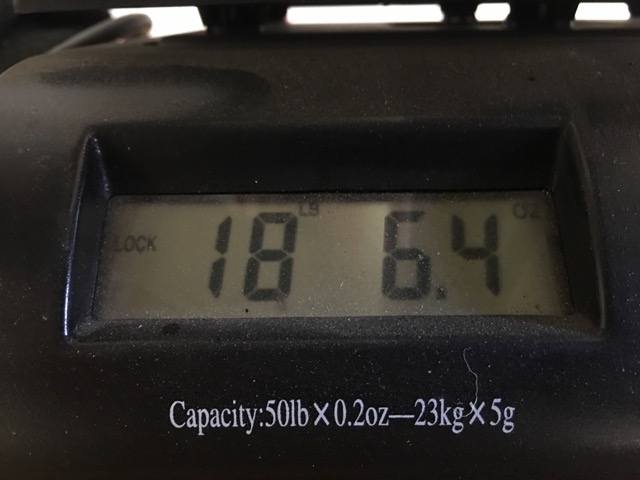 9.5x17 with center cap lug nuts and balance weights still in place.  I then took my old transmission out of the car. Removed the spool, disassembled my new trans, installed the spool. Bolted it up to the an engine, mounted it in the car. I need to make a couple spacers for my transmission hanger, and everything clears the trunk floor with out cutting. So I can weld my trunk bak in and make it look like stock. (IMG:style_emoticons/default/headbang.gif) Now for the catch, lowering the trans means I might be running into ground clearance issues as the car is also being lowered. I am having Chris move the front spindles up 30mm little over 1" up from stock. The rear pickp points are being raised 2" from the stock location. Not sure what that is going to do to this, except make it closer to the tar. Solution wold be to raise the engine and trans. Not liking that one. Run skid strips . Titanium makes for so dramatic roaster tails, That makes that a win! Or nothing happens at all and it is all good. guess we won't know until it is done. Off to find some Aluminum I can chuck in the lathe and make my spacers with. (IMG:style_emoticons/default/biggrin.gif) |
|
|
|
| 914forme |
Jun 21 2016, 05:11 PM
Post
#213
|
|
Times a wastin', get wrenchin'! Group: Members Posts: 3,897 Joined: 24-July 04 From: Dayton, Ohio Member No.: 2,388 Region Association: None |
So I got a little time yesterday to look over the stuff I did a few days ago.
Placement of the clutch slave. 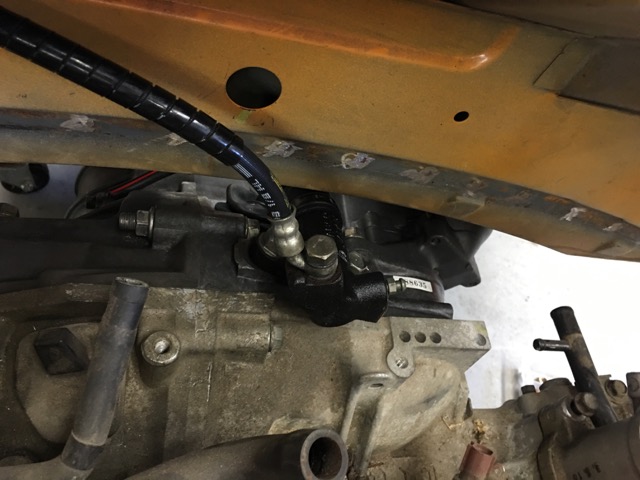 clearance of the start and clutch slave 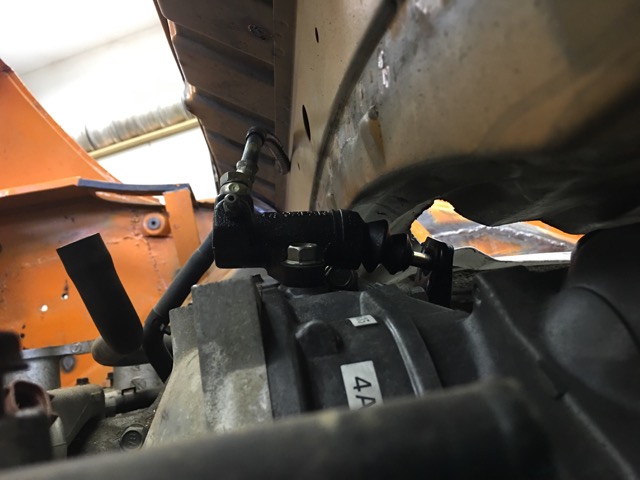 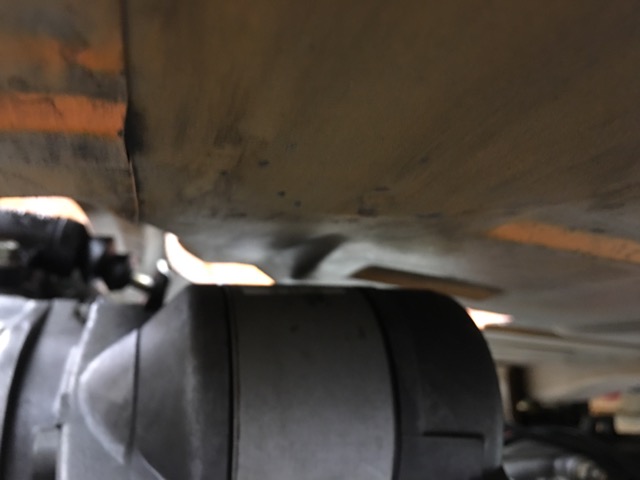 My spacer prototype system, stacks of washers (IMG:style_emoticons/default/biggrin.gif) 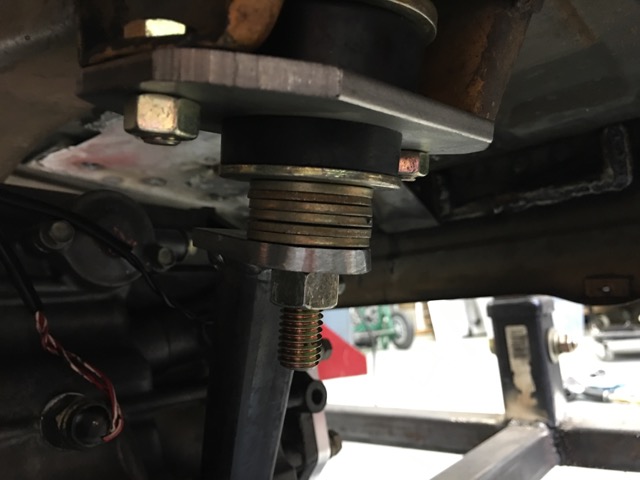 930 Flange on the trans 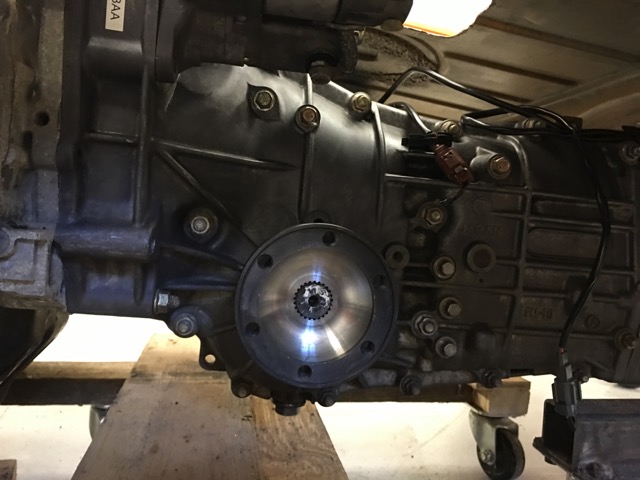 Howe Racing Master Cylinder compared to the Tilton 73 M/C not much difference, except on the Tilton the brake line exits out the back of the M/C 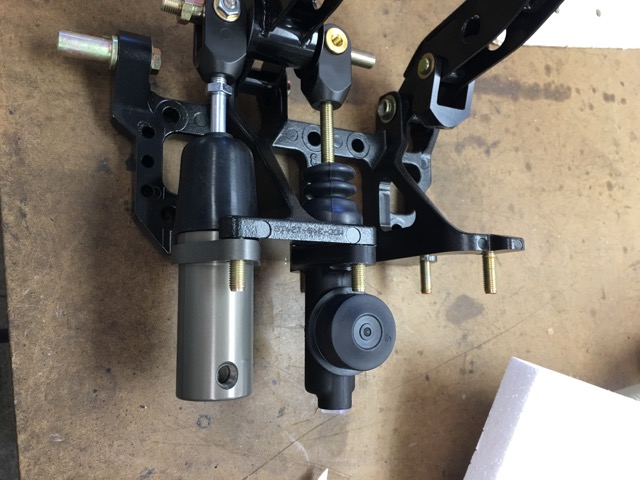 Like the Howes for the positive threaded brake line feeds, I think I could have done the same thing with the Tilton 74 series. I will have some Tilton 73s up for sale shortly 2 3/4" and 1 5/8" units, complete kits if anyone would like them, they will be 1/2 the price of new. And well they are new, you just have my (IMG:style_emoticons/default/drooley.gif) on them (IMG:style_emoticons/default/confused24.gif) |
|
|
|
| 76-914 |
Jun 22 2016, 09:15 AM
Post
#214
|
|
Repeat Offender & Resident Subaru Antagonist Group: Members Posts: 13,843 Joined: 23-January 09 From: Temecula, CA Member No.: 9,964 Region Association: Southern California |
Good progress. Question: Where are your output flanges in relation to the wheel centers? (IMG:style_emoticons/default/beerchug.gif)
|
|
|
|
| 914forme |
Jun 22 2016, 09:26 AM
Post
#215
|
|
Times a wastin', get wrenchin'! Group: Members Posts: 3,897 Joined: 24-July 04 From: Dayton, Ohio Member No.: 2,388 Region Association: None |
Kent interesting question. At one point they where almost dead nuts on, with a slight bend maybe 5 degrees to make for a happy CV.
With the changes I am about to make they will be off by a little bit more, luckily by using 930 CVs I can get high degree angle CVs if I need to, and they can still take the torques. I will not know for sure until the rear pickup points get changed. This could all go to hell in a hand basket here shortly, and I redo the engine / trans mounts for a third time. (IMG:style_emoticons/default/blink.gif) |
|
|
|
| 76-914 |
Jun 22 2016, 12:37 PM
Post
#216
|
|
Repeat Offender & Resident Subaru Antagonist Group: Members Posts: 13,843 Joined: 23-January 09 From: Temecula, CA Member No.: 9,964 Region Association: Southern California |
QUOTE(914forme @ Jun 22 2016, 08:26 AM) I will not know for sure until the rear pickup points get changed. This could all go to hell in a hand basket here shortly, and I redo the engine / trans mounts for a third time. (IMG:style_emoticons/default/blink.gif) Ain't that the (IMG:style_emoticons/default/sheeplove.gif) truth, Stephen! I want to tell every guy starting a conversion this same thing. If you can't admit defeat and doing things over and over till correct; don't even think about it! It took 4 iterations of the exhaust before I was satisfied. And a good thing too or I would have missed the water in the exhaust and possible some engine damage. Same deal with the cooling system, hydraulic clutch and yadi, yadi, yadi. Hopefully we can stub our toes enough that we settle upon a proven conversion system(s), be it Nissan, Audi or Subaru, for future guys and gals. Keep up the good work. (IMG:style_emoticons/default/beerchug.gif) |
|
|
|
| 914forme |
Jun 30 2016, 10:58 AM
Post
#217
|
|
Times a wastin', get wrenchin'! Group: Members Posts: 3,897 Joined: 24-July 04 From: Dayton, Ohio Member No.: 2,388 Region Association: None |
Between travels and family duties I got a bit more done of the car.
Removed the other -4 engine mount from the passenger side.  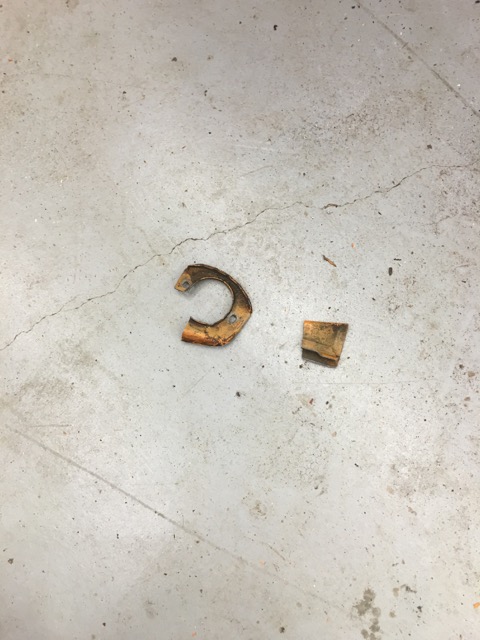 Never knew how much I would enjoy a cordless sawzall (IMG:style_emoticons/default/sawzall-smiley.gif) Removed the triangle and the lift donut. 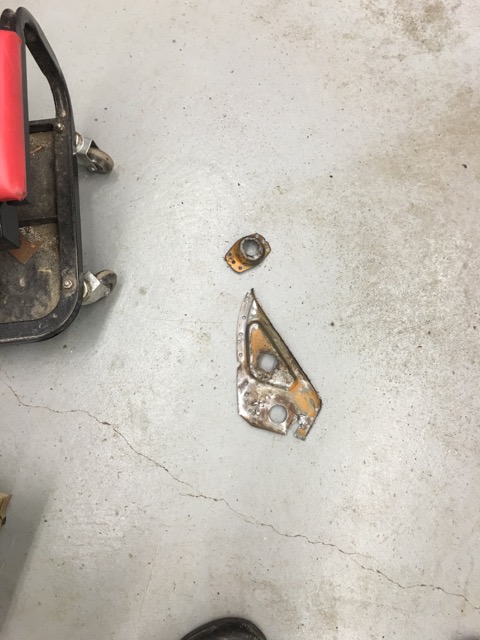 And well I am glad I did 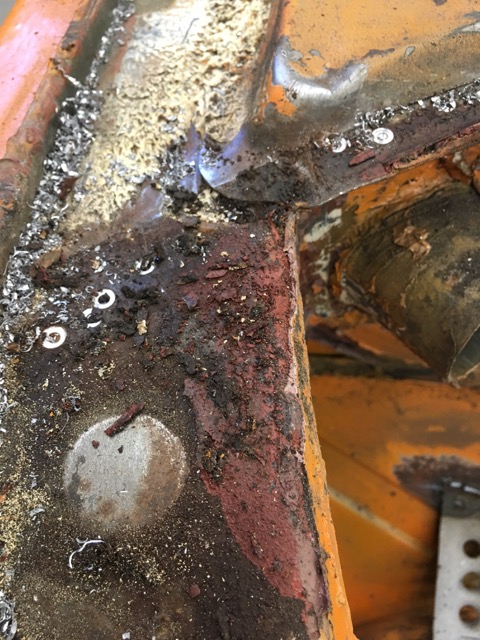 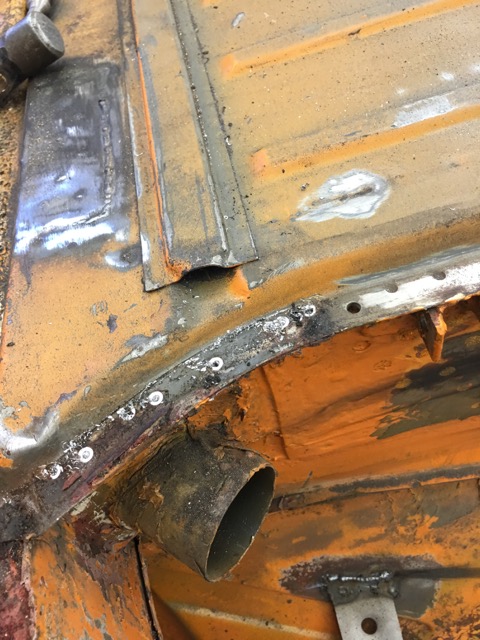 Work on getting that cleaned up and I might have to take off the driverside now. Other items in the progress. Chris now has my parts to work his magic with. I got some Picklex 20 in as the humid Ohio air has caused some flash rust on my shock towers. Give it a try as I can weld through it, stops rust, removes flash rust. It slices, dices and julians fries also. LED backup lights came in from Jerry Still looking for a piece of trunk sheetmetal to fill my hole, and maybe just maybe I will be done with the rear trunk. Never (IMG:style_emoticons/default/dry.gif) |
|
|
|
| Amenson |
Jun 30 2016, 01:20 PM
Post
#218
|
|
That's opposite lock!! Group: Members Posts: 645 Joined: 27-May 05 From: Dublin, OH Member No.: 4,154 Region Association: None |
No parts made with your new welder?
|
|
|
|
| Chris H. |
Jun 30 2016, 05:56 PM
Post
#219
|
|
Senior Member Group: Members Posts: 4,071 Joined: 2-January 03 From: Chicago 'burbs Member No.: 73 Region Association: Upper MidWest |
He's probably welded up a whole new chassis by now (IMG:style_emoticons/default/av-943.gif) .
|
|
|
|
| trojanhorsepower |
Jul 2 2016, 05:36 PM
Post
#220
|
|
Senior Member Group: Members Posts: 1,029 Joined: 21-September 03 From: Marion, NC Member No.: 1,179 Region Association: None |
June was a low productivity month for me as well. Still having trouble getting all the seams to line up. So far no matter what I do I can not get the trunk to line up right.
Unexpected surprises: The difficulty of lining all this stuff up at once. Vendors: None... DougL help me some more, but I still have not started welding... I would drive this car off a cliff...... if it could get to a cliff. 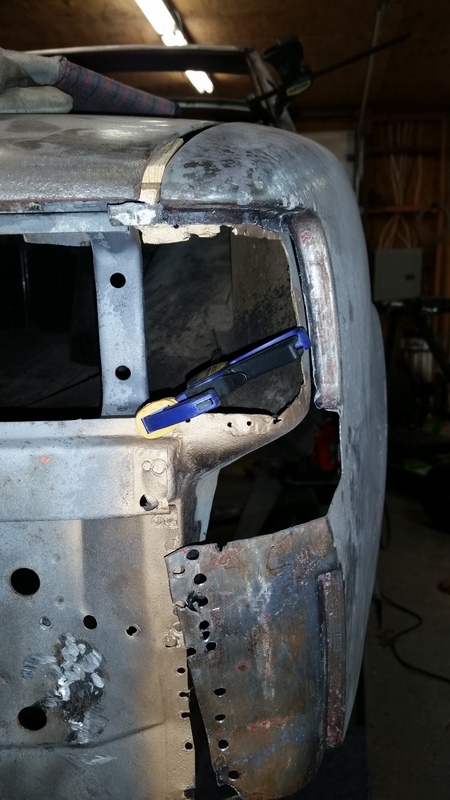 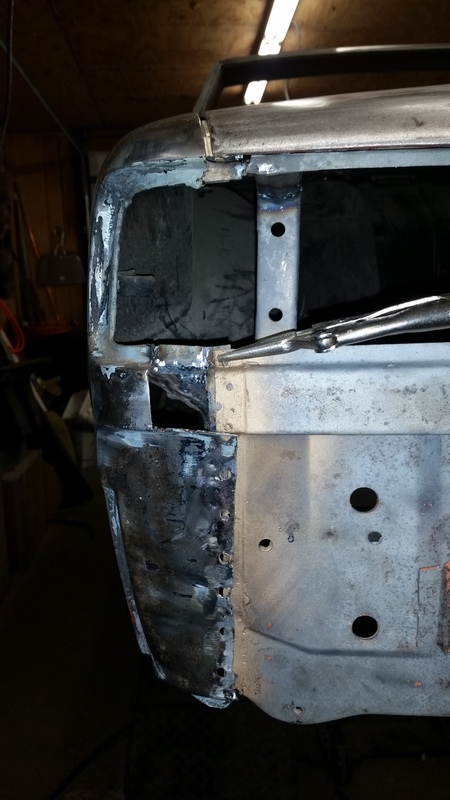 |
|
|
|
|
1 User(s) are reading this topic (1 Guests and 0 Anonymous Users)
0 Members:

|
Lo-Fi Version | Time is now: 24th January 2026 - 07:59 AM |
Invision Power Board
v9.1.4 © 2026 IPS, Inc.