|
|
|
Porsche, and the Porsche crest are registered trademarks of Dr. Ing. h.c. F. Porsche AG.
This site is not affiliated with Porsche in any way. Its only purpose is to provide an online forum for car enthusiasts. All other trademarks are property of their respective owners. |
|
|

  |

| 76-914 |
 Nov 14 2023, 10:59 AM Nov 14 2023, 10:59 AM
Post
#161
|
|
Repeat Offender & Resident Subaru Antagonist  Group: Members Posts: 13,908 Joined: 23-January 09 From: Temecula, CA Member No.: 9,964 Region Association: Southern California |
|
   |

 
|
| ThinAir |
Nov 15 2023, 02:37 PM
Post
#162
|
|
Best friends Group: Members Posts: 2,575 Joined: 4-February 03 From: Flagstaff, AZ Member No.: 231 Region Association: Southwest Region |
It's amazing to see the magic that you work!
|
|
|
|
| rick 918-S |
Dec 24 2023, 09:34 AM
Post
#163
|
|
Hey nice rack! -Celette Group: Members Posts: 21,295 Joined: 30-December 02 From: Now in Superior WI Member No.: 43 Region Association: Northstar Region |
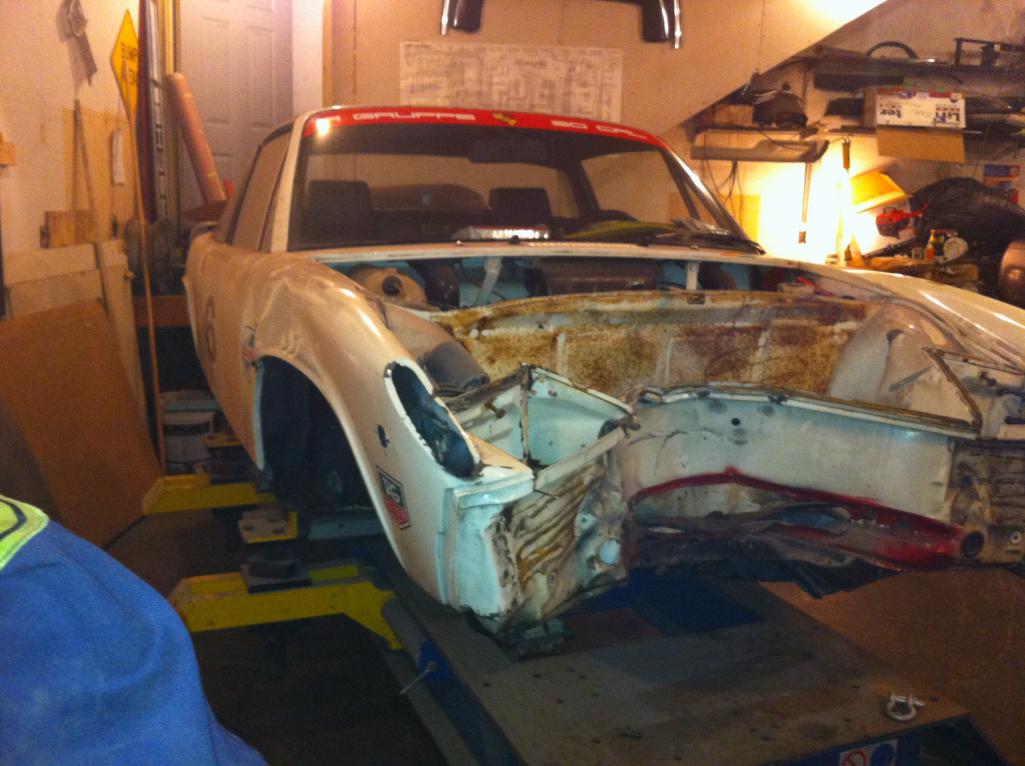
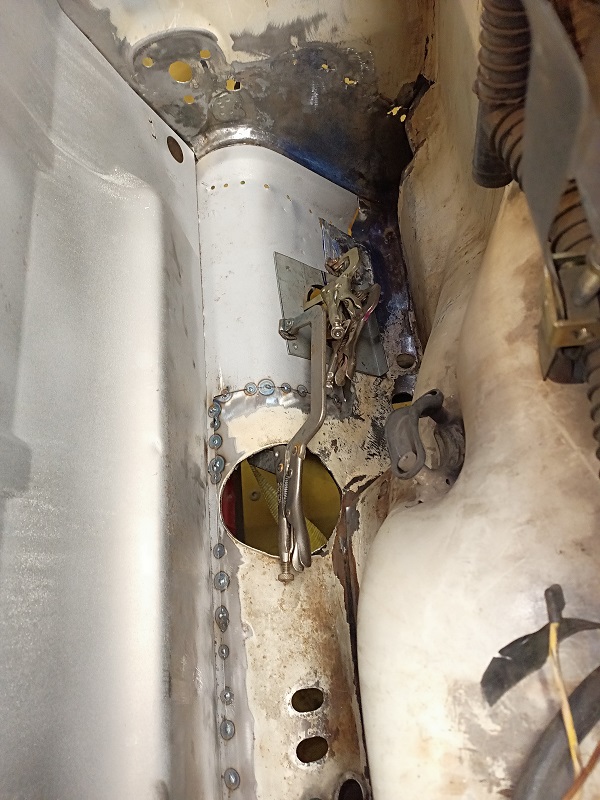
It has been a few minutes since I updated this repair. I have an NOS right fender but decided to see if I could save the factory part. As I dug into it I discovered it had been hit, drilled full of holes and bondo'd. Besides be crushed for the last accident there was alot of prior damage. I spent a few hours on it and it is strting to come around. I think I will just keep at it as I work out the inner panels and see where it leads.
  I also discovered this front suspension mount. This was the left side forward of the rack. 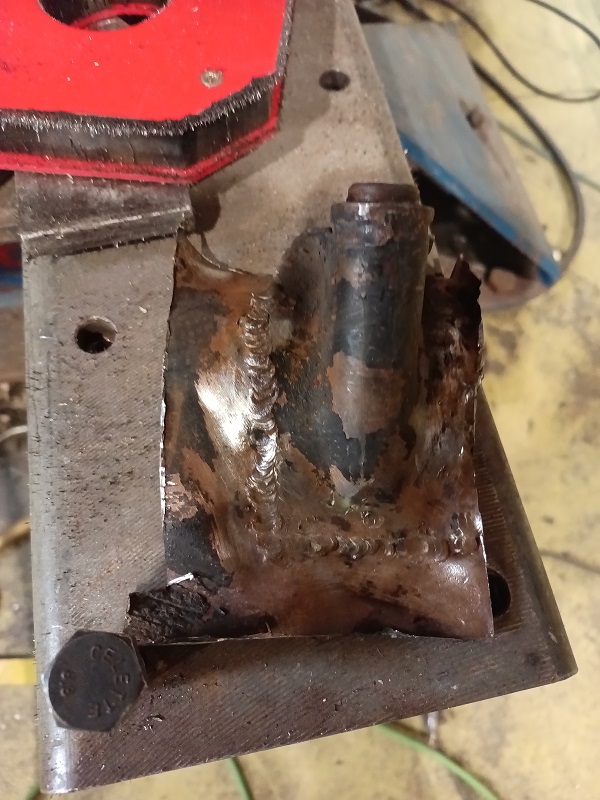 |
|
|
|
| Root_Werks |
Dec 29 2023, 11:42 AM
Post
#164
|
|
Village Idiot Group: Members Posts: 9,020 Joined: 25-May 04 From: About 15NM from Canada Member No.: 2,105 Region Association: Pacific Northwest |
Seems like keeping as much of the original metal as possible lends to the value of the finished product.
Looking good, it's come a long way! |
 |
|
| rick 918-S |
Dec 30 2023, 11:20 PM
Post
#165
|
|
Hey nice rack! -Celette Group: Members Posts: 21,295 Joined: 30-December 02 From: Now in Superior WI Member No.: 43 Region Association: Northstar Region |
started trimming the clip to line up with the fixtures.
 I made this circle fixture for Juergen's car when I sectioned on the right side floor pan. 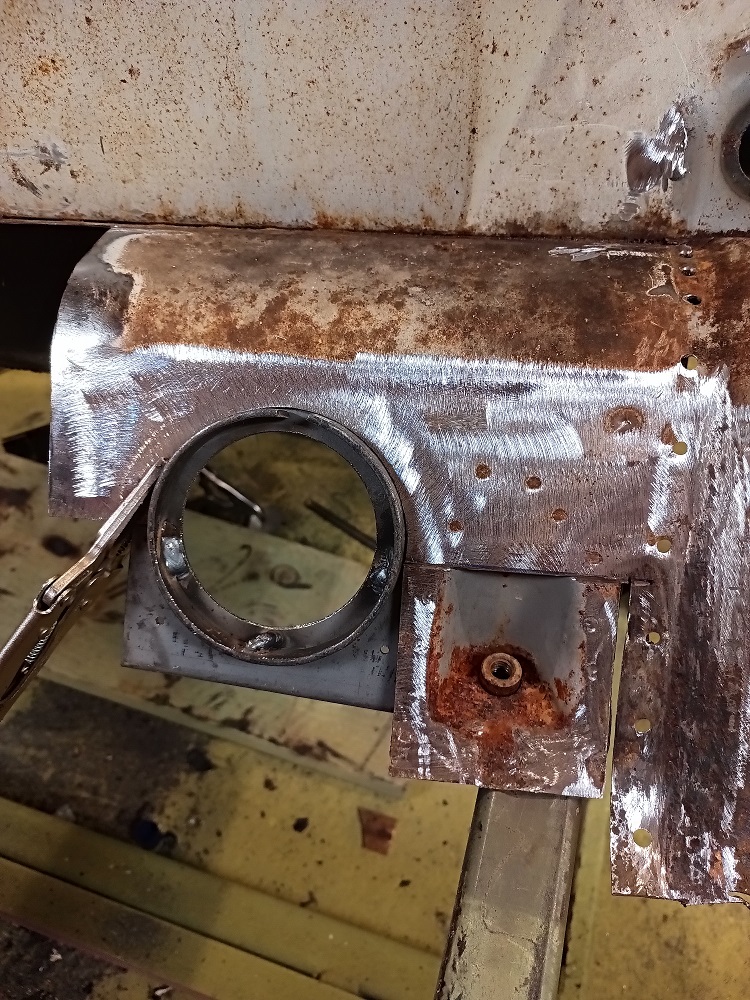 I stripped the floor pan section I am saving and trimmed a mount as an alignment point so i know when I set the floor pan back the mount will line up with the fixture. 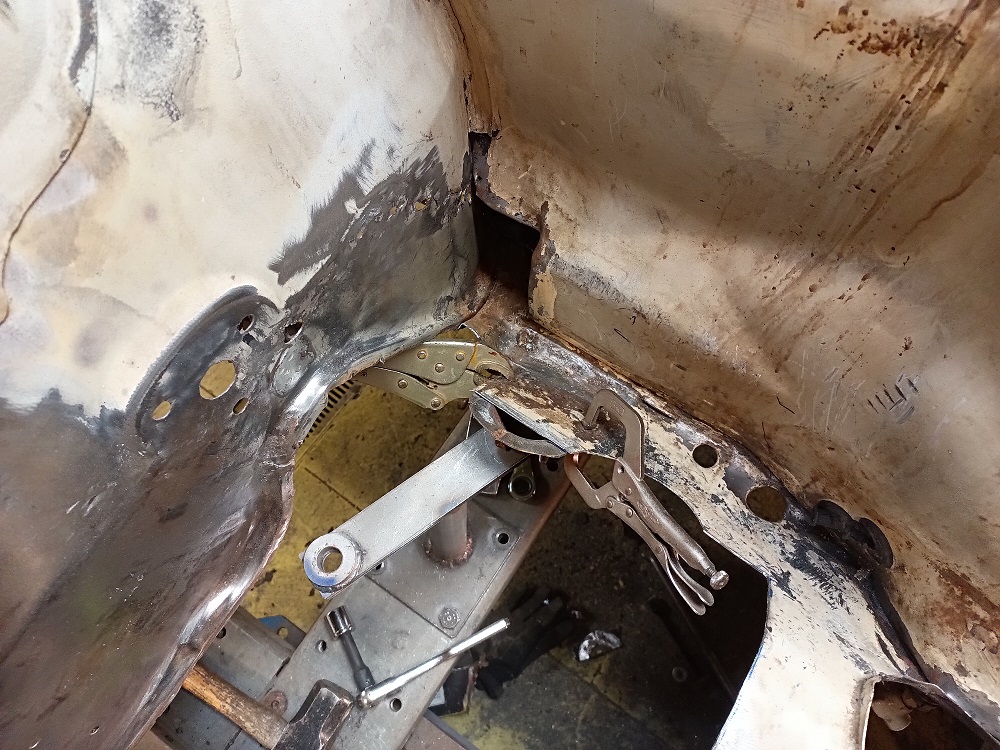 I finished up the left wheelhouse with the planisher and knocked the horizontal crease back in the panel. 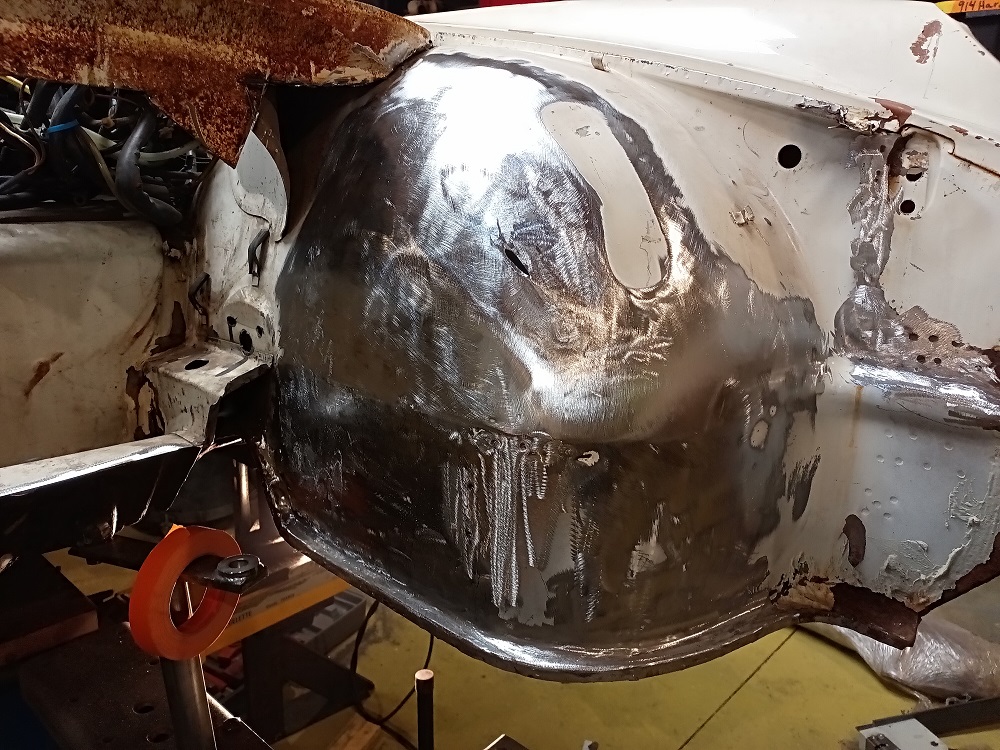 |
|
|
|
| 76-914 |
Dec 31 2023, 07:14 AM
Post
#166
|
|
Repeat Offender & Resident Subaru Antagonist Group: Members Posts: 13,908 Joined: 23-January 09 From: Temecula, CA Member No.: 9,964 Region Association: Southern California |
Amazing work as always Rick. The first time that I noticed that crease I thought it was from a collision. (IMG:style_emoticons/default/av-943.gif)
|
|
|
|
| rhodyguy |
Dec 31 2023, 02:34 PM
Post
#167
|
|
Chimp Sanctuary NW. Check it out. Group: Members Posts: 22,252 Joined: 2-March 03 From: Orion's Bell. The BELL! Member No.: 378 Region Association: Galt's Gulch |
Super stuff Rick. The dr side hole/mount for the anti-sway bar picture pretty much settles that debate.
|
|
|
|
| flyer86d |
Dec 31 2023, 03:05 PM
Post
#168
|
|
Member Group: Members Posts: 485 Joined: 12-January 11 From: Corea, Maine Member No.: 12,585 Region Association: North East States |
Nicely done and you are very brave!
Charlie Happy New Year! |
|
|
|
| rick 918-S |
Jan 1 2024, 06:56 AM
Post
#169
|
|
Hey nice rack! -Celette Group: Members Posts: 21,295 Joined: 30-December 02 From: Now in Superior WI Member No.: 43 Region Association: Northstar Region |
I purchased a floor pan from Restoration Design. I am not going to end up using it but thought as long as I have it in the shop I would see how the inner panels are linning up.
 |
|
|
|
| rick 918-S |
Jan 3 2024, 08:11 AM
Post
#170
|
|
Hey nice rack! -Celette Group: Members Posts: 21,295 Joined: 30-December 02 From: Now in Superior WI Member No.: 43 Region Association: Northstar Region |
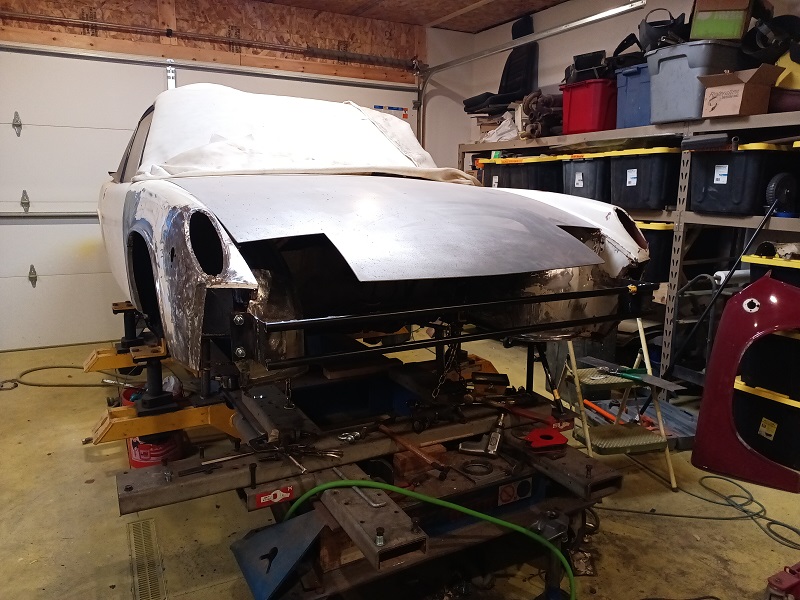
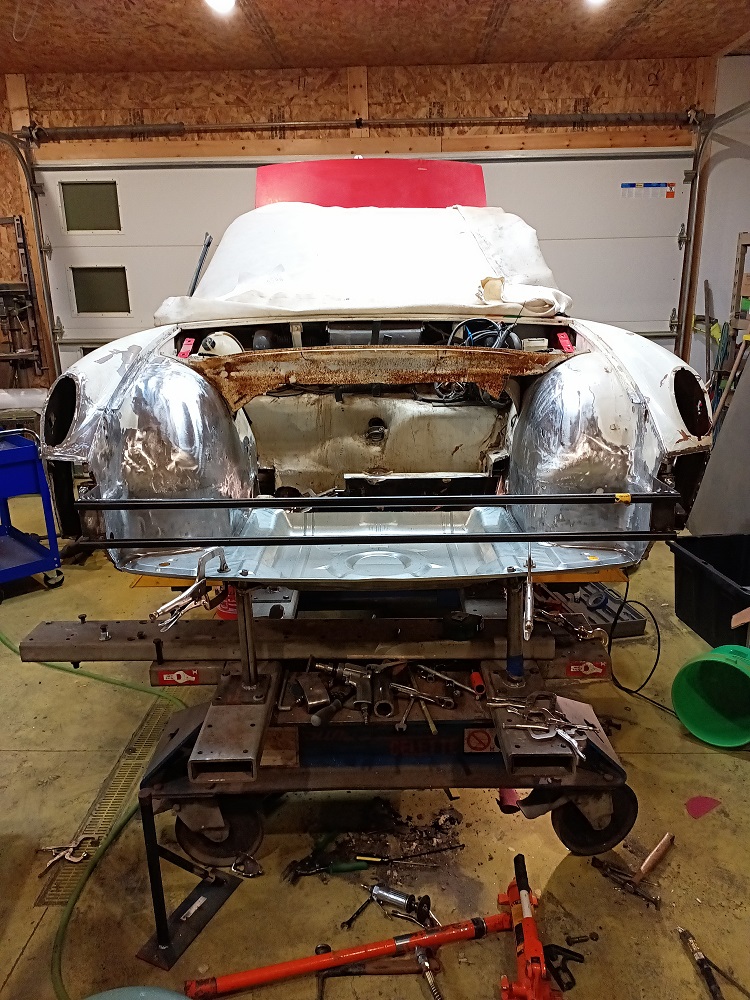
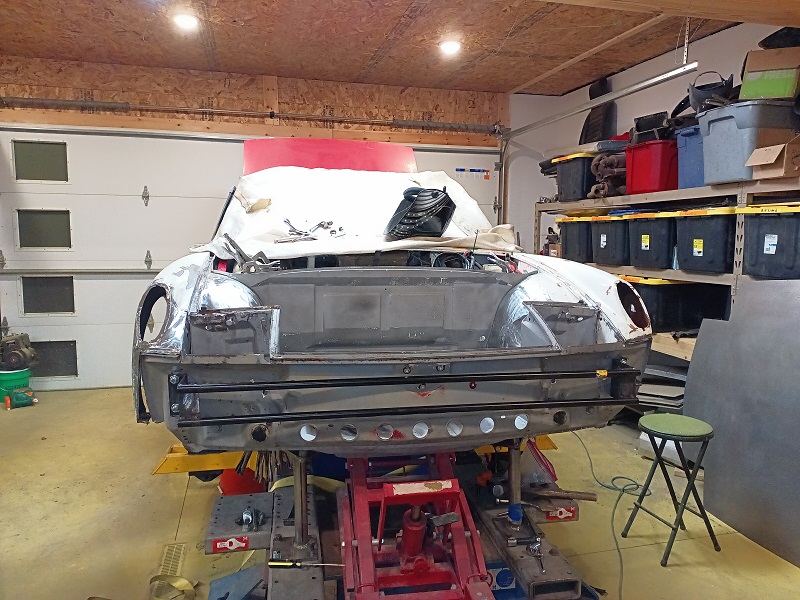
Slow Progress but the inner wheelhouses are lining up with the floor pan. That is an important step. The fenders are starting to come back in line. This may not look like much but from where these were to where they are is a considerable correction.
  |
|
|
|
| Mikey914 |
Jan 3 2024, 01:57 PM
Post
#171
|
|
The rubber man Group: Members Posts: 12,782 Joined: 27-December 04 From: Hillsboro, OR Member No.: 3,348 Region Association: None |
I remember seeing that. I formidable project, but sure you can handle it. (IMG:style_emoticons/default/beerchug.gif)
|
|
|
|
| rick 918-S |
Jan 3 2024, 11:55 PM
Post
#172
|
|
Hey nice rack! -Celette Group: Members Posts: 21,295 Joined: 30-December 02 From: Now in Superior WI Member No.: 43 Region Association: Northstar Region |
Progress The donor part is trimmed
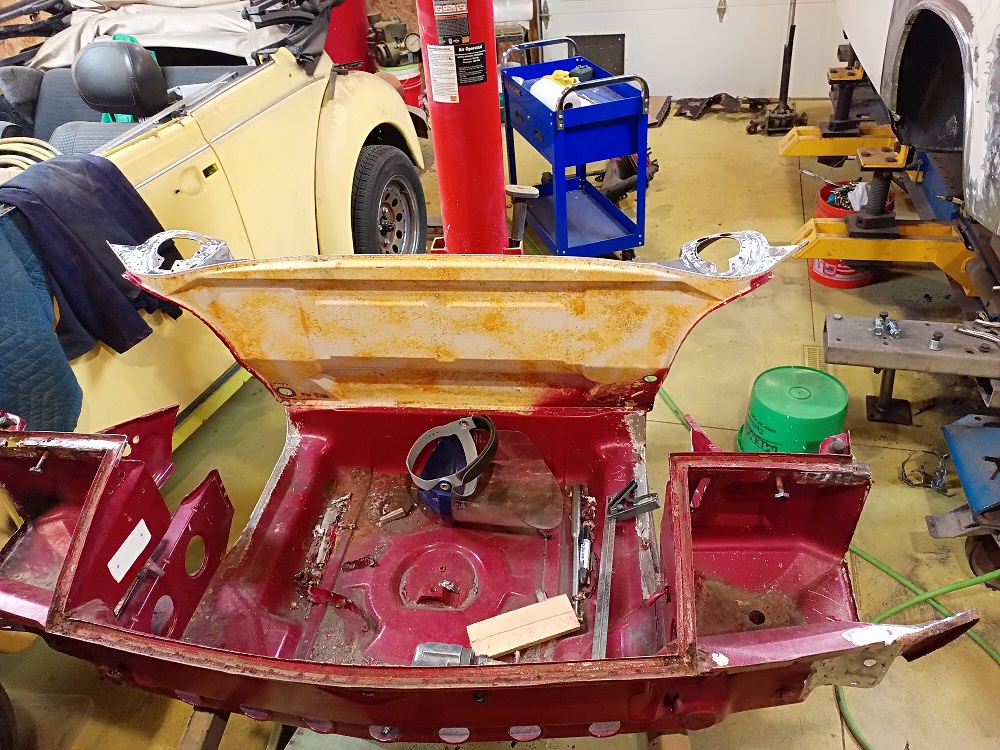 The car is trimmed 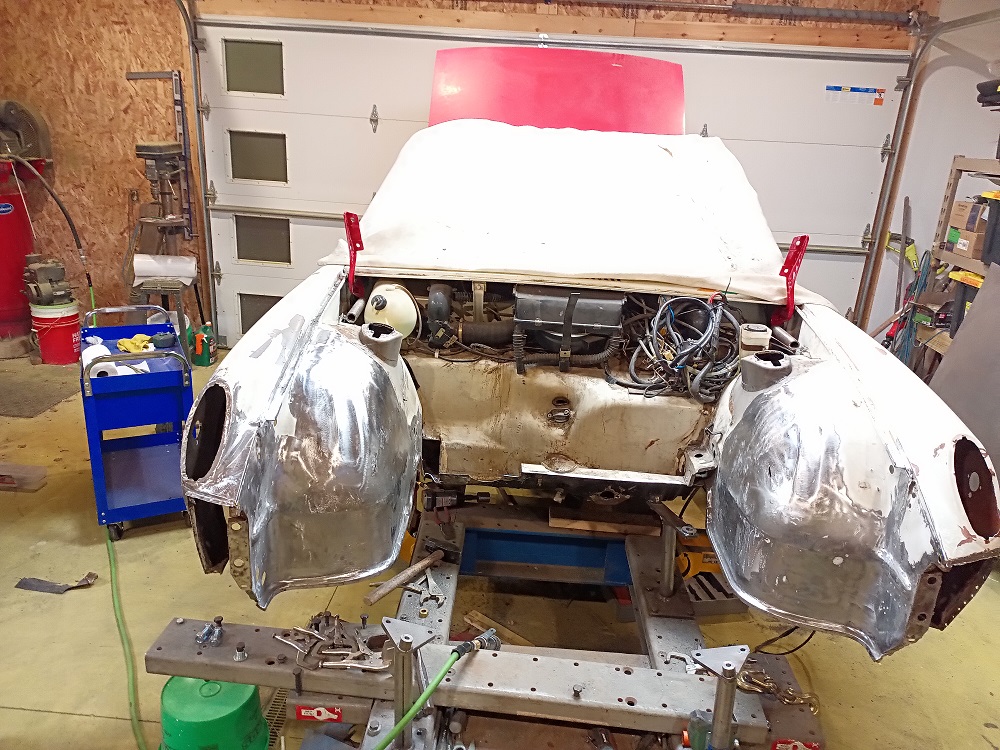 And this is the first test fit 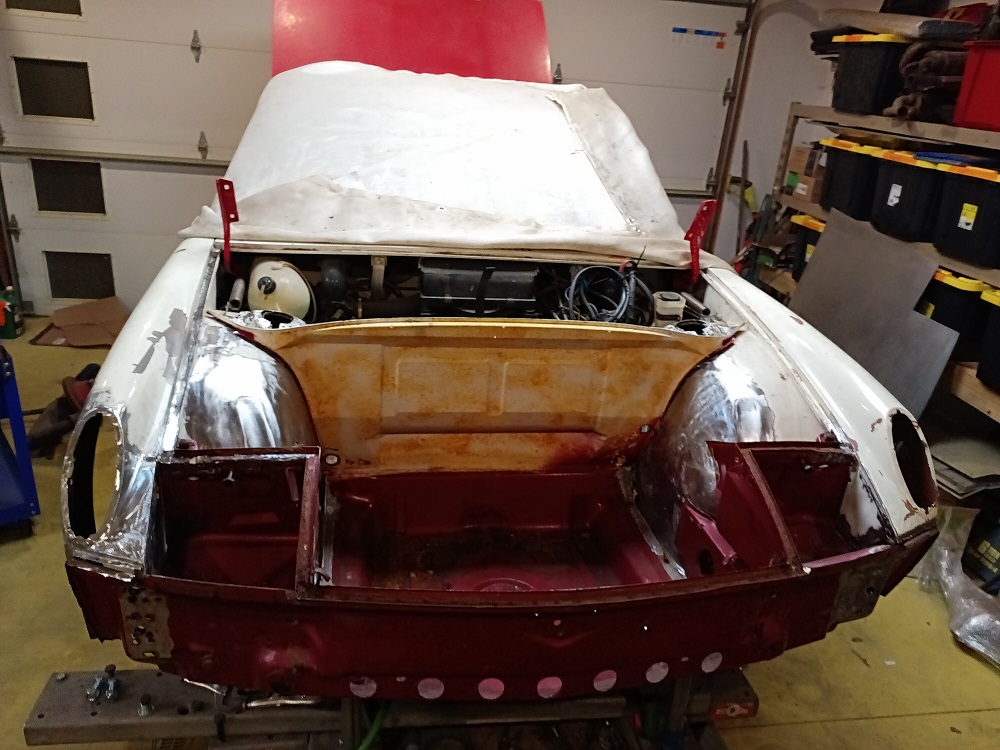 Still some final fitting to do. Then sandblast and epoxy before welding it up. once the platform is stable I can complete the metal finishing on the upper body. |
|
|
|
| infraredcalvin |
Jan 4 2024, 12:21 AM
Post
#173
|
|
Distracted Member Group: Members Posts: 1,754 Joined: 25-August 08 From: Ladera Ranch, CA Member No.: 9,463 Region Association: Southern California |
Wow, that is staring to look like you’re in the home stretch… doesn't look like any damage telegraphed to the mid/rear of the chassis. Fascinated with your progress!!!
|
|
|
|
| rick 918-S |
Feb 1 2024, 10:05 PM
Post
#174
|
|
Hey nice rack! -Celette Group: Members Posts: 21,295 Joined: 30-December 02 From: Now in Superior WI Member No.: 43 Region Association: Northstar Region |
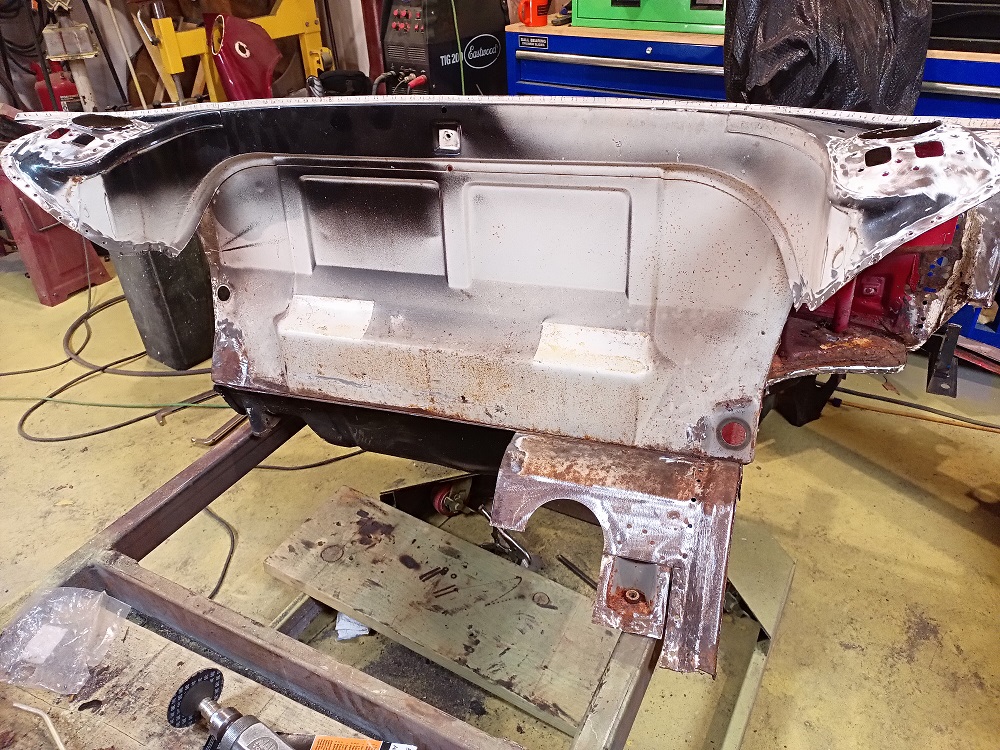
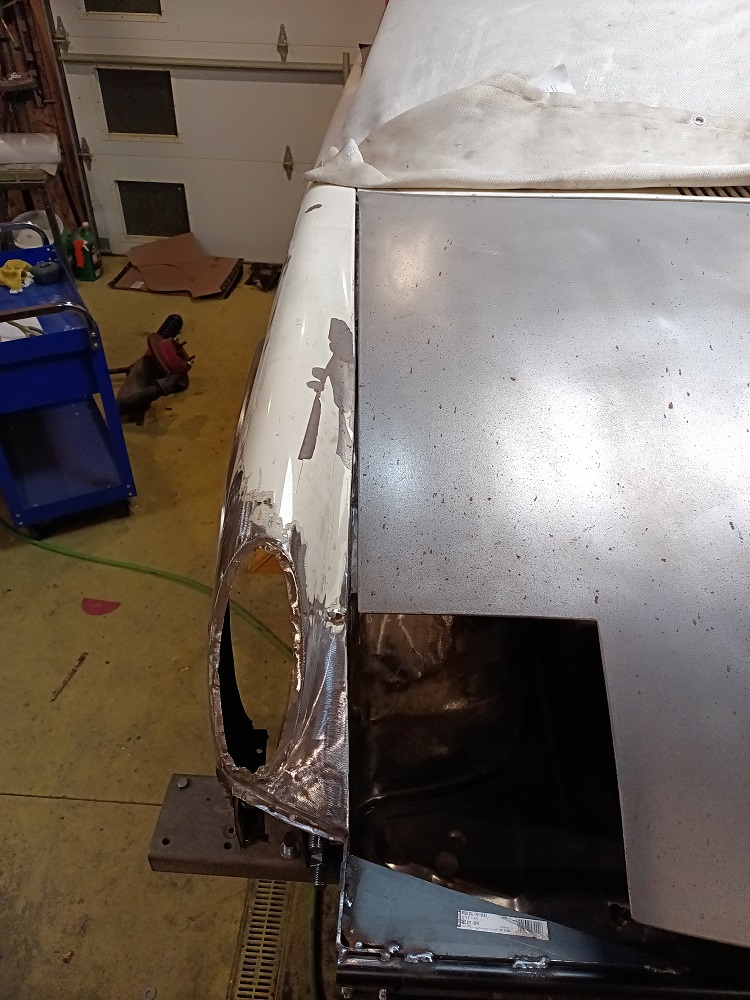
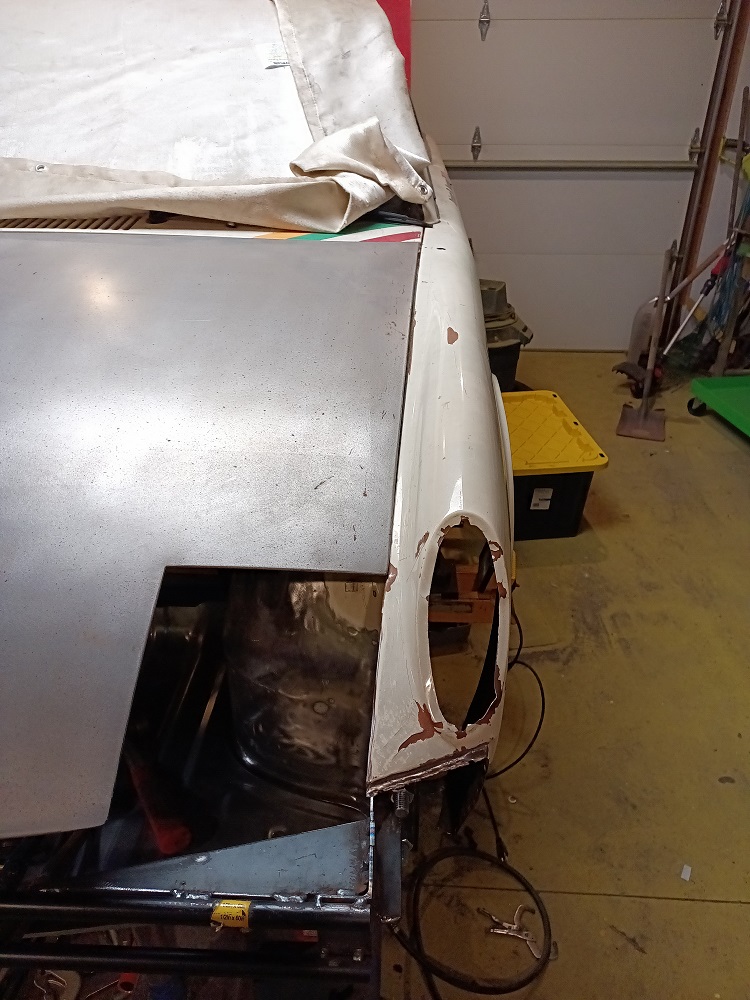
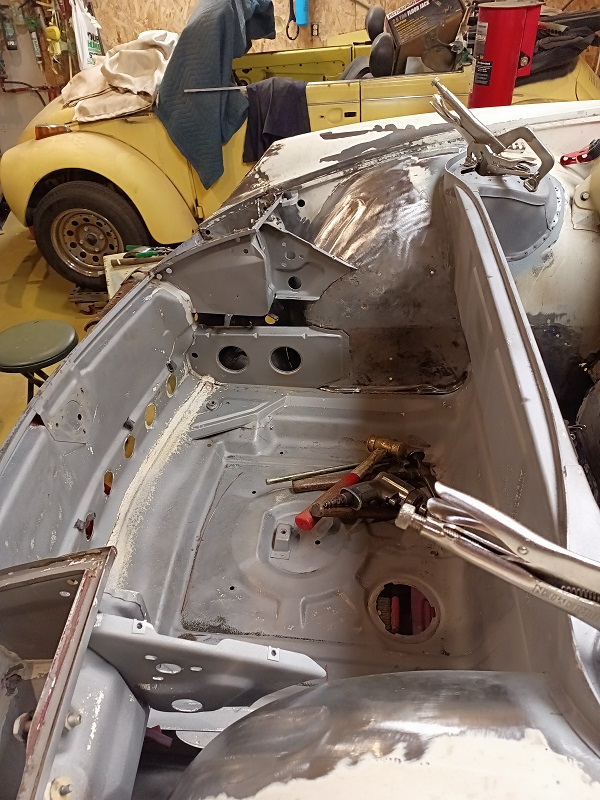
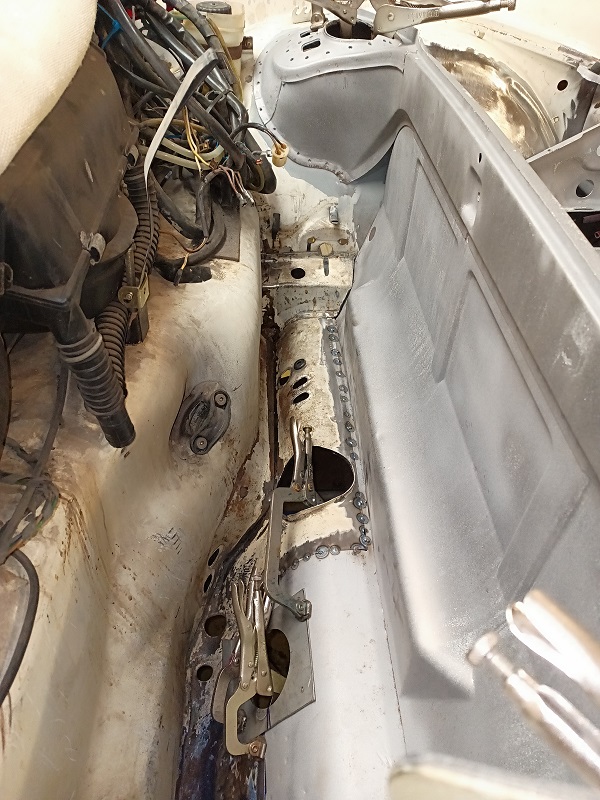
Starting to fit. I plan to tig weld the butts. Here is are some photos of the seams starting to line up tight. It is hard to see but there is a seam just behind the bulkhead.
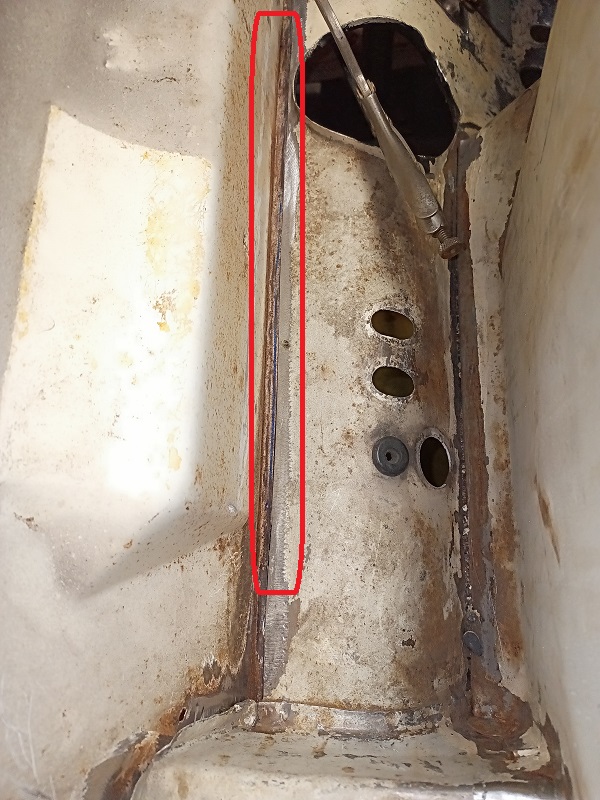 I split the hole and made a fixture to align it when the section comes back together. 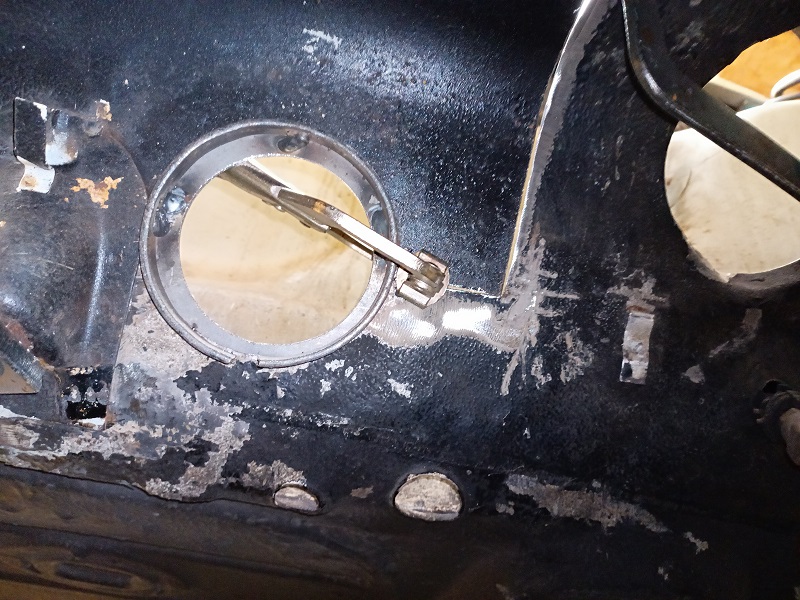 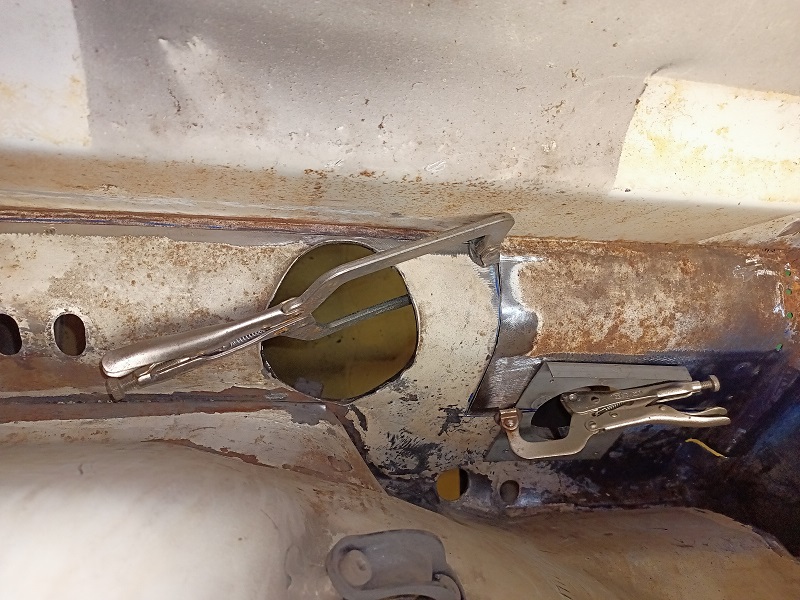 Left side hood gap is starting to line up.  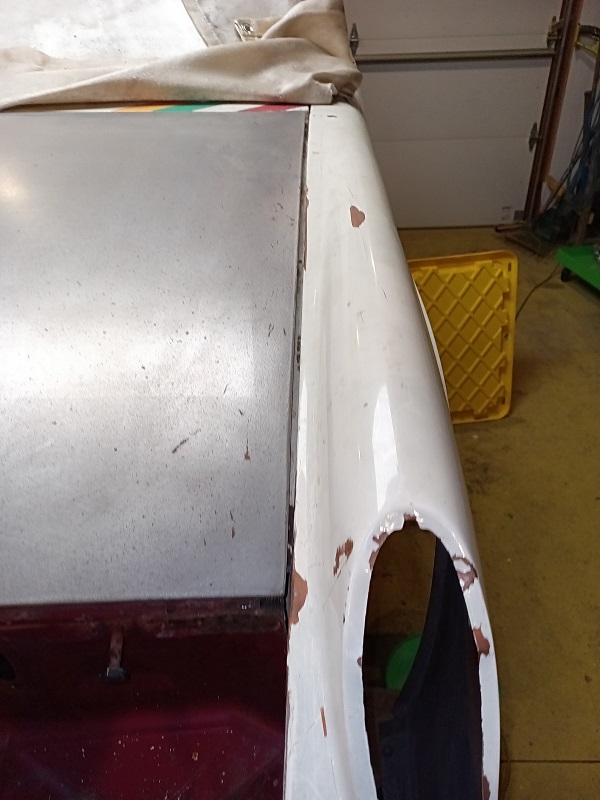 |
|
|
|
| East coaster |
Feb 2 2024, 06:35 AM
Post
#175
|
|
Senior Member Group: Members Posts: 1,942 Joined: 28-March 03 From: Millville, NJ Member No.: 487 Region Association: None |
Amazing work…….and a lesson in patience!
|
|
|
|
| DRPHIL914 |
Feb 2 2024, 09:58 AM
Post
#176
|
|
Dr. Phil Group: Members Posts: 5,950 Joined: 9-December 09 From: Kennesaw, GA Member No.: 11,106 Region Association: South East States |
QUOTE(rick 918-S @ Feb 1 2024, 11:05 PM)  Starting to fit. I plan to tig weld the butts. Here is are some photos of the seams starting to line up tight. It is hard to see but there is a seam just behind the bulkhead. I split the hole and made a fixture to align it when the section comes back together. Left side hood gap is starting to line up. exciting transformation! was it easier to just use that whole front clip rather than the Restoration Design part for the front frunk floor etc? Phil |
|
|
|
| rick 918-S |
Feb 2 2024, 10:26 AM
Post
#177
|
|
Hey nice rack! -Celette Group: Members Posts: 21,295 Joined: 30-December 02 From: Now in Superior WI Member No.: 43 Region Association: Northstar Region |
QUOTE(DRPHIL914 @ Feb 2 2024, 09:58 AM) QUOTE(rick 918-S @ Feb 1 2024, 11:05 PM) Starting to fit. I plan to tig weld the butts. Here is are some photos of the seams starting to line up tight. It is hard to see but there is a seam just behind the bulkhead. I split the hole and made a fixture to align it when the section comes back together. Left side hood gap is starting to line up. exciting transformation! was it easier to just use that whole front clip rather than the Restoration Design part for the front frunk floor etc? Phil The damage was too far into the car. The floor section wasn't long enough. I have been using it just to check the wheelhouse fit along the frunk floor though. |
|
|
|
| rick 918-S |
Feb 2 2024, 10:27 AM
Post
#178
|
|
Hey nice rack! -Celette Group: Members Posts: 21,295 Joined: 30-December 02 From: Now in Superior WI Member No.: 43 Region Association: Northstar Region |
QUOTE(DRPHIL914 @ Feb 2 2024, 09:58 AM) QUOTE(rick 918-S @ Feb 1 2024, 11:05 PM) Starting to fit. I plan to tig weld the butts. Here is are some photos of the seams starting to line up tight. It is hard to see but there is a seam just behind the bulkhead. I split the hole and made a fixture to align it when the section comes back together. Left side hood gap is starting to line up. exciting transformation! was it easier to just use that whole front clip rather than the Restoration Design part for the front frunk floor etc? Phil The damage was too far into the car. The floor section wasn't long enough. I have been using it just to check the wheelhouse fit along the frunk floor though. |
|
|
|
| Montreal914 |
Feb 2 2024, 10:32 AM
Post
#179
|
|
Advanced Member Group: Members Posts: 2,160 Joined: 8-August 10 From: Claremont, CA Member No.: 12,023 Region Association: Southern California |
Pure art! (IMG:style_emoticons/default/pray.gif)
|
|
|
|
| rick 918-S |
Feb 16 2024, 06:00 AM
Post
#180
|
|
Hey nice rack! -Celette Group: Members Posts: 21,295 Joined: 30-December 02 From: Now in Superior WI Member No.: 43 Region Association: Northstar Region |
I sand blasted the replacement section and started the welding process.
     |
|
|
|
|
1 User(s) are reading this topic (1 Guests and 0 Anonymous Users)
0 Members:

|
Lo-Fi Version | Time is now: 1st July 2026 - 11:04 AM |
Invision Power Board
v9.1.4 © 2026 IPS, Inc.