|
|
|
Porsche, and the Porsche crest are registered trademarks of Dr. Ing. h.c. F. Porsche AG.
This site is not affiliated with Porsche in any way. Its only purpose is to provide an online forum for car enthusiasts. All other trademarks are property of their respective owners. |
|
|

  |

| trojanhorsepower |
 Apr 22 2014, 06:51 PM Apr 22 2014, 06:51 PM
Post
#41
|
|
Senior Member  Group: Members Posts: 1,031 Joined: 21-September 03 From: Marion, NC Member No.: 1,179 Region Association: None |
Ok, the curvy part is probably rotted out on most cars that one would cut up. This is my solution. Not elegant, but it works.
I am glad this is done. Attached image(s) 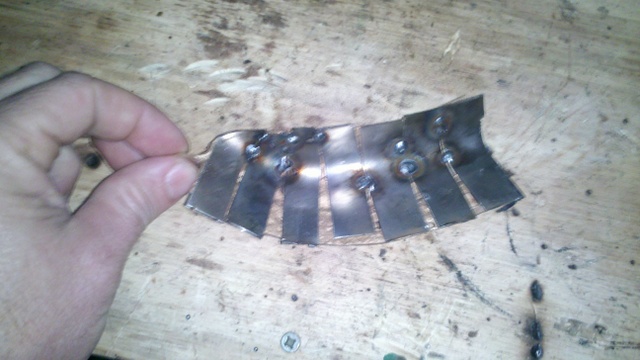 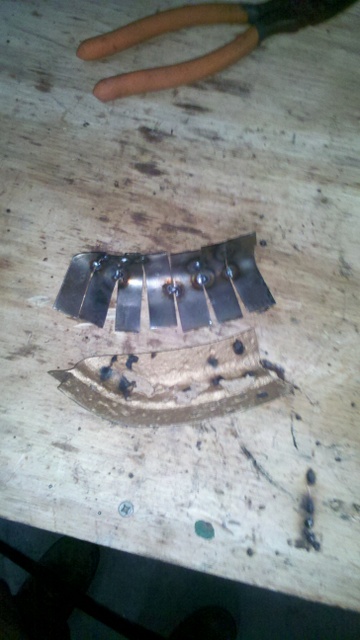 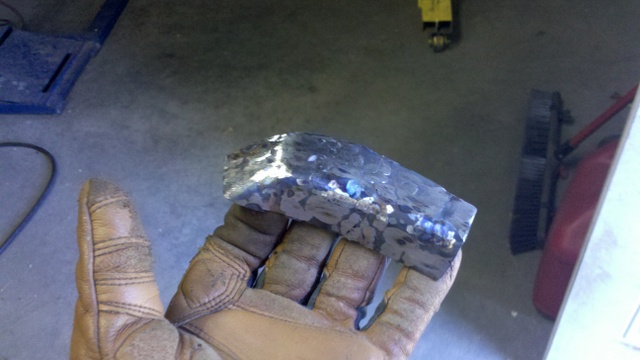 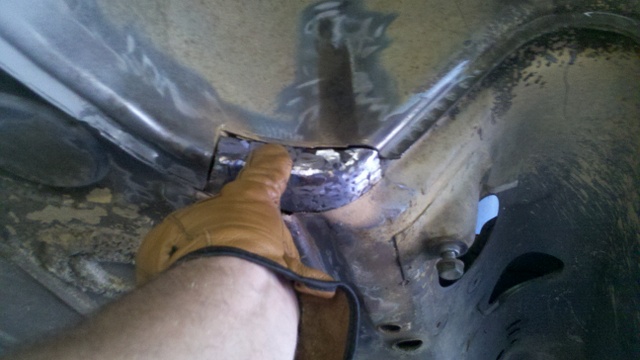 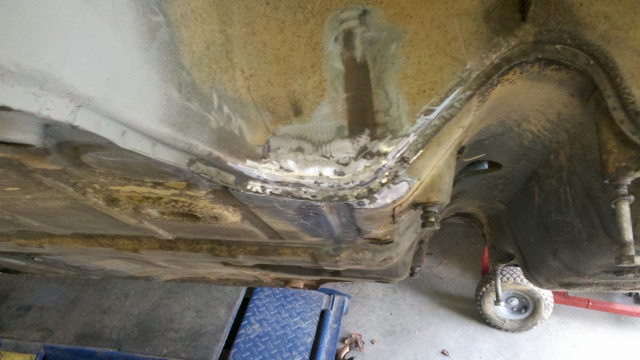 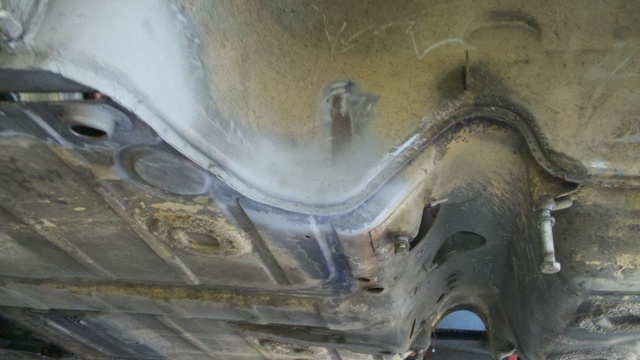
|
   |

 
|
| dlee6204 |
Apr 22 2014, 06:55 PM
Post
#42
|
|
Howdy Group: Members Posts: 2,162 Joined: 30-April 06 From: Burnsville, NC Member No.: 5,956 |
Looks good!
|
|
|
|
| poorsche914 |
Apr 22 2014, 07:29 PM
Post
#43
|
|
9fourteen Group: Members Posts: 3,151 Joined: 28-May 09 From: Smoky Mountains Member No.: 10,419 Region Association: South East States |
|
|
|
|
| trojanhorsepower |
Jun 26 2014, 07:20 PM
Post
#44
|
|
Senior Member Group: Members Posts: 1,031 Joined: 21-September 03 From: Marion, NC Member No.: 1,179 Region Association: None |
Well with the honeybee season in full swing work has slowed down a little. I have however been chipping away at it. Slowly seeming up the long.
 |
|
|
|
| trojanhorsepower |
Jun 26 2014, 07:21 PM
Post
#45
|
|
Senior Member Group: Members Posts: 1,031 Joined: 21-September 03 From: Marion, NC Member No.: 1,179 Region Association: None |
I also worked on the engine mount. I still need to blast and prime it, but the metal work looks OK.
Attached image(s) 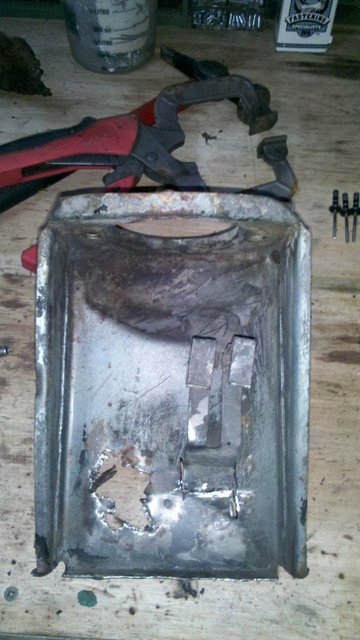 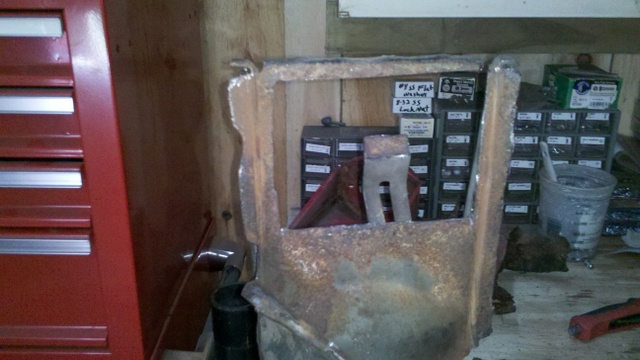 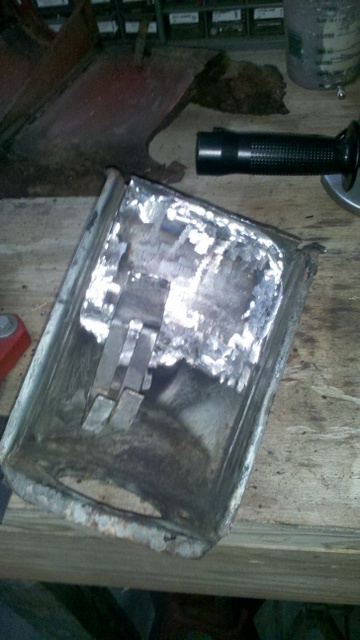
|
|
|
|
| trojanhorsepower |
Sep 19 2014, 03:13 PM
Post
#46
|
|
Senior Member Group: Members Posts: 1,031 Joined: 21-September 03 From: Marion, NC Member No.: 1,179 Region Association: None |
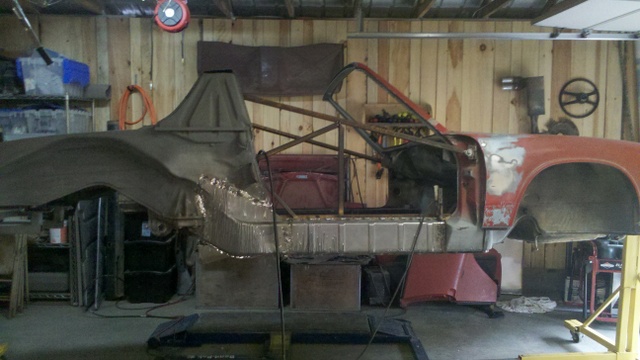
Bee work and other projects have slowed the car work down, but not all the work is unrelated. I finally got a shed roof built off my shop.
Attached image(s) 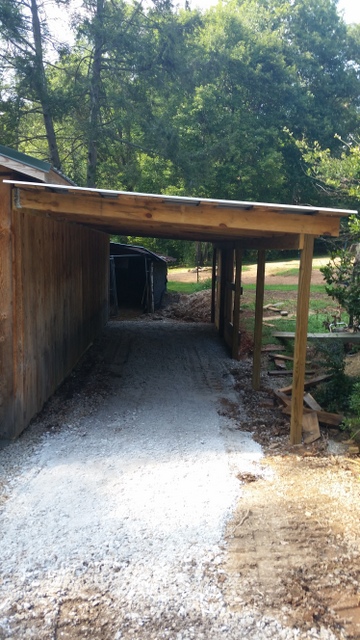
|
|
|
|
| trojanhorsepower |
Sep 19 2014, 03:14 PM
Post
#47
|
|
Senior Member Group: Members Posts: 1,031 Joined: 21-September 03 From: Marion, NC Member No.: 1,179 Region Association: None |
Once the shed was done I could move my giant stack of lumber out of the shop, which gave me this!
Attached image(s) 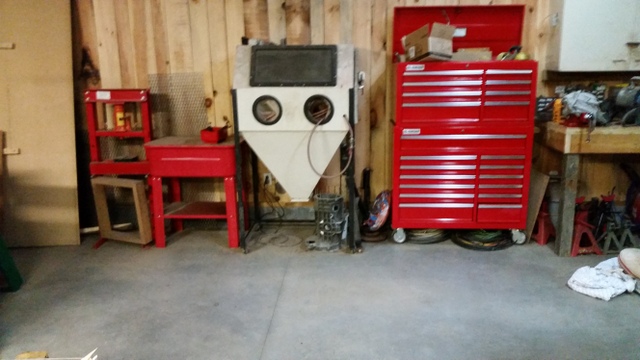
|
|
|
|
| trojanhorsepower |
Sep 19 2014, 03:16 PM
Post
#48
|
|
Senior Member Group: Members Posts: 1,031 Joined: 21-September 03 From: Marion, NC Member No.: 1,179 Region Association: None |
So now I can get back to work. With newly gained access to the bead blaster I was able to finish my engine mount.
Attached image(s) 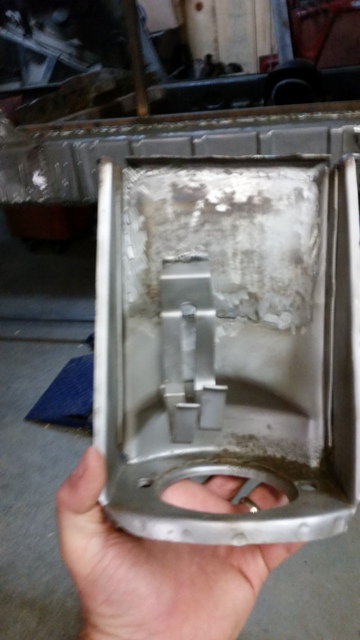 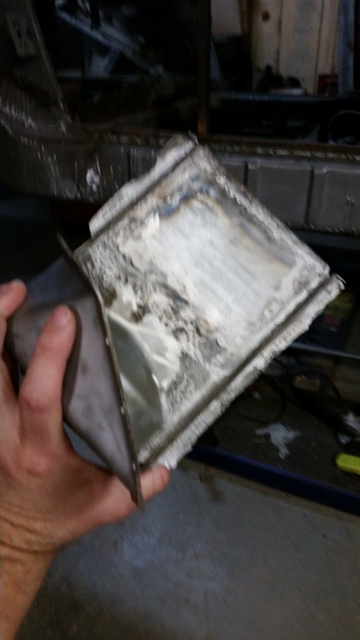 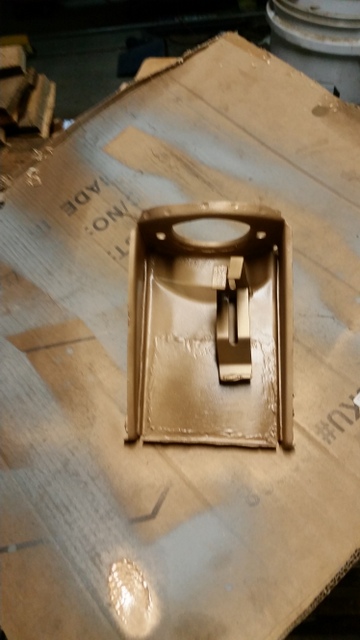
|
|
|
|
| trojanhorsepower |
Oct 3 2014, 04:45 PM
Post
#49
|
|
Senior Member Group: Members Posts: 1,031 Joined: 21-September 03 From: Marion, NC Member No.: 1,179 Region Association: None |
I may have accidentally gotten the engine mount in the right place! Still triple checking the numbers, before I weld it in.
Attached image(s) 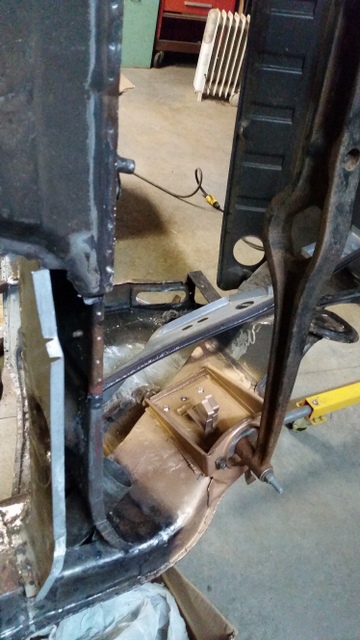
|
|
|
|
| dlee6204 |
Oct 3 2014, 04:52 PM
Post
#50
|
|
Howdy Group: Members Posts: 2,162 Joined: 30-April 06 From: Burnsville, NC Member No.: 5,956 |
Good timing on the update... Was just about to text you.
|
|
|
|
| trojanhorsepower |
Oct 3 2014, 04:55 PM
Post
#51
|
|
Senior Member Group: Members Posts: 1,031 Joined: 21-September 03 From: Marion, NC Member No.: 1,179 Region Association: None |
Great! Any recommendations on placement? Also is there anything rubber between the mount and the bar? It looks like just metal on metal, but I can't really tell.
|
|
|
|
| dlee6204 |
Oct 3 2014, 05:11 PM
Post
#52
|
|
Howdy Group: Members Posts: 2,162 Joined: 30-April 06 From: Burnsville, NC Member No.: 5,956 |
Metal on metal. Only early cars had rubber outboard mounts.
|
|
|
|
| trojanhorsepower |
Oct 10 2014, 02:19 PM
Post
#53
|
|
Senior Member Group: Members Posts: 1,031 Joined: 21-September 03 From: Marion, NC Member No.: 1,179 Region Association: None |
I have been patching the front floor pan, while I dither about the engine mount.
Attached image(s) 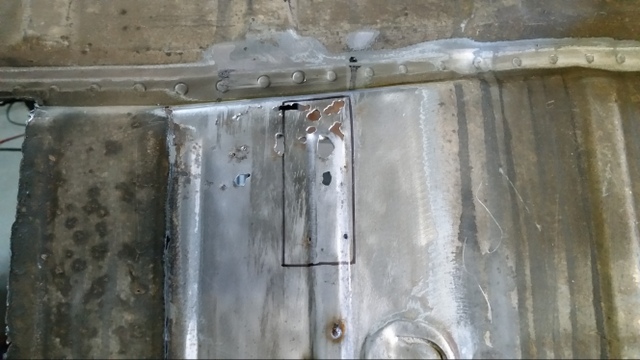 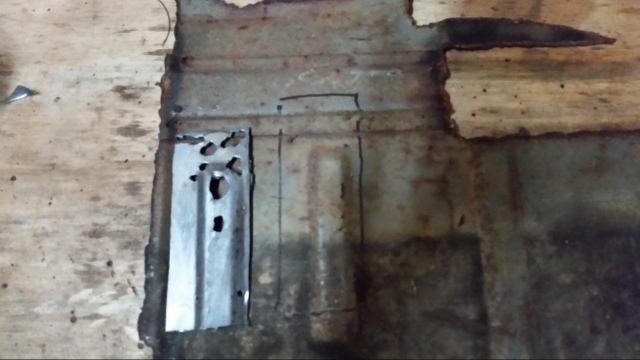 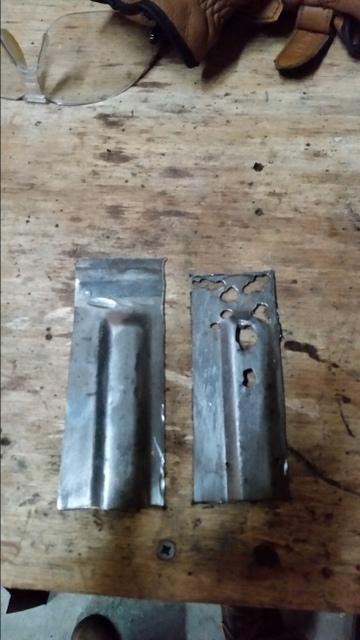 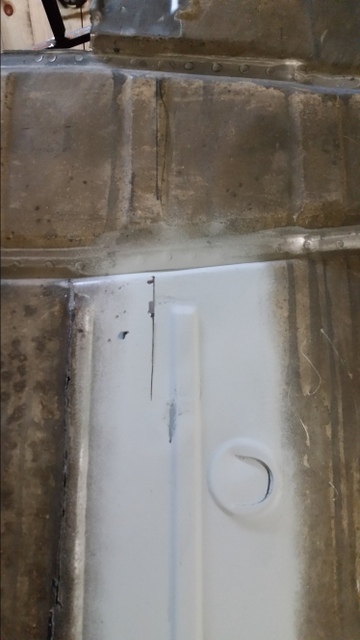
|
|
|
|
| FourBlades |
Oct 12 2014, 11:30 AM
Post
#54
|
|
From Wreck to Rockin Group: Members Posts: 2,056 Joined: 3-December 07 From: Brevard, FL Member No.: 8,414 Region Association: South East States |
You are making good progress. (IMG:style_emoticons/default/piratenanner.gif) Keep it going. (IMG:style_emoticons/default/beerchug.gif) Wait until you prime the whole car one color. Then it gets really exciting. John |
|
|
|
| trojanhorsepower |
Oct 13 2014, 07:07 PM
Post
#55
|
|
Senior Member Group: Members Posts: 1,031 Joined: 21-September 03 From: Marion, NC Member No.: 1,179 Region Association: None |
Thanks John,
I can only dream about the day it is one color. Any tips for locating the engine mount? Both mounts measure out to be the same distance from their corresponding trans mount. Are there any critical points I should check? |
|
|
|
| FourBlades |
Oct 13 2014, 07:22 PM
Post
#56
|
|
From Wreck to Rockin Group: Members Posts: 2,056 Joined: 3-December 07 From: Brevard, FL Member No.: 8,414 Region Association: South East States |
I replaced one of mine that was really rusted out. I think I measured off the firewall very carefully. I don't think the engine mounts are quite as critical to locate as the suspension mounting points. If you are within 1 cm it should be good enough. Your CV joints can move a lot more than that. I am sure the experts will chime in soon. (IMG:style_emoticons/default/popcorn[1].gif) John |
|
|
|
| trojanhorsepower |
Oct 15 2014, 02:10 PM
Post
#57
|
|
Senior Member Group: Members Posts: 1,031 Joined: 21-September 03 From: Marion, NC Member No.: 1,179 Region Association: None |
Thanks John,
Other experts please chime in..... I am not sure how to measure off the firewall after my repairs. Any other points to check? |
|
|
|
| FourBlades |
Oct 15 2014, 07:25 PM
Post
#58
|
|
From Wreck to Rockin Group: Members Posts: 2,056 Joined: 3-December 07 From: Brevard, FL Member No.: 8,414 Region Association: South East States |
Here is a picture after I replaced mine.
There is a flat part of the fire wall that you can't see in this picture that you can measure off of for the fore-and-aft location (red line). The top of the motor mount needs to be just below the engine tin on that side. You want to measure from the ground to the bottom of your existing one and duplicate that measurement so that it is not hanging lower or higher than the one on the other side (green line). I seem to remember that removing the old one left traces behind of where it had been that also helped to locate the new one. That may not work if you replaced that part of your long. 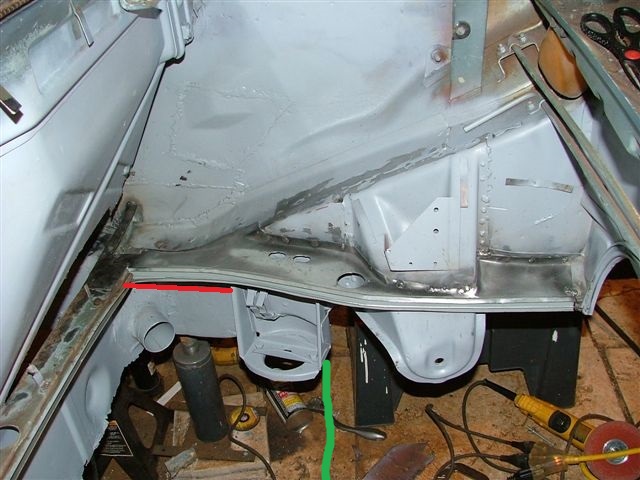 I think I also looked at the distance from the right edge of the motor mount to the suspension console as another landmark to check. Hope this helps. John |
|
|
|
| trojanhorsepower |
Oct 15 2014, 07:44 PM
Post
#59
|
|
Senior Member Group: Members Posts: 1,031 Joined: 21-September 03 From: Marion, NC Member No.: 1,179 Region Association: None |
Thanks John,
I will check those tomorrow. |
|
|
|
| trojanhorsepower |
Oct 17 2014, 06:28 PM
Post
#60
|
|
Senior Member Group: Members Posts: 1,031 Joined: 21-September 03 From: Marion, NC Member No.: 1,179 Region Association: None |
Well, she's welded in now. I hope its right.
Attached image(s) 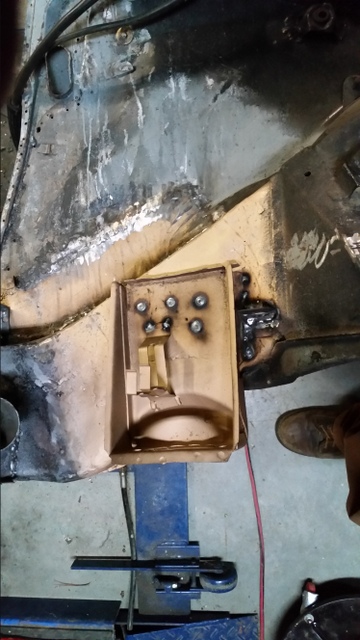 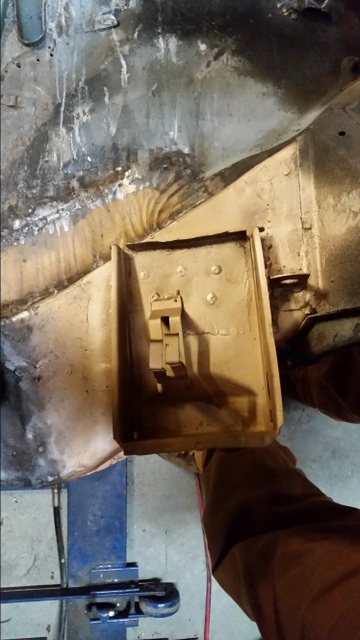
|
|
|
|
|
2 User(s) are reading this topic (2 Guests and 0 Anonymous Users)
0 Members:

|
Lo-Fi Version | Time is now: 10th May 2026 - 10:31 AM |
Invision Power Board
v9.1.4 © 2026 IPS, Inc.