|
|
|
Porsche, and the Porsche crest are registered trademarks of Dr. Ing. h.c. F. Porsche AG.
This site is not affiliated with Porsche in any way. Its only purpose is to provide an online forum for car enthusiasts. All other trademarks are property of their respective owners. |
|
|

  |

| ConeDodger |
 Dec 16 2013, 06:09 PM Dec 16 2013, 06:09 PM
Post
#21
|
|
Apex killer!  Group: Members Posts: 24,432 Joined: 31-December 04 From: Tahoe Area Member No.: 3,380 Region Association: Northern California |
(IMG:style_emoticons/default/cheer.gif) (IMG:style_emoticons/default/aktion035.gif) (IMG:style_emoticons/default/drooley.gif) (IMG:style_emoticons/default/smilie_pokal.gif)
That trailer looks vaguely familiar... (IMG:style_emoticons/default/huh.gif) Sorry I couldn't come Jim, in fact, somehow I'm still working. I'm in Elko Nevada right now. Hoping to make it back to Reno by morning if the plane keeps flying !!! |
   |

 
|
| jcd914 |
Dec 17 2013, 01:47 AM
Post
#22
|
|
Advanced Member Group: Members Posts: 2,097 Joined: 7-February 08 From: Sacramento, CA Member No.: 8,684 Region Association: Northern California |
QUOTE(ConeDodger @ Dec 16 2013, 04:09 PM)  (IMG:style_emoticons/default/cheer.gif) (IMG:style_emoticons/default/aktion035.gif) (IMG:style_emoticons/default/drooley.gif) (IMG:style_emoticons/default/smilie_pokal.gif) That trailer looks vaguely familiar... (IMG:style_emoticons/default/huh.gif) Sorry I couldn't come Jim, in fact, somehow I'm still working. I'm in Elko Nevada right now. Hoping to make it back to Reno by morning if the plane keeps flying !!! It was dark when I picked up the trailer and I was a little concerned about the tire. They actually looked better in the morning and I no problems at all, well except trying to find a place to park a truck and trailer in Long Beach (IMG:style_emoticons/default/sad.gif) I found a Super 8 Motel that advertised truck/bus/RV parking, not far from either of my kids apartments. There is no truth in advertising anymore (IMG:style_emoticons/default/sad.gif) Their RV/bus/truck parking was a row of end to end spots along a block wall on a dead end row of motel rooms. Not really enough room to turn around so I just planned on having to back out on to the street I came in off of. That was the plan until some dolt parked behind me, blocking me in, at checkout time they were still parked there. I think it took 27 back and forths to get turned around and out of the lot. (IMG:style_emoticons/default/cheer.gif) Thanks for the use of the trailer!! Jim |
|
|
|
| jcd914 |
Dec 17 2013, 01:47 AM
Post
#23
|
|
Advanced Member Group: Members Posts: 2,097 Joined: 7-February 08 From: Sacramento, CA Member No.: 8,684 Region Association: Northern California |
Best pictures Yet !!
In MY Garage (IMG:style_emoticons/default/cheer.gif) (IMG:style_emoticons/default/beerchug.gif) (IMG:style_emoticons/default/beer3.gif) 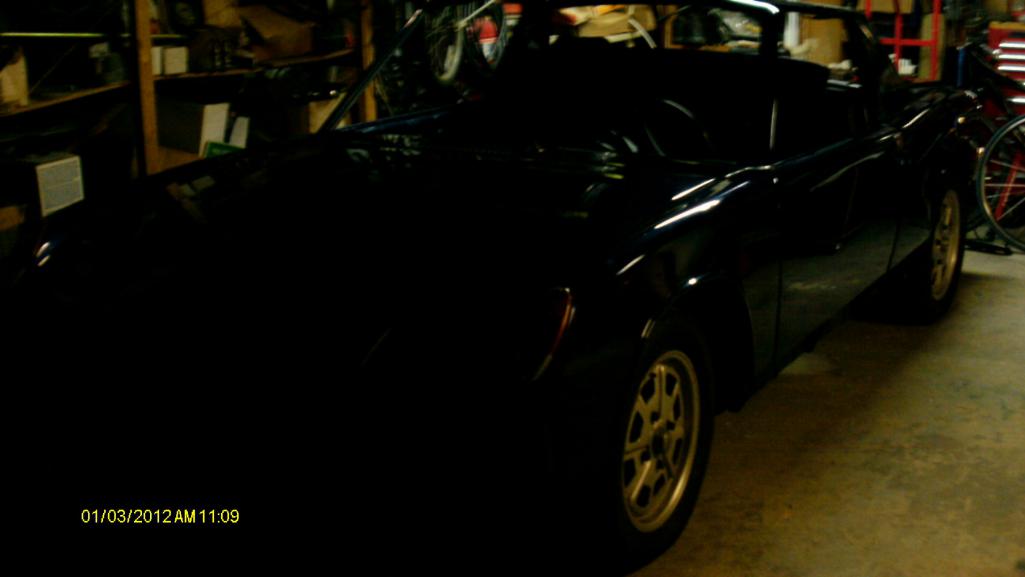 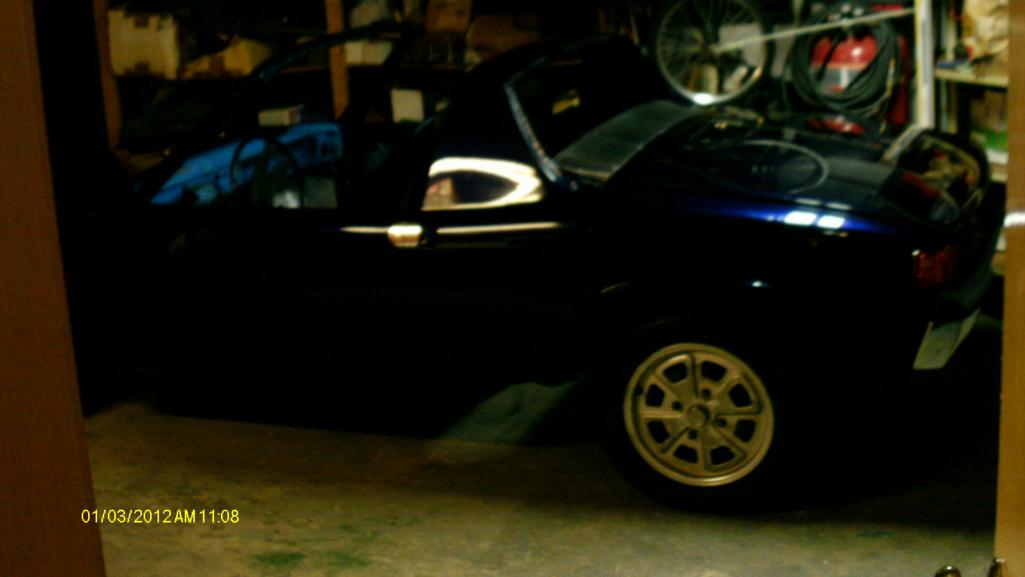 OK, they aren't great picture but they do show it in MY garage! Jim |
|
|
|
| ConeDodger |
Dec 17 2013, 05:44 AM
Post
#24
|
|
Apex killer! Group: Members Posts: 24,432 Joined: 31-December 04 From: Tahoe Area Member No.: 3,380 Region Association: Northern California |
Tires should be fine, in fact not many miles (you probably doubled the miles) from Americas Tire with the warranty. Sorry, I should have told you that you could just stop there and they would check them and so forth...
Car looks good in there Jim but just a warning, if we see beer making equipment stacked on top of it, McMark and me will come get it and hide it in the back corner of Mark's shop with your Dwight Mitchell motor... (IMG:style_emoticons/default/slap.gif) (IMG:style_emoticons/default/blink.gif) (IMG:style_emoticons/default/lol-2.gif) (IMG:style_emoticons/default/av-943.gif) |
|
|
|
| jcd914 |
Mar 24 2014, 12:22 AM
Post
#25
|
|
Advanced Member Group: Members Posts: 2,097 Joined: 7-February 08 From: Sacramento, CA Member No.: 8,684 Region Association: Northern California |
OK, So I have been spending what "914" time I have selling parts to recoup some of my cost from buying this new project car.
(IMG:style_emoticons/default/cheer.gif) (IMG:style_emoticons/default/cheer.gif) Today I actually started working on it! (IMG:style_emoticons/default/cheer.gif) (IMG:style_emoticons/default/cheer.gif) Started sorting through the wiring harnes mess made when the car was stripped and painted. Chris did not take out the whole harness, I think Chris (the PO) did the disassembly for paint work. In the rear he pulled it all out of the rear trunk and into the engine compartment and bundled together. In the passenger compartment he pulled the whole dashboard and dash frame, so the whole harness was loose and bundled together. There is also a stereo harness, Mega-squirt harness and center console gauge harness mixed in here too. The interior harnesses!?! 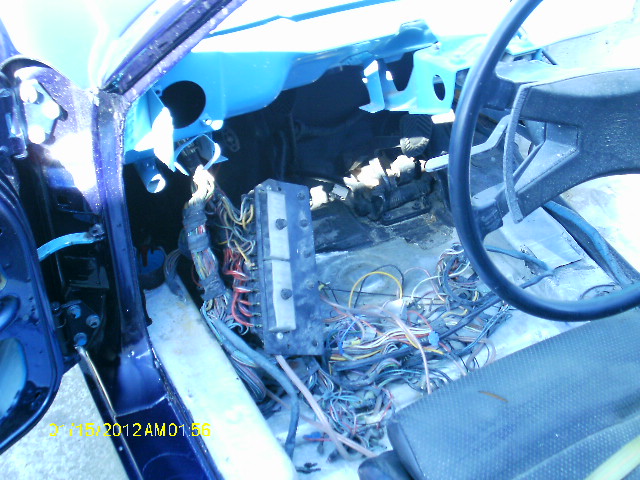 So mostly I untangled the harnesses and inspected them to see what I am up against. There are some poor splices in the harness that I will need to fixed and a bunch of additional connections I need to ID and correct. Jim |
|
|
|
| jcd914 |
Mar 24 2014, 12:43 AM
Post
#26
|
|
Advanced Member Group: Members Posts: 2,097 Joined: 7-February 08 From: Sacramento, CA Member No.: 8,684 Region Association: Northern California |
While I was untangling and rerouting the rear harness into the trunks I discovered the drive side trunk hinge mount has torn loose.
A fairly common failure and the passenger side had been welded before the paint work was down. Which made me wonder why the driver side was not fixed before painting but on closer inspection it looks to me that the driver side tore loose after the paint work was done. I don't own a welder, so I will have to borrow one or take my car to someone that has a welder. I probably know at least a dozen people local to me that have welders I could use and of course McMark is a short drive (or tow) away. Part of the problem with rear trunk hings is the torsion bar spring set up used to support the opened trunk lid. These method puts a lot of load on the hing pivots and I think that contributes to their failure. So I plan to convert to gas struts to lift the rear lid. Then the gas struts carry a large portion of the weight of the rear lid and reduce the load on the hing pivots. So I took out the rear trunk torsion bars in preparation for conversion to gas shocks fr the rear trunk lid, PITA job! Jim |
|
|
|
| jcd914 |
Oct 5 2015, 11:26 PM
Post
#27
|
|
Advanced Member Group: Members Posts: 2,097 Joined: 7-February 08 From: Sacramento, CA Member No.: 8,684 Region Association: Northern California |
This is the official start of my 914 Build Off - Jim's Majik Blue 72 Thread
First an intro and a little background on me. I'm Jim Dupree and I live Carmichael CA, just outside Sacramento. For almost 20 years I was a full time mechanic (before we were called Technicians) and worked for 3 Porsche Audi dealerships and an independent Porsche speciality shop. Then I made a career change and moved to working at a computer in a office for a company that publishes automotive diagnostic & repair information and software. I've been working a keyboard now for 20 years and somewhere along the way I got old and gray and a bit fat. I got my first 914 around 1989 (I think) and after taking care of some of those normal 914 issues, I started autocrossing. With my 1971 1.7L 914, I autocrossed for about 5 years including competing in the PCA Zone 7 Autocross series and even competed with a few current 914world members. Around 1996 or 1997 the engine in my 914 seized, this was about a year after I changed jobs and had no money to fix it. So it sat while I saved up to fix it, about 10 years latter I joined 914world as I set out to revive my 914. Well I read on 914world about this thing called "The Hell Hole" and found out my 914 had one, as well as other significant rust. So I bought this Blue 72 as a build project and we can all pretend I didn't buy 3 other 914s before I found this one. So having owned this new project for almost 2 years now and done almost nothing to it, the build off seemed like a great motivator and excuse to get the project moving. About my "Majik Blue 72". So having too many 914s (3) that all need too much work, I started looking for a project that was farther along than mine and came across this Majic Blue 72 listed in the 914world classified. When I first read the ad for the stripped to bare metal and repainted (in House of Color's, Majik Blue Pearl paint) but never reassembled 72 914, I figured it was too good a deal to last very long. It was in Southern California and I was in Northern California so I couldn't go look at and I just couldn't pull the trigger on it without inspecting it first. So I wrote it off and went back to looking closer to home. But I keep seeing the ad, there were a few people that showed interest but no buyers, a couple members were trying to buy either the engine or the roller but not both. Eventually the price dropped and my wife and I were heading to Long Beach for Thanksgiving with our 2 kids, both had moved there for school. So while on a holiday trip I arranged to go look at the car and ended up buying it. Made another trip back 2 weeks latter to pick it up. So on the surface this looks like a simple project, its was a runner before accident repair and repaint, all it needs is reassembly. The reality is little different. The wiring needs a lot of work, main harness has multiple wires that have poor repairs or are just cut, there is a stereo harness poorly spliced in, the megasquirt FI harness is poorly routed/assembled and pretty much every ground point on the car has been sprayed over with paint or truck bed liner. The body shop that did the paint was to "finish it off" after the car was assembled but they are in LA somewhere (PO never sent me the info) and I am in Sacto. The paint has several flaws that will need to be fixed. In addition to the MS FI wiring being "funky" all the fuel & vacuum hoses need replacement and correct FI clamps. I suspect there are/were vacuum leaks but the engine has never run while I owned it. Per the PO, the transmission pops out of gear sometimes and it is a tail shifter. I think the biggest challenge for me is that the car was stripped down for paint but someone else, not me. I have bags and bags of hardware and boxes of parts. Some are marked, most are not. And the few things the PO reinstalled that I have looked at were istalled loose or wrong, probably just so they were inplace when he was trying to sell it and someone looked at the car. So my plan is (not necesarily in this order): 1 - Fix the wiring and grounds front to rear, installing electrical equipment as I go. 2 - Reassemble/install the complete interior, Seats, door/window mechanizms, trim panels, carpets, etc... 3 - Install all new rubber seals, frt trunk, rear trunk, doors, traga top, etc... 4 - Prep the engine for installation, new gaskets, vacuum hoses fuel hoses, etc... 5 - Convert car & trans to side shifter, will require I fix or replace the transmission. 6 - Install engine & transmission and getit running, including fuel tanks, lines, pump, etc... 7 - Convert to 5 lug, intially I will be using Cookie cutters but would like to find some Fuchs. I am also wanting to upgrade the brakes to some Alfa Aluminum Brembo front calipers and a set of PMB Vintage Aluminum Rear 914-6 calipers. 8 - Get the paint fixed by a proffesional. So my project is not as big as some (many) of the others in the Build-off but it is plenty big for me and the time & money I have availible. I did not enter the build off because I want to win (or think I can win) but instead to be part of it for motivation and a dead line. Thanks Jim |
|
|
|
| jcd914 |
Oct 5 2015, 11:34 PM
Post
#28
|
|
Advanced Member Group: Members Posts: 2,097 Joined: 7-February 08 From: Sacramento, CA Member No.: 8,684 Region Association: Northern California |
Ignore the time stamps on the pictures, old camera chewed through batteries so fast I quit resetting the time & date.
Picking It Up: 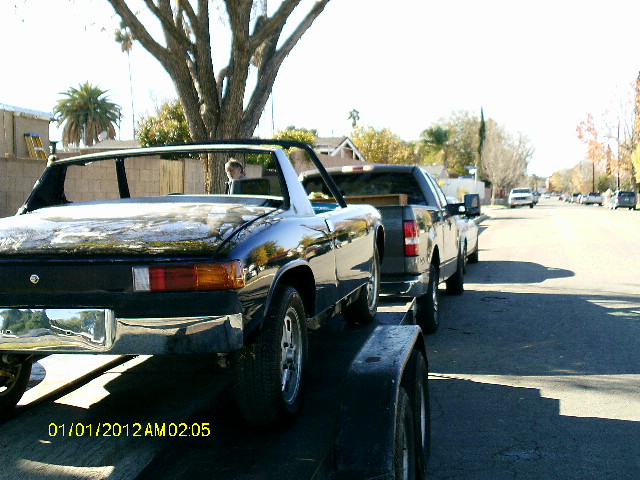 Arrival At Home: 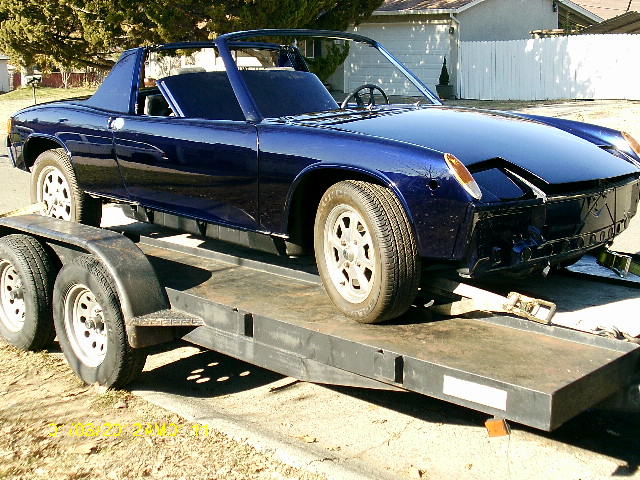 In the Driveway: 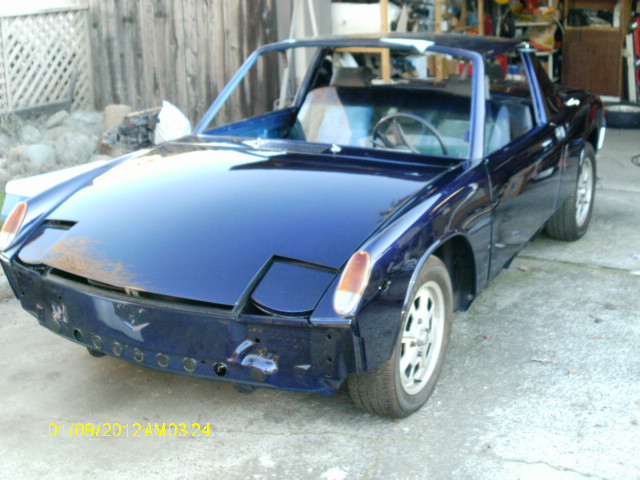 The Fancy Interior: 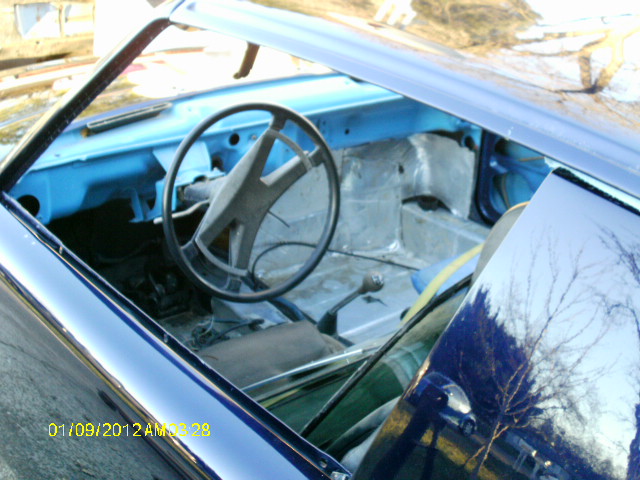 Jim |
|
|
|
| Andyrew |
Oct 6 2015, 07:42 AM
Post
#29
|
|
Spooling.... Please wait Group: Members Posts: 13,380 Joined: 20-January 03 From: Riverbank, Ca Member No.: 172 Region Association: Northern California |
Looks like a fantastic start!!
|
|
|
|
| EdwardBlume |
Oct 6 2015, 04:06 PM
Post
#30
|
|
914 Wizard Group: Members Posts: 12,340 Joined: 2-January 03 From: SLO Member No.: 81 Region Association: Central California |
Great color car Jim. Get on it!
|
|
|
|
| jcd914 |
Mar 27 2016, 10:55 PM
Post
#31
|
|
Advanced Member Group: Members Posts: 2,097 Joined: 7-February 08 From: Sacramento, CA Member No.: 8,684 Region Association: Northern California |
Progress, actual progress! (IMG:style_emoticons/default/sawzall-smiley.gif) (IMG:style_emoticons/default/smash.gif)
Some of you that know me may have trouble believing this but I have actually been working on my 914! (IMG:style_emoticons/default/smile.gif) And this weekend I actually made progress. Most of my time so far has been undoing stuff the PO did poorly but yesterday I made net progress. I finished installing the fuse panel and put the driver door back on. 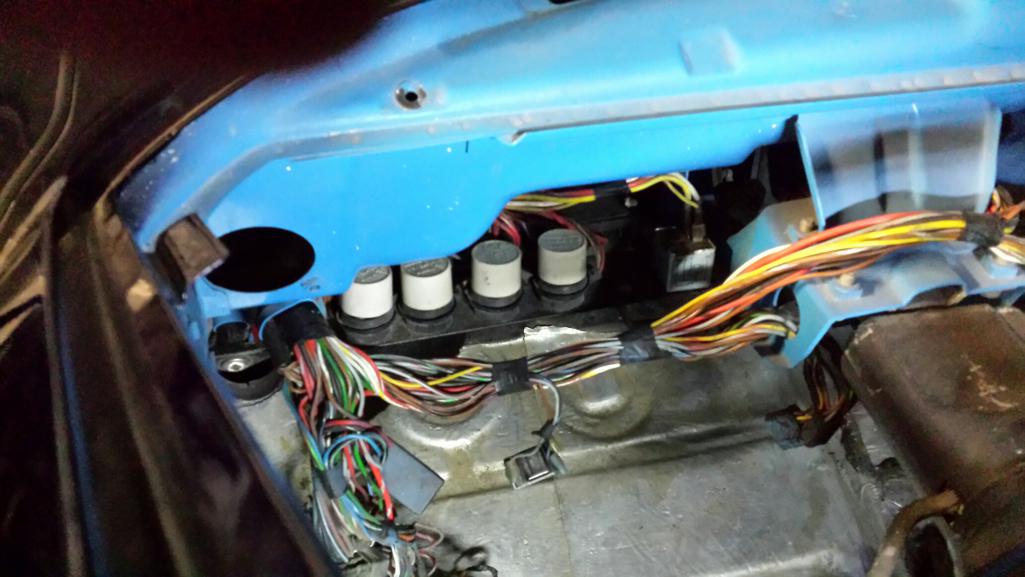 I routed the front portion of the wire harness up to the headlights, horns and fog lights, nothing is connected yet but the harness is in place. Cleaned up the rear Fuse/relay panel in prep to install it. 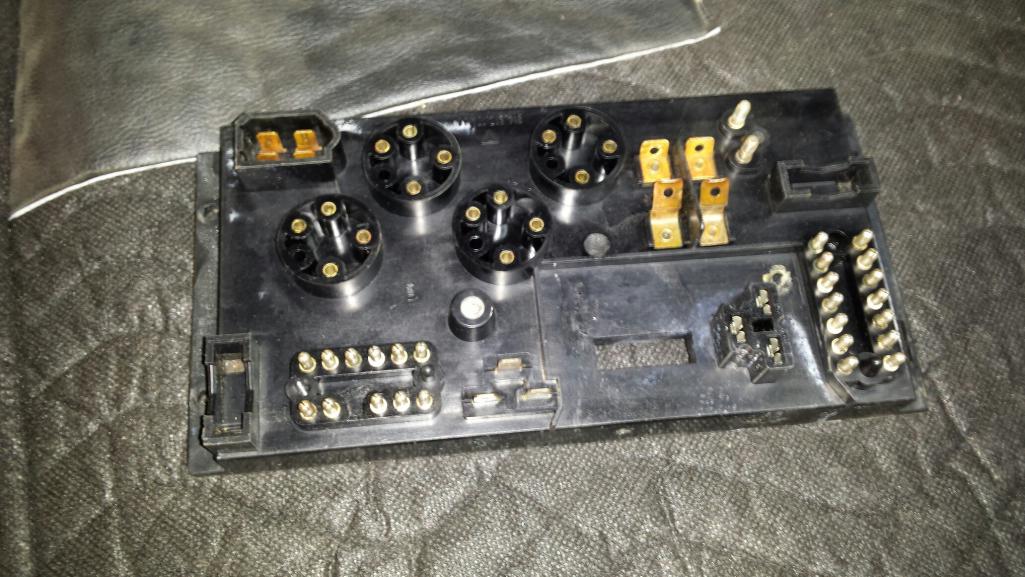 I ran the rear harness to the tail lights and connected them. The complete rear harness from the fuse panel back to the taillights has been rewrapped with electrical tape and has some patching to the right rear taillight, maybe else where as well. I will probably see if I can find a new harness and replace it at some point latter but for now hopefully it works. 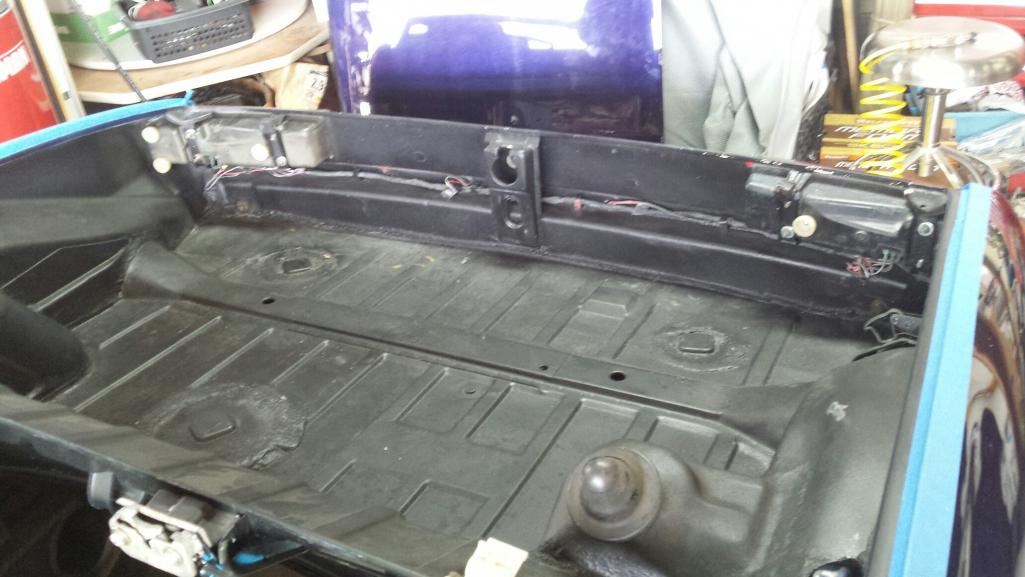 I have removed the tail shifter shift lever and front shift rod. I am switching over to a side shift trans I have had for awhile. 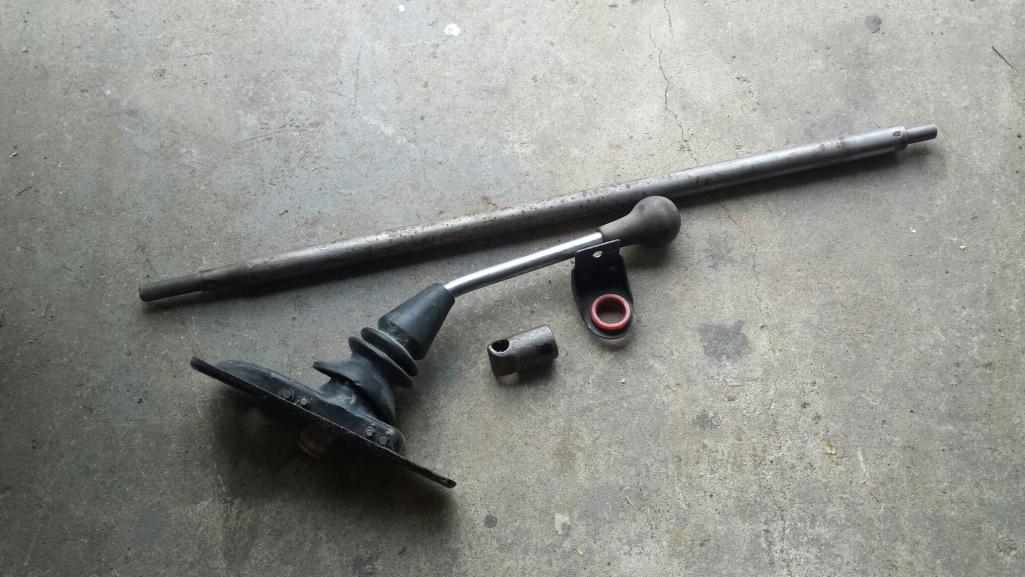 I removed the poorly assembled & installed Mega Squirt wiring, I am installing a known running 2.0L with D-jet.  The Mega Squirt was installed with the control unit behind the passenger seat and the harness run thru the tunnel and into the engine comp. The harness had to be disconnected from each engine component just to get the engine out. To get the harness out I had to pull out the stainless fuel lines since the harness was wrapped around and thru the fuel lines. It took me several tries to get the fuel lines back in the tunnel correctly, they apparently were a bit bent, but I got them in.I also installed the rear fuel line grommets which I found inside the tunnel. Still have a long way to go but at least I am heading the right direction!! Jim |
|
|
|
| 76-914 |
Mar 28 2016, 09:03 AM
Post
#32
|
|
Repeat Offender & Resident Subaru Antagonist Group: Members Posts: 13,882 Joined: 23-January 09 From: Temecula, CA Member No.: 9,964 Region Association: Southern California |
A "long way to go" can be a good thing if your having fun. (IMG:style_emoticons/default/beerchug.gif)
|
|
|
|
| jcd914 |
Apr 8 2018, 12:39 AM
Post
#33
|
|
Advanced Member Group: Members Posts: 2,097 Joined: 7-February 08 From: Sacramento, CA Member No.: 8,684 Region Association: Northern California |
So it has been over 2 years since I posted any progress on my car.
There of course were lots of things that kept from working on that were completely out of my control. Well that is my story and I am sticking to it. At any rate I have actually made some progress on it. A while back I was continuing on the wiring repairs I last posted on. Cleaned up the harness in the front trunk and straightened out the installation of the stainless fuel lines. Then I moved on to the wiring harness in the engine compartment. There I found some very poor repairers and melted wires, quite a mess and not something I wanted to risk coming back to bite me. I had previously bought a harness but it turned out to be a 70 or 71 harness not 72. Since I had already fixed the harness in the front trunk and passenger compartment I decide I would do the unthinkable. I am splicing the rear half of a 75 harness into my 72. I know there will be some challenges in this but I am OK with wiring. I cleaned up the rear portion of the 75 harness, repaired a couple tail light wires, rewrapped it and made sure the routing through the engine compartment and to the tail light worked. The first issue I ran into was after threading the harness through the engine shelf and through the engine compartment and to the tail lights. When I attempted to put the snorkel through the engine shelf it wouldn't fit. I assumed it was just stiff and it would take a little extra effort. After several hours of extra effort over several days I decided there was something else going on. I did some looking around and figured out that there are 2 different versions of the snorkels, smaller diameter early version and larger diameter late version. As best I can tell the change was around 75, I have seen pictures of 74's with the early smaller snorkel and the larger snorkel I have was from a 75 2.0L. My first thought was to open the whole in the engine shelf but there is not room, I found a picture of a 75/76 and the snorkel goes through the engine shelf a few inches over where the shelf is wider. So I bought a new snorkel from 914rubber and pulled the rear harness half back out of the car, removed the original snorkel and installed the new one. I then reinstalled the rear half harness, routed it through the engine compartment and to the tail lights. Threaded into the passenger compartment and installed the snorkel through the engine shelf and into the firewall. Now I can proceed with splicing the 75 rear half into the 72 front half. Jim 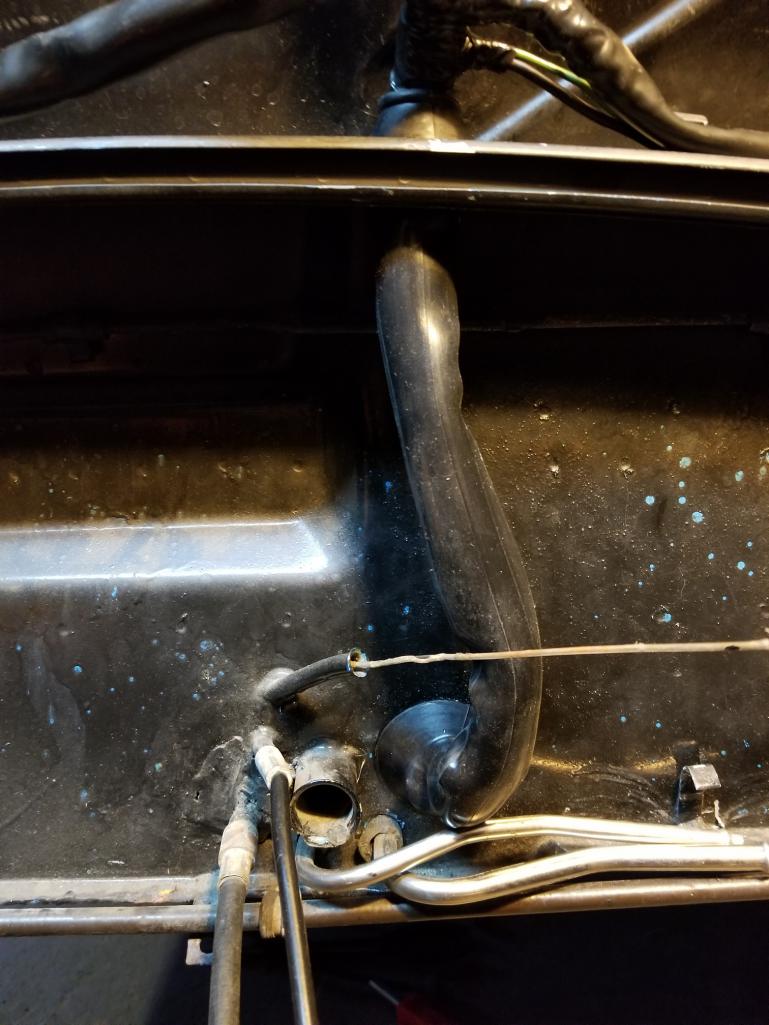 |
|
|
|
| jcd914 |
Apr 8 2018, 12:50 AM
Post
#34
|
|
Advanced Member Group: Members Posts: 2,097 Joined: 7-February 08 From: Sacramento, CA Member No.: 8,684 Region Association: Northern California |
Some pictures of the different snorkels, 75 OE and 914rubber replacement.
Jim 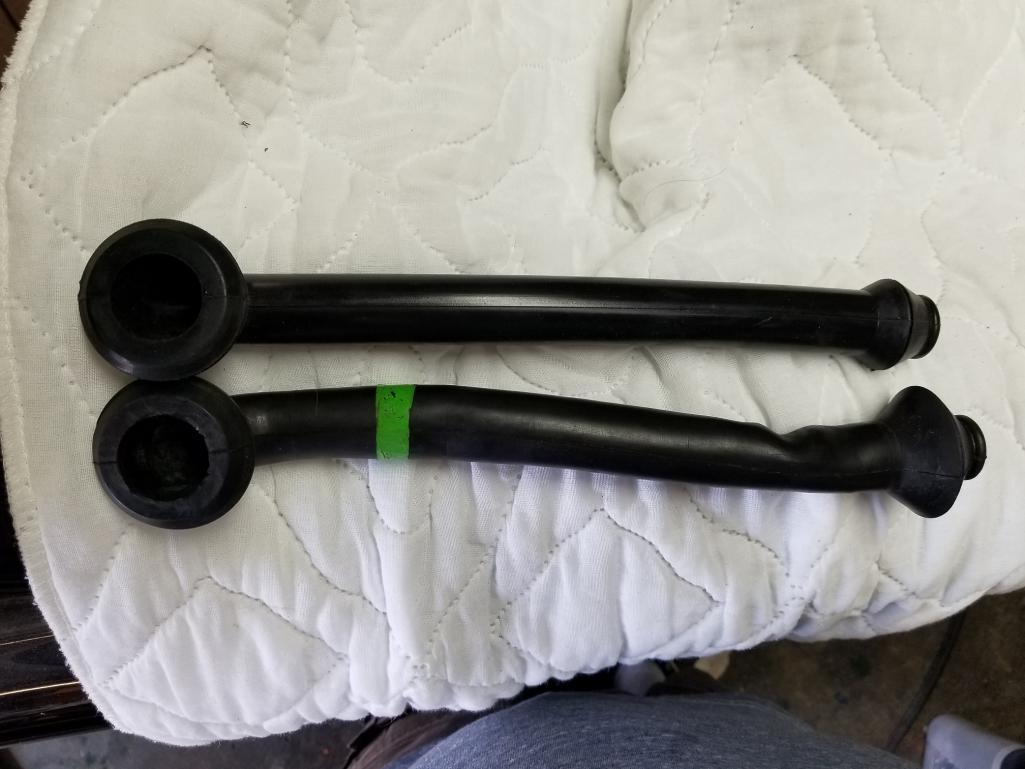 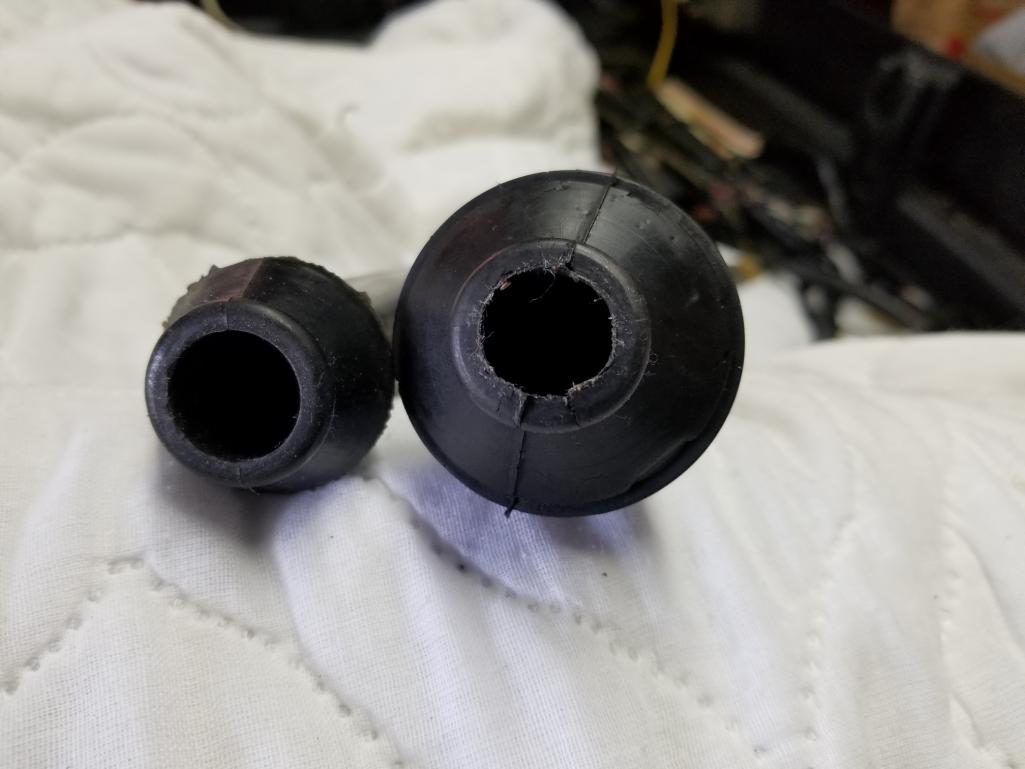 |
|
|
|
| rgalla9146 |
Apr 8 2018, 03:09 PM
Post
#35
|
|
Advanced Member Group: Members Posts: 4,959 Joined: 23-November 05 From: Paramus NJ Member No.: 5,176 Region Association: None |
In that case I got very lucky.
I recently installed a 914 6 harness in my '75 GT project chassis. I had no issue early vs. late snorkel. It fit as if it was always there. |
|
|
|
| jcd914 |
Apr 8 2018, 03:45 PM
Post
#36
|
|
Advanced Member Group: Members Posts: 2,097 Joined: 7-February 08 From: Sacramento, CA Member No.: 8,684 Region Association: Northern California |
QUOTE(rgalla9146 @ Apr 8 2018, 02:09 PM) In that case I got very lucky. I recently installed a 914 6 harness in my '75 GT project chassis. I had no issue early vs. late snorkel. It fit as if it was always there. Do you have a picture of the engine shelf where the snorkel goes through? I don't know what the production data or vin or chasis number was for the car my rear half harness came out of. It was a front end crashed 914 I bought and parted 20 years ago or so. Thanks Jim |
|
|
|
| rgalla9146 |
Apr 8 2018, 05:31 PM
Post
#37
|
|
Advanced Member Group: Members Posts: 4,959 Joined: 23-November 05 From: Paramus NJ Member No.: 5,176 Region Association: None |
QUOTE(jcd914 @ Apr 8 2018, 05:45 PM) QUOTE(rgalla9146 @ Apr 8 2018, 02:09 PM) In that case I got very lucky. I recently installed a 914 6 harness in my '75 GT project chassis. I had no issue early vs. late snorkel. It fit as if it was always there. Do you have a picture of the engine shelf where the snorkel goes through? I don't know what the production data or vin or chasis number was for the car my rear half harness came out of. It was a front end crashed 914 I bought and parted 20 years ago or so. Thanks Jim Hope this helps. It's the 53rd 1975 Attached thumbnail(s) 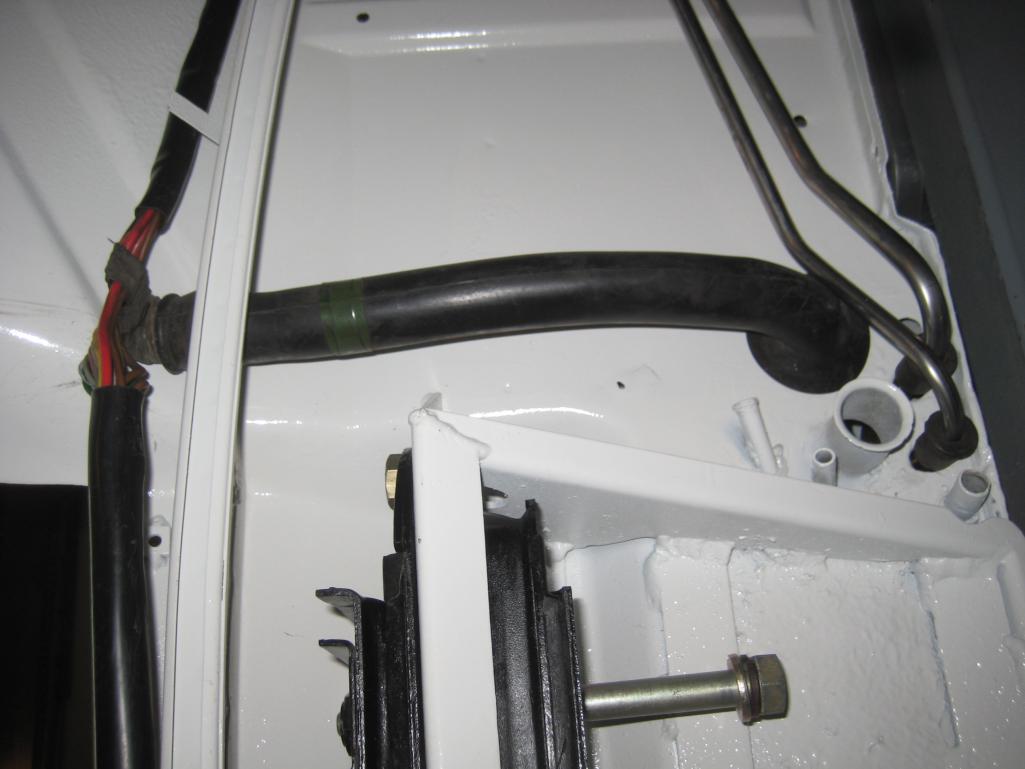
|
|
|
|
| jcd914 |
Apr 8 2018, 07:10 PM
Post
#38
|
|
Advanced Member Group: Members Posts: 2,097 Joined: 7-February 08 From: Sacramento, CA Member No.: 8,684 Region Association: Northern California |
In your picture it is a little hard to tell where the hole in the engine shelf is.
From above you can see the hole in my 72 engine shelf and the big washer is about where I have seen on 75 cars. It is in the middle section where the shelf gets wider. I also found a picture earlier that showed the latter 75 location but was said to be a 74, so I don't know when the change was made or if there was an equipment difference that went along with the change. My late 75 rear half harness was out of a2.0L California car. Jim 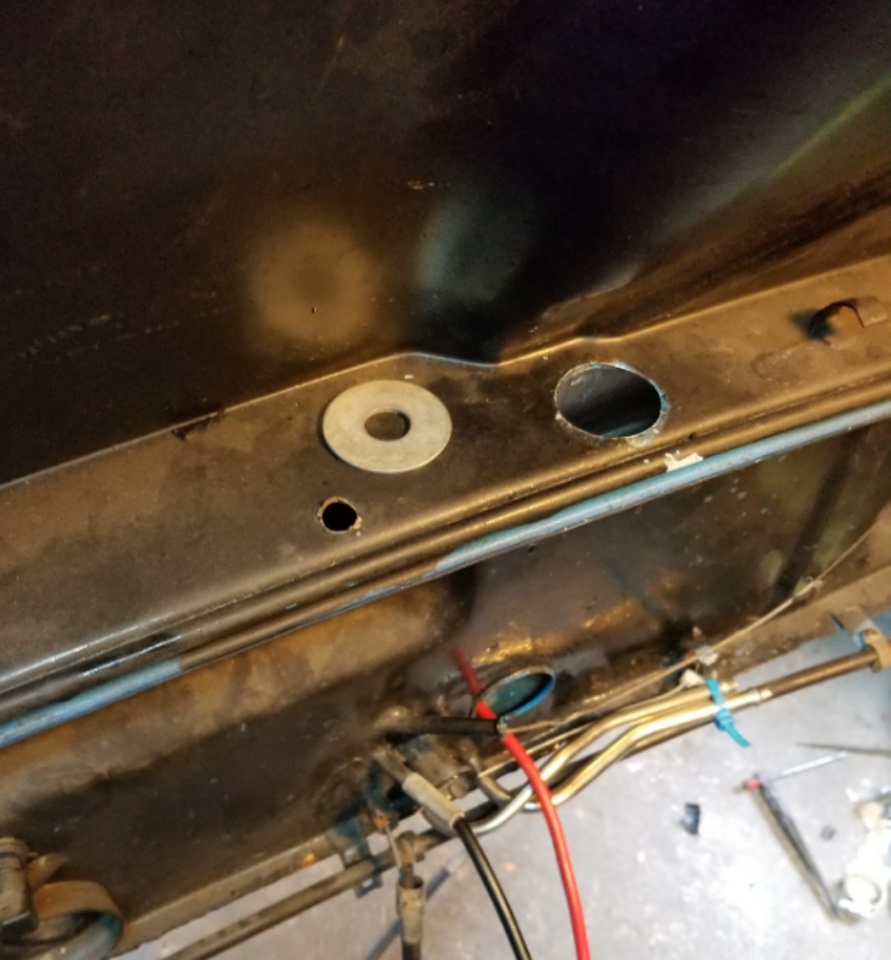 |
|
|
|
| jcd914 |
Apr 30 2018, 10:26 PM
Post
#39
|
|
Advanced Member Group: Members Posts: 2,097 Joined: 7-February 08 From: Sacramento, CA Member No.: 8,684 Region Association: Northern California |
I need to catch-up on reporting what I have done to my 914.
Several months ago I took apart the headlight buckets and cleaned, removed the surface rust and painted them. I reassembled with a new bushing kit from A&P Girl (I think), a prize from a past WCR. The kit is nice and fit well. I painted the mechanism with a rustolieum black paint that I had in my shed, not sure when I bought it but it worked well and I think I like it better that gray. I am not concerned with matching OE. I also painted the headlight surrounds a black/gray color I think will work well with the dark blue/black/purple color of my car. Pictures of the parts in the process: What they looked like 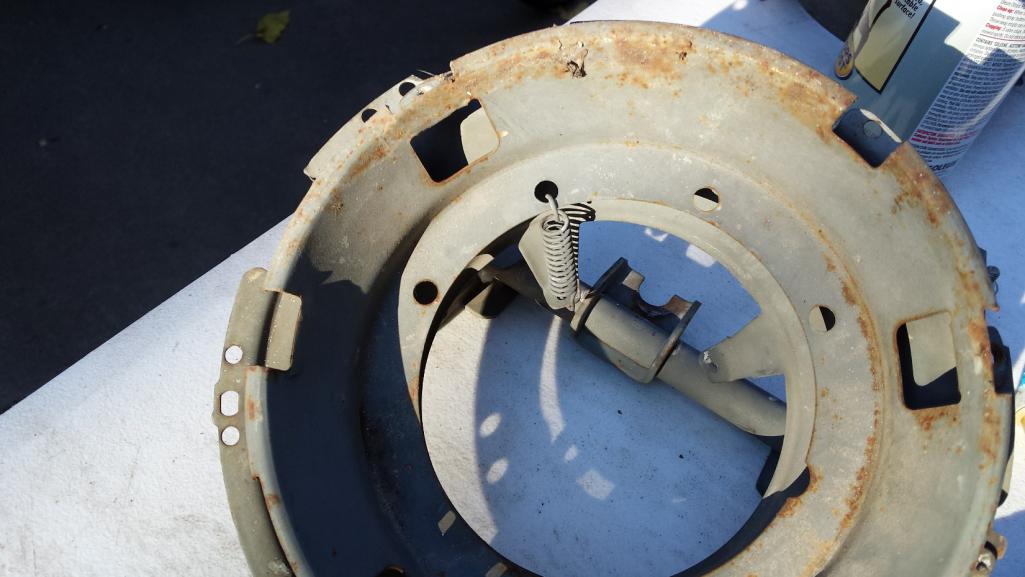 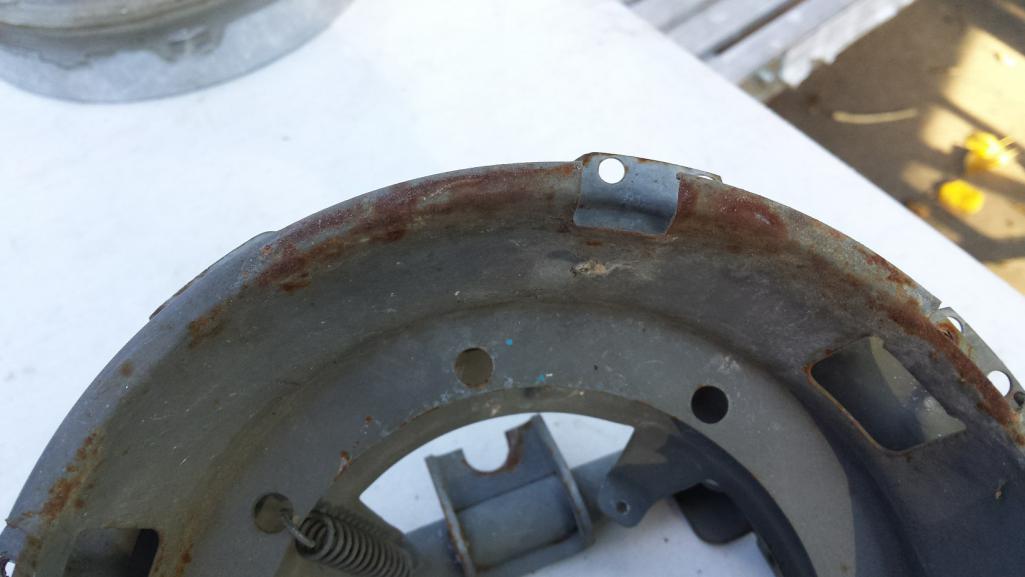 After clean up and paint 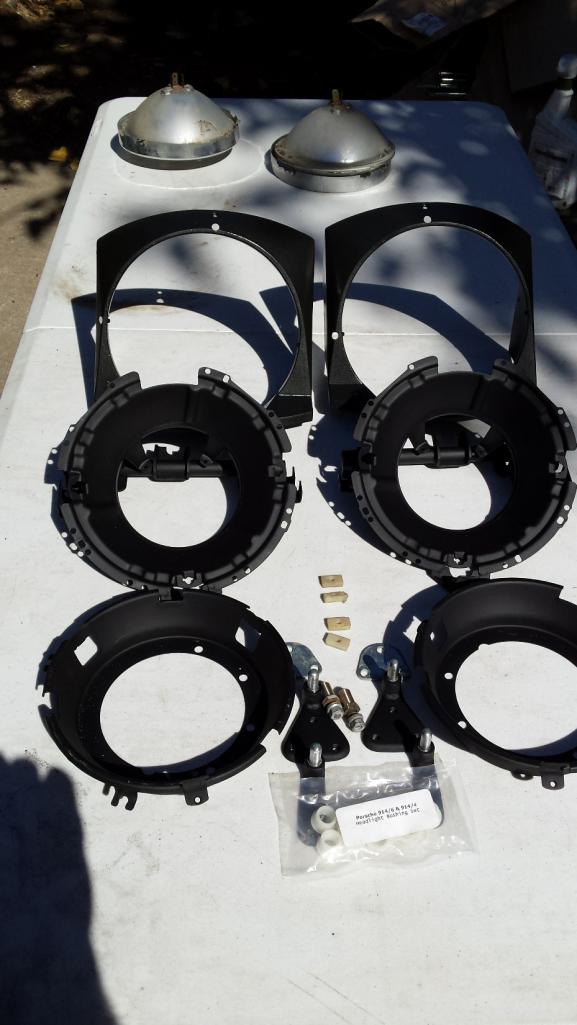 Installed again  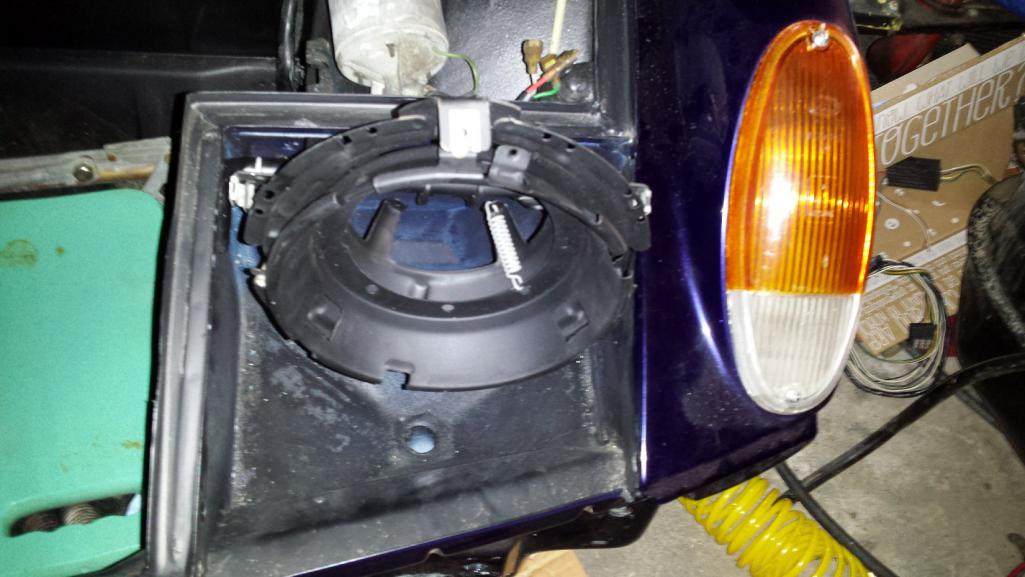 Jim |
|
|
|
| Mueller |
Apr 30 2018, 10:46 PM
Post
#40
|
|
914 Freak! Group: Members Posts: 17,155 Joined: 4-January 03 From: Antioch, CA Member No.: 87 Region Association: None |
Nice feeling getting some work done on it huh? Nice progress.
|
|
|
|
|
1 User(s) are reading this topic (1 Guests and 0 Anonymous Users)
0 Members:

|
Lo-Fi Version | Time is now: 10th May 2026 - 10:32 AM |
Invision Power Board
v9.1.4 © 2026 IPS, Inc.