|
|
|
Porsche, and the Porsche crest are registered trademarks of Dr. Ing. h.c. F. Porsche AG.
This site is not affiliated with Porsche in any way. Its only purpose is to provide an online forum for car enthusiasts. All other trademarks are property of their respective owners. |
|
|

  |

| 914forme |
 Feb 23 2014, 03:56 PM Feb 23 2014, 03:56 PM
Post
#1
|
|
Times a wastin', get wrenchin'!  Group: Members Posts: 3,896 Joined: 24-July 04 From: Dayton, Ohio Member No.: 2,388 Region Association: None |
A lot of people have been asking me for these, so here you all go. They are what we used. Technology has gotten way better now so its a lot easier to improve on these.
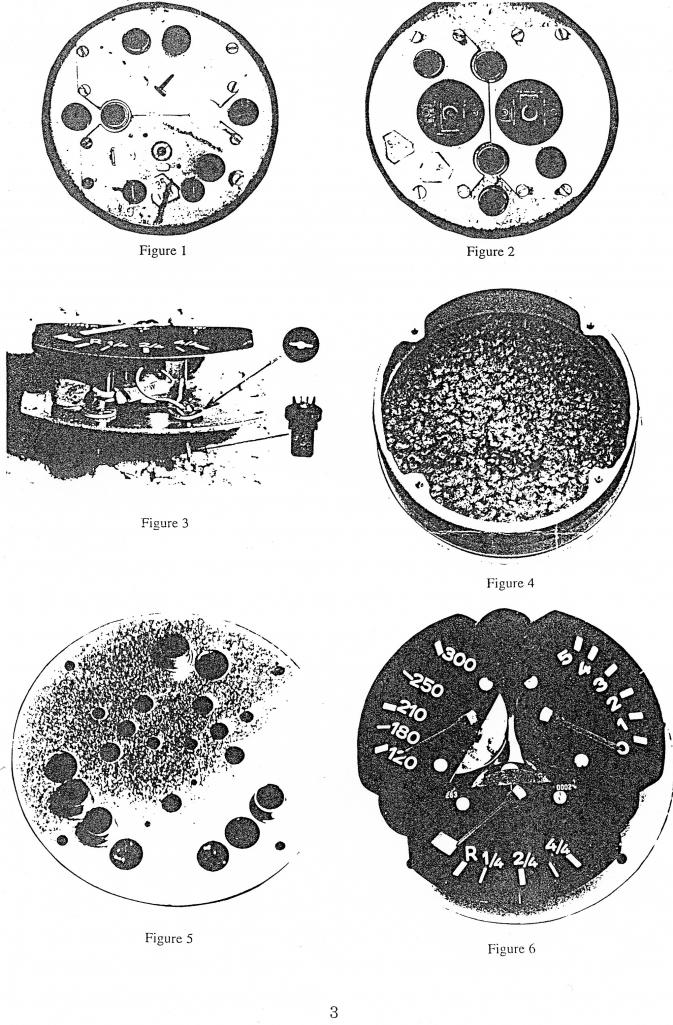
This is the gauge face printing we used it was silk screened onto the face, 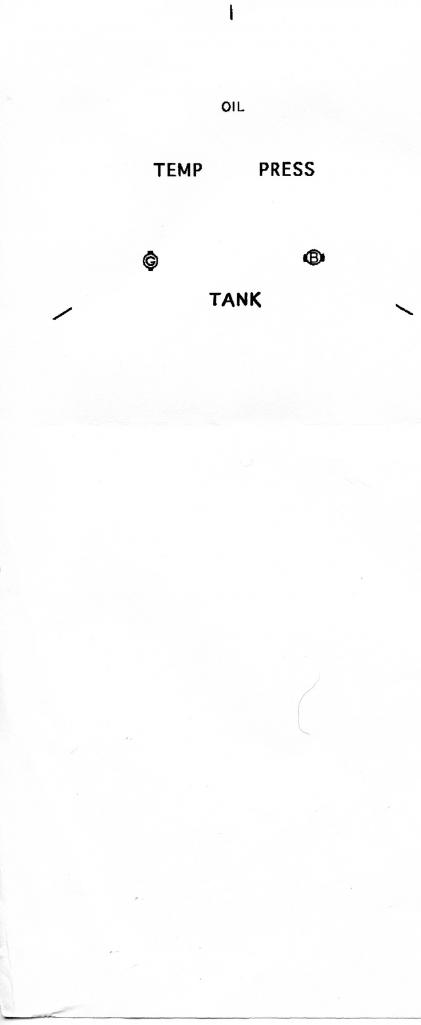 This is the original face we did, I added the radius' to the comers, the sharp 90 degree angles just did not make sense. As you can tell from the note at the bottom of the page. 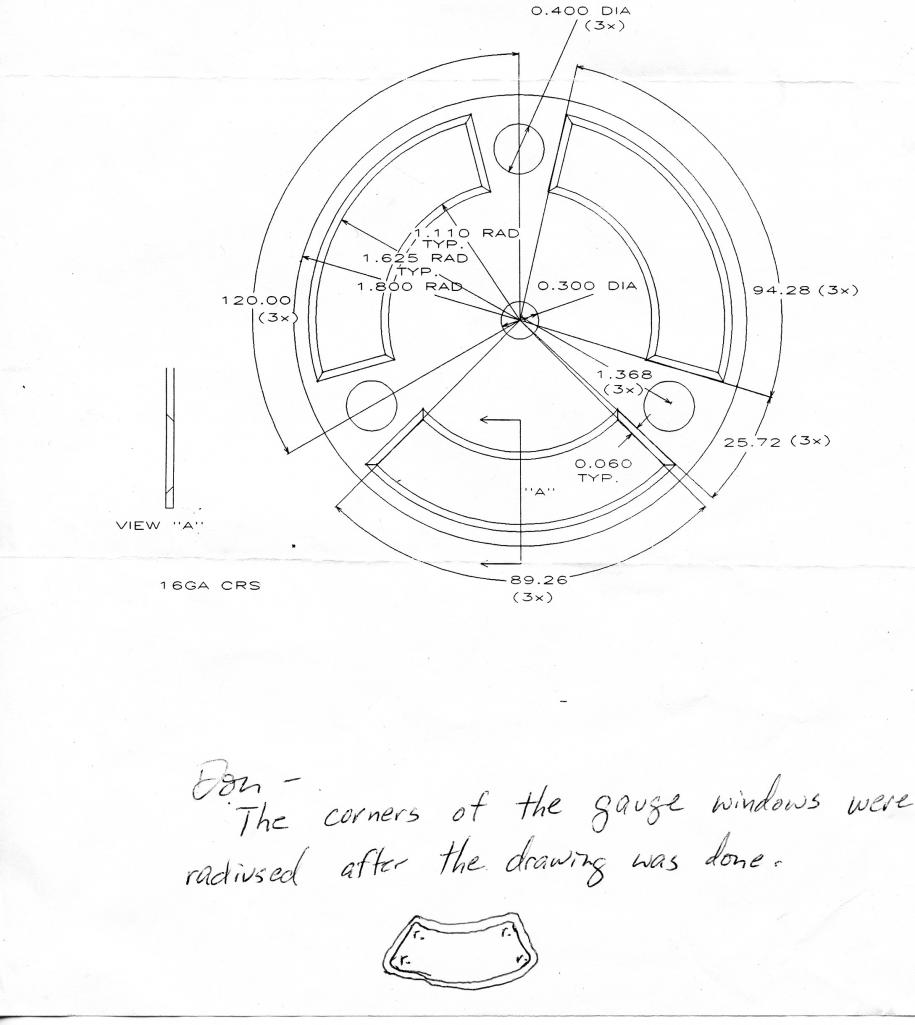 This the back gauge plate it supports all the gauge steppers and lighting tubes. 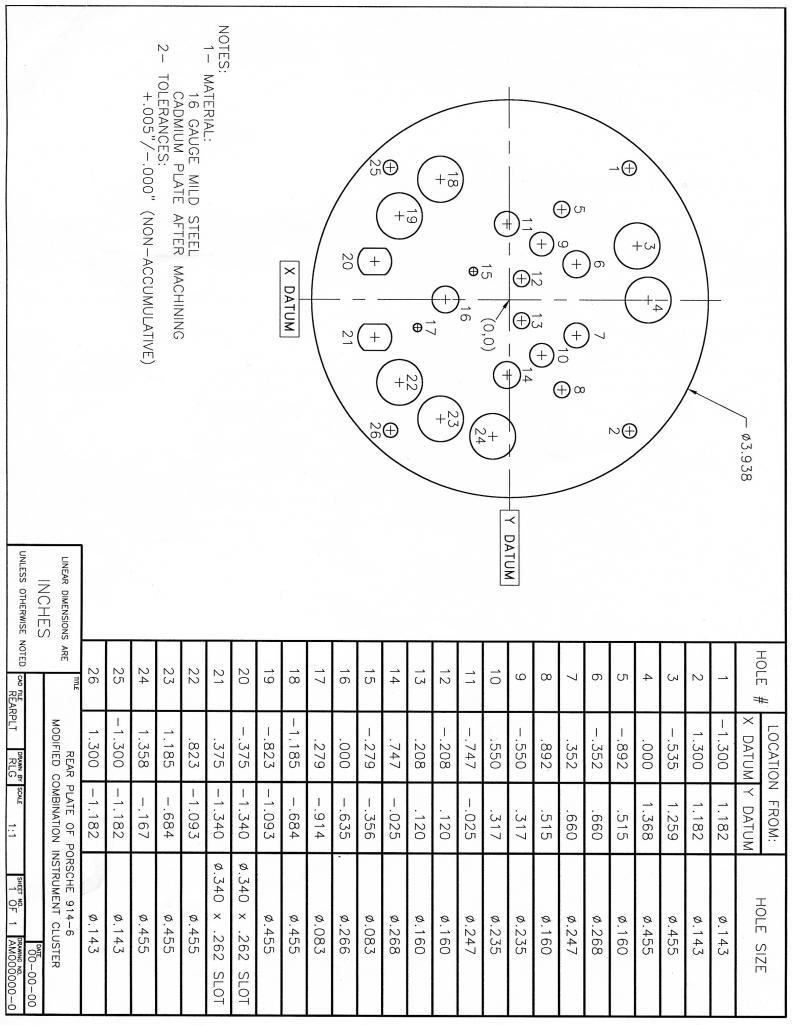 First page of instructions. 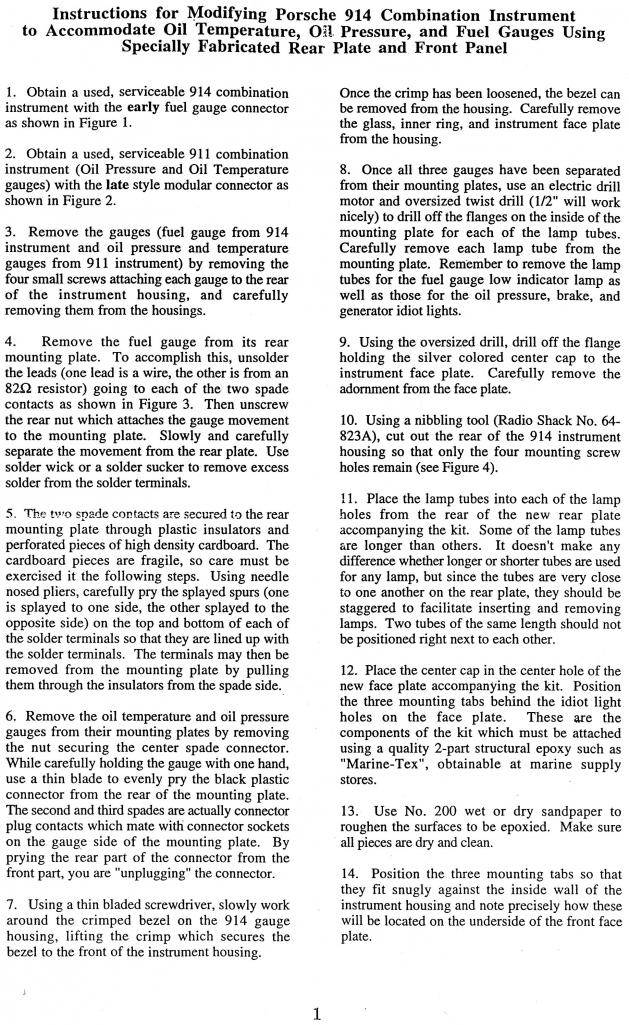 This a replacement to step 14, I did when I did mine. I cut out the original faces to use as support for the new face. This save you trying to epoxy stand off of inside the gauge body. Much easier for me. 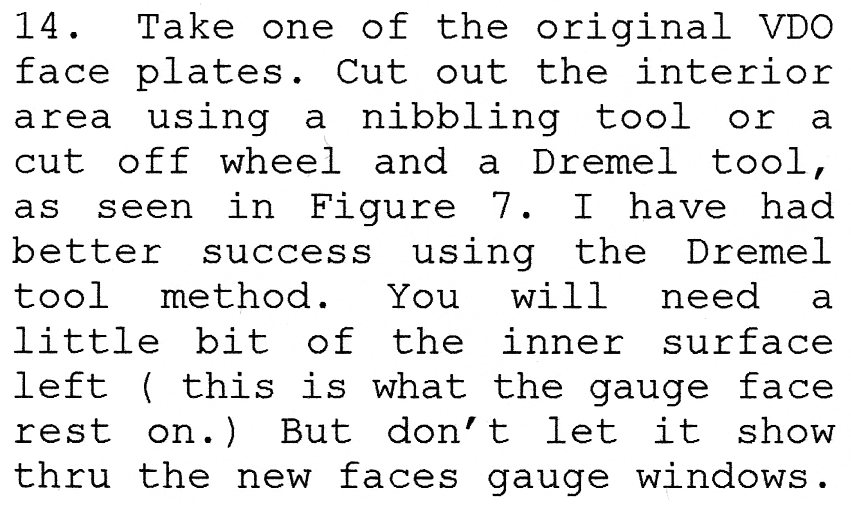 Page two of the instructions. 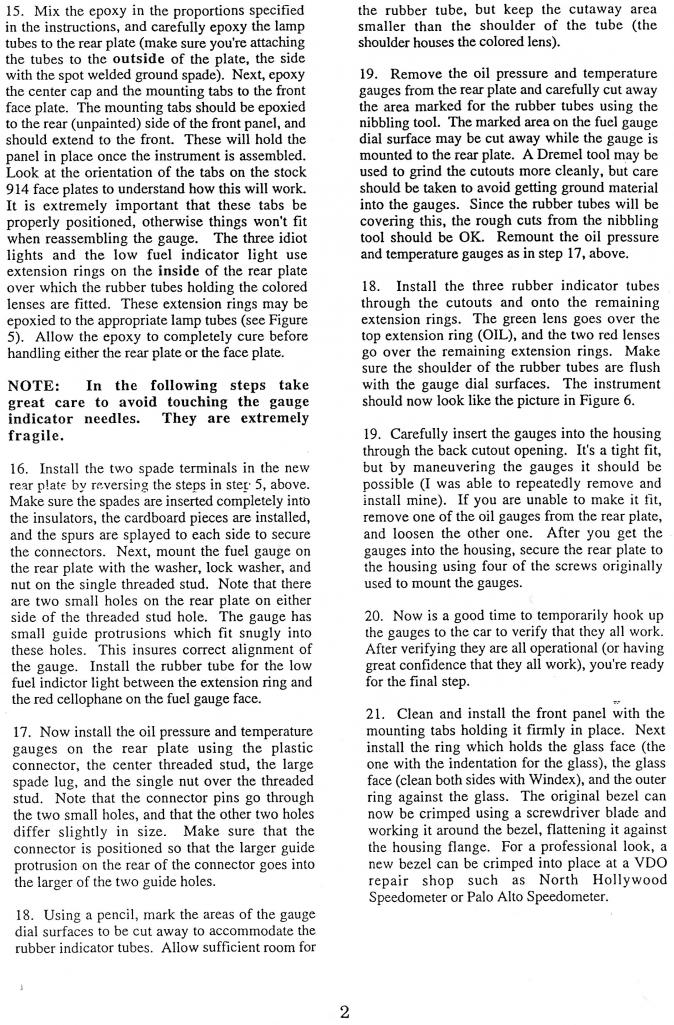 Adding more files in he next post. |
   |

 
|
| 914forme |
Feb 23 2014, 04:03 PM
Post
#2
|
|
Times a wastin', get wrenchin'! Group: Members Posts: 3,896 Joined: 24-July 04 From: Dayton, Ohio Member No.: 2,388 Region Association: None |
Here is the pictures used as reference in the instructions.
 And here is the art work to print the gauge faces themselves in proper letter orientation. 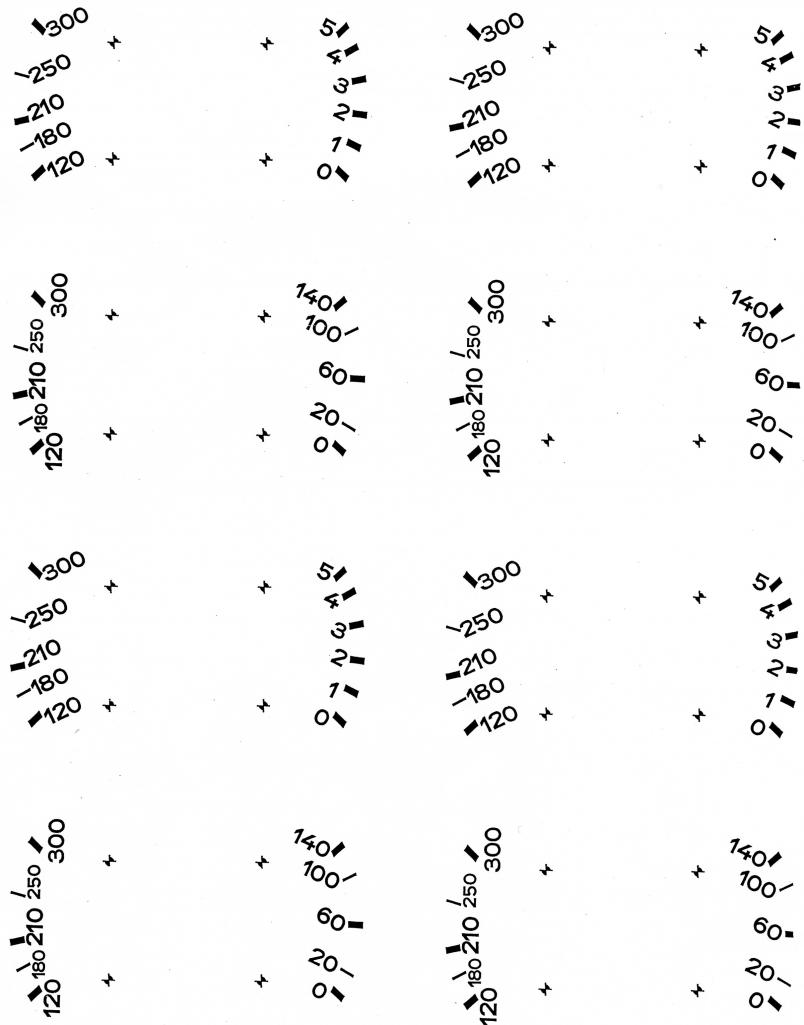 And the cross reference of gauges to senders: 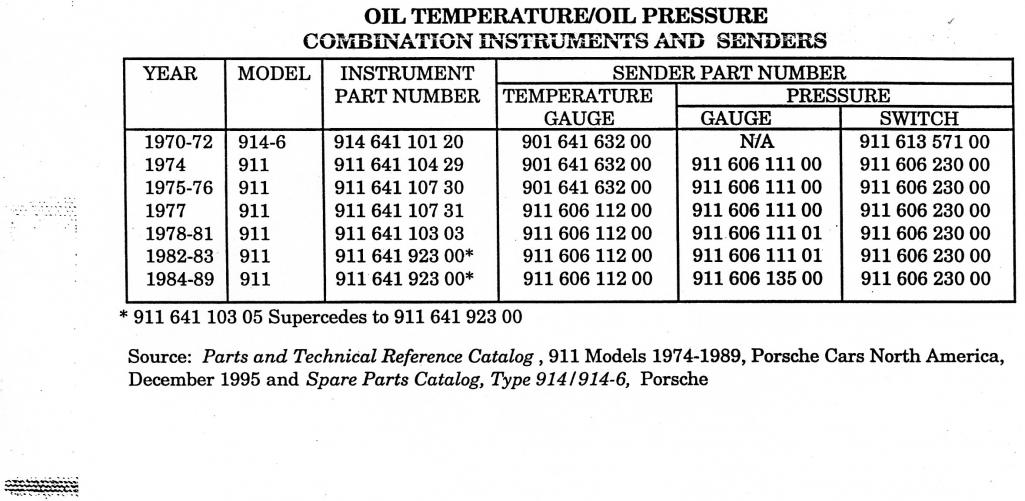 I hope this helps someone out there. |
|
|
|
| 914forme |
Feb 23 2014, 04:05 PM
Post
#3
|
|
Times a wastin', get wrenchin'! Group: Members Posts: 3,896 Joined: 24-July 04 From: Dayton, Ohio Member No.: 2,388 Region Association: None |
You can get these faces printed up via http://whitegauges.net thy also have items to help you restore the gauges like needle paint. etc.... Thanks to timothy_nd28 for this great resource.
|
|
|
|
| 0396 |
Feb 23 2014, 07:12 PM
Post
#4
|
|
Advanced Member Group: Members Posts: 2,046 Joined: 13-October 03 From: L.A. Calif Member No.: 1,245 Region Association: Southern California |
Thanks for the great info.
|
|
|
|
| timothy_nd28 |
Feb 3 2016, 12:21 AM
Post
#5
|
|
Advanced Member Group: Members Posts: 2,299 Joined: 25-September 07 From: IN Member No.: 8,154 Region Association: Upper MidWest |
Step 15. Is it better to use a conductive epoxy? How are the lamp tubes otherwise grounded to the back plate/gauge can?
|
|
|
|
|
1 User(s) are reading this topic (1 Guests and 0 Anonymous Users)
0 Members:

|
Lo-Fi Version | Time is now: 2nd May 2024 - 04:42 PM |
Invision Power Board
v9.1.4 © 2024 IPS, Inc.