|
|
|
Porsche, and the Porsche crest are registered trademarks of Dr. Ing. h.c. F. Porsche AG.
This site is not affiliated with Porsche in any way. Its only purpose is to provide an online forum for car enthusiasts. All other trademarks are property of their respective owners. |
|
|

  |

| Saggas |
 Jan 20 2016, 04:14 PM Jan 20 2016, 04:14 PM
Post
#61
|
|
Newbie  Group: Members Posts: 1 Joined: 17-January 16 From: Australia Member No.: 19,570 Region Association: None |
hey barry!
awesome to see an aussie restoration. where abouts are you located? I just scored a 914 and am in melb. |
   |

 
|
| barrym |
Jan 20 2016, 04:18 PM
Post
#62
|
|
Member Group: Members Posts: 88 Joined: 12-October 14 From: Australia Member No.: 18,008 Region Association: None |
nice .. a few thousand clicks north ... sunshine coast
|
|
|
|
| dale73914 |
Jan 20 2016, 05:12 PM
Post
#63
|
|
Member Group: Members Posts: 209 Joined: 15-September 11 From: Victoria, Australia Member No.: 13,562 Region Association: Australia and New Zealand |
QUOTE(Saggas @ Jan 21 2016, 09:14 AM)  hey barry! awesome to see an aussie restoration. where abouts are you located? I just scored a 914 and am in melb. Hey Saggas, I'm in Melbourne too ( North East ). Ive got a 73 model 1.7 . Which 914 did you buy ?? Would like to see a few pics , you should put a post up (IMG:style_emoticons/default/smile.gif) Cheers Dale |
|
|
|
| Larmo63 |
Jan 20 2016, 06:28 PM
Post
#64
|
|
Advanced Member Group: Members Posts: 4,267 Joined: 3-March 14 From: San Clemente, Ca Member No.: 17,068 Region Association: Southern California |
THIS is Viper Green:
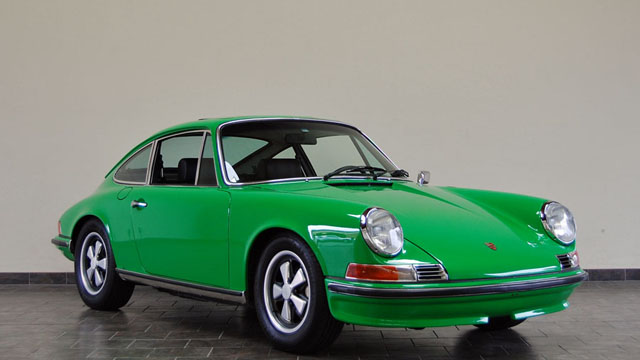 Your 914 would look good in this color!!!! |
|
|
|
| barrym |
Feb 24 2016, 02:43 AM
Post
#65
|
|
Member Group: Members Posts: 88 Joined: 12-October 14 From: Australia Member No.: 18,008 Region Association: None |
have been working on the front end a bit - got lower radiator (celica gt) brackets fabricated & placed fuel tank ... its the RCI one from summit racing - however, the sender is the incorrect ohm reading - the Porsche unit looks for 0 ohms full, 90 ohms empty - the RCI unit measures 90 ohms full, 0 ohms empty ...
so I pulled apart the sender unit and soldered on a wire on the other end of the resister circuit to measure 'correctly' also have the A arms completely rebuilt now with new bushings etc ... Attached thumbnail(s) 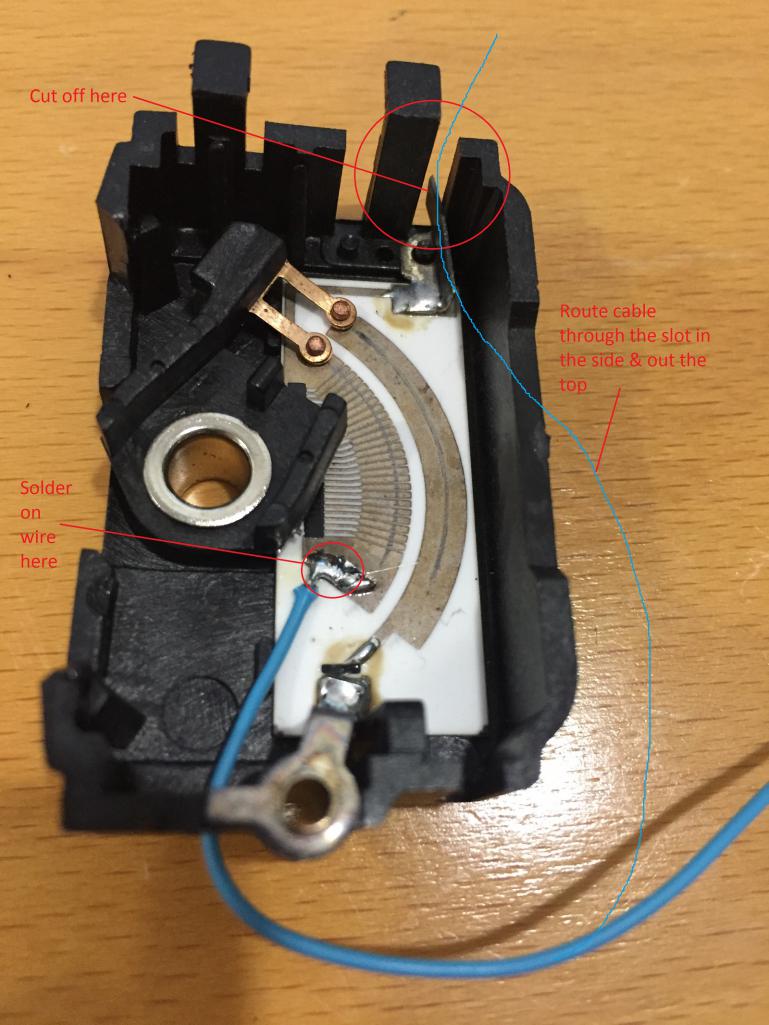 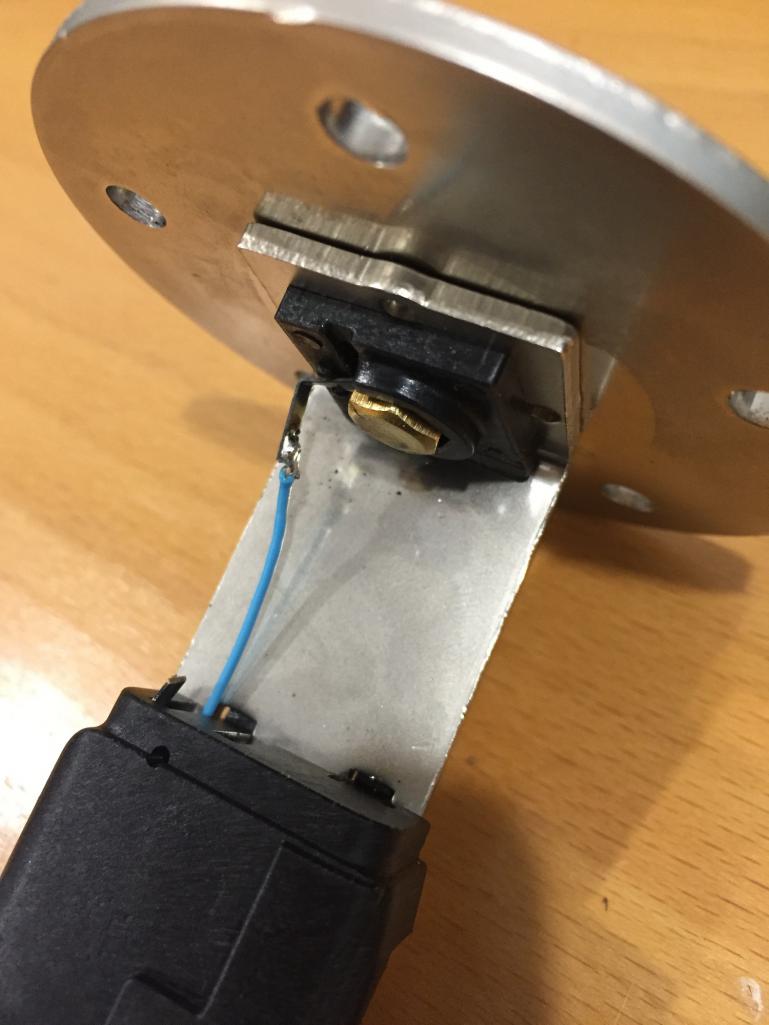
|
|
|
|
| 914forme |
Feb 24 2016, 07:22 AM
Post
#66
|
|
Times a wastin', get wrenchin'! Group: Members Posts: 3,896 Joined: 24-July 04 From: Dayton, Ohio Member No.: 2,388 Region Association: None |
Loving this thread (IMG:style_emoticons/default/popcorn[1].gif)
|
|
|
|
| forrestkhaag |
Mar 4 2016, 01:33 PM
Post
#67
|
|
Senior Member Group: Members Posts: 935 Joined: 21-April 14 From: Scottsdale, Arizona Member No.: 17,273 Region Association: Southwest Region |
Hey Barry: Nice work / An immense undertaking. At your convenience, can you post a few pictures of your headlight release system noted in a prior post?
(IMG:style_emoticons/default/beerchug.gif) Attached thumbnail(s) 
|
|
|
|
| Michel |
Mar 8 2016, 11:45 AM
Post
#68
|
|
Newbie Group: Members Posts: 34 Joined: 22-August 13 From: Australia Member No.: 16,286 Region Association: None |
Barry enjoying the thread. And having just bought a 14 project car following with interest.
Lime green metallic - great colour. There's a 911 been painted same in Bris right now. Cheers Michel Attached image(s) 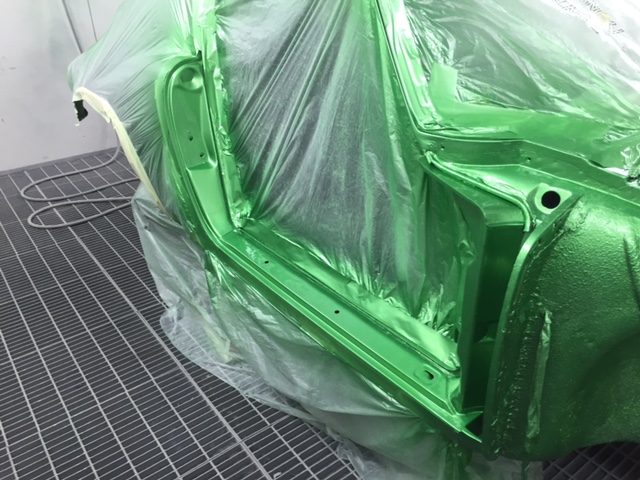 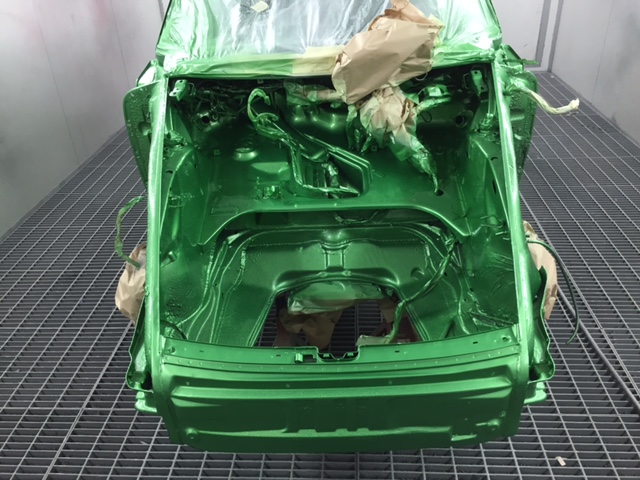
|
|
|
|
| barrym |
Mar 29 2016, 05:15 AM
Post
#69
|
|
Member Group: Members Posts: 88 Joined: 12-October 14 From: Australia Member No.: 18,008 Region Association: None |
QUOTE(forrestkhaag @ Mar 5 2016, 05:33 AM) Hey Barry: Nice work / An immense undertaking. At your convenience, can you post a few pictures of your headlight release system noted in a prior post? (IMG:style_emoticons/default/beerchug.gif) Hi, that's prob the best pic I have of the mechanism currently - I built it to fit then stripped it down as I continue to work through the front of the chassis to fit the fuel tank & radiator - progress is slow due to house renovations :/ but I did refurb the steering rack, installing turbo tie rods & have the indicator / key wiring all figured out. have ordered bolts for to mount the indicator ring to the column ... |
|
|
|
| 76-914 |
Mar 29 2016, 01:04 PM
Post
#70
|
|
Repeat Offender & Resident Subaru Antagonist Group: Members Posts: 13,734 Joined: 23-January 09 From: Temecula, CA Member No.: 9,964 Region Association: Southern California |
What a beautiful green. My favorite color. (IMG:style_emoticons/default/wub.gif) Can't wait to see it in all of it's splendor.
|
|
|
|
| barrym |
Apr 26 2016, 04:52 AM
Post
#71
|
|
Member Group: Members Posts: 88 Joined: 12-October 14 From: Australia Member No.: 18,008 Region Association: None |
Well, have managed to get a few things done over the last few weeks...
Got radiator mounted, fuel tank frame & removable mounting feet, as well as the start of the coolant pipes ... Also have been stripping down the wrx engine & replacing seals etc.... I also made up a tool for beading the aluminium coolant pipes ... Works well (IMG:style_emoticons/default/smile.gif) Attached thumbnail(s) 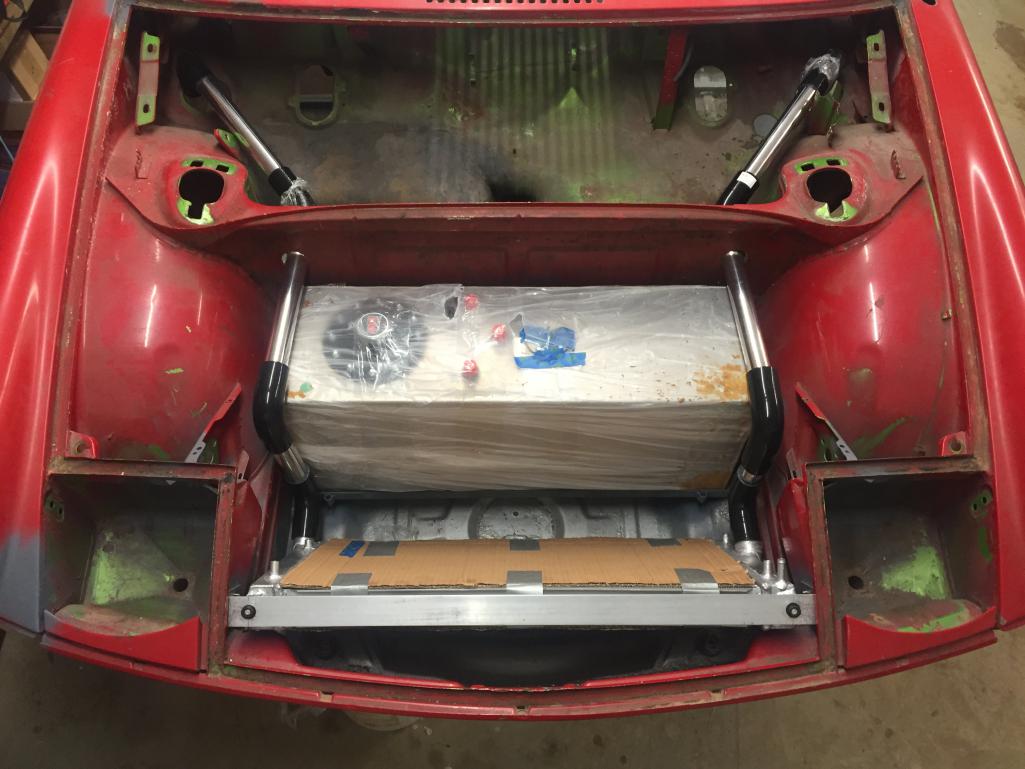 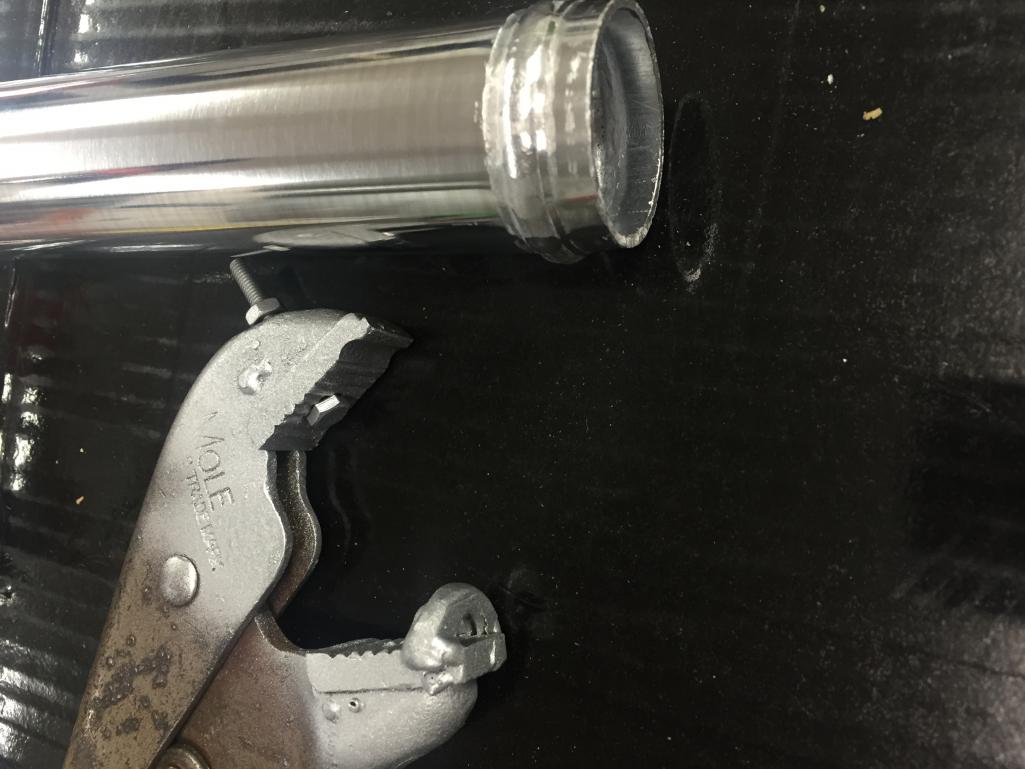
|
|
|
|
| barrym |
May 9 2016, 08:28 PM
Post
#72
|
|
Member Group: Members Posts: 88 Joined: 12-October 14 From: Australia Member No.: 18,008 Region Association: None |
have been making some solid progress over the last few weeks ...
took a cut off wheel to the pedal box area & made up a new box for the 3 pedal assembly - its not completely done, but I have an off road adventure through western Australia to go on soon so just covered it up in primer while i'm away. the new pedal assembly had to be cut up a bit and I had to make up a new accelerator pedal & associated brackets / levers for the cable - took a day, well, 8am to 3pm to sort out the pedal ratio's & brackets etc ... the new pedal doesn't have the capability for a brake bias adjuster cable to run through it - the old one had a big U shape in the pedal to accommodate it. instead i'll use a 90 degree gearbox on the end of the bias bar. i'm using wildwood master cylinders, of the 'compact' variety - they give me about an inch of clearance from the steering arm flexi joint. I still have to work on the cross bar strap, but have a cunning plan that will leave it in place and provide some additional rigidity to the pedal box area. had to get the shell on the rotisserie in order to do all this too ... (IMG:style_emoticons/default/smile.gif) Attached thumbnail(s)  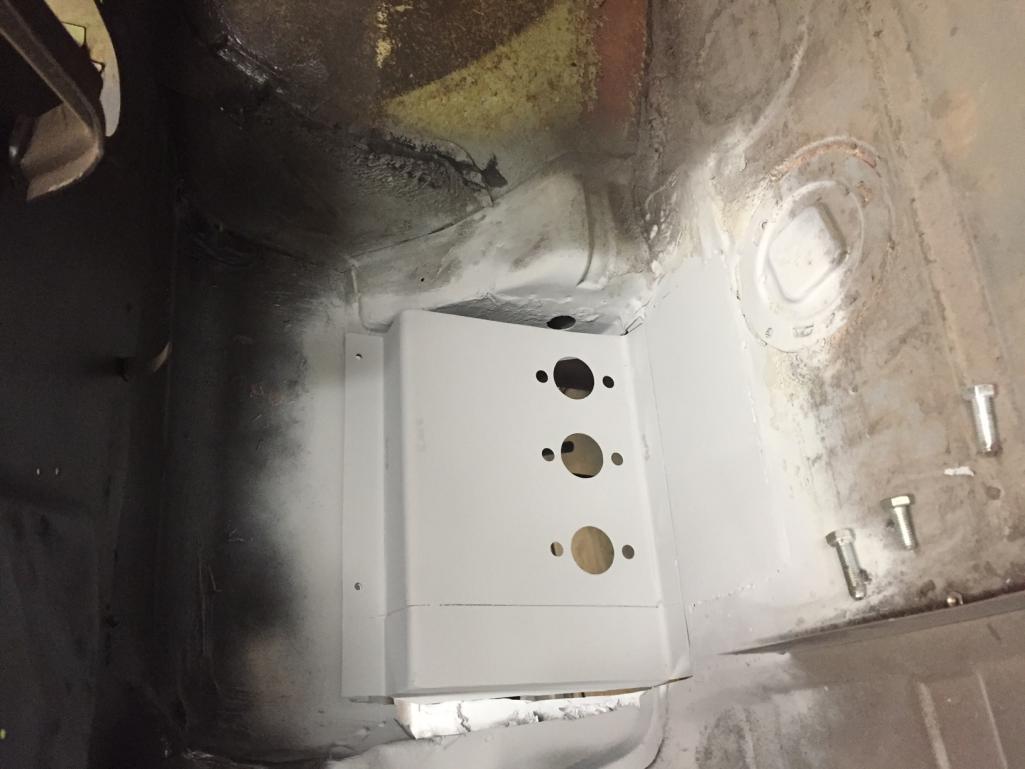 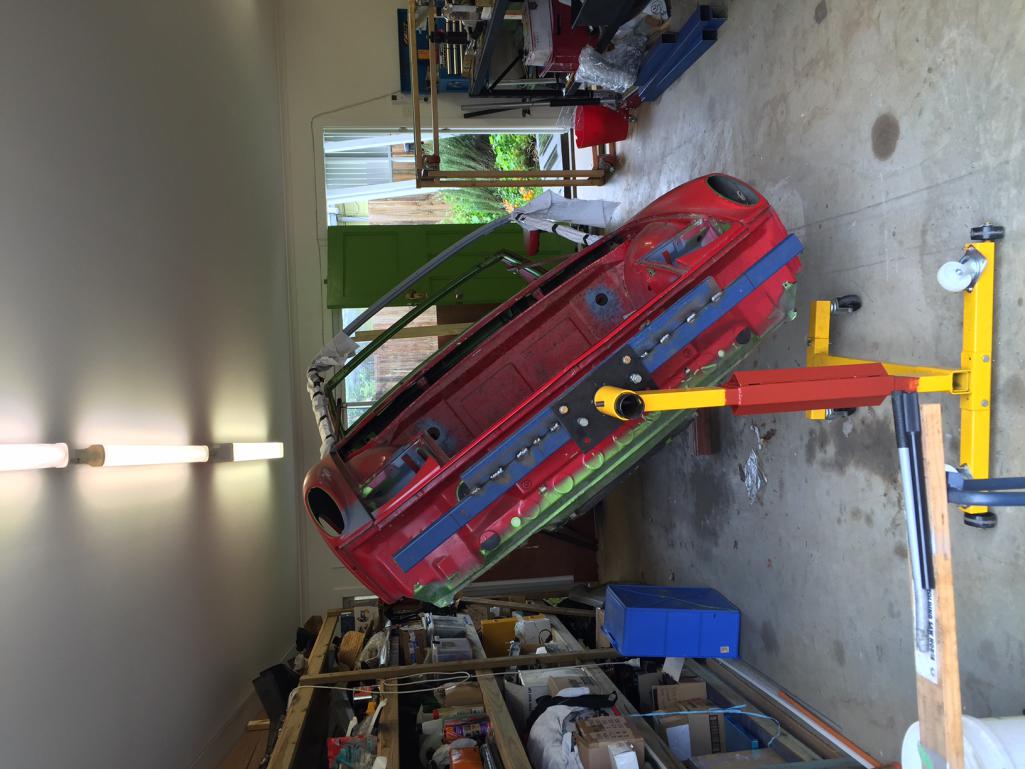
|
|
|
|
| barrym |
May 9 2016, 08:34 PM
Post
#73
|
|
Member Group: Members Posts: 88 Joined: 12-October 14 From: Australia Member No.: 18,008 Region Association: None |
I had to bend some sheet metal for the pedal box - so made a metal brake ... works perfectly !
Attached thumbnail(s) 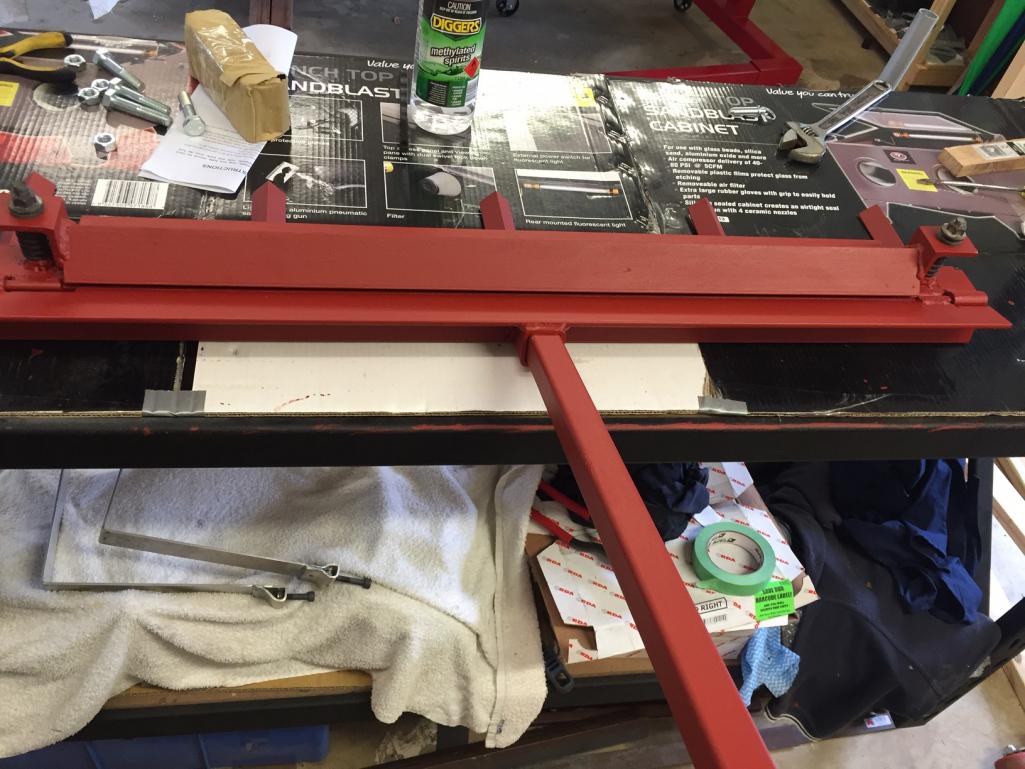
|
|
|
|
| barrym |
Aug 24 2016, 01:39 AM
Post
#74
|
|
Member Group: Members Posts: 88 Joined: 12-October 14 From: Australia Member No.: 18,008 Region Association: None |
wow - time really does fly - looking at some of the pics above and where i'm at now it doesn't feel like I've achieved as much as I should - but I've been working a lot on the detail bits.
I was scratching my head over the way to bolt in the rearward facing stay from the front suspension cross bar given I cut out the pedal box area - I saw a few options but settled on welding in some re-enforcement and welding in a cross bar with out of 5mm bar & welded in a new mounting tab - fits perfectly and clears the 3 master cylinders that poke through the pedal box. the MC's also clear the steering rack when its installed. the top of the pedal box (the angled part) also now has holes cut in it for the brake fluid bottle. I did the relevant cuts and installed a front sway bar, also using the maddog reinforcement plates in the wheel arches. I made up a battery tray, & bolted it in place - its painted with an epoxy paint in pewter - i'll be painting the interior of the car in this colour. All the fuel lines are now cut to length & bulkhead mounts installed. didn't realise the RCI fuel tank came with a built in roll over valve - handy that ! i'm still waiting on a few AN6 hose ends to arrive, but all that's left to do is to a final fit of the lines when i'm ready. I've also finished all the fuel line routing on the engine - I've scrapped most of the factory fueling system and ensured parallel fueling is feeding both rails properly with a rising rate fuel pressure reg. I picked up a stainless manifold that was on sale - $180AUD ! wrapped it in tape - doent need to last a long time as i'll get it ceramic coated in the future at some point ... Attached image(s) 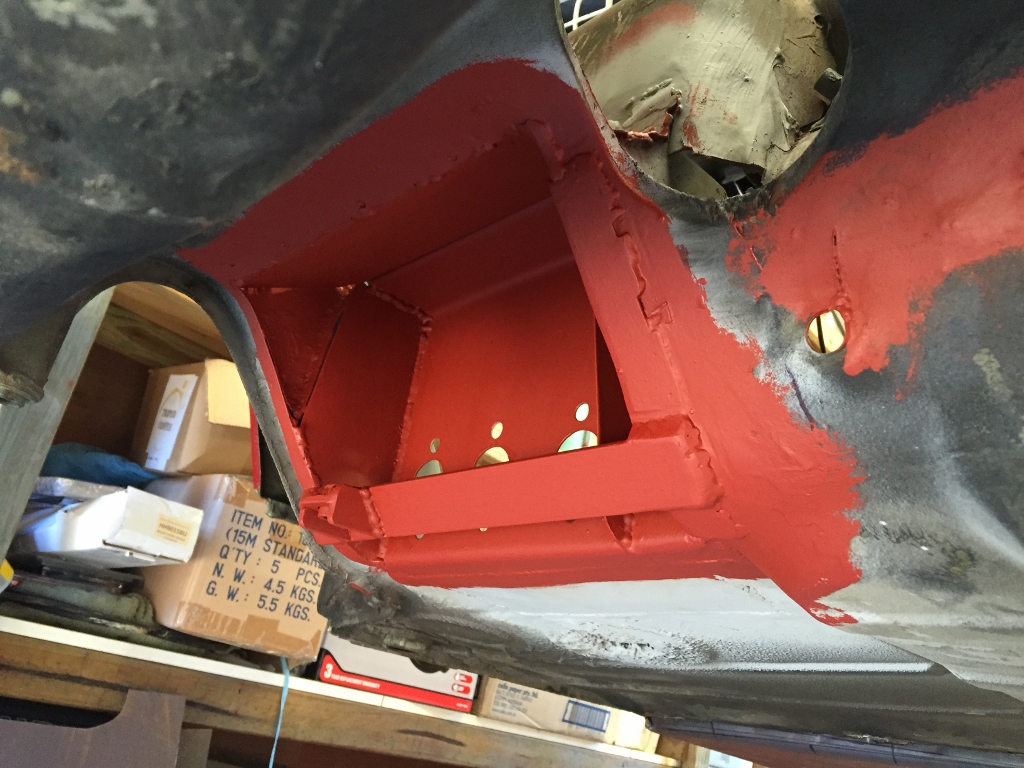 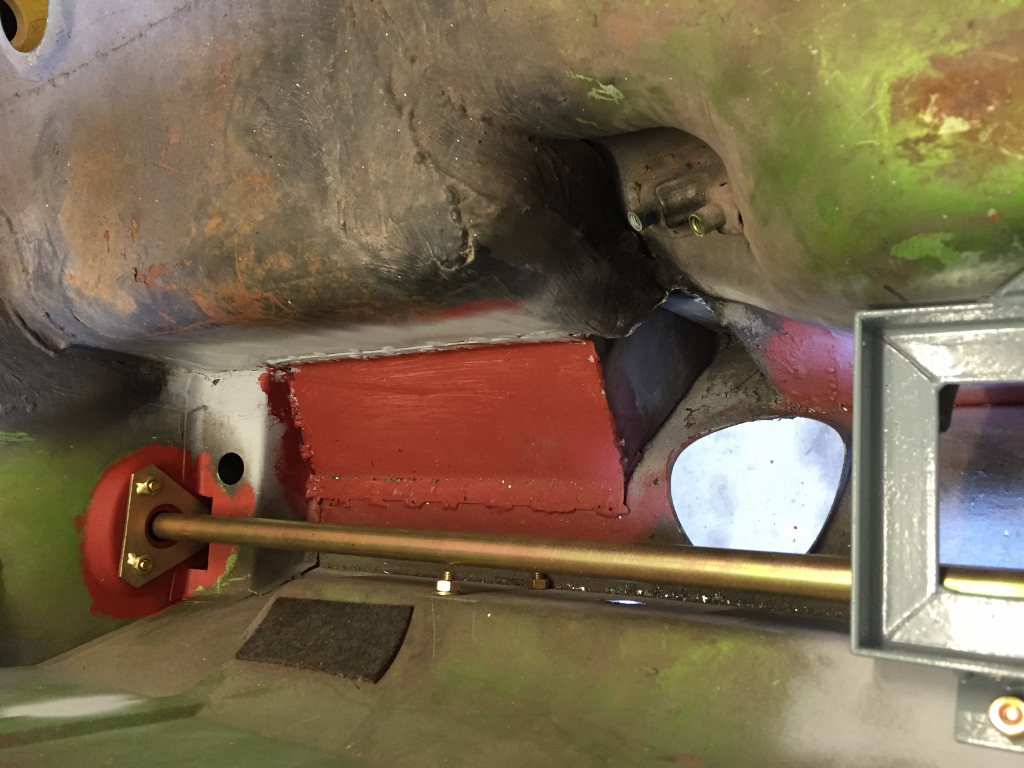 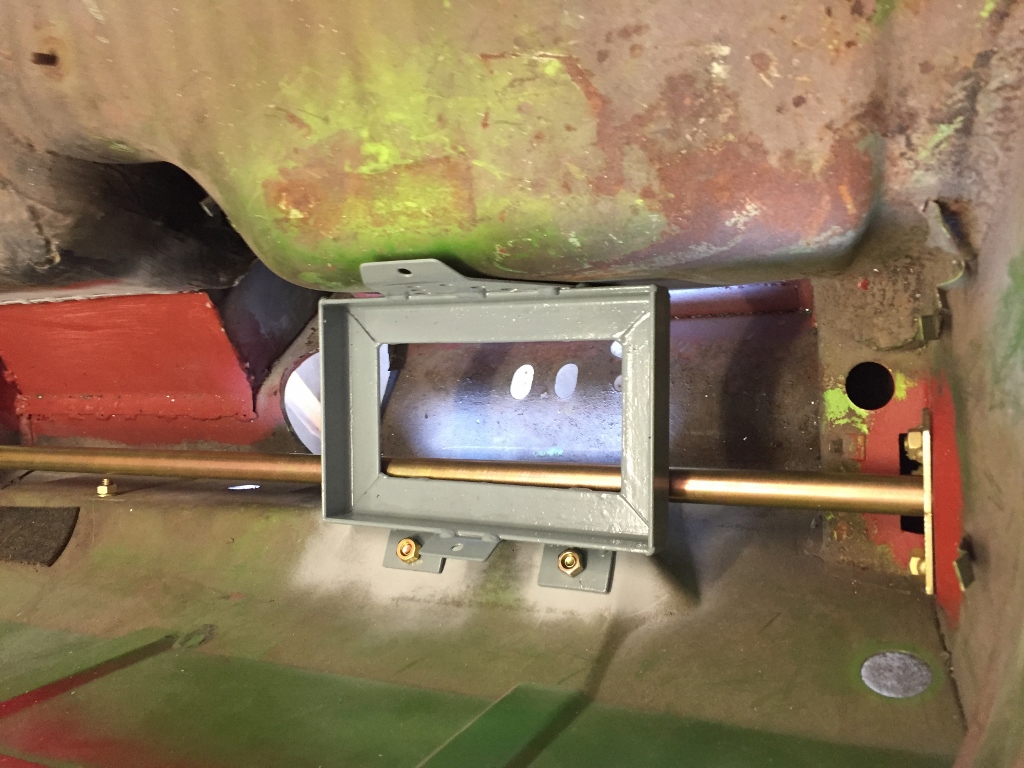 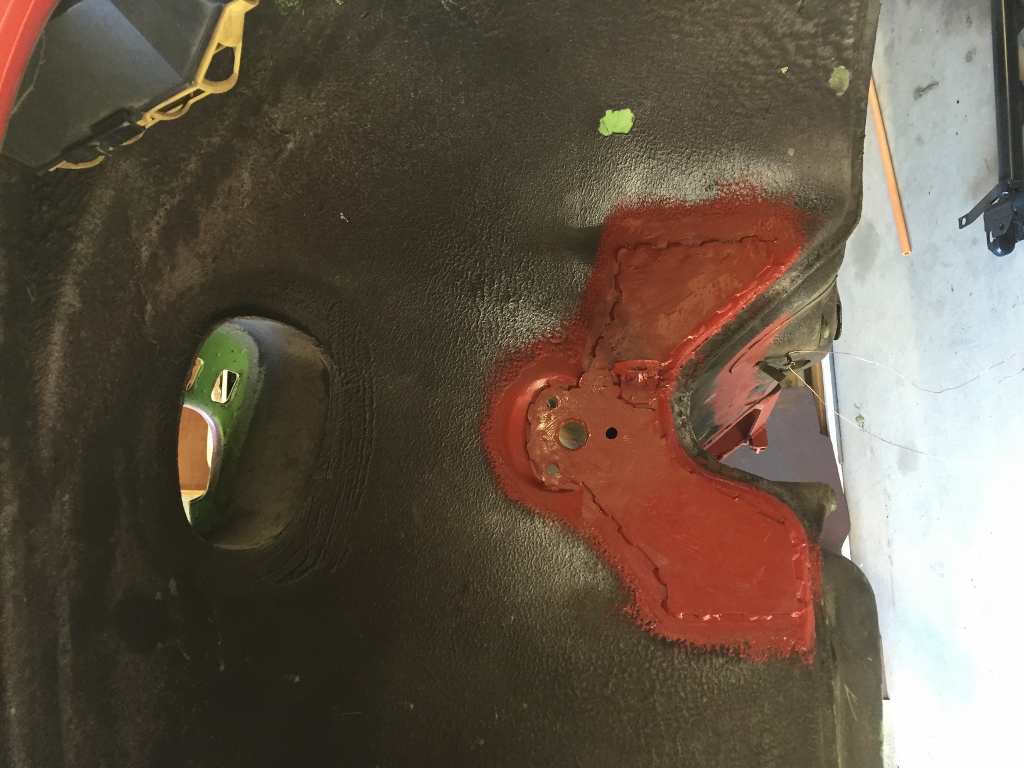 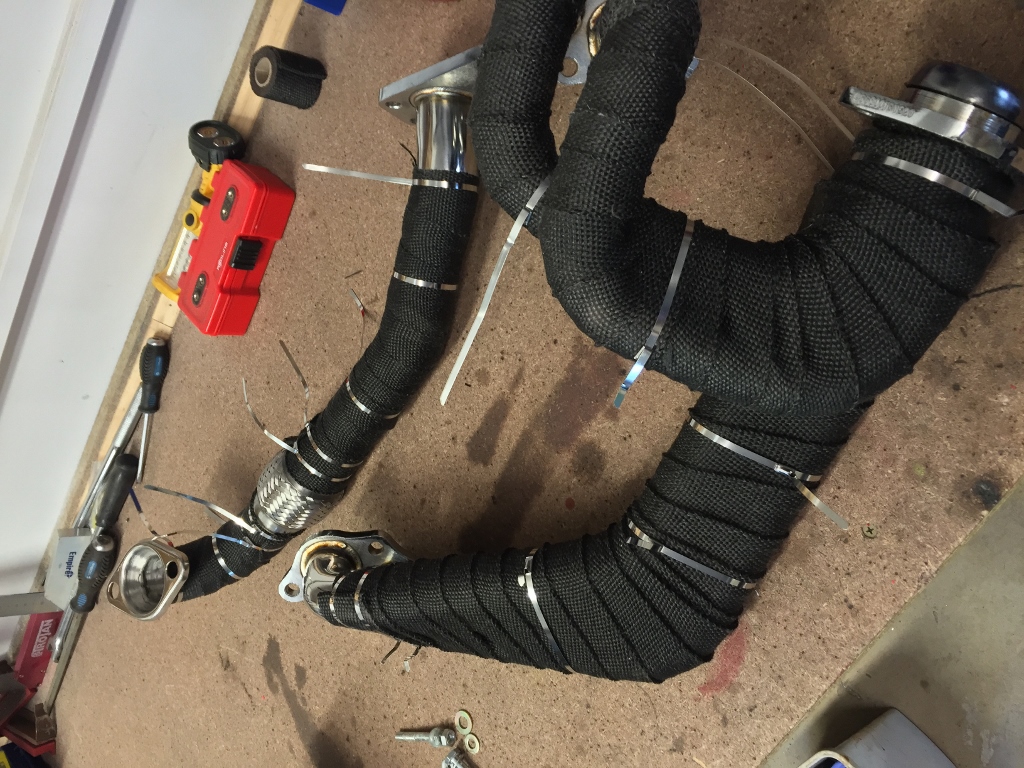
|
|
|
|
| barrym |
Aug 24 2016, 01:46 AM
Post
#75
|
|
Member Group: Members Posts: 88 Joined: 12-October 14 From: Australia Member No.: 18,008 Region Association: None |
I needed to straighten the brake lines as it came to me in a big roll, and didn't want to pay $$ for a straightener - bought some wardrobe door rollers for a few $ and bolted them to some scrap pine - then 2 bolts through to adjust tension - it works perfectly !
dropped on the fiberglass hood as I needed to check clearance for the radiator - no problems here - first time a hood has been on it for a year or so - makes the car seem wider somehow ... Attached image(s) 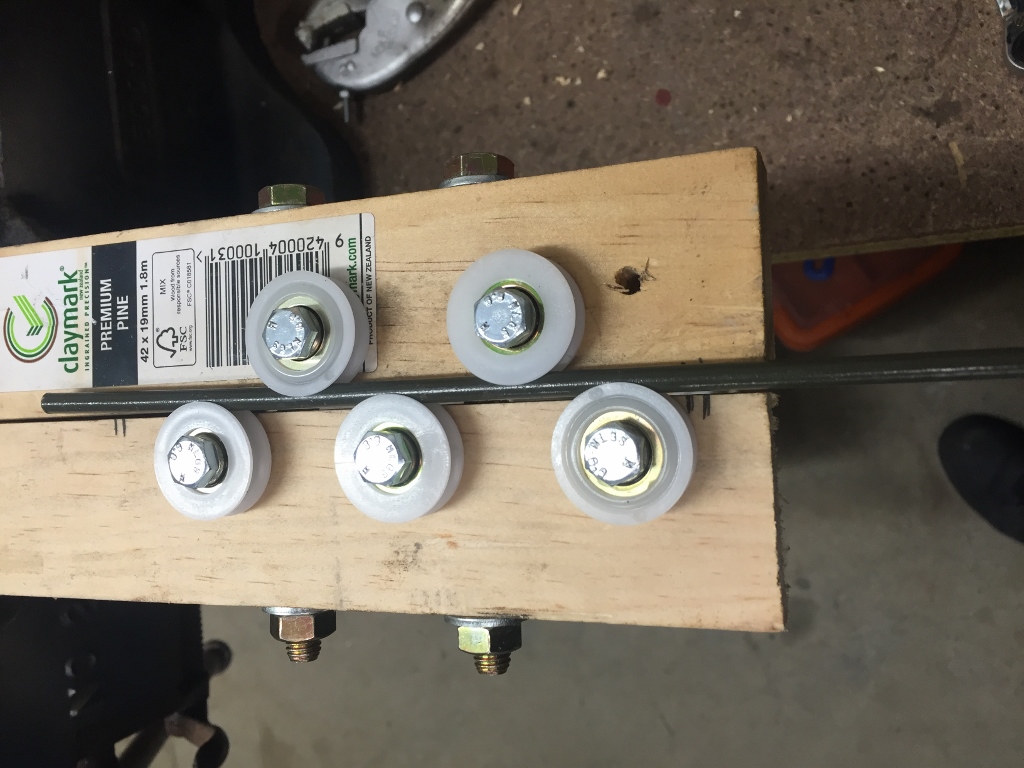 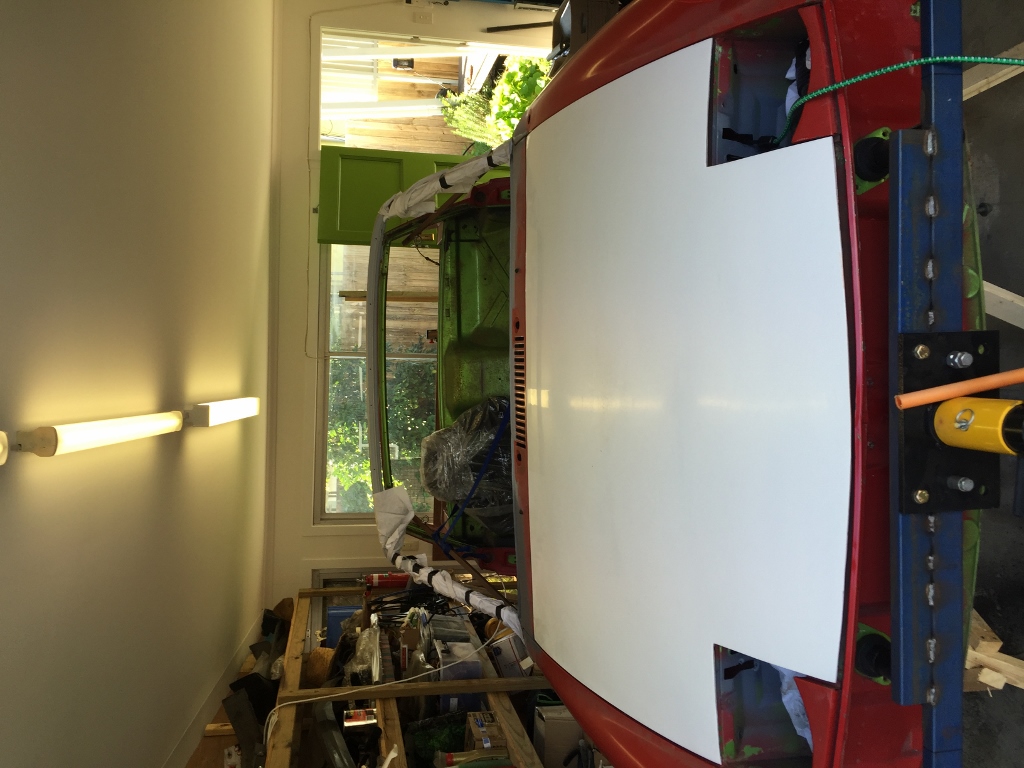
|
|
|
|
| barrym |
Aug 24 2016, 01:50 AM
Post
#76
|
|
Member Group: Members Posts: 88 Joined: 12-October 14 From: Australia Member No.: 18,008 Region Association: None |
have started to get busy with wiring - this was a MAJOR time consumer on my last car build (lotus 7 clone) so want to do this car wiring in parts ...
I started on the wiper motor - my 914 didn't come with a wiper stalk, I also wanted to declutter around the wheel as much as possible so I bought a cole hersey wiper switch - then had to figure out how to hook it all up ... this is done now and the below is how it works ... Attached image(s) 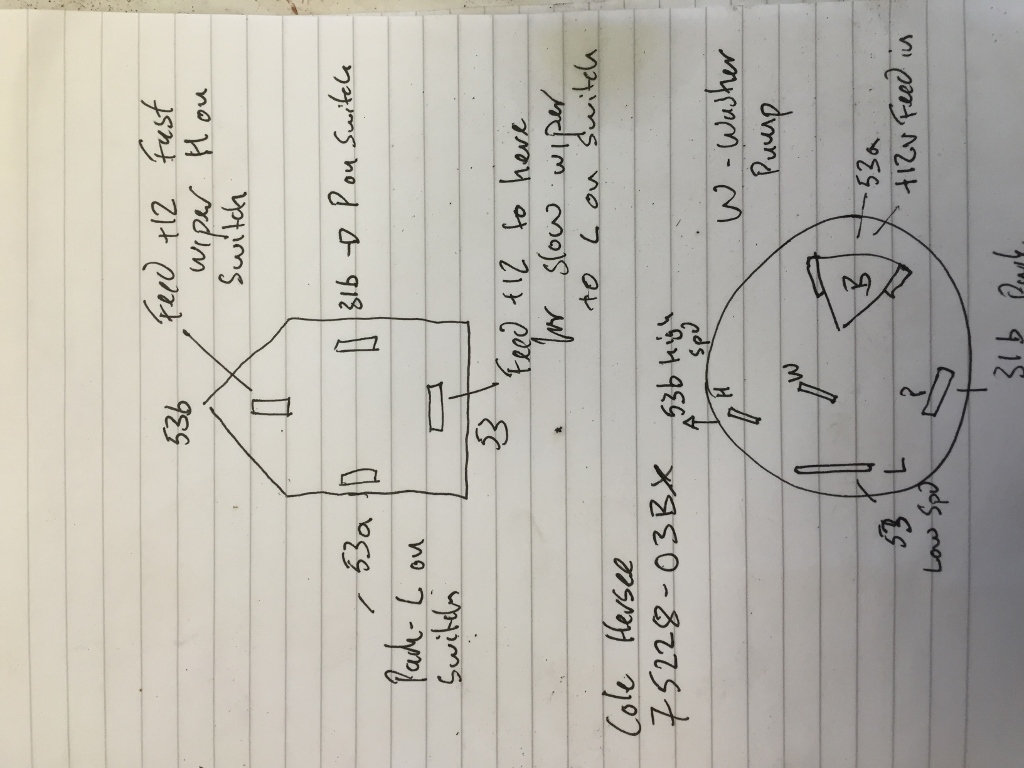
|
|
|
|
| barrym |
Aug 24 2016, 02:05 AM
Post
#77
|
|
Member Group: Members Posts: 88 Joined: 12-October 14 From: Australia Member No.: 18,008 Region Association: None |
also pulled apart the WRX wiring loom - I have it strung up in the garage and all wires marked where they hook up to and what ISNT needed. I also pulled the engine part of the loom off and cleaned / re-wrapped it with cloth tape. one of the nice things with the Subaru loom is the plugs at the engine - makes it very easy to remove the engine as the harness has 3 or 4 plugs that sit at the side of the engine that snake off into the various engine sensors & injectors etc.
I broke some of my ethos too ... started work on the rear hubs by installing the 930 turbo CV's to the inner side of the suspension arm - fits well ! I also procured an early 911 handbrake (e-brake) setup that needs a little cleaning up before installing ... this'll sit on the shelf for a little while tho. I fabricated a mount for the brake fluid bottle - searched around for a suitable container, but ended up using the Subaru one from the wreck I have and made up a mount for it - easy & cheap solution ! just some time on the lathe & some scrap aluminium. I've prob spent at least 2 days working on the throttle cable mechanism - I still don't like it, too much slop, despite using bearing races, and couldn't get the 'feel' right. it was just too tight. so I bought an '07 corolla ecu, an '07 camry throttle pedal and an IS350 throttle body - all drive by wire and will use this lot for my throttle solution. in the medium term i'll replace the factory wrx ecu (cant be tuned) and corolla ecu with a single standalone ecu - but that's a 2.5k investment I don't NEED to make right now ... it'll also lead me down the 'more power & e85' route ... i'm close now to be able to paint the inside of the front trunk, strip the underside and re-tar it. - that'll be a great milestone to hit and will allow me to move to the middle of the car which is a fairly minor amount of work then to the rear of the car ... LOTS of work here ... onwards on upwards ! Attached image(s) 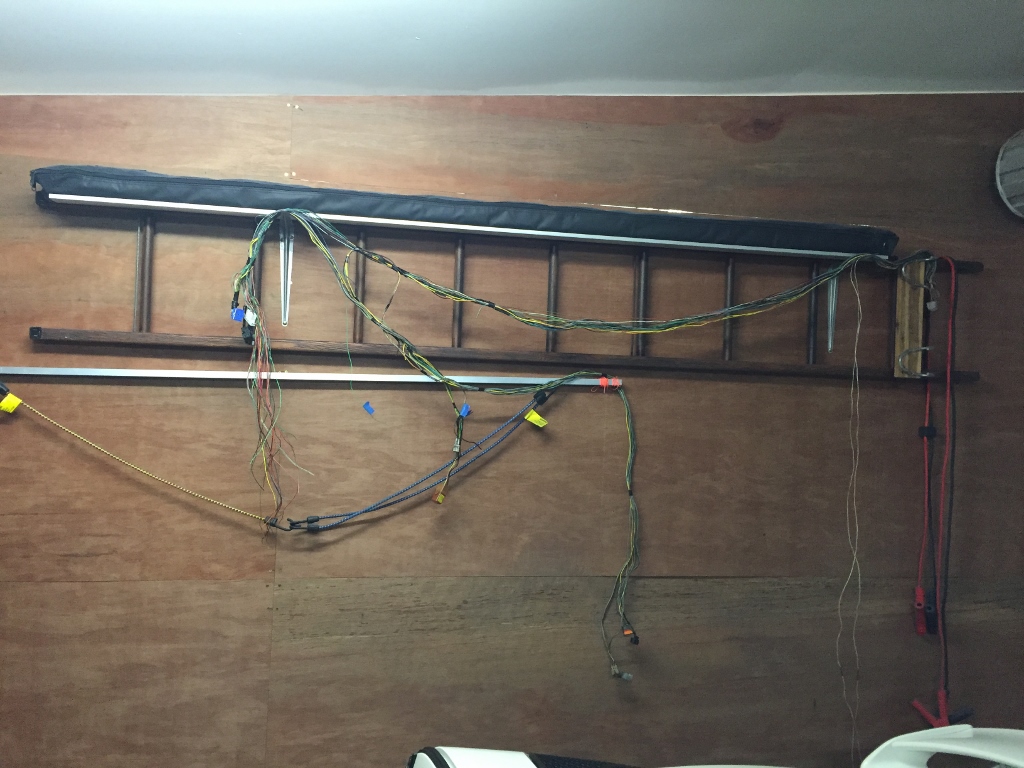
|
|
|
|
| Old Yella |
Aug 24 2016, 02:42 AM
Post
#78
|
|
Old Yella Group: Members Posts: 158 Joined: 2-July 13 From: Canberra Australia Member No.: 16,086 Region Association: Southwest Region |
What did you do with your 914 running gear if I may ask?
|
|
|
|
| barrym |
Aug 24 2016, 04:18 AM
Post
#79
|
|
Member Group: Members Posts: 88 Joined: 12-October 14 From: Australia Member No.: 18,008 Region Association: None |
The motor went to far north Australia - I still have the gearbox... The car was very incomplete when I got it ...
|
|
|
|
| barrym |
Sep 5 2016, 02:35 AM
Post
#80
|
|
Member Group: Members Posts: 88 Joined: 12-October 14 From: Australia Member No.: 18,008 Region Association: None |
Because I'm switching to electronic throttle on a stand alone system I need to be able for the stock ecu to control idle speed - so took the Subaru iac valve from the cable throttle body & made a new housing for it ....
Attached thumbnail(s)  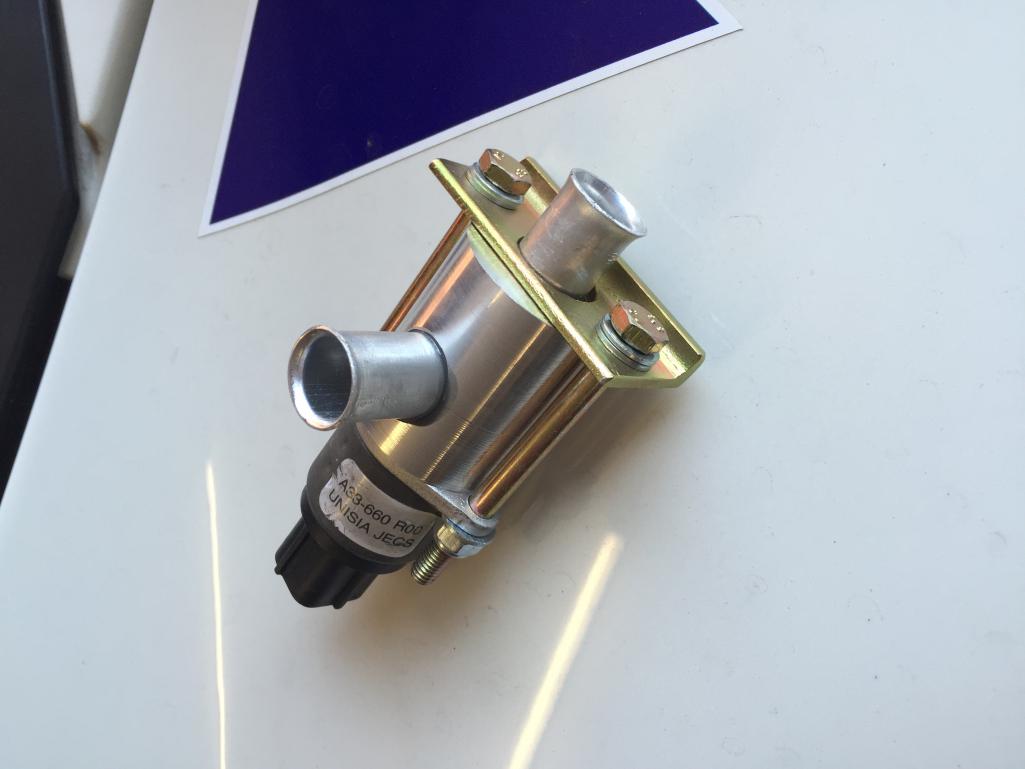
|
|
|
|
|
1 User(s) are reading this topic (1 Guests and 0 Anonymous Users)
0 Members:

|
Lo-Fi Version | Time is now: 1st July 2025 - 10:55 PM |
Invision Power Board
v9.1.4 © 2025 IPS, Inc.