|
|

|
Porsche, and the Porsche crest are registered trademarks of Dr. Ing. h.c. F. Porsche AG.
This site is not affiliated with Porsche in any way. Its only purpose is to provide an online forum for car enthusiasts. All other trademarks are property of their respective owners. |
|
|
  |
| dlee6204 |
 Apr 21 2016, 06:42 PM Apr 21 2016, 06:42 PM
Post
#41
|
|
Howdy     Group: Members Posts: 2,162 Joined: 30-April 06 From: Burnsville, NC Member No.: 5,956 |
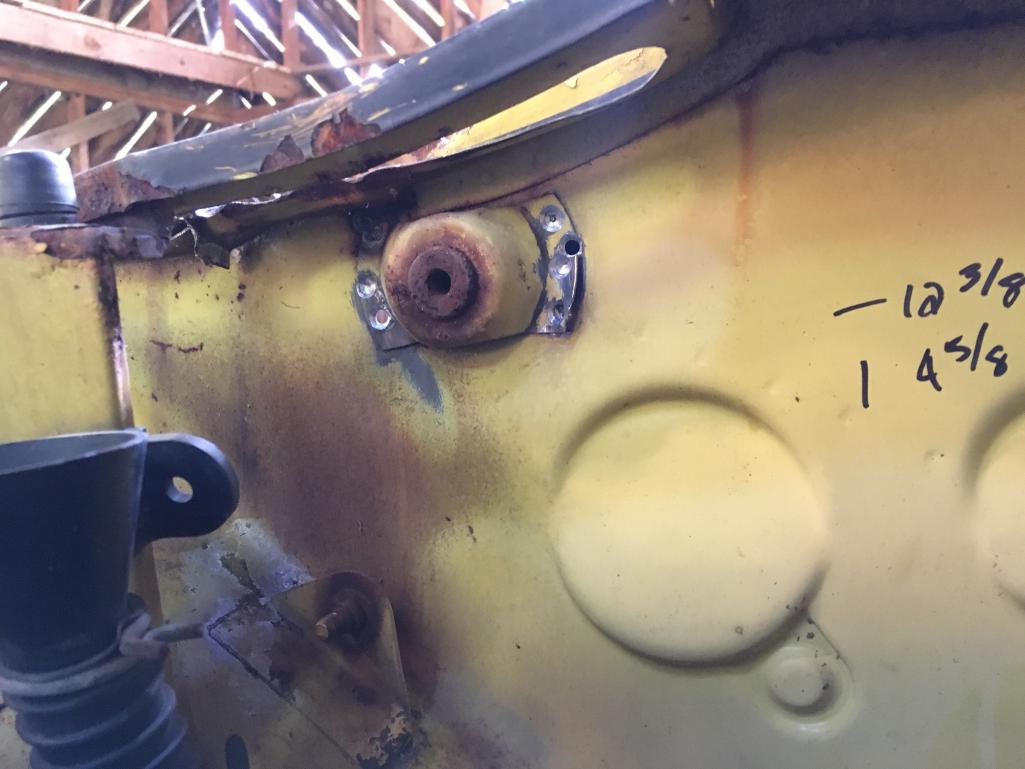
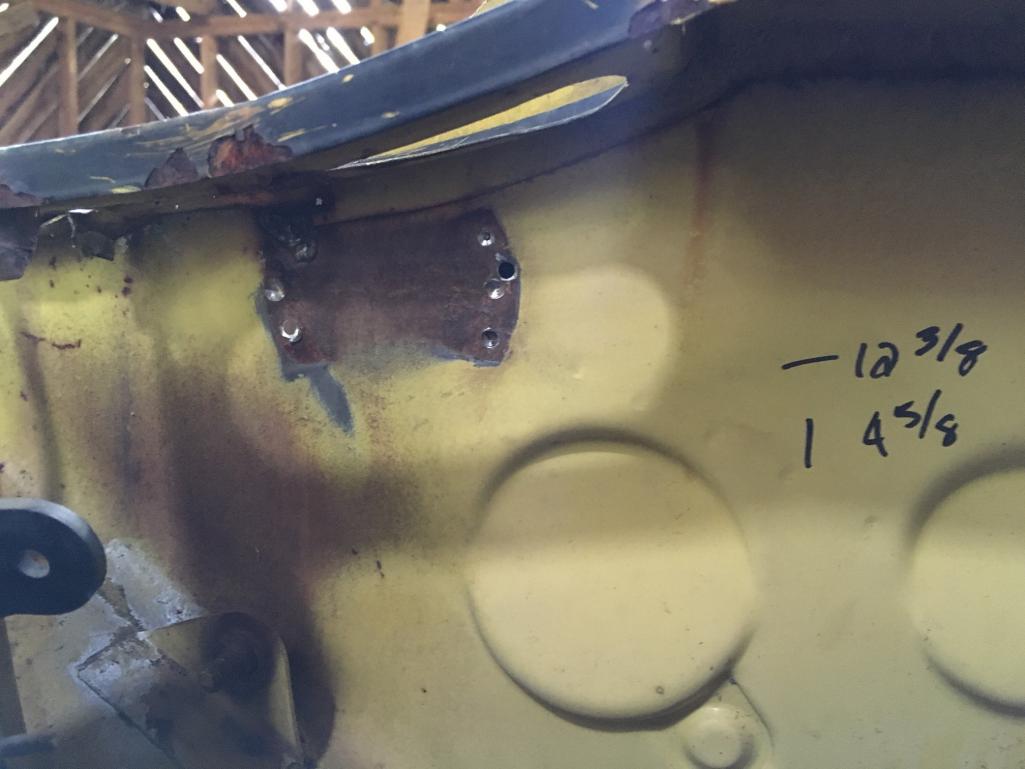
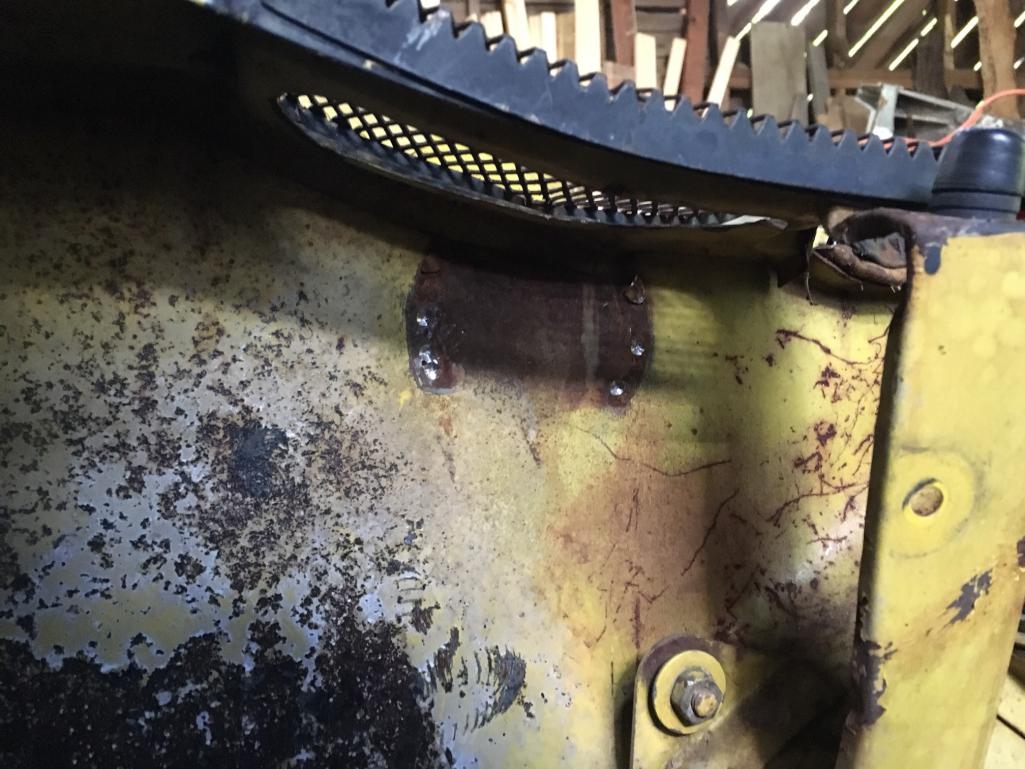
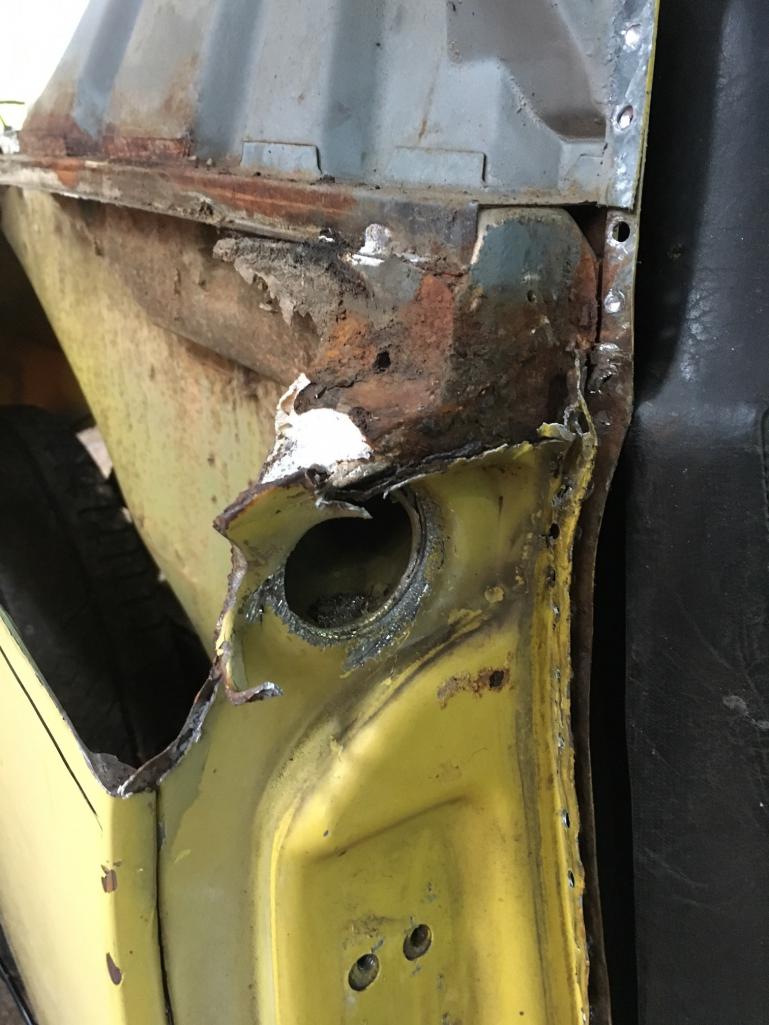
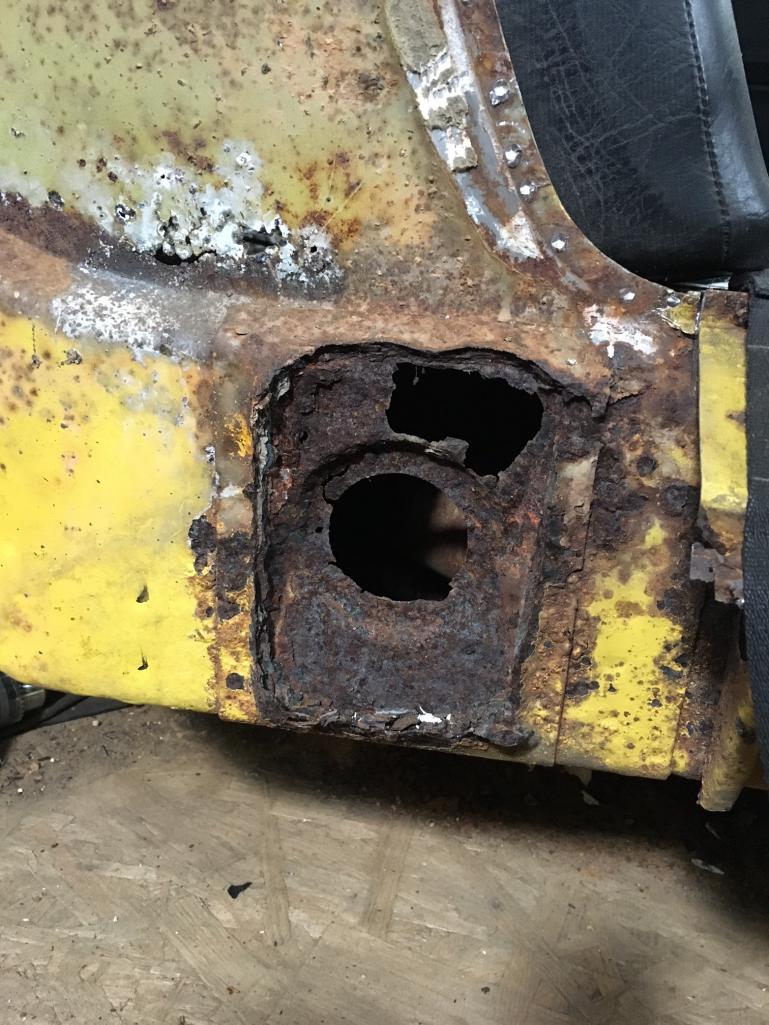
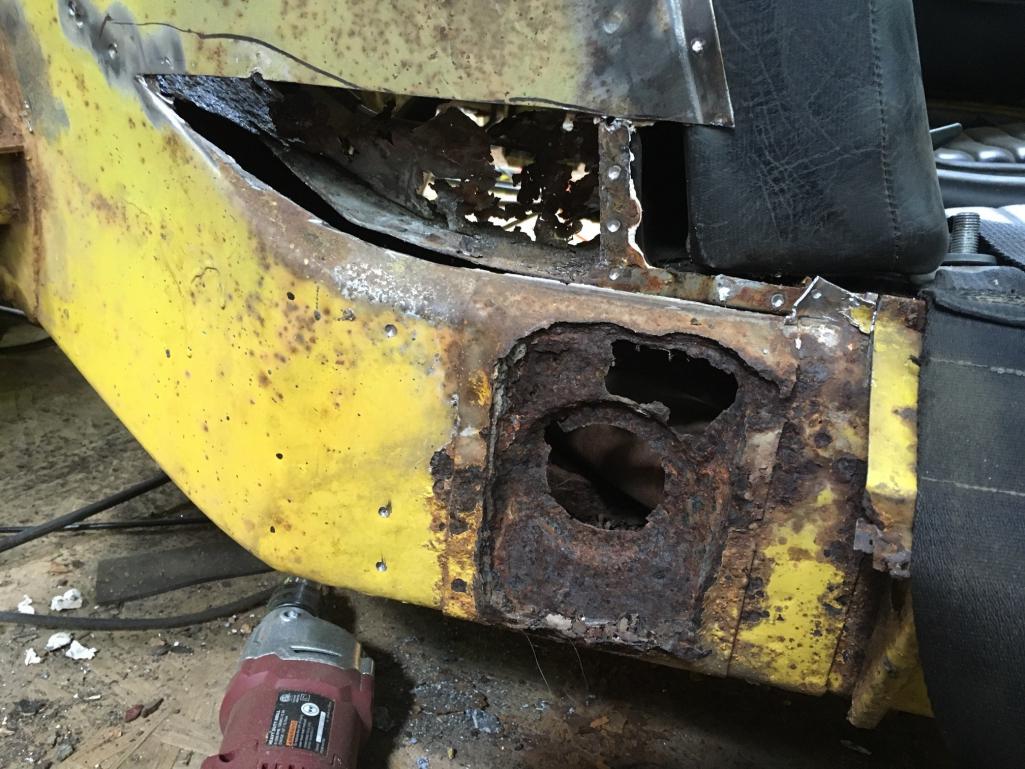
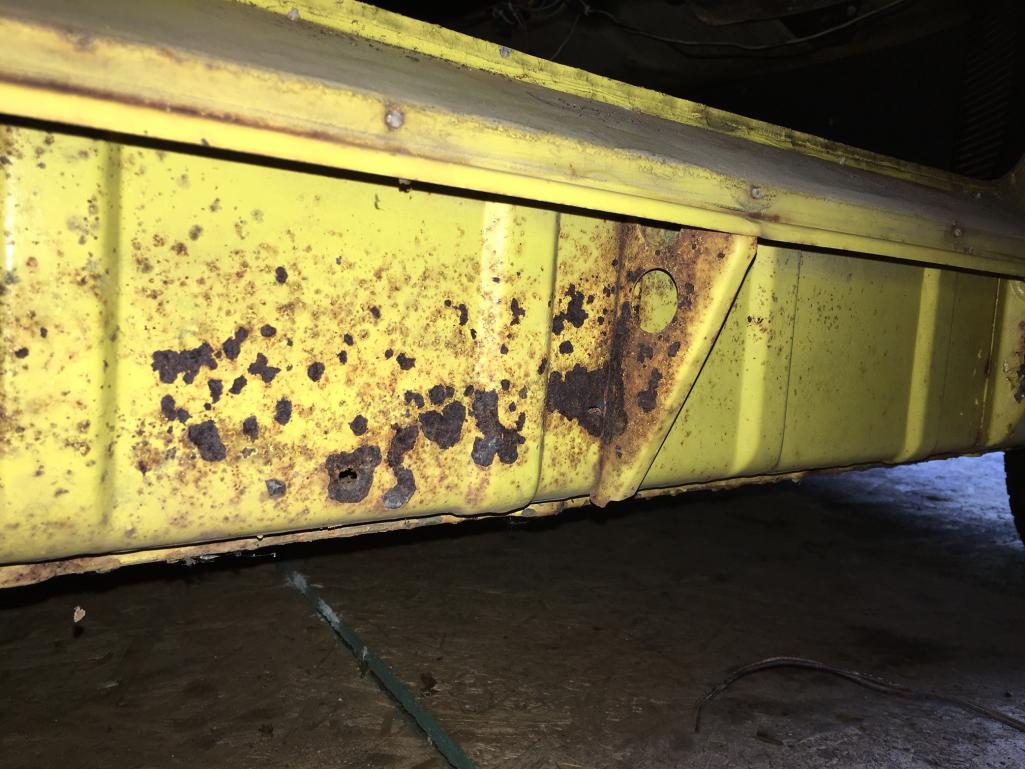
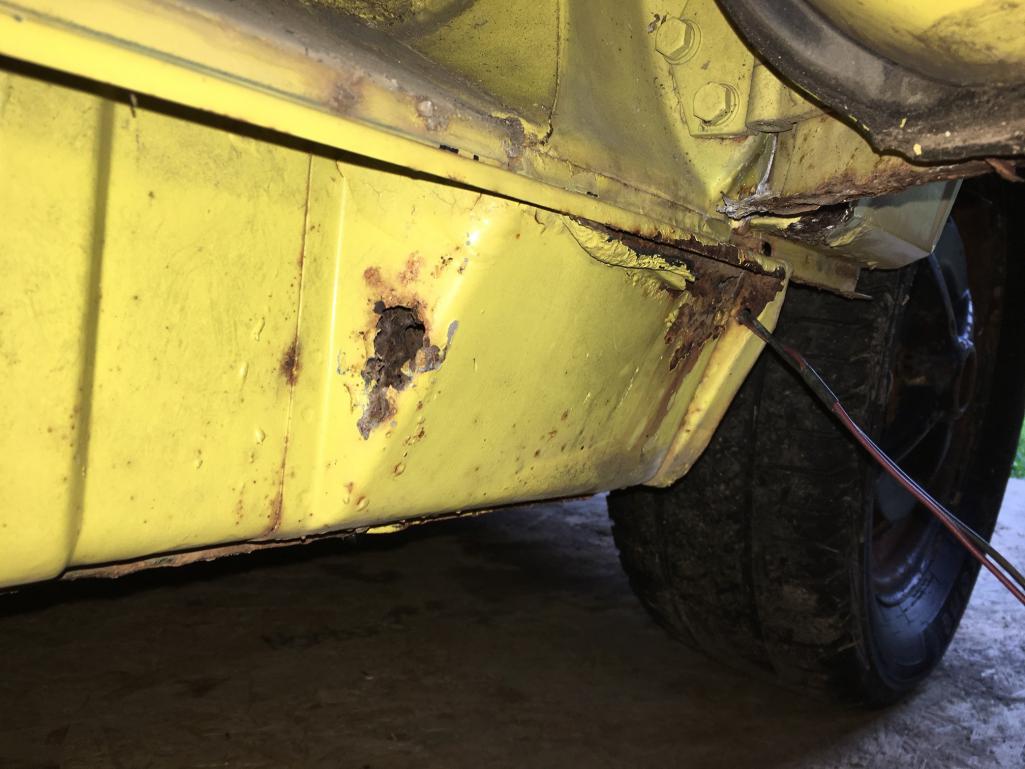
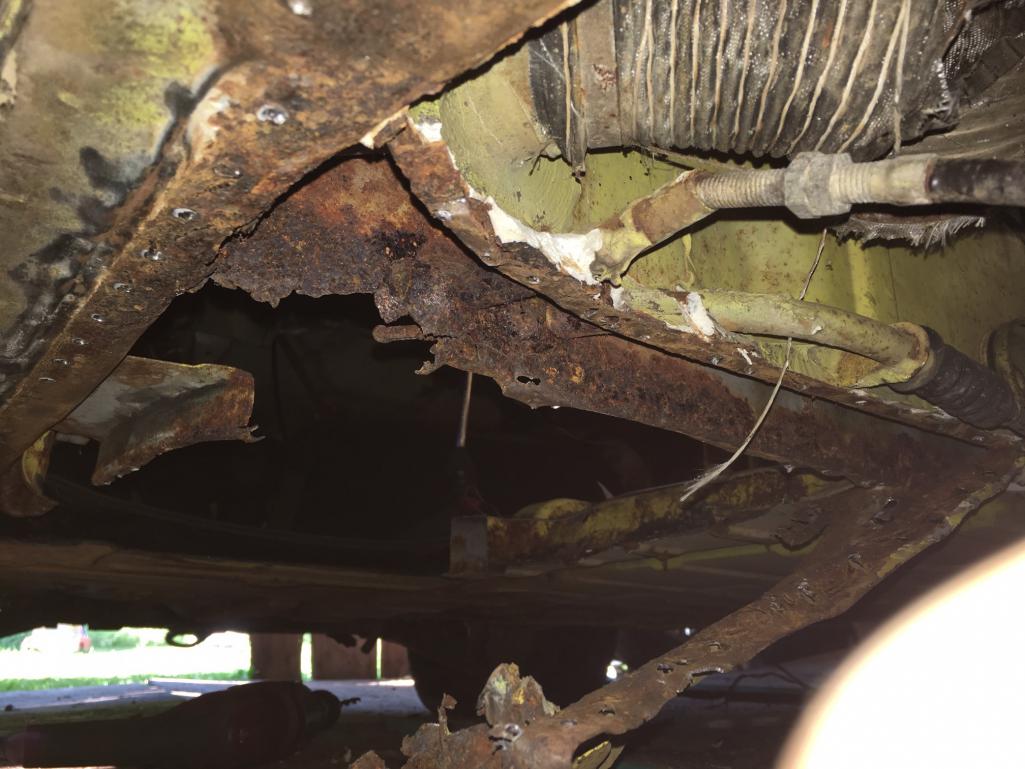
I also got some rust repair done on the driver's jack point and unfortunately I didn't take the best of pictures.
I started with this. 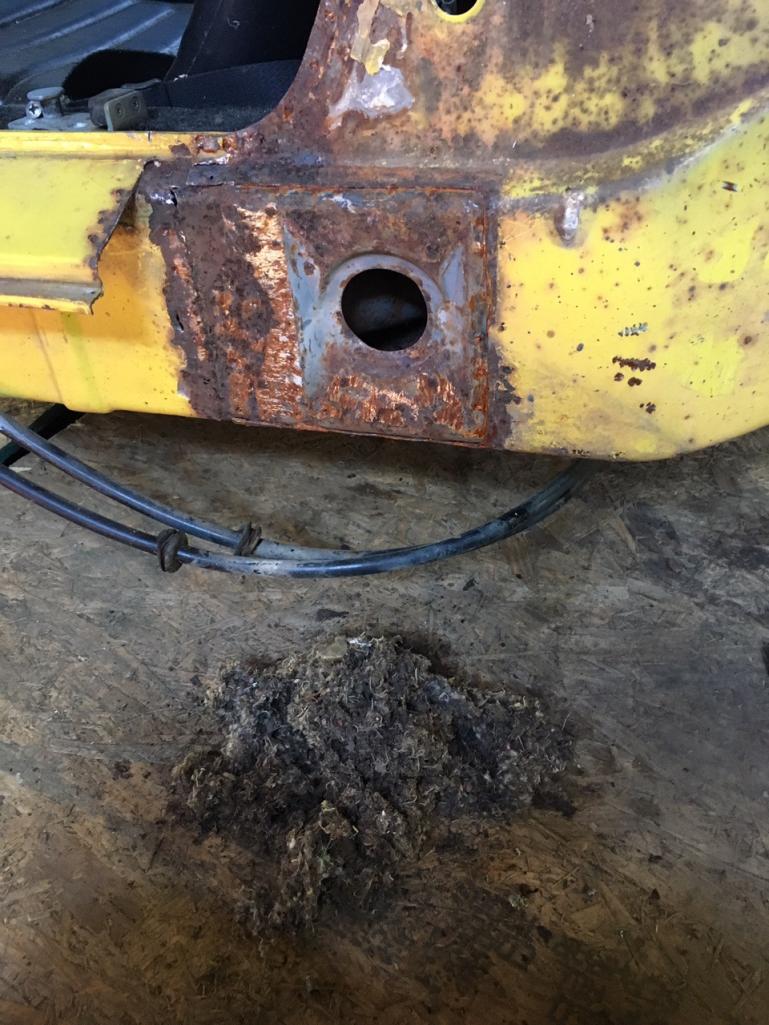 I then welded up a circle plate to cover the hole. The jack tube welds to this plate. 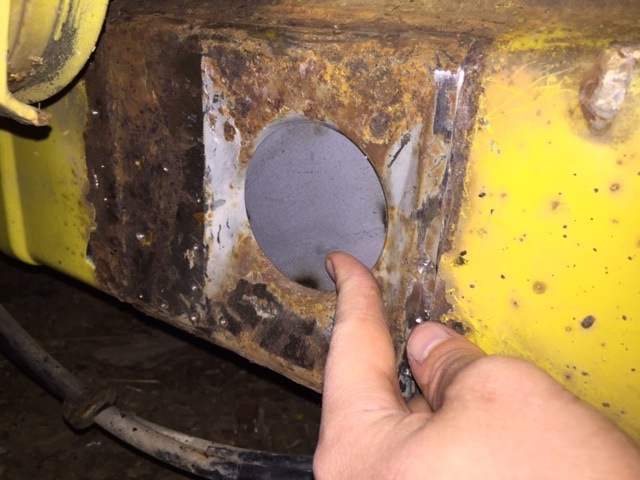 I then added a second layer and I cut a square hole in the middle for the jack tube. 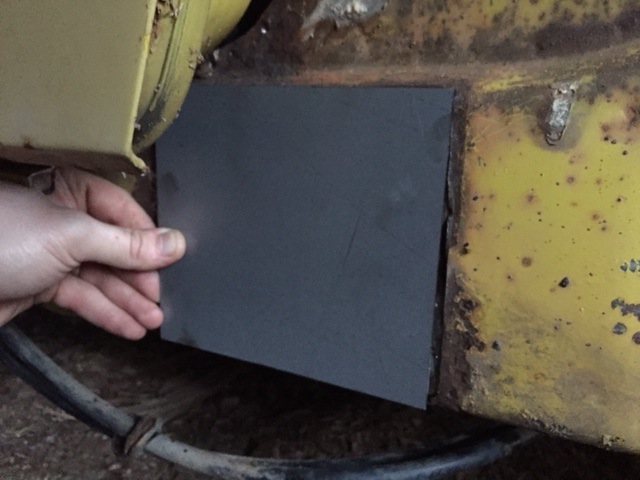 I used a rocker panel to ensure everything lined up and then welded on the outer cover. 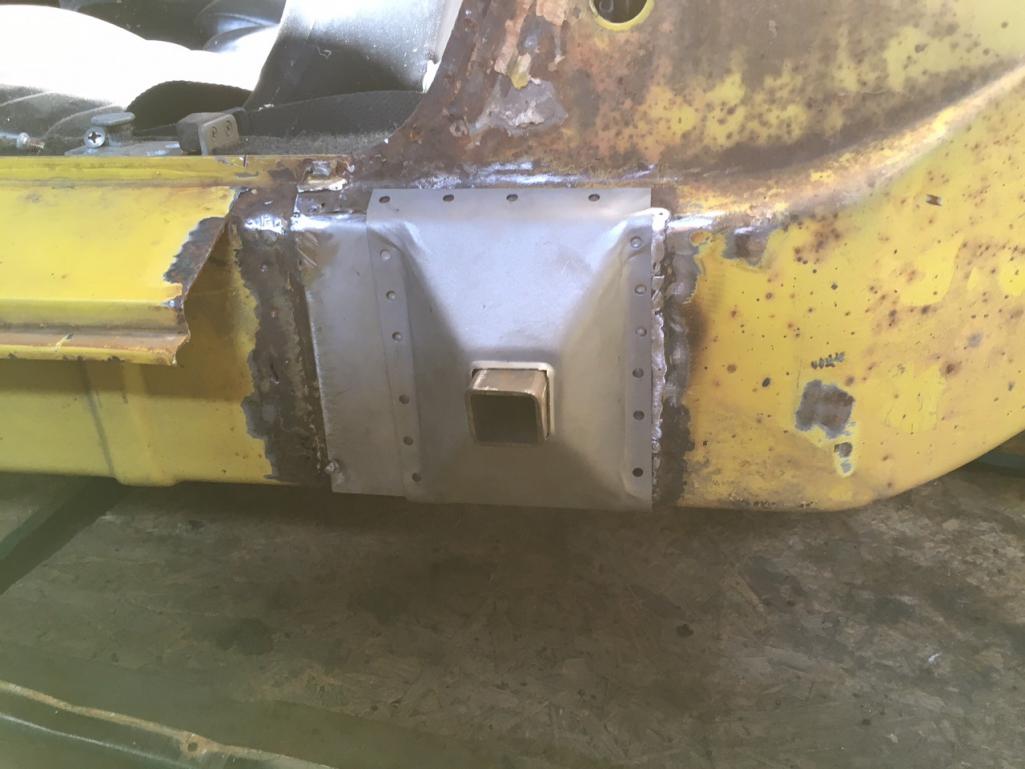 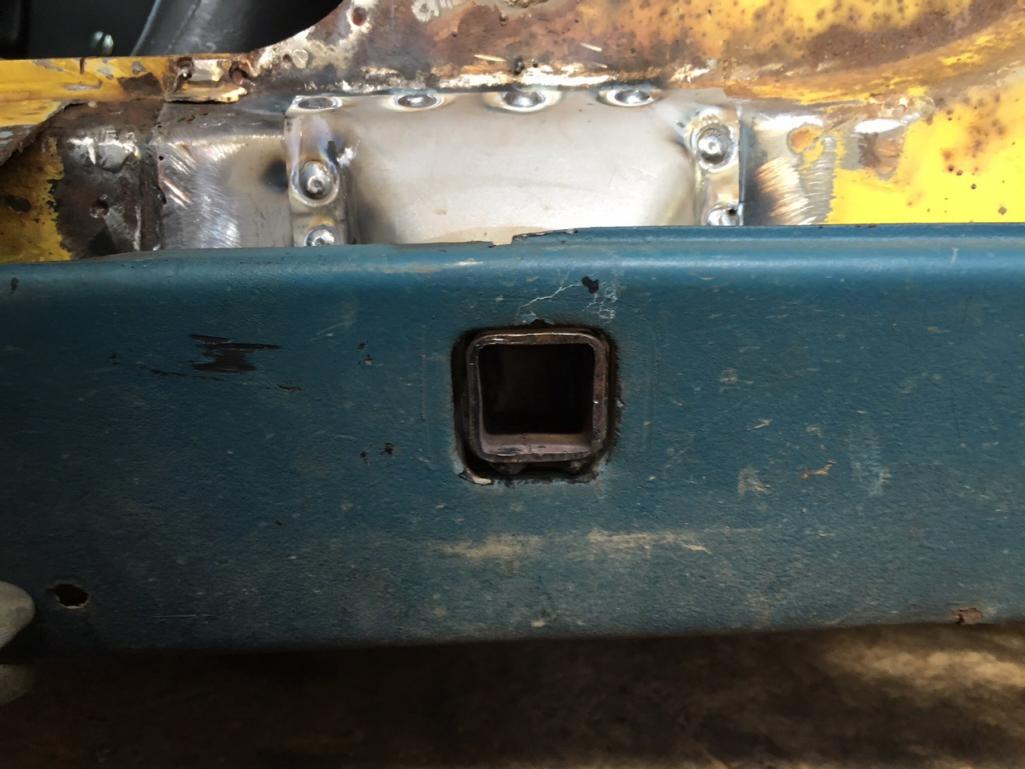 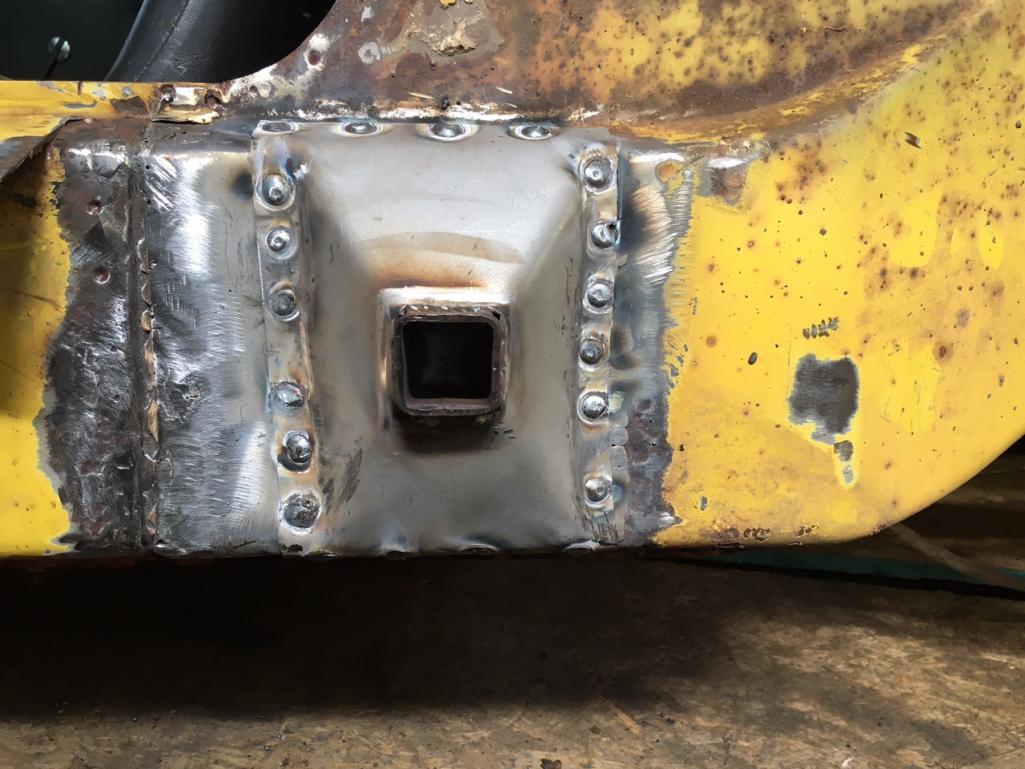 |
| dlee6204 |
 Apr 21 2016, 06:46 PM Apr 21 2016, 06:46 PM
Post
#42
|
|
Howdy     Group: Members Posts: 2,162 Joined: 30-April 06 From: Burnsville, NC Member No.: 5,956 |
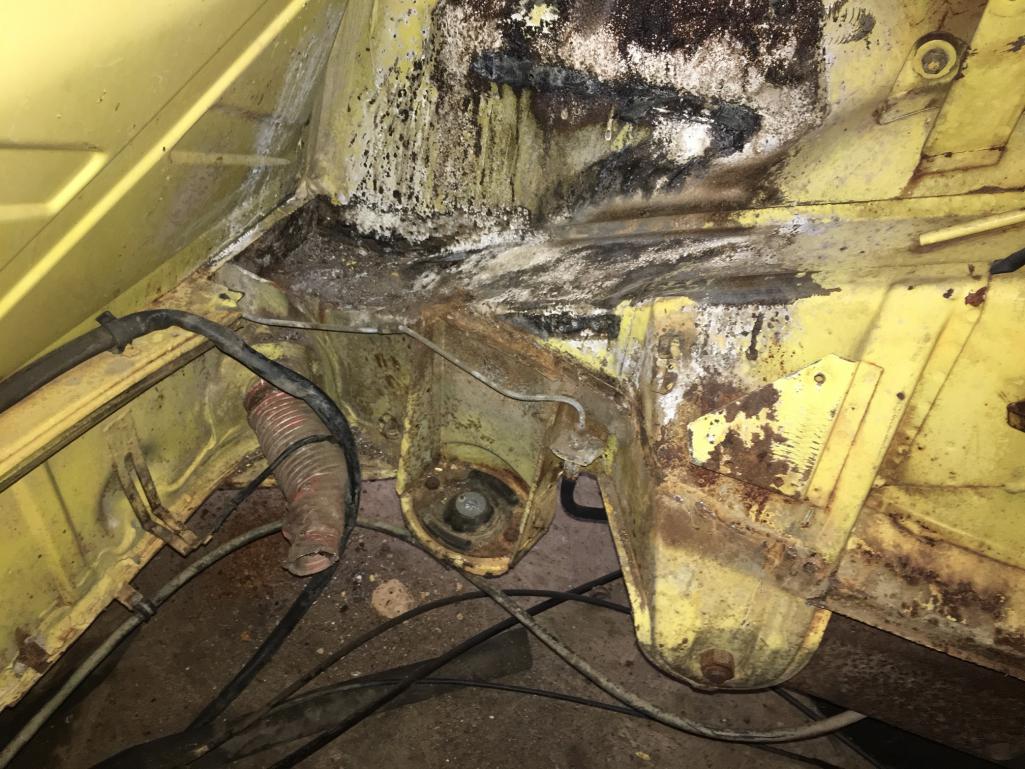
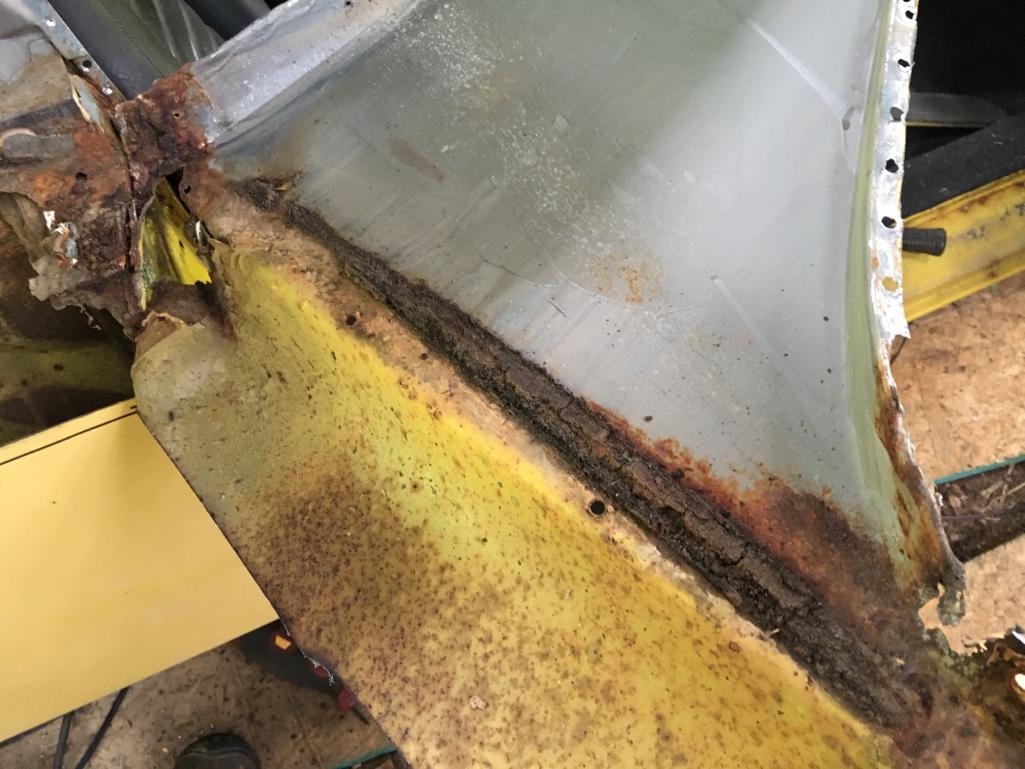
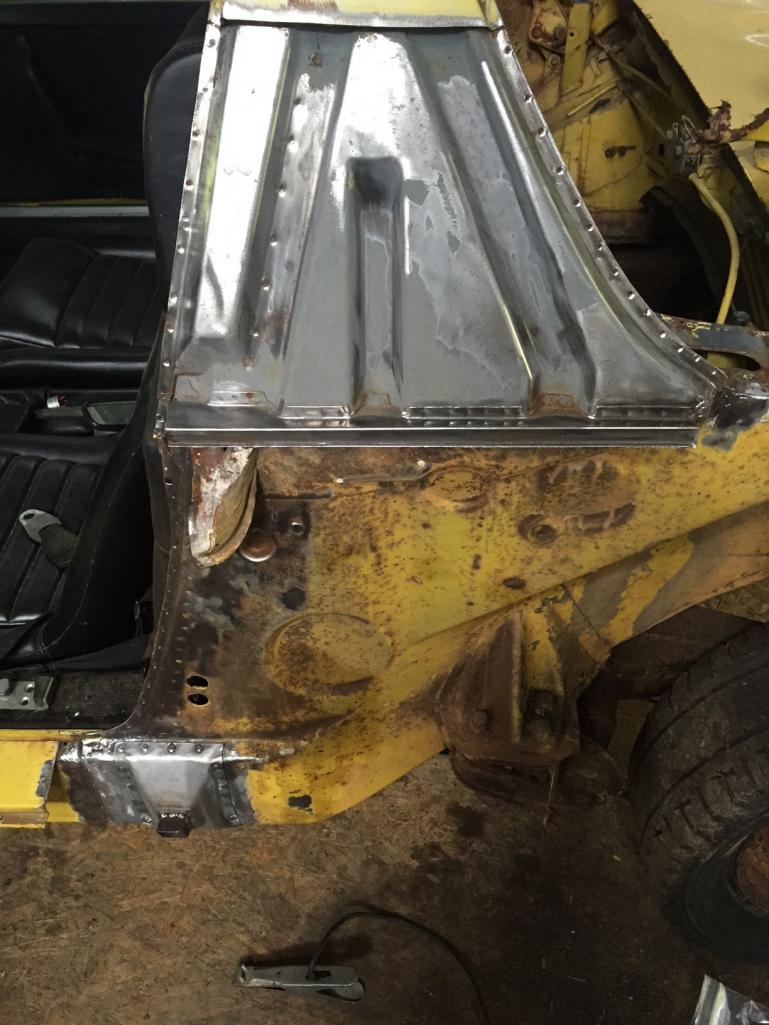
I finished by cleaning up the inner sail panel area with a wire wheel and then coated everything with Ospho. Once it dries I will clean the area up and start fitting the sail panel and new door jamb. (IMG:style_emoticons/default/piratenanner.gif) Progress feels good.
 |
| 76-914 |
 Apr 21 2016, 07:06 PM Apr 21 2016, 07:06 PM
Post
#43
|
|
Repeat Offender & Resident Subaru Antagonist           Group: Members Posts: 13,830 Joined: 23-January 09 From: Temecula, CA Member No.: 9,964 Region Association: Southern California 
|
|
| dlee6204 |
 Apr 23 2016, 02:34 PM Apr 23 2016, 02:34 PM
Post
#44
|
|
Howdy     Group: Members Posts: 2,162 Joined: 30-April 06 From: Burnsville, NC Member No.: 5,956 |
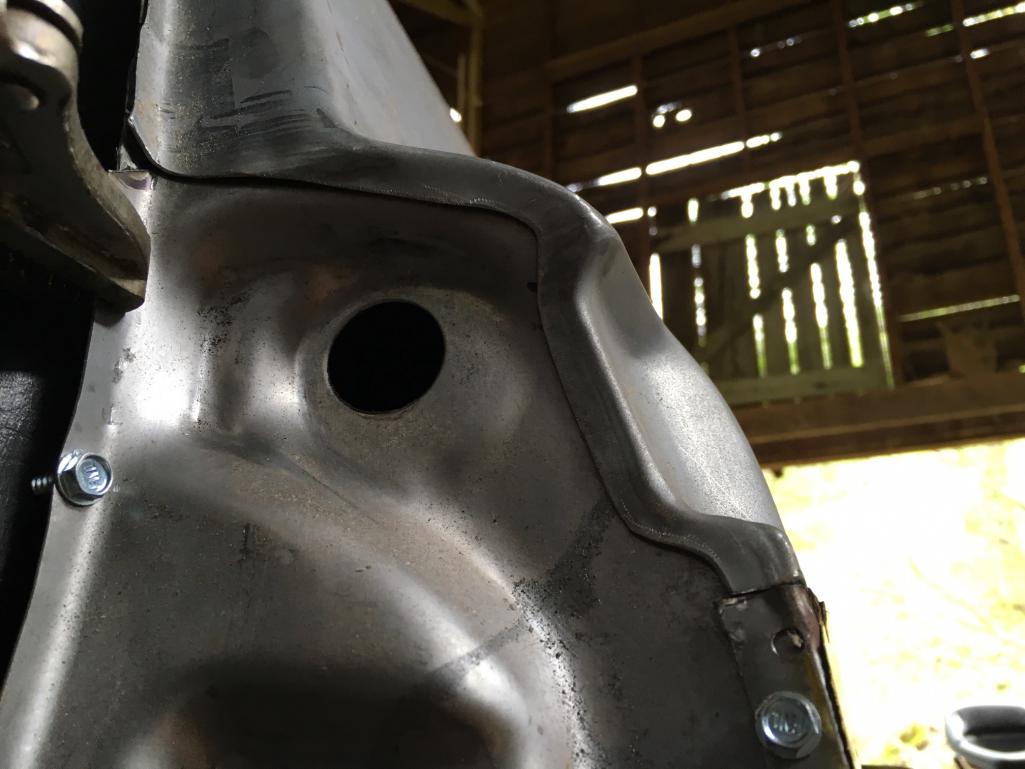
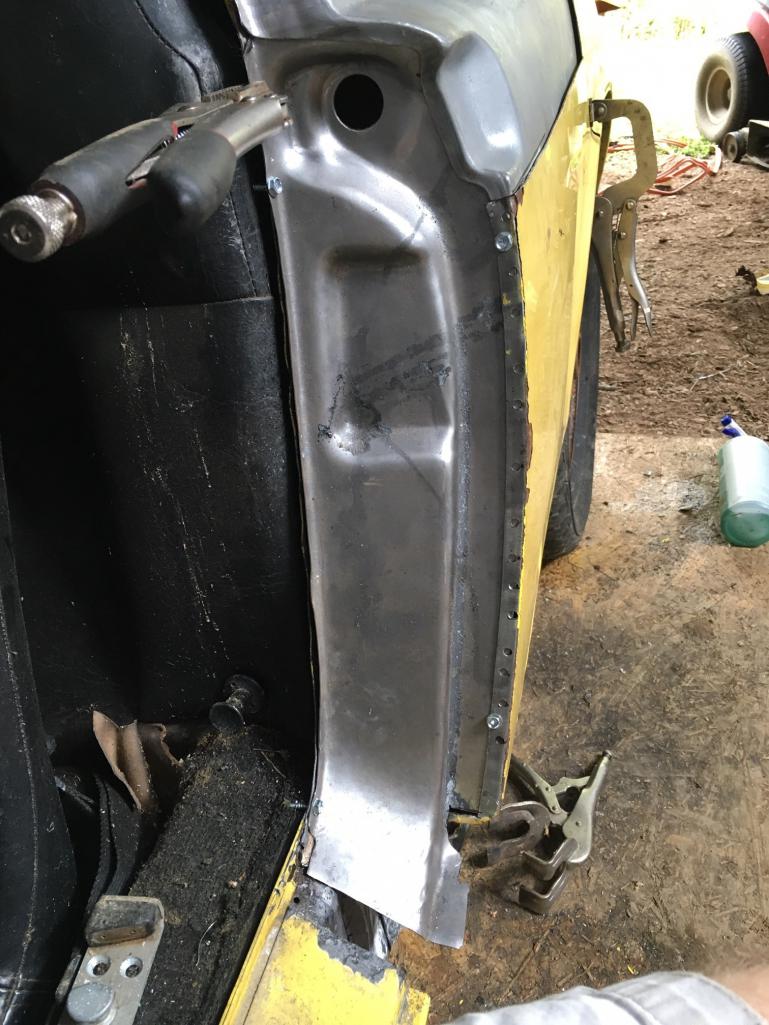
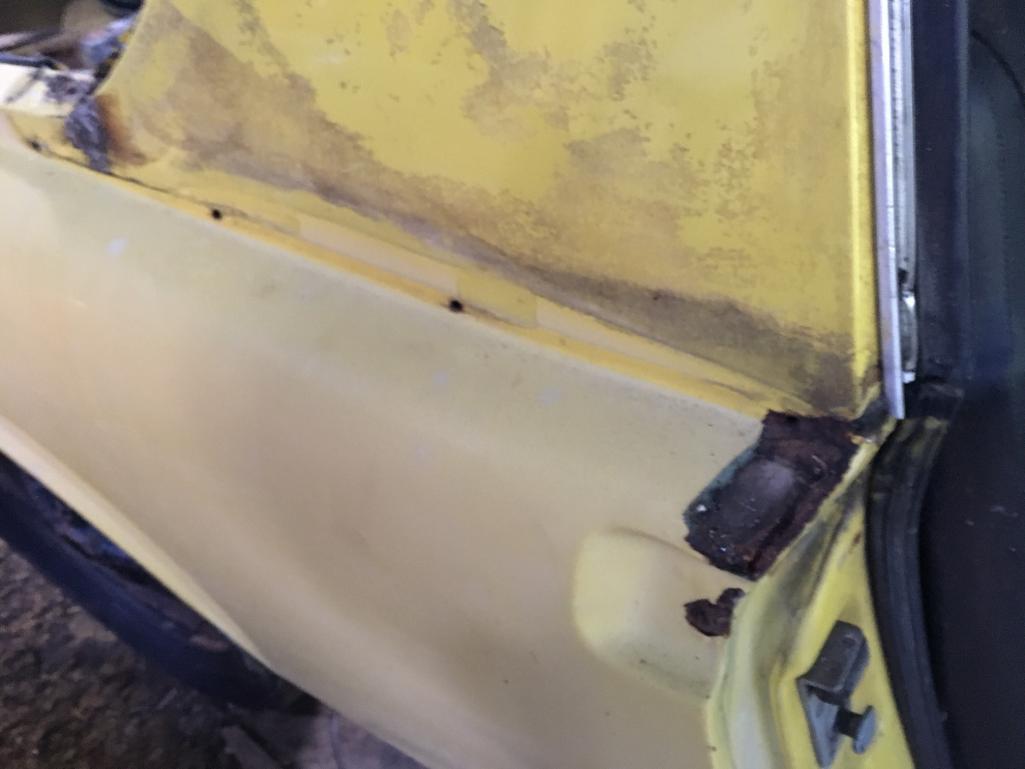
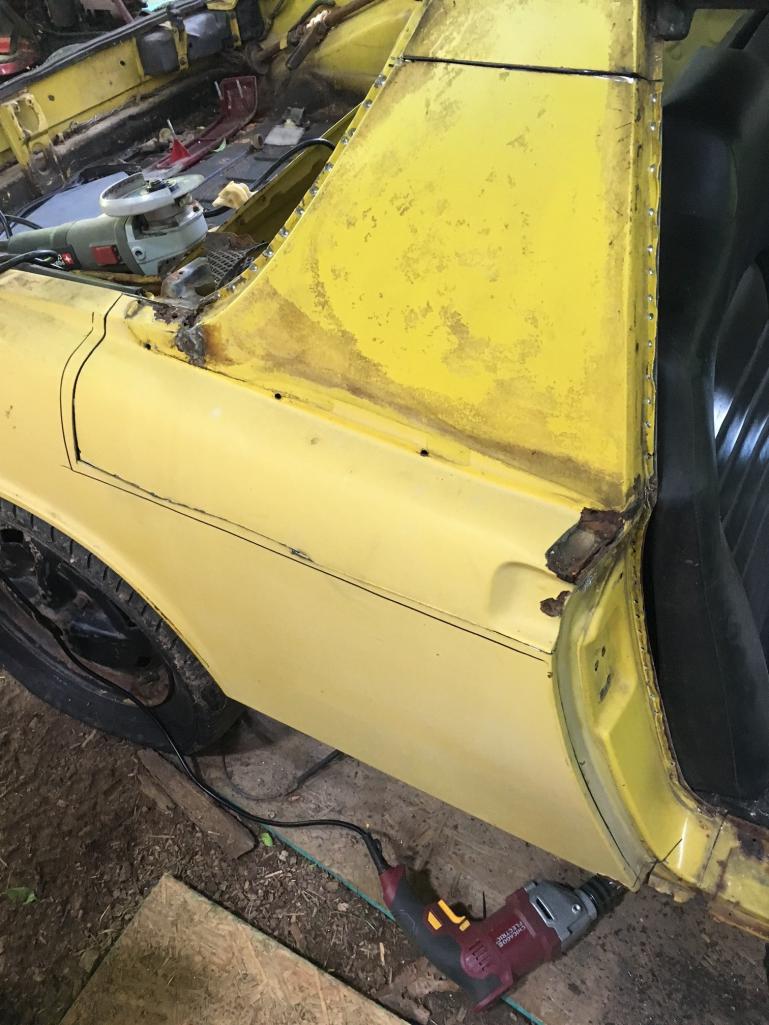
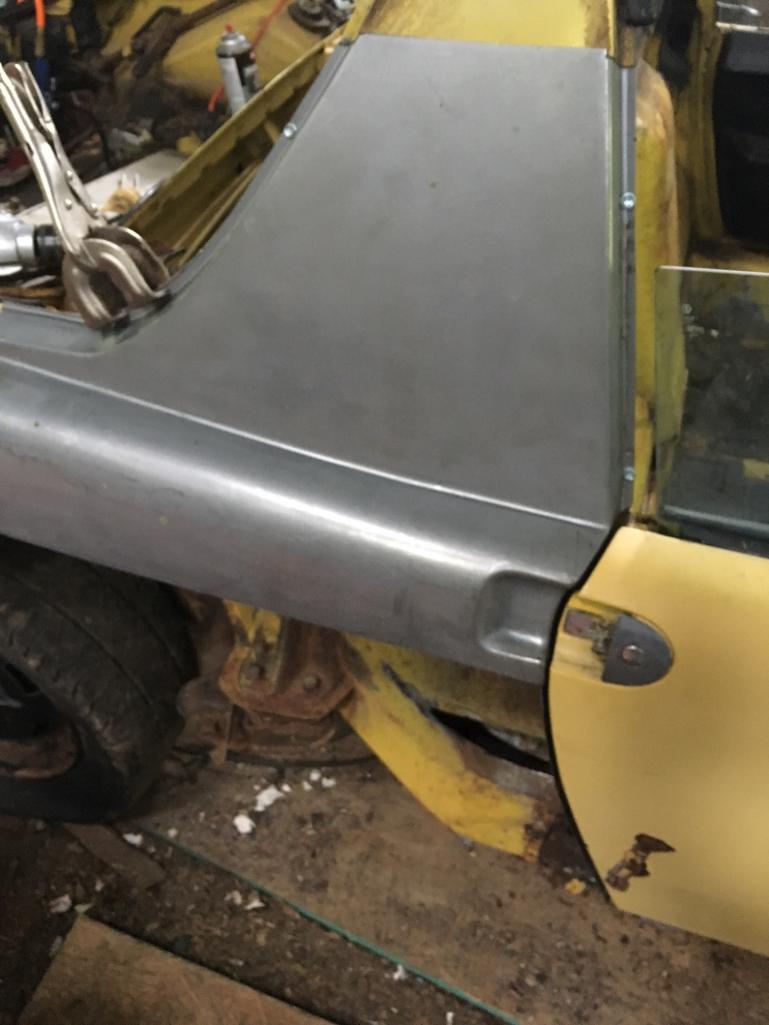
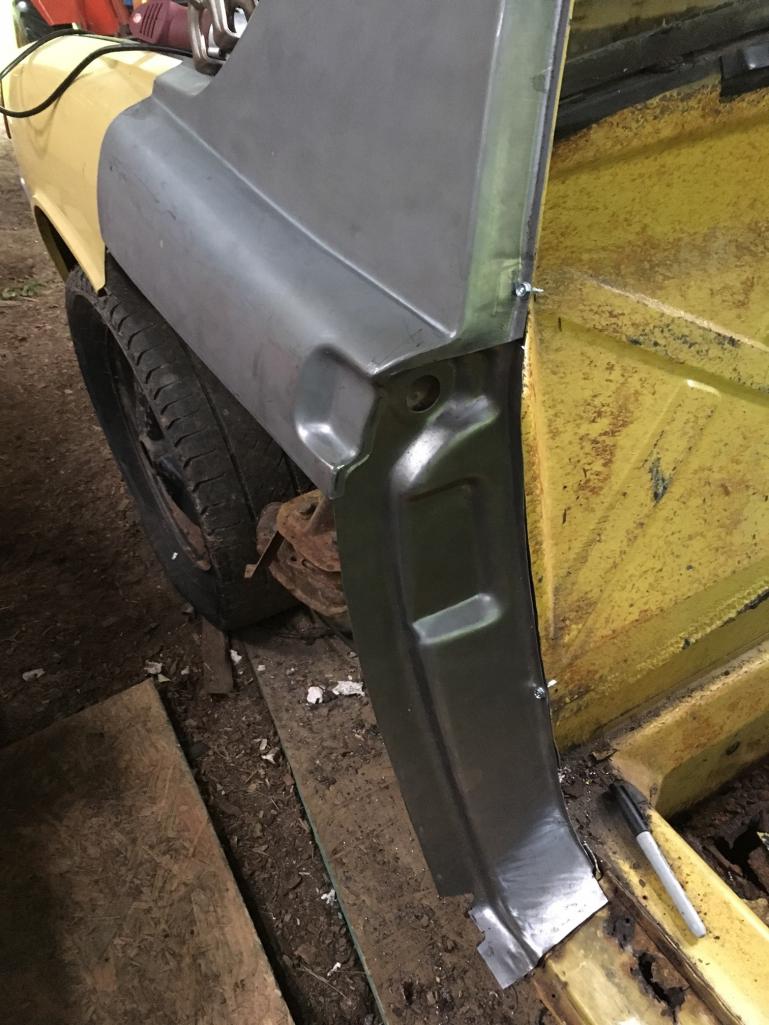
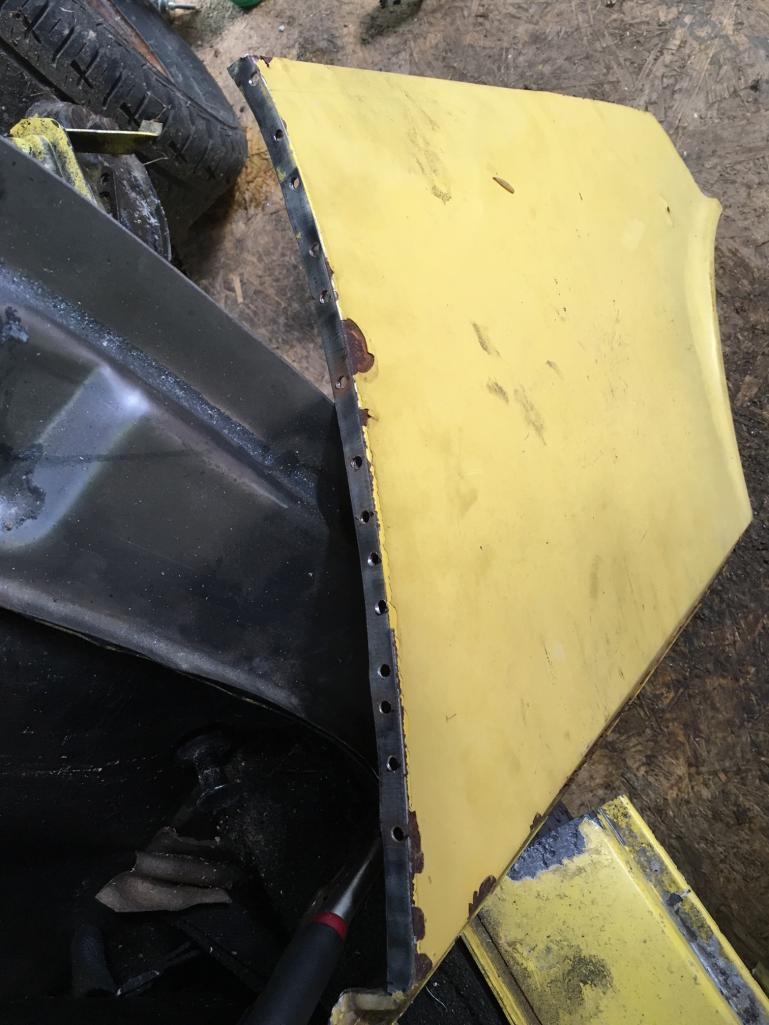
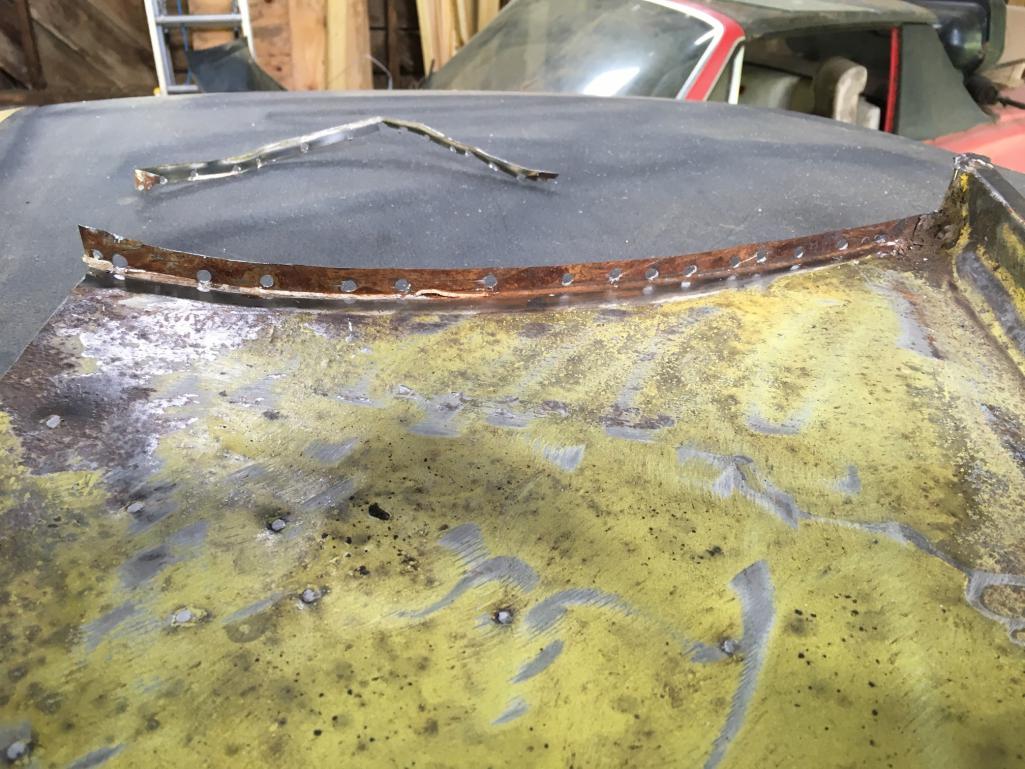
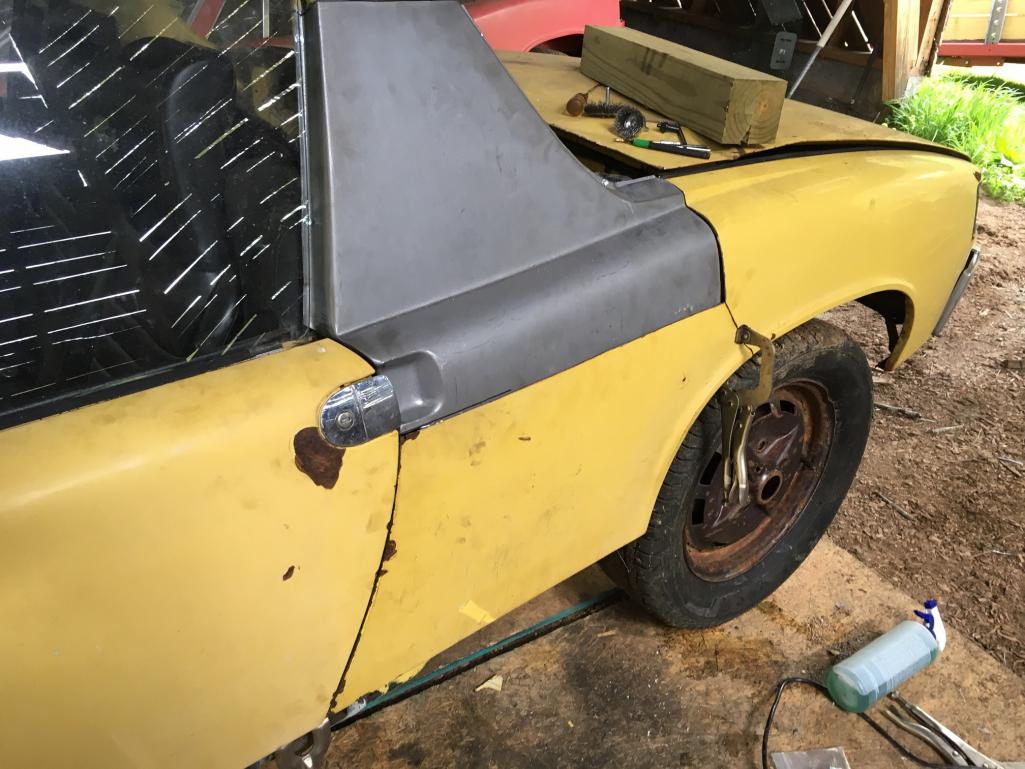
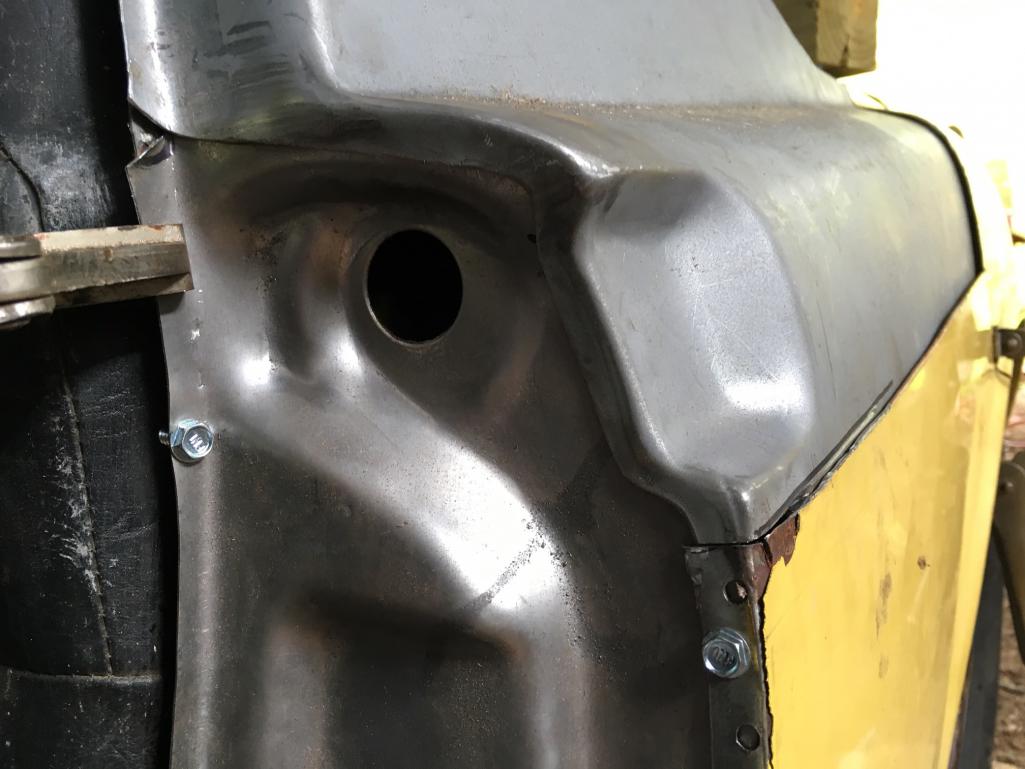
Today I was able to trim and fit the new sail panel, new door jamb, and the old section of fender. Taking my time and making one cut at a time, all the panels came together surprisingly well. Everything is currently held together with sheet metal screws and ready for welding. I'm going to apply primer to the back of everything before any welding happens. I still have to enlarge the vent hole.
    |
| dlee6204 |
 Apr 23 2016, 02:37 PM Apr 23 2016, 02:37 PM
Post
#45
|
|
Howdy     Group: Members Posts: 2,162 Joined: 30-April 06 From: Burnsville, NC Member No.: 5,956 |
|
| dlee6204 |
 Apr 23 2016, 02:43 PM Apr 23 2016, 02:43 PM
Post
#46
|
|
Howdy     Group: Members Posts: 2,162 Joined: 30-April 06 From: Burnsville, NC Member No.: 5,956 |
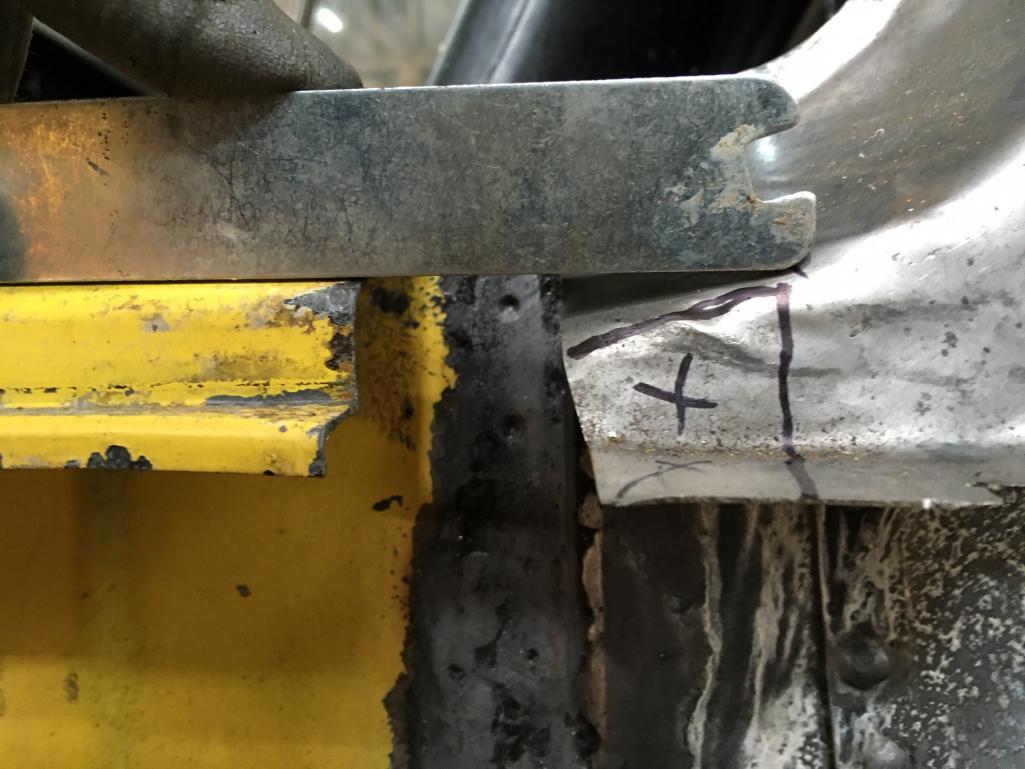
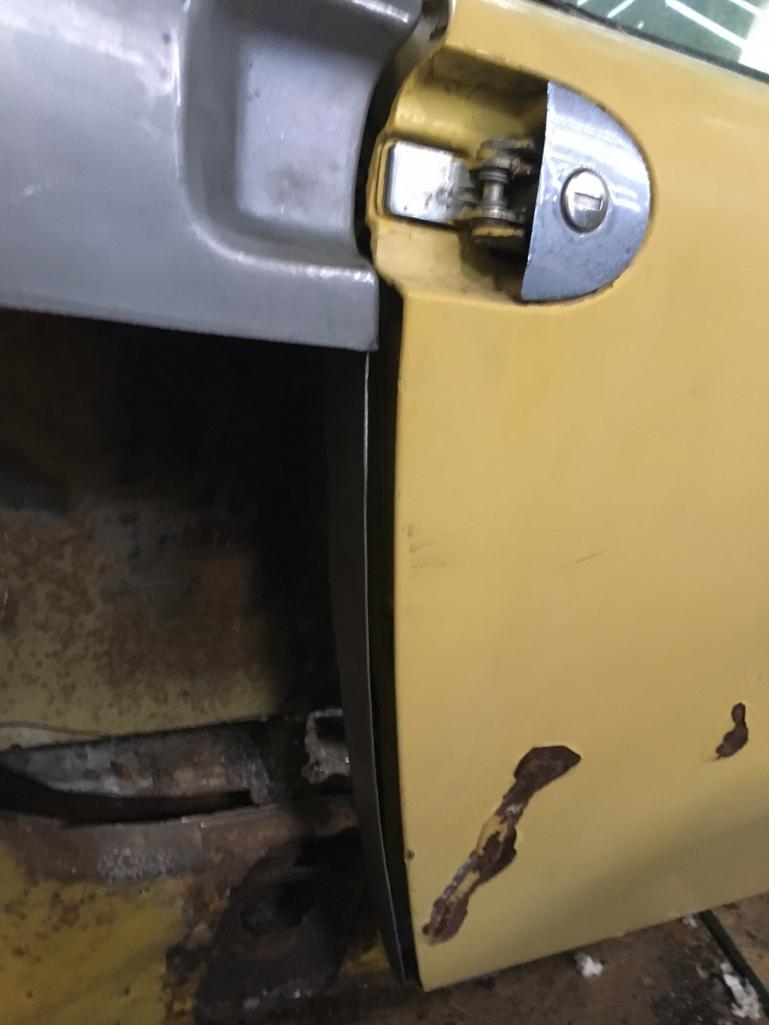
One of the tasks I had to do to the door jamb was to relocate the striker plate for the door. I drilled out the spot welds on the retaining strap on the back of the old jamb. I then used part of the old jamb to locate my holes. I then installed the striker and adjusted the door. Then welded on the retaining strap again.
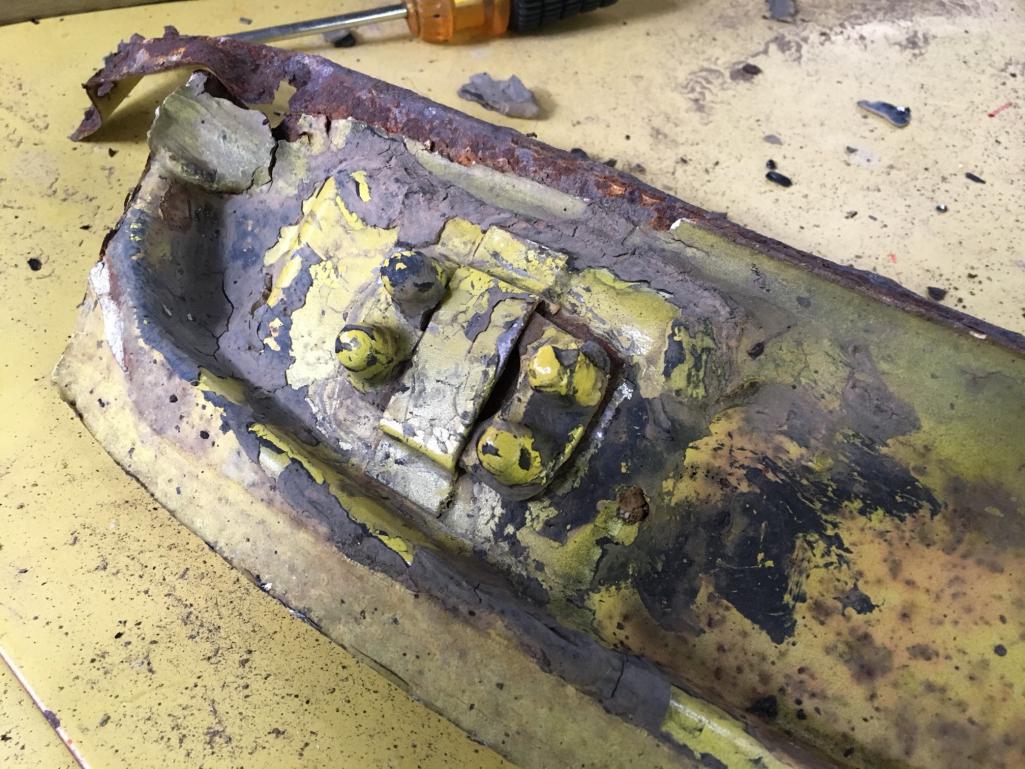 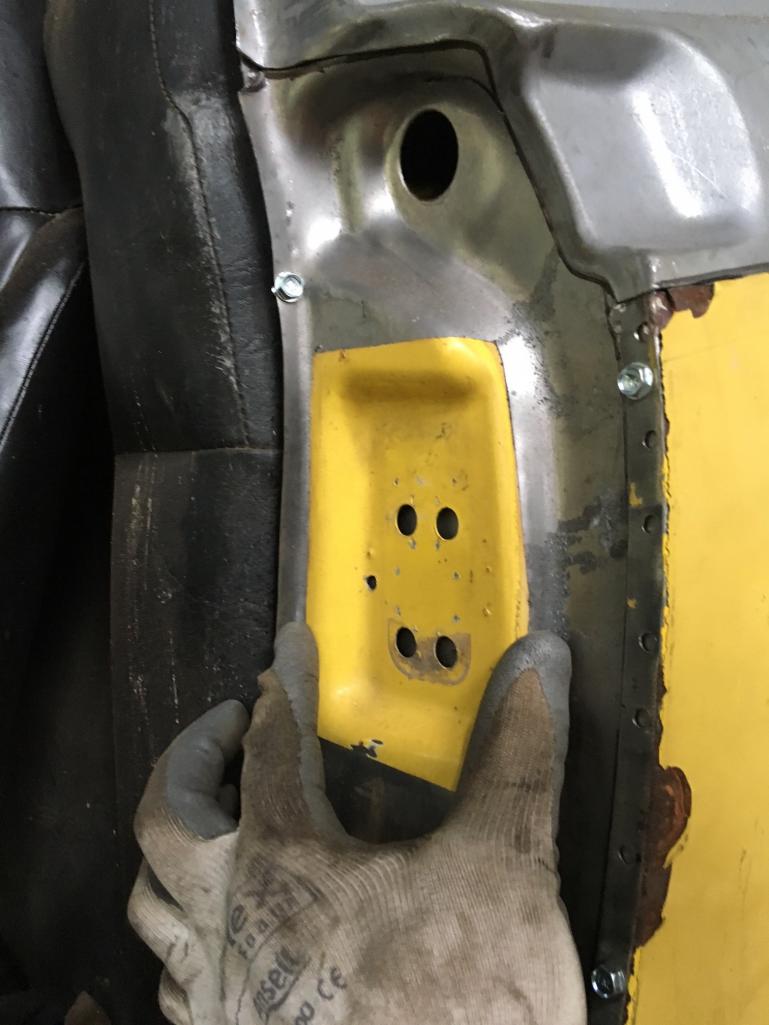 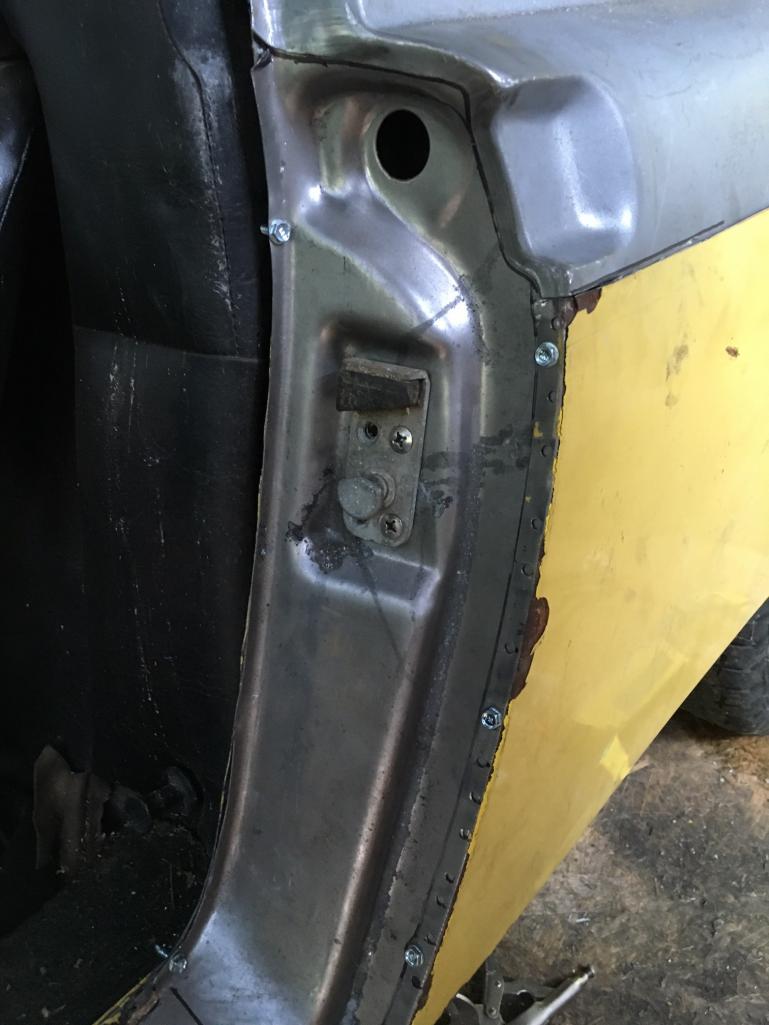 Door gap is looking good. (IMG:style_emoticons/default/shades.gif) 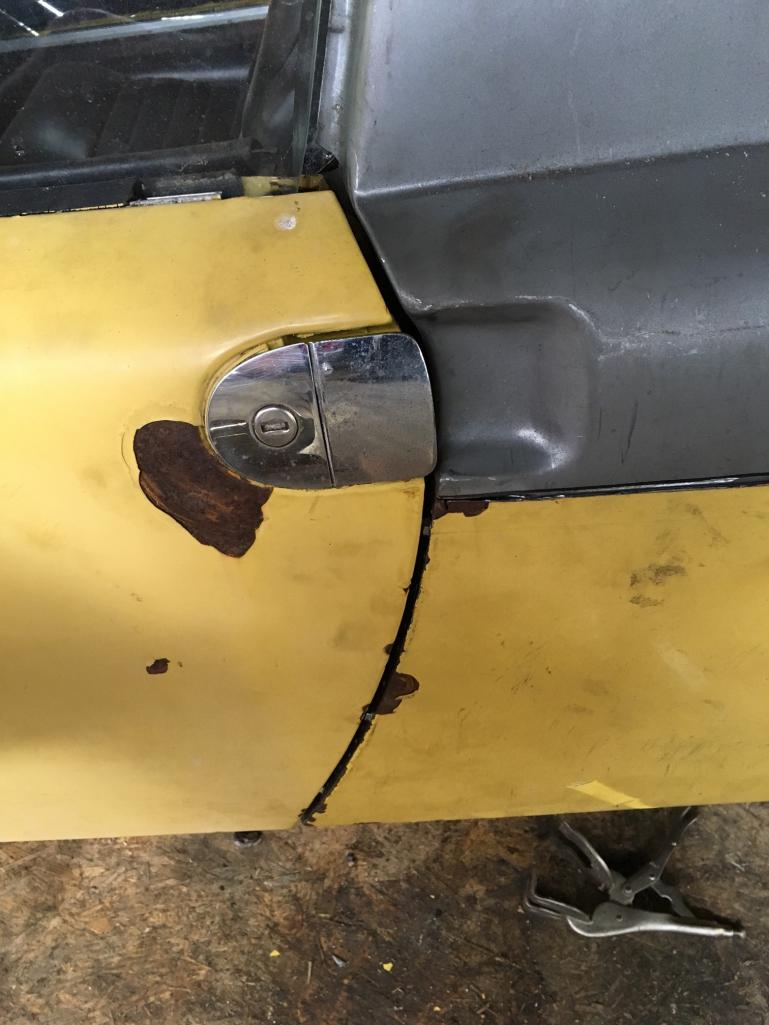 |
| dlee6204 |
 May 6 2016, 06:08 PM May 6 2016, 06:08 PM
Post
#47
|
|
Howdy     Group: Members Posts: 2,162 Joined: 30-April 06 From: Burnsville, NC Member No.: 5,956 |
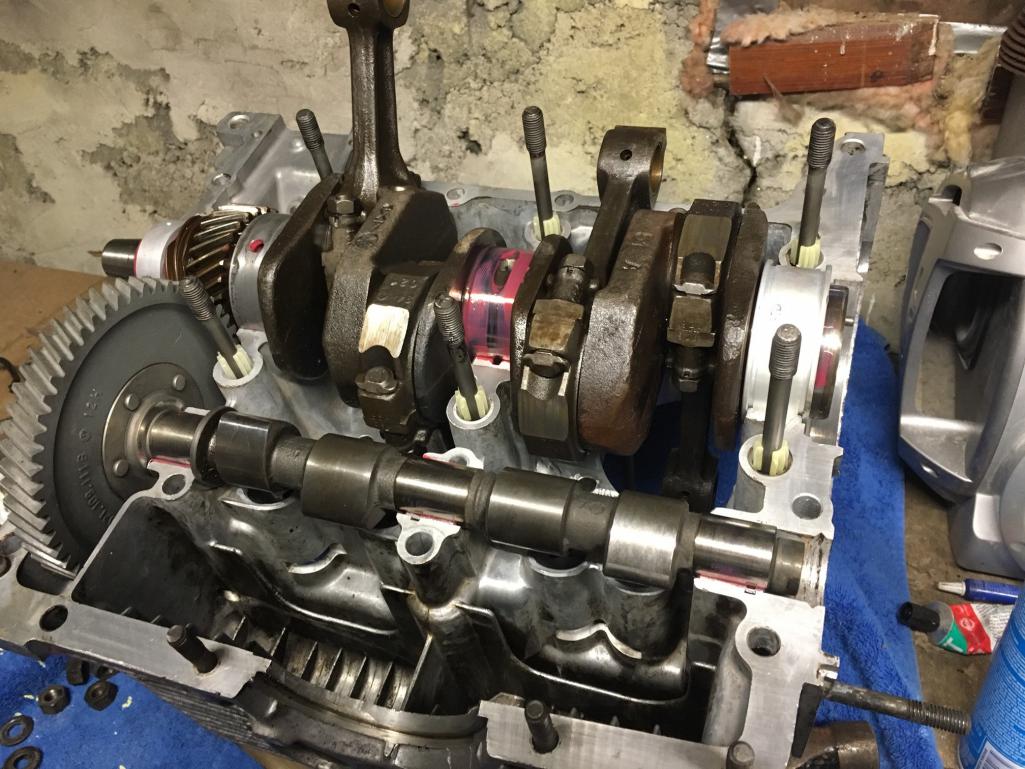
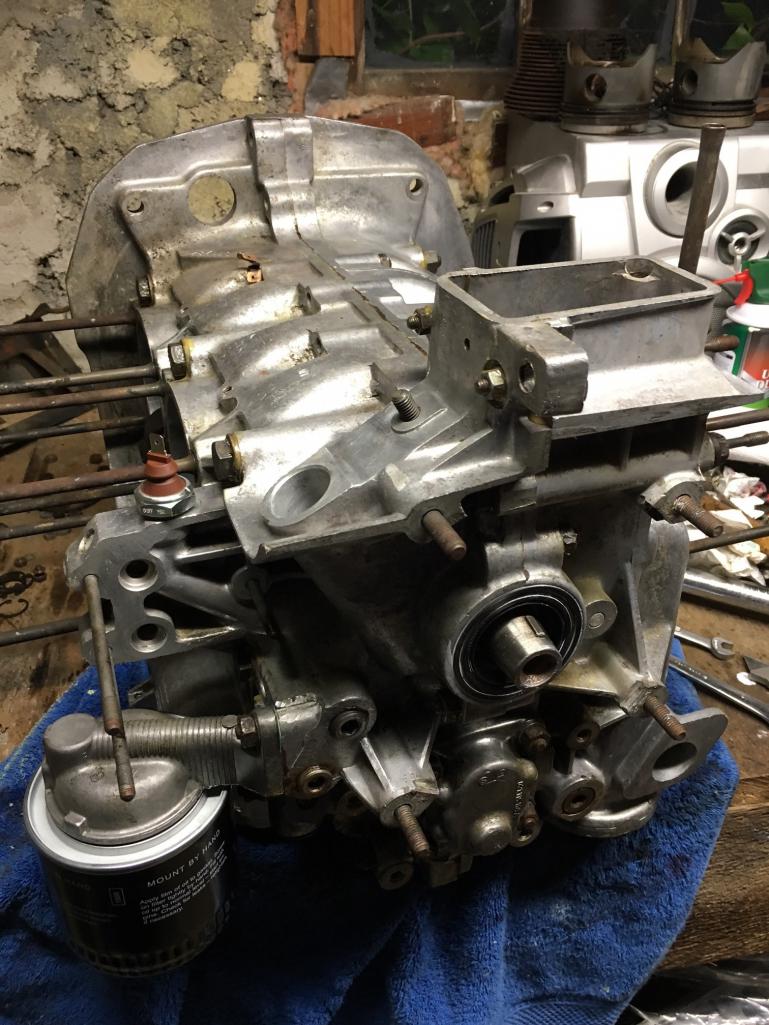
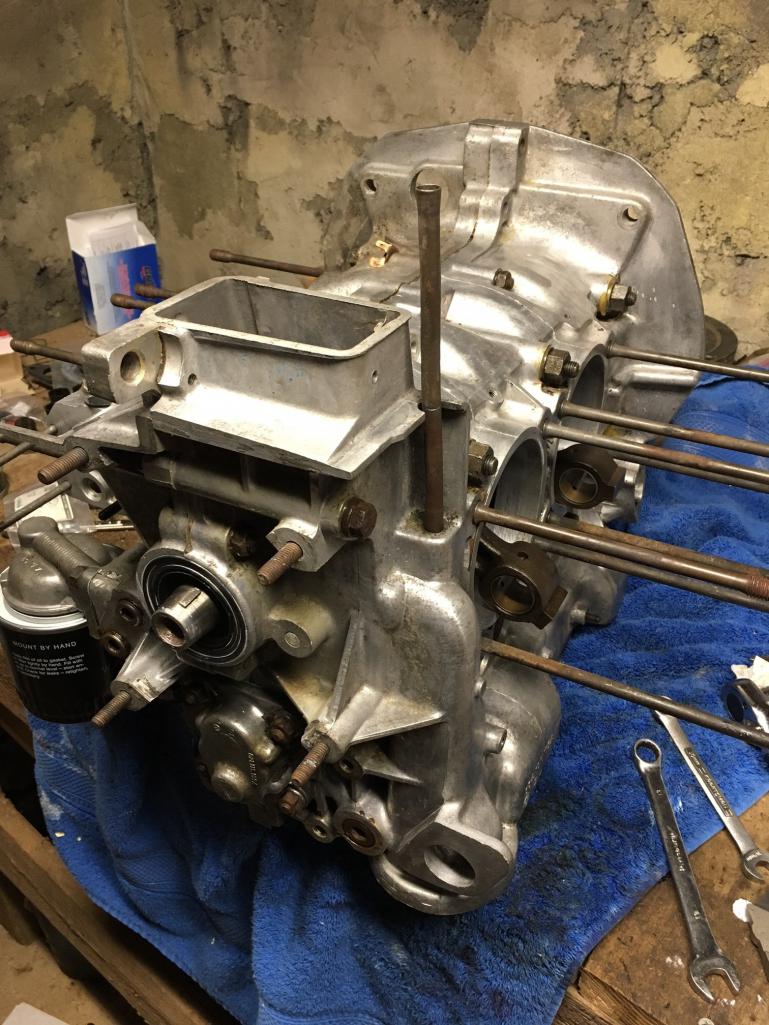
Progress: I got the engine halves back together and started putting some of the items back on it. (IMG:style_emoticons/default/smile.gif)
   |
| dlee6204 |
 May 6 2016, 06:19 PM May 6 2016, 06:19 PM
Post
#48
|
|
Howdy     Group: Members Posts: 2,162 Joined: 30-April 06 From: Burnsville, NC Member No.: 5,956 |
|
| dlee6204 |
 May 9 2016, 06:02 PM May 9 2016, 06:02 PM
Post
#49
|
|
Howdy     Group: Members Posts: 2,162 Joined: 30-April 06 From: Burnsville, NC Member No.: 5,956 |
|
| dlee6204 |
 May 9 2016, 06:05 PM May 9 2016, 06:05 PM
Post
#50
|
|
Howdy     Group: Members Posts: 2,162 Joined: 30-April 06 From: Burnsville, NC Member No.: 5,956 |
|
| dlee6204 |
 May 9 2016, 06:09 PM May 9 2016, 06:09 PM
Post
#51
|
|
Howdy     Group: Members Posts: 2,162 Joined: 30-April 06 From: Burnsville, NC Member No.: 5,956 |
|
| 76-914 |
 May 9 2016, 08:13 PM May 9 2016, 08:13 PM
Post
#52
|
|
Repeat Offender & Resident Subaru Antagonist           Group: Members Posts: 13,830 Joined: 23-January 09 From: Temecula, CA Member No.: 9,964 Region Association: Southern California 
|
Your having way too much fun. (IMG:style_emoticons/default/biggrin.gif) (IMG:style_emoticons/default/popcorn[1].gif)
|
| 2mAn |
 May 9 2016, 09:51 PM May 9 2016, 09:51 PM
Post
#53
|
|
trying to see how long I can go without a 914   Group: Members Posts: 487 Joined: 14-November 13 From: Westchester (Los Angeles) Member No.: 16,644 Region Association: Southern California |
excellent skills!
|
| dlee6204 |
 May 15 2016, 03:18 PM May 15 2016, 03:18 PM
Post
#54
|
|
Howdy     Group: Members Posts: 2,162 Joined: 30-April 06 From: Burnsville, NC Member No.: 5,956 |
Today I took some time to remove the interior.
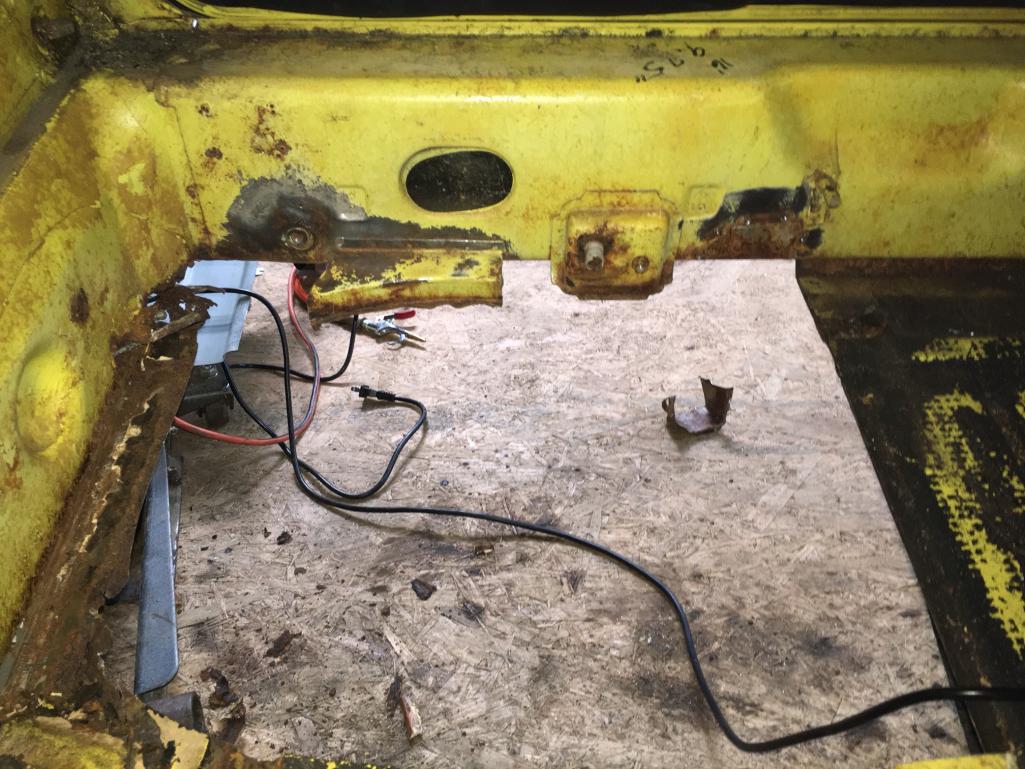
Good news: Interior is in good shape with no rips or tears. Just needs some cleaning. I also found $0.29. Score! Carpet is trashed but I already have replacements from 914Rubber. Bad news: More rust. (IMG:style_emoticons/default/dry.gif) I had planned to replace the rear floorpan but now it looks like I will be replacing the inner lower firewall and possibly the floor crossmembers. 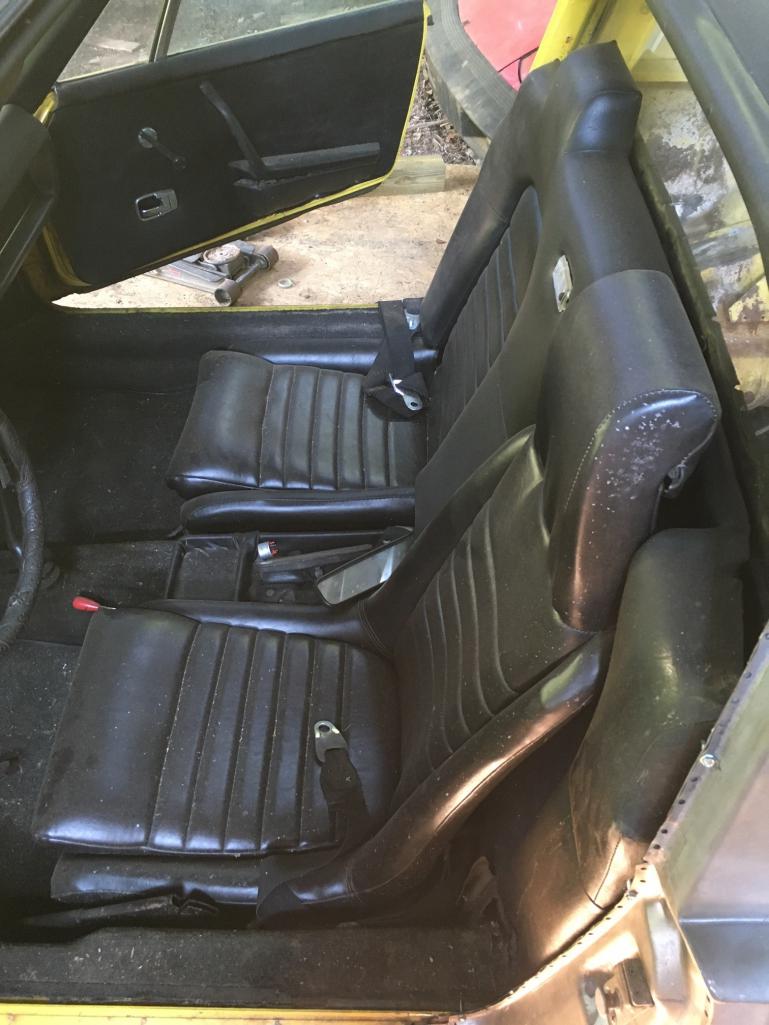 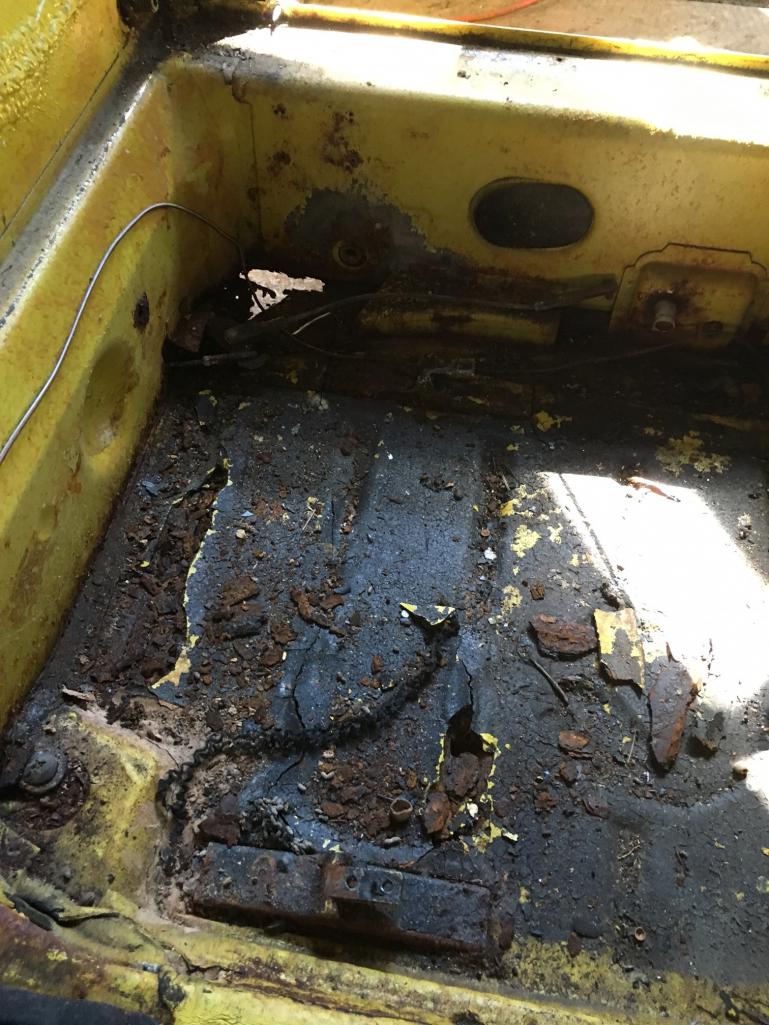 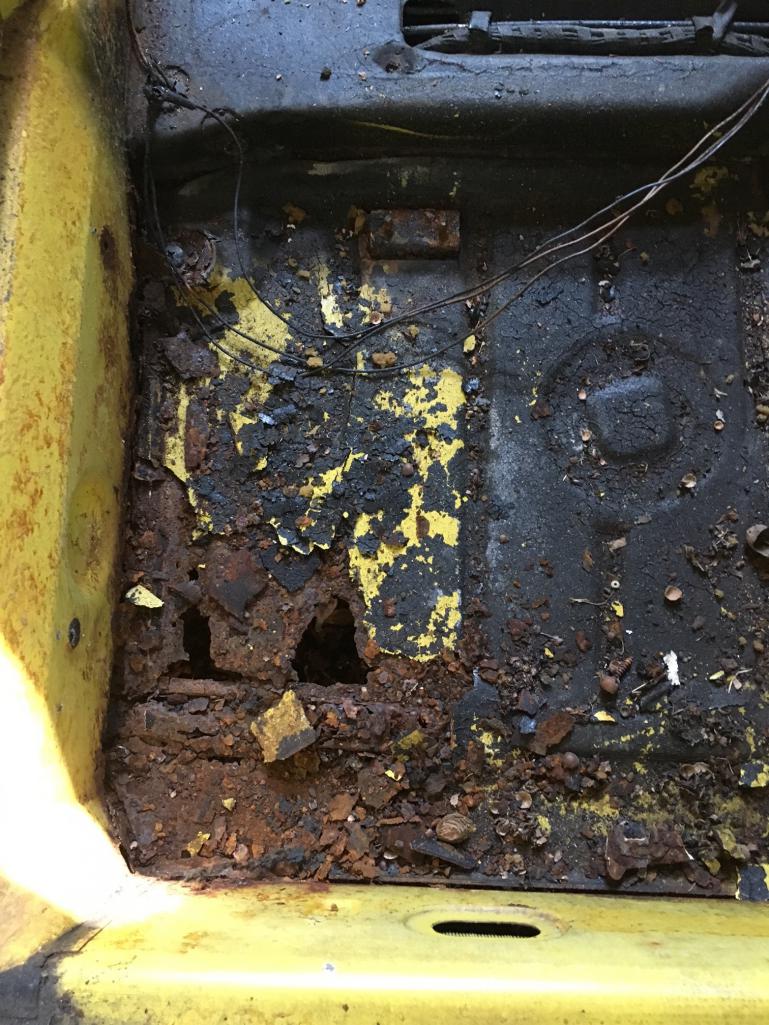 |
| dlee6204 |
 May 16 2016, 06:25 PM May 16 2016, 06:25 PM
Post
#55
|
|
Howdy     Group: Members Posts: 2,162 Joined: 30-April 06 From: Burnsville, NC Member No.: 5,956 |
|
| Garland |
 May 16 2016, 06:35 PM May 16 2016, 06:35 PM
Post
#56
|
|
Restoration Fanatic    Group: Members Posts: 1,424 Joined: 8-January 04 From: ......Michigan...... Member No.: 1,535 Region Association: Upper MidWest 
|
Glad to see that interior out of the way. Coming along great, keep up the good work.
|
| dlee6204 |
 May 23 2016, 06:27 PM May 23 2016, 06:27 PM
Post
#57
|
|
Howdy     Group: Members Posts: 2,162 Joined: 30-April 06 From: Burnsville, NC Member No.: 5,956 |
|
| dlee6204 |
 May 25 2016, 06:47 PM May 25 2016, 06:47 PM
Post
#58
|
|
Howdy     Group: Members Posts: 2,162 Joined: 30-April 06 From: Burnsville, NC Member No.: 5,956 |
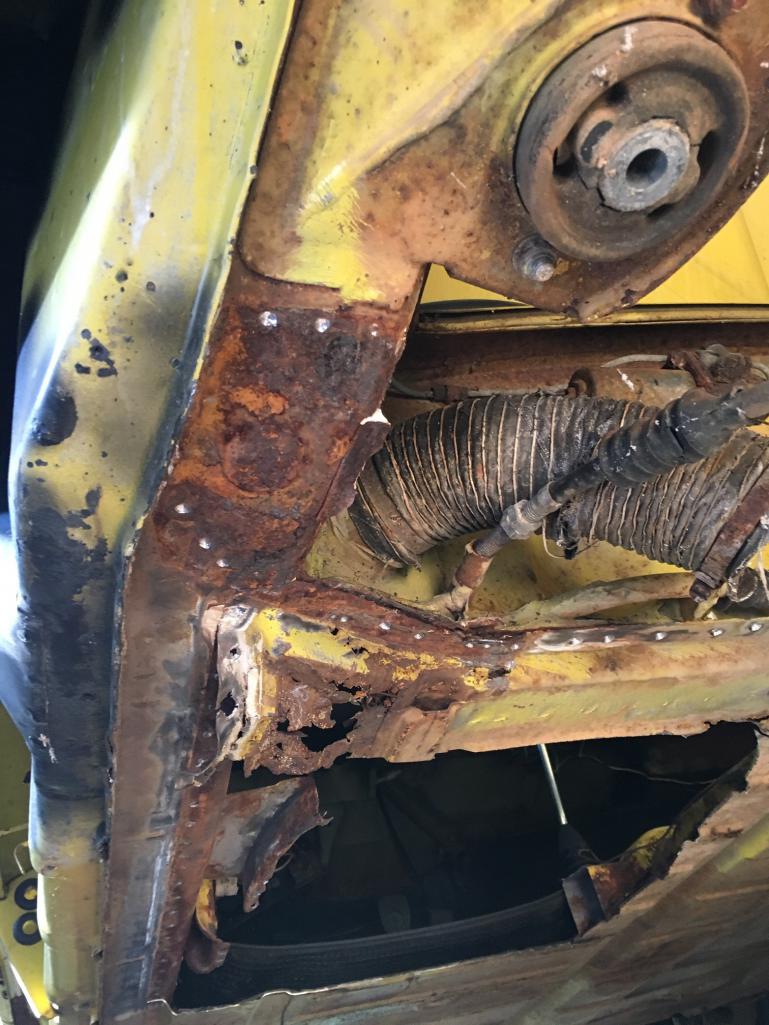
Got some more removed tonight. Crossmember is removed and passenger side inner firewall. I have a some more spot welds to drill out for the floor under the center tunnel and the floor will be completely removed
Inner Firewall removed. 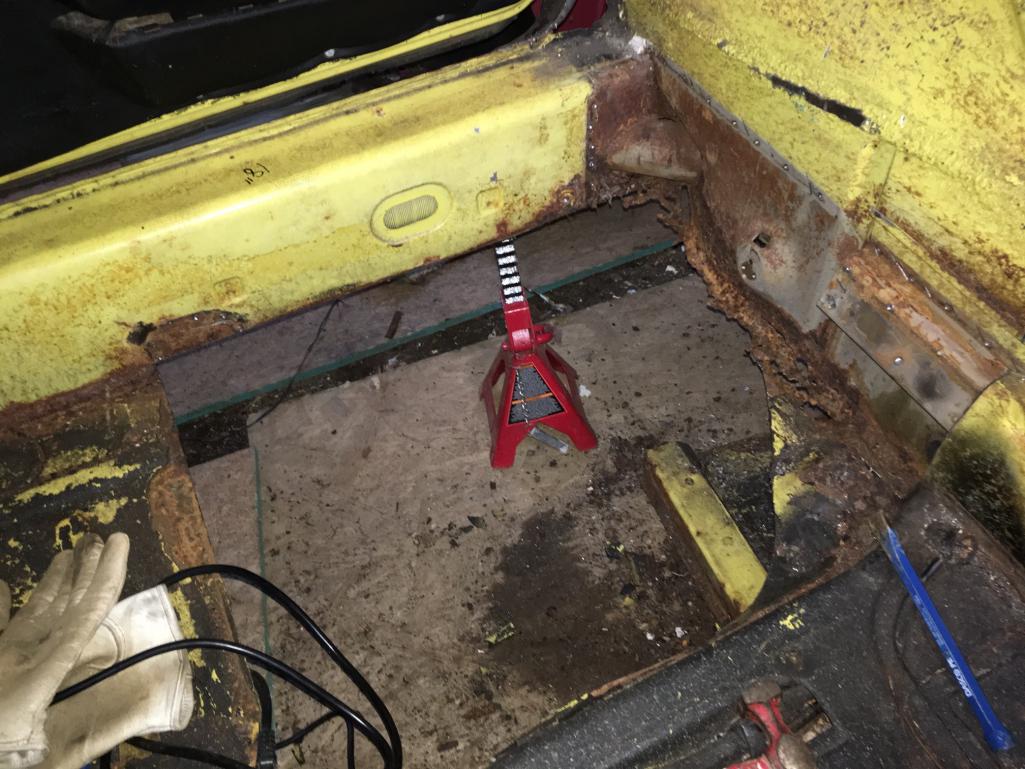 And the only repair to the inner long I will have to do.... I hope. 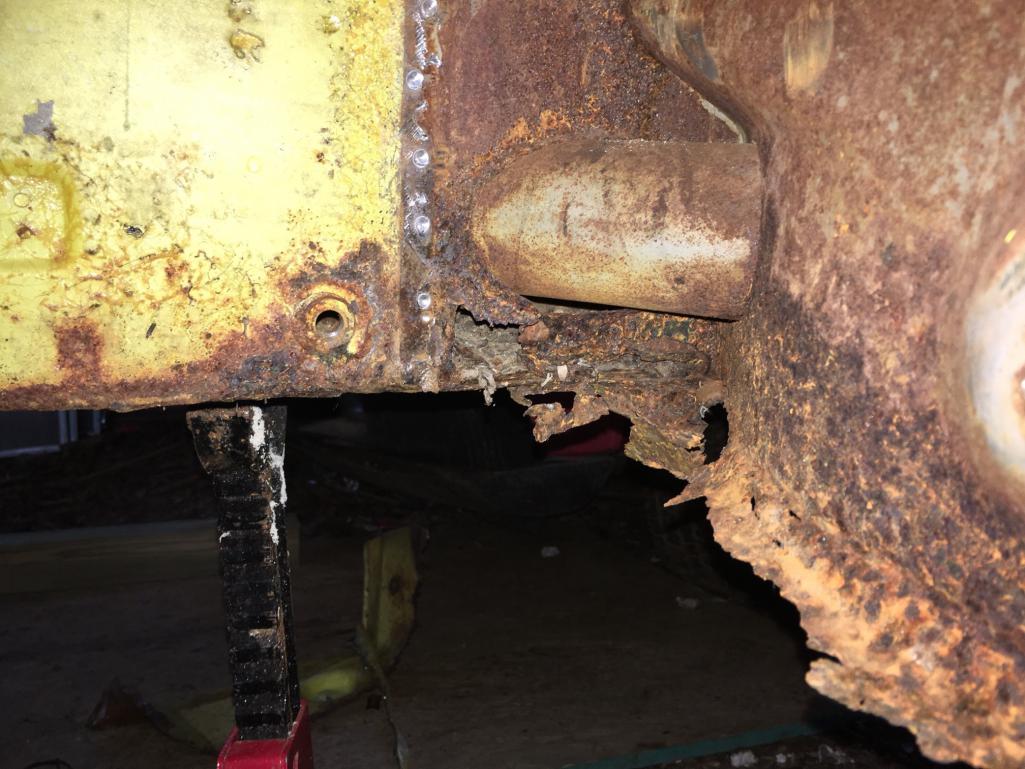 Attached thumbnail(s) 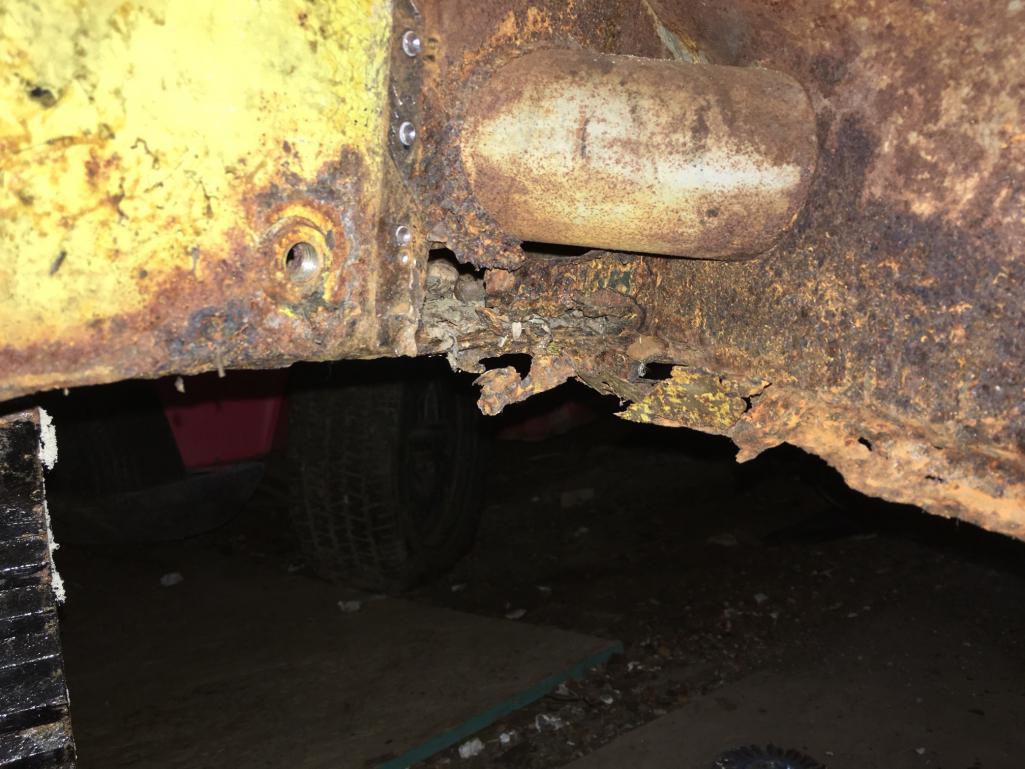
|
| dlee6204 |
 May 30 2016, 02:01 PM May 30 2016, 02:01 PM
Post
#59
|
|
Howdy     Group: Members Posts: 2,162 Joined: 30-April 06 From: Burnsville, NC Member No.: 5,956 |
This weekend I made some big progress is the engine bay. I started by removing what was left of the "outer" layer on top of the long. I then made some patches, welded them in and mocked up the engine shelf. I made sure to keep the inner layer of the long intact for strength purposes.
Outer layer removed. 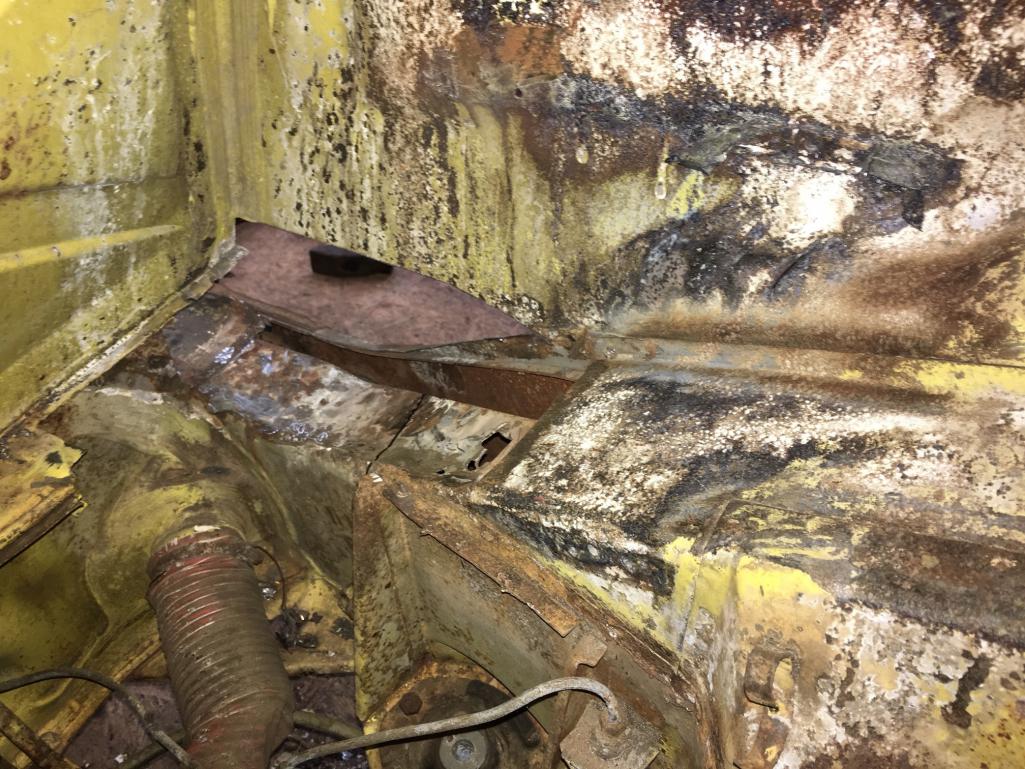 The patches. 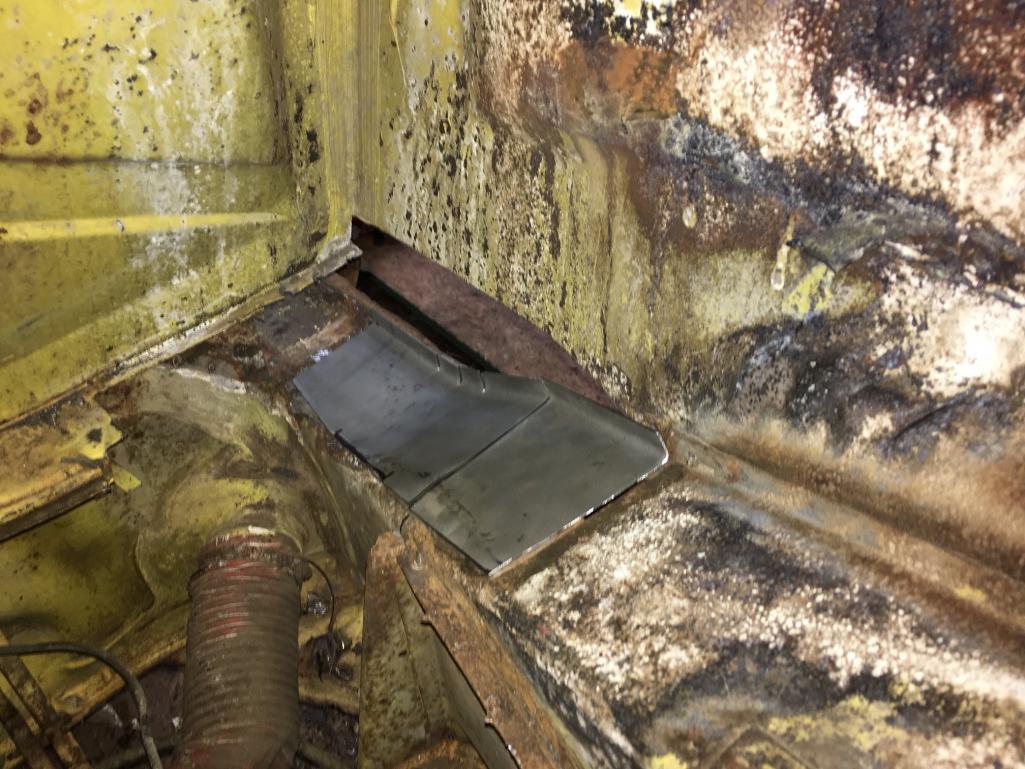 Mocked up. 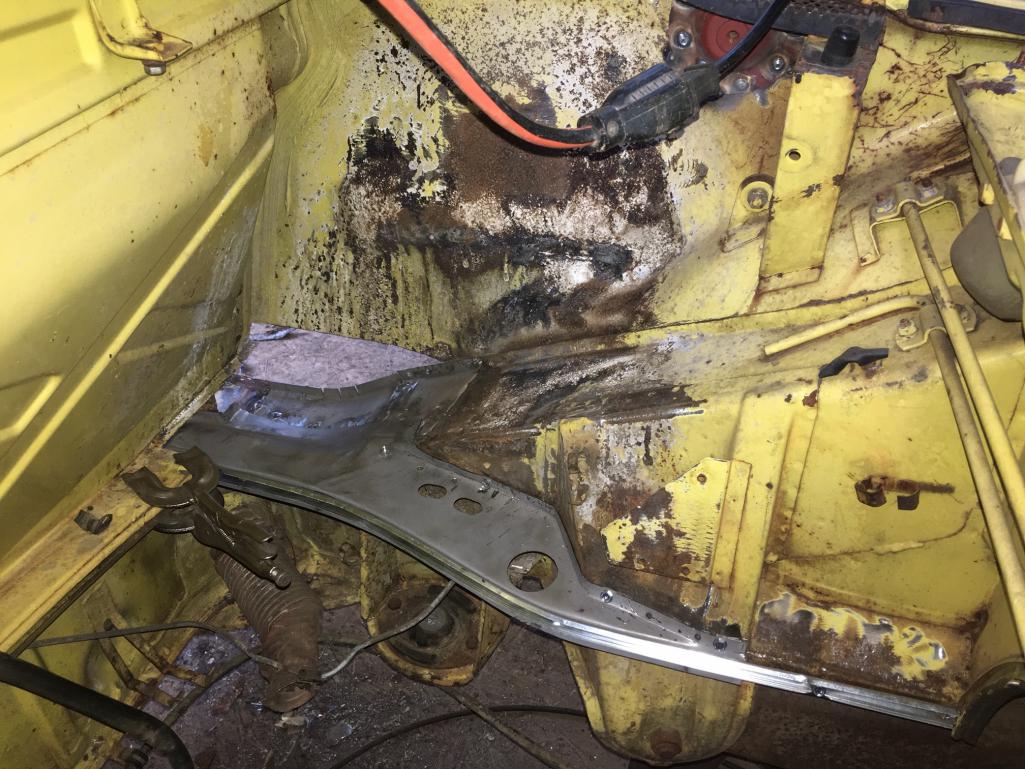 |
| dlee6204 |
 May 30 2016, 02:02 PM May 30 2016, 02:02 PM
Post
#60
|
|
Howdy     Group: Members Posts: 2,162 Joined: 30-April 06 From: Burnsville, NC Member No.: 5,956 |
Got it all welded up. (IMG:style_emoticons/default/smile.gif) It feels good to be adding metal and not removing it.
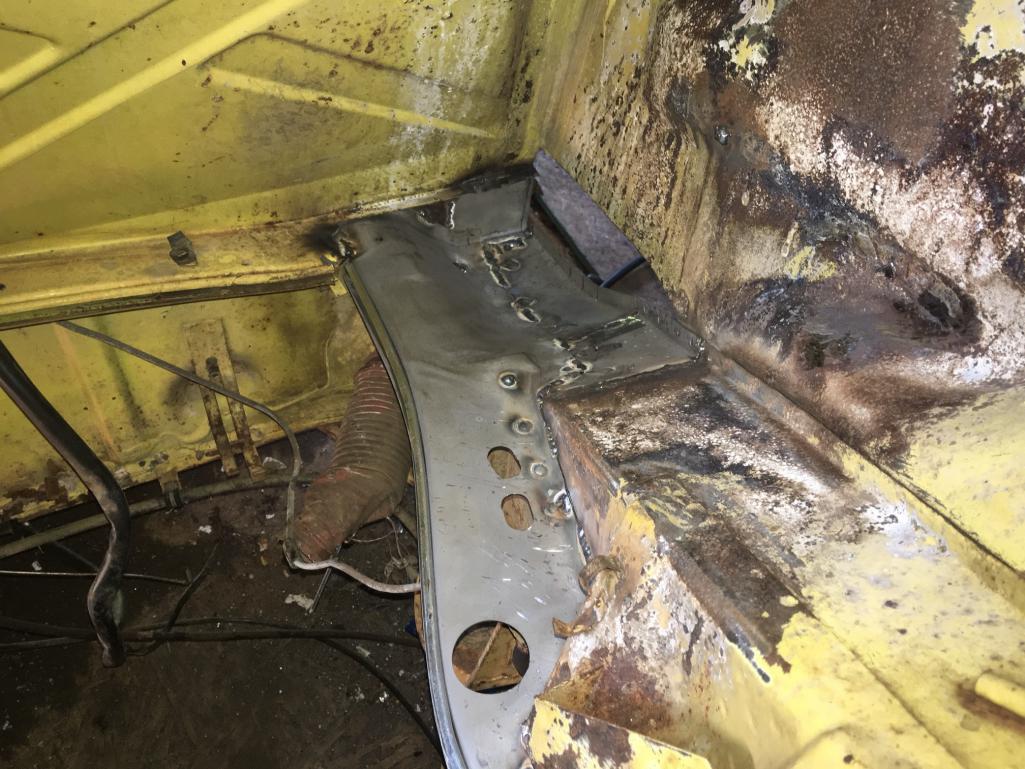 Firewall patch 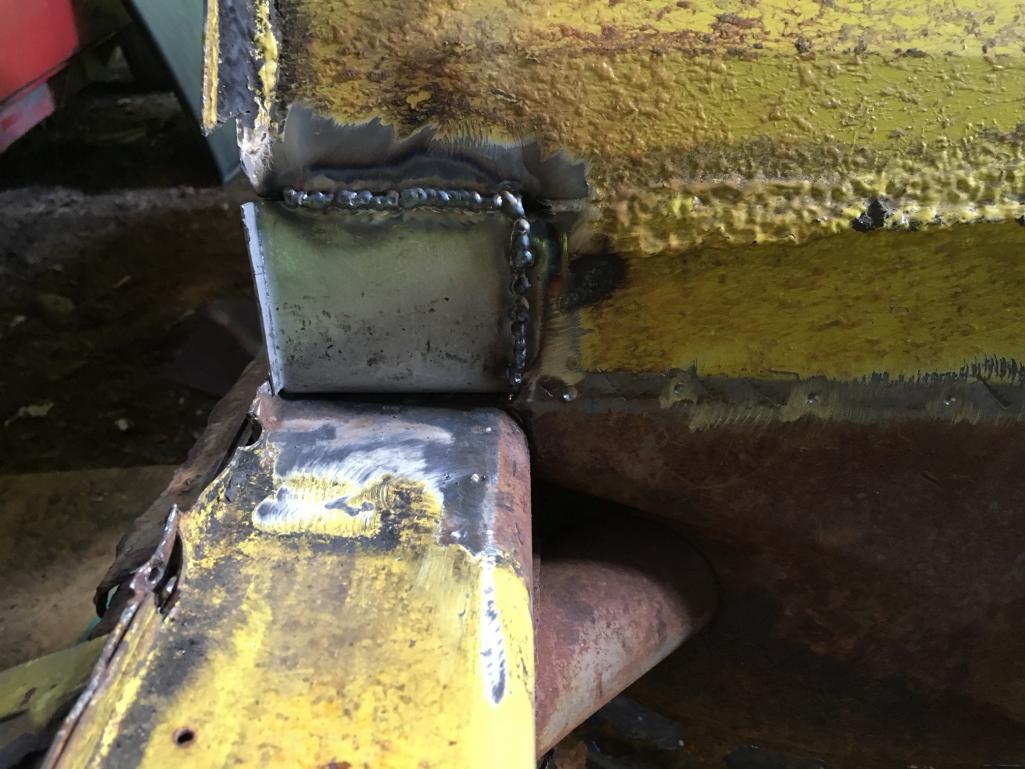 |
  |
2 User(s) are reading this topic (2 Guests and 0 Anonymous Users)
0 Members:

|
Lo-Fi Version | Time is now: 23rd December 2025 - 03:25 PM |
Invision Power Board
v9.1.4 © 2025 IPS, Inc.


