|
|
|
Porsche, and the Porsche crest are registered trademarks of Dr. Ing. h.c. F. Porsche AG.
This site is not affiliated with Porsche in any way. Its only purpose is to provide an online forum for car enthusiasts. All other trademarks are property of their respective owners. |
|
|

  |

| tygaboy |
 Aug 8 2018, 07:22 AM Aug 8 2018, 07:22 AM
Post
#621
|
|
914 Guru  Group: Members Posts: 5,844 Joined: 6-October 15 From: Petaluma, CA Member No.: 19,241 Region Association: Northern California |
One word: Tidy
Beautiful results, congrats to all those involved with the build! |
   |

 
|
| raynekat |
Aug 8 2018, 05:14 PM
Post
#622
|
|
Advanced Member Group: Members Posts: 2,171 Joined: 30-December 14 From: Coeur d'Alene, Idaho Member No.: 18,263 Region Association: Pacific Northwest |
QUOTE(mepstein @ Aug 8 2018, 04:50 AM)  QUOTE(raynekat @ Aug 7 2018, 08:23 PM) For completion, the normal skid panel didn't fit anymore as I went with an aluminum cross member. So I put together a simple aluminum skid plate to protect the master brake cylinder, etc. Looks like it was always meant to be there. Did you save the pattern? Can easily make a template or pattern for anyone that's interested. Purchased the aluminum plate from a company called Metal Remnants. They cut it to size and put the 15deg bend on it for a reasonable cost. I had a local water jet cutting company do the circular cut by the master brake cylinder. I drilled the bolt holes. Had some leftover edging to cover the front and rear edges. Easy peasy |
|
|
|
| raynekat |
Aug 8 2018, 05:19 PM
Post
#623
|
|
Advanced Member Group: Members Posts: 2,171 Joined: 30-December 14 From: Coeur d'Alene, Idaho Member No.: 18,263 Region Association: Pacific Northwest |
QUOTE(milwlandrover @ Aug 8 2018, 05:37 AM) very nice. Obviously you plan on racing. you should have a barrel of fun. cheers! From Milwaukee WI No racing beyond some autocrossing and an occasional track event. Car will mostly be my street machine, coffee & cars, grocery getter..... |
|
|
|
| raynekat |
Aug 17 2018, 10:42 PM
Post
#624
|
|
Advanced Member Group: Members Posts: 2,171 Joined: 30-December 14 From: Coeur d'Alene, Idaho Member No.: 18,263 Region Association: Pacific Northwest |
This car/project was engine lid challenged to say the least.
One of the engine lid hinge brackets had been ripped off it's location in the engine bay with the previous owner allowing the engine lid to dangle and bend the snot out of the hinge on the lid itself. Cary installed new Restoration Design hinge brackets. After paint, the engine lid just never fit correctly with the leading edge (nearest the rear window) being a good 1/2" or more lower than the seal and the adjoining metal work. Another 2nd hand engine lid off Ebay was no better. Luck had it that Cary still had the engine lid from the donor car we used for some of the metal replacement on this car. He and Jack brought it by a few weeks back and it seemed to fit much better. Some more tweeking with the engine bay brackets and we were there. Rather than body work and paint a 2nd lid entered from scratch, my paint shop swapped out the hinges from the better fitting lid onto the lid that had already been painted. Pretty easy to do. Just drilled out the pins that hold the hinges onto the lid. Painted the new hinges white and installed them on the existing lid with stainless steel bolts. Quick and easy and relatively inexpensive. Below are pics of the newly reworked engine lid. Fits like a treat now. Will be fitting the grill and other bits to the lid soon to finish it up. A lot of this stuff that I just took for granted would fit no problem....turned out to be a big problem. In hindsight, I should have had Cary test fit the original engine lid after he installed the new hinge brackets in the engine bay to make sure everything was good. Never thought that the engine lid fitment would be that far off. Live and learn.... (IMG:style_emoticons/default/chair.gif) 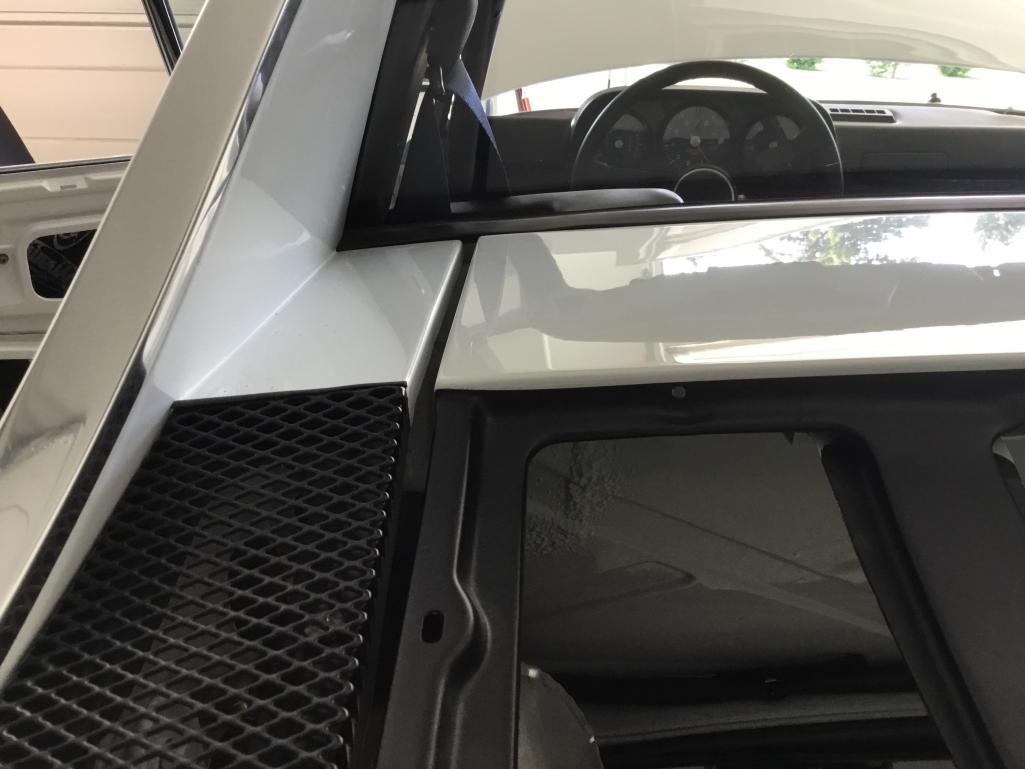 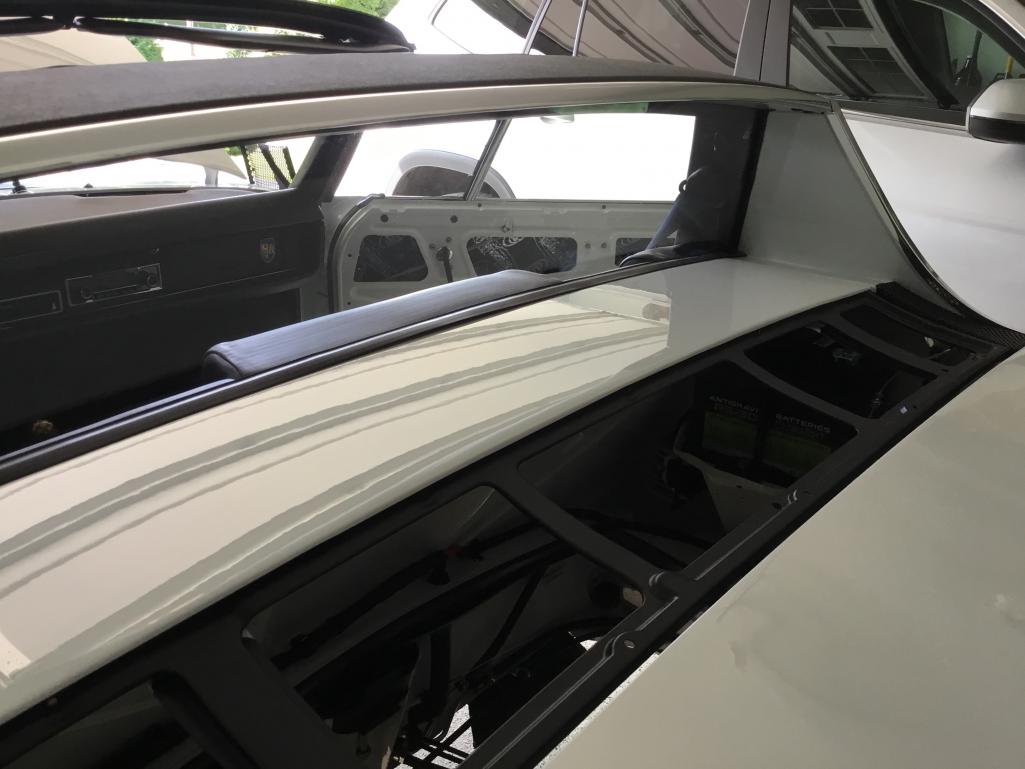 |
|
|
|
| raynekat |
Aug 17 2018, 11:12 PM
Post
#625
|
|
Advanced Member Group: Members Posts: 2,171 Joined: 30-December 14 From: Coeur d'Alene, Idaho Member No.: 18,263 Region Association: Pacific Northwest |
Finally installed the rear window this week.
I used the 3/8 butyl tape for this job. Was a bit unsure how this would all work out, but in the end, not too tough. To aid in holding/controlling the window, I purchased a pair of these suction cup devices. They worked quite well and allowed me to single handedly install the window. 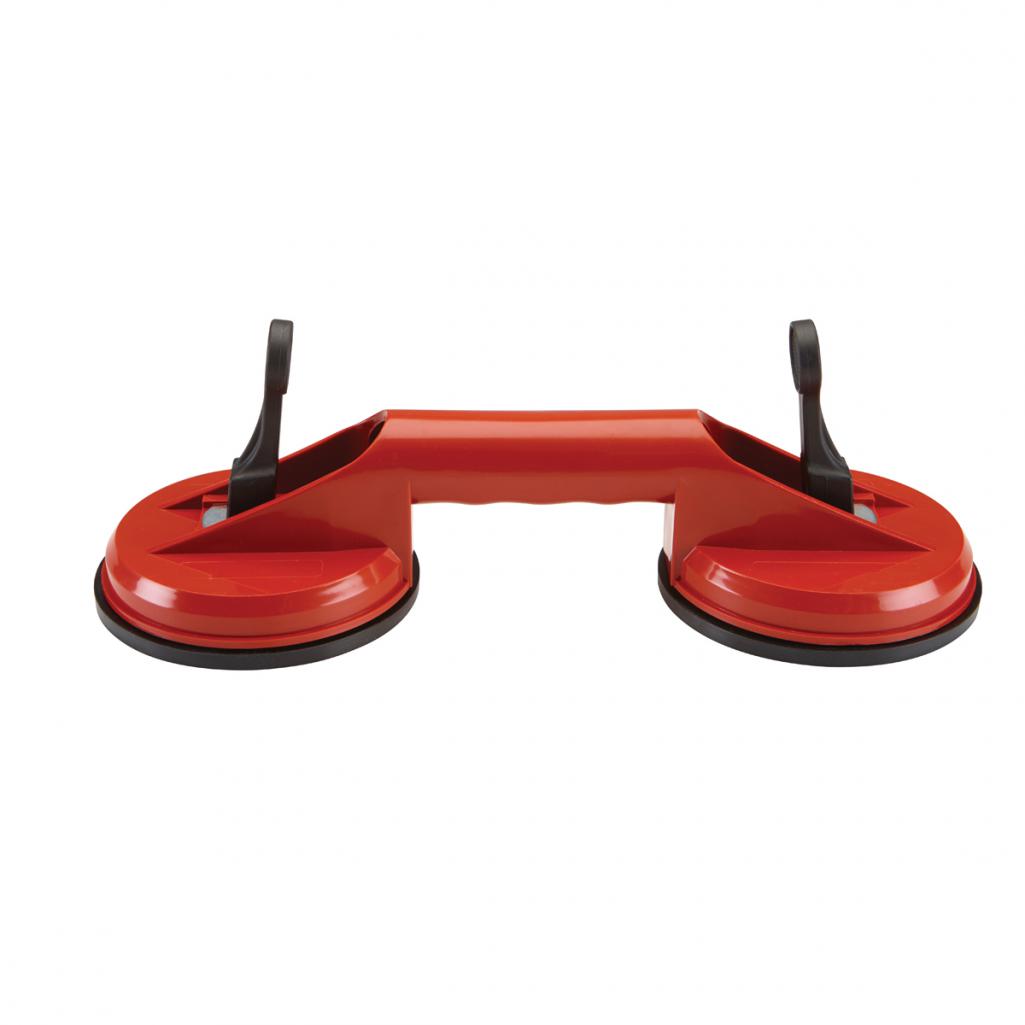 I put a small stool inside the cab facing the rear window to do the install. Gentle pressure all around had the window sitting nicely and the butyl slightly spread out along the mounting channel. To finish off the window, I put one pass of black electrical tape to hide the white paint you could see from inside the cabin. After the rear window went in, I could finally get about installing the new Porsche factory fresh back pad. My existing one was in such terrible shape, there was no way I was putting that back in there. Couldn't pull off the resto of the old backed using the 914Rubber kit (guess I'm just not that talented of a retrimmer), so I just bit the bullet. Actually we get great prices here locally with Sunset Porsche on all factory parts, so in the end the tariff wasn't overwhelming. Have to say that it really looks great....and brand new! cause it is. (IMG:style_emoticons/default/tongue.gif) Emerging from behind the new back pad you can see the new navy retractible seat belts from Seatbelt Planet. Made especially for the 914, they were a cinch to install. Nice that I had Cary make the modification of adding the recess that the later cars all have in the firewall for the retractible belts. I think this will be a very nice upgrade over the fixed belts that the early cars have for daily use. My wife has already given my the thumbs up as she doesn't like the fixed harnesses in the other sportscar. (IMG:style_emoticons/default/cheer.gif) 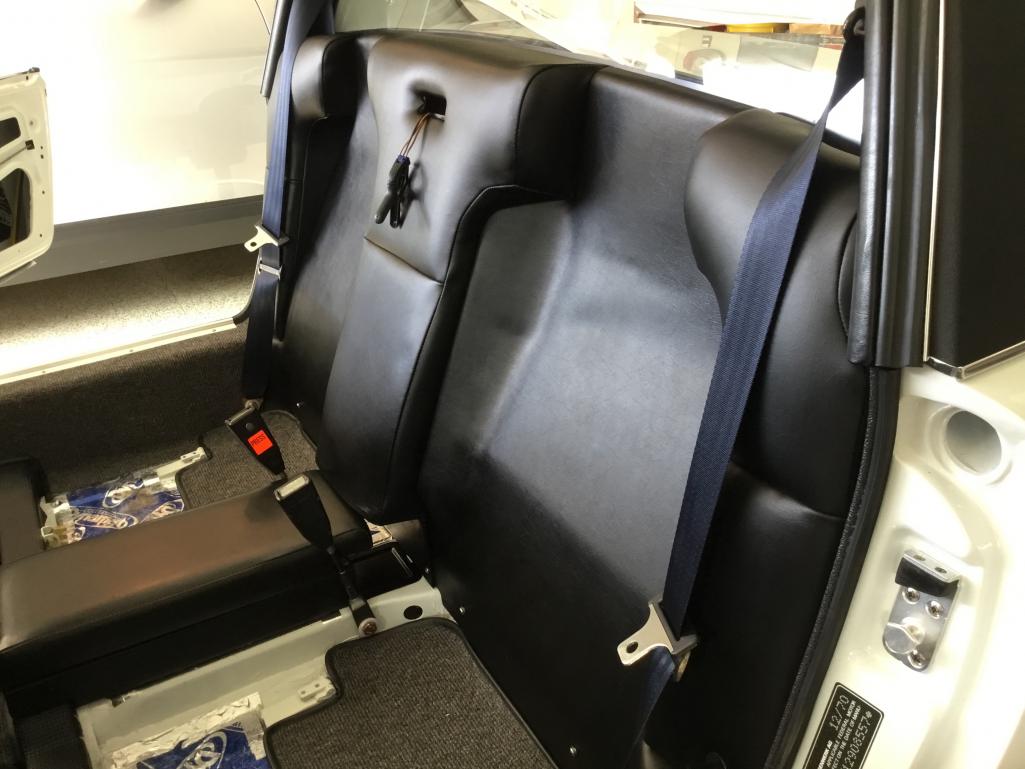 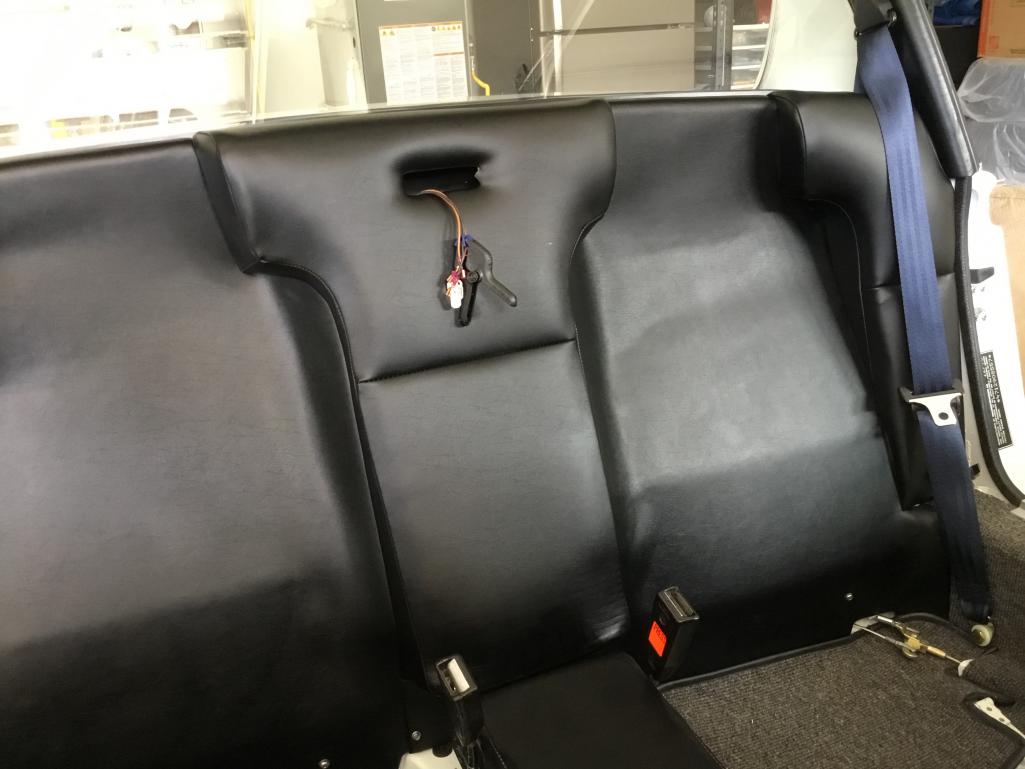 |
|
|
|
| raynekat |
Aug 17 2018, 11:22 PM
Post
#626
|
|
Advanced Member Group: Members Posts: 2,171 Joined: 30-December 14 From: Coeur d'Alene, Idaho Member No.: 18,263 Region Association: Pacific Northwest |
Couple of poor pics of some of the interior work completed.
All the carpeting is in. Went with charcoal colored German square weave that Autobahn Interiors put together for me. I originally had some jute padding down, but it was just too thick I thought, so out it came. The carpets are glued directly to the floor with Dynamat Lite underneath. I didn't like the funky rear half carpets, so I put together some patterns for some full size rear carpets that go underneath the seats. Sent these down to Autobahn Interiors and should have them back next week. The top mats are Lloyds Mats, black with blue logo. Didn't like them at first, but they're growing on me. I'll get a heal pad sewn into the driver side (again Autobahn Interiors) so they'll hold up better for daily driving. Generic Alpine speakers to go along with the old school Becker Europa stereo. Both the heat/defrost and hand throttle levers are present and accounted for. Early 914 foot rest for the wifey. Even with the adjustable passenger seat that we installed, she'll appreciate this I know. 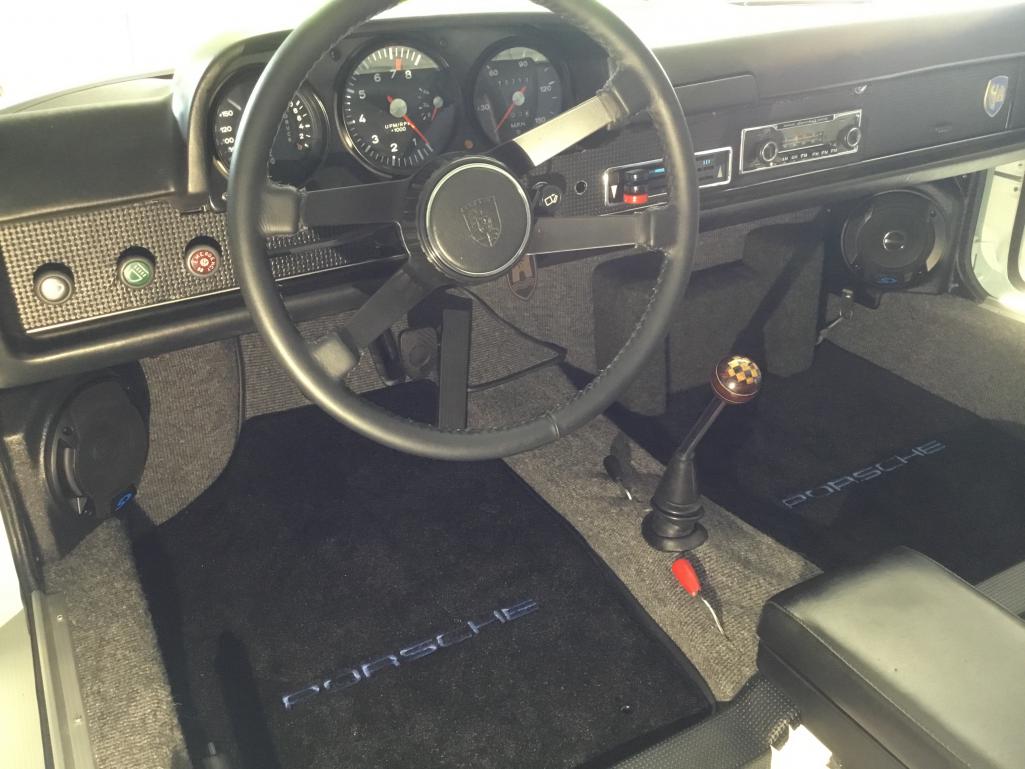 |
|
|
|
| raynekat |
Aug 17 2018, 11:31 PM
Post
#627
|
|
Advanced Member Group: Members Posts: 2,171 Joined: 30-December 14 From: Coeur d'Alene, Idaho Member No.: 18,263 Region Association: Pacific Northwest |
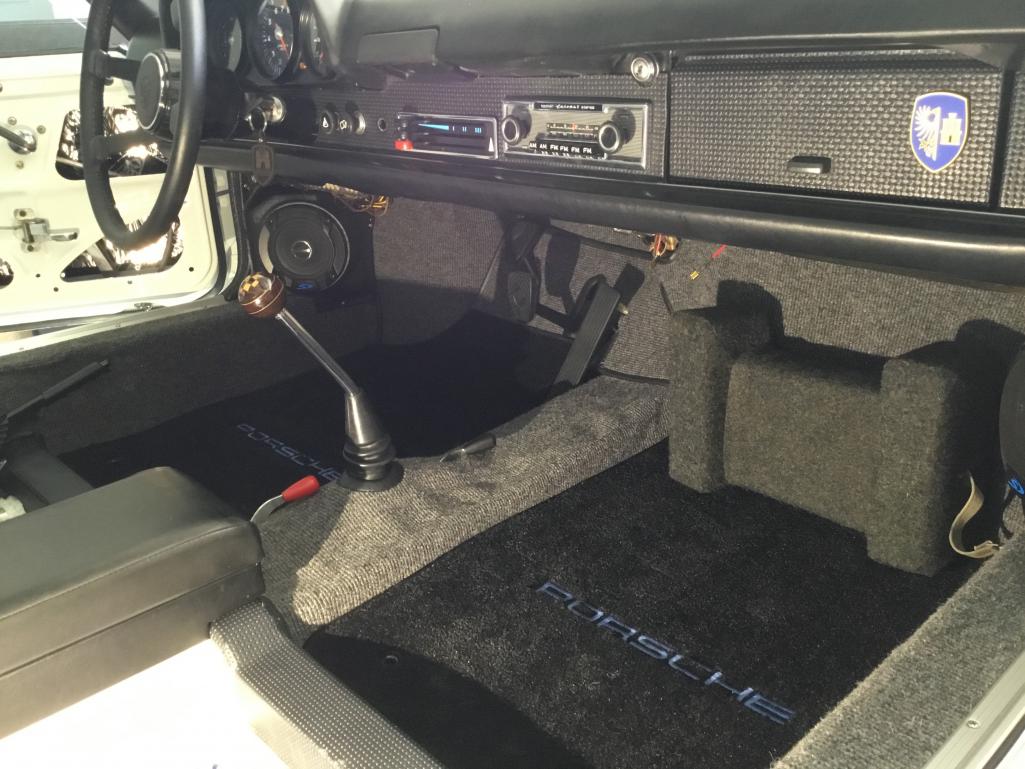
A different view of the interior.
 |
|
|
|
| raynekat |
Aug 17 2018, 11:38 PM
Post
#628
|
|
Advanced Member Group: Members Posts: 2,171 Joined: 30-December 14 From: Coeur d'Alene, Idaho Member No.: 18,263 Region Association: Pacific Northwest |
So at this point, "my" punch list is getting smaller.
1) Install the seats after I get back the larger rear carpets. 2) Install the windshield. The wife and I will be doing this in the next couple of days. Wish me luck. 3) Finish a bit of wiring under the dash. The radio & speakers, the fuel pump and the rear fog light. Mostly need to find a terminal with switched on (run) power. 4) Finish out the side windows and doors. My attempt at putting a bushing in the door stop arms seems to have worked, so quiet door stops are in my future. 5) Tighten up and aim the headlight/bucket assembly. 6) Put brake fluid in the system, bleed the brakes and adjust the parking brakes. 7) Finish out the engine lid. Just waiting on some speed nuts for the grill. After all this is complete in the next couple of weeks, I'll schedule a slot with Rothsport to do the drivetrain installation. The completed 2.7 MFI engine and trick gearbox are waiting patiently at their shop. They will also add an aux oil cooler....likely underneath the rear trunk. Put the car at European height, align and corner balance. Troubleshoot and fix and of my mistakes that I made on my part. |
|
|
|
| Cairo94507 |
Aug 18 2018, 06:04 AM
Post
#629
|
|
Michael Group: Members Posts: 10,706 Joined: 1-November 08 From: Auburn, CA Member No.: 9,712 Region Association: Northern California |
That interior looks great. The whole car looks great. Nice job. (IMG:style_emoticons/default/beerchug.gif)
|
|
|
|
| bbrock |
Aug 18 2018, 10:31 AM
Post
#630
|
|
914 Guru Group: Members Posts: 5,269 Joined: 17-February 17 From: Montana Member No.: 20,845 Region Association: Rocky Mountains |
I know you said reassembling these cars is a combination of fun and frustration, but it is nothing but fun watching from this end. You are getting so close. Nice work!
|
|
|
|
| mepstein |
Aug 18 2018, 11:25 AM
Post
#631
|
|
914-6 GT in waiting Group: Members Posts: 20,819 Joined: 19-September 09 From: Landenberg, PA/Wilmington, DE Member No.: 10,825 Region Association: MidAtlantic Region |
looks amazing. Lots of cool details when you look close.
|
|
|
|
| raynekat |
Aug 18 2018, 11:08 PM
Post
#632
|
|
Advanced Member Group: Members Posts: 2,171 Joined: 30-December 14 From: Coeur d'Alene, Idaho Member No.: 18,263 Region Association: Pacific Northwest |
Rebuilt both door stops again today to try and get rid of the awful snapping you hear when you open and close the door.
After putting in all the 914Rubber new parts in the door stops, I still had a lot of noise. Upon close inspection, I saw that the arms were moving in and out at the pin. The pin wasn't moving....just the arm. Removing it all, I could see that my pins fit snuggly on both sides of the car into the receivers in the door jams. The holes in the 914Rubber arms were just a hair to big allowing for a lot of movement there. On-line I found some 3/16" x 5/16" x 1/4" bronze bushings that seemed about what I needed. Enlarged the holes slightly in the arms and drove the new bushings in with a hammer on my vise. Progressively enlarged the hole in the bushing such that the door pin would just snuggly fit. Made sure none of the bushing was sticking out on either side of the arm. And voila....upon installation, my door stops are much, much quieter now with out all the loud popping they had previously exhibited. Yay! Happy camper here. (IMG:style_emoticons/default/biggrin.gif) The pic you see here is the finished product on one of the factory arms. I did this with the 914Rubber arms as well. 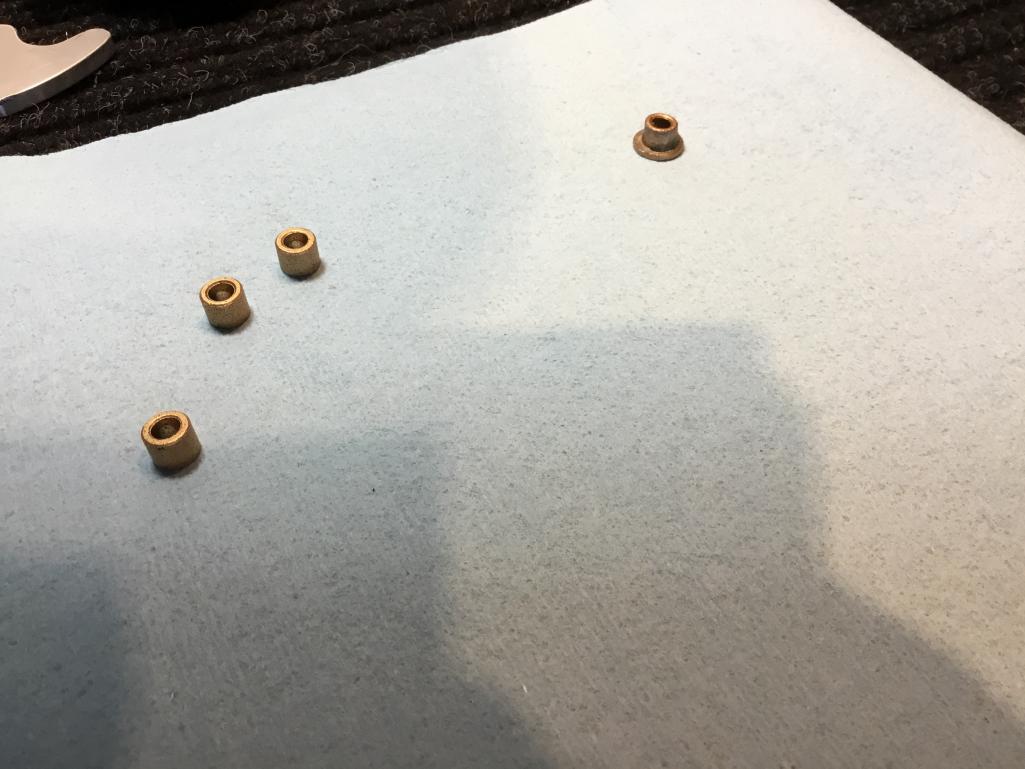 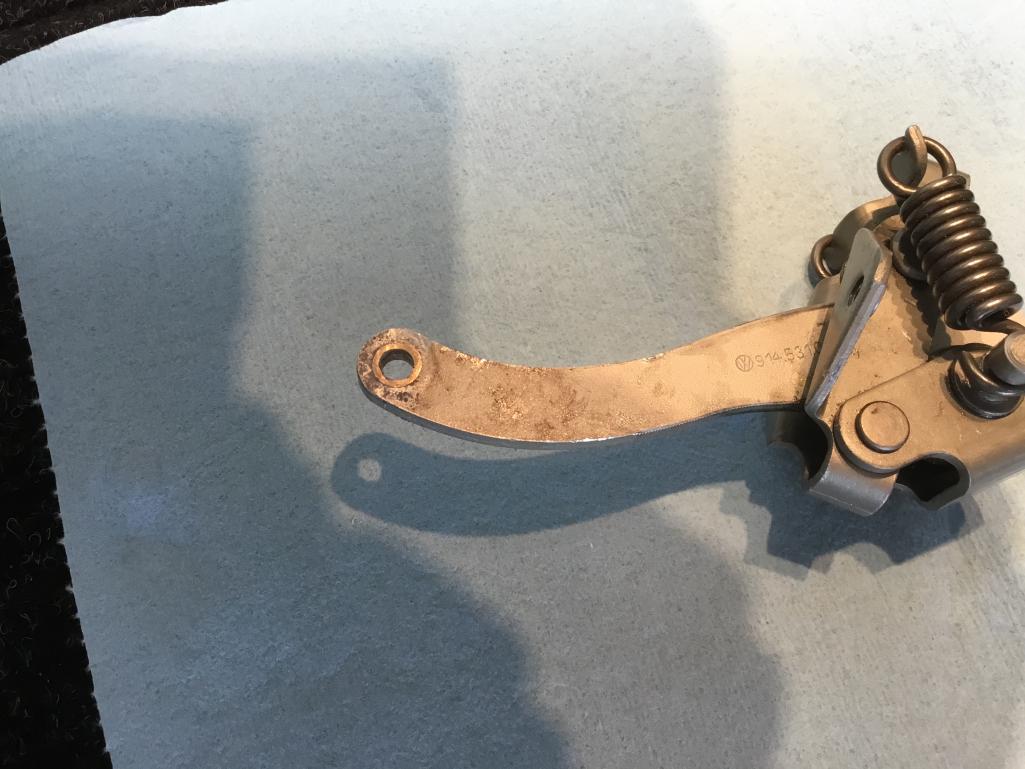 |
|
|
|
| raynekat |
Aug 18 2018, 11:16 PM
Post
#633
|
|
Advanced Member Group: Members Posts: 2,171 Joined: 30-December 14 From: Coeur d'Alene, Idaho Member No.: 18,263 Region Association: Pacific Northwest |
Also had some luck with the quarter window install today as well.
After modifying the 914Rubber seals to some extent, the window guide/glass/seal assembly fairly easily went into place. Still need to adjust the alignment of this assembly, then the side windows will be going in next with all assorting accompanying seals. Will post some more pics of this area of assembly tomorrow hopefully. |
|
|
|
| raynekat |
Aug 25 2018, 12:57 PM
Post
#634
|
|
Advanced Member Group: Members Posts: 2,171 Joined: 30-December 14 From: Coeur d'Alene, Idaho Member No.: 18,263 Region Association: Pacific Northwest |
Put down some butyl primer today as we're getting ready for the windshield install in the next day.
Blue tape to help with alignment later. Put some details here: http://www.914world.com/bbs2/index.php?showtopic=332713 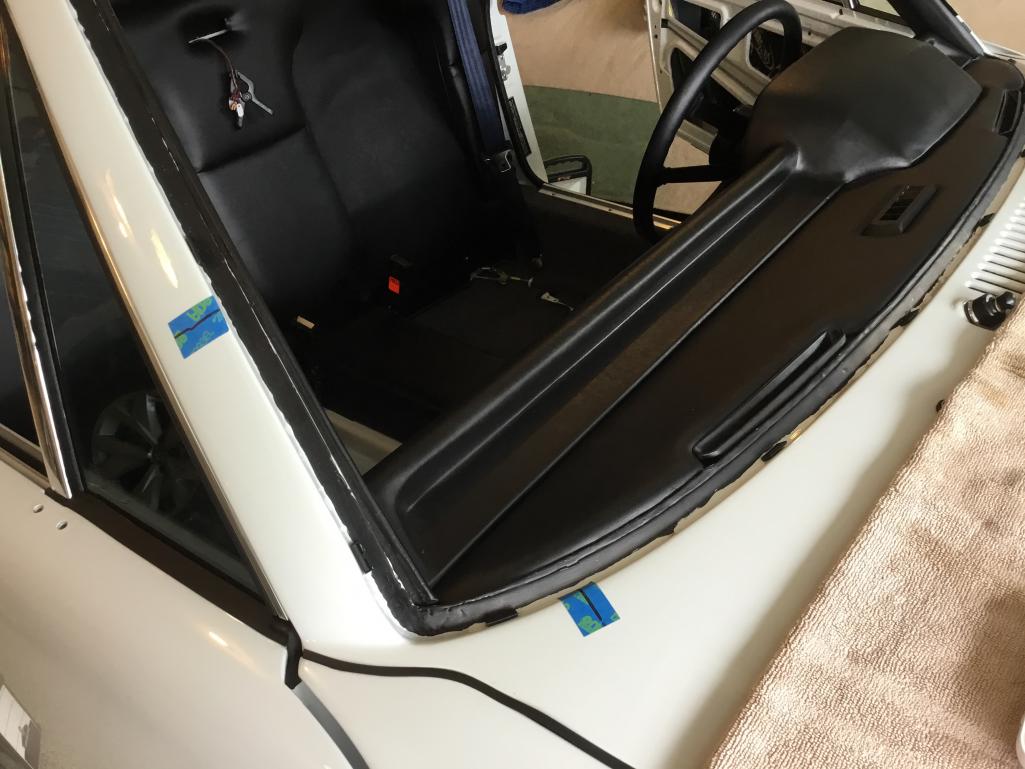 |
|
|
|
| raynekat |
Aug 25 2018, 12:58 PM
Post
#635
|
|
Advanced Member Group: Members Posts: 2,171 Joined: 30-December 14 From: Coeur d'Alene, Idaho Member No.: 18,263 Region Association: Pacific Northwest |
The perimeter of the windshield also got a swath of the butyl primer as well.
Will wait a day to make sure the primer is good and dry or cured. 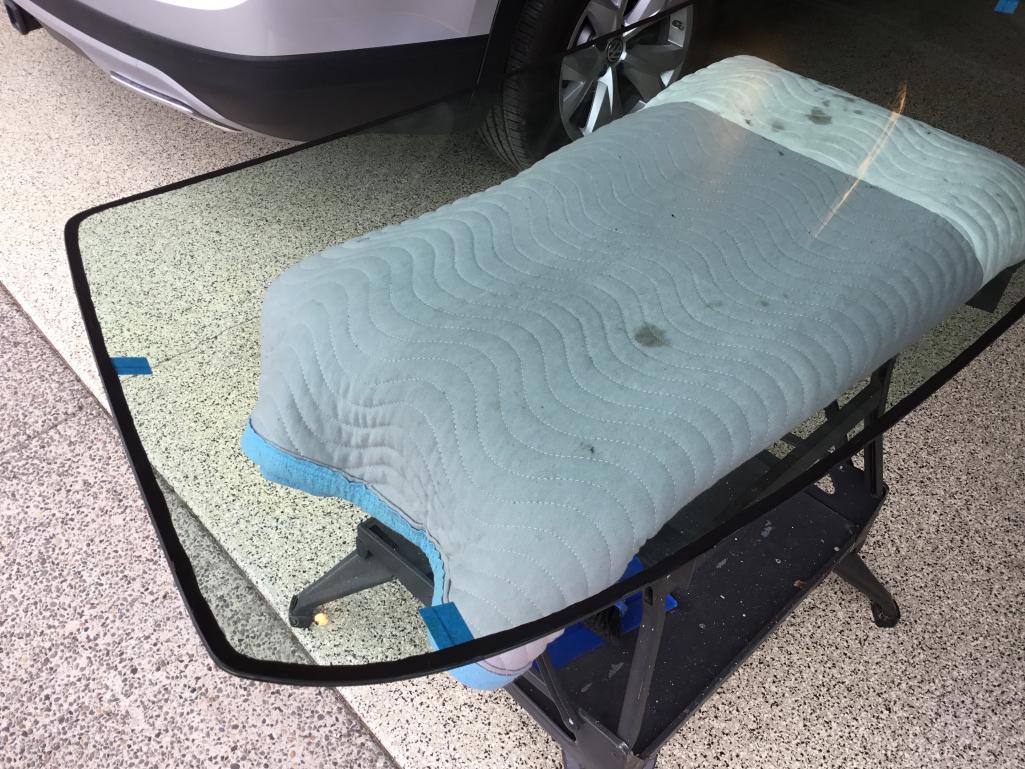 |
|
|
|
| raynekat |
Aug 25 2018, 01:30 PM
Post
#636
|
|
Advanced Member Group: Members Posts: 2,171 Joined: 30-December 14 From: Coeur d'Alene, Idaho Member No.: 18,263 Region Association: Pacific Northwest |
Got the engine lid back from the painters after changing out the bent/distorted hinges.
Prior owner had some issues with the engine lid brackets on the firewall getting ripping off, bent hinges and bent engine lid. Got another engine lid that seemed to fit better and took it's hinges and put on this lid. Drilled out the pins and went with bolts for the hinges. The fit is still not "perfect" but more than acceptable compared to what it used to be. Get to put some of my fun decals on the lower side of the lid. 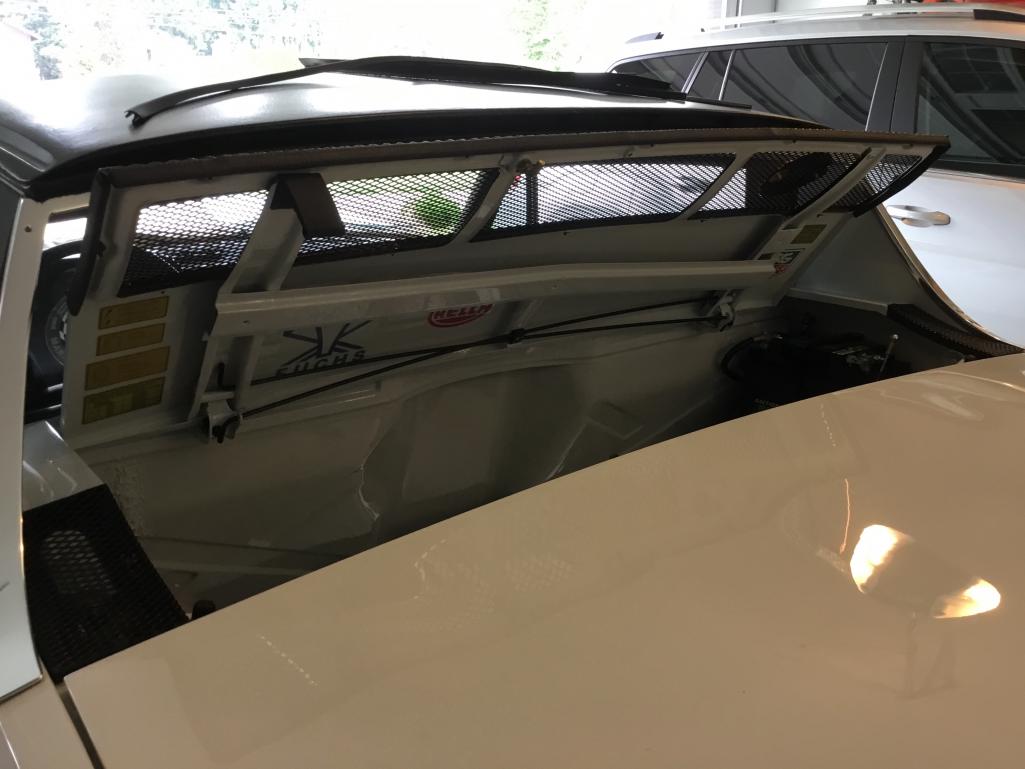 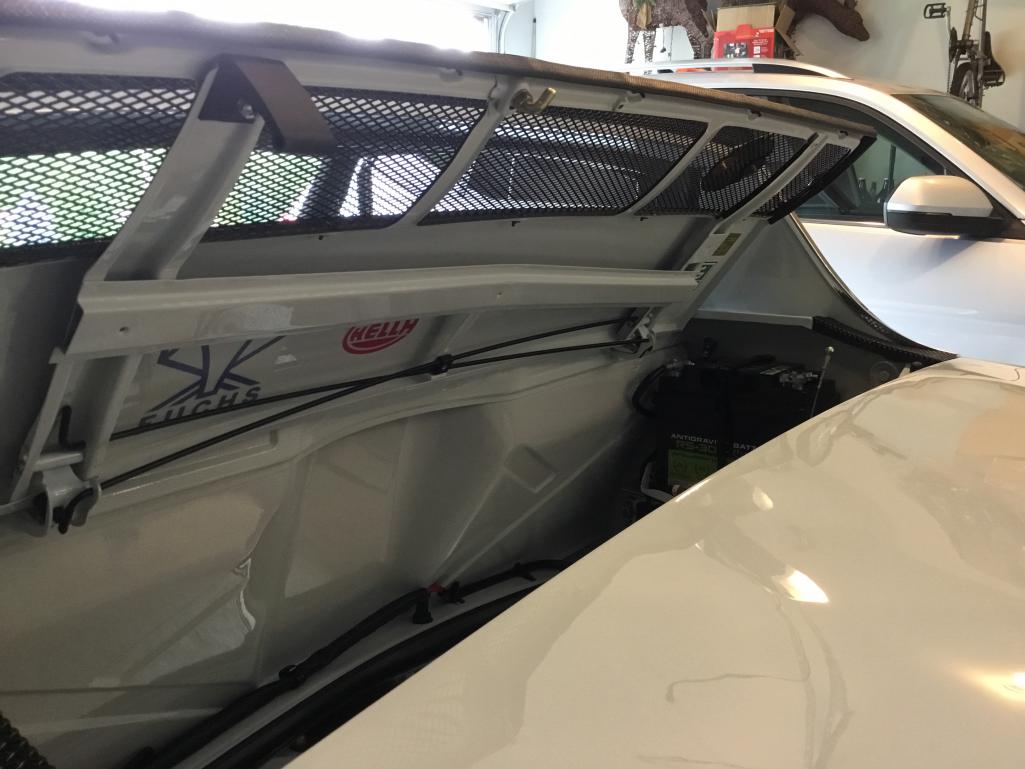 |
|
|
|
| raynekat |
Aug 25 2018, 01:34 PM
Post
#637
|
|
Advanced Member Group: Members Posts: 2,171 Joined: 30-December 14 From: Coeur d'Alene, Idaho Member No.: 18,263 Region Association: Pacific Northwest |
Pics of the engine lid in the closed position.
Even after getting it back from the painter with the "new" hinges there were fitment issues. The engine lid from one side to the other was just a bit too flat. So when you had the lid latched, both rear corners were sticking up too high. Took the lid off and gently bent it into more of a slight arc. Now the corners fit better and actually contact the rubber bumpers. Found a cool rally badge on Ebay in the year of the car (1971). Helps put a bit of interest on the grill. The P-O-R-S-C-H-E letters are not going back on the car as I'm trying to replicate something you would have found in Europe. 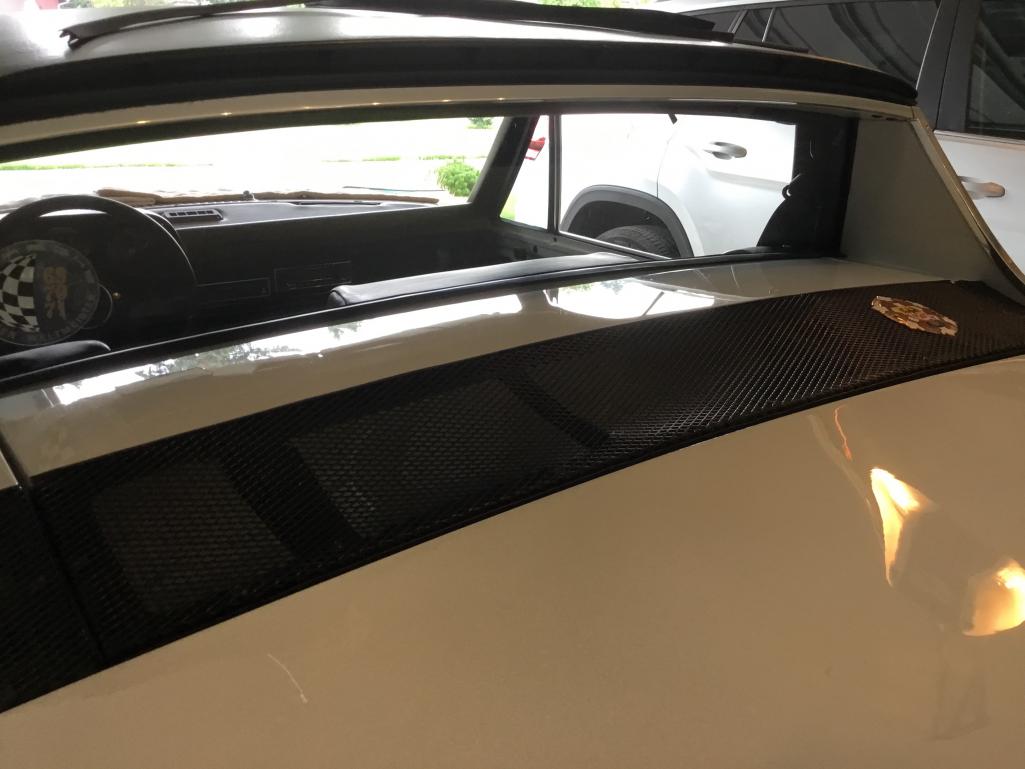 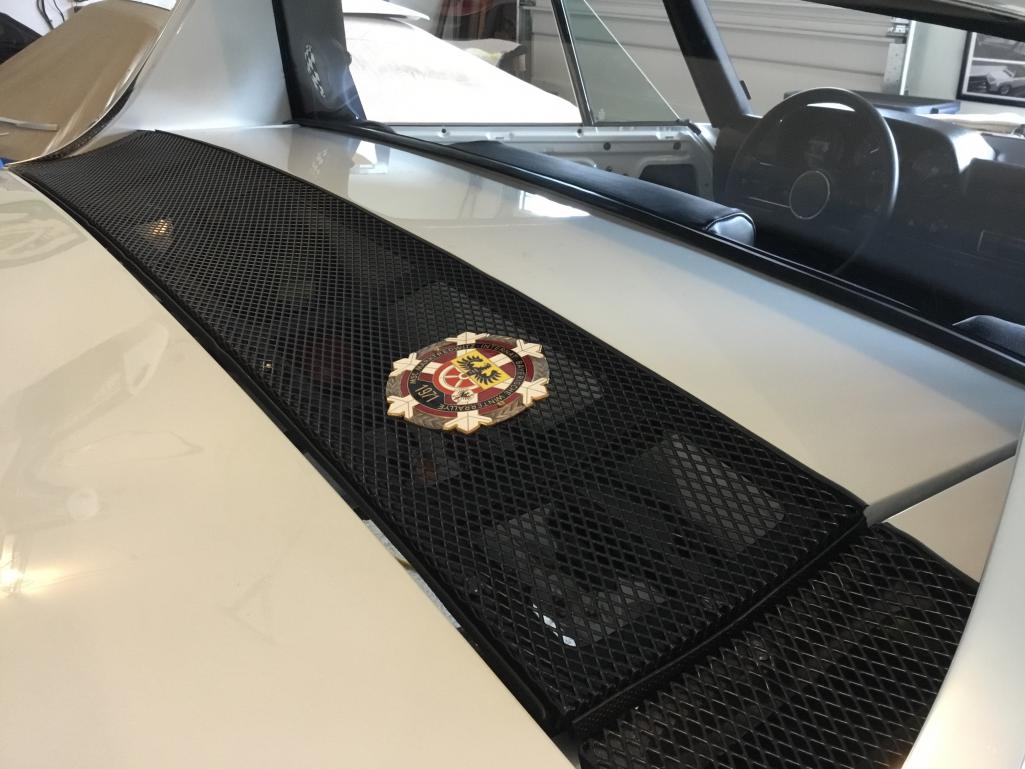 |
|
|
|
| raynekat |
Aug 30 2018, 02:28 AM
Post
#638
|
|
Advanced Member Group: Members Posts: 2,171 Joined: 30-December 14 From: Coeur d'Alene, Idaho Member No.: 18,263 Region Association: Pacific Northwest |
Got the windshield installed yesterday with the help of my wife.
Took us a couple attempts to get it nicely centered, but finally it was in. The details of this can be found here: http://www.914world.com/bbs2/index.php?showtopic=332713 The butyl primer on the perimeter of the glass and in the pinch weld area make for a very secure installation. That windshield isn't going anywhere in the coming decades. Actually the moulding took much more time to install than glass itself, but finally it too was all snapped into place. 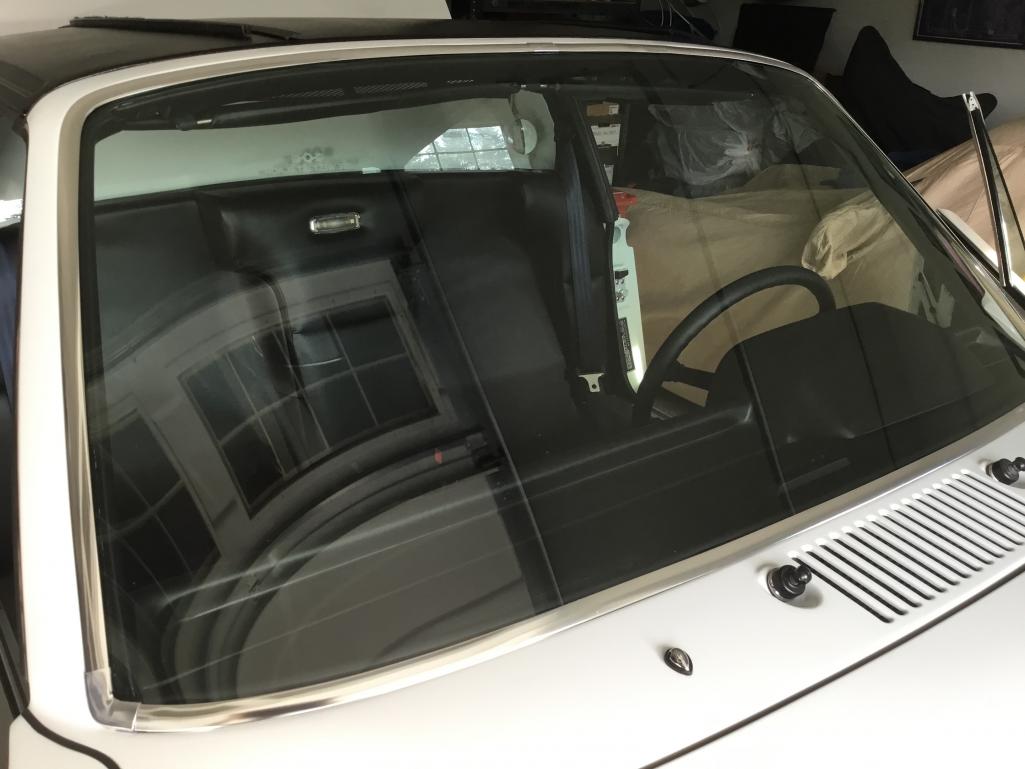 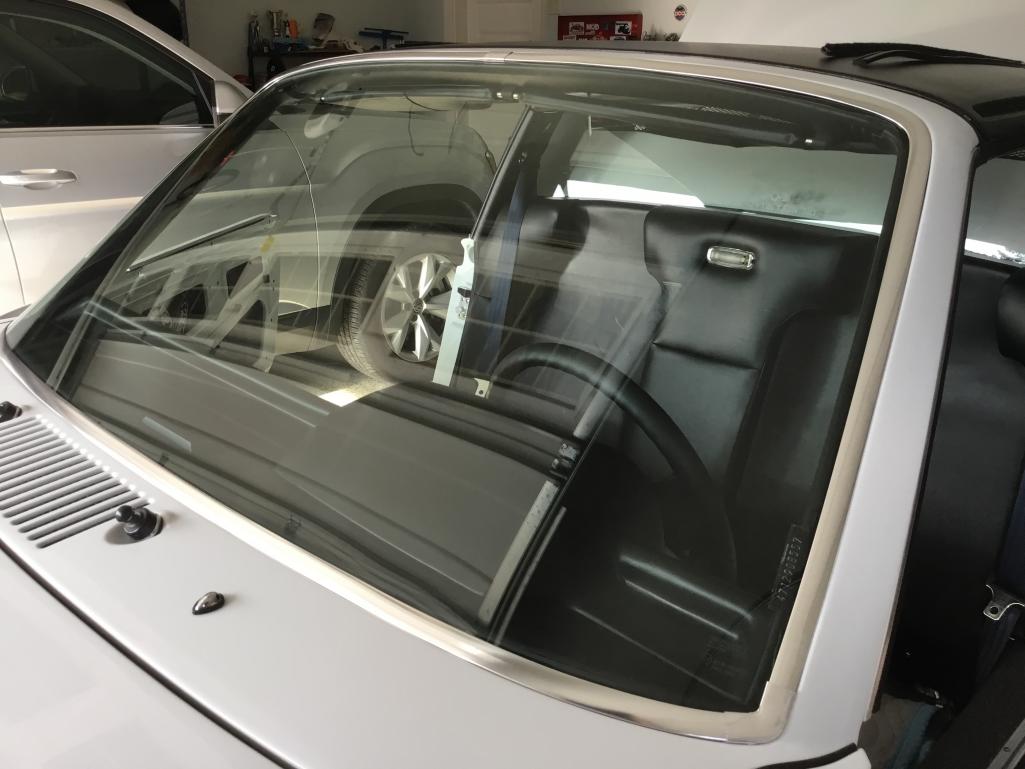 |
|
|
|
| raynekat |
Aug 30 2018, 02:31 AM
Post
#639
|
|
Advanced Member Group: Members Posts: 2,171 Joined: 30-December 14 From: Coeur d'Alene, Idaho Member No.: 18,263 Region Association: Pacific Northwest |
The windshield came from Prosource.
Nice Sekurit glass from Finland. Fit and finish was top quality. 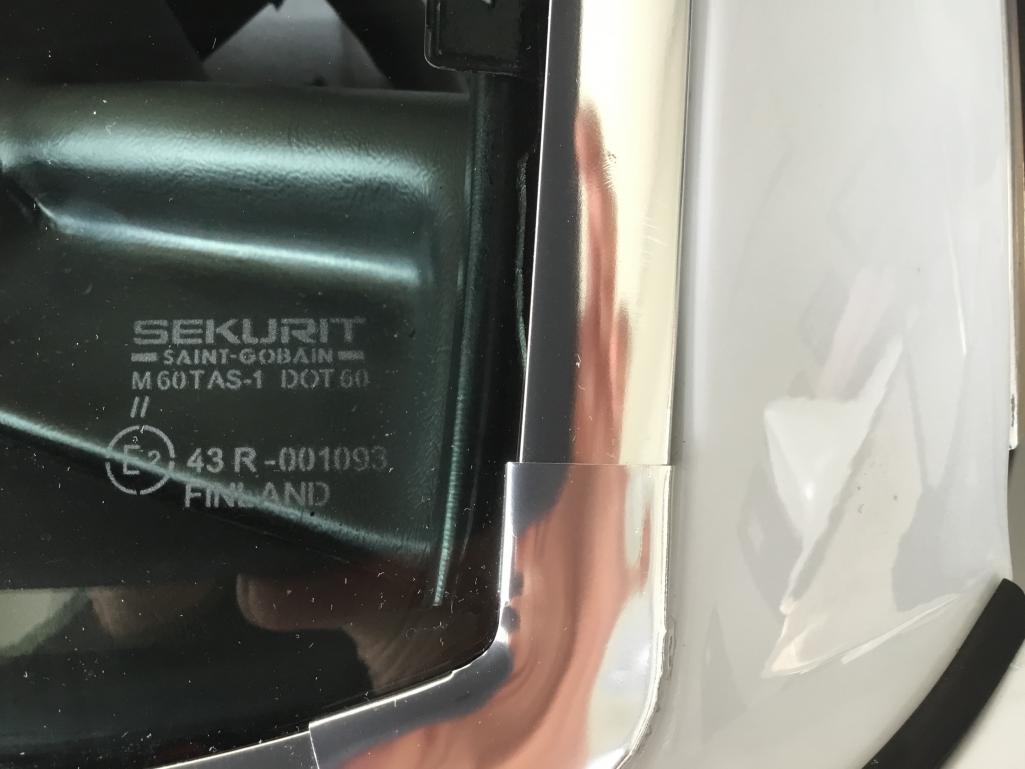 Pushed the windshield to dash seal in after the glass had been installed. New from 914Rubber. 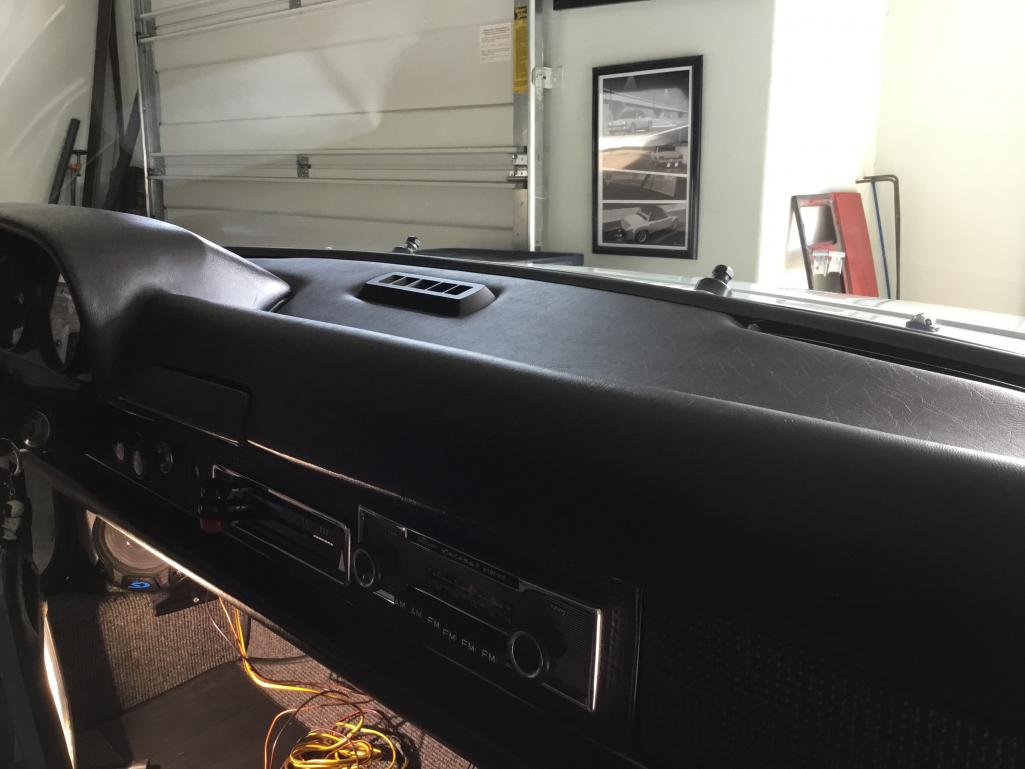 |
|
|
|
| raynekat |
Aug 30 2018, 02:34 AM
Post
#640
|
|
Advanced Member Group: Members Posts: 2,171 Joined: 30-December 14 From: Coeur d'Alene, Idaho Member No.: 18,263 Region Association: Pacific Northwest |
My punch list has shrunk down to the following:
1) Finish out the side window install. Currently waiting on a new passenger side window regulator and a new piece of tinted glass for the driver side. 2) Complete the under dash wiring which includes the radio, rear fog light and fuel pump. 3) Install the seats. 4) Bleed the brakes and adjust the parking brake. 5) Test as much of the electrical system as I can without the engine installed. (IMG:style_emoticons/default/beer.gif) |
|
|
|
|
2 User(s) are reading this topic (2 Guests and 0 Anonymous Users)
0 Members:

|
Lo-Fi Version | Time is now: 18th July 2026 - 04:09 AM |
Invision Power Board
v9.1.4 © 2026 IPS, Inc.