|
|
|
Porsche, and the Porsche crest are registered trademarks of Dr. Ing. h.c. F. Porsche AG.
This site is not affiliated with Porsche in any way. Its only purpose is to provide an online forum for car enthusiasts. All other trademarks are property of their respective owners. |
|
|

  |

| gereed75 |
 Feb 15 2015, 09:16 PM Feb 15 2015, 09:16 PM
Post
#1
|
|
Senior Member  Group: Members Posts: 1,246 Joined: 19-March 13 From: Pittsburgh PA Member No.: 15,674 Region Association: North East States |
I am prepping my original six engine tins for repaint. I have then all looking pretty straight except one end of the long piece that goes on the front of the engine.
Can anyone tell me what this end should look like?? The one in the picture appears to be kinked up, or is this the correct shape?? Should this end be "flat" or have this upturn?? Hope you can see by the pictures below. Thanks Attached thumbnail(s) 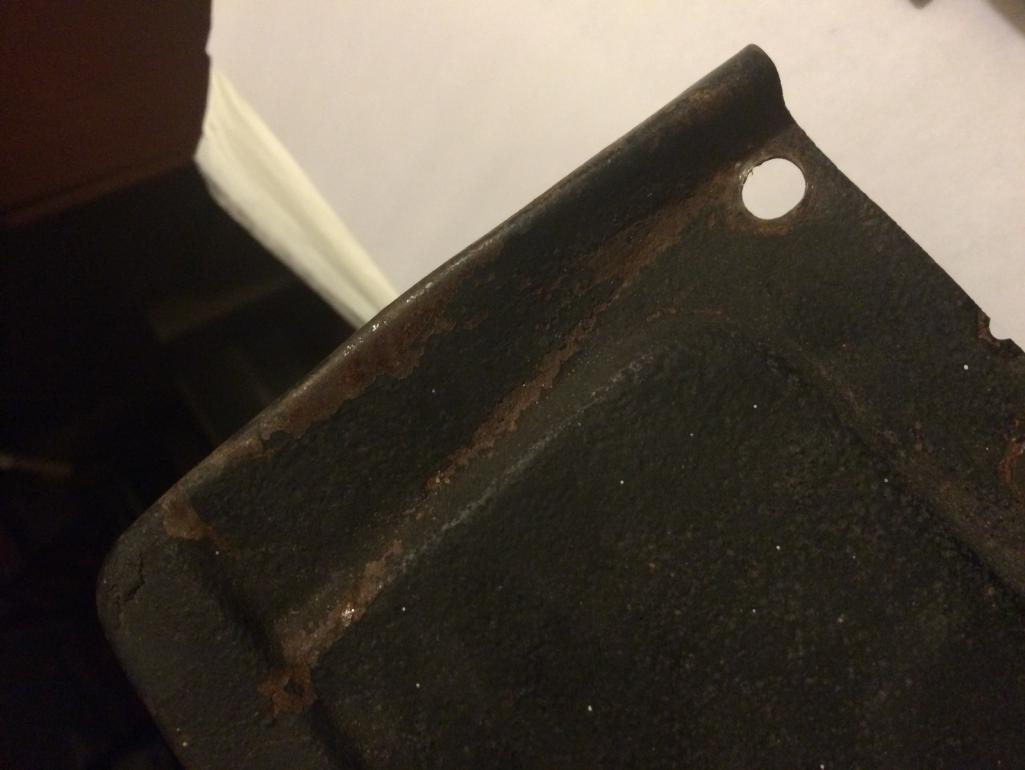  Attached image(s) 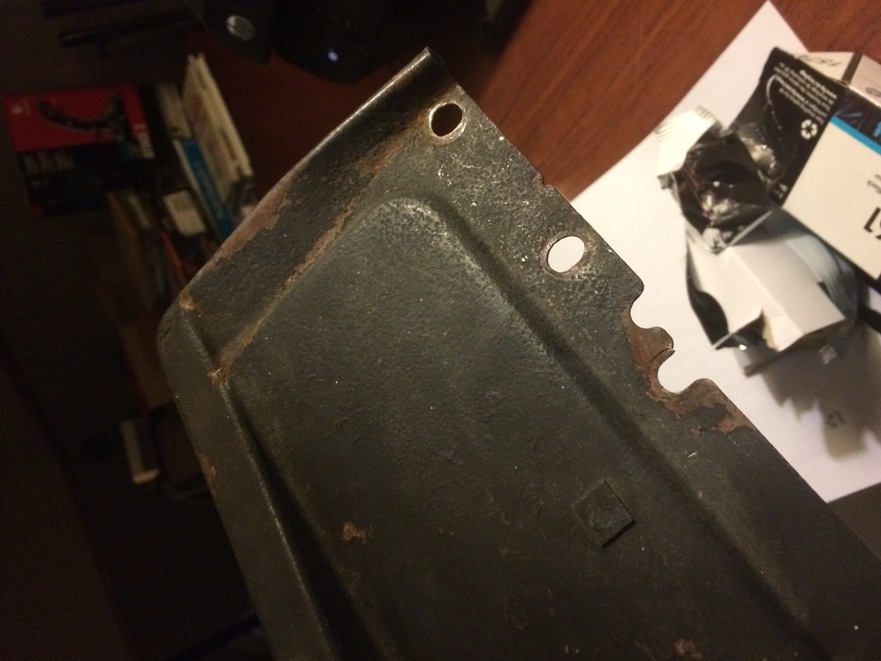
|
   |

 
|
| worn |
Feb 15 2015, 09:29 PM
Post
#2
|
|
can't remember Group: Members Posts: 3,156 Joined: 3-June 11 From: Madison, WI Member No.: 13,152 Region Association: Upper MidWest |
QUOTE(gereed75 @ Feb 15 2015, 07:16 PM)  I am prepping my original six engine tins for repaint. I have then all looking pretty straight except one end of the long piece that goes on the front of the engine. Can anyone tell me what this end should look like?? The one in the picture appears to be kinked up, or is this the correct shape?? Should this end be "flat" or have this upturn?? Hope you can see by the pictures below. Thanks I should say they are kinked at the ends, perhaps so as to make things fit better. Just made a set of my own, and I must say I like the extra detail in the stock version. |
|
|
|
| rgalla9146 |
Feb 15 2015, 09:38 PM
Post
#3
|
|
Advanced Member Group: Members Posts: 4,552 Joined: 23-November 05 From: Paramus NJ Member No.: 5,176 Region Association: None |
It should be flat.
That diagonal bend with the surface rust has to be worked out. And that square attached piece is supposed to be a bendable strap to hold the harness. Attached thumbnail(s) 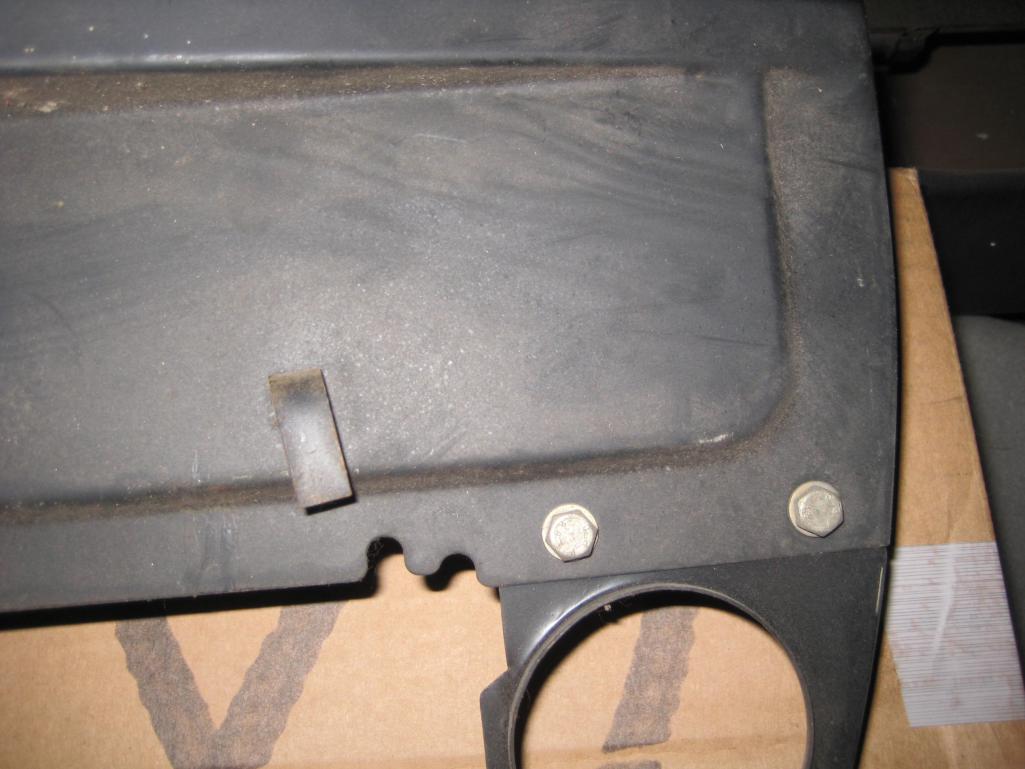 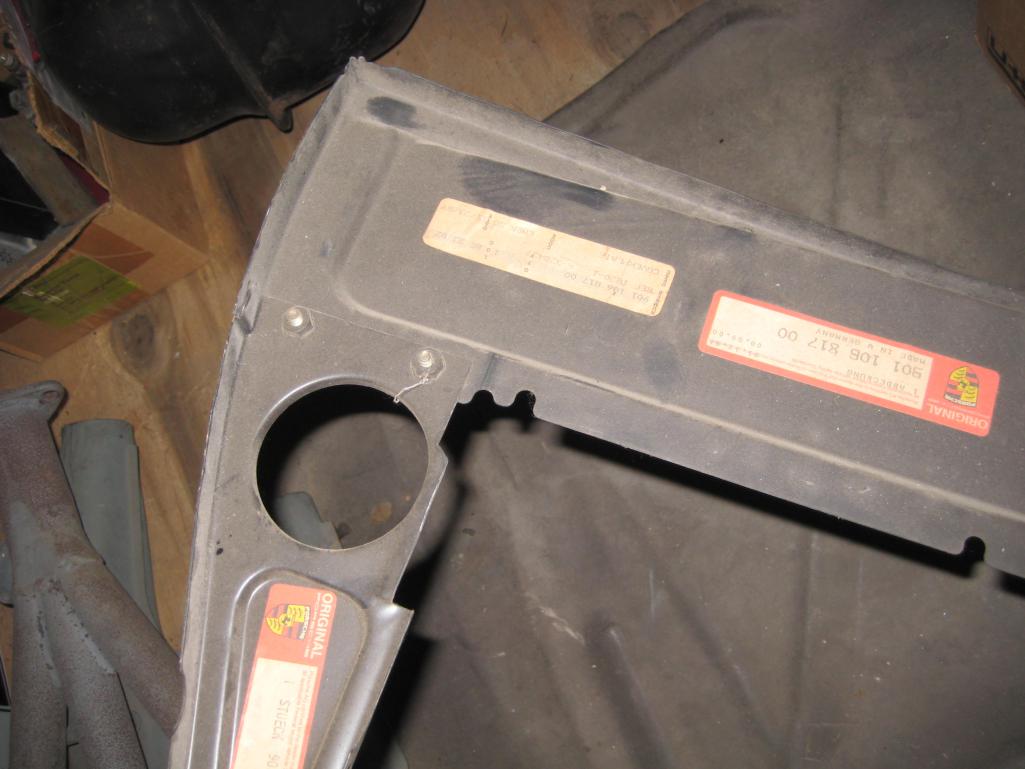
|
|
|
|
| gereed75 |
Feb 15 2015, 09:42 PM
Post
#4
|
|
Senior Member Group: Members Posts: 1,246 Joined: 19-March 13 From: Pittsburgh PA Member No.: 15,674 Region Association: North East States |
QUOTE(rgalla9146 @ Feb 15 2015, 10:38 PM) It should be flat. That diagonal bend with the surface rust has to be worked out. Yep, I see that now. Mated it to the matching side piece. Should be flat. Thanks Attached thumbnail(s) 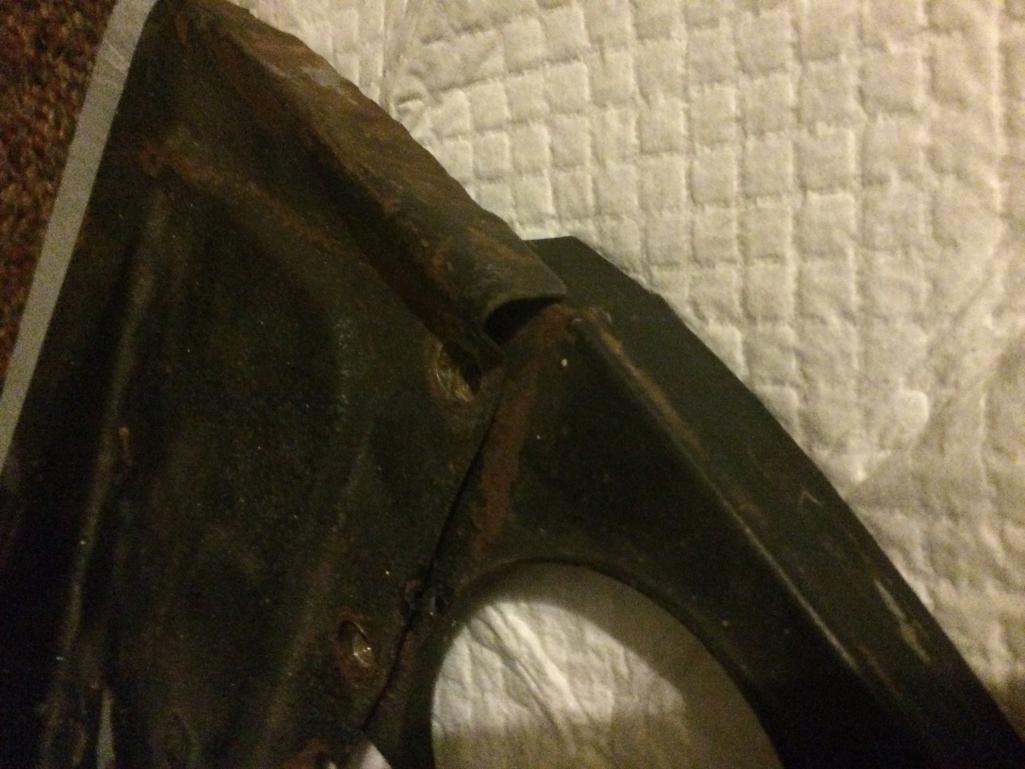
|
|
|
|
| gereed75 |
Feb 15 2015, 11:15 PM
Post
#5
|
|
Senior Member Group: Members Posts: 1,246 Joined: 19-March 13 From: Pittsburgh PA Member No.: 15,674 Region Association: North East States |
Rgalla, Thanks for digging out the parts for those pix and thanks for catching my broken harness strap. This forum rocks again!!
|
|
|
|
|
1 User(s) are reading this topic (1 Guests and 0 Anonymous Users)
0 Members:

|
Lo-Fi Version | Time is now: 16th May 2024 - 04:06 AM |
Invision Power Board
v9.1.4 © 2024 IPS, Inc.