|
|
|
Porsche, and the Porsche crest are registered trademarks of Dr. Ing. h.c. F. Porsche AG.
This site is not affiliated with Porsche in any way. Its only purpose is to provide an online forum for car enthusiasts. All other trademarks are property of their respective owners. |
|
|

  |

| scotty914 |
 Feb 21 2005, 12:35 AM Feb 21 2005, 12:35 AM
Post
#1
|
|
suby torque rules  Group: Members Posts: 1,525 Joined: 20-July 03 From: maryland, the land of 25 year Member No.: 924 |
okay i was board ofter pool tonight, so i broke out a spare door handle and rekeyed it to match my car's key. i did this as most people would do it, as in not having extra tumblers. just say it now instead of in questions, i use alcohol to clean the parts, its cuts grease and wont burn your skin like other chems can.
okay first pic is of the back of the door handle, you need to remove this screw and the part with the pin, but be careful there is a spring undernieth. Attached image(s) 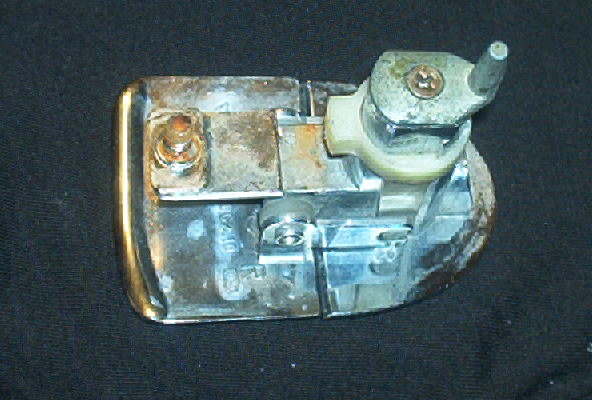
|
   |

 
|
| scotty914 |
Feb 21 2005, 12:36 AM
Post
#2
|
|
suby torque rules Group: Members Posts: 1,525 Joined: 20-July 03 From: maryland, the land of 25 year Member No.: 924 |
here is the spring and the part with the pin
Attached image(s) 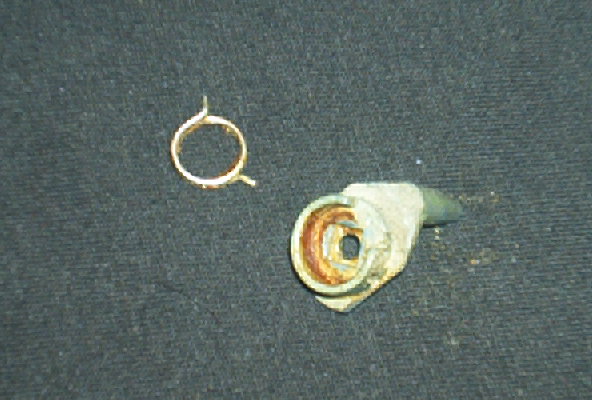
|
|
|
|
| scotty914 |
Feb 21 2005, 12:39 AM
Post
#3
|
|
suby torque rules Group: Members Posts: 1,525 Joined: 20-July 03 From: maryland, the land of 25 year Member No.: 924 |
next you pull out the cylinder, most of the time it pulls right out but some times you need to use a key to pull in some tumblers, it does not need to be the proper key though. normally because it is so dirty, heres what this one looked like after pulling it out
Attached image(s) 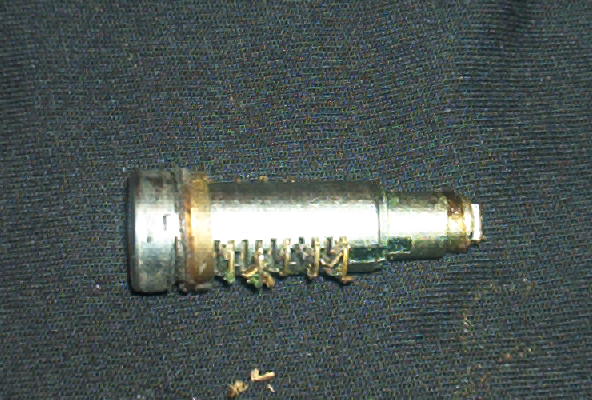
|
|
|
|
| scotty914 |
Feb 21 2005, 12:42 AM
Post
#4
|
|
suby torque rules Group: Members Posts: 1,525 Joined: 20-July 03 From: maryland, the land of 25 year Member No.: 924 |
next push/pull out all the tumblers and springs, i do this useing a tooth pick over a bowl or something i can just drop parts in to. it already has alcohol in it to start loosening the crud. then just let em sit for a few, then pull them out and wip them off. then use a tooth pick or tooth brush to clean out the crud from the cylinder.
here is all the parts laid out and clean Attached image(s) 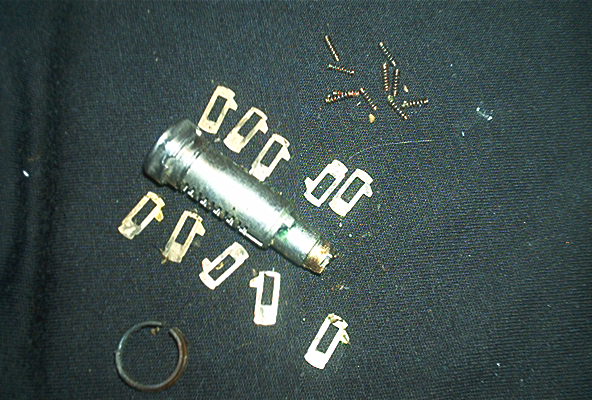
|
|
|
|
| scotty914 |
Feb 21 2005, 12:48 AM
Post
#5
|
|
suby torque rules Group: Members Posts: 1,525 Joined: 20-July 03 From: maryland, the land of 25 year Member No.: 924 |
next thing to do is insert the key you want to work the lock in to the cylinder, with out any tumblers.
then take a tumbler and insert it in to a slot till it touches the key, when it does if the notch in the tumbler lines up with the out side if the cylinder, then just pull out the key and push the tumbler in place, and push the key back in to hold the tumbler in place here is a pic ( looks like andy took it ) of how the tumbler should line up Attached image(s) 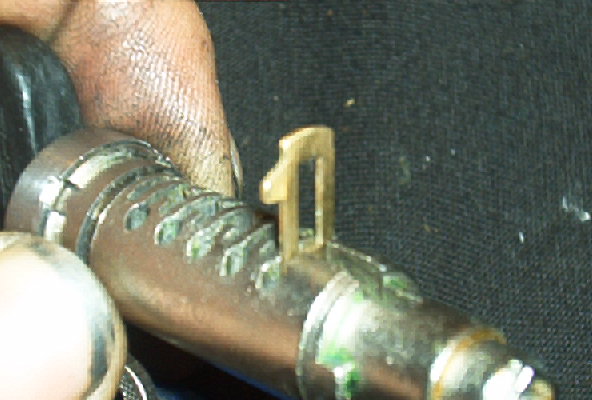
|
|
|
|
| scotty914 |
Feb 21 2005, 12:49 AM
Post
#6
|
|
suby torque rules Group: Members Posts: 1,525 Joined: 20-July 03 From: maryland, the land of 25 year Member No.: 924 |
here is a pic of a tumbler that does not fit right
Attached image(s) 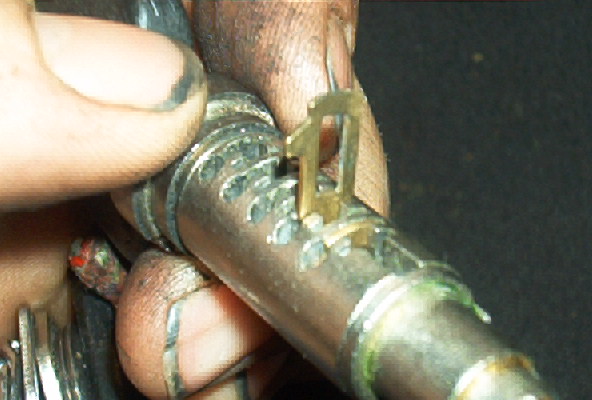
|
|
|
|
| scotty914 |
Feb 21 2005, 12:57 AM
Post
#7
|
|
suby torque rules Group: Members Posts: 1,525 Joined: 20-July 03 From: maryland, the land of 25 year Member No.: 924 |
well after you have found a spot for the tumbler just pull the key out, push the tumbler in, and reinsert the key to hold them all in place.
after you have gotten all the tumblers in that you can on each side, and you have extras that dont fit, you have 2 options. option one is leave them out, it nots like one or two tumblers less is going to make much difference. option 2 is to file down the tumbler top if the bottom of the tumbler notch is too short, or if the bottom is too long file the top. after all the tumblers are in ( that will fit ) take the key out completely. then one at a time take out a tumbler and insert a spring, then reinsert the tumbler, just be carefull the tumblers will want to stick out and maybe fall out. Attached image(s) 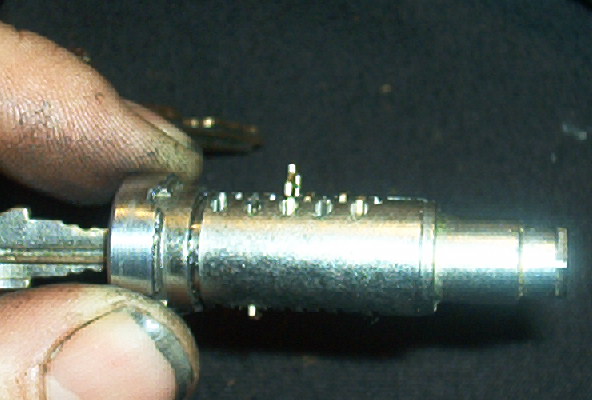
|
|
|
|
| scotty914 |
Feb 21 2005, 01:06 AM
Post
#8
|
|
suby torque rules Group: Members Posts: 1,525 Joined: 20-July 03 From: maryland, the land of 25 year Member No.: 924 |
okay at this point my camera battery died so no more pics.
but after the tumblers are in and the key is reinserted take the tooth pick and push on every tumbler fron the bottom of the tumbler to make sure they are right... they should not be above the cylinder at all, top or bottom. reinsert the cylinder with key in to the door handle. then place the spring in the recess for the part with the pin, it will not go in all the way because the spring with the pressured relieved is wider the the spot for it. just take another key, screw driver or whatever and push it back in place, but keep you finger close it will try to pop out. then put the pin thing back on and replace the screw. congrats the lock should work like new. a couple of things more, when you do this work on a dark cloth, for 2 reasons, its easier to see things and it stops the springs from rolling away. another dont use oil or grease in there because it will cause more crud to stick. i use and oil that evaporates and leaves behind a teflon coating. have fun doing this or just send to me, and i can do it for you |
|
|
|
| riverman |
Feb 21 2005, 09:21 AM
Post
#9
|
|
Learn As I Go Group: Members Posts: 449 Joined: 18-January 05 From: Kitchener, ON Member No.: 3,466 |
Good thread (IMG:http://www.914world.com/bbs2/html/emoticons/clap.gif) Does this work for the trunk lock as well?
|
|
|
|
| markb |
Feb 21 2005, 10:07 AM
Post
#10
|
|
914less :( Group: Members Posts: 5,449 Joined: 22-January 03 From: Nipomo, CA Member No.: 180 Region Association: Central California |
Speaking of trunk locks, anybody got a couple of the pin parts? The part that actually pushes on the latch to release it. I have 2 trunk locks that have the pins broken off of them.
|
|
|
|
| scotty914 |
Feb 21 2005, 11:17 AM
Post
#11
|
||
|
suby torque rules Group: Members Posts: 1,525 Joined: 20-July 03 From: maryland, the land of 25 year Member No.: 924 |
yes it does you just line up the deeper notch. here is a pic from another thread ( stole the pic from doug ) showing the valet tumbler on the left. Attached image(s) 
|
||
|
|
|
||
| rhodyguy |
Feb 21 2005, 01:28 PM
Post
#12
|
|
Chimp Sanctuary NW. Check it out. Group: Members Posts: 22,072 Joined: 2-March 03 From: Orion's Bell. The BELL! Member No.: 378 Region Association: Galt's Gulch |
rather than do every lock on the car to match the ignition, can the ignition be keyed to match the locks?
k |
|
|
|
| scotty914 |
Feb 21 2005, 02:57 PM
Post
#13
|
|
suby torque rules Group: Members Posts: 1,525 Joined: 20-July 03 From: maryland, the land of 25 year Member No.: 924 |
it can be but its the hardest to get out, due to pins in the column and in the lock it self there was a post a few weeks ago about this exact thing
the doors and trunk are the easiest, i would not worry about doing the glove box, also a pain to get out or the front trunk pull |
|
|
|
| ematulac |
Feb 21 2005, 03:37 PM
Post
#14
|
|
914 addict Group: Members Posts: 540 Joined: 24-November 03 From: Palmdale, CA Member No.: 1,382 |
Beautiful! (IMG:http://www.914world.com/bbs2/html/emoticons/smilie_pokal.gif)
I'm tired of carrying 2 keys for the 914. |
|
|
|
| mack914 |
Feb 21 2005, 07:19 PM
Post
#15
|
|
Member Group: Members Posts: 387 Joined: 5-July 04 From: Toledo, Oh Member No.: 2,306 |
I rekeyed all the locks including the gbox and trunk release handle from the the ignition key. I enjoyed the process and felt good about the accomplishment. Now carry only one key instead of three.
|
|
|
|
| markb |
Feb 21 2005, 09:39 PM
Post
#16
|
||
|
914less :( Group: Members Posts: 5,449 Joined: 22-January 03 From: Nipomo, CA Member No.: 180 Region Association: Central California |
So, what position does the valet tumbler go in? |
||
|
|
|
||
| Rhodes71/914 |
Feb 21 2005, 10:26 PM
Post
#17
|
|
Glacier Group: Members Posts: 1,374 Joined: 8-August 04 From: End of the Road, Alaska Member No.: 2,482 |
Excellent, I'll be doing this to match my doors and trunk to the new ignition I have.
|
|
|
|
| scotty914 |
Feb 21 2005, 10:31 PM
Post
#18
|
||
|
suby torque rules Group: Members Posts: 1,525 Joined: 20-July 03 From: maryland, the land of 25 year Member No.: 924 |
it does not matter as long as you line up the little notch on the out side of the cylinder when finding proper location to fit each tumbler size or just leave em out just remember to check it with the key when you are done |
||
|
|
|
||
| Doug Leggins |
Feb 22 2005, 10:58 AM
Post
#19
|
||
|
Senior Member Group: Benefactors Posts: 1,358 Joined: 6-February 03 From: Nashville, Indiana Member No.: 261 Region Association: None |
I recently keyed the ignition to match a door key. I had some difficulty disassembling the ignition switch to get the tumbler out. There are 2 roll pins that hold the end cam on the ignition tumbler. The pins are small and not in a good location to allow for grasping them and pulling them out. I chose to drive them out using a cut off nail as a drift/punch sort of worked sort of didn't. I was successfull with one ignition switch the 2nd one still has mangled roll pins in it. I think that the roll pins must be driven out, but should be done using a proper size drift/punch. I could not easily find metric sized roll pins for a replacement (That is why I was trying to get the roll pins out of the second ignition switch). I did find 5/64" diamater 1/4" long roll pins and they seem to work just fine. I tried 3/8" long roll pins and they proved to be too long. Other than the 2 roll pins I don't recall having any other issues re-keying the ignition. |
||
|
|
|
||
| Doug Leggins |
Feb 22 2005, 11:20 AM
Post
#20
|
||
|
Senior Member Group: Benefactors Posts: 1,358 Joined: 6-February 03 From: Nashville, Indiana Member No.: 261 Region Association: None |
The valet wafer needs to replace a #2 wafer in the tumbler. Other than it needing to be in place of a #2 wafer, I don't think it matters which one of 10 possible tumbler locations that the valet wafer is in. If you look at the pic with the valet wafer and the #2 and #4 wafer in it you might be able to understand how the valet wafer works. I'll try to put something together with pics soon that better describes how the keys and the valet wafer work together. But for now, I'll try to describe it. When the red key is inserted into the lock the cut points of the key ride on the highest step of the valet wafer. The step on the left side of the valet wafer in the pic. This forces the valet wafer to act like a #4 wafer. It pushes the bottom of the wafer out past the tumbler body and prevents the lock from turning. The red key rides on the top step of the valet wafer because the cut portion of the red key is in the center of the key blank. A pic would do wonders here -LOL! When the black key is inserted into the lock the cut points of the key ride on the lowest step of the valet wafer. The step on the right side of the valet wafer in the pic. This forces the valet wafer to act like a #2 wafer. It positions the valet wafer in a position that will allow the lock to turn. The black key rides on the bottom step of the valet wafer because the cut portion of the black key is on the side of the key blank. Again, a pic would do wonders here. But, for now just look at your red and black key and you can see the difference. (IMG:http://www.914world.com/bbs2/html/emoticons/biggrin.gif) Hope this helps! Gotta get back to work. (IMG:http://www.914world.com/bbs2/html/emoticons/biggrin.gif) |
||
|
|
|
||
|
1 User(s) are reading this topic (1 Guests and 0 Anonymous Users)
0 Members:

|
Lo-Fi Version | Time is now: 6th May 2024 - 01:19 PM |
Invision Power Board
v9.1.4 © 2024 IPS, Inc.