|
|

|
Porsche, and the Porsche crest are registered trademarks of Dr. Ing. h.c. F. Porsche AG.
This site is not affiliated with Porsche in any way. Its only purpose is to provide an online forum for car enthusiasts. All other trademarks are property of their respective owners. |
|
|
  |
| Nemisus |
 Jun 29 2015, 08:55 PM Jun 29 2015, 08:55 PM
Post
#61
|
|
Member   Group: Members Posts: 82 Joined: 1-October 11 From: North Bay CA Member No.: 13,631 Region Association: Northern California |
This statement was why I responded the way I did. No negativity intended. It's easy to get upside down in a rustoration. I get it... I believe I walked into that one. Its like half of me wants to admit defeat and the other half of me says quite! The part that doesn't help is that my wife is extremely supportive of this project. She is encouraging me to work through it and focus on the results rather than what I see in front of me! (IMG:style_emoticons/default/agree.gif) just take it one step (or two) at a time. When I found mine I walked because I had no welding experience although I was willing to learn. I wanted to save the car so went back and picked it up because I was fortunate to have a great resource here in town that was able to get the car structurally sound for what I consider a bargain price. Every time we dug deeper we found more rust and each time the mechanic's answer was "we can fix that" or "I've seen worse". I've still got a ways to go but am not discouraged and know that it will be worth it once I'm done - even if takes another year or so. Don't take anything personally here. We're all here to help (IMG:style_emoticons/default/biggrin.gif) In truth I know everyone here wants to see another 914 saved. You offer great advice. After reading nearly all the restoration threads I have a pretty sound plan should I find myself going forward with this tub. Hey, If you want to tackle the work, go for it! My car had a good deal more work than I thought I would, however nowhere to the extent yours does. When I tackled my project (still ongoing, though the car is now on her feet and running and driving) I thought I was going to be able to do things in small stages and piecemeal it together, which was very much not the case. I do highly recommend to try and do that, bite off small parts to do, make a list (dont look at it too often, you will get discouraged) but finish small stuff, have a beer and feel accomplished. Brushing up on my welding skills was interesting, but through support of guys on here and family friends with 914s, I know my car probably has more rust hiding somewhere, I have to drop the engine soon and patch a part of the drivers side firewall. Sorry for rambling, but just take your time and your project will pay dividends to you, and you will feel great saving a car too. (IMG:style_emoticons/default/beerchug.gif) Thanks for the advice. Pretty good idea really. Set up the project in stages and focus on one stage at a time... (IMG:style_emoticons/default/beerchug.gif) I only get weekends to work on it as I get home too late. One thing I am set on is finding a Rotisserie. I'd prefer to find one used, as we all know these aren't cheap. I just think it will make a world of difference when I get to the hard stuff. On the plus side I do know how to weld. It has been some time but I weld well enough that I am confident I can do this. In fact I feel the welding is the easy part... removing the old and placing the new might be a different story. I have absorbed a lot reading the restoration threads. |
| Chris H. |
 Jun 30 2015, 07:35 AM Jun 30 2015, 07:35 AM
Post
#62
|
|
Senior Member     Group: Members Posts: 4,027 Joined: 2-January 03 From: Chicago 'burbs Member No.: 73 Region Association: Upper MidWest 
|
Here's the good part:
You have what looks to be a really good drive train there. A 2.0L makes anything you put it in fun to drive and a decent value. No matter what happens with the tub, you have that. Did you take a look at LeftCoastErik's thread? He's working through some unexpected rust and repair issues. Even found a previous repair on his car with a green section grafted in (not a huge problem if done correctly). If you or your friend are at his skill level you're all set. You really have to take that tub down to the bare metal like he did and check the whole thing. There is a lot of rust in your center tunnel, like water was getting in there regularly. Looks like the floor pans might have been treated with POR15 or something like that which could just be masking the issues. Media blast it, grind it off, however you want, but start with a fresh palette to work from with no surprises. The good news is that most of the repair panels are available if you want to do the work. The reason you're getting recommendations to move the parts to another tub is that it's a LOT of work to repair rust. But..if you want to do it we'll cheer you on. Go for it. Take a look at Veltror's thread. Now that's a car that was almost gone. Don't think it's done yet but he is determined. BTW McMark had a flared roller for sale for a while. Not sure if he still has it but he is in the Bay area (until he moves). Marathon Blue originally. |
| Dave_Darling |
 Jun 30 2015, 08:55 AM Jun 30 2015, 08:55 AM
Post
#63
|
|
914 Idiot           Group: Members Posts: 14,981 Joined: 9-January 03 From: Silicon Valley / Kailua-Kona Member No.: 121 Region Association: Northern California 
|
One thing I am set on is finding a Rotisserie. I'd prefer to find one used, as we all know these aren't cheap. One great thing about welders--you can make stuff. I suggest that putting together a rotisserie would be an excellent warm-up project for your welding skills. If you start with a couple of engine stands, you have the rotating bits taken care of. Just hook them together, and build the bits that mount to the car, and there's your rotisserie! --DD |
| Nemisus |
 Jun 30 2015, 09:25 PM Jun 30 2015, 09:25 PM
Post
#64
|
|
Member   Group: Members Posts: 82 Joined: 1-October 11 From: North Bay CA Member No.: 13,631 Region Association: Northern California |
BTW McMark had a flared roller for sale for a while. Not sure if he still has it but he is in the Bay area (until he moves). Marathon Blue originally. Unfortunately for me McMark sold the car a few months ago. Since I have little time to actually spend on the current tub I am actively looking as far as So Cal for any good tubs. There is one on Clist that is flared going for about 2k, but I know very little about it. Maybe I'll look it up again and see if anyone can take a look at it for me? One thing I am set on is finding a Rotisserie. I'd prefer to find one used, as we all know these aren't cheap. One great thing about welders--you can make stuff. I suggest that putting together a rotisserie would be an excellent warm-up project for your welding skills. If you start with a couple of engine stands, you have the rotating bits taken care of. Just hook them together, and build the bits that mount to the car, and there's your rotisserie! --DD You know Dave I have considered doing exactly this. I've actually spent some time looking over the design that Restoration Design makes. Anyway I go building my own will certainly cost less. And as you said it, would be a great way to get back into the groove of welding. It has been some time. |
| Nemisus |
 Jul 7 2015, 05:05 PM Jul 7 2015, 05:05 PM
Post
#65
|
|
Member   Group: Members Posts: 82 Joined: 1-October 11 From: North Bay CA Member No.: 13,631 Region Association: Northern California |
Update:
So after several late nights and hours of searching, as well as the great advice from the members here... I do believe I have found the solution to my 74 rust woes. In an effort to not ruin a good thing I will hold off on going into too much detail. Need to finalize the deal first. stay tuned for more updates! Cheers (IMG:style_emoticons/default/icon_bump.gif) |
| McMark |
 Jul 7 2015, 09:34 PM Jul 7 2015, 09:34 PM
Post
#66
|
|
914 Freak!                Group: Retired Admin Posts: 20,179 Joined: 13-March 03 From: Grand Rapids, MI Member No.: 419 Region Association: None |
|
| ConeDodger |
 Jul 7 2015, 09:39 PM Jul 7 2015, 09:39 PM
Post
#67
|
|
Apex killer!                Group: Members Posts: 23,556 Joined: 31-December 04 From: Tahoe Area Member No.: 3,380 Region Association: Northern California 
|
|
| Nemisus |
 Jul 7 2015, 09:51 PM Jul 7 2015, 09:51 PM
Post
#68
|
|
Member   Group: Members Posts: 82 Joined: 1-October 11 From: North Bay CA Member No.: 13,631 Region Association: Northern California |
I plead the 5th... (IMG:style_emoticons/default/beerchug.gif)
Lets just say that one possible deal lead to another more realistic deal for my needs! |
| TeenerTech |
 Jul 7 2015, 10:25 PM Jul 7 2015, 10:25 PM
Post
#69
|
|
some mechanic  Group: Members Posts: 17 Joined: 21-July 14 From: Grand Rapids, MI Member No.: 17,667 Region Association: North East States |
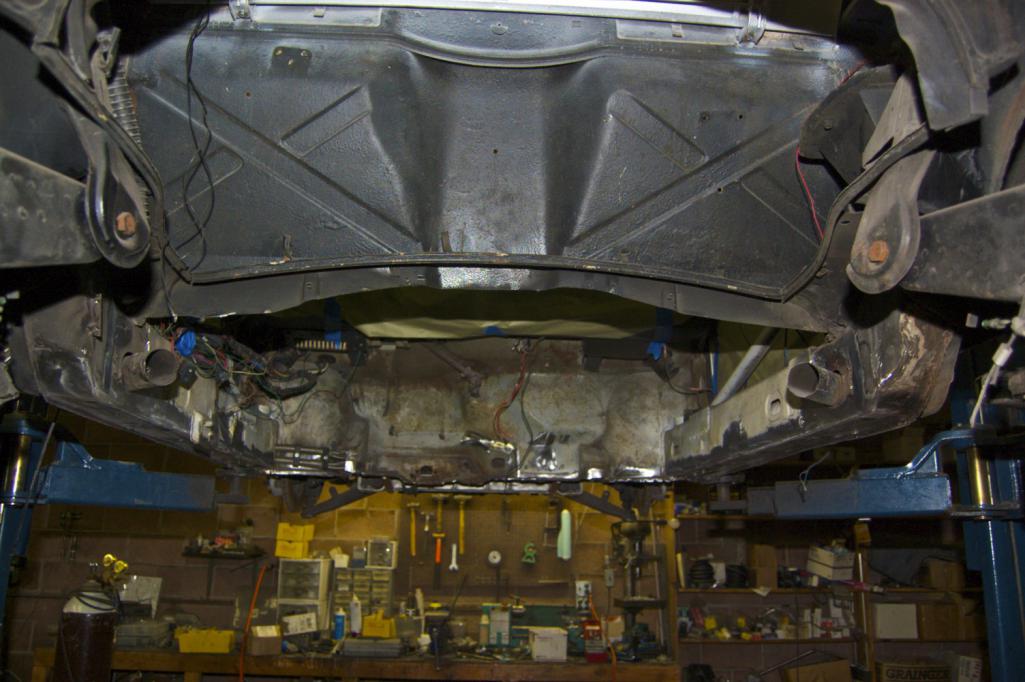
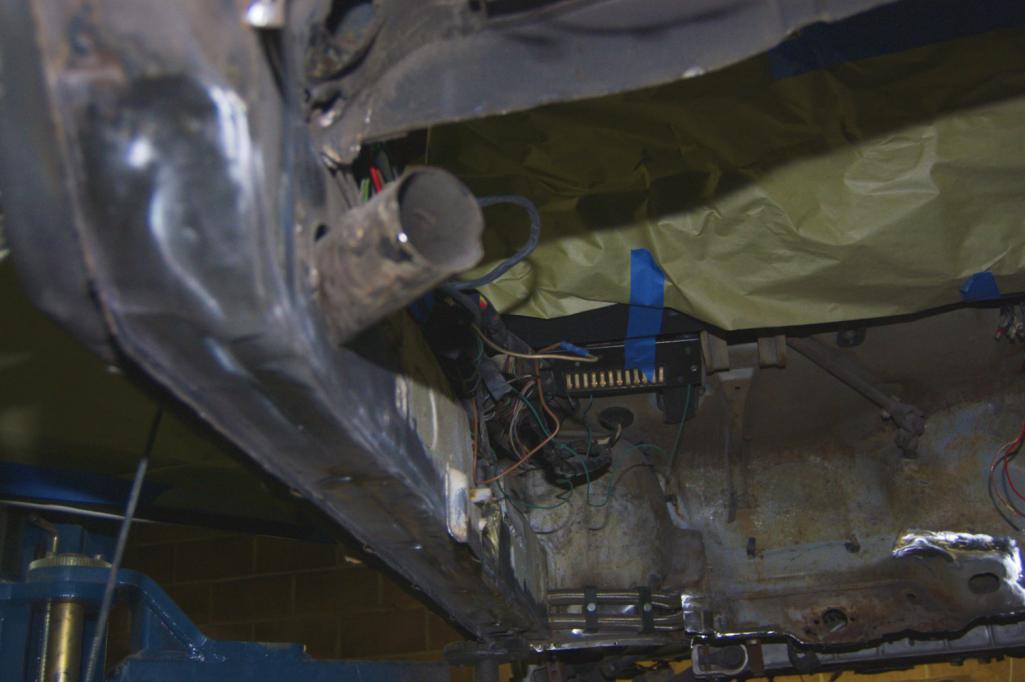
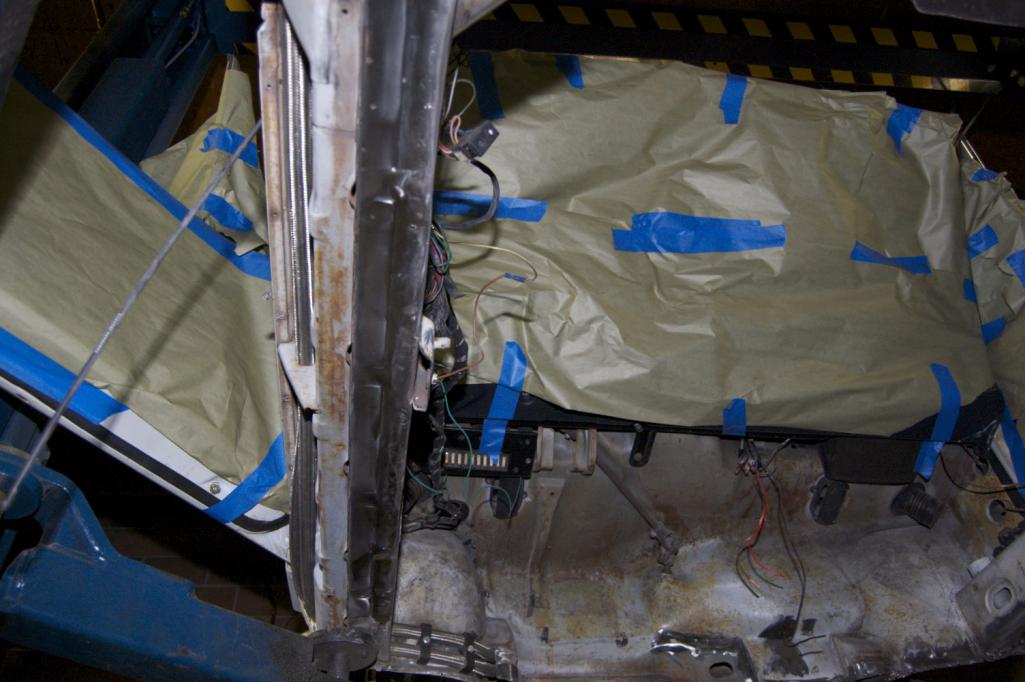
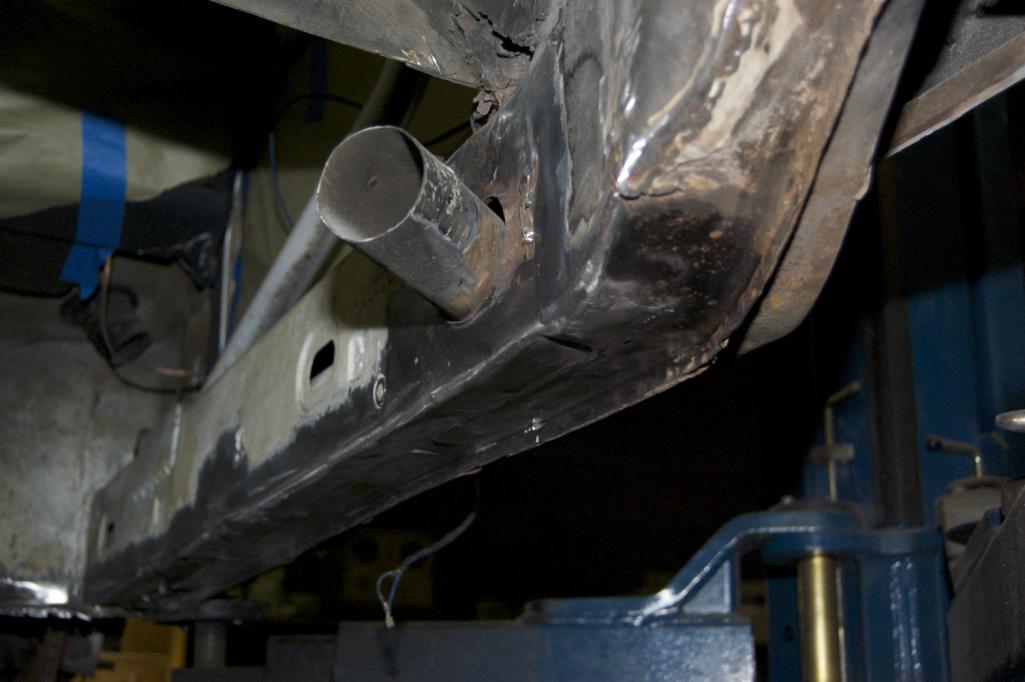
This is what you need to do to your 74. (IMG:style_emoticons/default/sawzall-smiley.gif) (IMG:style_emoticons/default/welder.gif) (IMG:style_emoticons/default/smash.gif)
    [attachmentid=507 [attachmentid=507469] 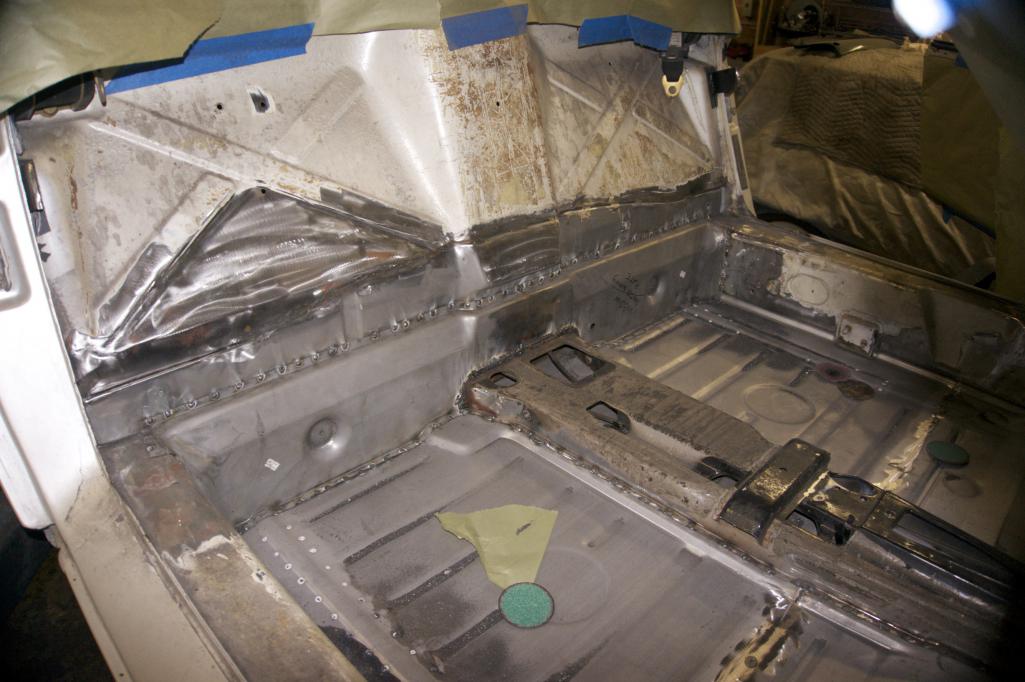 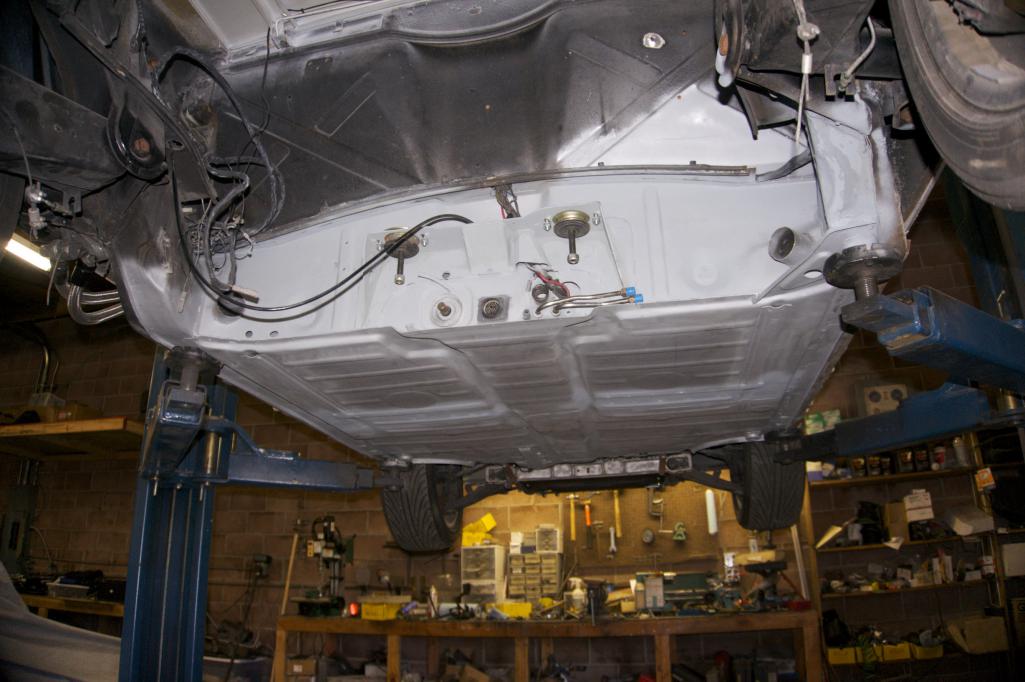 Attached thumbnail(s) 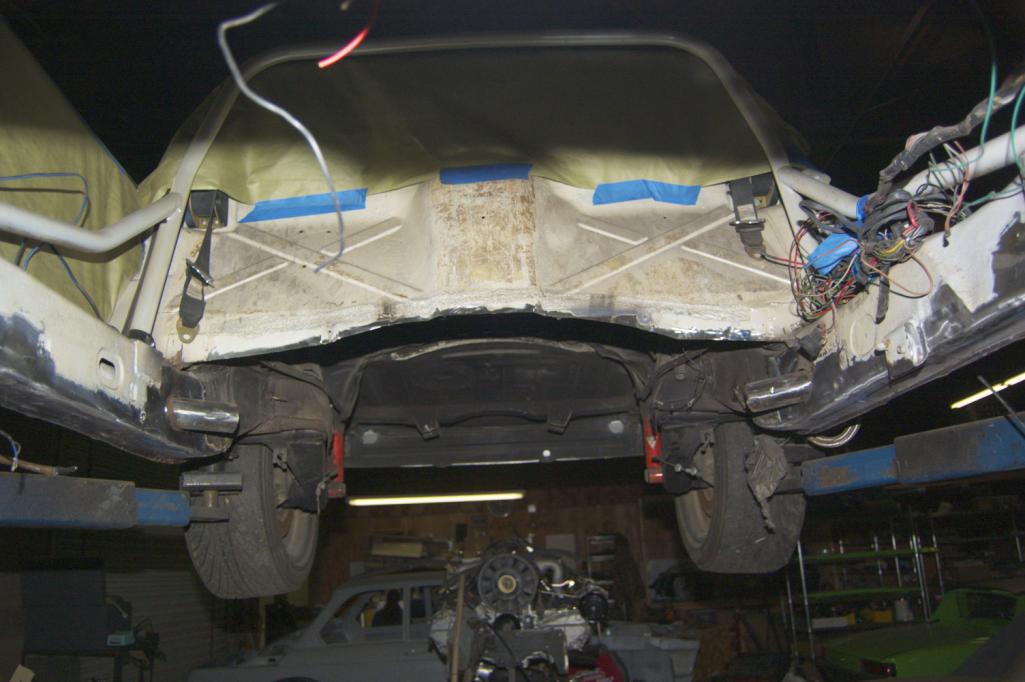
|
| Nemisus |
 Jul 7 2015, 10:37 PM Jul 7 2015, 10:37 PM
Post
#70
|
|
Member   Group: Members Posts: 82 Joined: 1-October 11 From: North Bay CA Member No.: 13,631 Region Association: Northern California |
Tim,
Appreciate the pictures. Really does put the job into perspective when you see it laid out like that. I wont give up on the 74 just yet, but the new direction I am going will certainly get me in a working and driving 914 sooner than later. The next few weeks are definitely going to be exciting for me! Cheers JB |
| Nemisus |
 Jul 11 2015, 03:52 PM Jul 11 2015, 03:52 PM
Post
#71
|
|
Member   Group: Members Posts: 82 Joined: 1-October 11 From: North Bay CA Member No.: 13,631 Region Association: Northern California |
Update:
Since I am waiting on a new addition to my 74 project (HINT: its 42 years old and has a color code of L96M) I thought I would spend some time with the 2.0 getting it cleaned up and just overall see how things look. The 74 sat for what I think was about 6 years. As most of the previous pictures show there are a lot of webs and nests of sorts covering the car. Anyhow... Here are some shots of a near naked 2.0. Fuel Inject and most of the wiring harness removed: Just wiping down the tin made a big difference in cleanliness. (IMG:http://www.914world.com/bbs2/uploads_offsite/i98.photobucket.com-13631-1436651553.1.jpg) an over head: (IMG:http://www.914world.com/bbs2/uploads_offsite/i98.photobucket.com-13631-1436651553.2.jpg) almost all the tins removed: Had to take a break and have lunch (IMG:http://www.914world.com/bbs2/uploads_offsite/i98.photobucket.com-13631-1436651553.3.jpg) (IMG:http://www.914world.com/bbs2/uploads_offsite/i98.photobucket.com-13631-1436651553.4.jpg) (IMG:http://www.914world.com/bbs2/uploads_offsite/i98.photobucket.com-13631-1436651554.5.jpg) (IMG:http://www.914world.com/bbs2/uploads_offsite/i98.photobucket.com-13631-1436651554.6.jpg) (IMG:http://www.914world.com/bbs2/uploads_offsite/i98.photobucket.com-13631-1436651554.7.jpg) That about does it for that. I have the 901 ready for a trip to Mark at Original Customs to get looked at. Figured I might as well use their services before the move. It will also give me some time to sneak a peak at the "new addition". (IMG:style_emoticons/default/lol-2.gif) Stay Tuned, Updates and more pictures soon. Cheers Nemi |
| Nemisus |
 Jul 12 2015, 09:42 PM Jul 12 2015, 09:42 PM
Post
#72
|
|
Member   Group: Members Posts: 82 Joined: 1-October 11 From: North Bay CA Member No.: 13,631 Region Association: Northern California |
For this project I leave you with the final update. At least for some time. I am moving in a different direction. If your curious please check things out here
http://www.914world.com/bbs2/index.php?showtopic=259717 |
| McMark |
 Jul 13 2015, 02:56 PM Jul 13 2015, 02:56 PM
Post
#73
|
|
914 Freak!                Group: Retired Admin Posts: 20,179 Joined: 13-March 03 From: Grand Rapids, MI Member No.: 419 Region Association: None |
Pull that pressure plate and make sure the clutch is in good shape while you're there. This will also make sure it's free. In some cases the flywheel clutch and pressure plate will stick/rust together. Happened to me on a Datsun 280Z once.
|
| Nemisus |
 Jul 13 2015, 05:27 PM Jul 13 2015, 05:27 PM
Post
#74
|
|
Member   Group: Members Posts: 82 Joined: 1-October 11 From: North Bay CA Member No.: 13,631 Region Association: Northern California |
Pull that pressure plate and make sure the clutch is in good shape while you're there. This will also make sure it's free. In some cases the flywheel clutch and pressure plate will stick/rust together. Happened to me on a Datsun 280Z once. Good call Mark! I was looking at the last night and had a hell of a time getting the bolts to loosen up. Is there a special thin walled socket that is used? Considering that this sat for 6 years I'd image a replacement would only benefit. |
| McMark |
 Jul 13 2015, 09:14 PM Jul 13 2015, 09:14 PM
Post
#75
|
|
914 Freak!                Group: Retired Admin Posts: 20,179 Joined: 13-March 03 From: Grand Rapids, MI Member No.: 419 Region Association: None |
Actually you don't need a thin wall. If you look at your 13mm socket, you'll see there is a taper where the nut goes in. If you grind this taper off the socket will actually grab.
|
| Nemisus |
 Jul 13 2015, 09:28 PM Jul 13 2015, 09:28 PM
Post
#76
|
|
Member   Group: Members Posts: 82 Joined: 1-October 11 From: North Bay CA Member No.: 13,631 Region Association: Northern California |
Actually you don't need a thin wall. If you look at your 13mm socket, you'll see there is a taper where the nut goes in. If you grind this taper off the socket will actually grab. I'll give this a try over the weekend! Appreciate the feedback and advice! Thanks Mark |
  |
1 User(s) are reading this topic (1 Guests and 0 Anonymous Users)
0 Members:

|
Lo-Fi Version | Time is now: 23rd April 2024 - 05:03 AM |
Invision Power Board
v9.1.4 © 2024 IPS, Inc.


