|
|
|
Porsche, and the Porsche crest are registered trademarks of Dr. Ing. h.c. F. Porsche AG.
This site is not affiliated with Porsche in any way. Its only purpose is to provide an online forum for car enthusiasts. All other trademarks are property of their respective owners. |
|
|


| gereed75 |
 Jun 25 2015, 08:08 AM Jun 25 2015, 08:08 AM
Post
#21
|
|
Senior Member  Group: Members Posts: 1,424 Joined: 19-March 13 From: Pittsburgh PA Member No.: 15,674 Region Association: North East States |
Just built this combo gauge.
Thanks to Steve Snyder for sending the center button to finish it off. Used an 84 911 combo to get the temp and press modules and a later 914 fuel for the module and face plate. All off ebay for about $150.00. Used condensed gothic dry transfer lettering...fairly close match to the original size and font. A real PITA to put on. Not perfect but looks fine from 2 feet. Made a new back plate per the instructions in various threads on the site. Lots of little dremel cutting (IMG:style_emoticons/default/sawzall-smiley.gif) The generosity and help from the World is really great!! 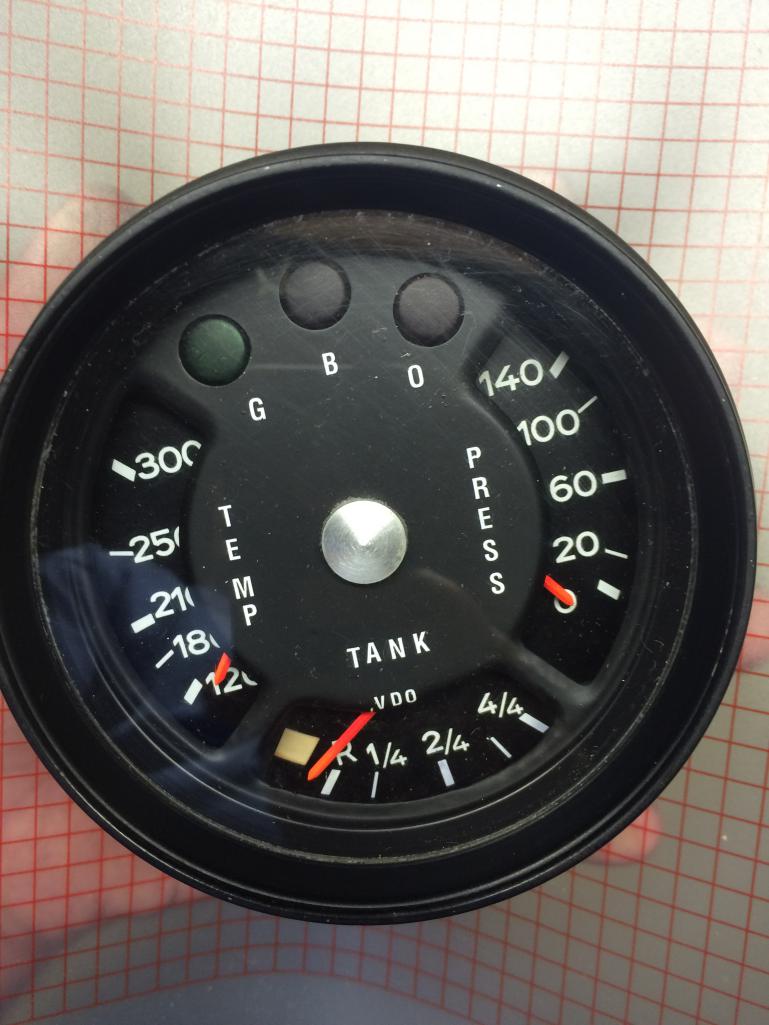 Going out to install. Hope it all works Attached thumbnail(s) 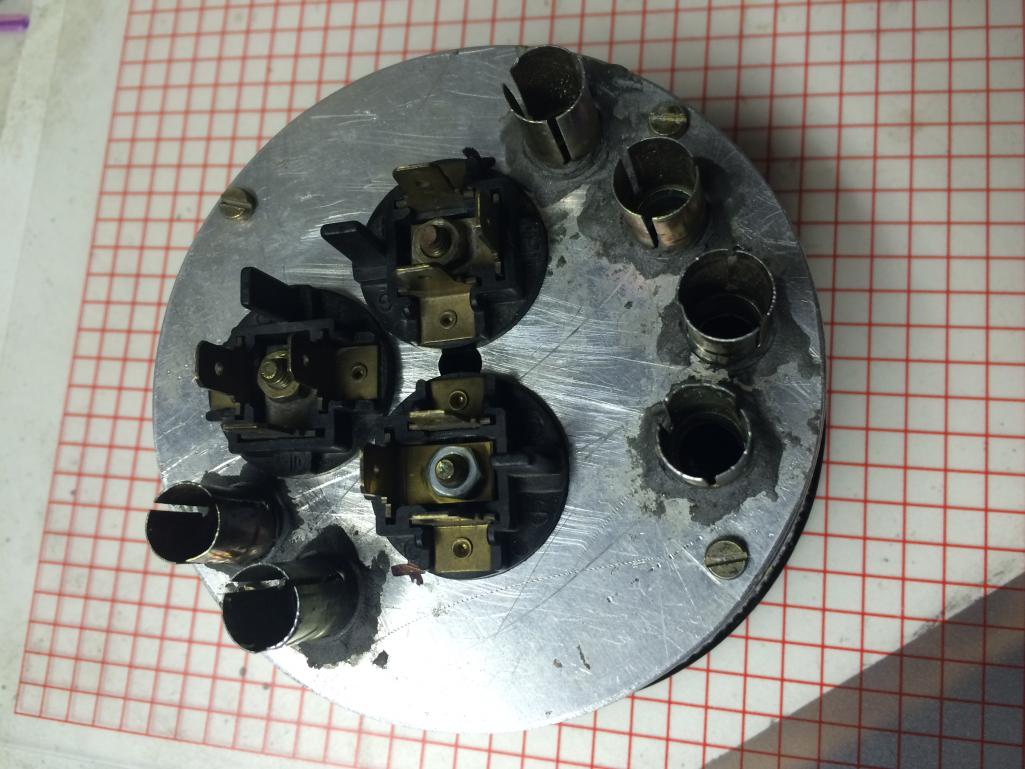
|
   |

 
|
Posts in this topic
 gereed75 Built this combo gauge Jun 25 2015, 08:08 AM
 rhodyguy what temp sensor will you be using? for a 4 or 6? ... Jun 25 2015, 08:21 AM
 gereed75
what temp sensor will you be using? for a 4 or 6?... Jun 25 2015, 08:55 AM Eddie914 WOW!
Great Job!
I might have time to try... Jun 25 2015, 09:50 AM Mark Henry WOW!
Very cool! Exactly what I want to do... Jun 25 2015, 12:58 PM Steve Snyder That looks sweet! Great job. Jun 25 2015, 01:45 PM bahnzai Any more details would be great. I am sure there a... Jun 25 2015, 02:07 PM 914forme :headbanger: Great Job there Jun 25 2015, 02:33 PM Alphaogre I just bought a donor 911 gauge to build a multi g... Jun 25 2015, 03:13 PM Vysoc Nice work Gary, can't wait to see the six.
Vy... Jun 25 2015, 04:11 PM JmuRiz Very creative look, and probably eliminates the wh... Jun 25 2015, 07:12 PM gereed75 Used this classic thread as guidance http://www.9... Jun 25 2015, 08:58 PM 914forme
One bad thing is that the light holders do no g... Jun 26 2015, 06:31 AM wndsnd Fine work! Jun 25 2015, 09:15 PM r_towle Good job Jun 25 2015, 09:24 PM Maltese Falcon I like the layout and it's well executed... j... Jun 25 2015, 09:25 PM bahnzai Gary,
Thanks so much for the additional info and i... Jun 26 2015, 05:00 AM mepstein
Gary,
Thanks so much for the additional info and ... Jun 26 2015, 05:12 AM gereed75
Gary,
Thanks so much for the additional info and... Jun 26 2015, 05:47 AM mepstein
[quote name='mepstein' post='2202777' date='Jun 2... Jun 26 2015, 05:53 AM gereed75
[quote name='mepstein' post='2202777' date='Jun ... Jun 26 2015, 05:55 AM 914forme Wow, I am humbled, did not realize that was my thr... Jun 26 2015, 06:36 AM nada911
Just built this combo gauge.
Thanks to Steve S... Jul 15 2015, 09:26 PM Michelj13 I love it. Been looking to buy a 3 gauge kit from ... Jul 17 2015, 01:49 AM John Wow!
Those look great.
I de-crimp and recrim... Mar 28 2016, 09:17 PM worn
Wow!
Those look great.
I de-crimp and recri... Mar 29 2016, 07:03 AM Wyvern WoW ...really cool !
:cheer: Mar 28 2016, 09:33 PM
gereed75
what temp sensor will you be using? for a 4 or 6?... Jun 25 2015, 08:55 AM Eddie914 WOW!
Great Job!
I might have time to try... Jun 25 2015, 09:50 AM Mark Henry WOW!
Very cool! Exactly what I want to do... Jun 25 2015, 12:58 PM Steve Snyder That looks sweet! Great job. Jun 25 2015, 01:45 PM bahnzai Any more details would be great. I am sure there a... Jun 25 2015, 02:07 PM 914forme :headbanger: Great Job there Jun 25 2015, 02:33 PM Alphaogre I just bought a donor 911 gauge to build a multi g... Jun 25 2015, 03:13 PM Vysoc Nice work Gary, can't wait to see the six.
Vy... Jun 25 2015, 04:11 PM JmuRiz Very creative look, and probably eliminates the wh... Jun 25 2015, 07:12 PM gereed75 Used this classic thread as guidance http://www.9... Jun 25 2015, 08:58 PM 914forme
One bad thing is that the light holders do no g... Jun 26 2015, 06:31 AM wndsnd Fine work! Jun 25 2015, 09:15 PM r_towle Good job Jun 25 2015, 09:24 PM Maltese Falcon I like the layout and it's well executed... j... Jun 25 2015, 09:25 PM bahnzai Gary,
Thanks so much for the additional info and i... Jun 26 2015, 05:00 AM mepstein
Gary,
Thanks so much for the additional info and ... Jun 26 2015, 05:12 AM gereed75
Gary,
Thanks so much for the additional info and... Jun 26 2015, 05:47 AM mepstein
[quote name='mepstein' post='2202777' date='Jun 2... Jun 26 2015, 05:53 AM gereed75
[quote name='mepstein' post='2202777' date='Jun ... Jun 26 2015, 05:55 AM 914forme Wow, I am humbled, did not realize that was my thr... Jun 26 2015, 06:36 AM nada911
Just built this combo gauge.
Thanks to Steve S... Jul 15 2015, 09:26 PM Michelj13 I love it. Been looking to buy a 3 gauge kit from ... Jul 17 2015, 01:49 AM John Wow!
Those look great.
I de-crimp and recrim... Mar 28 2016, 09:17 PM worn
Wow!
Those look great.
I de-crimp and recri... Mar 29 2016, 07:03 AM Wyvern WoW ...really cool !
:cheer: Mar 28 2016, 09:33 PM  |
1 User(s) are reading this topic (1 Guests and 0 Anonymous Users)
0 Members:

|
Lo-Fi Version | Time is now: 22nd March 2026 - 10:08 PM |
Invision Power Board
v9.1.4 © 2026 IPS, Inc.