|
|
|
Porsche, and the Porsche crest are registered trademarks of Dr. Ing. h.c. F. Porsche AG.
This site is not affiliated with Porsche in any way. Its only purpose is to provide an online forum for car enthusiasts. All other trademarks are property of their respective owners. |
|
|

  |

| Root_Werks |
 Feb 25 2005, 09:50 AM Feb 25 2005, 09:50 AM
Post
#1
|
|
Village Idiot  Group: Members Posts: 8,319 Joined: 25-May 04 From: About 5NM from Canada Member No.: 2,105 Region Association: Pacific Northwest |
In the almost year I have been acvite on the club, I have seen or heard about lots of glass flares being installed on 914's. Rick(alien) mentioned once he had to pull the lower corners out, add some material to keep them there. Others mentioned being able to see glass mat through the paint ect. Well, I will post more detialed pic's of course, but here is a couple of the flares I am putting on CAMP914's V8 car. His yellow on had rear flares installed (FG) and I am putting the front ones on for him.
|
   |

 
|
| Root_Werks |
Feb 25 2005, 09:57 AM
Post
#2
|
|
Village Idiot Group: Members Posts: 8,319 Joined: 25-May 04 From: About 5NM from Canada Member No.: 2,105 Region Association: Pacific Northwest |
These two are not close up shots. But I wanted to stress the importance of storing FG stuff properly. I am assuming the person who did this car bought all 4 flares and only installed the rears. Then I am guessing the fronts were stored for a length of time. These flares must have been laid out flat? It took a while and a lot of screws to get them shaped correctly to the fender. I started out by taping them on, marking them and then cutting inside the line 1/2-1". Then grinding the paint off down to bare metal. Fit and screw the flare on. I use little screws for ease of removal. After this weekend, I will show the different stages of bonding outside, inside, remove screws, bond outside, inside, sand, bond, sand, bond, sand, bond, fill and feather. it is a long process, but it is super strong when you are done and if done right, you will have even a paper thin layer of evercoat over all glassing so after you paint, you won't see any mat or holes etc.
Attached image(s) 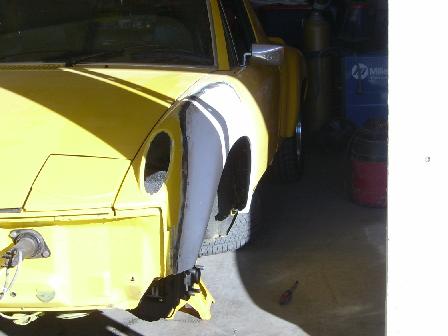
|
|
|
|
| TravisNeff |
Feb 25 2005, 09:57 AM
Post
#3
|
|
914 Guru Group: Members Posts: 5,082 Joined: 20-March 03 From: Mesa, AZ Member No.: 447 Region Association: Southwest Region |
Great! We'd love to see that
|
|
|
|
| Root_Werks |
Feb 25 2005, 10:27 AM
Post
#4
|
|
Village Idiot Group: Members Posts: 8,319 Joined: 25-May 04 From: About 5NM from Canada Member No.: 2,105 Region Association: Pacific Northwest |
Here is the other side, only ones I have for now. I carefully sand down the glass flare edge after screwing on the flares to lower the FG and pre form it even better to the fender. Then I carefully glass and mat between the screws front and back. On Craigs car here, the PO sprayed the tar underbody in the fender wells. Great stuff, until you try to remove it! (IMG:http://www.914world.com/bbs2/html/emoticons/laugh.gif) I still have little black specs on my face (tar). (IMG:http://www.914world.com/bbs2/html/emoticons/rolleyes.gif) I usually only grind down to bare metal only as far back as I need, 1-2" is about all you need. After this weekend, I will post more close ups. This way Craig will see I am really working on his car too! (IMG:http://www.914world.com/bbs2/html/emoticons/happy11.gif)
Attached image(s) 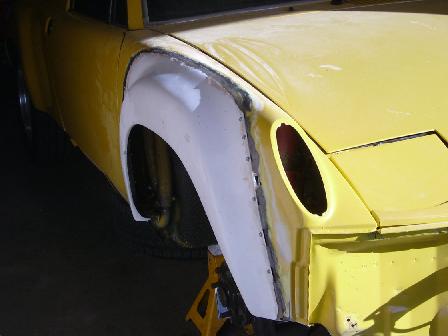
|
|
|
|
| Root_Werks |
Feb 25 2005, 10:45 AM
Post
#5
|
|
Village Idiot Group: Members Posts: 8,319 Joined: 25-May 04 From: About 5NM from Canada Member No.: 2,105 Region Association: Pacific Northwest |
This is a shot of another 914 I did. You can get an idea of how much is cut off the car. I only leave 1/2 - 1" lip to bond the flare to. The very first set I did(years ago), I left a huge 3-4" lip which hung low. Not good, leaves places for dirt to collect and you cannot bond from both sides. But I will shoot pic's of the inside this weekend. (IMG:http://www.914world.com/bbs2/html/emoticons/sawzall-smiley.gif) (IMG:http://www.914world.com/bbs2/html/emoticons/happy11.gif)
Attached image(s) 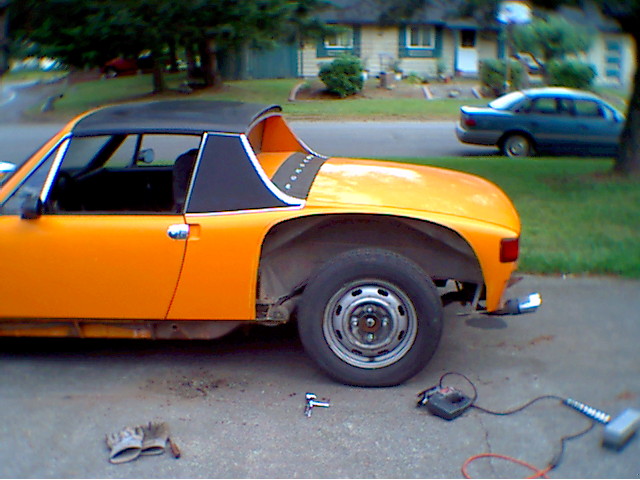
|
|
|
|
| pete-stevers |
Feb 25 2005, 11:34 AM
Post
#6
|
|
saved from fire! Group: Members Posts: 2,641 Joined: 10-October 04 From: Abbotsford,BC, Canada Member No.: 2,914 Region Association: Pacific Northwest |
looks great Root... show us the whole process... great idea for a thread
thanks (IMG:http://www.914world.com/bbs2/html/emoticons/biggrin.gif) steve |
|
|
|
| Quebecer |
Feb 25 2005, 02:01 PM
Post
#7
|
|
SuperDan Group: Members Posts: 100 Joined: 13-May 04 From: Lachenaie, Qc, CANADA Member No.: 2,063 |
What products are you using?
Good work by the way! |
|
|
|
| Root_Werks |
Feb 25 2005, 02:42 PM
Post
#8
|
|
Village Idiot Group: Members Posts: 8,319 Joined: 25-May 04 From: About 5NM from Canada Member No.: 2,105 Region Association: Pacific Northwest |
Just FG resin and cloth. I will post more on the filler I use after this weekend. I use a FG filler, it is strong, very hard to sand. So I apply a couple of very thin layers so I am not sanding for hours. Then I use evercoat to lightly cover all the work so you don't ever see screw holes or seams. I will also show better pictures of what I leave on the lower part of the fender for support so the flares don't "Sag" over time. (IMG:http://www.914world.com/bbs2/html/emoticons/sawzall-smiley.gif) (IMG:http://www.914world.com/bbs2/html/emoticons/happy11.gif)
|
|
|
|
| URY914 |
Feb 25 2005, 07:57 PM
Post
#9
|
|
I built the lightest 914 in the history of mankind. Group: Members Posts: 120,598 Joined: 3-February 03 From: Jacksonville, FL Member No.: 222 Region Association: None |
Go, Dan Go.
I'm still picking f/g dust out of my nose 6 months later. (IMG:http://www.914world.com/bbs2/html/emoticons/biggrin.gif) Paul |
|
|
|
| redshift |
Feb 25 2005, 08:21 PM
Post
#10
|
|
Bless the Hell out of you! Group: Members Posts: 10,926 Joined: 29-June 03 Member No.: 869 |
Hey cool, DIY plastic knockers! Kiss me, I'm a plasket sturgeon!
So, the bond is over both sides, and they are both ground out, and then re-matted, or just filler? M |
|
|
|
| root |
Feb 26 2005, 09:49 AM
Post
#11
|
|
Two Wheeled Type4 Completed! Group: Members Posts: 849 Joined: 5-May 04 From: Sterling, VA Member No.: 2,026 Region Association: None |
Hey Root Werks!
Really interested in this thread. I posted some pix of my FG flare install a couple of weeks ago. We got a couple days of warm weekend weather here in VA and I got started on the flares. I have a question for you..... I made up a couple test coupons before starting the flare install to see which method gave me the most strerngth and to get a feel for fibermorphing again, 'cause it's been a couple years since my last project. Making the test coupons I found that I had to cut short pieces of cloth to fit between the screw down points. If I used a long piece of cloth the hold down screw would tend to grab the cloth and spin it around making a mess. Of course I was able to lay extra long pieces of cloth 12"" or so around the out side edge of the hold down screws. The question is how do you do this (laydown the inner cloth)? I'll post a pic of the way I do it next time the weather breaks here. I just don't want to sand in the garage fiber resin dust gets in everything, |
|
|
|
| root |
Feb 26 2005, 09:51 AM
Post
#12
|
|
Two Wheeled Type4 Completed! Group: Members Posts: 849 Joined: 5-May 04 From: Sterling, VA Member No.: 2,026 Region Association: None |
here's one of the pics from my post .....
Attached image(s) 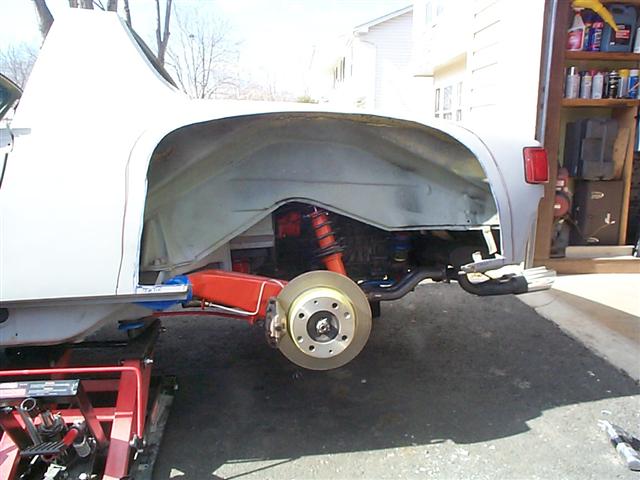
|
|
|
|
| rhodyguy |
Feb 26 2005, 10:55 AM
Post
#13
|
|
Chimp Sanctuary NW. Check it out. Group: Members Posts: 22,080 Joined: 2-March 03 From: Orion's Bell. The BELL! Member No.: 378 Region Association: Galt's Gulch |
nice dan. for craig, is this j-lo?
k |
|
|
|
| Root_Werks |
Feb 26 2005, 11:21 AM
Post
#14
|
||
|
Village Idiot Group: Members Posts: 8,319 Joined: 25-May 04 From: About 5NM from Canada Member No.: 2,105 Region Association: Pacific Northwest |
This is the V8 car he just got not too long ago. FG flares one the rear, but not the front, speaking of, better go get to work on it. (IMG:http://www.914world.com/bbs2/html/emoticons/biggrin.gif) |
||
|
|
|
||
| rhodyguy |
Feb 26 2005, 11:35 AM
Post
#15
|
|
Chimp Sanctuary NW. Check it out. Group: Members Posts: 22,080 Joined: 2-March 03 From: Orion's Bell. The BELL! Member No.: 378 Region Association: Galt's Gulch |
ok. i think it's the gh car. it's hard to keep track with craig.
k |
|
|
|
| Root_Werks |
Feb 27 2005, 09:32 AM
Post
#16
|
|
Village Idiot Group: Members Posts: 8,319 Joined: 25-May 04 From: About 5NM from Canada Member No.: 2,105 Region Association: Pacific Northwest |
Here is a little better shot to show how I glass between the screws, front and then the back side.
Attached image(s) 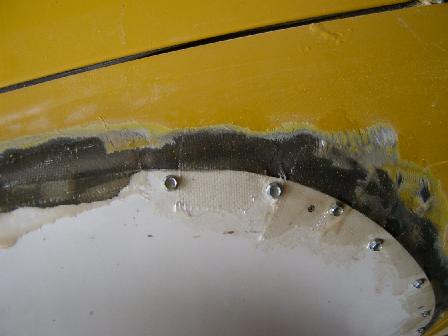
|
|
|
|
| Root_Werks |
Feb 27 2005, 09:34 AM
Post
#17
|
|
Village Idiot Group: Members Posts: 8,319 Joined: 25-May 04 From: About 5NM from Canada Member No.: 2,105 Region Association: Pacific Northwest |
One more like the last one.
Attached image(s) 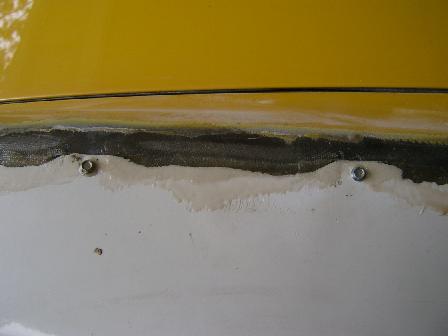
|
|
|
|
| Root_Werks |
Feb 27 2005, 09:37 AM
Post
#18
|
|
Village Idiot Group: Members Posts: 8,319 Joined: 25-May 04 From: About 5NM from Canada Member No.: 2,105 Region Association: Pacific Northwest |
That last shot you can see I actually sanded down the flare better before glassing it to the fender. This shot shows what metal I left behind to bond to on the lower corners of the fender. 99% of paint is ground away to bare metal. Sometimes I miss a little spot here and there, but I awlays grind it clean. This 914 had THICK underbody coating which cost a lot of time to prep.
Attached image(s) 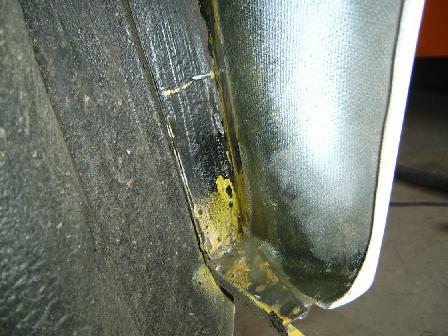
|
|
|
|
| Root_Werks |
Feb 27 2005, 09:39 AM
Post
#19
|
|
Village Idiot Group: Members Posts: 8,319 Joined: 25-May 04 From: About 5NM from Canada Member No.: 2,105 Region Association: Pacific Northwest |
This one shows a good shot of how well the inside of the flare fit against the fender. It is a good fit and will be bonded 100% around the seam. I finished all the bonding inside yesterday. I took this pic in the middle of cleaning up still.
Attached image(s) 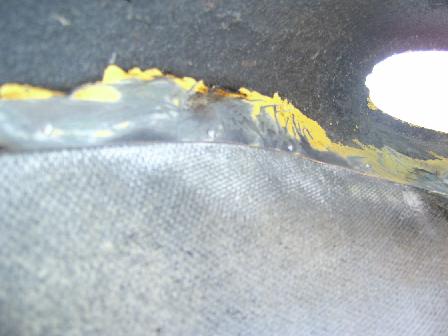
|
|
|
|
| Root_Werks |
Feb 27 2005, 09:41 AM
Post
#20
|
|
Village Idiot Group: Members Posts: 8,319 Joined: 25-May 04 From: About 5NM from Canada Member No.: 2,105 Region Association: Pacific Northwest |
Last one for now, simple FG matierials I am using. All the screws got pulled out yesterday so I could bond the inside seams 100% around and lower corners. Today I will sand off 50% of what I bonded on the front and re-bond it. But more on that later.... (IMG:http://www.914world.com/bbs2/html/emoticons/biggrin.gif) The front of the fender flares have warped a little over time. Paul knows what I am talking about! (IMG:http://www.914world.com/bbs2/html/emoticons/laugh.gif)
Attached image(s) 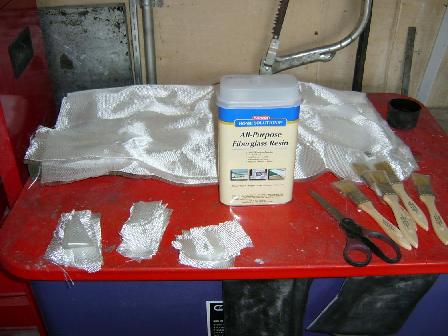
|
|
|
|
|
1 User(s) are reading this topic (1 Guests and 0 Anonymous Users)
0 Members:

|
Lo-Fi Version | Time is now: 15th May 2024 - 10:13 PM |
Invision Power Board
v9.1.4 © 2024 IPS, Inc.