|
|
|
Porsche, and the Porsche crest are registered trademarks of Dr. Ing. h.c. F. Porsche AG.
This site is not affiliated with Porsche in any way. Its only purpose is to provide an online forum for car enthusiasts. All other trademarks are property of their respective owners. |
|
|

  |

| Larmo63 |
 Sep 12 2017, 09:48 AM Sep 12 2017, 09:48 AM
Post
#221
|
|
Advanced Member  Group: Members Posts: 4,267 Joined: 3-March 14 From: San Clemente, Ca Member No.: 17,068 Region Association: Southern California |
I'm not sure why all of your spark plug wires aren't going through the holes in the manifolds?
Just wondered. |
   |

 
|
| Lucky9146 |
Sep 12 2017, 10:55 AM
Post
#222
|
|
Always Wanted A Bigger Go Cart Group: Members Posts: 1,690 Joined: 22-September 14 From: Poway California Member No.: 17,942 Region Association: Southern California |
QUOTE(Larmo63 @ Sep 12 2017, 08:48 AM)  I'm not sure why all of your spark plug wires aren't going through the holes in the manifolds? Just wondered. Good point! I never was real happy with the way that looked but it just seemed the #4 wire was too short to go through the manifold and look "right". So one would think that the wire lengths would necessarily coincide with the locations by length but it turns out not so in my case with these wires. (IMG:style_emoticons/default/WTF.gif) (IMG:style_emoticons/default/confused24.gif) The #6 seemed a bit too long so ended up shooting it through the same hole I had the #5 and it looked ok and was a good way to use up some of that wire length. But the that left no room for the #4 to fit through the same grommet in the manifold. Three wires would not fit through the forward grommet. In addition when I had tried the #4 through the grommet initially it was pretty much taught because of its location on the dist being near the bottom, it had a long way to go. So I left the #4 to go around the end of the manifold and was not real happy with it but it worked. The fix: I reversed the wires on the #4 and #5 both on the dist. and the plugs. By moving the longer $5 wire to #4 plug and #4 position near the bottom on the dist. it fits great and looks right. The shorter now fits well on the #5 because of the higher position on the dist. and the more direct shot to the #5. Yup looks better. Thanks! (IMG:style_emoticons/default/white914.jpg) 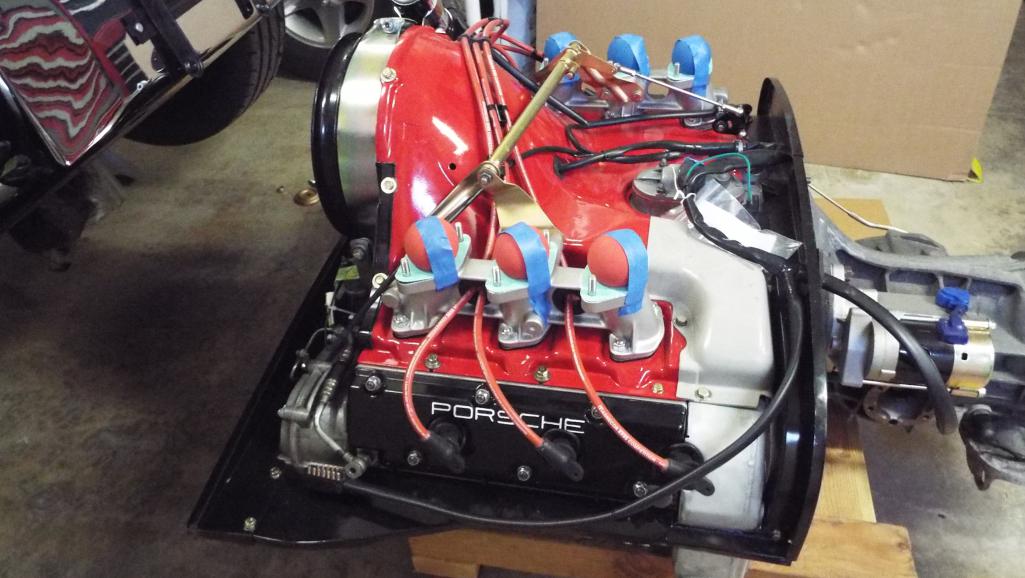 |
|
|
|
| Lucky9146 |
Sep 13 2017, 11:57 AM
Post
#223
|
|
Always Wanted A Bigger Go Cart Group: Members Posts: 1,690 Joined: 22-September 14 From: Poway California Member No.: 17,942 Region Association: Southern California |
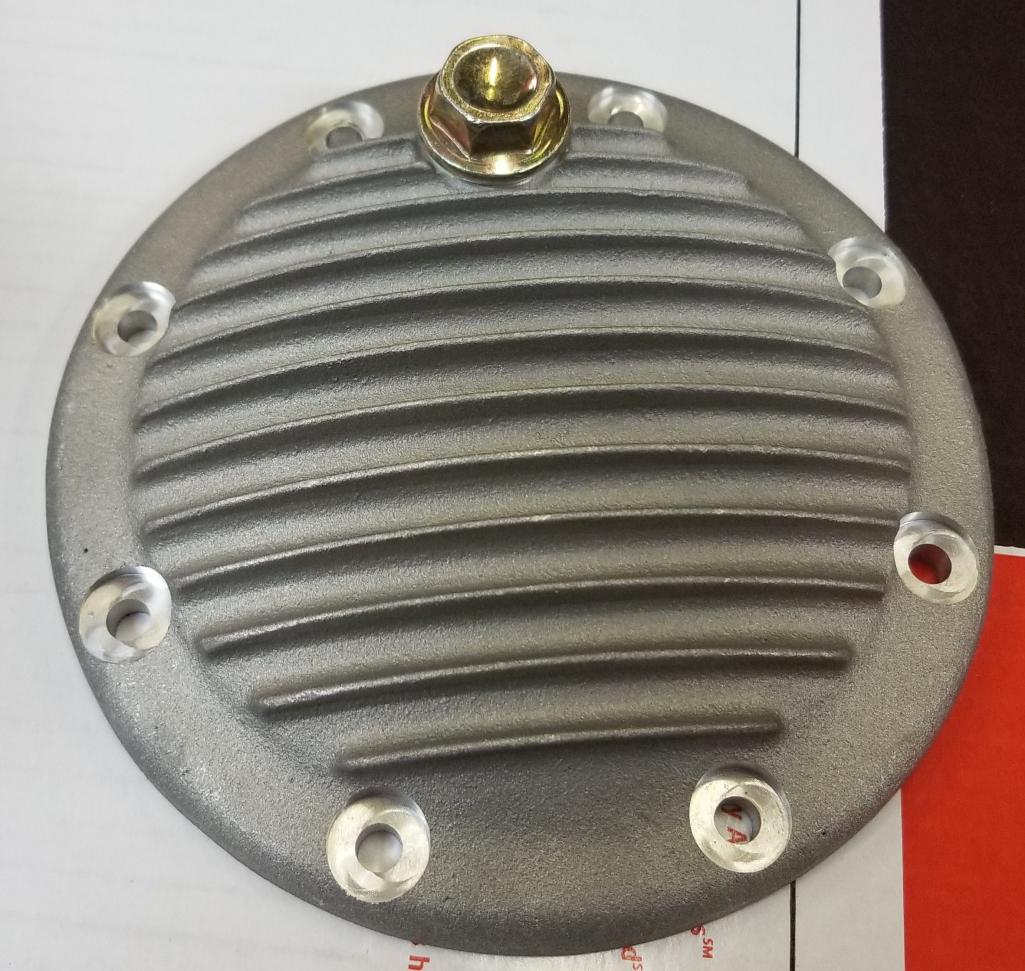
Little project I’d been putting off was the engine sump plate. Mine was not in that great a shape so I ordered a new one from EBS Racing, where I get a lot of my new stuff, and had it sitting on the shelf ready to go. It was reasonably priced at about $11.00. I specifically wanted one with the drain plug. When I got to the point of assembly I discovered the original magnetic plug would not work in the new plate. The new plate was made so that the plug went in more like a pipe plug and so there was no sealing ring flat for the old plug to seal against. I returned the new plate and figured I’d somehow make do or get another plate. You see Porsche does not make the original type plate anymore. Maybe they should.
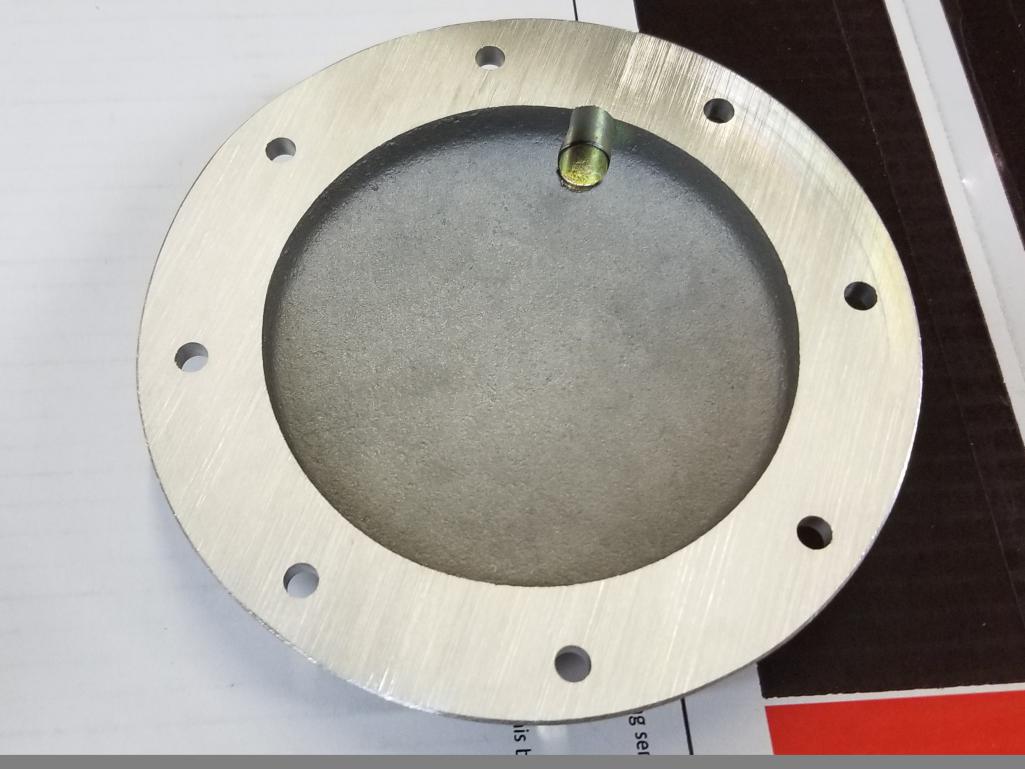
It seemed to me that the best solution would be to have a clamp ring that fit the bolt circle on the plate because those tiny 6mm washers and nuts had been over tightened so many times they had deformed the plate. 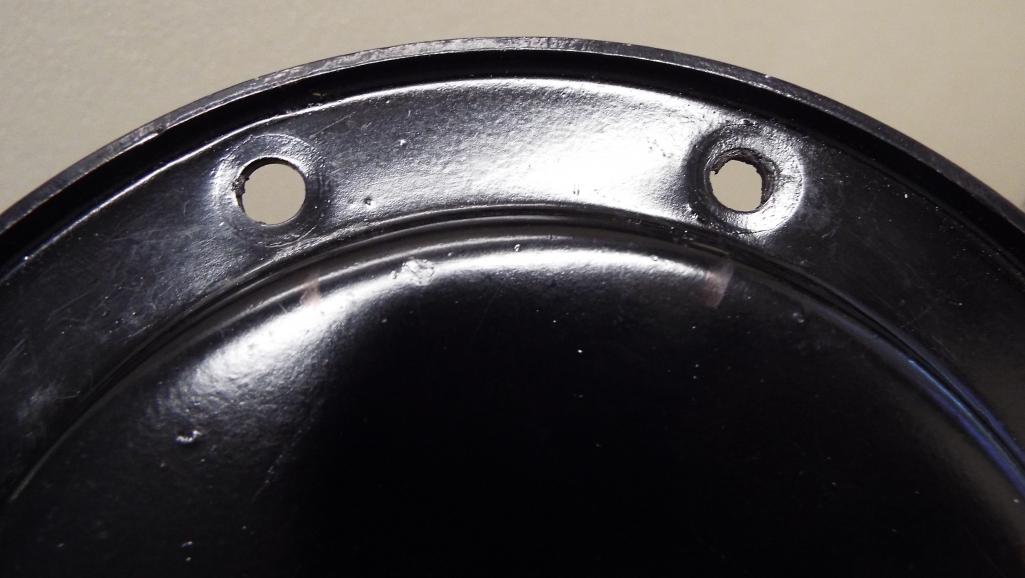 Did some hammer reshaping of the bolt circle where it had been pulled by the 6mm nuts and then ground the plate flat. 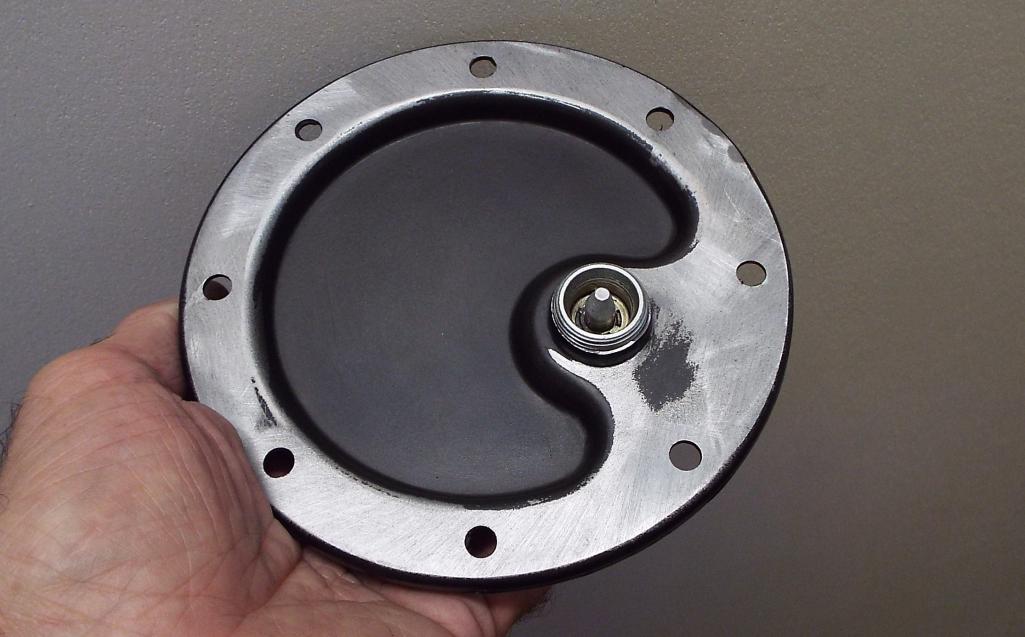 This project then went to the back burner in hopes a solution would emerge until now. I couldn’t really think of a way to make a clamp ring myself as it would need some precision to fit within the inner and outer diameter of the bolt circle and would need the holes drilled pretty accurately. So I looked for slightly larger diameter washers but had no luck, because again, there is not a whole lot of real estate for larger washers. 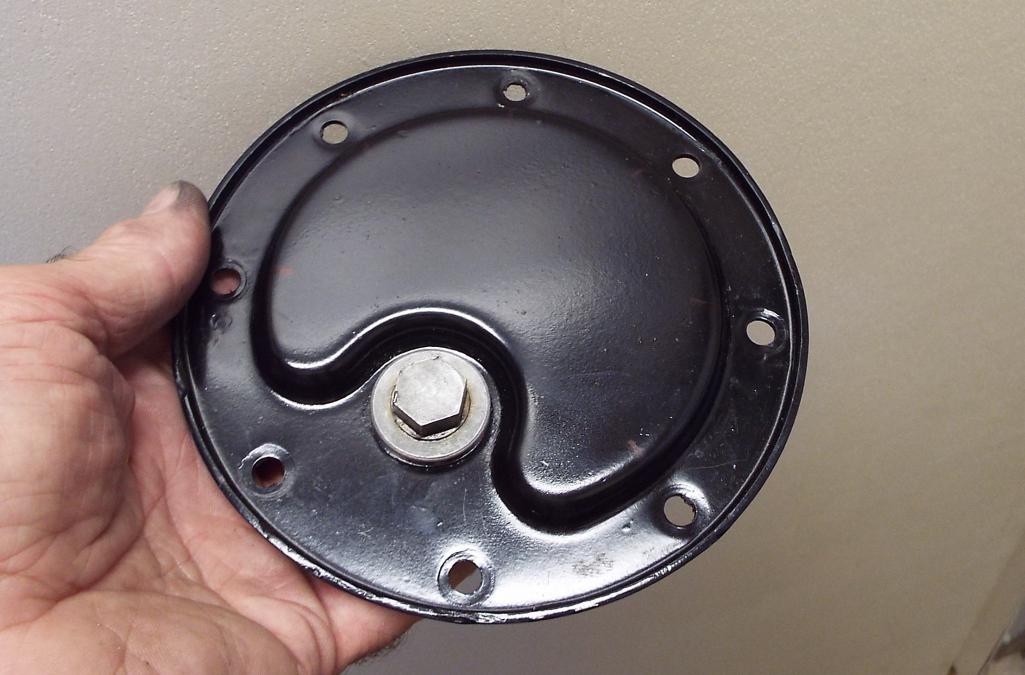 |
|
|
|
| Lucky9146 |
Sep 13 2017, 12:07 PM
Post
#224
|
|
Always Wanted A Bigger Go Cart Group: Members Posts: 1,690 Joined: 22-September 14 From: Poway California Member No.: 17,942 Region Association: Southern California |
Having come up with no solution and now needing to install the plate, and wanting some sort of fix, I contemplated making my own elongated clamp washers. But before I went down that path I searched on line with no luck and then contacted Pelican Parts, Patrick Motor Sports, Summit Racing, and EBS Racing in search of a better idea. I was surprised PMS just used the new plate like what I had returned, no magnetic drain plug. Hmmmm. EBS had what is called a billet plate machined out of aluminum. Nice piece but a bit too pricey for me at $87. a pop.
  Made 8 clamp washers out of large flat washers from Home Depot. They are right at 1/8” thick so they should more evenly provide clamping. 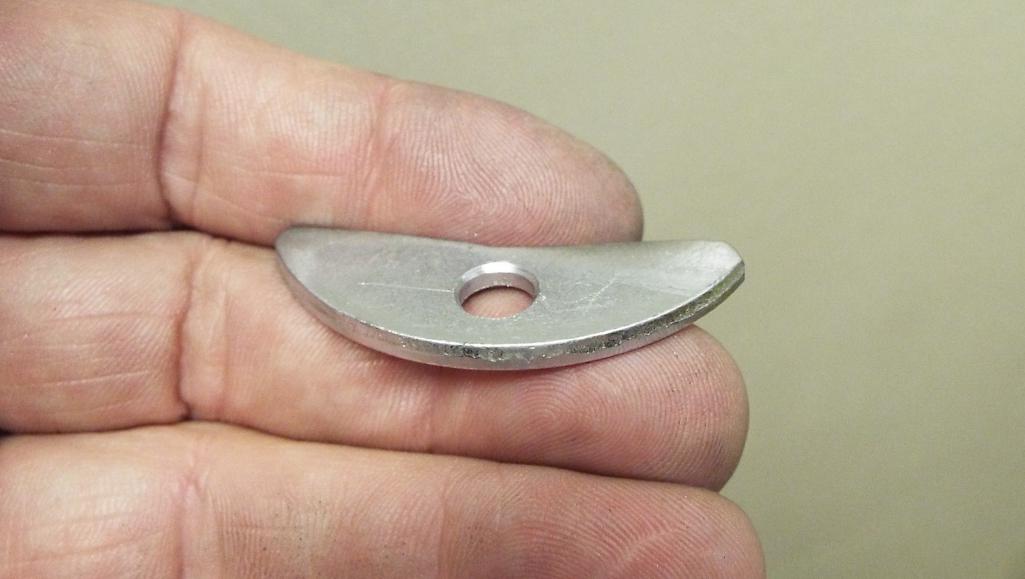 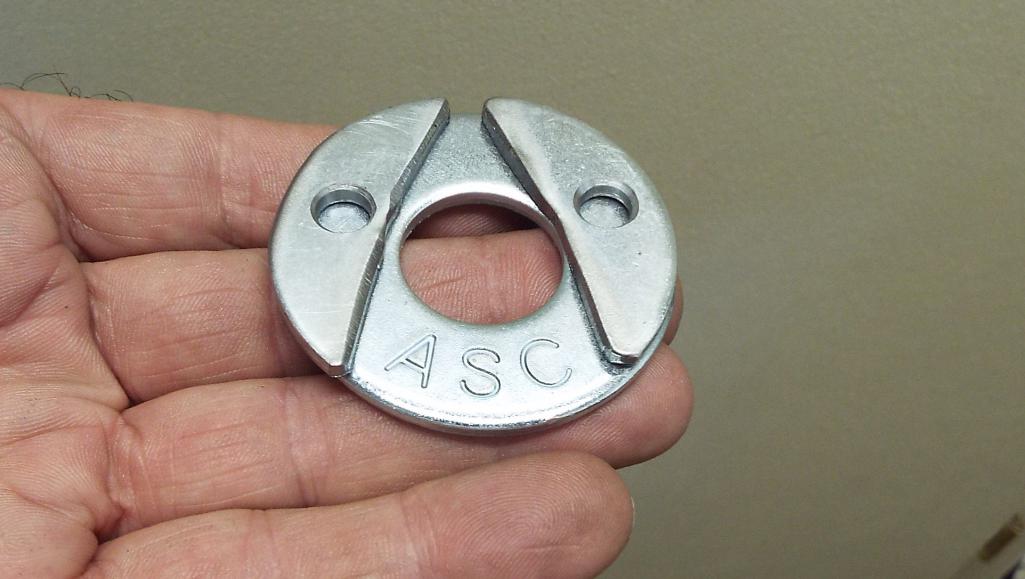 Here they are with only 4 complete. I like it and yes there is still room for that damn little nut. (IMG:style_emoticons/default/white914.jpg) 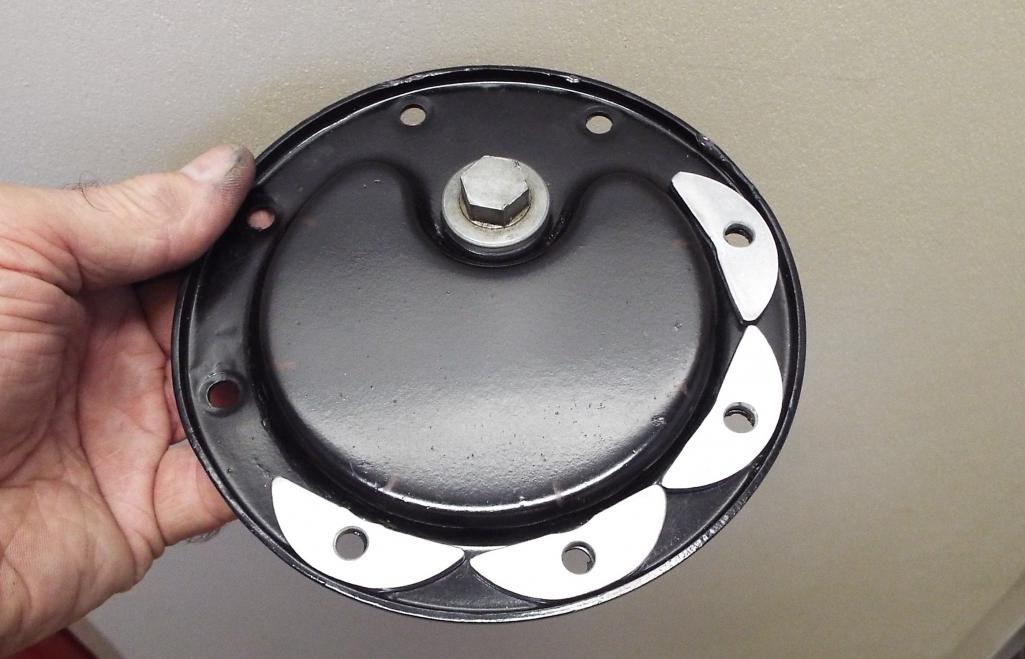 |
|
|
|
| Lucky9146 |
Sep 13 2017, 06:13 PM
Post
#225
|
|
Always Wanted A Bigger Go Cart Group: Members Posts: 1,690 Joined: 22-September 14 From: Poway California Member No.: 17,942 Region Association: Southern California |
Getting the rear axles out of the way to get ready to install the engine. (IMG:style_emoticons/default/piratenanner.gif)
My good friend toolguy suggested using a piece of 1/2” metal conduit as a support to hold up the rear axles and get them way up out of the way. I had PM’d Larma63 the other night looking for insight, since he had just gone through all this, only to recall right after hitting send I actually did have a tiny bit of experience on installing a 6. Larmo63 got back to me fairly quickly with some good pointers so thanks Larmo63 for that. (IMG:style_emoticons/default/beerchug.gif) Recall my car came to me with no engine installed. So although I have installed engines in 911’s, I had not actually done it myself on a 914, either in or out. I had lent toolguy a hand on an install a couple years ago and totally forgot. Well actually not much of a hand, I functioned as a spotter, mostly. When I arrived he was completely ready install a 6 in a real 6 car. Car up in the air, axles tied up, engine on jack, blocks of wood at the ready, engine all lined up. It went so fast it was over in a minute, of course this was not his first rodeo. So I really didn’t help a whole lot, I did take pictures only to loose them off my phone, another sad story. (IMG:style_emoticons/default/sad.gif) The conduit shown is 42” long and tied off to the shock springs, providing the opportunity to tie the axles up more toward the center of the conduit. This positions the wire from the axle to the conduit right at the end of the axle and also away from the boot. Of course I realized while under there tying up I had some unfinished business back there that I also forgot about. (IMG:style_emoticons/default/headbang.gif) Gonna be a bit longer! (IMG:style_emoticons/default/white914.jpg) 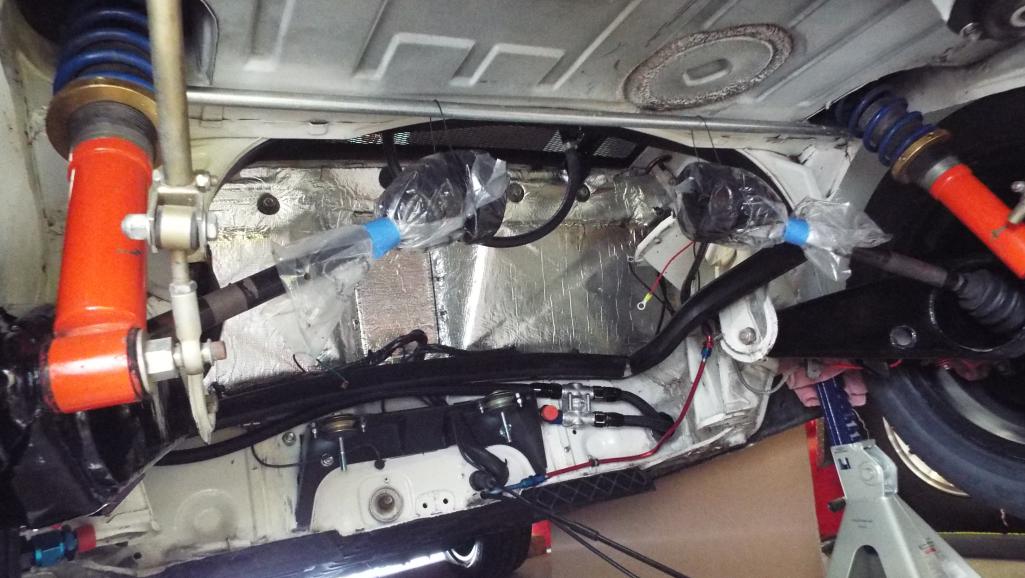 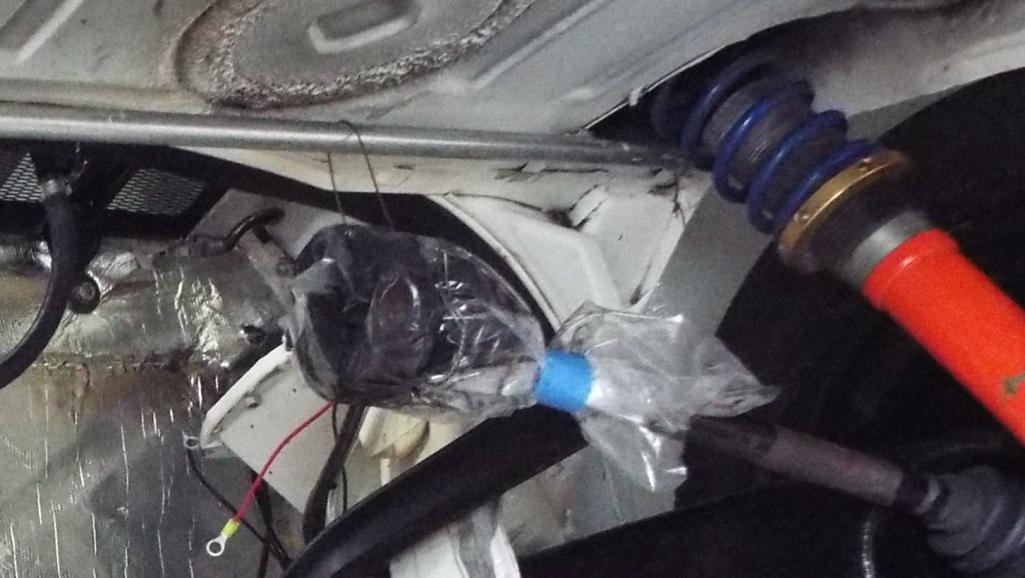 |
|
|
|
| Lucky9146 |
Sep 14 2017, 10:22 AM
Post
#226
|
|
Always Wanted A Bigger Go Cart Group: Members Posts: 1,690 Joined: 22-September 14 From: Poway California Member No.: 17,942 Region Association: Southern California |
Toolguy suggested marking my flywheel with timing marks before stuffing the engine. (IMG:style_emoticons/default/pray.gif) Only real 6 engines came with the flywheels marked and he's got one!
I already have the access hole cut through the cabin firewall but you never know you just might want to throw a timing light on it when you are right there with the distributor. Good point! And especially with the 914-6 sheet metal having the cut out and the fly wheel staring right at me. I am going the share the good the bad and the ugly in my postings. As you will see in the pictures that Kennedy flywheel is damn hard and the punch wants to jump and trying to correct is futile. I look like such a hack in these shots, mission accomplished, but not real pretty. Lesson here is probably should have removed the rear sheet metal it might have made it better. (IMG:style_emoticons/default/headbang.gif) Good luck if you try something similar! You really only get one chance to do it. (IMG:style_emoticons/default/white914.jpg) Shot of cut out and flywheel with no marking 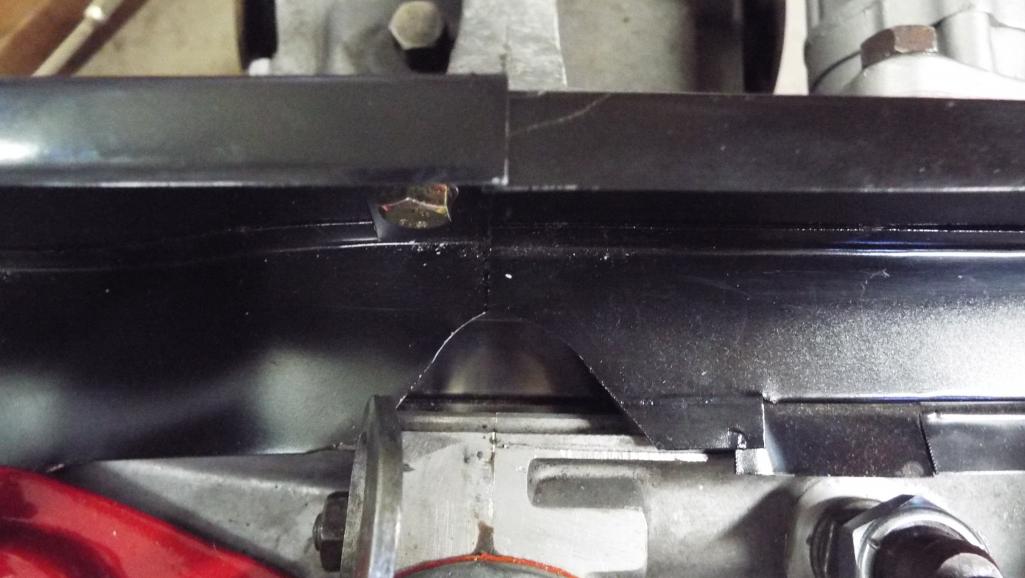 Here is the Z1 mark 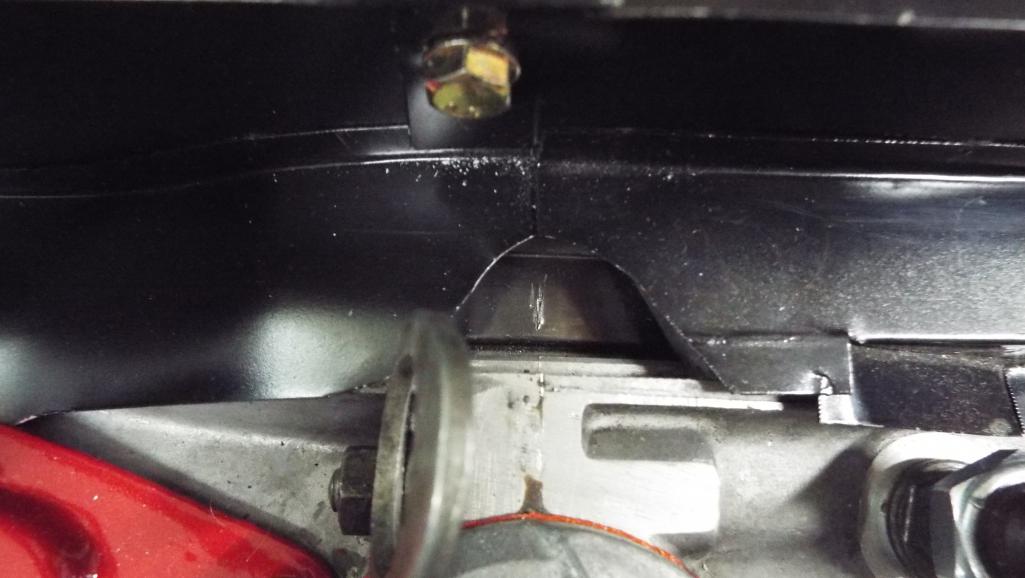 And a faint 5 degrees mark 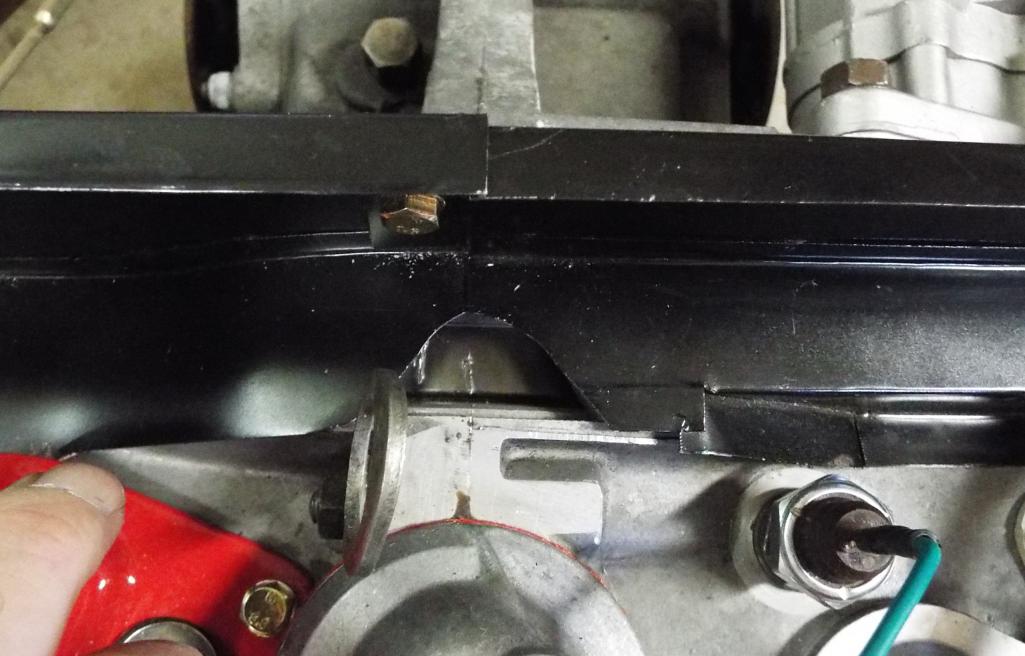 |
|
|
|
| Larmo63 |
Sep 14 2017, 12:13 PM
Post
#227
|
|
Advanced Member Group: Members Posts: 4,267 Joined: 3-March 14 From: San Clemente, Ca Member No.: 17,068 Region Association: Southern California |
My KEP 228mm flywheel was marked already. Strange.
|
|
|
|
| porschetub |
Sep 14 2017, 01:49 PM
Post
#228
|
|
Advanced Member Group: Members Posts: 4,963 Joined: 25-July 15 From: New Zealand Member No.: 18,995 Region Association: None |
Nice solution for the sump plate ,mine was had it because someone had added extra gaskets and overtightened it,replaced it with the one Pelican sell.
I found the axles were a pain so I removed the RH side before my engine went in,but what I forgot to do was mark my flywheel (IMG:style_emoticons/default/headbang.gif) . Your builds going great.....not long to fire up time (IMG:style_emoticons/default/aktion035.gif) |
|
|
|
| Lucky9146 |
Sep 15 2017, 09:56 AM
Post
#229
|
|
Always Wanted A Bigger Go Cart Group: Members Posts: 1,690 Joined: 22-September 14 From: Poway California Member No.: 17,942 Region Association: Southern California |
QUOTE(Larmo63 @ Sep 14 2017, 11:13 AM) My KEP 228mm flywheel was marked already. Strange. After reading your comment I went and double checked my flywheel last night to make sure I had not missed any marks. Nothing there but my marks. (IMG:style_emoticons/default/WTF.gif) This morning I called Kennedy Engineering and spoke to Brett. Here is the skinny. 6 bolt crank they mark (yours I believe) and you have a 2.7 right? 9 bolt crank they do not (mine) my engine is a 3.0 Mystery solved! (IMG:style_emoticons/default/beerchug.gif) (IMG:style_emoticons/default/white914.jpg) |
|
|
|
| Lucky9146 |
Sep 15 2017, 09:33 PM
Post
#230
|
|
Always Wanted A Bigger Go Cart Group: Members Posts: 1,690 Joined: 22-September 14 From: Poway California Member No.: 17,942 Region Association: Southern California |
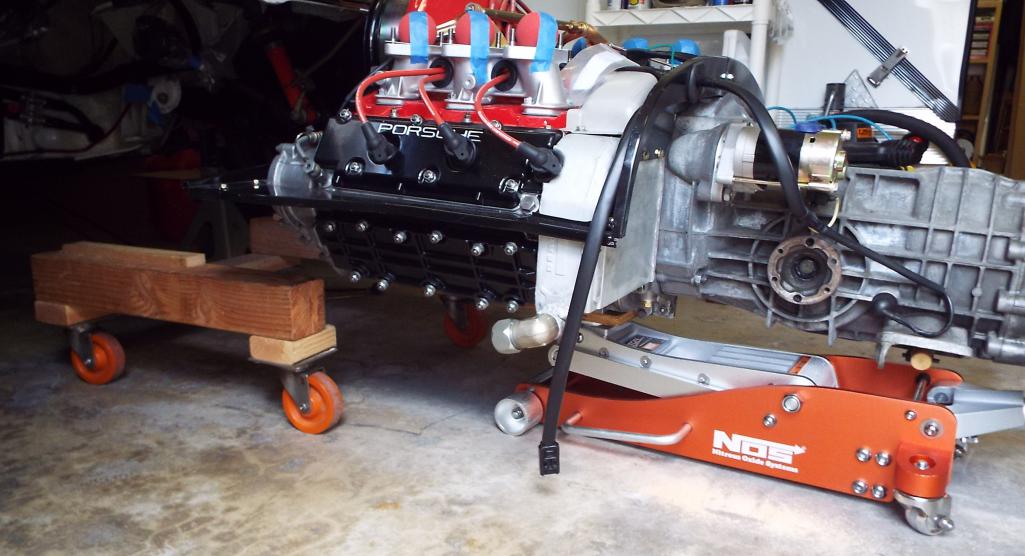
Today was a big day for me. Engine goes in today!
I possibly have the best wife in the world because not only does she support me with all my cars and car craziness, she helps where she can, and today this was waiting on my work bench this morning! Yes that is a cheesy fried egg, my favorite and YES I am one lucky guy! (IMG:style_emoticons/default/grouphug.gif) 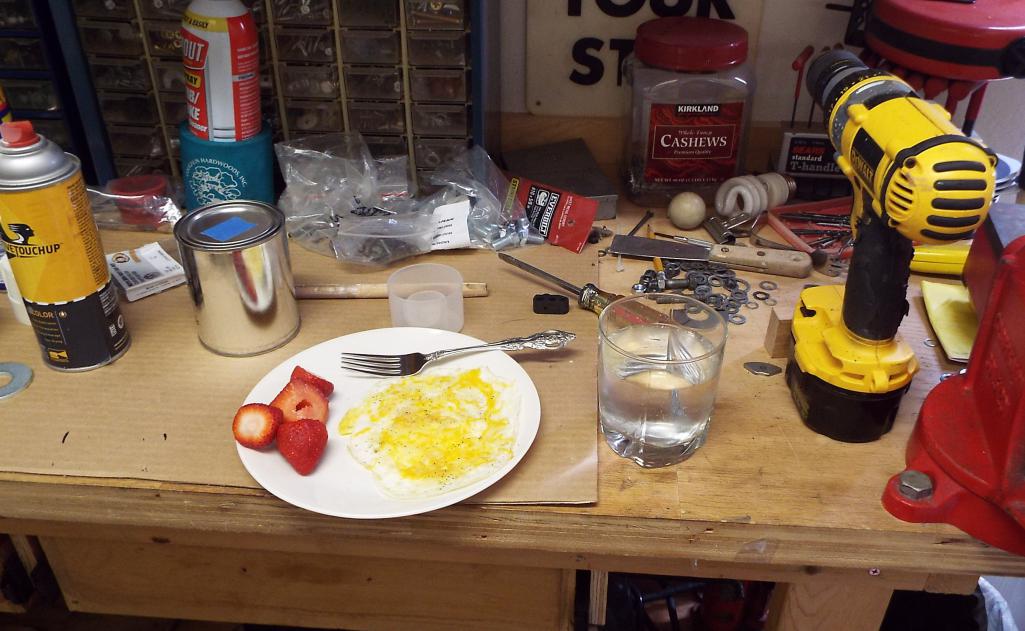 I made this wooden cart a couple years ago for storage and mobility because I knew it would be a while before the engine went in. It was designed at such a height that a floor jack would fit under it with my “special tool” (details later). It was also designed so that when the time came the rear 2X4 cross brace would literally be cut out with a saw. That would then allow the jack to go underneath and the engine, even without the rear cross brace, would still be completely supported. 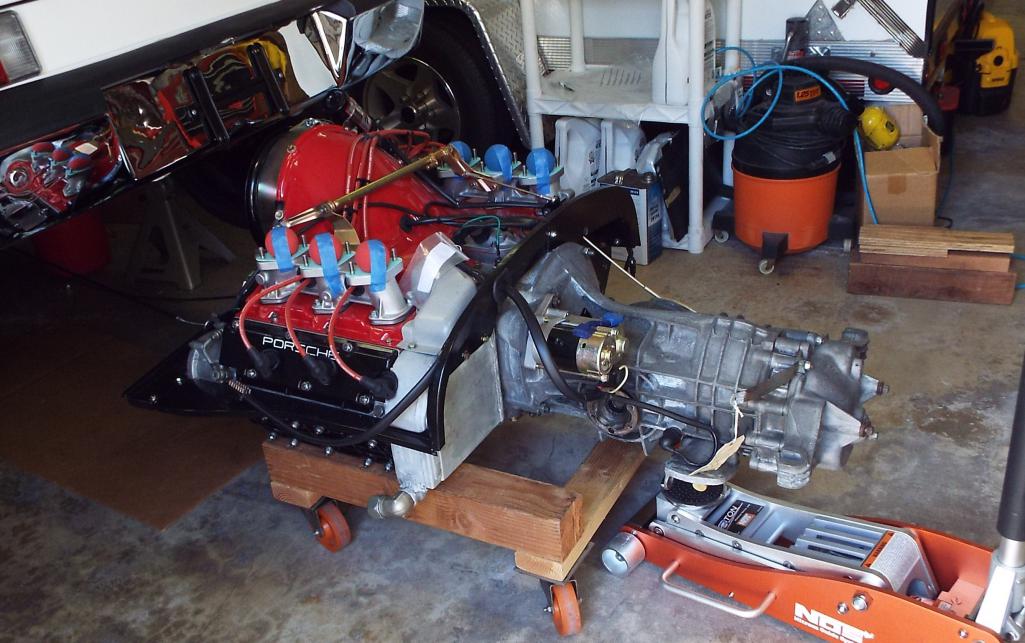 Here is the cross brace cut out and I had safety blocks on each side but I actually did not need them. Additionally, I had the jack positioned under the aft of the tranny for support as well, but did not need that either. Cart was way sturdier than I thought! 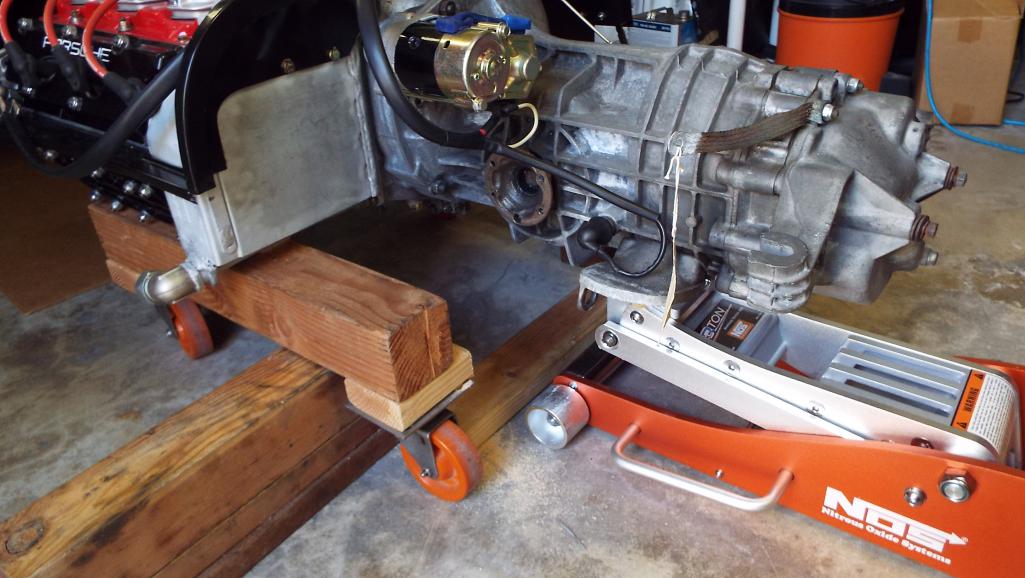 |
|
|
|
| Lucky9146 |
Sep 15 2017, 09:38 PM
Post
#231
|
|
Always Wanted A Bigger Go Cart Group: Members Posts: 1,690 Joined: 22-September 14 From: Poway California Member No.: 17,942 Region Association: Southern California |
Jack slides right under and there is the “special tool” I referred to earlier on the jack pad. (IMG:style_emoticons/default/smile.gif)
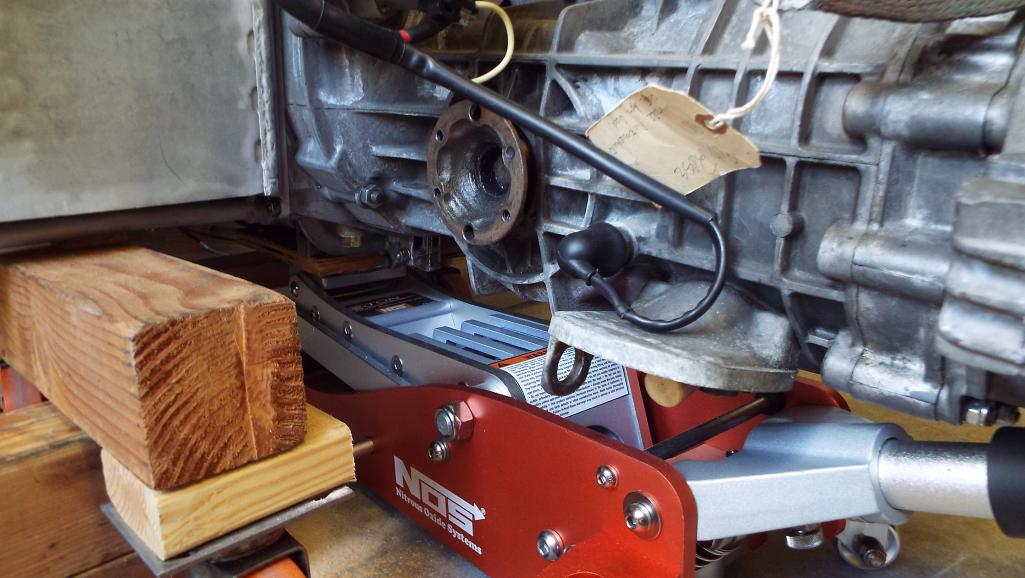  Engine is now completely on the jack only with tranny slightly resting on the jack by the handle, almost balanced fore to aft. 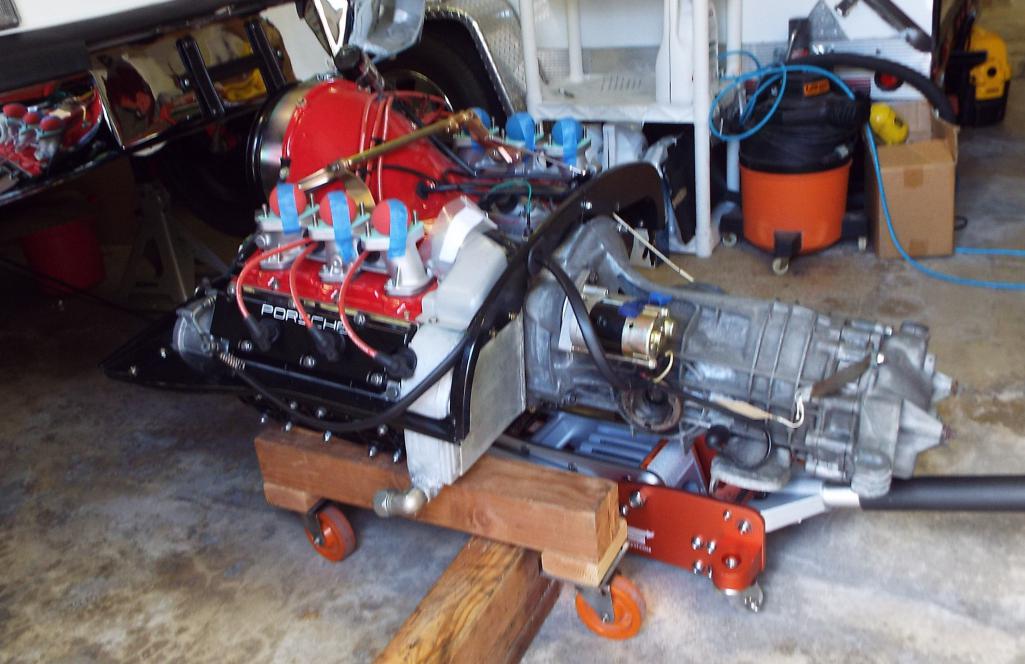 |
|
|
|
| Lucky9146 |
Sep 15 2017, 09:44 PM
Post
#232
|
|
Always Wanted A Bigger Go Cart Group: Members Posts: 1,690 Joined: 22-September 14 From: Poway California Member No.: 17,942 Region Association: Southern California |
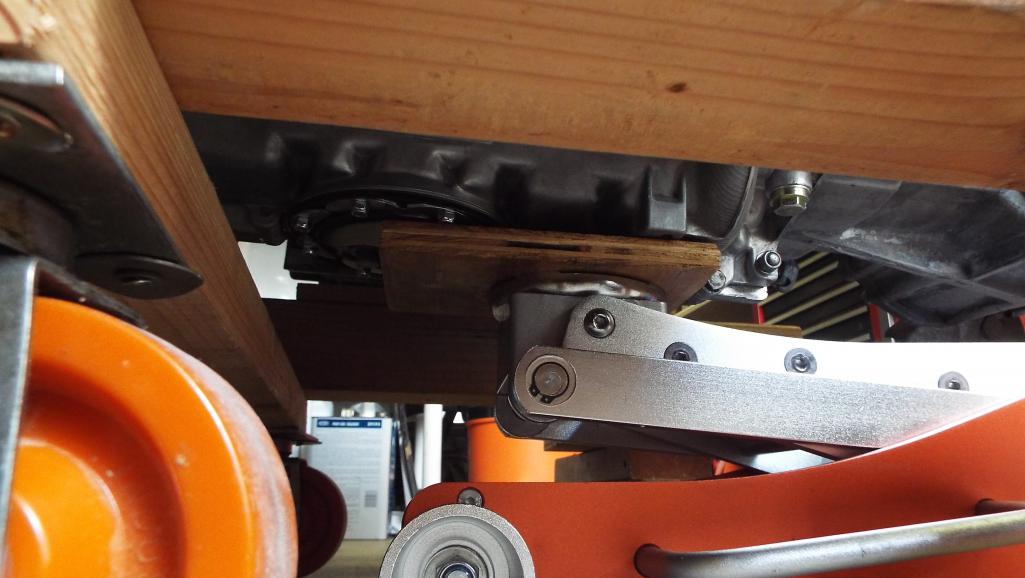
Remove the cart and the engine was actually very stable on the jack. I credit the special tool. (IMG:style_emoticons/default/smile.gif) The special tool is located on the sump plate mostly and the engine case just before the hump.
 I don’t know how, luck I guess, but the car was exactly at the right height to roll the engine under the bumper, coil and all. 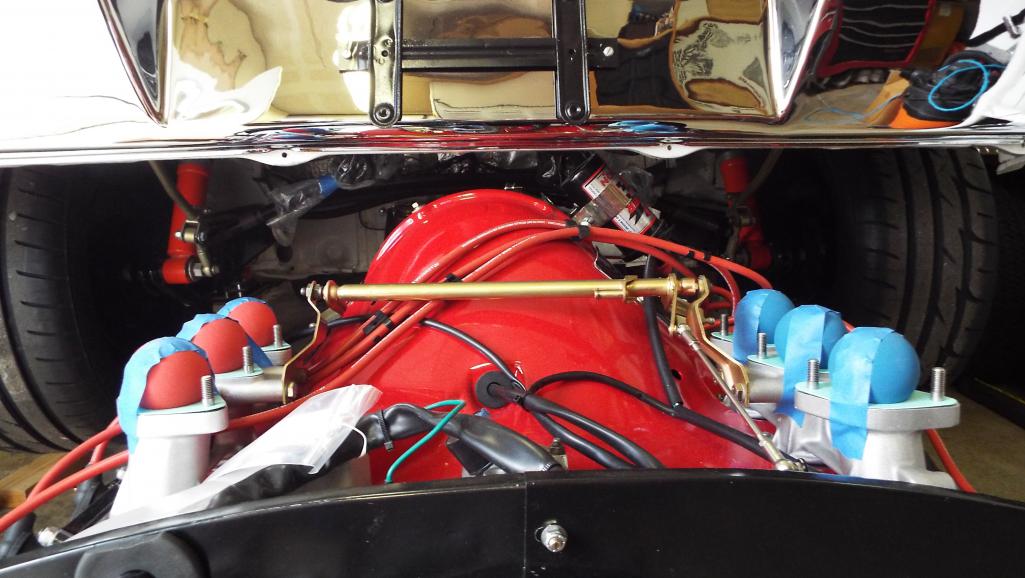 And it just rolls right forward. Opps you're not suppose to see that cable hanging down on the floor. (IMG:style_emoticons/default/huh.gif) 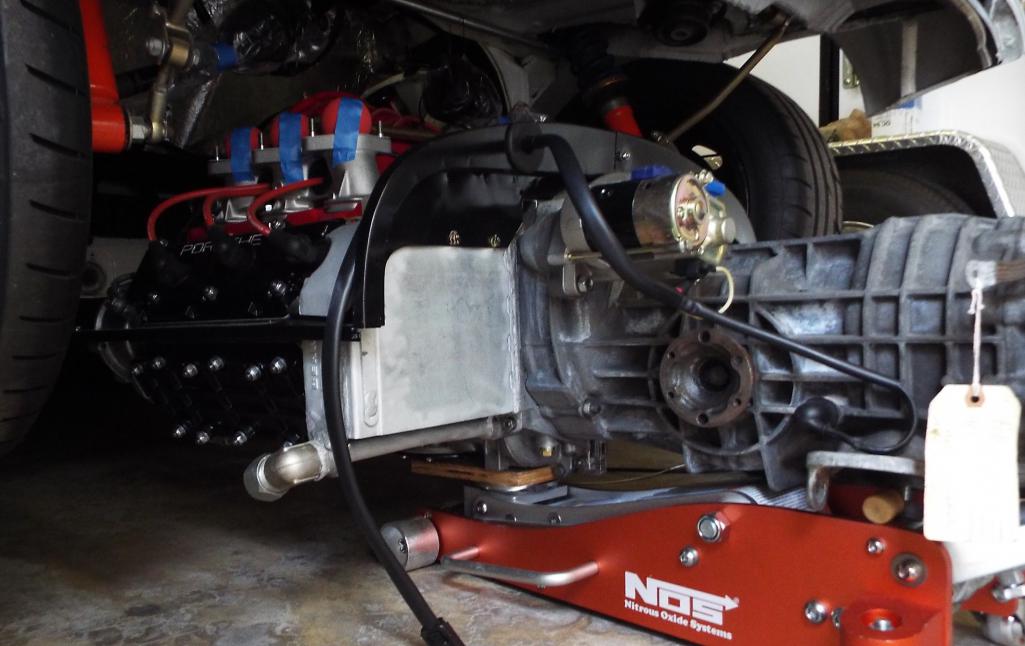 |
|
|
|
| Lucky9146 |
Sep 15 2017, 09:50 PM
Post
#233
|
|
Always Wanted A Bigger Go Cart Group: Members Posts: 1,690 Joined: 22-September 14 From: Poway California Member No.: 17,942 Region Association: Southern California |
Here we come
 Bring me on home 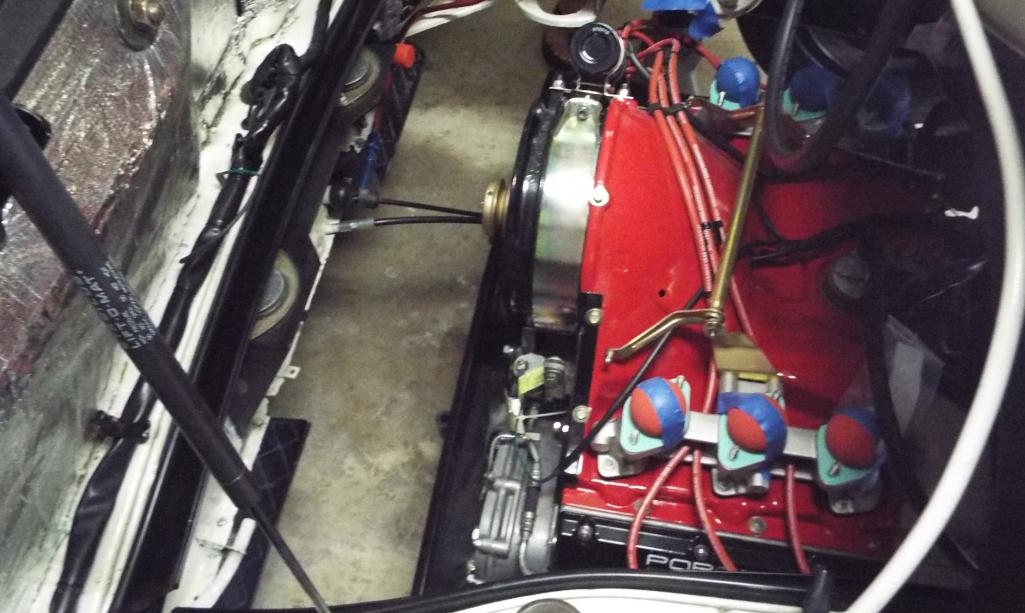 Even though the engine felt and was very balanced I‘m not an idiot, I still used support blocks under each side while jacking it up. (IMG:style_emoticons/default/smile.gif) 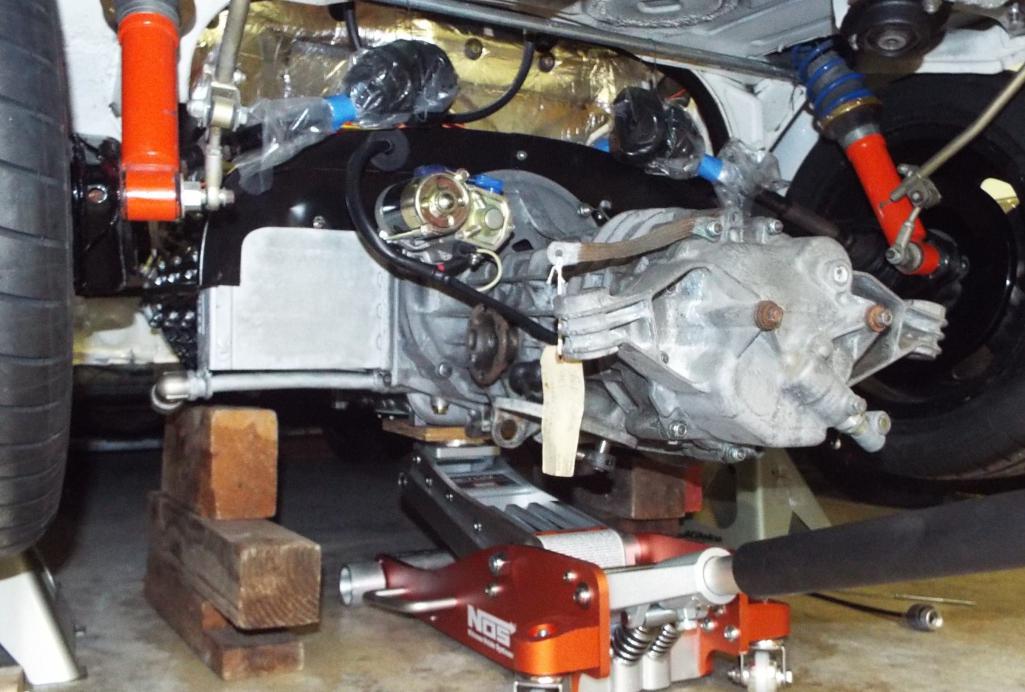 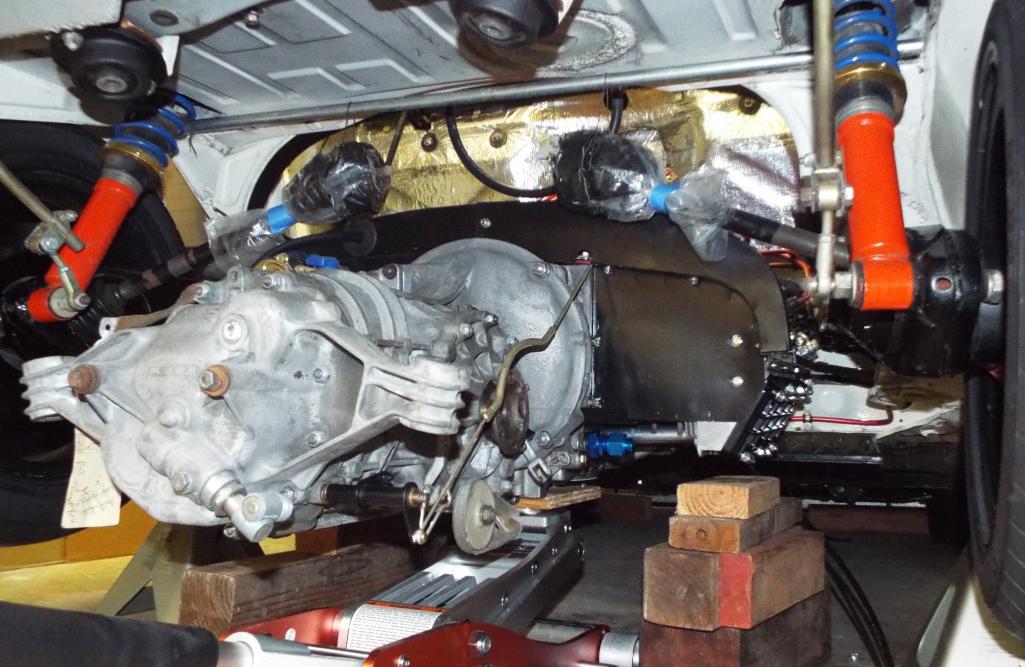 |
|
|
|
| Lucky9146 |
Sep 15 2017, 10:04 PM
Post
#234
|
|
Always Wanted A Bigger Go Cart Group: Members Posts: 1,690 Joined: 22-September 14 From: Poway California Member No.: 17,942 Region Association: Southern California |
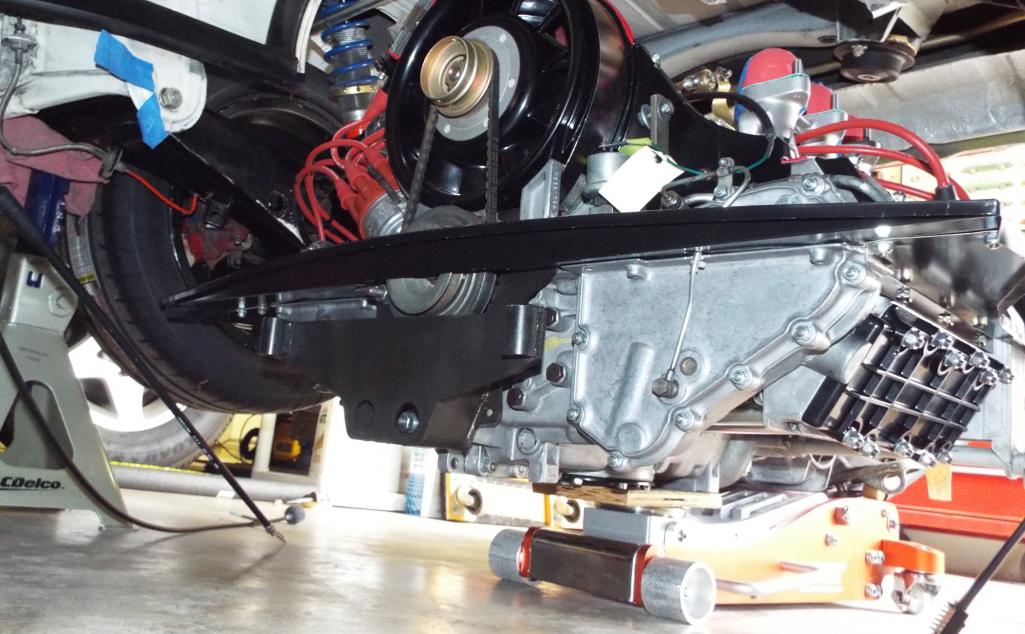
That forward engine mount shown here was installed by PO morarrob and it appears to be an excellent job.
Good thing because it is welded in and I know he took a lot of time figuring it out and installing it. 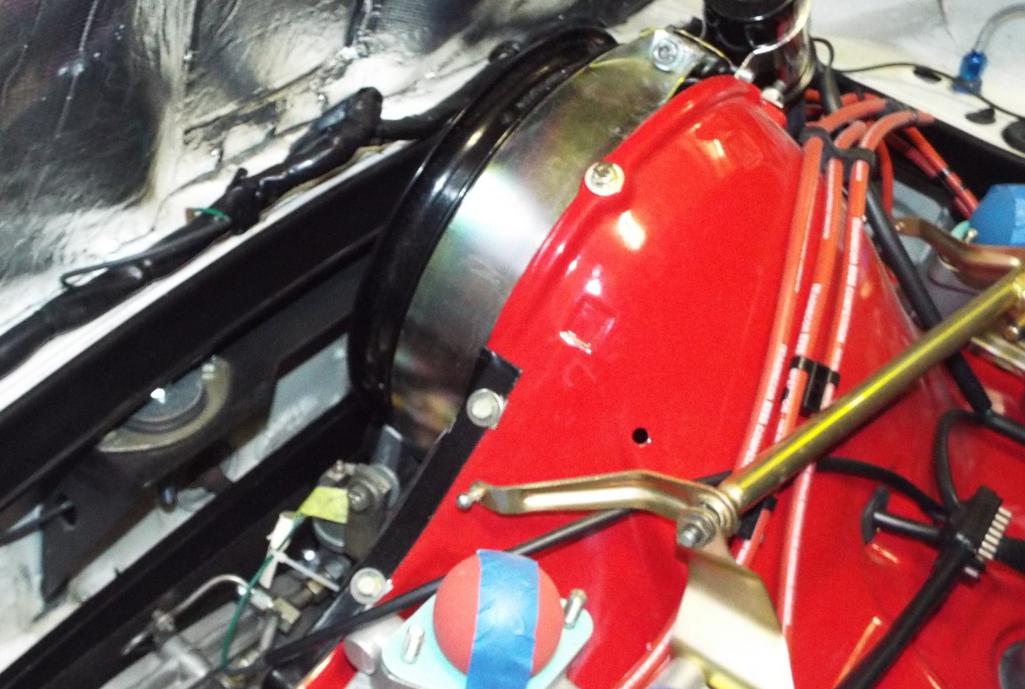 Up and past the axles 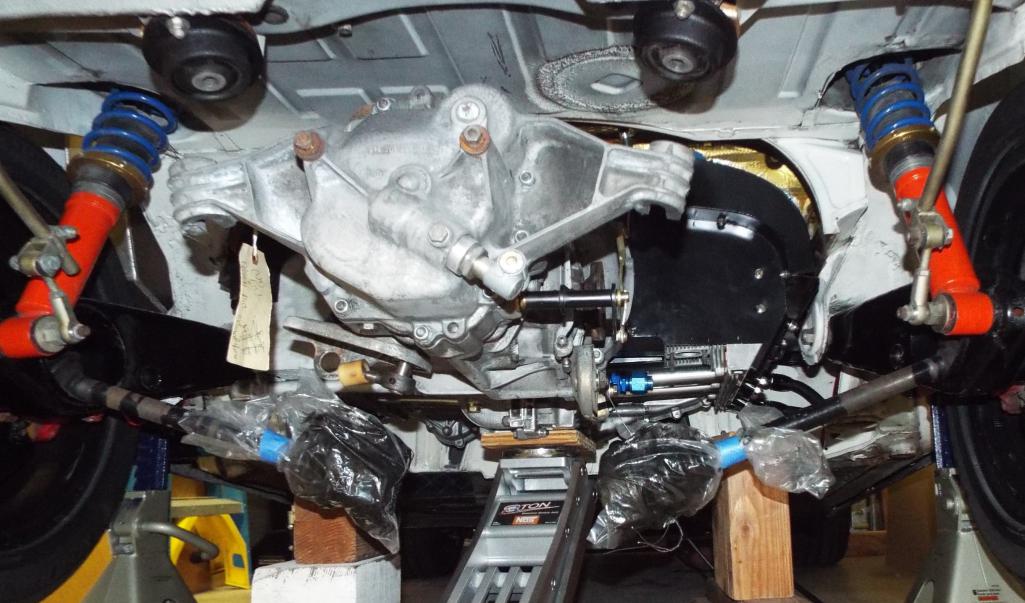 And there we are home at last it sure looks good in there! My goal was to install this week and I made it. Have to say it went very well, did it all myself, with my lovely wife as the spotter. (IMG:style_emoticons/default/smlove2.gif) (IMG:style_emoticons/default/driving-girl.gif) 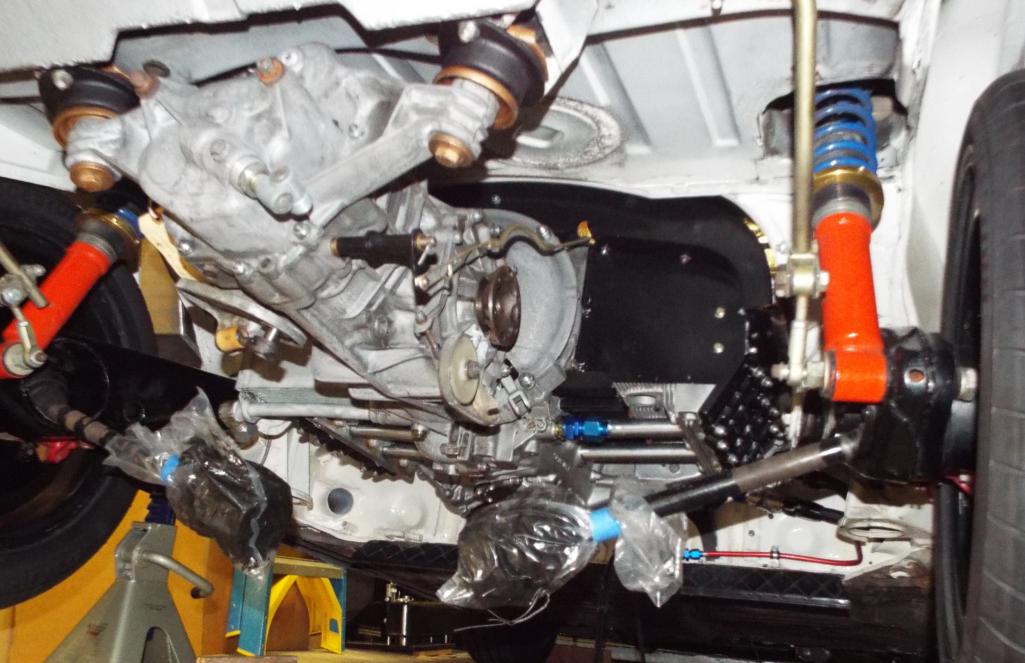 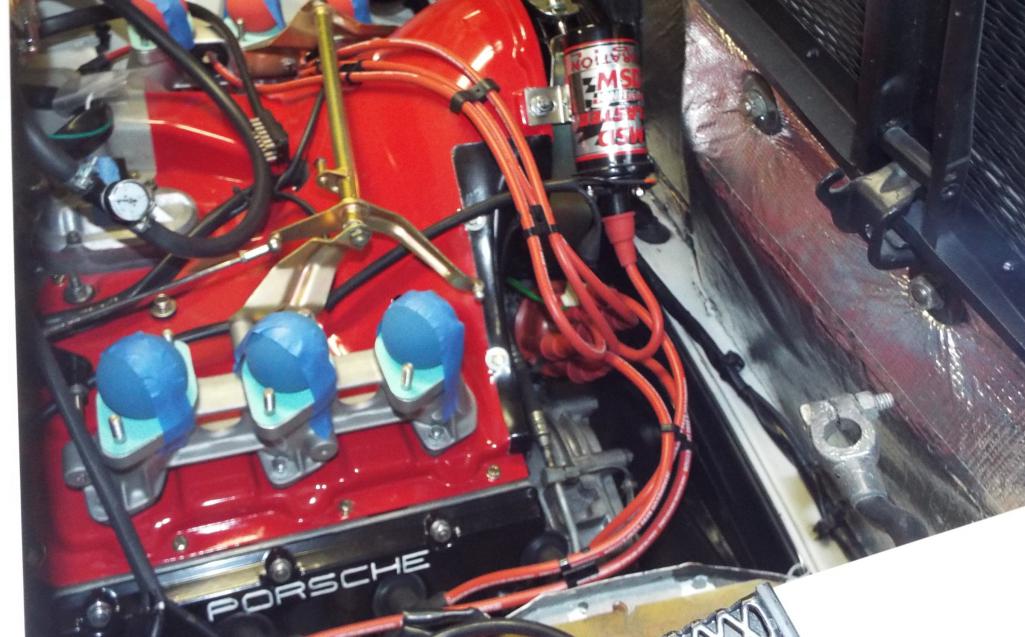 And the “special tool” is 3/4” ply 5 ½ X 7 3/4 Worked great! (IMG:style_emoticons/default/tongue.gif) 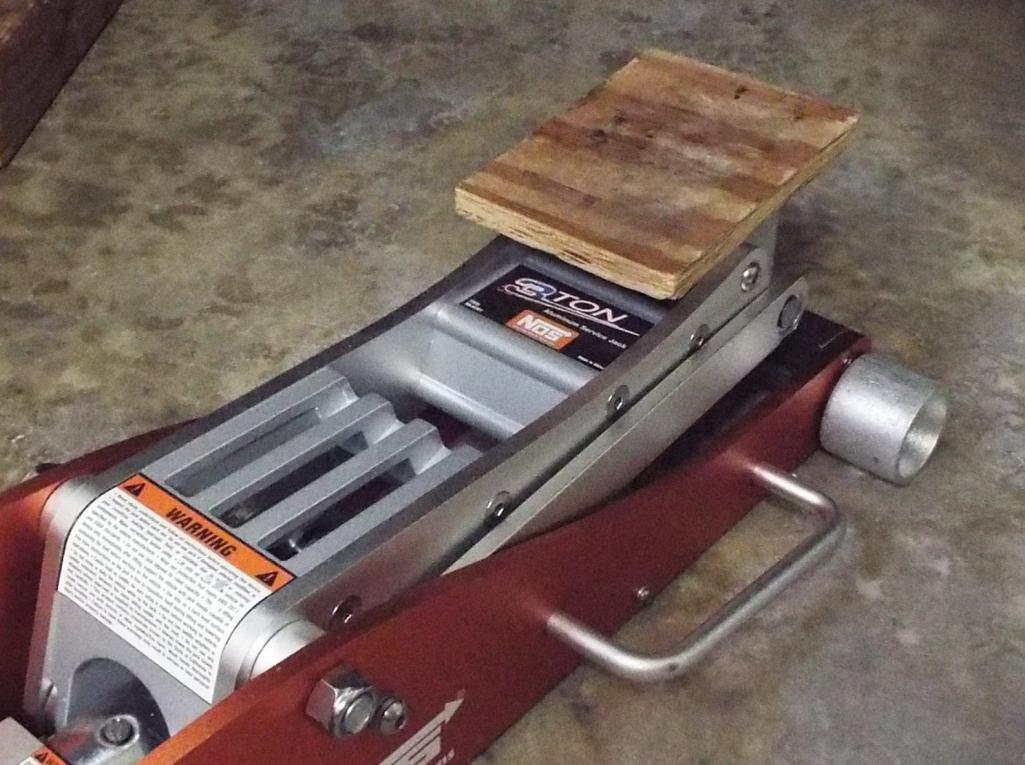 Hope to see some of you at 914 Day in Temecula! Wish the (IMG:style_emoticons/default/white914.jpg) was done to bring. |
|
|
|
| Larmo63 |
Sep 15 2017, 10:36 PM
Post
#235
|
|
Advanced Member Group: Members Posts: 4,267 Joined: 3-March 14 From: San Clemente, Ca Member No.: 17,068 Region Association: Southern California |
You might want to get a patent on the "special tool" before someone else does.
(IMG:style_emoticons/default/slap.gif) |
|
|
|
| defianty |
Sep 16 2017, 12:55 AM
Post
#236
|
|
Senior Member Group: Members Posts: 659 Joined: 9-August 06 From: Essex, UK Member No.: 6,621 Region Association: None |
Nicely done. Getting close to that finishing line now.
|
|
|
|
| Lucky9146 |
Sep 19 2017, 11:53 AM
Post
#237
|
|
Always Wanted A Bigger Go Cart Group: Members Posts: 1,690 Joined: 22-September 14 From: Poway California Member No.: 17,942 Region Association: Southern California |
A little progress and a little humor.
Since the wonderful 914 Fun Day in Temecula last Saturday hosted by ValcoOscar with the help of many others (IMG:style_emoticons/default/beerchug.gif) , where I learned a great deal from other 916-6 conversion owners Forrestkhaag and Larmo63, as well as a beginning insight into the Weber world from Keith914, I got back to (IMG:style_emoticons/default/white914.jpg) it yesterday. Having installed the engine in on the mounts last Friday everyone wants to know when I’m going to “fire it up”? I say probably 2 months and based on the entire afternoon spent below I’m probably right. (IMG:style_emoticons/default/sad.gif) As I am sure many of you know by now and from the title of this thread I have taken up where another left off. Obviously I did not take it apart so mostly I am working to pictures and looking at other peoples cars. The best part for me though is that the PO sourced a lot of very fine parts with which to continue and now I am actually installing some of those parts I have been looking at for almost 4 years now. Ugh! Yesterday was shifter linkage day! (IMG:style_emoticons/default/mueba.gif) This is a 74 car with side shifter, so in my treasure trove of parts was a brand new shift rod (body to trans) which is modified for headers. A beautiful piece still in its packaging that moparrob found as well as a brass trans bushing with 914 PN in its original bag dated 11/4/2010. I actually had everything needed boots and all. Took a bit of figuring out which way to install the bushing (shoulder in or out) and I understand the bushing was originally nylon like the other shifter bushings. Got that done and now time to button it up with the big plastic cover and secure it with the retaining strap. I think I got one of those. (IMG:style_emoticons/default/idea.gif) 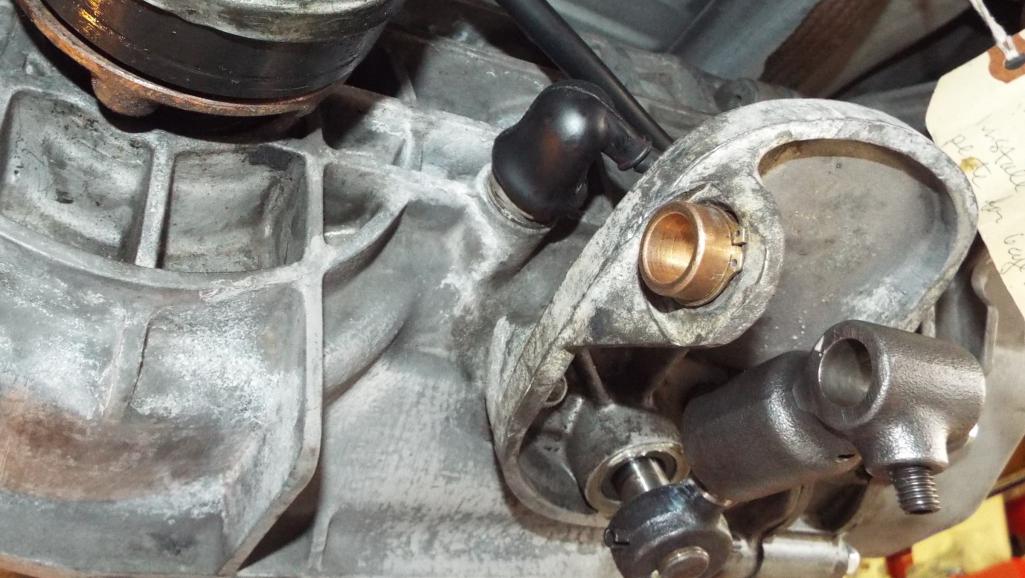 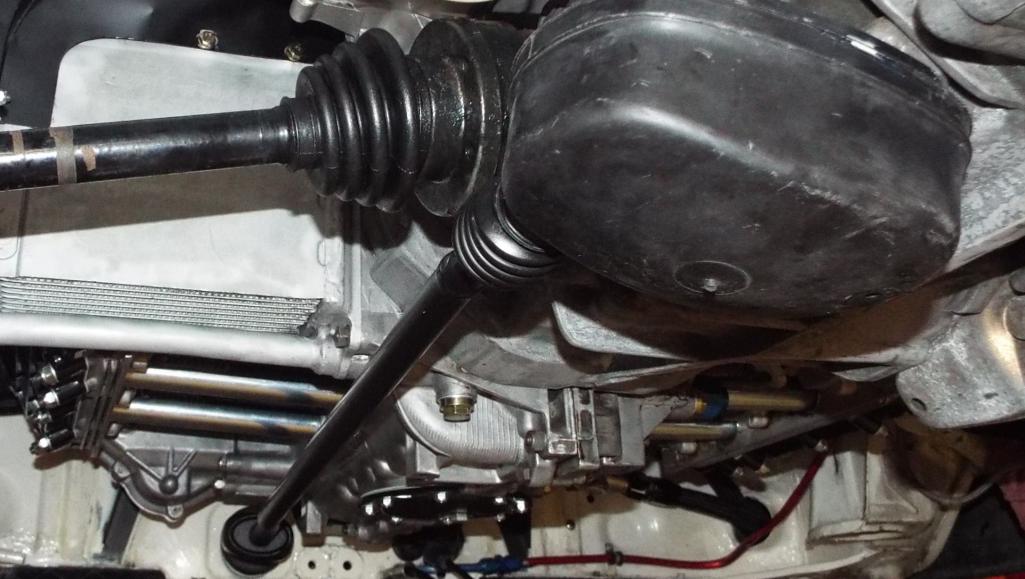 Here is the funny part. I actually had that “strap” that goes around the plastic housing and identified by PN for the application, and of all things, in an actual Porsche part bag. It’s a Ty-wrap! (IMG:style_emoticons/default/lol-2.gif)  Now I can’t say for sure if I bought it or it came with the parts I got but I thought it was a little cool to have an “actual” P part. Even though it is just a Ty-wrap. Turned out to be too short! (IMG:style_emoticons/default/headbang.gif)  I ended up using .041 safety wire and it holds it just fine. On to the braided oil hoses. (IMG:style_emoticons/default/white914.jpg) |
|
|
|
| porschetub |
Sep 19 2017, 04:53 PM
Post
#238
|
|
Advanced Member Group: Members Posts: 4,963 Joined: 25-July 15 From: New Zealand Member No.: 18,995 Region Association: None |
QUOTE(Lucky9146 @ Sep 20 2017, 05:53 AM) A little progress and a little humor. Since the wonderful 914 Fun Day in Temecula last Saturday hosted by ValcoOscar with the help of many others (IMG:style_emoticons/default/beerchug.gif) , where I learned a great deal from other 916-6 conversion owners Forrestkhaag and Larmo63, as well as a beginning insight into the Weber world from Keith914, I got back to (IMG:style_emoticons/default/white914.jpg) it yesterday. Having installed the engine in on the mounts last Friday everyone wants to know when I’m going to “fire it up”? I say probably 2 months and based on the entire afternoon spent below I’m probably right. (IMG:style_emoticons/default/sad.gif) As I am sure many of you know by now and from the title of this thread I have taken up where another left off. Obviously I did not take it apart so mostly I am working to pictures and looking at other peoples cars. The best part for me though is that the PO sourced a lot of very fine parts with which to continue and now I am actually installing some of those parts I have been looking at for almost 4 years now. Ugh! Yesterday was shifter linkage day! (IMG:style_emoticons/default/mueba.gif) This is a 74 car with side shifter, so in my treasure trove of parts was a brand new shift rod (body to trans) which is modified for headers. A beautiful piece still in its packaging that moparrob found as well as a brass trans bushing with 914 PN in its original bag dated 11/4/2010. I actually had everything needed boots and all. Took a bit of figuring out which way to install the bushing (shoulder in or out) and I understand the bushing was originally nylon like the other shifter bushings. Got that done and now time to button it up with the big plastic cover and secure it with the retaining strap. I think I got one of those. (IMG:style_emoticons/default/idea.gif) Here is the funny part. I actually had that “strap” that goes around the plastic housing and identified by PN for the application, and of all things, in an actual Porsche part bag. It’s a Ty-wrap! (IMG:style_emoticons/default/lol-2.gif) Now I can’t say for sure if I bought it or it came with the parts I got but I thought it was a little cool to have an “actual” P part. Even though it is just a Ty-wrap. Turned out to be too short! (IMG:style_emoticons/default/headbang.gif) I ended up using .041 safety wire and it holds it just fine. On to the braided oil hoses. (IMG:style_emoticons/default/white914.jpg) Well done ,looking really nice ,even if you aren't due start it for a while it's still a really good feeling to have the engine in there,least it was for me. I used those console bushes and found they were a little sloppy so I had a machinist make me up and oversize rod and did this; 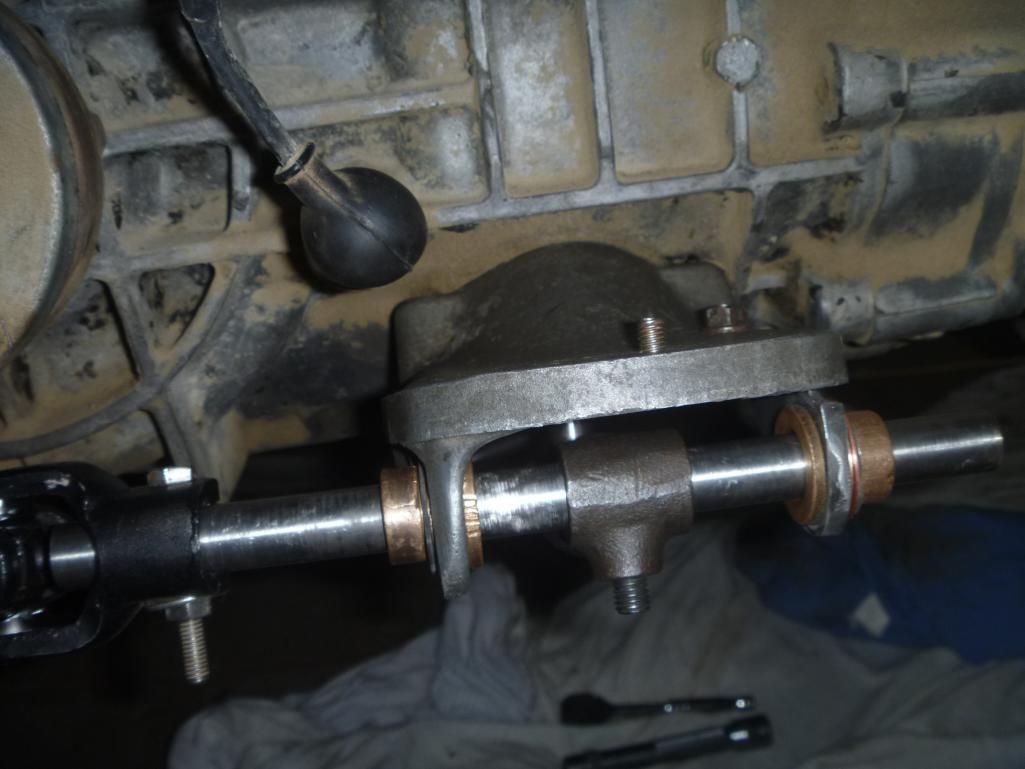 |
|
|
|
| Larmo63 |
Sep 19 2017, 06:38 PM
Post
#239
|
|
Advanced Member Group: Members Posts: 4,267 Joined: 3-March 14 From: San Clemente, Ca Member No.: 17,068 Region Association: Southern California |
You can source a large, narrow hose clamp at Home Depot or Lowe's that is used for Dryer exhaust hose. It works and fits perfect.
|
|
|
|
| Lucky9146 |
Sep 20 2017, 09:53 AM
Post
#240
|
|
Always Wanted A Bigger Go Cart Group: Members Posts: 1,690 Joined: 22-September 14 From: Poway California Member No.: 17,942 Region Association: Southern California |
QUOTE(porschetub @ Sep 19 2017, 03:53 PM) QUOTE(Lucky9146 @ Sep 20 2017, 05:53 AM) A little progress and a little humor. Yesterday was shifter linkage day! This is a 74 car with side shifter, so in my treasure trove of parts was a brand new shift rod (body to trans) which is modified for headers. A beautiful piece still in its packaging that moparrob found as well as a brass trans bushing with 914 PN in its original bag dated 11/4/2010. I actually had everything needed boots and all. Took a bit of figuring out which way to install the bushing (shoulder in or out) and I understand the bushing was originally nylon like the other shifter bushings. Got that done and now time to button it up with the big plastic cover and secure it with the retaining strap. I think I got one of those. (IMG:style_emoticons/default/idea.gif) Well done ,looking really nice ,even if you aren't due start it for a while it's still a really good feeling to have the engine in there,least it was for me. I used those console bushes and found they were a little sloppy so I had a machinist make me up and oversize rod and did this; Thanks for the idea that is a very robust design and I can see it is a major improvement because to your point it is a bit "sloppy". |
|
|
|
|
2 User(s) are reading this topic (2 Guests and 0 Anonymous Users)
0 Members:

|
Lo-Fi Version | Time is now: 29th November 2025 - 08:43 AM |
Invision Power Board
v9.1.4 © 2025 IPS, Inc.