|
|
|
Porsche, and the Porsche crest are registered trademarks of Dr. Ing. h.c. F. Porsche AG.
This site is not affiliated with Porsche in any way. Its only purpose is to provide an online forum for car enthusiasts. All other trademarks are property of their respective owners. |
|
|

  |

| Lucky9146 |
 Apr 27 2018, 03:44 PM Apr 27 2018, 03:44 PM
Post
#621
|
|
Always Wanted A Bigger Go Cart  Group: Members Posts: 1,690 Joined: 22-September 14 From: Poway California Member No.: 17,942 Region Association: Southern California |
QUOTE(914Toy @ Apr 27 2018, 12:54 PM)  QUOTE(Lucky9146 @ Apr 27 2018, 11:35 AM) _______________________________________________ Lucky9146 Apr 26 2018, 10:10 PM jcd914 is correct that the drop link is dependent on the ride height. My car is low. I set the car on the suspension with the sway bar arms horizontal to the ground and the 4 7/8" drop links that I had fit perfectly! Personally, I think the Weltmeister instructions suck. (IMG:style_emoticons/default/barf.gif) Thank you jcd914 This is a great site! (IMG:style_emoticons/default/white914.jpg) My 2 cent worth - as a place to start, you have the drop links too close to the torsion bar - i.e. will probably be too resistant to car roll = hard ride and significant stress on the wheel well. I appreciate your input believe me. Here is my struggle. The Weltmeister instructions suggest "a starting position, place the slider clamps so the forward edge of the clamp is about 3" from the forward edge of the arm (away from the bar itself)". Mine are at 2 3/4" right now. I kind of thought the same as you, until hooking up the exact same hardware I had, but with new bushings. If the clamp is to come forward much, it looks to me, like it will bind the turnbuckle on the bottom to the corresponding mount. The directions further say to reduce understeer slide the slider clamps forward away from the sway bar. To reduce oversteer move the slider clamps back closer to to the rear. I have very little seat time due to various reasons. Of that tiny seat time I did not notice anything radically peculiar in the steering, but time will tell. The concern you bring up about stress on the wheel well has me concerned. It is my understanding the suspension was set up by a reputable shop in WA. The car just may be too damn low, I don't know. I may need to find someone knowledgeable locally to bless this mess. Thanks! (IMG:style_emoticons/default/beerchug.gif) (IMG:style_emoticons/default/white914.jpg) |
   |

 
|
| 914Toy |
Apr 27 2018, 07:13 PM
Post
#622
|
|
Senior Member Group: Members Posts: 746 Joined: 12-November 17 From: Laguna beach Member No.: 21,596 Region Association: Southern California |
QUOTE(Lucky9146 @ Apr 27 2018, 02:44 PM) QUOTE(914Toy @ Apr 27 2018, 12:54 PM) QUOTE(Lucky9146 @ Apr 27 2018, 11:35 AM) _______________________________________________ Lucky9146 Apr 26 2018, 10:10 PM jcd914 is correct that the drop link is dependent on the ride height. My car is low. I set the car on the suspension with the sway bar arms horizontal to the ground and the 4 7/8" drop links that I had fit perfectly! Personally, I think the Weltmeister instructions suck. (IMG:style_emoticons/default/barf.gif) Thank you jcd914 This is a great site! (IMG:style_emoticons/default/white914.jpg) My 2 cent worth - as a place to start, you have the drop links too close to the torsion bar - i.e. will probably be too resistant to car roll = hard ride and significant stress on the wheel well. I appreciate your input believe me. Here is my struggle. The Weltmeister instructions suggest "a starting position, place the slider clamps so the forward edge of the clamp is about 3" from the forward edge of the arm (away from the bar itself)". Mine are at 2 3/4" right now. I kind of thought the same as you, until hooking up the exact same hardware I had, but with new bushings. If the clamp is to come forward much, it looks to me, like it will bind the turnbuckle on the bottom to the corresponding mount. The directions further say to reduce understeer slide the slider clamps forward away from the sway bar. To reduce oversteer move the slider clamps back closer to to the rear. I have very little seat time due to various reasons. Of that tiny seat time I did not notice anything radically peculiar in the steering, but time will tell. The concern you bring up about stress on the wheel well has me concerned. It is my understanding the suspension was set up by a reputable shop in WA. The car just may be too damn low, I don't know. I may need to find someone knowledgeable locally to bless this mess. Thanks! (IMG:style_emoticons/default/beerchug.gif) (IMG:style_emoticons/default/white914.jpg) Obviously the diameter of the anti-roll bar is key. My comments are based on the pics. I would start more like 5” from the bar and then adjust as necessary. Although the advice above on which way to move them to reduce under over steer is counter intuitive, I know it is correct based on my track experience. |
|
|
|
| Lucky9146 |
Apr 27 2018, 09:31 PM
Post
#623
|
|
Always Wanted A Bigger Go Cart Group: Members Posts: 1,690 Joined: 22-September 14 From: Poway California Member No.: 17,942 Region Association: Southern California |
QUOTE(moparrob @ Apr 27 2018, 12:40 PM) Man this is like a bad dream that just wont stop. When is that car going to be finished? The ghost of Roland lives in that car. Perhaps I should have taken you up on one of your three offers to buy it back when I had the chance (IMG:style_emoticons/default/poke.gif) . (IMG:style_emoticons/default/lol-2.gif) (IMG:style_emoticons/default/av-943.gif) (IMG:style_emoticons/default/lol-2.gif) (IMG:style_emoticons/default/av-943.gif) (IMG:style_emoticons/default/white914.jpg) |
|
|
|
| Lucky9146 |
Apr 27 2018, 09:38 PM
Post
#624
|
|
Always Wanted A Bigger Go Cart Group: Members Posts: 1,690 Joined: 22-September 14 From: Poway California Member No.: 17,942 Region Association: Southern California |
QUOTE(914Toy @ Apr 27 2018, 06:13 PM) QUOTE(Lucky9146 @ Apr 27 2018, 02:44 PM) QUOTE(914Toy @ Apr 27 2018, 12:54 PM) QUOTE(Lucky9146 @ Apr 27 2018, 11:35 AM) _______________________________________________ Lucky9146 Apr 26 2018, 10:10 PM jcd914 is correct that the drop link is dependent on the ride height. My car is low. I set the car on the suspension with the sway bar arms horizontal to the ground and the 4 7/8" drop links that I had fit perfectly! Personally, I think the Weltmeister instructions suck. (IMG:style_emoticons/default/barf.gif) Thank you jcd914 This is a great site! (IMG:style_emoticons/default/white914.jpg) My 2 cent worth - as a place to start, you have the drop links too close to the torsion bar - i.e. will probably be too resistant to car roll = hard ride and significant stress on the wheel well. I appreciate your input believe me. Here is my struggle. The Weltmeister instructions suggest "a starting position, place the slider clamps so the forward edge of the clamp is about 3" from the forward edge of the arm (away from the bar itself)". Mine are at 2 3/4" right now. I kind of thought the same as you, until hooking up the exact same hardware I had, but with new bushings. If the clamp is to come forward much, it looks to me, like it will bind the turnbuckle on the bottom to the corresponding mount. The directions further say to reduce understeer slide the slider clamps forward away from the sway bar. To reduce oversteer move the slider clamps back closer to to the rear. I have very little seat time due to various reasons. Of that tiny seat time I did not notice anything radically peculiar in the steering, but time will tell. The concern you bring up about stress on the wheel well has me concerned. It is my understanding the suspension was set up by a reputable shop in WA. The car just may be too damn low, I don't know. I may need to find someone knowledgeable locally to bless this mess. Thanks! (IMG:style_emoticons/default/beerchug.gif) (IMG:style_emoticons/default/white914.jpg) Obviously the diameter of the anti-roll bar is key. My comments are based on the pics. I would start more like 5” from the bar and then adjust as necessary. Although the advice above on which way to move them to reduce under over steer is counter intuitive, I know it is correct based on my track experience. Just measured from the center of the bar to the center of the sliding clamp is 4 1/2 inches, so I am close. Thanks! (IMG:style_emoticons/default/white914.jpg) |
|
|
|
| Lucky9146 |
Apr 29 2018, 04:13 PM
Post
#625
|
|
Always Wanted A Bigger Go Cart Group: Members Posts: 1,690 Joined: 22-September 14 From: Poway California Member No.: 17,942 Region Association: Southern California |
Drove it for about an hour yesterday and it is running great! (IMG:style_emoticons/default/driving.gif) Hadn't driven it much yet because of the exhaust leak, which is now fixed, and trying to understand why so much smoke on start up.
I initially thought there may have been too much oil in the system and researched dip stick lengths among other things in an effort to prove there was or wasn't. Have a PMS tank with what appears to be a OEM oil filler neck bringing into question whether the oil level was correct. Oil level is fine. I had been concerned about the smoke on start up, but as many told me, "just drive it" and they were right, the JE rings were just a little stubborn breaking in. All OK now. (IMG:style_emoticons/default/smile.gif) The suspension seems fine and even as low as the car sits, there is suspension travel. Did not detect any steering issues with the sway bar set up the way I got the car, but now with new bushings. Drop links are the correct length as reported earlier but now proven with road test. Great day yesterday! (IMG:style_emoticons/default/driving.gif) Today debut at the local PCASD Cars and Coffee. The 914 received a lot of attention and positive comments this morning. My wife accompanied me and we had a great time. One of the best turn outs for C&C here locally. (IMG:style_emoticons/default/white914.jpg) 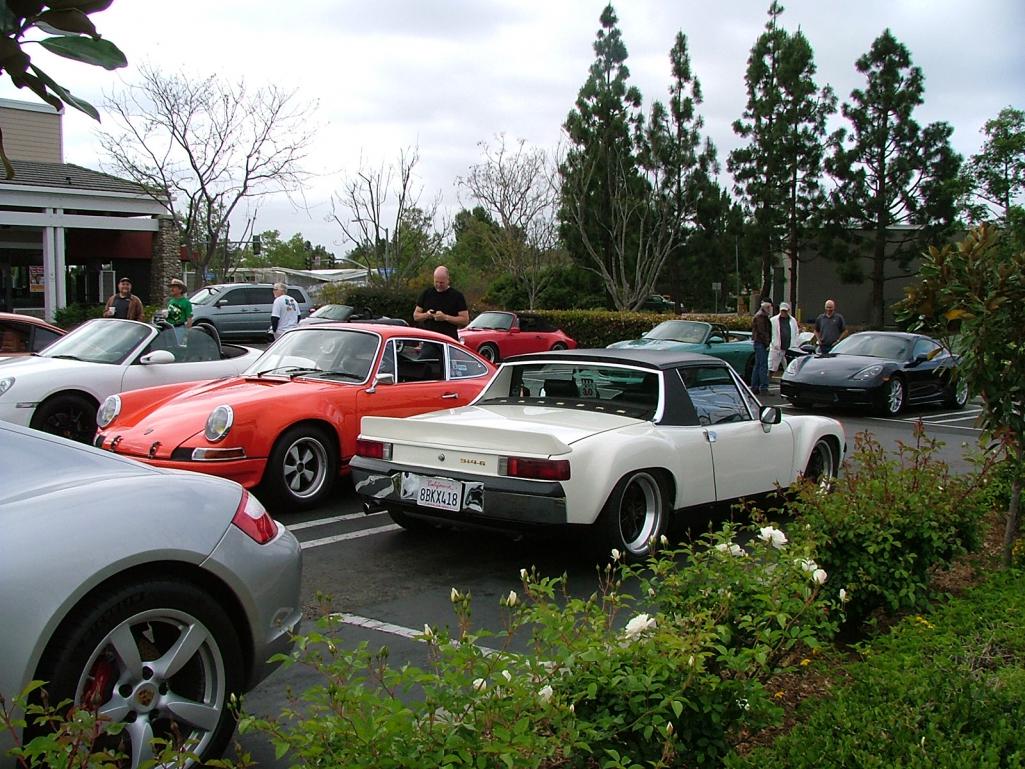 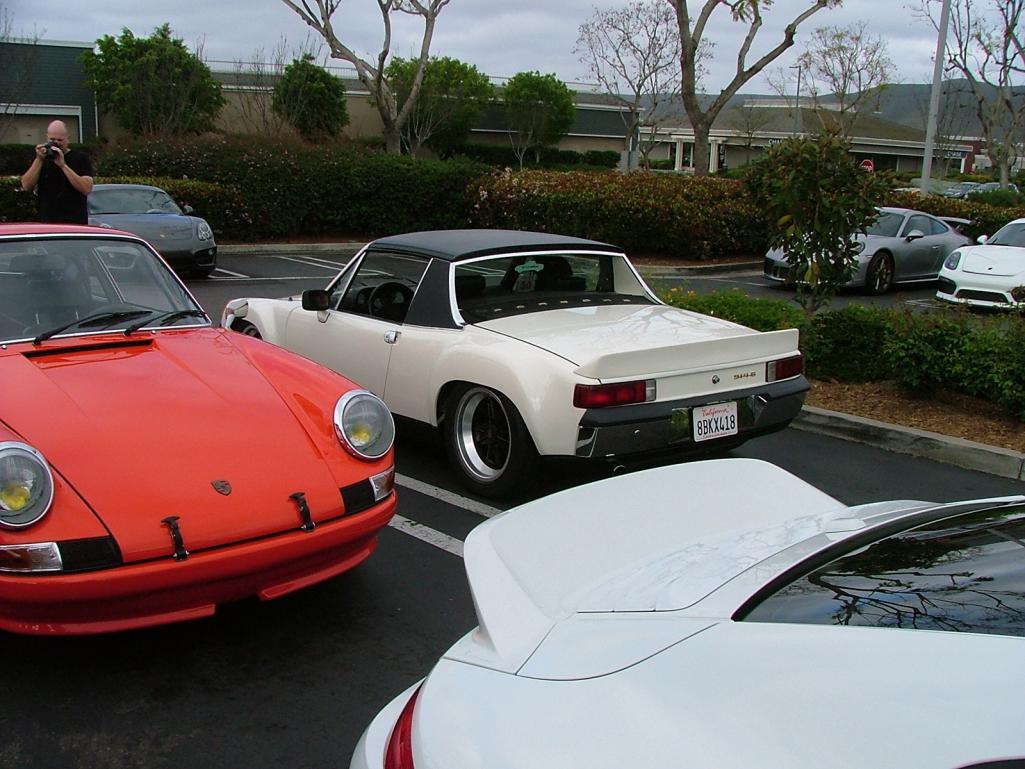 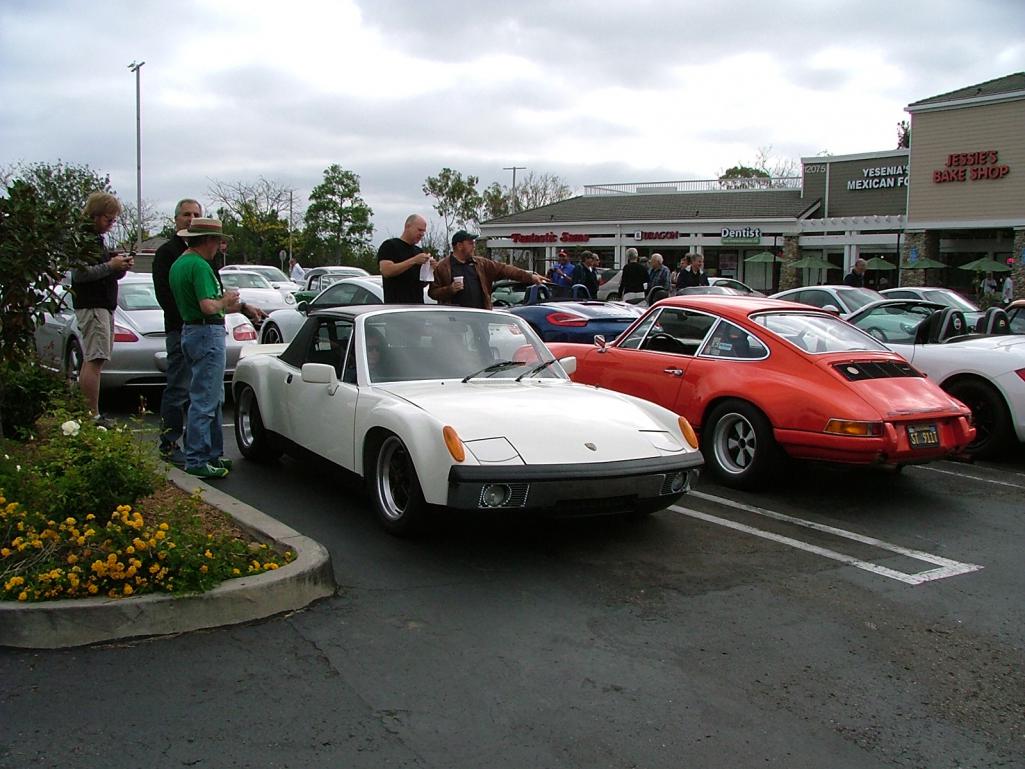 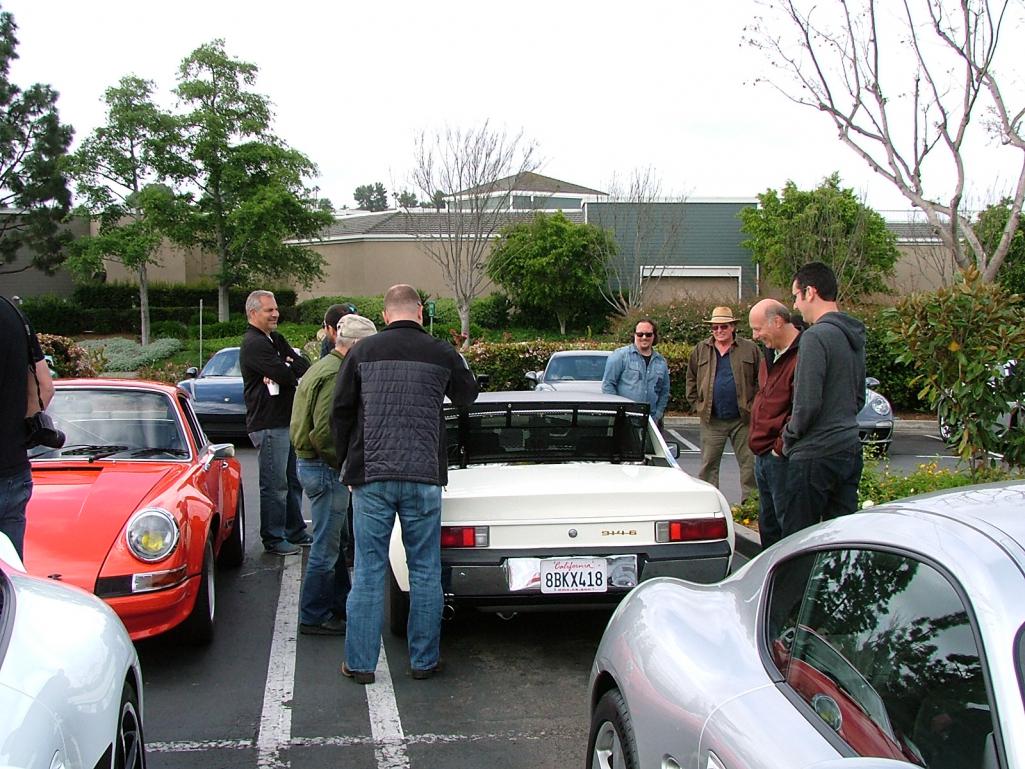 Attached thumbnail(s) 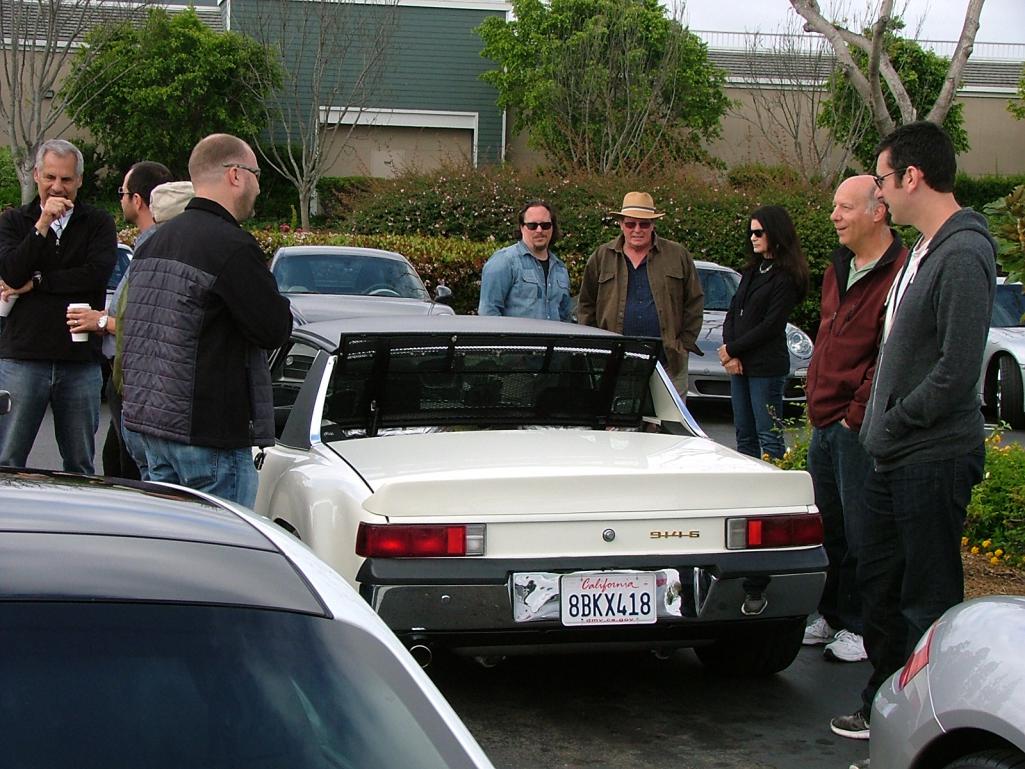
|
|
|
|
| Steve |
Apr 29 2018, 04:19 PM
Post
#626
|
|
914 Guru Group: Members Posts: 5,977 Joined: 14-June 03 From: Laguna Niguel, CA Member No.: 822 Region Association: Southern California |
Are you running a puke bottle? Dumb me I overfilled the oil tank which was causing excess oil into the intake. I had horrible smoke on startup, until I removed the oil breather from the intake and put it into a puke bottle. Otherwise some smoke on startup is normal. Maybe post a video of it.
|
|
|
|
| Lucky9146 |
Apr 29 2018, 04:30 PM
Post
#627
|
|
Always Wanted A Bigger Go Cart Group: Members Posts: 1,690 Joined: 22-September 14 From: Poway California Member No.: 17,942 Region Association: Southern California |
QUOTE(Steve @ Apr 29 2018, 03:19 PM) Are you running a puke bottle? Dumb me I overfilled the oil tank which was causing excess oil into the intake. I had horrible smoke on startup, until I removed the oil breather from the intake and put it into a puke bottle. Otherwise some smoke on startup is normal. Maybe post a video of it. Check on the puke bottle. Nothing to the carbs related to the oil system. Pretty sure now it was just the rings breaking in slower than anticipated. Hope to do another driving video soon. Thanks for weighing in Steve. (IMG:style_emoticons/default/beerchug.gif) (IMG:style_emoticons/default/white914.jpg) 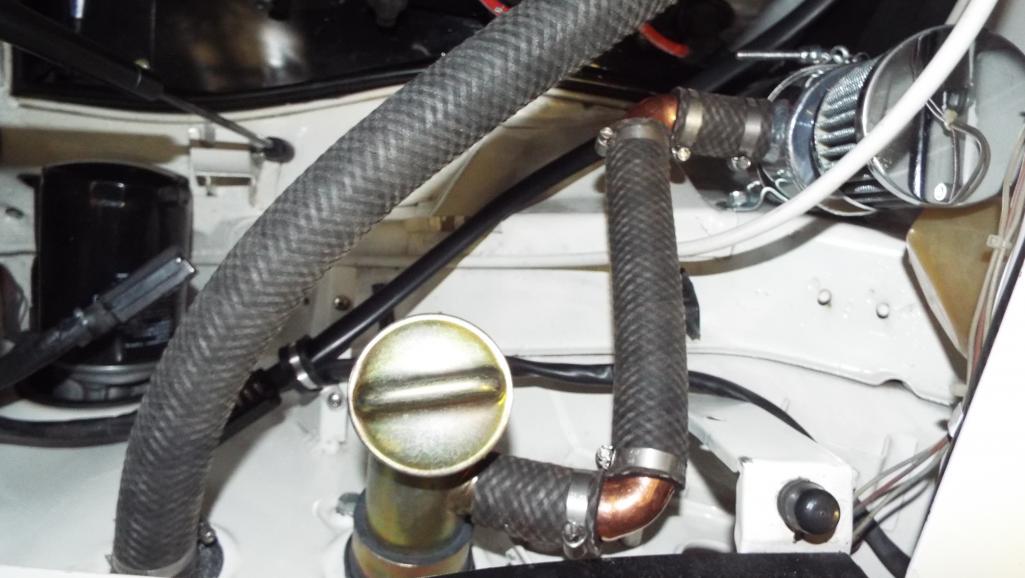 |
|
|
|
| Lucky9146 |
May 1 2018, 12:34 PM
Post
#628
|
|
Always Wanted A Bigger Go Cart Group: Members Posts: 1,690 Joined: 22-September 14 From: Poway California Member No.: 17,942 Region Association: Southern California |
One thing I always wanted, but never thought I would find, was a set of real Scheel seats to finish out my 6 GT conversion.
I was super excited I had found a set of vintage Scheel seats in early March. They arrived extremely well packed with great care. 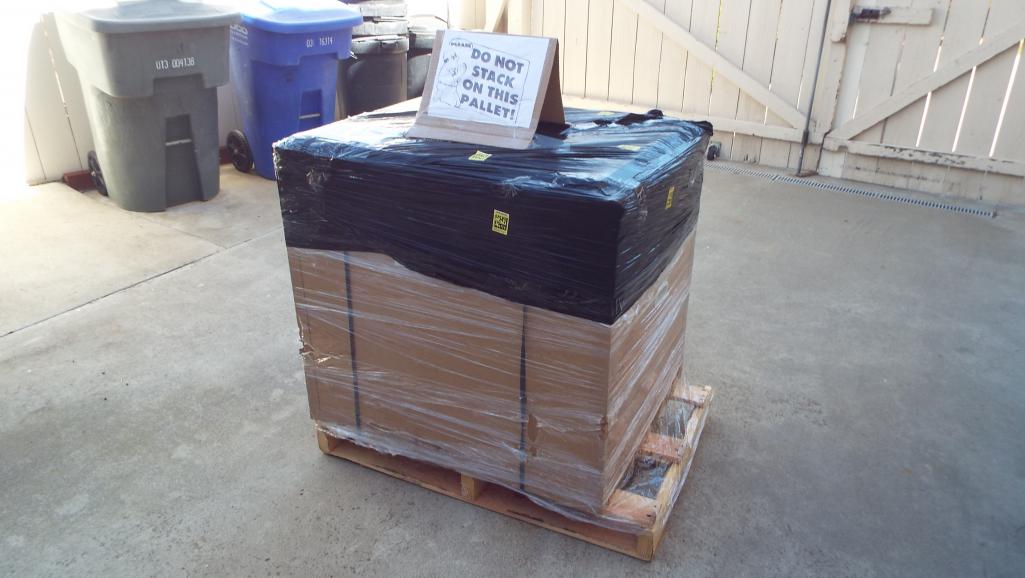 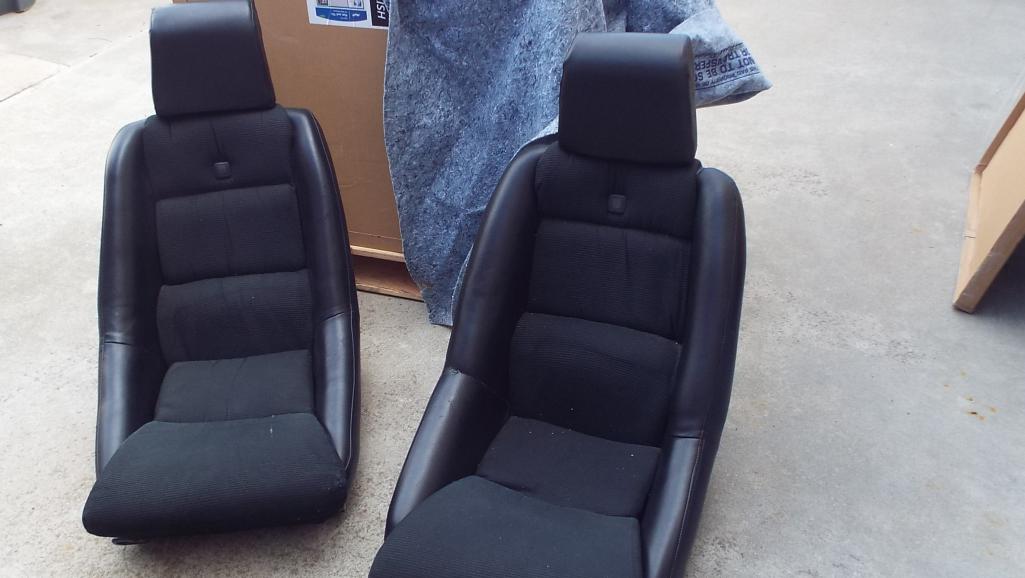 I knew from the pictures I’d seen before I bought them that they needed a little work so first thing I wanted to do was get them to my upholstery guy so that he could hopefully make repairs with some closely matched vinyl to a few problem areas. 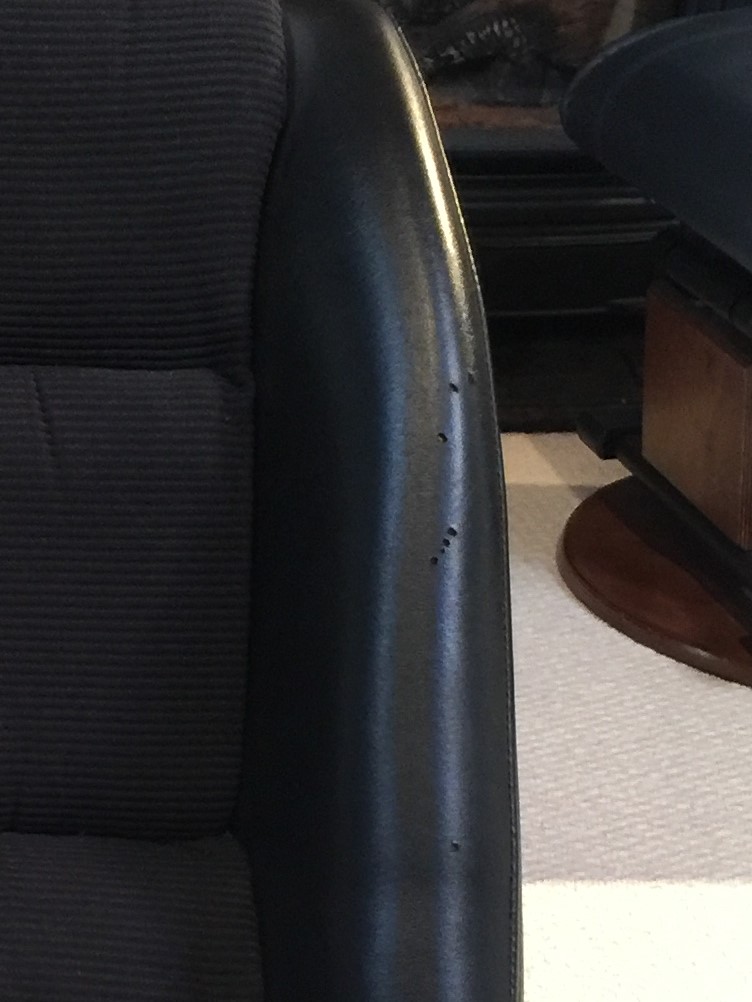  I drove them almost immediately to the upholstery shop and that is where I got a rude awakening. Within minutes I learned the vinyl had been recovered. He informed me that the vinyl on the seats was not really a period correct vinyl and showed me the difference. I had thought these were original seats. (IMG:style_emoticons/default/sad.gif) Oh boy here we go. (IMG:style_emoticons/default/white914.jpg) |
|
|
|
| Lucky9146 |
May 1 2018, 12:44 PM
Post
#629
|
|
Always Wanted A Bigger Go Cart Group: Members Posts: 1,690 Joined: 22-September 14 From: Poway California Member No.: 17,942 Region Association: Southern California |
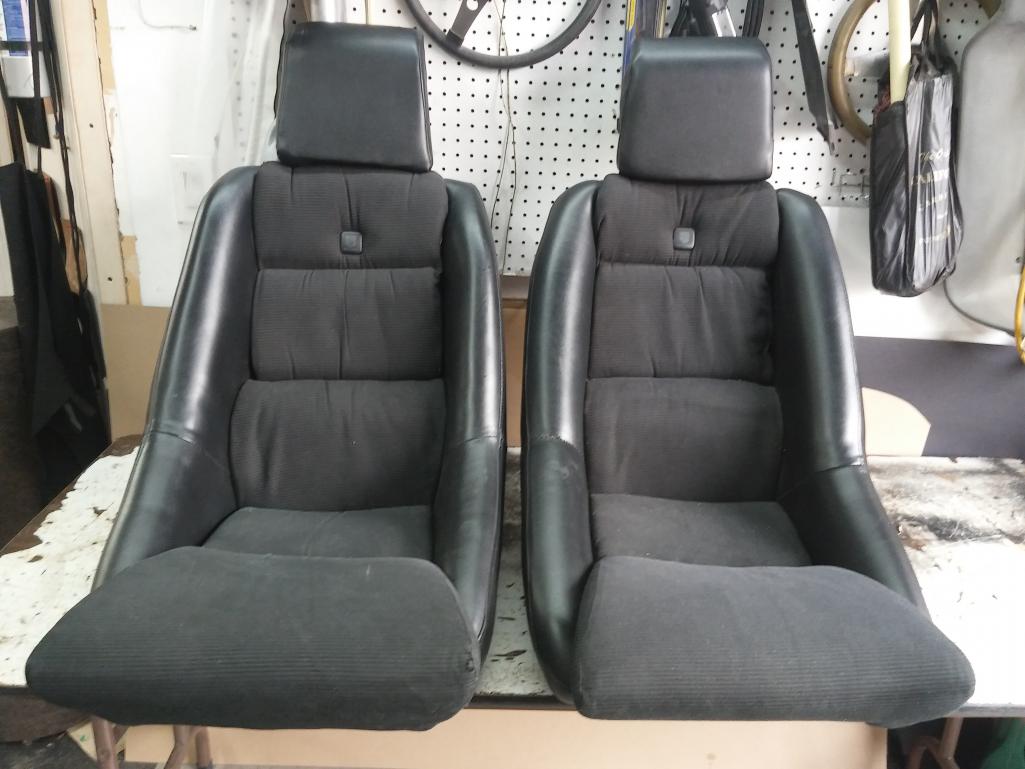
My upholsterer and I talked about recovering with a correct vinyl because he could not replace the damaged sections only. We thought we could keep what looked to be the original corduroy, so we planned a recover. The seats really did not seem to look the same though, somehow the shapes were a little different we noticed. When the seats sit side by side there were many differences, even in the corduroy sections. The head rests angles did not match either, with one being straight up vertical, while the other was tilted back. I was thinking the head rest was bent and would be something I could bend back.
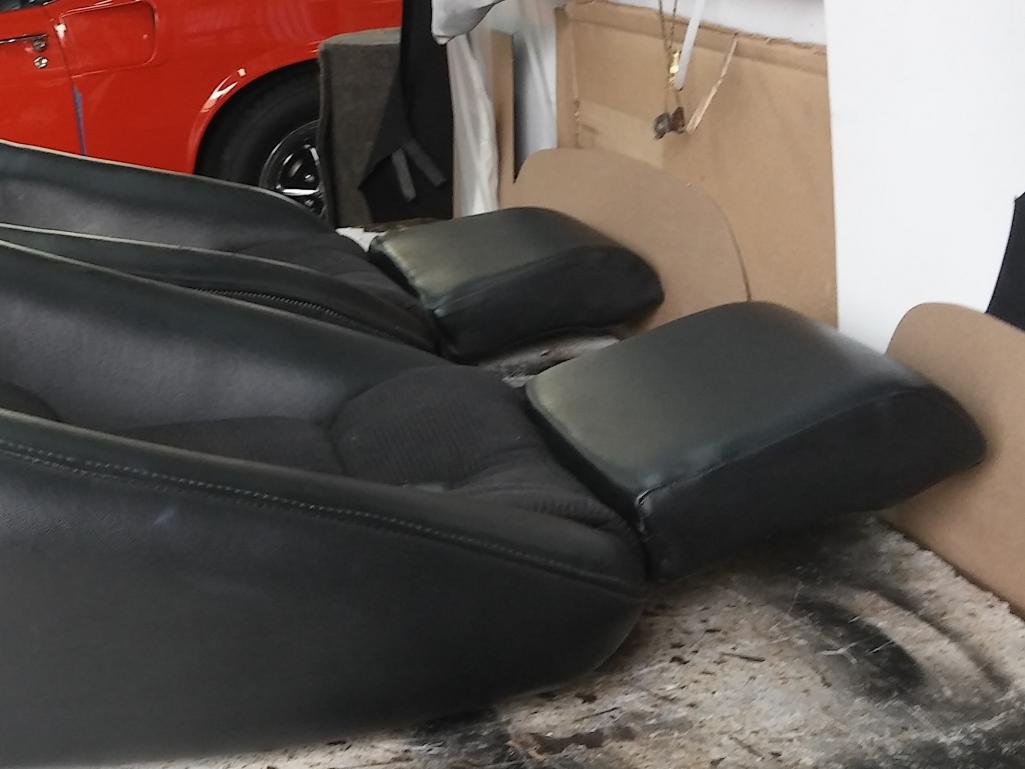  One seat bottom was not the same as the other as far as the cushion and attachment. Hard to describe this but one was fastened down well, and the other just lifted right up unattached. Next was he would strip them down and a few days later I would pick up the frames to get them blasted. (IMG:style_emoticons/default/white914.jpg) |
|
|
|
| Lucky9146 |
May 1 2018, 12:50 PM
Post
#630
|
|
Always Wanted A Bigger Go Cart Group: Members Posts: 1,690 Joined: 22-September 14 From: Poway California Member No.: 17,942 Region Association: Southern California |
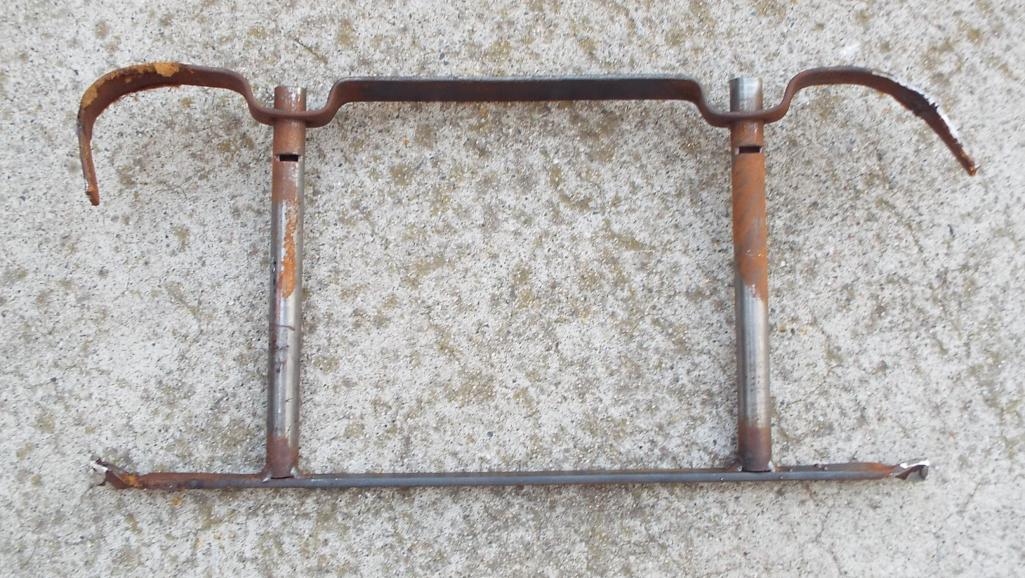
When I returned to the shop there was more bad news from the tear down. It wasn’t that the head rest was bent, it was that the actual frames were different, physically shaped different, even made slightly different, and one a tad shorter. One frame was now going to need to be modified to look like the other.
Then I learned even the corduroy had been re done as well. Plastic rosettes that finish off the head rests insertion to the seats were missing and broken. All the webbing was in fact original but was so tired it could not be re-used. One head rest foam was much denser than the other as well. (IMG:style_emoticons/default/confused24.gif) When I got home I began to really understand the differences in the seat frames. (IMG:style_emoticons/default/white914.jpg) 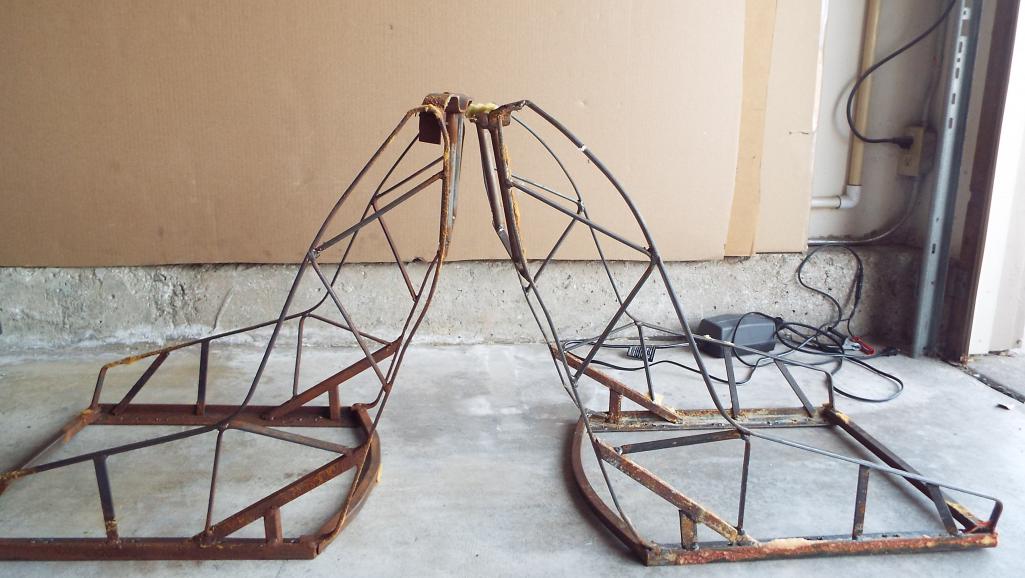 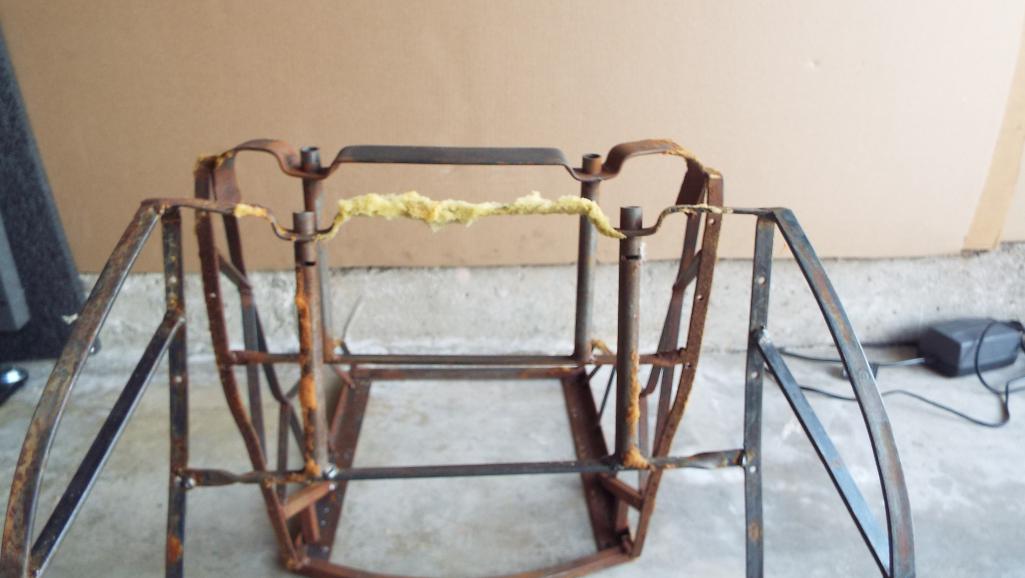 |
|
|
|
| Lucky9146 |
May 1 2018, 01:03 PM
Post
#631
|
|
Always Wanted A Bigger Go Cart Group: Members Posts: 1,690 Joined: 22-September 14 From: Poway California Member No.: 17,942 Region Association: Southern California |
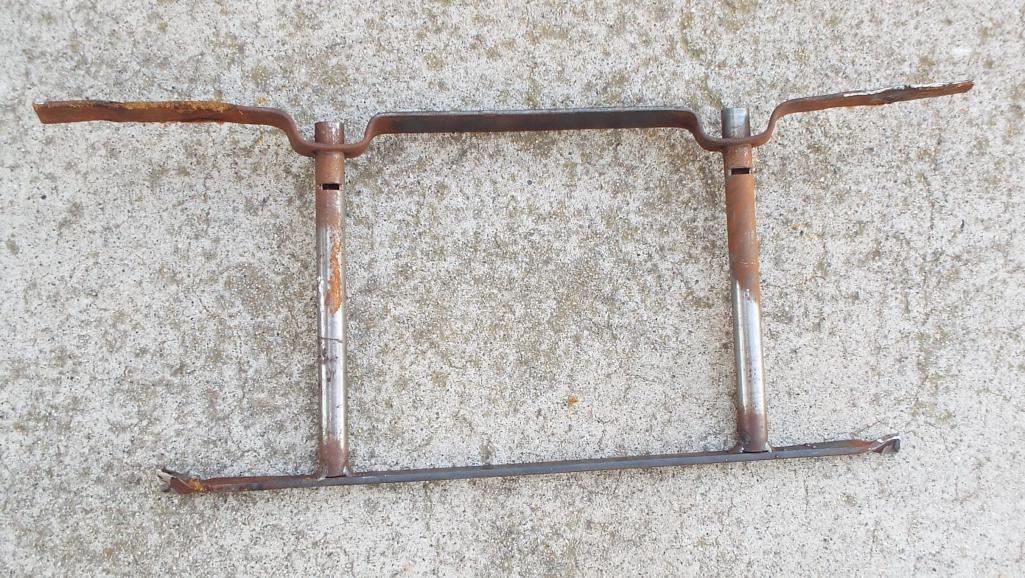
First I had to figure out which seat configuration I had was correct, so did a lot of research and determined that the slightly tilted head rest was correct as opposed to straight up head rest version.
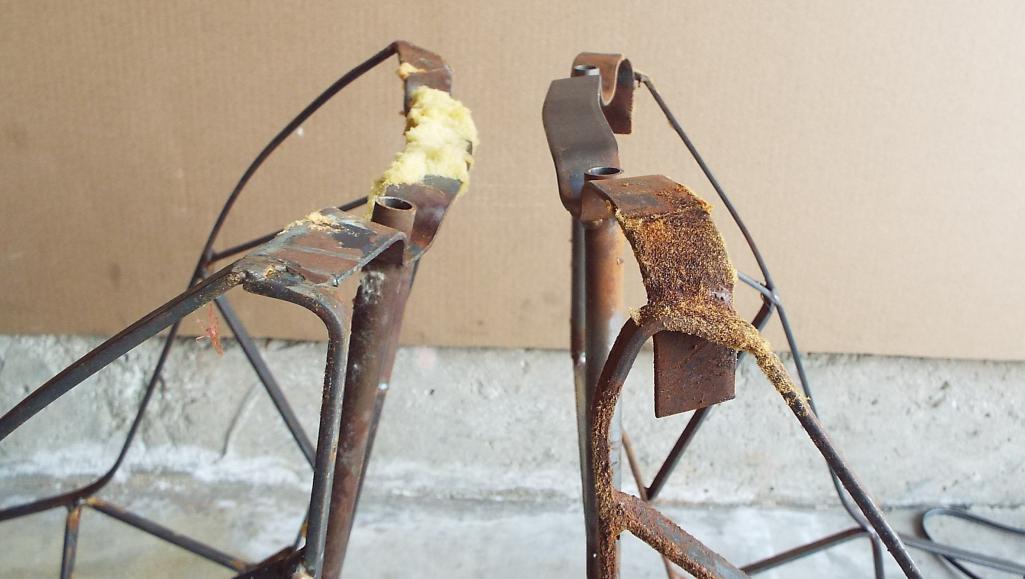 I then began cutting one seat apart with a saws-all. Measurements revealed the straight up seat was narrower at the top and the shape for the back was thinner from a template I made. (IMG:style_emoticons/default/white914.jpg) 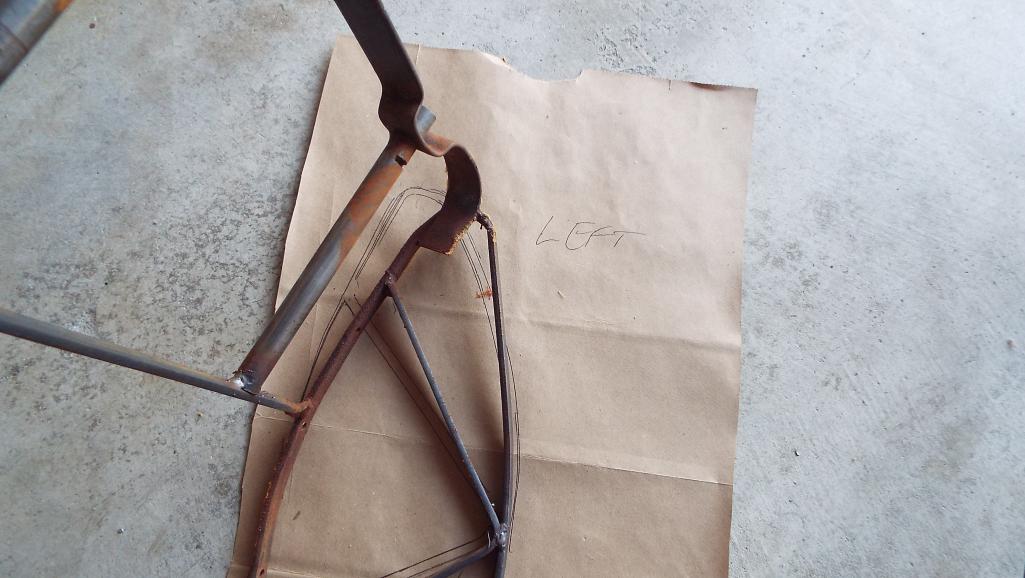 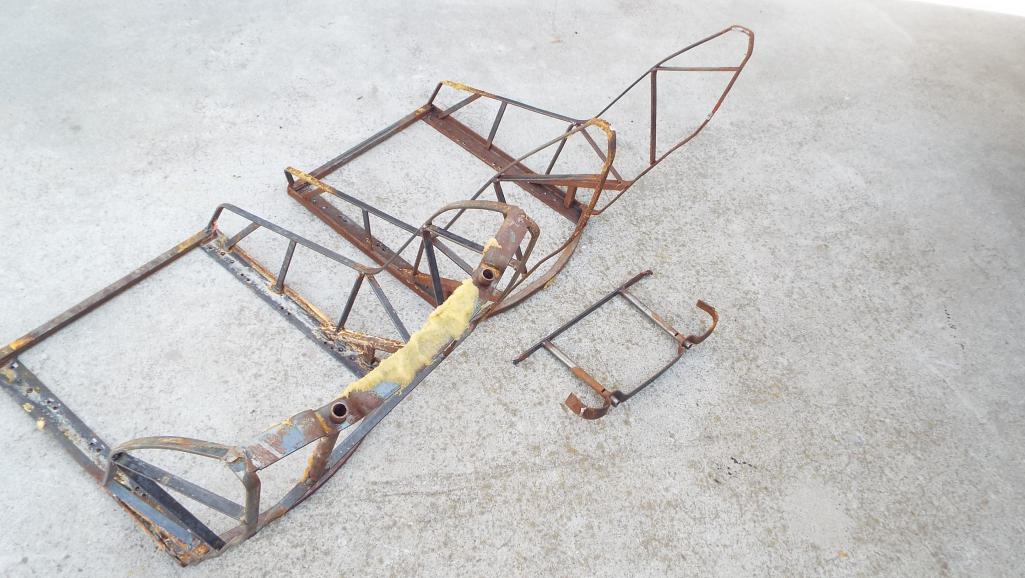 |
|
|
|
| Lucky9146 |
May 1 2018, 01:13 PM
Post
#632
|
|
Always Wanted A Bigger Go Cart Group: Members Posts: 1,690 Joined: 22-September 14 From: Poway California Member No.: 17,942 Region Association: Southern California |
|
|
|
|
| Lucky9146 |
May 1 2018, 01:24 PM
Post
#633
|
|
Always Wanted A Bigger Go Cart Group: Members Posts: 1,690 Joined: 22-September 14 From: Poway California Member No.: 17,942 Region Association: Southern California |
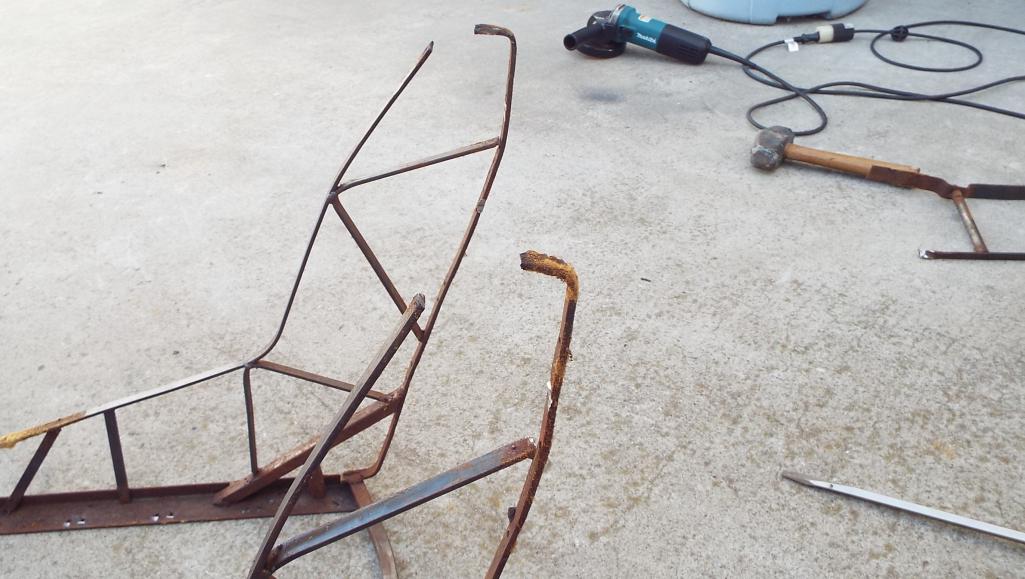
The seat shapes really were different in several places. Backs slightly different and now the head rests are the same angle! (IMG:style_emoticons/default/biggrin.gif)
(IMG:style_emoticons/default/white914.jpg) 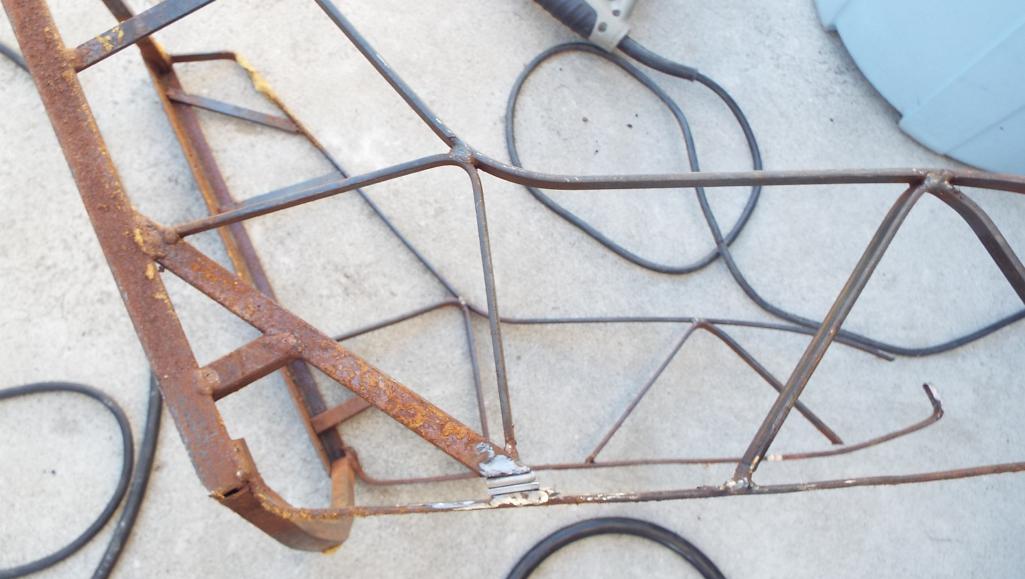 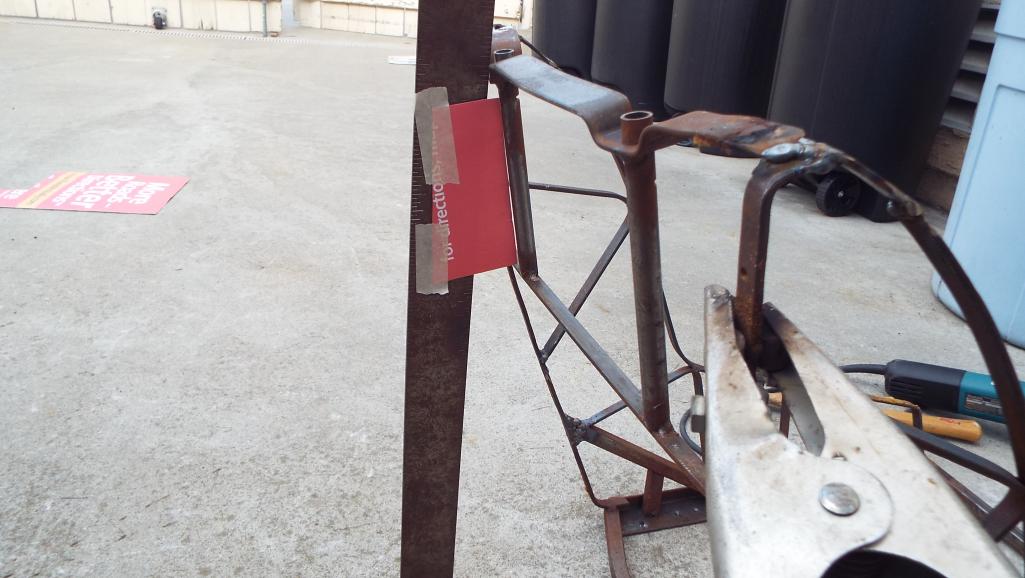 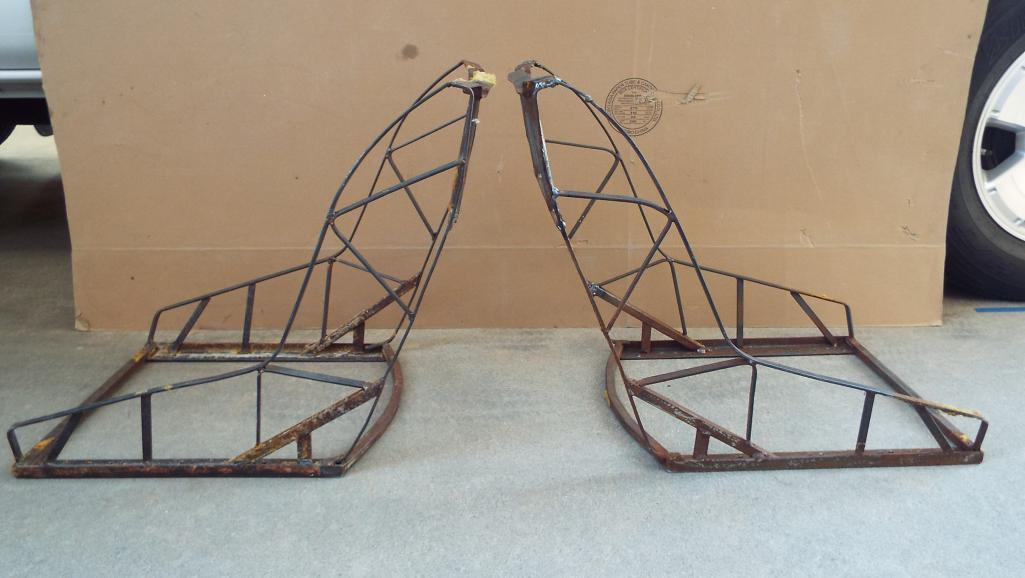 |
|
|
|
| Lucky9146 |
May 1 2018, 01:40 PM
Post
#634
|
|
Always Wanted A Bigger Go Cart Group: Members Posts: 1,690 Joined: 22-September 14 From: Poway California Member No.: 17,942 Region Association: Southern California |
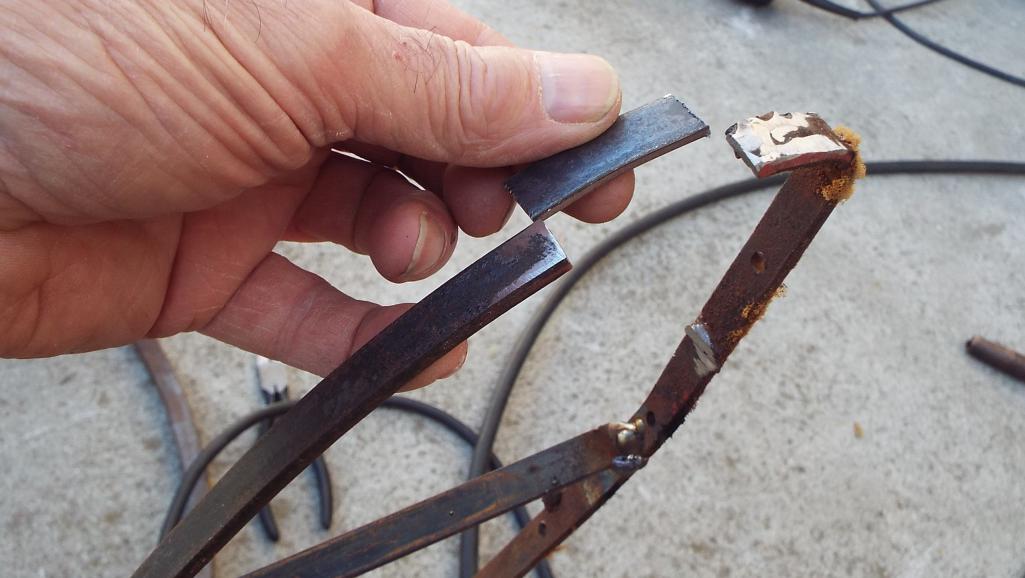
I cleaned up the rust and hit them with Por15 silver.
Far cry from where I thought I would be, just bolting them in, not too long after receiving and repairing them. I was telling Lawrence (larmo63) who has some nice Scheel seats about what I found on mine after buying them and he said that back in the day a lot of seats were sold individually, and a lot of times only the driver was a Scheel leaving the passenger stock. If that were the case here, then likely someone took two seats and had them recovered to look like they were a pair, many years ago. Both frames were Scheel all right, but possibly many years apart or they just didn’t pay too much attention to having them look exactly the same. (IMG:style_emoticons/default/confused24.gif) A good lesson in buying by picture. As a friend of mine once said: “the camera doesn’t catch what the eye can”. Had I seen these seats in person I likely would not have bought them. All I saw was what looked to be original looking seats. I got caught up in the excitement. Drove the frames and material up to the upholsterer last Monday. I know they will look great when he’s done. (IMG:style_emoticons/default/white914.jpg) 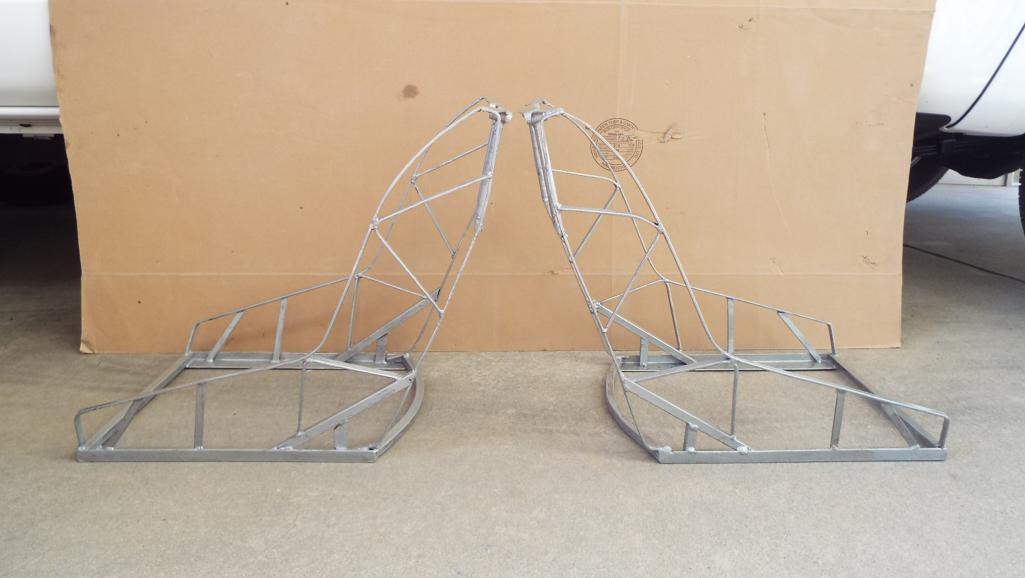  |
|
|
|
| 914Toy |
May 1 2018, 01:51 PM
Post
#635
|
|
Senior Member Group: Members Posts: 746 Joined: 12-November 17 From: Laguna beach Member No.: 21,596 Region Association: Southern California |
Bummer. Judging by your words, you have a remarkable cheerful attitude which will propel you out of this disappointment (IMG:style_emoticons/default/beerchug.gif)
|
|
|
|
| raynekat |
May 1 2018, 02:15 PM
Post
#636
|
|
Advanced Member Group: Members Posts: 2,170 Joined: 30-December 14 From: Coeur d'Alene, Idaho Member No.: 18,263 Region Association: Pacific Northwest |
Good on you to correct the issues with these seats.
In the end, you'll have a pair of "matching" seats that will look wonderful in your car. Lots of times it's 2 steps forward, 1 step back in these builds. Keep your head down and keep moving ahead. It will be killer in the end. |
|
|
|
| mepstein |
May 1 2018, 02:18 PM
Post
#637
|
|
914-6 GT in waiting Group: Members Posts: 20,265 Joined: 19-September 09 From: Landenberg, PA/Wilmington, DE Member No.: 10,825 Region Association: MidAtlantic Region |
QUOTE(raynekat @ May 1 2018, 04:15 PM) Good on you to correct the issues with these seats. In the end, you'll have a pair of "matching" seats that will look wonderful in your car. Lots of times it's 2 steps forward, 1 step back in these builds. Keep your head down and keep moving ahead. It will be killer in the end. (IMG:style_emoticons/default/agree.gif) Now they will look perfect. |
|
|
|
| ValcoOscar |
May 1 2018, 02:37 PM
Post
#638
|
|
Garage Life Group: Members Posts: 2,546 Joined: 19-November 13 From: SoCal Member No.: 16,669 Region Association: Southern California |
Sorry about your latest seat challenge Jim but you've proven that you can fix practicality anything. March on my friend...can't wait to meet up soon.
Awaiting your next driving video!!! (IMG:style_emoticons/default/piratenanner.gif) Oscar |
|
|
|
| porschetub |
May 1 2018, 06:10 PM
Post
#639
|
|
Advanced Member Group: Members Posts: 4,963 Joined: 25-July 15 From: New Zealand Member No.: 18,995 Region Association: None |
Bummer about the seats Jim, (IMG:style_emoticons/default/agree.gif) they could have been made years apart hence the difference,can you still get the needle corduroy for the inners ? .
Re: the oil level I had a similar issue but in reverse..PMS filler and stock tank,appears they don't match,I calculated I would need around 12 litres to reach halfway on the dipstick which is too much for my engine (no front cooler) so adjusted the filler neck to bring it closer to the tank ,did an oil change and added 9.5 litres and marked the dipstick ,finally I know where I am. Car looks great and seems to be getting attention (IMG:style_emoticons/default/biggrin.gif) . |
|
|
|
| Cairo94507 |
May 1 2018, 06:19 PM
Post
#640
|
|
Michael Group: Members Posts: 10,503 Joined: 1-November 08 From: Auburn, CA Member No.: 9,712 Region Association: Northern California |
Sorry to see what you had to go through with your seats. In doing a build it seems we all have to just keep our eye on the windshield and out of the rear view mirror. Stay as positive as possible. Those seats are going to look absolutely amazing once finished and every time you sit in them you will love them. (IMG:style_emoticons/default/beerchug.gif)
|
 |
|
|
3 User(s) are reading this topic (3 Guests and 0 Anonymous Users)
0 Members:

|
Lo-Fi Version | Time is now: 29th November 2025 - 12:05 PM |
Invision Power Board
v9.1.4 © 2025 IPS, Inc.