|
|

|
Porsche, and the Porsche crest are registered trademarks of Dr. Ing. h.c. F. Porsche AG.
This site is not affiliated with Porsche in any way. Its only purpose is to provide an online forum for car enthusiasts. All other trademarks are property of their respective owners. |
|
|
  |
| Mueller |
 Feb 27 2018, 09:27 AM Feb 27 2018, 09:27 AM
Post
#101
|
|
914 Freak!                Group: Members Posts: 17,155 Joined: 4-January 03 From: Antioch, CA Member No.: 87 Region Association: None 
|
Bookmarking thread, great visual tutorial on some repairs I need to do.
|
| mbseto |
 Feb 27 2018, 12:46 PM Feb 27 2018, 12:46 PM
Post
#102
|
|
Senior Member    Group: Members Posts: 1,257 Joined: 6-August 14 From: Cincy Member No.: 17,743 Region Association: North East States |
I'm really impressed with your work. Keep 'em coming! Nice work rebuilding that post bottom from scratch. Can't quite tell, but did you leave drainage holes at the bottom? Thank you! Yes, the long had indentations for drain holes already and the piece I added runs straight over them to leave a hole. I scalloped it a little at those points as well. |
| mbseto |
 May 19 2018, 09:09 PM May 19 2018, 09:09 PM
Post
#103
|
|
Senior Member    Group: Members Posts: 1,257 Joined: 6-August 14 From: Cincy Member No.: 17,743 Region Association: North East States |
Just to finish up the last post, this is the sill tacked, welded and ground down.
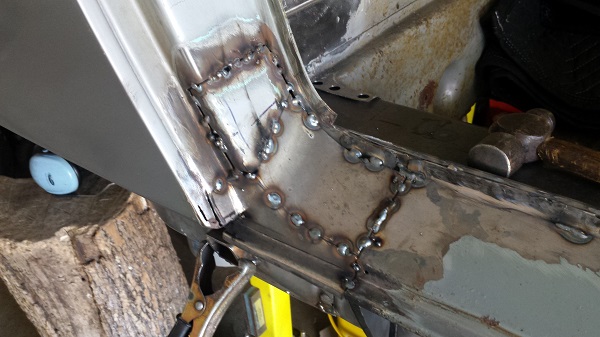 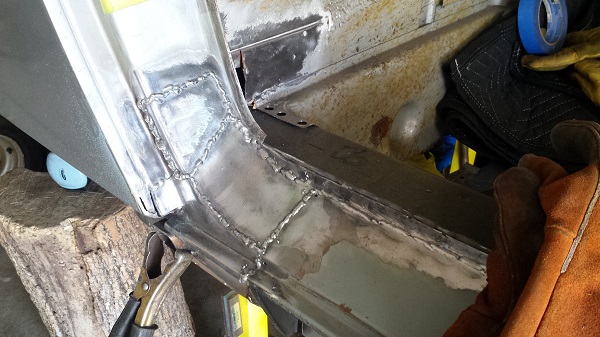 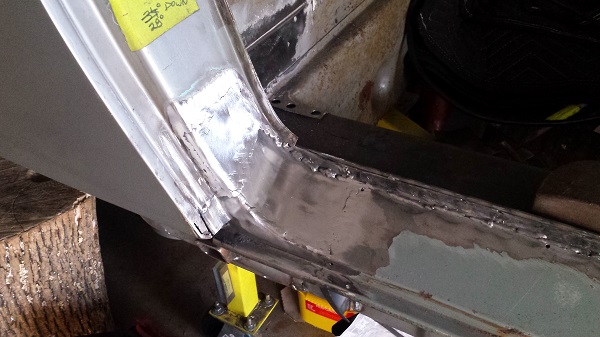 Not perfect, but glad to get it back on. I may go back and try to touch it up a little later. Sometimes I mess with it too much when I should leave it alone. |
| mbseto |
 May 19 2018, 09:18 PM May 19 2018, 09:18 PM
Post
#104
|
|
Senior Member    Group: Members Posts: 1,257 Joined: 6-August 14 From: Cincy Member No.: 17,743 Region Association: North East States |
This brings me to a milestone... The passenger long is completely replaced. Still need to get the suspension pylons and install them and also the engine tray, but I'll be flipping her around to get the driver's long done.
Glad I followed Rick's advice and did not cut the fender. Wasn't sure it would work, but it did. Pulled all the parts boxes out of the way and rolled her out of the garage. Swept the floor and flipped her around and back in. 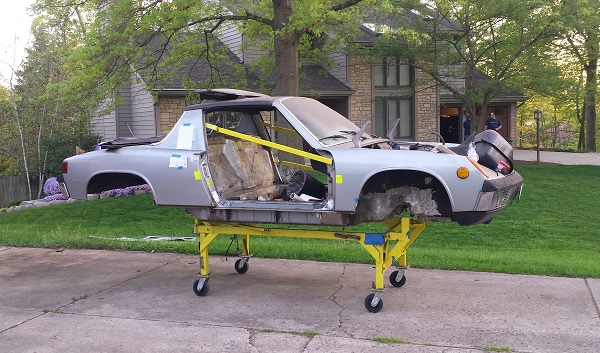 |
| mbseto |
 May 19 2018, 11:10 PM May 19 2018, 11:10 PM
Post
#105
|
|
Senior Member    Group: Members Posts: 1,257 Joined: 6-August 14 From: Cincy Member No.: 17,743 Region Association: North East States |
Shifting back into destructo-mode to remove the old long. Here's the before:
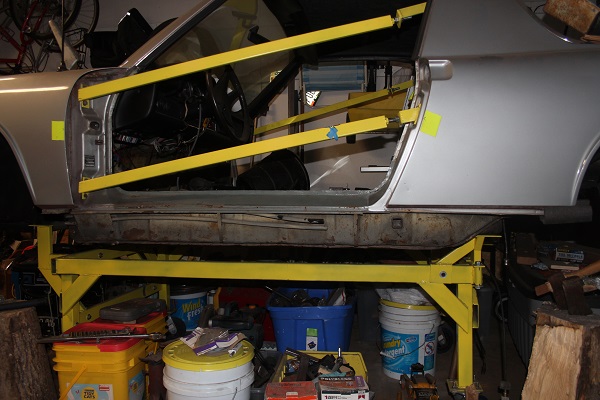 Here's the carnage. Good view of all the previous repair work. 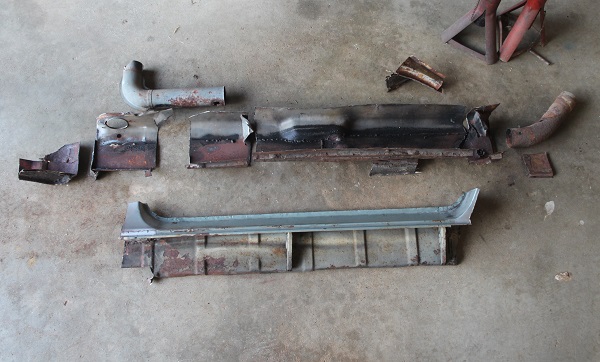 Looks like the hole for the seatbelt boss was made with a .45: 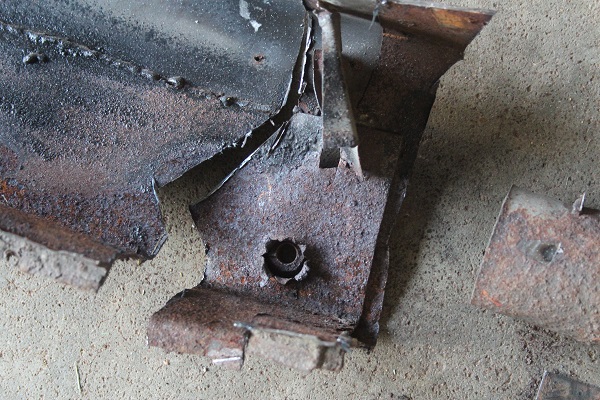 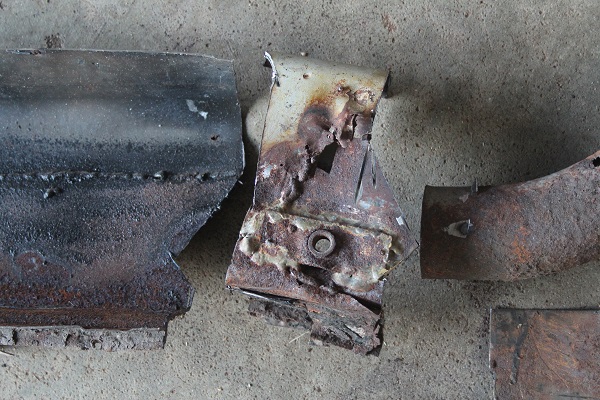 E-brake bosses: 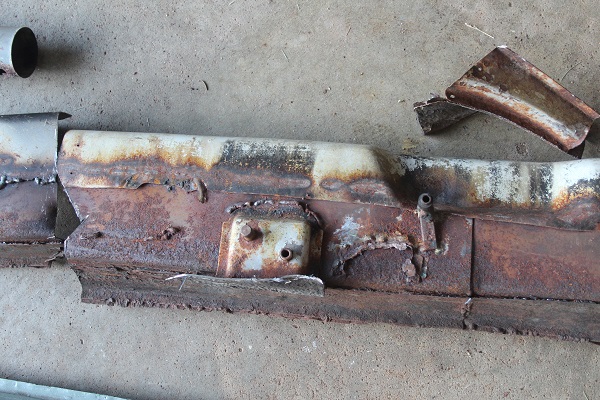 Saving the heater tube. A lot of this looks like it was brazed together: 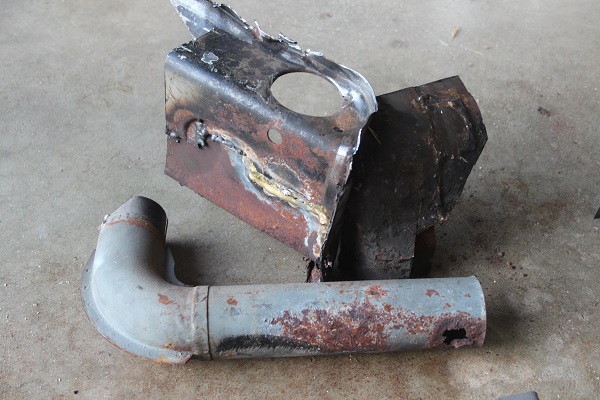 After the experience of the passenger side long, I cut this side with a hack saw because it has a very narrow kerf, and cut high up on the ends. I should be able to get this sill back on in one piece. 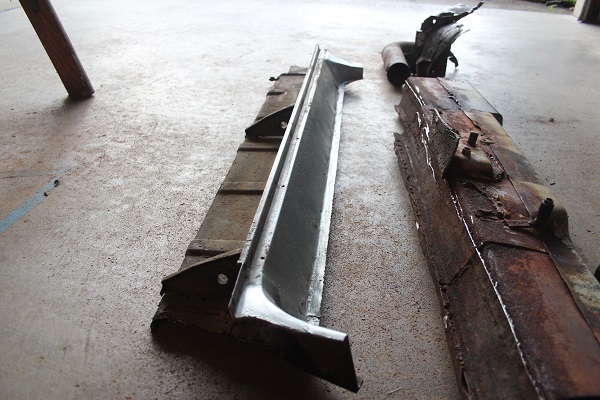 Cut ends, forward and aft. 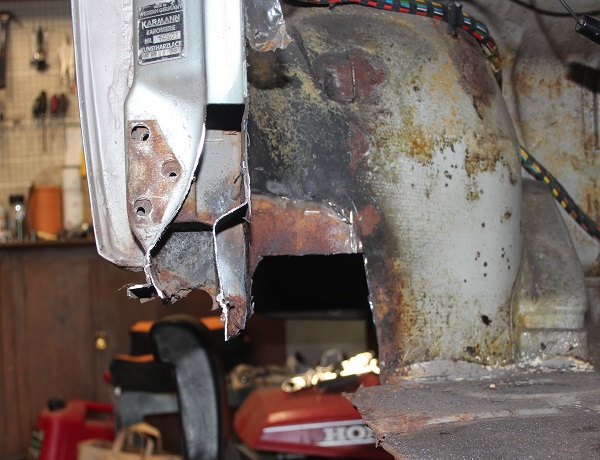 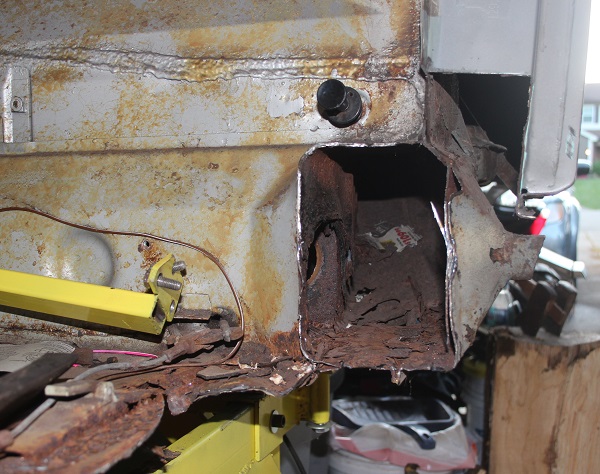 That little bit of newspaper up there came from another mouse nest in the driver's side suspension console. Must be an ideal spot. Maybe this is where they put the mother-in-law. I guess that console is going to be filled with sunflower seeds, too. |
| jmitro |
 May 20 2018, 07:06 AM May 20 2018, 07:06 AM
Post
#106
|
|
Senior Member    Group: Members Posts: 713 Joined: 23-July 15 From: Oklahoma Member No.: 18,986 Region Association: None 
|
|
| mbseto |
 Jun 4 2018, 09:55 PM Jun 4 2018, 09:55 PM
Post
#107
|
|
Senior Member    Group: Members Posts: 1,257 Joined: 6-August 14 From: Cincy Member No.: 17,743 Region Association: North East States |
|
| mbseto |
 Jun 8 2018, 07:05 AM Jun 8 2018, 07:05 AM
Post
#108
|
|
Senior Member    Group: Members Posts: 1,257 Joined: 6-August 14 From: Cincy Member No.: 17,743 Region Association: North East States |
Temporarily switched from destructo-mode to fab mode to gin up the rear corner of the wheel well that extends back under the door post and between the halves of the long.
Cut a rectangle and bent the edge profile: 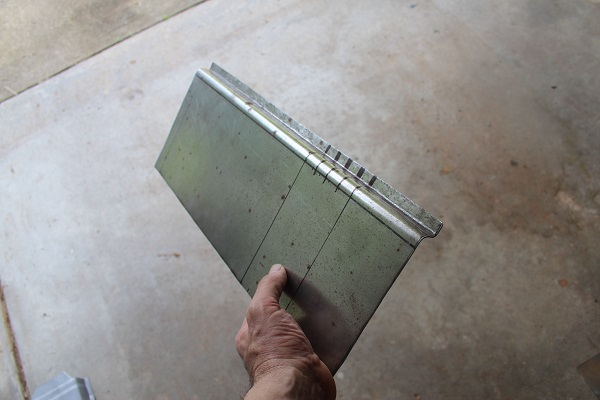 Checking the profile against the outer long piece: 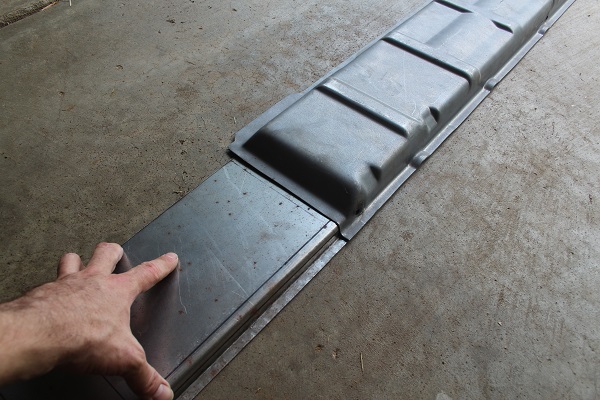 Bending the contour around the inner long piece: 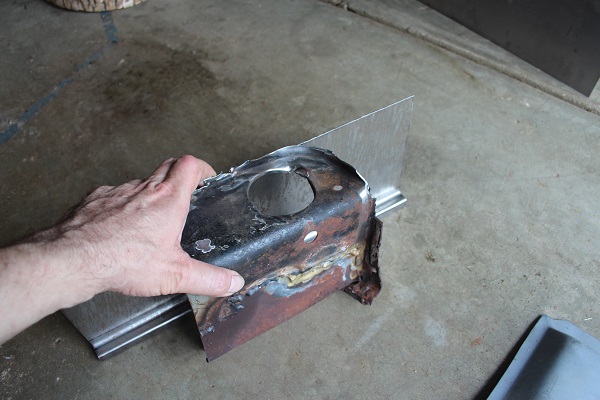 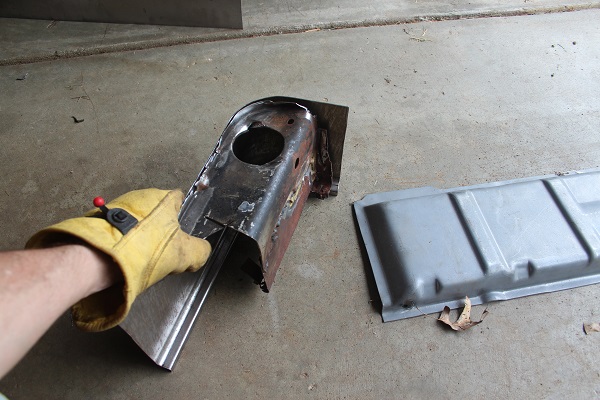 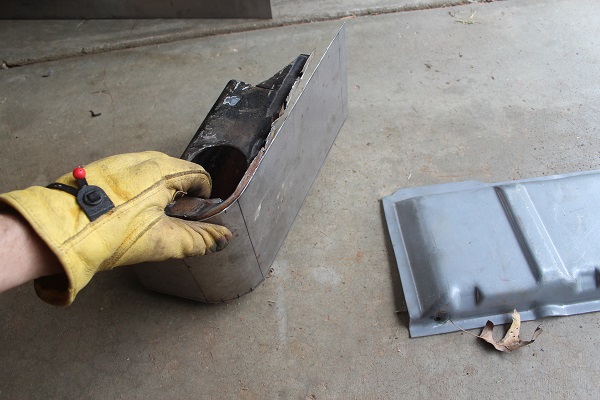 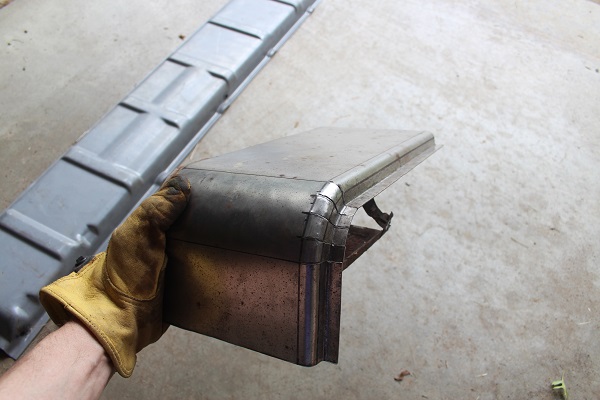 Mise en place: 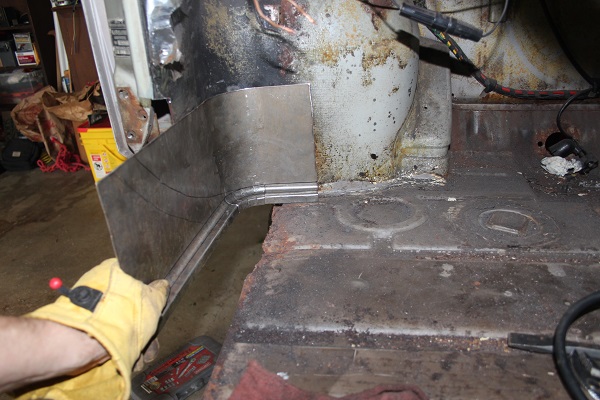 |
| bbrock |
 Jun 8 2018, 07:12 AM Jun 8 2018, 07:12 AM
Post
#109
|
|
914 Guru      Group: Members Posts: 5,269 Joined: 17-February 17 From: Montana Member No.: 20,845 Region Association: Rocky Mountains 
|
That there is some fine work! (IMG:style_emoticons/default/thumb3d.gif) I know how difficult getting that bend around the front of the inner is to accomplish. (IMG:style_emoticons/default/smash.gif) (IMG:style_emoticons/default/welder.gif)
|
| Dion |
 Jun 8 2018, 02:59 PM Jun 8 2018, 02:59 PM
Post
#110
|
|
RN     Group: Members Posts: 2,920 Joined: 16-September 04 From: Audubon,PA Member No.: 2,766 Region Association: MidAtlantic Region 

|
Brilliant stuff here Matthew. I’ll certainly be borrowing your ideas on the heater tube hole in the long when I do my drivers side. Really like the templates you made.
Keep it coming! |
| mbseto |
 Jun 19 2018, 10:56 PM Jun 19 2018, 10:56 PM
Post
#111
|
|
Senior Member    Group: Members Posts: 1,257 Joined: 6-August 14 From: Cincy Member No.: 17,743 Region Association: North East States |
I suppose this guy's best laid schemes went agley many years ago...
https://www.youtube.com/watch?v=fnEi0LrQ-WQ Shop vac'd him out with a custom attachment: 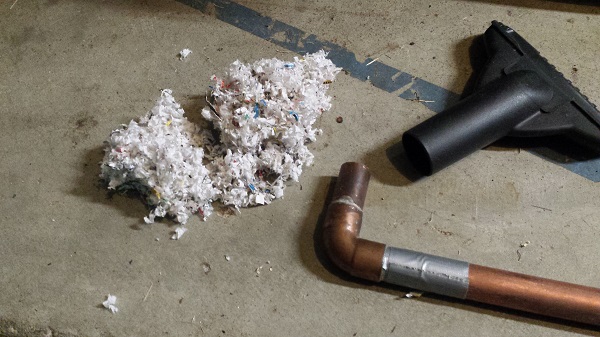 |
| mbseto |
 Jun 19 2018, 11:06 PM Jun 19 2018, 11:06 PM
Post
#112
|
|
Senior Member    Group: Members Posts: 1,257 Joined: 6-August 14 From: Cincy Member No.: 17,743 Region Association: North East States |
I posted a question in its own thread looking for opinions on whether any of the long can be saved. I'll not belabor it here, but with the help of a few others here, convinced myself to cut the whole thing out and replace with RD metal.
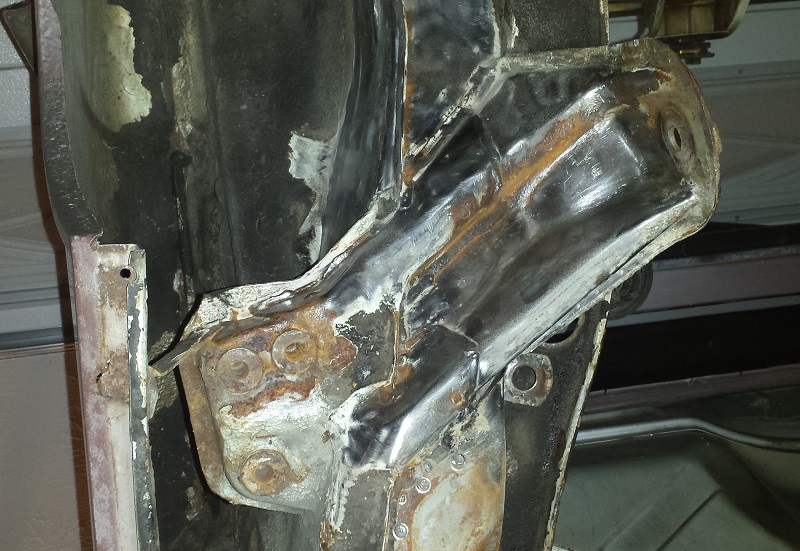
Looking into the upper driver's side long: 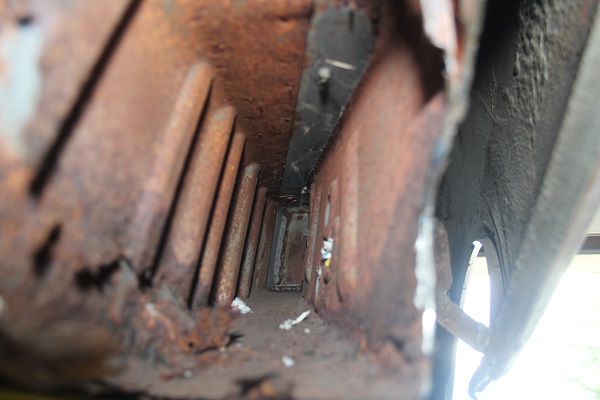 Level of the rot. It almost looks like this car was sitting in water at one point. The common saw is "rots from the inside out", but this seems to be from the bottom up: 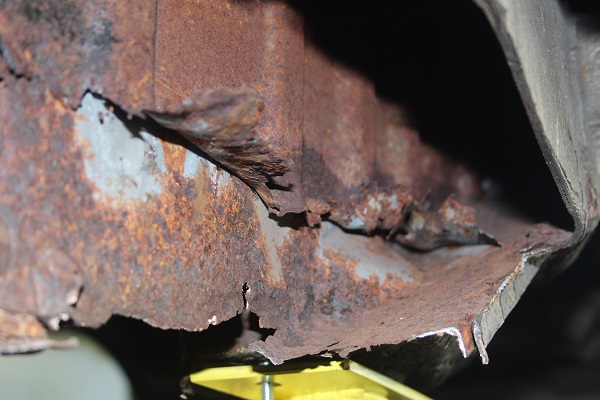 Took of the engine mount to get access a little further up and also just wanted to see behind it. The mount on the left is the driver's side, the right is the pass side for comparison. Pass side is scrap, but I think the driver's side will clean up OK. 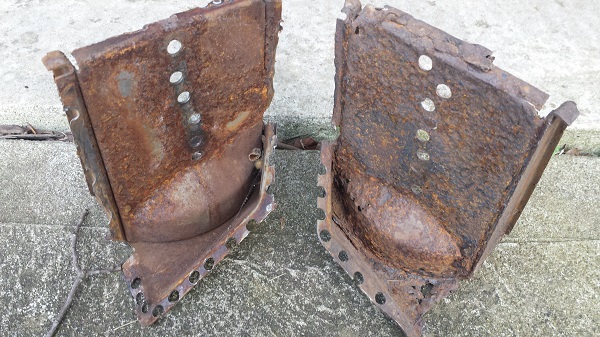 |
| bbrock |
 Jun 19 2018, 11:12 PM Jun 19 2018, 11:12 PM
Post
#113
|
|
914 Guru      Group: Members Posts: 5,269 Joined: 17-February 17 From: Montana Member No.: 20,845 Region Association: Rocky Mountains 
|
That nest looks so well preserved I kept expecting to see a mouse head pop into view.
Looking forward to watching the long replacement. (IMG:style_emoticons/default/popcorn[1].gif) (IMG:style_emoticons/default/sawzall-smiley.gif) (IMG:style_emoticons/default/welder.gif) |
| mbseto |
 Jun 19 2018, 11:21 PM Jun 19 2018, 11:21 PM
Post
#114
|
|
Senior Member    Group: Members Posts: 1,257 Joined: 6-August 14 From: Cincy Member No.: 17,743 Region Association: North East States |
Here's some borescope pics. Not the greatest quality, but if you want to see what you can get from a $20 borescope attached to a smartphone, here you go. First, the suspension consoles after a little cleanup work. Nowhere near as bad as the passenger side, but the streak of rust is a little concerning...
 This is inside the outer console looking at the bolt tubes, this is where the mouse nest used to be: 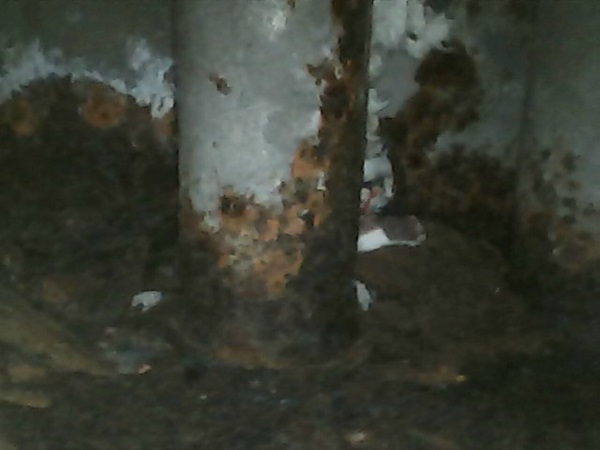 And another. Large flaked-off rust visible here. 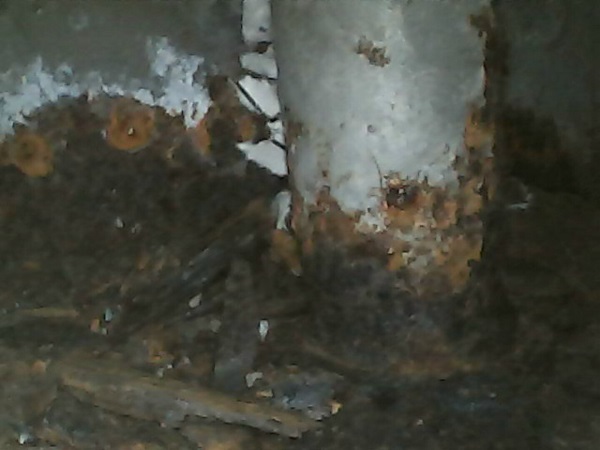 This is inside the inner console, looking straight down into the grooves formed by the thick reinforcement pieces: 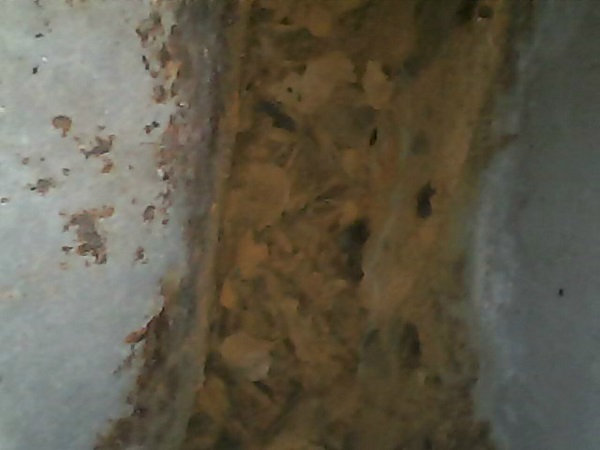 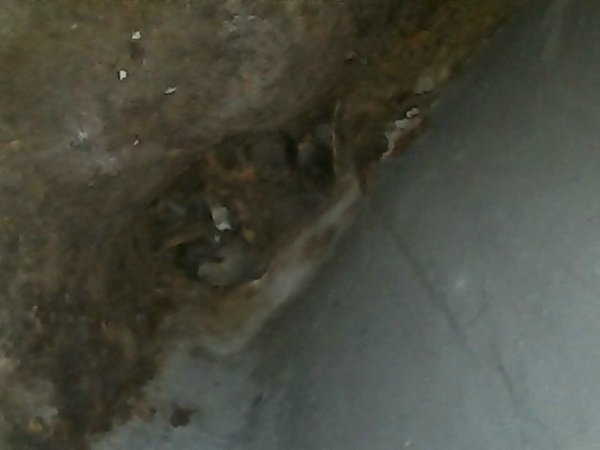 I could probably convince myself that these are structurally sound, but in the end I think I want both sides to be at the same level of restoration, if that makes any sense. |
| mbseto |
 Mar 24 2019, 09:18 PM Mar 24 2019, 09:18 PM
Post
#115
|
|
Senior Member    Group: Members Posts: 1,257 Joined: 6-August 14 From: Cincy Member No.: 17,743 Region Association: North East States |
Can't believe it's been so long since my last post. Busy fall and winter, got work on the car done incrementally. Time to catch y'all up... I guess I knew this at one point, but after cutting all the rust out of the driver's side long, I realized I was going to be fabbing more than I did on the other side. I suppose that's why I started this project in the first place.
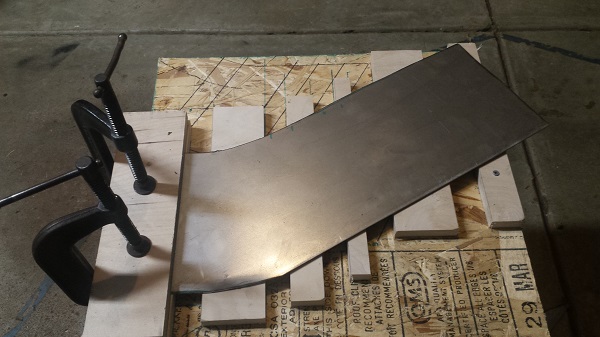
So after removing the engine support and suspension pylon, then peeling back the rusted layers, I figured I would build a buck and hammer form the "elbow" shape where the long comes out of the wheel well and turns horizontal... 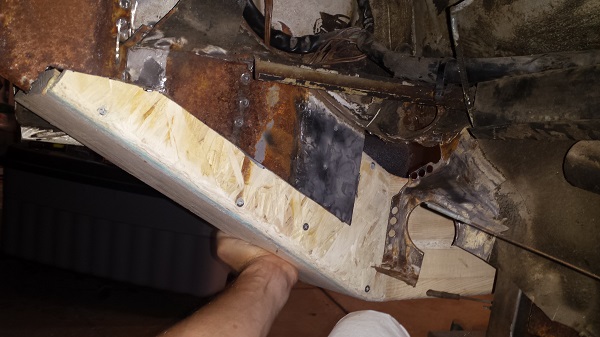 I thought I would impress everyone with a gif of me forming this part. The gif turned out good, but the part is no bueno. (IMG:style_emoticons/default/sad.gif) 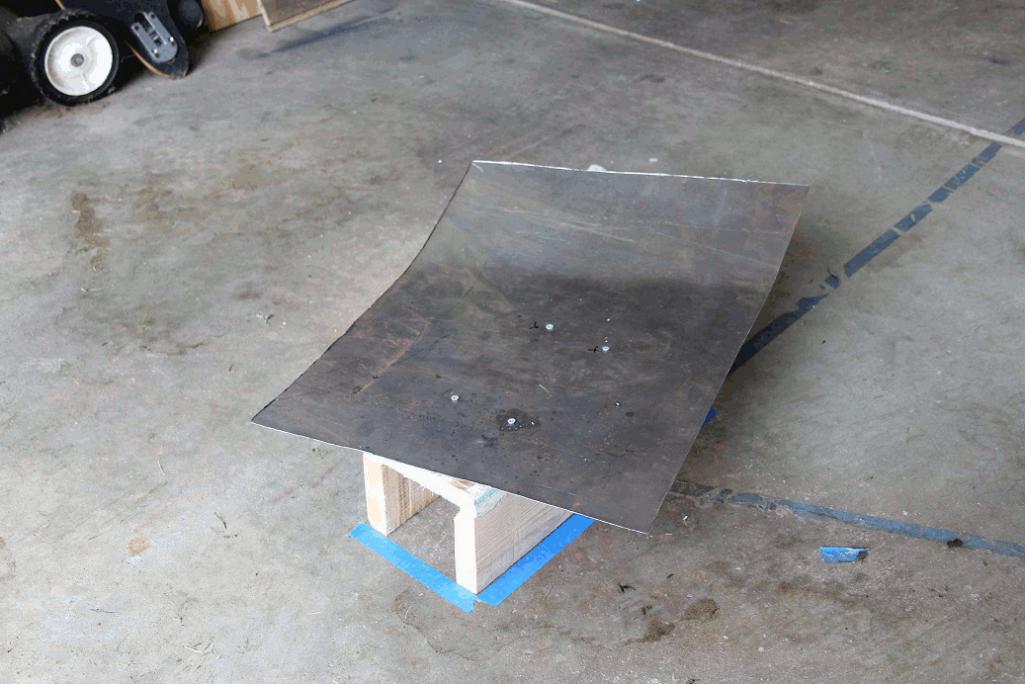 Here's the final - not usable. In the end, I just made the part as a straight channel section, then slitted it and bent as needed. Slits get welded shut. A couple transition pieces will be cut to fit and added for the final attachment to the horizontal part of the long. 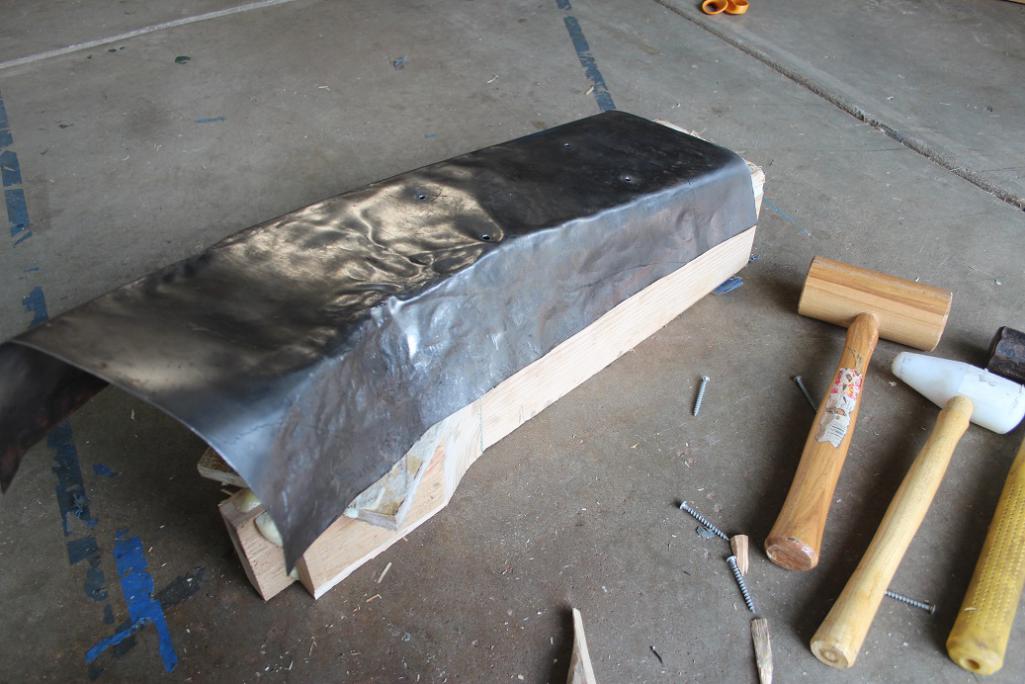 |
| mbseto |
 Mar 24 2019, 09:27 PM Mar 24 2019, 09:27 PM
Post
#116
|
|
Senior Member    Group: Members Posts: 1,257 Joined: 6-August 14 From: Cincy Member No.: 17,743 Region Association: North East States |
Made a buck to form the inner corrugated layer. This is going to be a weld-up of three pieces. Trying to strategize here so that the welds on the inner layer go one direction and the welds on the outer layer go the other direction. I.e. they are never parallel.
 So here's the inner piece. If you want inner piece, you have to make it yourself. Wisdom for our time. 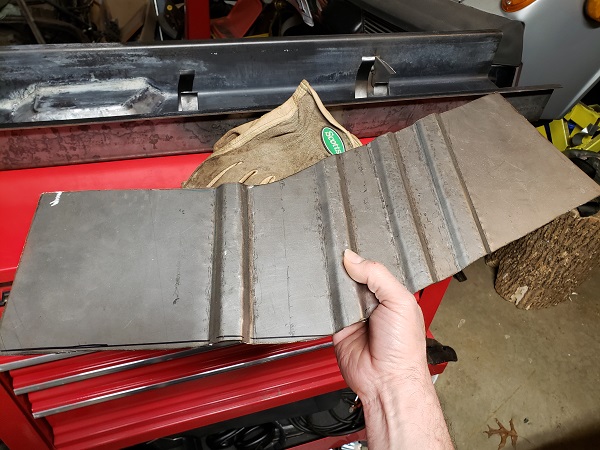 We'll come back to this, I'll be making the sides of it to fit - after the outer layer is all welded up. |
| mbseto |
 Mar 24 2019, 09:49 PM Mar 24 2019, 09:49 PM
Post
#117
|
|
Senior Member    Group: Members Posts: 1,257 Joined: 6-August 14 From: Cincy Member No.: 17,743 Region Association: North East States |
You might remember from way back, I had a couple long blanks made up from 12 gauge, so they would have the combined thickness of the stock piece plus the stiffening kit in a single layer. So one additional task for the driver's side is to create the e-brake pocket.
Marking the position next to the original: 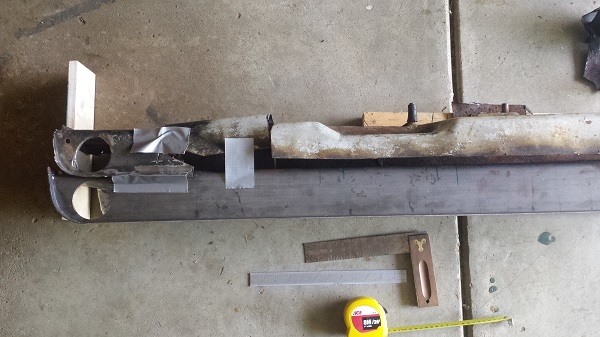 Marked out the shape of the pocket and started cutting... 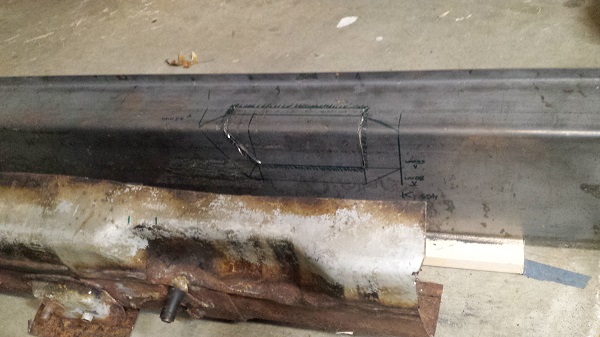 Trimmed the cut piece down and then tacked it back on. Just trying to be efficient here. Layed masking tape over the gap to make a pattern. 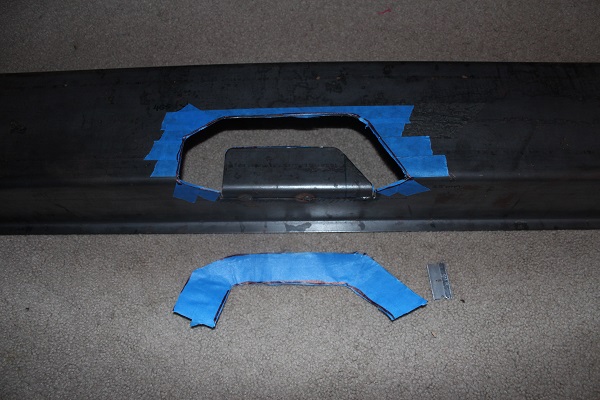 Made the patch piece from the pattern and bent it. Little fine tuning with the grinding wheel to match it up and bevel the edges to weld. 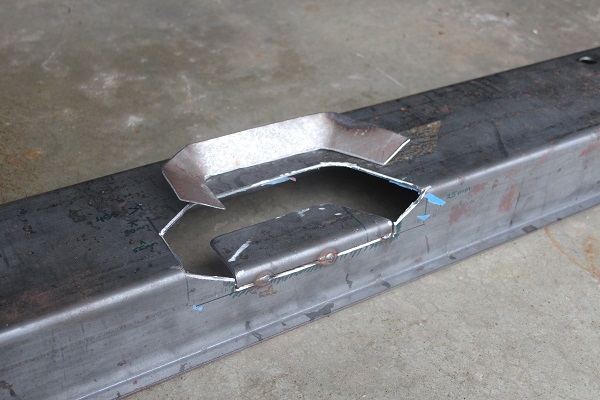 Final pocket, dressed up a little. 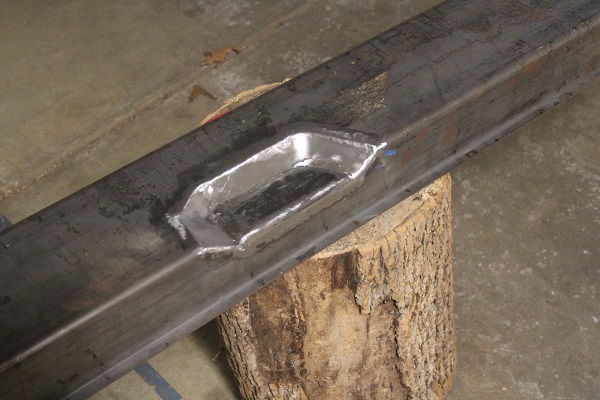 |
| mbseto |
 Mar 24 2019, 09:56 PM Mar 24 2019, 09:56 PM
Post
#118
|
|
Senior Member    Group: Members Posts: 1,257 Joined: 6-August 14 From: Cincy Member No.: 17,743 Region Association: North East States |
So here's the driver's side long, all kitted up. I made all of it except the obvious Restoration Design piece and the tubes. You can see my final version of the inner long on the right - after rejecting my hammer-form attempt.
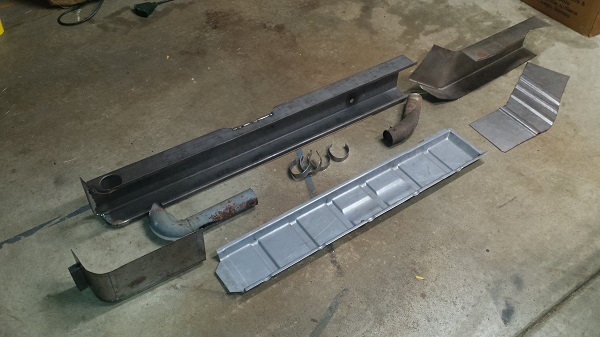 That should do for some Monday morning reading. Still have a couple posts before it's all caught up. I'll try to get to it in the next day or two. |
| bbrock |
 Mar 24 2019, 10:03 PM Mar 24 2019, 10:03 PM
Post
#119
|
|
914 Guru      Group: Members Posts: 5,269 Joined: 17-February 17 From: Montana Member No.: 20,845 Region Association: Rocky Mountains 
|
I thought I would impress everyone with a gif of me forming this part. The gif turned out good, but the part is no bueno. (IMG:style_emoticons/default/sad.gif) Thanks for the update! I went through a similar exercise on that elbow piece and wound up doing the same. I think you made a better run at it though with that buck. (IMG:style_emoticons/default/beer3.gif) QUOTE So here's the inner piece. If you want inner piece, you have to make it yourself. Wisdom for our time.  We'll come back to this, I'll be making the sides of it to fit - after the outer layer is all welded up. That sir, is impressive! (IMG:style_emoticons/default/beerchug.gif) |
| tygaboy |
 Mar 25 2019, 07:56 AM Mar 25 2019, 07:56 AM
Post
#120
|
|
914 Guru      Group: Members Posts: 5,731 Joined: 6-October 15 From: Petaluma, CA Member No.: 19,241 Region Association: Northern California 
|
It's Hammer time! Way to go on making your own parts. Damn impressive.
You look like you're really enjoying yourself with all the fab work. It's very motivational so please keep the pics coming! |
  |
1 User(s) are reading this topic (1 Guests and 0 Anonymous Users)
0 Members:

|
Lo-Fi Version | Time is now: 23rd December 2025 - 05:33 PM |
Invision Power Board
v9.1.4 © 2025 IPS, Inc.


