|
|
|
Porsche, and the Porsche crest are registered trademarks of Dr. Ing. h.c. F. Porsche AG.
This site is not affiliated with Porsche in any way. Its only purpose is to provide an online forum for car enthusiasts. All other trademarks are property of their respective owners. |
|
|


| mbseto |
 Aug 16 2015, 07:32 PM Aug 16 2015, 07:32 PM
Post
#21
|
|
Senior Member  Group: Members Posts: 1,257 Joined: 6-August 14 From: Cincy Member No.: 17,743 Region Association: North East States |
Funny, I am as nervous starting this thread as I was to start cutting into my car.
I resolved to start a rustoration thread when I made my first cuts, so here it is. I'm hoping the community will pipe in periodically with any, "Don't do that!", "Do it this other way!", "Do this first!", or "Don't forget this!" comments that are appropriate. Any and all guidance will be appreciated. So here's the car as I got it, not quite a year ago: 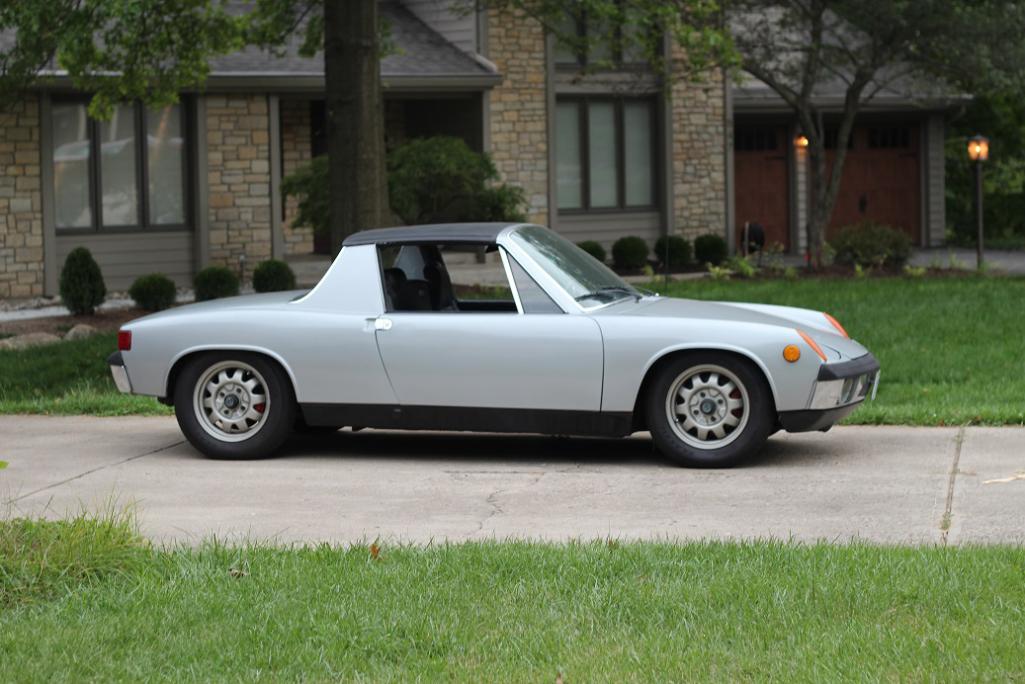 Started out doing a little engine work to get it running, then drove it around a little bit before starting to take it apart. Took the engine out, put it up on a dolly, took out much of the interior and suspension, and this is how it sits now: 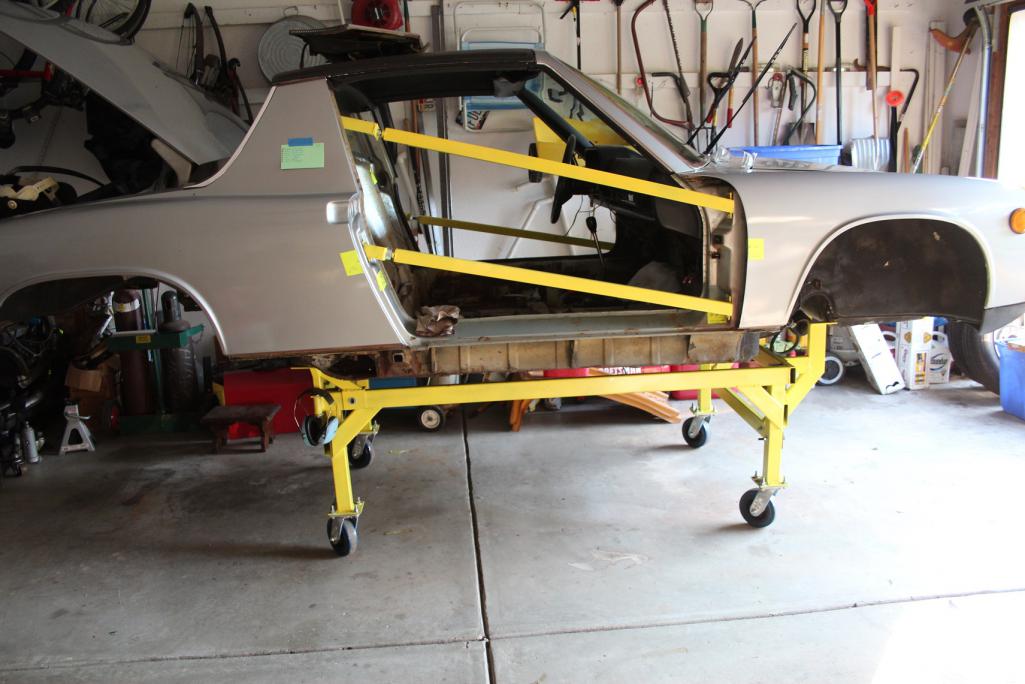 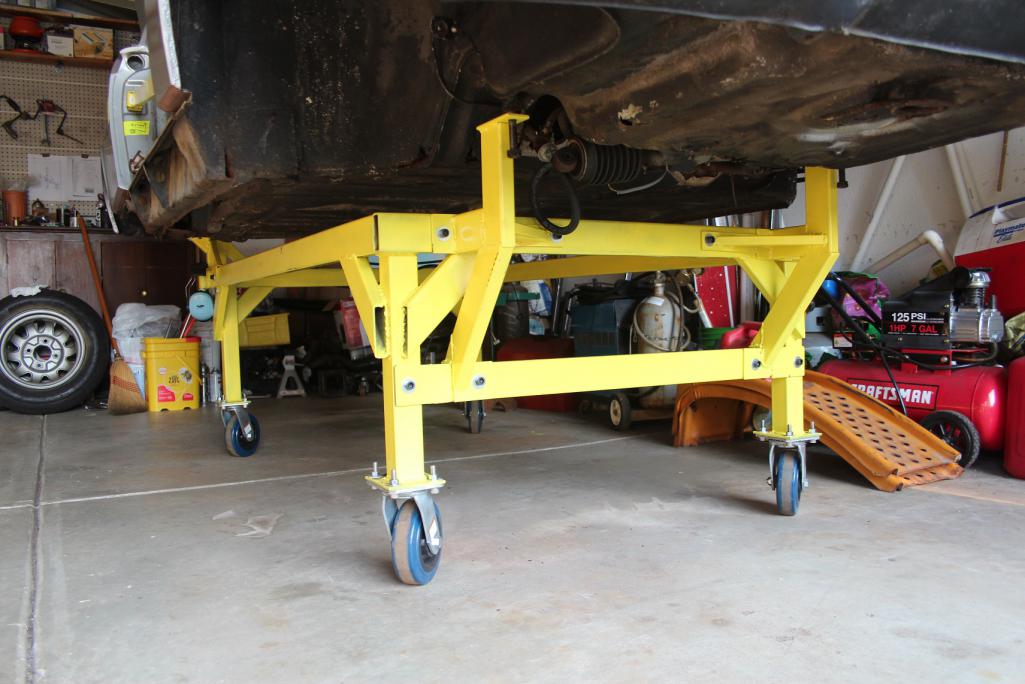 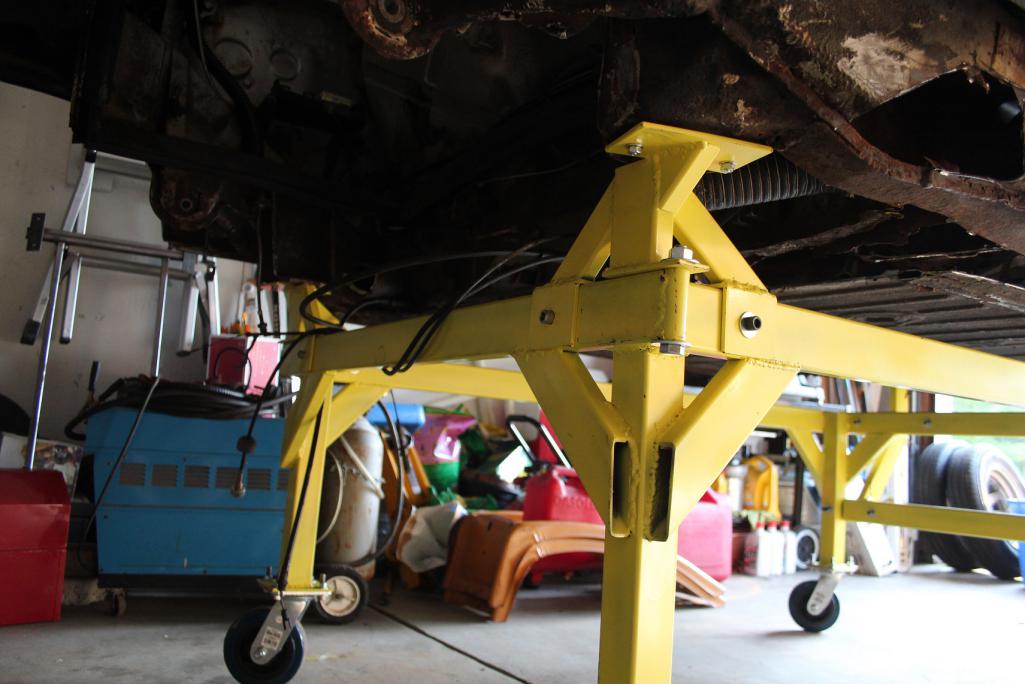 After cleaning out the inside and seeing the rust, it was hard to believe we were driving it at all. These are the first cuts, just straightening out the edges of the rust holes really. 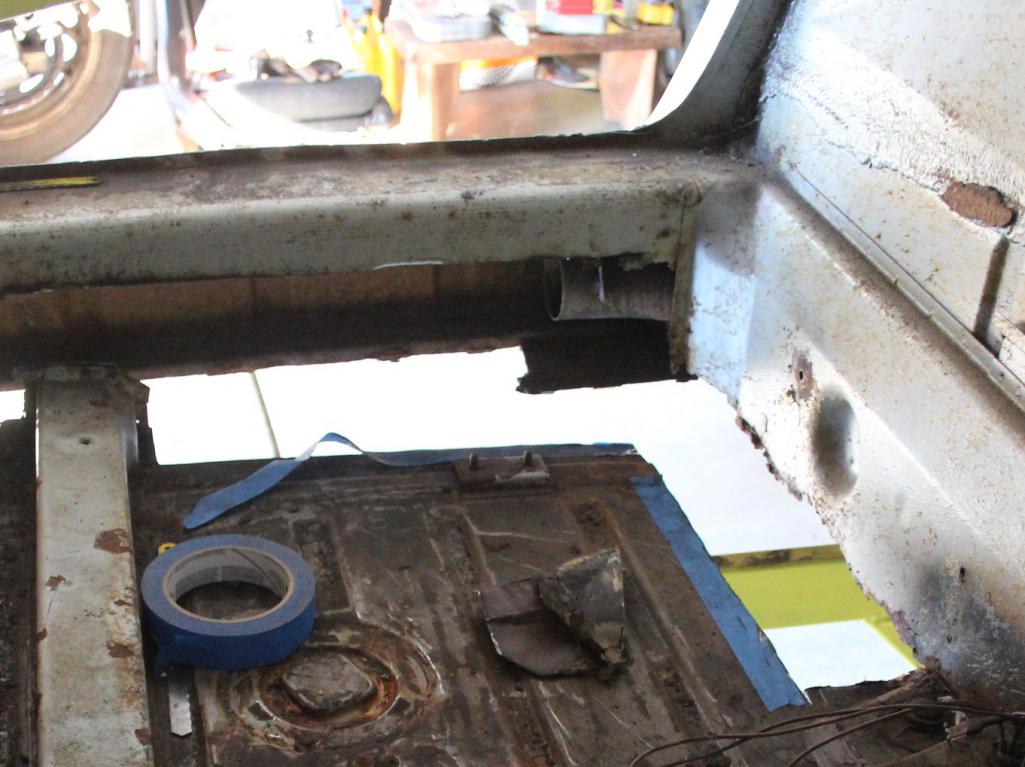 More pics coming soon, I'll be documenting the extent of the damage and forming a battle plan. |
   |

 
|
Posts in this topic
mbseto BUILD-OFF CHALLENGE: Eisberg rustoration Aug 16 2015, 07:32 PM TargaToy Love your dolly setup. Keep the progress reports ... Aug 16 2015, 07:35 PM
 Zimms
Love your dolly setup.
:agree: Nice work Aug 17 2015, 02:46 AM rick 918-S Good bracing. If you end up needing to weld higher... Aug 16 2015, 08:44 PM mgp4591 Thanks for posting your pics- now I don't feel... Aug 16 2015, 09:01 PM thieuster Nice! Don't be tempted to start working on... Aug 17 2015, 04:27 AM rgalla9146
Nice! Don't be tempted to start working o... Aug 17 2015, 08:32 AM Claus Graf Nice dolly. Good Luck with the 914!
I would s... Aug 17 2015, 09:03 AM blackmoon nice work, good luck with the restoration, it... Aug 17 2015, 09:17 AM jmitro love that color.
good luck with your rustoration;... Aug 17 2015, 09:50 AM sfrenck Shouldn't the door braces form an "X... Aug 17 2015, 09:58 AM rdauenhauer How's your center tunnel- is it rusted up the ... Aug 17 2015, 10:24 AM mbseto Thanks all for the kind words.
...I would sugges... Aug 17 2015, 06:28 PM mbseto
BTW, I love the wheels on your car. What are the... Aug 17 2015, 06:34 PM mbseto
Shouldn't the door braces form an "X... Aug 17 2015, 06:44 PM DirtyCossack I'll be learning in the near future whether yo... Aug 17 2015, 08:29 PM mbseto Guess I better update you guys... Some PO welded ... Oct 3 2015, 07:49 PM mbseto I'm planning on buying a bunch of sheet metal ... Oct 3 2015, 07:57 PM turk22
I'm planning on buying a bunch of sheet metal... Oct 4 2015, 10:29 AM DirtyCossack So far in my rustoration I'm not finding a nee... Oct 3 2015, 07:57 PM mbseto I'm going to try to weld everything from the i... Oct 3 2015, 08:09 PM 914forme Matthew, I really like the dolly. I will be liber... Oct 3 2015, 08:13 PM Vysoc Nice Dolly, I will bet that Brake can bend 16g but... Oct 4 2015, 10:09 AM Andyrew Killer dolly setup!! Oct 4 2015, 11:40 AM mbseto
Matthew, I really like the dolly. I will be libe... Oct 5 2015, 08:04 AM mbseto
Breakfast of champions:
I really like your Blo... Oct 5 2015, 08:08 AM jmitro ha; timely update. I was just ruminating over how ... Oct 5 2015, 08:44 AM mbseto
ha; timely update. I was just ruminating over how... Oct 6 2015, 09:51 PM Andyrew That is awesome... Its so simple! Oct 6 2015, 09:58 PM mbseto Hammer forming patch for the back part of the forw... Oct 9 2015, 08:46 PM mbseto You can probably guess where this little monkey is... Dec 21 2015, 06:40 PM tygaboy Back at you on the fab skills! And I'll ad... Jan 18 2016, 03:01 PM injunmort awesome work, that tunnel shot looks like a surgic... Jan 18 2016, 03:50 PM mbseto Time to catch you guys up... Spending some cold J... Jan 20 2016, 10:11 PM mbseto Some strategy: Was puzzling over the best way to ... Jan 20 2016, 10:17 PM ssuperflyoldguy Just a suggestion, when I do sheetmetal fab on rus... Jan 23 2016, 01:10 PM mbseto
Just a suggestion, when I do sheetmetal fab on ru... Jan 31 2016, 10:45 PM mbseto Man, the voting is quite a job. Fun to see where ... Jan 31 2016, 10:47 PM rick 918-S Lots of hand fab work. nice. Jan 31 2016, 10:53 PM mbseto Slow month. But started working on the tank. Dum... Feb 29 2016, 09:46 PM mbseto Results of electrolysis on the tank. I would turn... Mar 6 2016, 09:42 PM mbseto Front passenger corner is pretty much rebuilt and ... Jul 6 2016, 09:42 PM mbseto Now you see it, now you don't...
Final corn... Jul 6 2016, 09:47 PM mbseto Anatomy Autopsy of a long...
Here's the whole... Jul 6 2016, 10:11 PM 914forme Cool, I love dissections. Jul 7 2016, 11:44 AM mbseto Had a shop bend channel sections in 12g. Did the ... Jul 18 2016, 07:10 PM Andyrew 12ga? Holy crap... Jul 18 2016, 08:45 PM mbseto
12ga? Holy crap...
That's the standard gaug... Jul 19 2016, 09:37 AM DirtyCossack That's awesome right there. Jul 19 2016, 09:40 AM buck toenges How are you going to refinish your fuel tank on th... Jul 19 2016, 09:53 AM mbseto Thinking of getting the POR15 kit. I'm planni... Jul 19 2016, 10:00 AM jd74914
Thinking of getting the POR15 kit. I'm plann... Jul 19 2016, 02:28 PM DirtyCossack When I move back to CVG next year we're going ... Jul 19 2016, 04:10 PM 914forme
When I move back to CVG next year we're going... Jul 19 2016, 05:43 PM trojanhorsepower Wow! A complete longectomy.
The replacement ... Jul 19 2016, 06:05 PM mbseto
Would you mind sharing the cost of getting those ... Jul 19 2016, 09:10 PM mbseto
When I move back to CVG next year we're going... Jul 19 2016, 09:13 PM jmitro That's really nice work you're doing. onc... Jul 20 2016, 08:26 AM mbseto More dissection... Cut the suspension pylon and m... Jul 25 2016, 08:33 PM mbseto With that long completely cut out, it is pretty fl... Aug 21 2016, 10:11 AM mbseto Now the car is mounted on 4 points again and I can... Aug 21 2016, 10:23 AM jmitro Very nice work. i'm impressed with your foreth... Aug 29 2016, 11:10 AM mbseto Continuing work on fabricating the inner long. Ne... Aug 29 2016, 09:21 PM mbseto Puzzled over how to match up the inner long to the... Aug 29 2016, 09:33 PM mbseto Test fitting the heater tube.
Going to need a li... Aug 29 2016, 09:40 PM 914forme :drooley: Loving the work, We all know how frustra... Aug 30 2016, 06:00 AM mbseto Thank you!
I definitely plan to sleeve that ... Aug 30 2016, 11:43 AM mbseto Acquired a mascot:
Aug 31 2016, 10:43 AM mbseto Getting behind on my updates. Got the long sleeve... Jan 2 2017, 05:00 PM 914forme Matthew, working it 12 ga. is a little :screwy: I... Jan 2 2017, 07:00 PM SixerJ How did I miss this great thread before now, subsc... Jan 4 2017, 02:03 AM amfab I am about a month behind you...
http://www.914wo... Jan 4 2017, 10:18 PM cary
I am about a month behind you...
http://www.914w... Jan 23 2017, 05:40 AM mbseto
Matthew, working it 12 ga. is a little :screwy: ... Jan 5 2017, 05:06 PM mbseto Building a motor mount.
Making a pattern...
C... Jan 5 2017, 05:14 PM mbseto All the bits... These are actually the bits from ... Jan 5 2017, 05:22 PM 914forme Nice work there :smash: Jan 5 2017, 05:40 PM JoeDees That...is...awesome!!!! Jan 5 2017, 06:10 PM amfab Man, that is great
Matthew you have similar spots ... Jan 5 2017, 10:12 PM mbseto
Are you learning as you go or have you worked in ... Jan 6 2017, 08:00 AM amfab Can you recommend a good Sheetmetal forum? Jan 6 2017, 06:47 PM tygaboy
Can you recommend a good Sheetmetal forum?
Som... Jan 6 2017, 09:23 PM 914forme
Can you recommend a good Sheetmetal forum?
Not ... Jan 7 2017, 08:17 AM Cairo94507 Wow! :trophy: :popcorn: Jan 6 2017, 08:19 AM mbseto metalmeet.com is about my speed, there's guys ... Jan 7 2017, 10:41 AM Cupomeat Wow, been a little lax on the 914world lately due ... Jan 7 2017, 11:23 AM Curbandgutter MBSETO Man you are awesome. Love your work. :t... Feb 13 2017, 01:43 PM mbseto Thanks for the encouragement, guys...
mbseto, lo... Jun 25 2017, 09:16 AM mbseto Need an update, Spring got away from me- work, etc... Jun 25 2017, 09:52 AM mbseto The new long is tacked in place. I keep measuring... Jun 25 2017, 10:03 AM amfab
The new long is tacked in place. I keep measurin... Jun 25 2017, 12:21 PM Garland I was not sure how this build was going to go in t... Jun 25 2017, 01:57 PM mbseto Thank you for the encouragement. Being a part of ... Oct 26 2017, 11:25 AM mbseto Another thread I was reading was talking about how... Oct 26 2017, 11:36 AM bbrock Man you do pretty work! :thumbsup: Oct 26 2017, 11:47 AM mbseto These pics should have gone in with the last post,... Feb 25 2018, 11:43 PM defianty Nice work you're doing there. Feb 26 2018, 02:42 AM mbseto
Nice work you're doing there.
Thank you, I ... Feb 26 2018, 10:46 PM mbseto Took out a little of the door frame to get those r... Feb 26 2018, 11:15 PM bbrock I'm really impressed with your work. Keep ... Feb 27 2018, 09:07 AM
Zimms
Love your dolly setup.
:agree: Nice work Aug 17 2015, 02:46 AM rick 918-S Good bracing. If you end up needing to weld higher... Aug 16 2015, 08:44 PM mgp4591 Thanks for posting your pics- now I don't feel... Aug 16 2015, 09:01 PM thieuster Nice! Don't be tempted to start working on... Aug 17 2015, 04:27 AM rgalla9146
Nice! Don't be tempted to start working o... Aug 17 2015, 08:32 AM Claus Graf Nice dolly. Good Luck with the 914!
I would s... Aug 17 2015, 09:03 AM blackmoon nice work, good luck with the restoration, it... Aug 17 2015, 09:17 AM jmitro love that color.
good luck with your rustoration;... Aug 17 2015, 09:50 AM sfrenck Shouldn't the door braces form an "X... Aug 17 2015, 09:58 AM rdauenhauer How's your center tunnel- is it rusted up the ... Aug 17 2015, 10:24 AM mbseto Thanks all for the kind words.
...I would sugges... Aug 17 2015, 06:28 PM mbseto
BTW, I love the wheels on your car. What are the... Aug 17 2015, 06:34 PM mbseto
Shouldn't the door braces form an "X... Aug 17 2015, 06:44 PM DirtyCossack I'll be learning in the near future whether yo... Aug 17 2015, 08:29 PM mbseto Guess I better update you guys... Some PO welded ... Oct 3 2015, 07:49 PM mbseto I'm planning on buying a bunch of sheet metal ... Oct 3 2015, 07:57 PM turk22
I'm planning on buying a bunch of sheet metal... Oct 4 2015, 10:29 AM DirtyCossack So far in my rustoration I'm not finding a nee... Oct 3 2015, 07:57 PM mbseto I'm going to try to weld everything from the i... Oct 3 2015, 08:09 PM 914forme Matthew, I really like the dolly. I will be liber... Oct 3 2015, 08:13 PM Vysoc Nice Dolly, I will bet that Brake can bend 16g but... Oct 4 2015, 10:09 AM Andyrew Killer dolly setup!! Oct 4 2015, 11:40 AM mbseto
Matthew, I really like the dolly. I will be libe... Oct 5 2015, 08:04 AM mbseto
Breakfast of champions:
I really like your Blo... Oct 5 2015, 08:08 AM jmitro ha; timely update. I was just ruminating over how ... Oct 5 2015, 08:44 AM mbseto
ha; timely update. I was just ruminating over how... Oct 6 2015, 09:51 PM Andyrew That is awesome... Its so simple! Oct 6 2015, 09:58 PM mbseto Hammer forming patch for the back part of the forw... Oct 9 2015, 08:46 PM mbseto You can probably guess where this little monkey is... Dec 21 2015, 06:40 PM tygaboy Back at you on the fab skills! And I'll ad... Jan 18 2016, 03:01 PM injunmort awesome work, that tunnel shot looks like a surgic... Jan 18 2016, 03:50 PM mbseto Time to catch you guys up... Spending some cold J... Jan 20 2016, 10:11 PM mbseto Some strategy: Was puzzling over the best way to ... Jan 20 2016, 10:17 PM ssuperflyoldguy Just a suggestion, when I do sheetmetal fab on rus... Jan 23 2016, 01:10 PM mbseto
Just a suggestion, when I do sheetmetal fab on ru... Jan 31 2016, 10:45 PM mbseto Man, the voting is quite a job. Fun to see where ... Jan 31 2016, 10:47 PM rick 918-S Lots of hand fab work. nice. Jan 31 2016, 10:53 PM mbseto Slow month. But started working on the tank. Dum... Feb 29 2016, 09:46 PM mbseto Results of electrolysis on the tank. I would turn... Mar 6 2016, 09:42 PM mbseto Front passenger corner is pretty much rebuilt and ... Jul 6 2016, 09:42 PM mbseto Now you see it, now you don't...
Final corn... Jul 6 2016, 09:47 PM mbseto Anatomy Autopsy of a long...
Here's the whole... Jul 6 2016, 10:11 PM 914forme Cool, I love dissections. Jul 7 2016, 11:44 AM mbseto Had a shop bend channel sections in 12g. Did the ... Jul 18 2016, 07:10 PM Andyrew 12ga? Holy crap... Jul 18 2016, 08:45 PM mbseto
12ga? Holy crap...
That's the standard gaug... Jul 19 2016, 09:37 AM DirtyCossack That's awesome right there. Jul 19 2016, 09:40 AM buck toenges How are you going to refinish your fuel tank on th... Jul 19 2016, 09:53 AM mbseto Thinking of getting the POR15 kit. I'm planni... Jul 19 2016, 10:00 AM jd74914
Thinking of getting the POR15 kit. I'm plann... Jul 19 2016, 02:28 PM DirtyCossack When I move back to CVG next year we're going ... Jul 19 2016, 04:10 PM 914forme
When I move back to CVG next year we're going... Jul 19 2016, 05:43 PM trojanhorsepower Wow! A complete longectomy.
The replacement ... Jul 19 2016, 06:05 PM mbseto
Would you mind sharing the cost of getting those ... Jul 19 2016, 09:10 PM mbseto
When I move back to CVG next year we're going... Jul 19 2016, 09:13 PM jmitro That's really nice work you're doing. onc... Jul 20 2016, 08:26 AM mbseto More dissection... Cut the suspension pylon and m... Jul 25 2016, 08:33 PM mbseto With that long completely cut out, it is pretty fl... Aug 21 2016, 10:11 AM mbseto Now the car is mounted on 4 points again and I can... Aug 21 2016, 10:23 AM jmitro Very nice work. i'm impressed with your foreth... Aug 29 2016, 11:10 AM mbseto Continuing work on fabricating the inner long. Ne... Aug 29 2016, 09:21 PM mbseto Puzzled over how to match up the inner long to the... Aug 29 2016, 09:33 PM mbseto Test fitting the heater tube.
Going to need a li... Aug 29 2016, 09:40 PM 914forme :drooley: Loving the work, We all know how frustra... Aug 30 2016, 06:00 AM mbseto Thank you!
I definitely plan to sleeve that ... Aug 30 2016, 11:43 AM mbseto Acquired a mascot:
Aug 31 2016, 10:43 AM mbseto Getting behind on my updates. Got the long sleeve... Jan 2 2017, 05:00 PM 914forme Matthew, working it 12 ga. is a little :screwy: I... Jan 2 2017, 07:00 PM SixerJ How did I miss this great thread before now, subsc... Jan 4 2017, 02:03 AM amfab I am about a month behind you...
http://www.914wo... Jan 4 2017, 10:18 PM cary
I am about a month behind you...
http://www.914w... Jan 23 2017, 05:40 AM mbseto
Matthew, working it 12 ga. is a little :screwy: ... Jan 5 2017, 05:06 PM mbseto Building a motor mount.
Making a pattern...
C... Jan 5 2017, 05:14 PM mbseto All the bits... These are actually the bits from ... Jan 5 2017, 05:22 PM 914forme Nice work there :smash: Jan 5 2017, 05:40 PM JoeDees That...is...awesome!!!! Jan 5 2017, 06:10 PM amfab Man, that is great
Matthew you have similar spots ... Jan 5 2017, 10:12 PM mbseto
Are you learning as you go or have you worked in ... Jan 6 2017, 08:00 AM amfab Can you recommend a good Sheetmetal forum? Jan 6 2017, 06:47 PM tygaboy
Can you recommend a good Sheetmetal forum?
Som... Jan 6 2017, 09:23 PM 914forme
Can you recommend a good Sheetmetal forum?
Not ... Jan 7 2017, 08:17 AM Cairo94507 Wow! :trophy: :popcorn: Jan 6 2017, 08:19 AM mbseto metalmeet.com is about my speed, there's guys ... Jan 7 2017, 10:41 AM Cupomeat Wow, been a little lax on the 914world lately due ... Jan 7 2017, 11:23 AM Curbandgutter MBSETO Man you are awesome. Love your work. :t... Feb 13 2017, 01:43 PM mbseto Thanks for the encouragement, guys...
mbseto, lo... Jun 25 2017, 09:16 AM mbseto Need an update, Spring got away from me- work, etc... Jun 25 2017, 09:52 AM mbseto The new long is tacked in place. I keep measuring... Jun 25 2017, 10:03 AM amfab
The new long is tacked in place. I keep measurin... Jun 25 2017, 12:21 PM Garland I was not sure how this build was going to go in t... Jun 25 2017, 01:57 PM mbseto Thank you for the encouragement. Being a part of ... Oct 26 2017, 11:25 AM mbseto Another thread I was reading was talking about how... Oct 26 2017, 11:36 AM bbrock Man you do pretty work! :thumbsup: Oct 26 2017, 11:47 AM mbseto These pics should have gone in with the last post,... Feb 25 2018, 11:43 PM defianty Nice work you're doing there. Feb 26 2018, 02:42 AM mbseto
Nice work you're doing there.
Thank you, I ... Feb 26 2018, 10:46 PM mbseto Took out a little of the door frame to get those r... Feb 26 2018, 11:15 PM bbrock I'm really impressed with your work. Keep ... Feb 27 2018, 09:07 AM  |
32 User(s) are reading this topic (32 Guests and 0 Anonymous Users)
0 Members:

|
Lo-Fi Version | Time is now: 23rd June 2026 - 01:12 PM |
Invision Power Board
v9.1.4 © 2026 IPS, Inc.