|
|
|
Porsche, and the Porsche crest are registered trademarks of Dr. Ing. h.c. F. Porsche AG.
This site is not affiliated with Porsche in any way. Its only purpose is to provide an online forum for car enthusiasts. All other trademarks are property of their respective owners. |
|
|

  |

| relentless |
 Aug 20 2015, 08:17 PM Aug 20 2015, 08:17 PM
Post
#1
|
|
Member  Group: Members Posts: 352 Joined: 1-April 07 From: Oregon Member No.: 7,636 |
I took out my '76 and while driving I could tell there was some additional drag when I depressed the clutch pedal. I pulled over and felt the wheels, and found the driver's side rear was much warmer than the other three. So, after filling with E-free gas, I drove home and put her up on blocks.
I took the rear wheels off first, and found the driver's side rotor and caliper were essentially seized - I couldn't turn the rotor at all. Since the car is almost 40 years old, and in terrific condition otherwise, I placed an order with PMB Performance for a complete brake replacement. I started by cleaning the wheel wells that had decades of dirt. Here is what the rear looked like: Attached thumbnail(s) 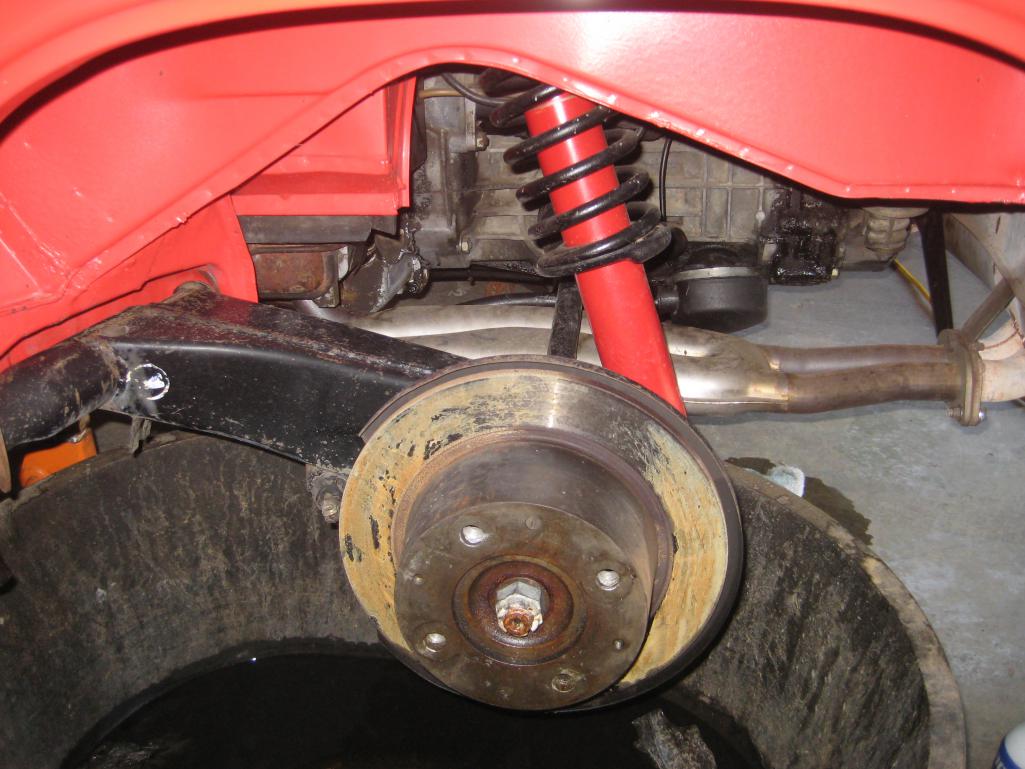 
|
   |

 
|
| mikedsilva |
Aug 20 2015, 08:26 PM
Post
#2
|
|
Member Group: Members Posts: 90 Joined: 23-February 15 From: Australia Member No.: 18,462 Region Association: Australia and New Zealand |
that wheel arch is amazingly clean!
|
|
|
|
| relentless |
Aug 20 2015, 08:41 PM
Post
#3
|
|
Member Group: Members Posts: 352 Joined: 1-April 07 From: Oregon Member No.: 7,636 |
The other side.
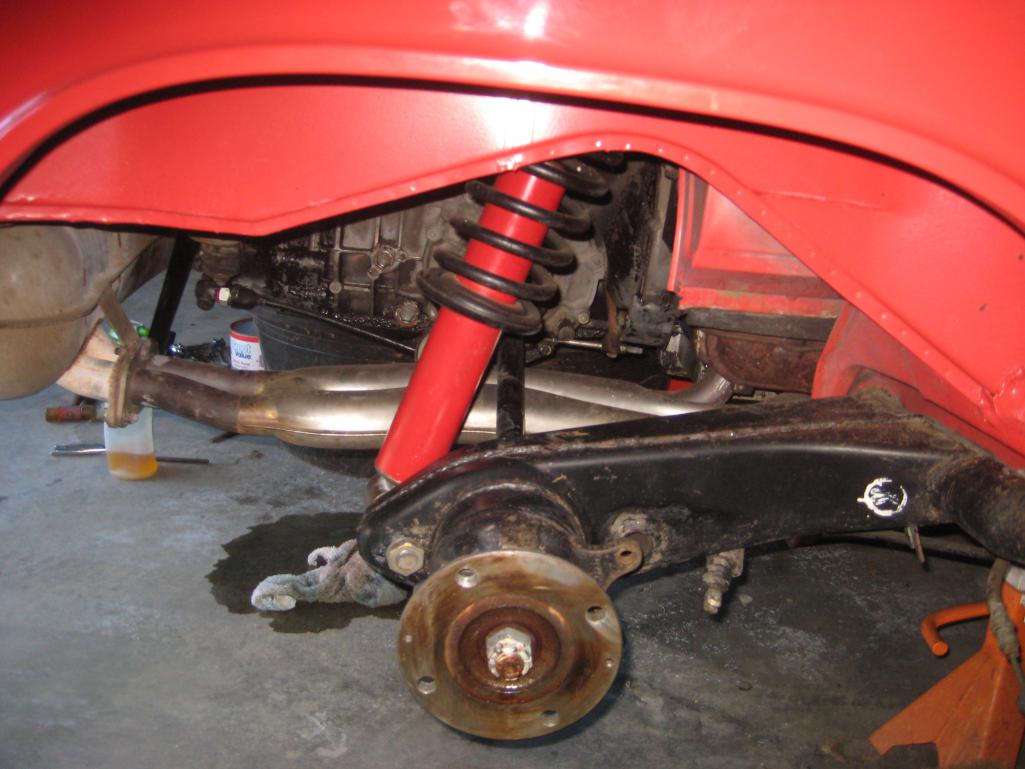 I used some of Eastwood's Chassis Black paint to touch up the trailing arms. I stripped the paint off the rotor guards using paint stripper followed by a 3M paint removing disc in my drill, and finally a brass wire wheel on the drill. 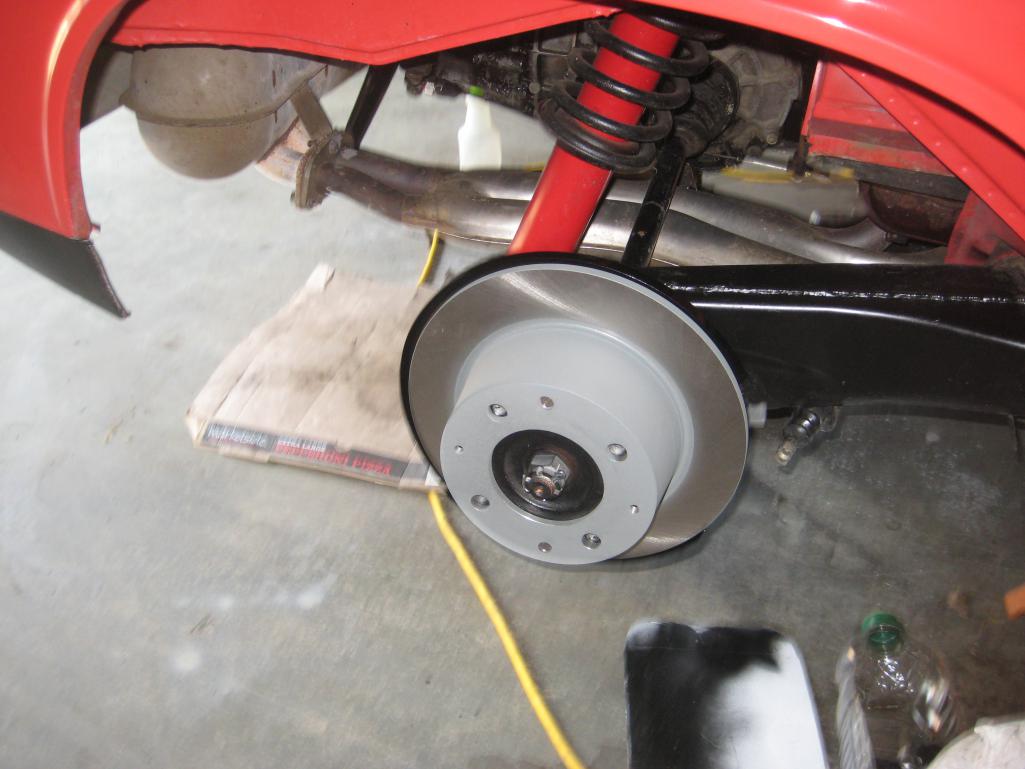 |
|
|
|
| relentless |
Aug 20 2015, 08:50 PM
Post
#4
|
|
Member Group: Members Posts: 352 Joined: 1-April 07 From: Oregon Member No.: 7,636 |
QUOTE(relentless @ Aug 20 2015, 07:41 PM)  The other side. I used some of Eastwood's Chassis Black paint to touch up the trailing arms. I stripped the paint off the rotor guards using paint stripper followed by a 3M paint removing disc in my drill, and finally a brass wire wheel on the drill. New rotors really set it off. Just wait until the new brake lines and Eric's calipers are added! 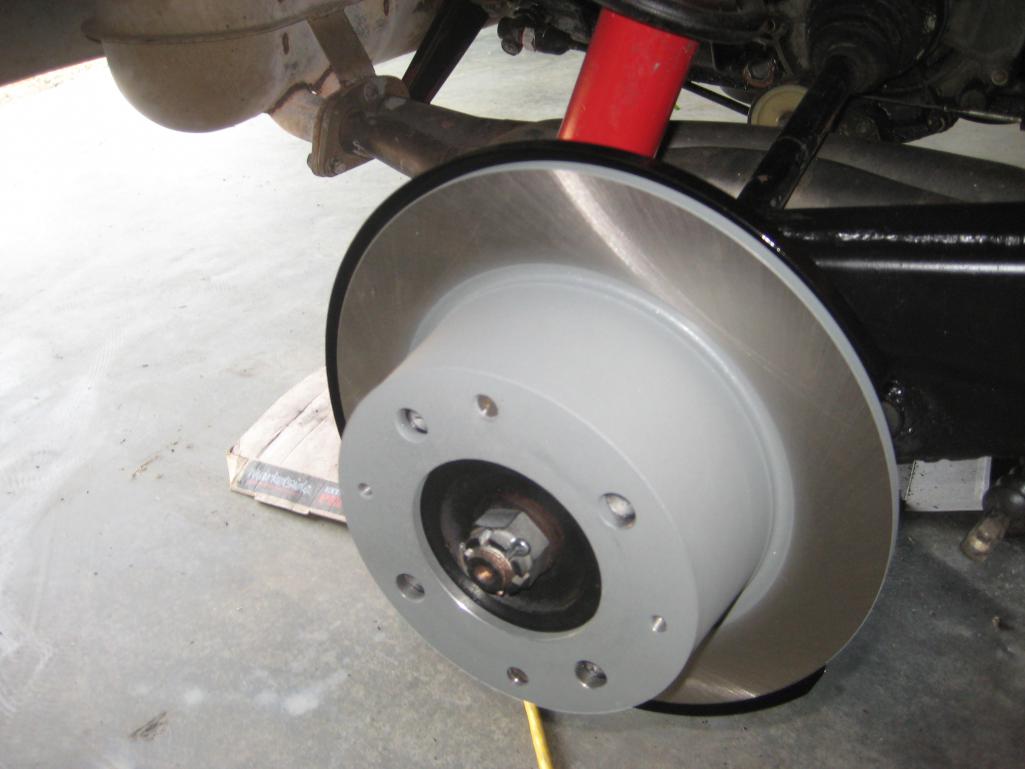 Attached thumbnail(s) 
|
|
|
|
| relentless |
Aug 20 2015, 08:55 PM
Post
#5
|
|
Member Group: Members Posts: 352 Joined: 1-April 07 From: Oregon Member No.: 7,636 |
Strange, I'm getting redundant pix and not in the order I want. I will continue this thread after I find out what is going on.
Very strange; I checked the name of the pictures on 914World and they don't match the names of the same pictures on my computer. I have rebooted the computer to see if that clears up the glitch. |
|
|
|
| relentless |
Aug 21 2015, 01:38 PM
Post
#6
|
|
Member Group: Members Posts: 352 Joined: 1-April 07 From: Oregon Member No.: 7,636 |
QUOTE(relentless @ Aug 20 2015, 07:55 PM) Strange, I'm getting redundant pix and not in the order I want. I will continue this thread after I find out what is going on. Very strange; I checked the name of the pictures on 914World and they don't match the names of the same pictures on my computer. I have rebooted the computer to see if that clears up the glitch. Let's try this again. Here is the disc brake guard with some paint remover helping take off the paint.  |
|
|
|
| relentless |
Aug 21 2015, 01:46 PM
Post
#7
|
|
Member Group: Members Posts: 352 Joined: 1-April 07 From: Oregon Member No.: 7,636 |
The disc guards were powdercoated mirror black.
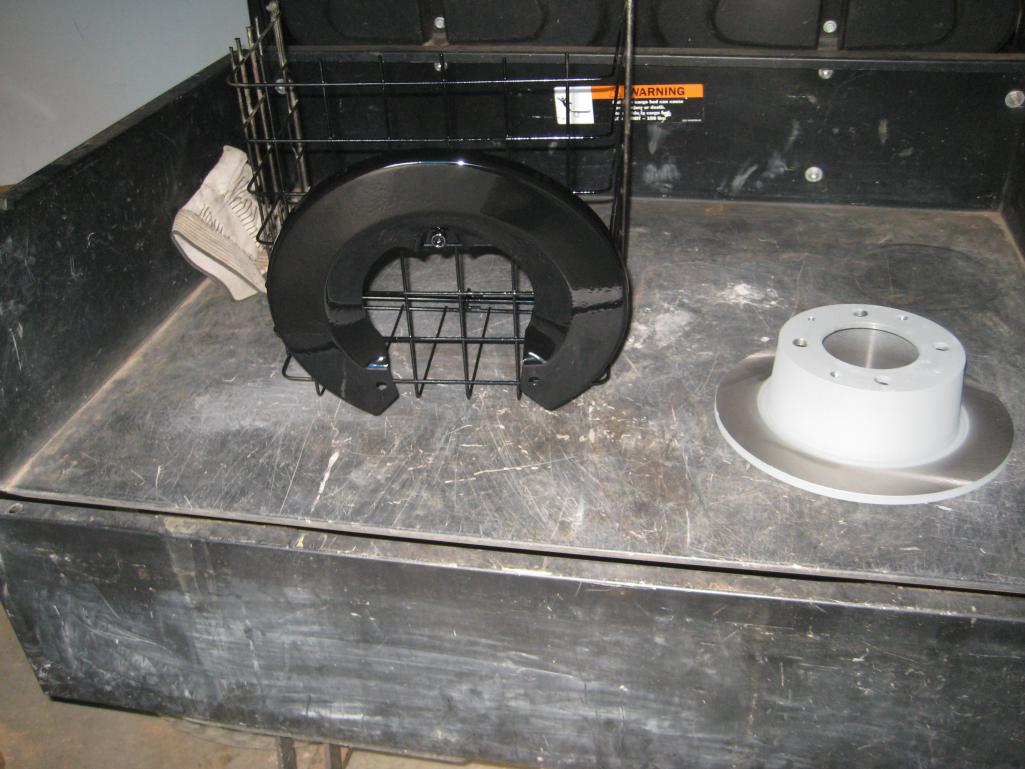 I even powdercoated the mounting bolts and washers, as they were getting pretty oxidized. 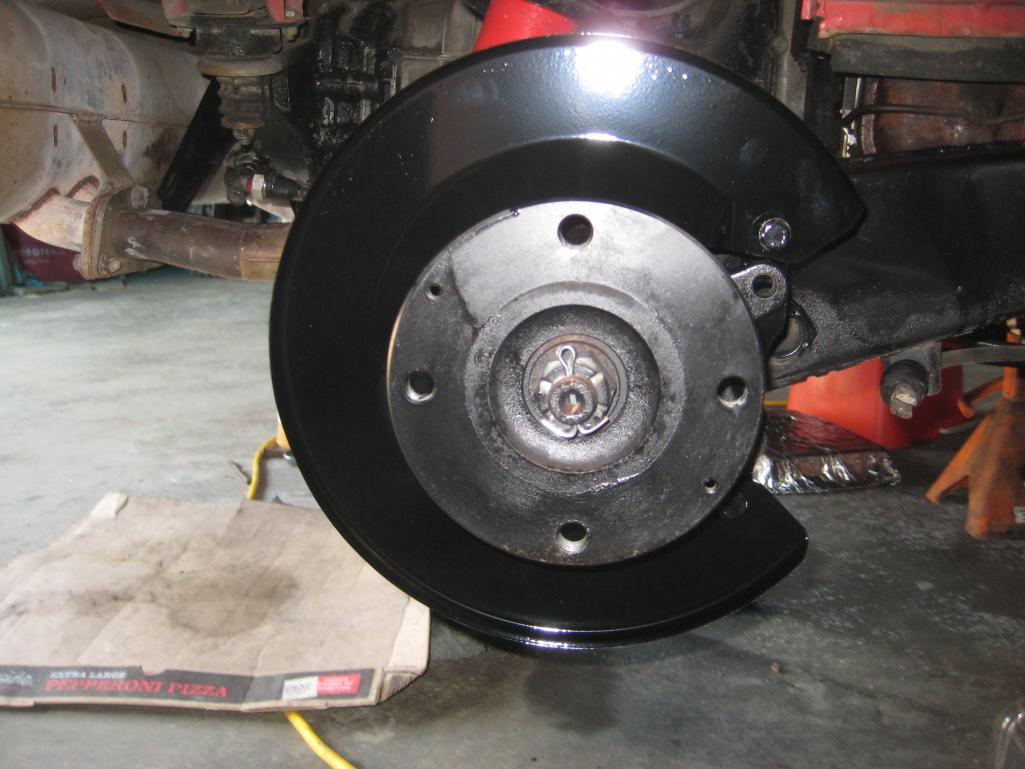 |
|
|
|
| relentless |
Aug 21 2015, 01:57 PM
Post
#8
|
|
Member Group: Members Posts: 352 Joined: 1-April 07 From: Oregon Member No.: 7,636 |
The same steps were used for the front of the car.
Before  After 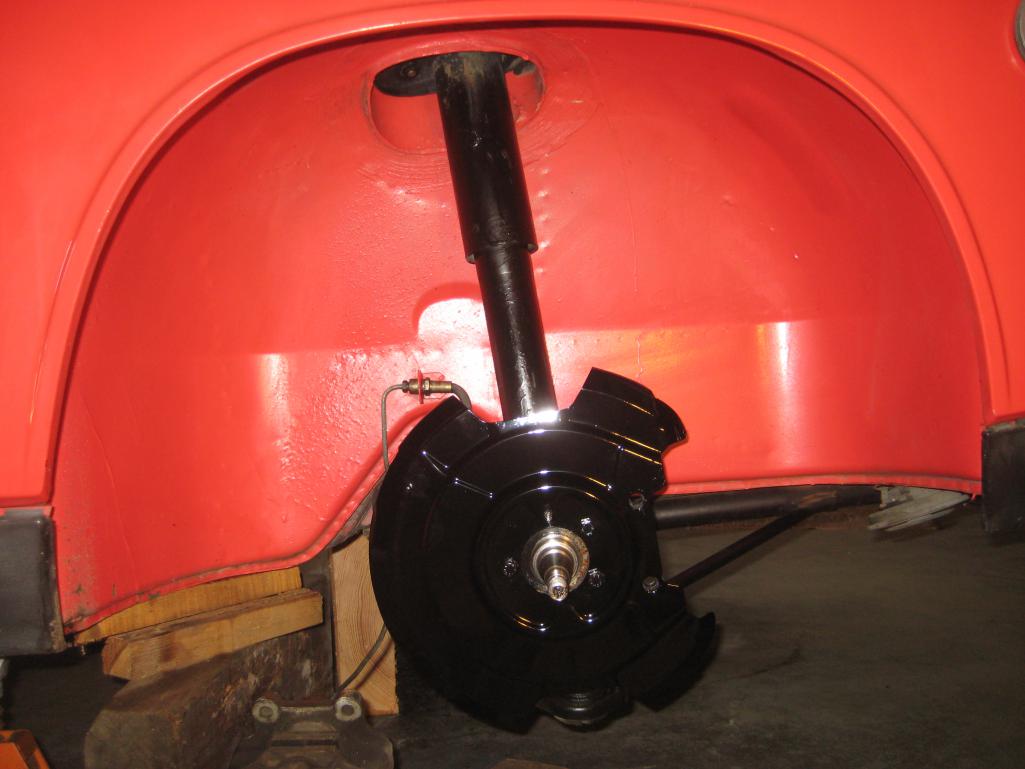 |
|
|
|
| Cairo94507 |
Aug 21 2015, 03:34 PM
Post
#9
|
|
Michael Group: Members Posts: 10,685 Joined: 1-November 08 From: Auburn, CA Member No.: 9,712 Region Association: Northern California |
Nice work. That is the way to keep these cars looking and performing as they should.
|
|
|
|
| relentless |
Aug 21 2015, 06:58 PM
Post
#10
|
|
Member Group: Members Posts: 352 Joined: 1-April 07 From: Oregon Member No.: 7,636 |
Thanks Cairo94507. Today I took delivery of the rear calipers and hard lines for the rear - Thanks Eric at PMB! I only need the new front hard lines to complete the brake rebuild.
Today I heated the front rotors up to about 300 degrees and had the front wheel bearing races in the freezer overnight. I found two sockets that were just under the OD of the races, and once the rotors were heated up I dropped the bearing races in and tapped them down and seated them. The heating of the rotors and freezing of the races will gain you several thousandths of clearance when installing them. I also measured with my vernier to ensure the races were seated and matched the rotors I removed. After packing the bearings with wheel bearing grease and installing the inner seal, the rotors were installed. The locking nut was adjusted to have zero clearance, but the rotor spun easily. I had some difficulty putting the bearing cap back on. I looked around and found a piece of pipe that fit the outer flange on the cap, and was able to pound it on. Here is a picture of how it turned out. 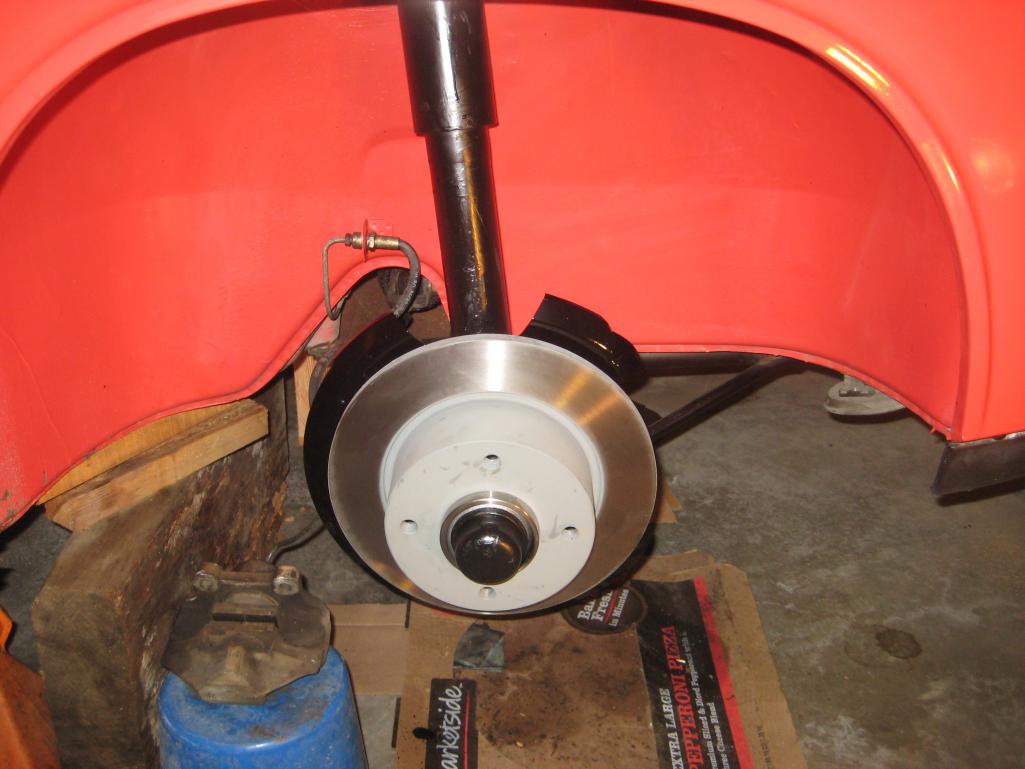 Here it is with the new re-manufactured caliper from PMB: 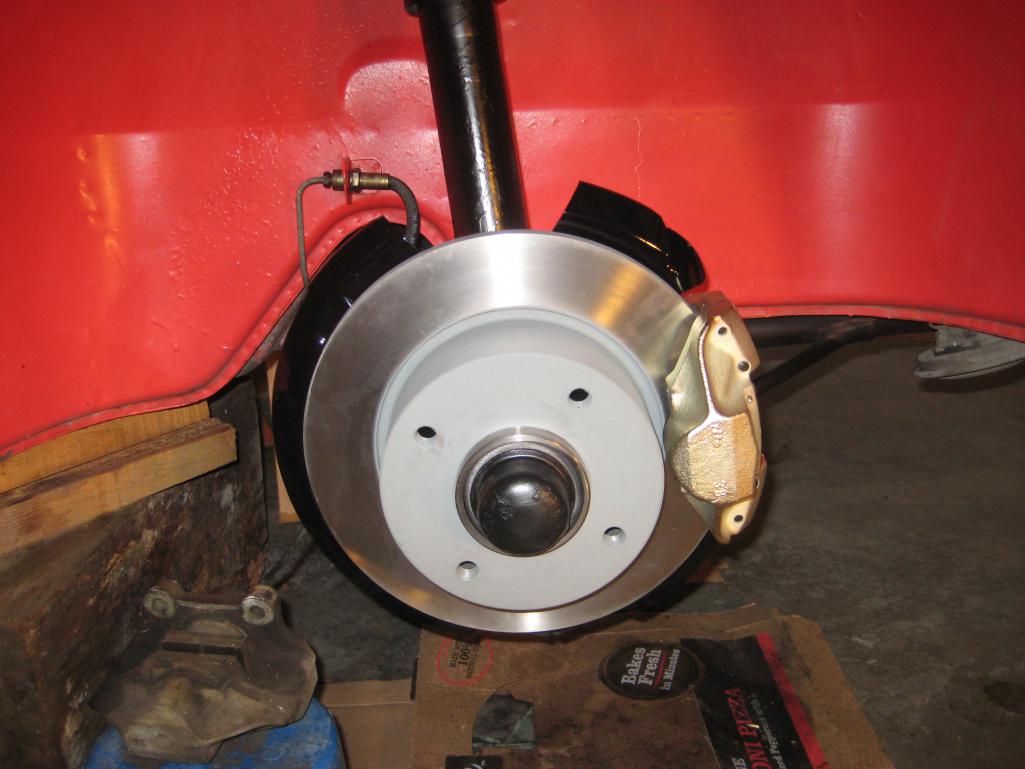 You can see the original caliper to the bottom left. Once the new hard line and rubber line are installed this corner will be ready for a bleed job and ready for another 40 years of cruising! |
|
|
|
| relentless |
Sep 22 2015, 01:32 PM
Post
#11
|
|
Member Group: Members Posts: 352 Joined: 1-April 07 From: Oregon Member No.: 7,636 |
Here is the Eastwood vacuum device I used to bleed the calipers. I have put a section of clear 3/16" ID clear vinyl tubing from the reservoir and attach it to the bleeder valve. After pumping the hand actuated lever six times or so I crack the bleeder valve open a quarter turn and keep pumping. I could see the air and old fluid being drawn out.
Attached thumbnail(s) 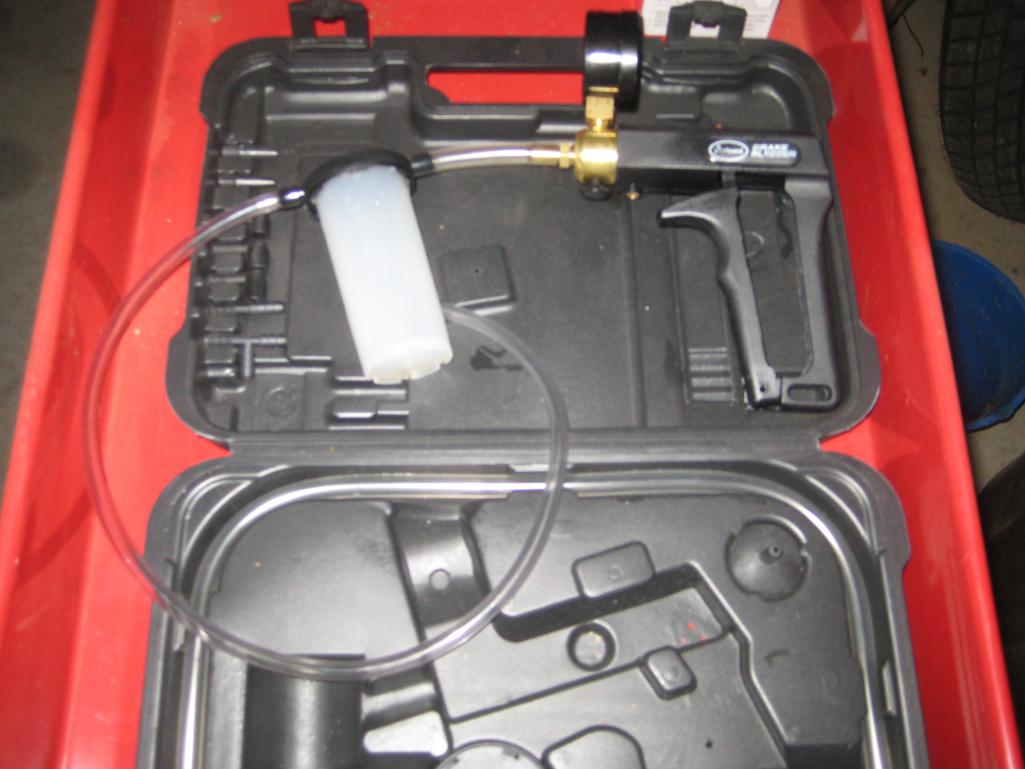
|
|
|
|
| relentless |
Sep 22 2015, 01:49 PM
Post
#12
|
|
Member Group: Members Posts: 352 Joined: 1-April 07 From: Oregon Member No.: 7,636 |
I kept drawing out old brake fluid and topping the car's brake fluid reservoir up with the DOT 4 fluid I purchased from PMB. I like the Eastwood brake bleeder's vacuum gauge as it ensured I had good vacuum while I did this operation.
Once I was satisfied that I had new clean fluid coming out I used the technique on the PMB tech page to ensure I had all the air out of the lines. I put a 7mm spanner on the bleed valve first. Then I taped another section of the clear 3/16" ID vinyl line to the car in several places and ran the line to the bleed valve. Be sure the line extends higher than the car's brake fluid reservoir! I cracked the valve open and watched while the fluid rose in the line until it reached the height of the car's fluid reservoir. I used a rubber mallet to tap on the new caliper to ensure any air trapped in the caliper would be released. I was happy to see there were no air bubbles rising in the vinyl line and once I had verified that I had the air out of the line I closed the bleed valve and after draining the fluid in the vinyl line moved on to the driver's side rear caliper. Same procedure for the front, starting on the passenger's side and finishing on the driver's side. A couple other notes: I taped over the caliper to ensure no brake fluid could drip onto the new pads. I also used a lot of paper towels stuffed below the bleed valve so any fluid that might weep from the threads of the bleed valve would be sopped up. Be careful that you don't get any brake fluid on your paint - brake fluid will eat paint! Attached thumbnail(s) 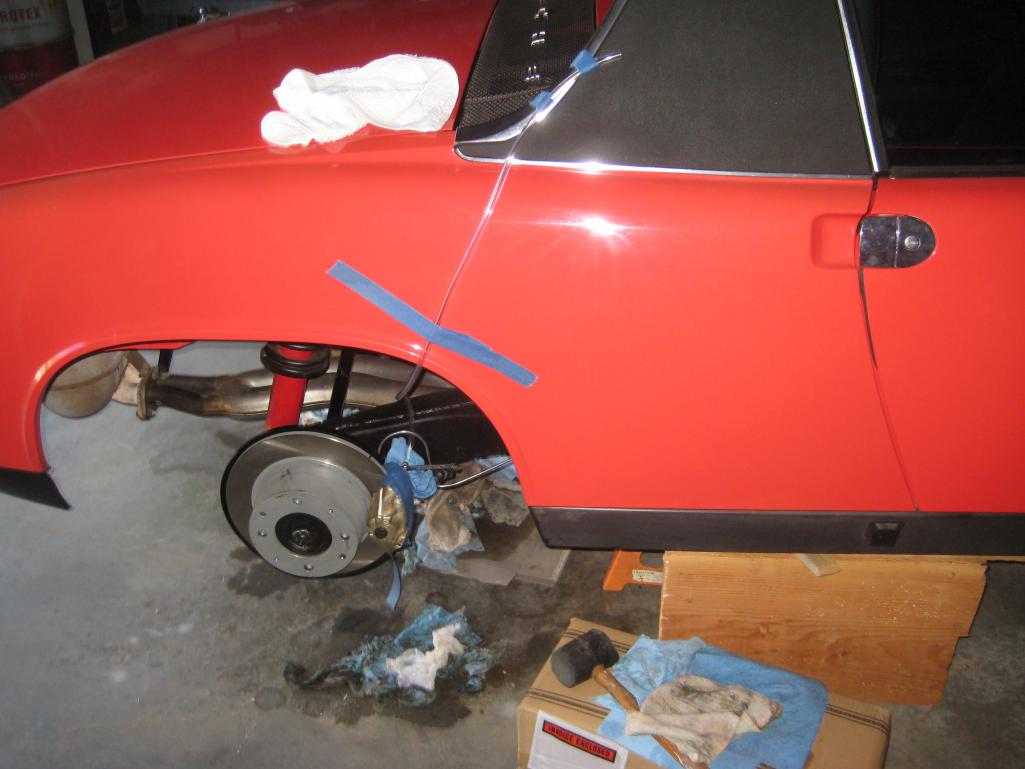
|
|
|
|
| draganc |
Sep 22 2015, 05:36 PM
Post
#13
|
|
Senior Member Group: Members Posts: 725 Joined: 2-November 09 From: central new jersey Member No.: 11,000 Region Association: North East States |
I don't care about the brake job, I want to know how you cleaned the wheel well - just kidding!
Thanks for posting this, since I'm in the process of doing the same right now. One question, you mentioned that you have adjusted the front wheel bearing to zero play. I thought it should be adjusted to zero and than backed out by a 1/4 turn to allow for some heat expansion of the metal. Not correcting but rather a curious questions. Thanks and keep up the good work. |
|
|
|
| JawjaPorsche |
Sep 22 2015, 06:09 PM
Post
#14
|
|
Advanced Member Group: Members Posts: 3,463 Joined: 23-July 11 From: Clayton, Georgia Member No.: 13,351 Region Association: South East States |
Thank you for posting. Always learn something from our members.
|
|
|
|
| Eric_Shea |
Sep 22 2015, 06:58 PM
Post
#15
|
|
PMB Performance Group: Admin Posts: 19,304 Joined: 3-September 03 From: Salt Lake City, UT Member No.: 1,110 Region Association: Rocky Mountains |
You really did a great job!
|
|
|
|
| relentless |
Sep 29 2015, 10:47 AM
Post
#16
|
|
Member Group: Members Posts: 352 Joined: 1-April 07 From: Oregon Member No.: 7,636 |
Here's what the workshop manual says about adjusting the front wheel bearings:
Watch out for correct adjustment of wheel bearing. a. Tighten clamping nut slightly (approx. 1.5 mkp = 11 ft. lbs) while turning the wheel or hub, so that the taper rollers can rest well against the bearing races. b. Loosen clamping nut until the nose washer can be just pushed along from the side with a screw driver and no noticeable bearing play is indicated during axial movements of the wheel hub. Caution! Do not support screw driver against hub but hold freely in hand. c. Tighten cheesehead screw of clamping nut to specified tightening torque. Check adjustment once again by moving nose washer and without turning clamping nut, and correct, if required. Caution! The slot width of the clamping nut should be 2.5 + 0.5 mm (.1 + .02”) so that perfect clamping is obtained even under unfavorable tolerance overlaps. |
|
|
|
| simonjb |
Jan 5 2017, 11:31 AM
Post
#17
|
|
KiwiMan Group: Members Posts: 574 Joined: 18-October 16 From: Stamford, Connecticut Member No.: 20,505 Region Association: North East States |
Looks great!
What brand/color/type of paint did you use to paint the Rotors/Disc's? |
|
|
|
| stugray |
Jan 6 2017, 01:27 PM
Post
#18
|
|
Advanced Member Group: Members Posts: 3,825 Joined: 17-September 09 From: Longmont, CO Member No.: 10,819 Region Association: None |
QUOTE(relentless @ Sep 29 2015, 09:47 AM) Here's what the workshop manual says about adjusting the front wheel bearings: Watch out for correct adjustment of wheel bearing. a. Tighten clamping nut slightly (approx. 1.5 mkp = 11 ft. lbs) while turning the wheel or hub, so that the taper rollers can rest well against the bearing races. b. Loosen clamping nut until the nose washer can be just pushed along from the side with a screw driver and no noticeable bearing play is indicated during axial movements of the wheel hub. Caution! Do not support screw driver against hub but hold freely in hand. c. Tighten cheesehead screw of clamping nut to specified tightening torque. Check adjustment once again by moving nose washer and without turning clamping nut, and correct, if required. Caution! The slot width of the clamping nut should be 2.5 + 0.5 mm (.1 + .02”) so that perfect clamping is obtained even under unfavorable tolerance overlaps. d. Drive the car for a few miles, then recheck torque on front bearings. They will usually loosen slightly after "break-in" |
|
|
|
|
1 User(s) are reading this topic (1 Guests and 0 Anonymous Users)
0 Members:

|
Lo-Fi Version | Time is now: 29th June 2026 - 09:38 AM |
Invision Power Board
v9.1.4 © 2026 IPS, Inc.