|
|
|
Porsche, and the Porsche crest are registered trademarks of Dr. Ing. h.c. F. Porsche AG.
This site is not affiliated with Porsche in any way. Its only purpose is to provide an online forum for car enthusiasts. All other trademarks are property of their respective owners. |
|
|


| JoeDees |
 Sep 30 2015, 07:40 PM Sep 30 2015, 07:40 PM
Post
#61
|
|
Senior Member  Group: Members Posts: 515 Joined: 10-November 14 From: Northern Kentucky Member No.: 18,106 Region Association: None |
I had every intention of making an introduction video, but I found that I had ruined my wide angle lens trying to film some cool shots of grinding. So while I'm waiting for the new lens to be delivered, I will go with this novel:
I bought the car about a year ago with the shortsighted intention of throwing it back together and having a driver until its turn came for rustoration. I bought the car and a carload of parts from a guy in Dallas who did some really shady work and an incredible job hiding other rust; magician style he distracted with his obvious poor work. The drivetrain was out of the car and registration said it had been sitting for 12 years, so I don’t know what made me think I could get it driving in a month… Soon after buying the car, my daily driver VW went down and needed a bunch of work and Uncle Sam gave me orders to move 800 miles. I fiddled with the 914 now and then, mostly just probing for rust, but focused my attention on prepping my other projects and VW for sale, knowing I could only bring one car with me and it had to be rolling so I couldn’t really tear into it. I’ve been here in the new, much smaller shop since June and have been slowly tearing into the 914 between honey-do new house projects, new job training, and getting the new shop in order. As we sit now, the car is on jackstands with the rotisserie acting as additional bracing, the engine and trans are under a workbench, the bigger pieces of the car are using the extra bedroom (the one my wife says needs to be vacated when we get pregnant) and others in boxes in my closet. Tearing the car down, I’ve found almost everything worse than I expected. The gas tank is pretty nasty with rust, all 4 calipers are locked up and the wheel bearing grease congealed. Removing the bumpers I found some evidence of prior damage and filler. Further probes into the longs found some rust on the driver side, and the passenger side nearly shot. The hellhole was a known problem, and turned into a chasm. I haven’t really dove to much into the floor, but found rust around the firewall and under a seat mount. The good news seems to be in a relatively dry trunk and pedal area. My project’s Big 5 jobs are: 1) Rust repair. 2) Body work and a complete repaint. 3) Complete overhaul of the brake system, bearings, CVs, getting the window to work and stuff like that. 4) Engine rebuild. 5) Customization: wart removal, interior work, and an attempt at making custom made bumper tops. In this build off challenge I face multiple fronts of challenges: 1) I grew up helping my Dad fix VWs, redid a Triumph Spitfire in my early 20s with his help, and have done numerous small projects over the years, but this is my first full rustoration on my own. 2) I have a severely limited budget. I am active duty Army, and everybody knows that NCO paychecks leave much to be desired. 3) I’m often short on time. My current assignment is as an instructor requiring me to work 10-12 hour days and 50-60 hour weeks. 4) I have a bum knee that makes it almost impossible to crouch and am fighting a shoulder issue that makes working overhead painful (praying for no surgery). 5) Nothing but the windshield and fine machine work like the heads and crank will be farmed out, I’m doing this on my own. Well this is where we are starting, and honestly, who knows where we’ll end up. I haven’t really decided on color, engine, or upgrades, though I’m leaning towards keeping the 1.7 Liter Fuel Injection unless a good deal on another engine arises. I’m also thinking of keeping the car black but going minimal chrome, but who knows what the good idea fairy will deliver. I hope you enjoy the journey as much as I do. Attached thumbnail(s) 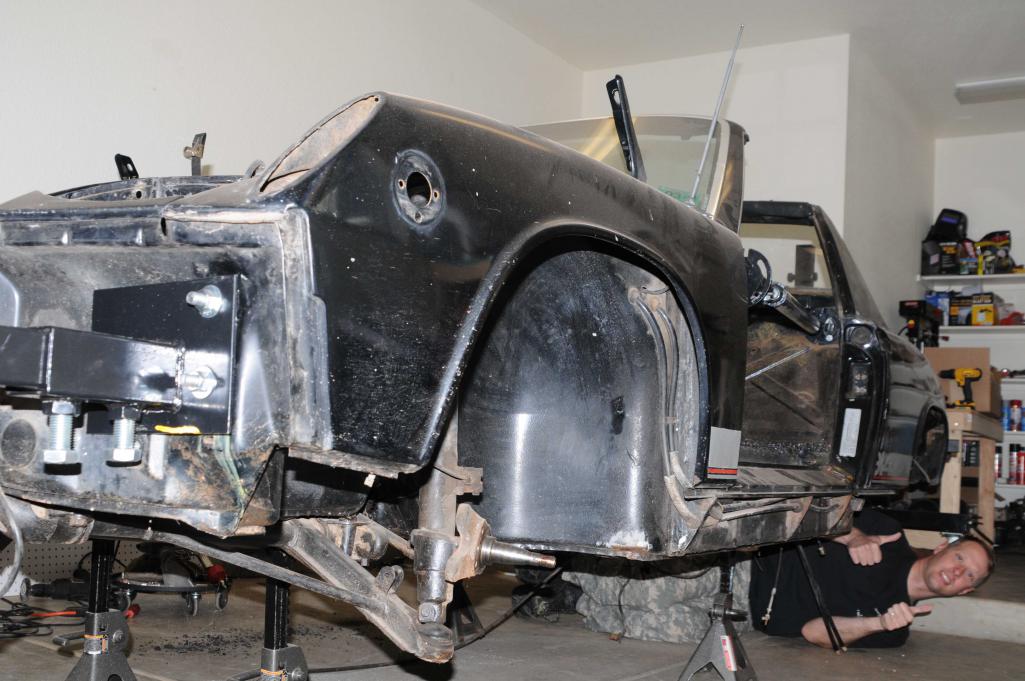 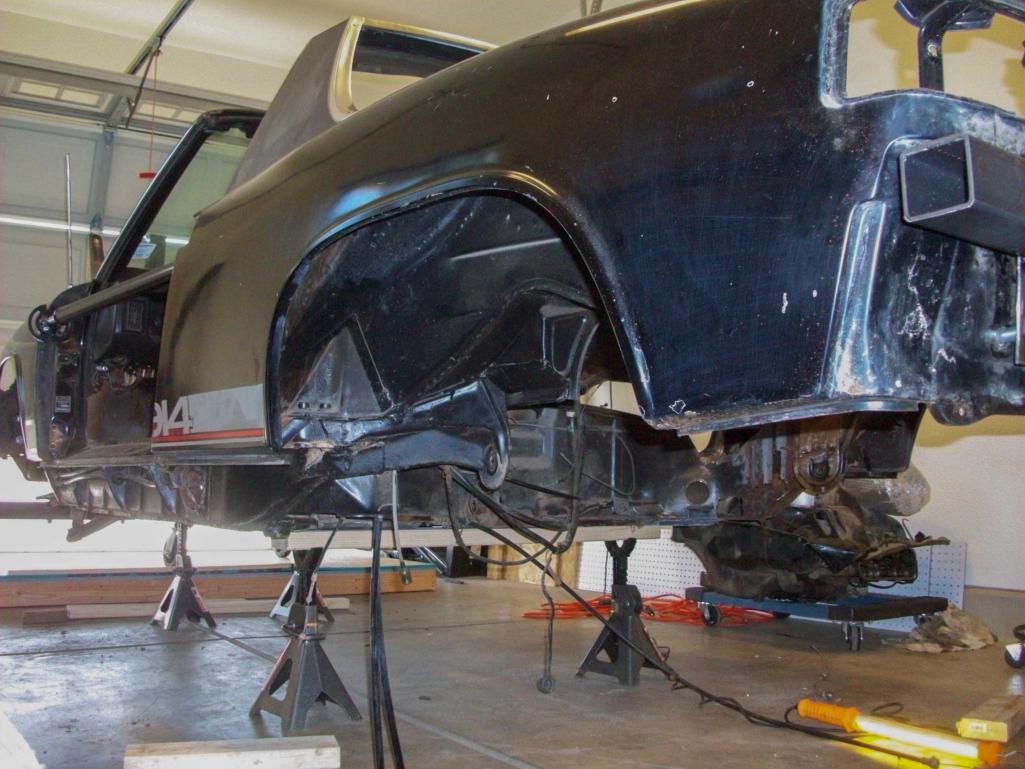 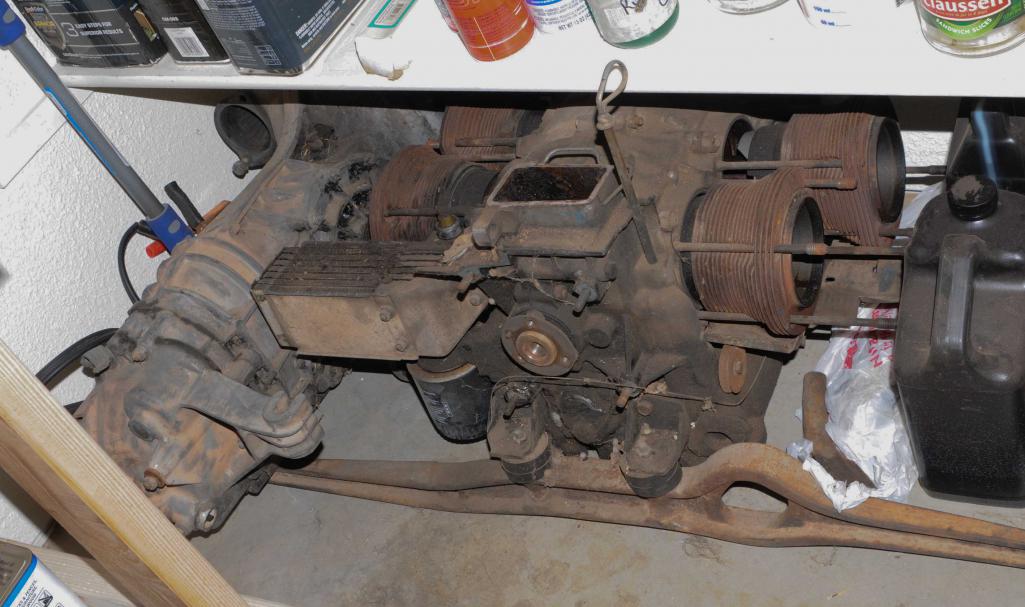 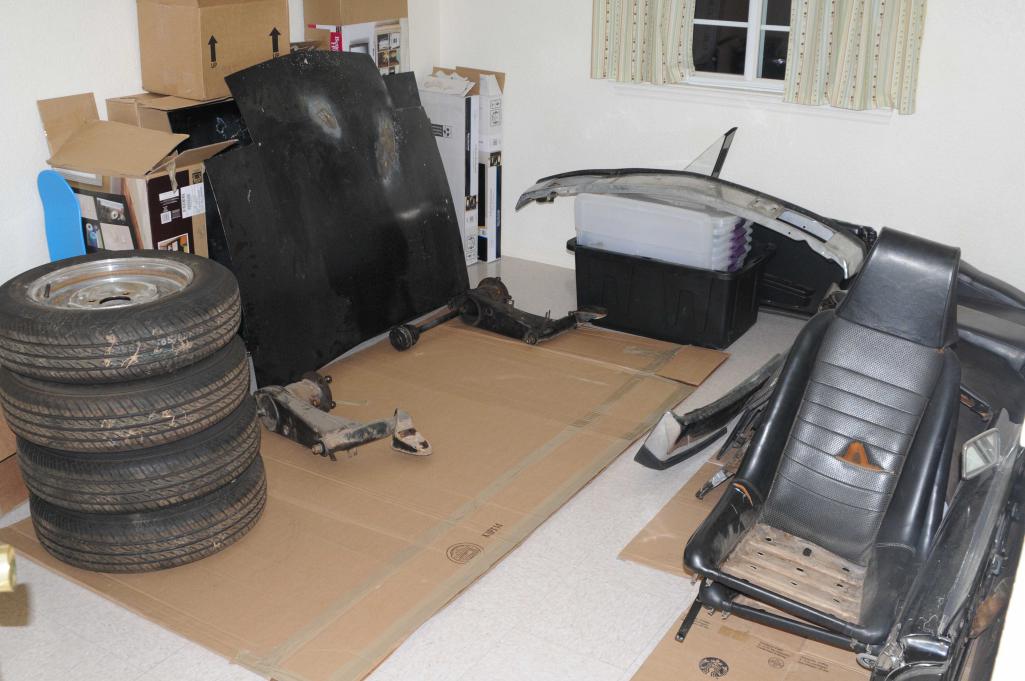 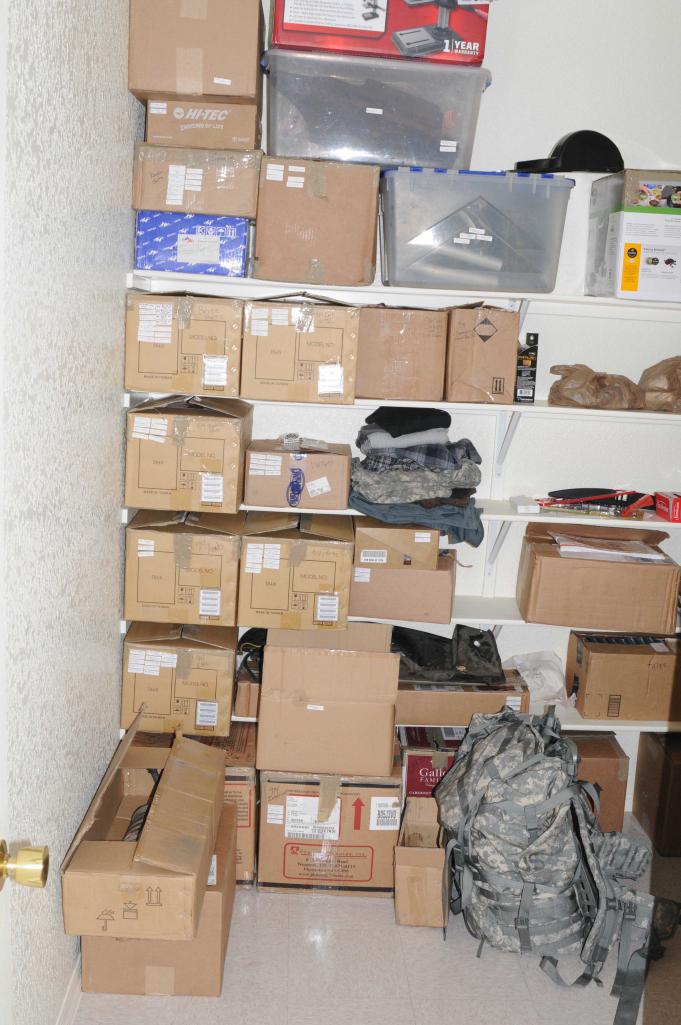 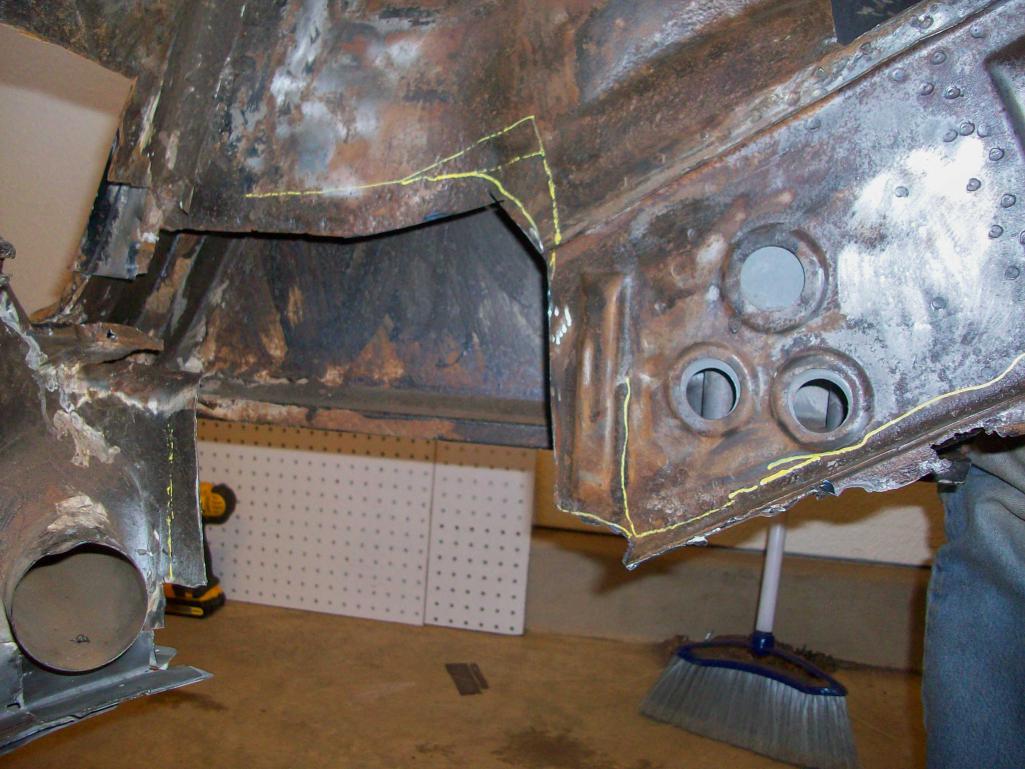 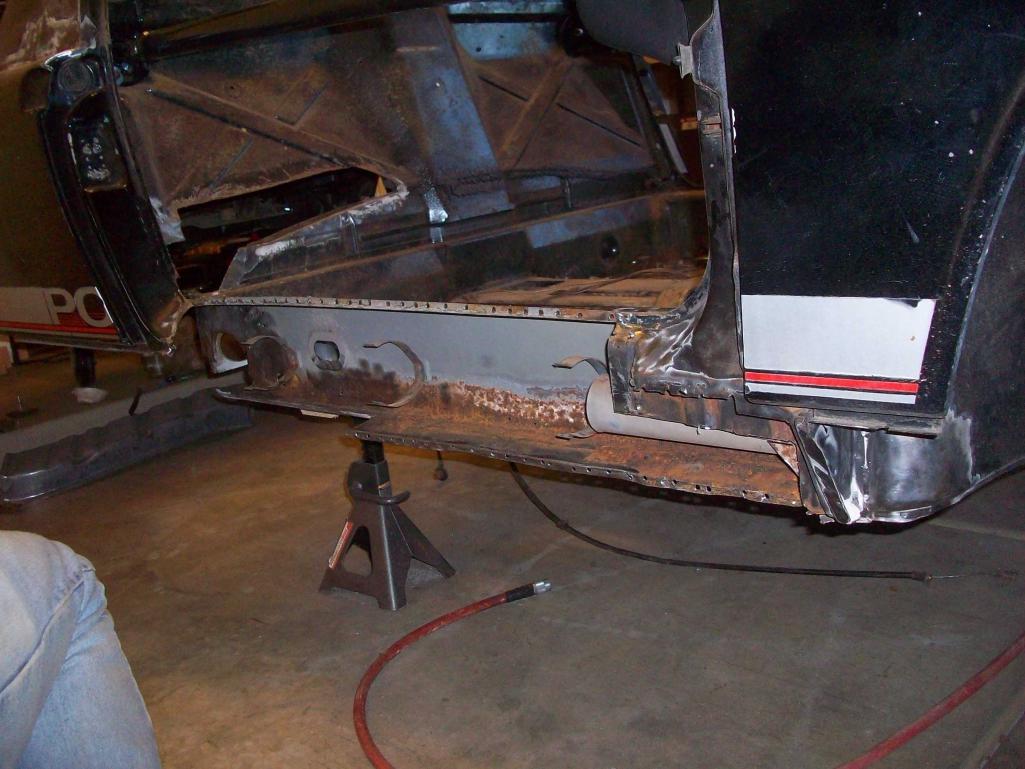
|
   |

 
|
Posts in this topic
 DirtyCossack BUILD-OFF CHALLENGE: Dirty Cossack's Build Sep 30 2015, 07:40 PM
 DirtyCossack Some more pics to show where we are starting. Yeah... Sep 30 2015, 07:44 PM VWTortuga336 First, thank you for your service, it is greatly a... Sep 30 2015, 08:27 PM
 DirtyCossack
First, thank you for your service, it is greatly ... Sep 30 2015, 09:14 PM 914werke its unfortunate but true that MANY car's are i... Oct 1 2015, 10:31 AM DirtyCossack
its unfortunate but true that MANY car's are ... Oct 1 2015, 02:11 PM Cairo94507 Call me optimistic.... but the rust does not look ... Oct 1 2015, 02:59 PM DirtyCossack
Call me optimistic.... but the rust does not look... Oct 5 2015, 04:58 PM cary Subcribe Oct 6 2015, 06:47 AM mbseto I double up a pair of cheap cotton gloves and a pa... Oct 6 2015, 07:21 AM AndyB No need to worry about a head start. Just keep le... Oct 6 2015, 07:26 AM DirtyCossack It wasn't the most productive long weekend, th... Oct 11 2015, 06:39 PM DirtyCossack I just noticed in the pictures (then ran out to ve... Oct 11 2015, 06:44 PM DirtyCossack Felt extremely productive this weekend fabbing and... Oct 18 2015, 09:27 PM DirtyCossack And on the front piece I drilled/ground out the od... Oct 18 2015, 09:32 PM DirtyCossack I thought I was to the point of putting pieces bac... Oct 25 2015, 09:26 PM DirtyCossack And since I was in the spirit of cutting, grinding... Oct 25 2015, 09:28 PM DirtyCossack It was one of those tedious weekends of prep work ... Nov 15 2015, 07:45 PM DirtyCossack It's weird how parts of the heater tube look l... Nov 15 2015, 07:48 PM DirtyCossack Also, word of advice to future me: Weld the long f... Nov 15 2015, 07:51 PM DirtyCossack I spent the whole weekend measuring and thinking. ... Nov 22 2015, 07:48 PM Andyrew Your going to support the doors prior to starting ... Nov 23 2015, 07:36 AM DirtyCossack Doors are braced, but I'm still concerned with... Nov 23 2015, 03:42 PM DirtyCossack After a weekend or two of measuring, fitting, and ... Dec 6 2015, 07:26 PM DirtyCossack I am disappointed in myself that I worked half day... Dec 27 2015, 07:35 PM mbseto
So here it is, the engine compartment long welded... Dec 28 2015, 10:28 AM DirtyCossack The outer suspension console would take some serio... Dec 28 2015, 01:58 PM DirtyCossack So today's short work was spent making a littl... Dec 28 2015, 06:10 PM DirtyCossack Question for the gurus:
When installing the moto... Dec 29 2015, 05:09 PM DirtyCossack It took a while to get it measured out and then he... Dec 29 2015, 07:21 PM DirtyCossack I spent the day off fitting and prepping the inner... Dec 31 2015, 06:32 PM mbseto Looks like you decided not to make a layer to go o... Jan 1 2016, 12:27 PM DirtyCossack I debated it for a while and wondered how sturdy I... Jan 1 2016, 08:10 PM DirtyCossack Today was a big day in that I closed up the passen... Jan 1 2016, 09:01 PM DirtyCossack Funniest part of the day was that I almost forgot ... Jan 1 2016, 09:03 PM DirtyCossack Non-car update:
No shoulder surgery to keep me ou... Jan 4 2016, 08:11 PM r_towle Get a second opinion so you don't waste a lot ... Jan 4 2016, 08:14 PM DirtyCossack I'm active duty Army so it won't cost me a... Jan 4 2016, 08:26 PM rick 918-S Nice to see your working through the process in sp... Jan 31 2016, 10:37 PM DirtyCossack This was the month of health chaos. First I missed... Feb 1 2016, 05:54 PM DirtyCossack It was a long weekend but more in-laws were in tow... Feb 15 2016, 11:36 AM DirtyCossack Other pics Feb 15 2016, 11:37 AM DirtyCossack We picked up a new class of students this week so ... Feb 21 2016, 07:32 PM DirtyCossack This weekend's goal was to tack the floor sect... Feb 28 2016, 07:58 PM DirtyCossack But the big event of the weekend was getting the f... Feb 28 2016, 08:02 PM DirtyCossack The story begins 2 weeks ago... I spent that Satur... Mar 20 2016, 01:21 PM Andyrew Really sorry to hear about your dog! Looks lik... Mar 20 2016, 04:35 PM trojanhorsepower Sorry about the loss of your dog. I have one that... Mar 20 2016, 05:47 PM DirtyCossack So it's been a long time... After the finger i... May 8 2016, 08:21 PM DirtyCossack This weekend was spent on one major job, a job I t... May 8 2016, 08:41 PM jkb944t Looks like you are making some good progress despi... May 9 2016, 10:26 AM mbseto Just catching up on your thread, quite a month... ... May 9 2016, 11:25 AM DirtyCossack Thanks! My only handicap (from the finger) I... May 9 2016, 05:10 PM DirtyCossack The "build off challenge" has turned int... May 15 2016, 09:05 AM Darren C Shit Joe, I'm real sorry to hear your news. I ... May 15 2016, 10:21 AM DirtyCossack I'm a Gulf War veteran myself who was invalide... May 21 2016, 07:31 PM DirtyCossack Thank you, I'm confident I'll be fine. Thi... May 15 2016, 10:37 AM Andyrew Really sorry to hear about your health issues... May 15 2016, 11:31 AM DirtyCossack Still fighting Army doctors for an MRI and referra... May 21 2016, 07:44 PM 2mAn man, that thing is collecting a lot of rust.... an... May 22 2016, 12:08 AM DirtyCossack What you see is 6 hours of work. This was probably... May 22 2016, 08:52 PM DirtyCossack You can also see in the pics (not really this one)... May 22 2016, 08:57 PM Garland Nice work, attention to detail will pay off. May 22 2016, 09:05 PM DirtyCossack Post for Friday 27 May:
Shop soundtrack: my Iron ... May 29 2016, 09:41 PM DirtyCossack Post for Saturday 28 May:
Shop soundtrack: my Wil... May 29 2016, 09:59 PM DirtyCossack Post for Sunday 29 May:
Shop soundtrack: my Littl... May 29 2016, 10:49 PM 914forme Wow looking good May 30 2016, 03:45 AM cary Looks very nice. Always a great since of accomplis... May 30 2016, 06:41 AM DirtyCossack
Looks very nice. Always a great since of accompli... May 30 2016, 09:44 AM trojanhorsepower Looks good! May 30 2016, 08:04 AM jmitro nice job especially with fabricating patches from ... May 30 2016, 04:00 PM DirtyCossack
nice job especially with fabricating patches from... May 30 2016, 07:35 PM Darren C Looking good Joe, rest that shoulder up, lift your... May 30 2016, 11:23 PM DirtyCossack Shop soundtrack: Euro 2016 matches and then Harry ... Jun 12 2016, 09:19 PM DirtyCossack For the second tie, I used the method from the abo... Jun 12 2016, 09:27 PM DirtyCossack On 2 other notes:
Those are some ugly ass welds..... Jun 12 2016, 09:29 PM DirtyCossack I'll start with a medical update: Physical the... Jun 26 2016, 09:39 PM Olympic 1.7 Great job on the fabrication.
I feel your pain,... Jun 27 2016, 09:12 AM DirtyCossack I posted a WTB ad in the classifieds in case someb... Jun 27 2016, 01:27 PM DirtyCossack It was a long weekend but that did not equate to a... Jul 4 2016, 09:06 PM DirtyCossack Pics of the other side of hell. Jul 4 2016, 09:09 PM DirtyCossack Is it crazy that after I drilled out and cut aroun... Jul 4 2016, 09:38 PM Andyrew Sorry to hear about your health issues! Hopefu... Jul 4 2016, 09:49 PM mbseto Shelf looks good. Hope they can do something good... Jul 5 2016, 10:35 AM DirtyCossack Shop soundtrack: Euro 2016 Final (Sunday), some ML... Jul 10 2016, 08:19 PM DirtyCossack Saturday 16 July.
A good day in the shop. I start... Jul 17 2016, 06:53 PM DirtyCossack Sunday. Shop soundtrack: Ramones discography.
It ... Jul 17 2016, 07:15 PM 914forme
Sunday. Shop soundtrack: Ramones discography.
... Jul 18 2016, 11:04 AM DirtyCossack It was a huge mess but seemed to spread and cover ... Jul 18 2016, 11:50 AM DirtyCossack Shop soundtrack: My Pandora psychobilly station
I... Jul 23 2016, 08:43 PM DirtyCossack Whoa, I just noticed that the angle on the first p... Jul 23 2016, 08:50 PM 914forme I did not see that until you pointed it out. We l... Jul 24 2016, 07:37 AM DirtyCossack Shop soundtrack: 3M: Motorhead, Metallica, Megadet... Jul 24 2016, 08:05 PM Vysoc Love the music thing, Mega Bands yesterday.
Keep ... Jul 25 2016, 07:32 PM DirtyCossack Well, the surgeon still won't touch the should... Jul 26 2016, 07:29 PM DirtyCossack I'm taking the weekend off to hang out with th... Jul 30 2016, 03:22 PM tygaboy
I'm taking the weekend off to hang out with t... Jul 30 2016, 03:25 PM Vysoc Is that a whippet or a retired Greyhound?
Vysoc :... Aug 10 2016, 09:20 AM DirtyCossack She's a retired racer with many races and wins... Aug 10 2016, 03:29 PM DirtyCossack I guess it's as good of a time as any to make ... Aug 10 2016, 05:31 PM
DirtyCossack
First, thank you for your service, it is greatly ... Sep 30 2015, 09:14 PM 914werke its unfortunate but true that MANY car's are i... Oct 1 2015, 10:31 AM DirtyCossack
its unfortunate but true that MANY car's are ... Oct 1 2015, 02:11 PM Cairo94507 Call me optimistic.... but the rust does not look ... Oct 1 2015, 02:59 PM DirtyCossack
Call me optimistic.... but the rust does not look... Oct 5 2015, 04:58 PM cary Subcribe Oct 6 2015, 06:47 AM mbseto I double up a pair of cheap cotton gloves and a pa... Oct 6 2015, 07:21 AM AndyB No need to worry about a head start. Just keep le... Oct 6 2015, 07:26 AM DirtyCossack It wasn't the most productive long weekend, th... Oct 11 2015, 06:39 PM DirtyCossack I just noticed in the pictures (then ran out to ve... Oct 11 2015, 06:44 PM DirtyCossack Felt extremely productive this weekend fabbing and... Oct 18 2015, 09:27 PM DirtyCossack And on the front piece I drilled/ground out the od... Oct 18 2015, 09:32 PM DirtyCossack I thought I was to the point of putting pieces bac... Oct 25 2015, 09:26 PM DirtyCossack And since I was in the spirit of cutting, grinding... Oct 25 2015, 09:28 PM DirtyCossack It was one of those tedious weekends of prep work ... Nov 15 2015, 07:45 PM DirtyCossack It's weird how parts of the heater tube look l... Nov 15 2015, 07:48 PM DirtyCossack Also, word of advice to future me: Weld the long f... Nov 15 2015, 07:51 PM DirtyCossack I spent the whole weekend measuring and thinking. ... Nov 22 2015, 07:48 PM Andyrew Your going to support the doors prior to starting ... Nov 23 2015, 07:36 AM DirtyCossack Doors are braced, but I'm still concerned with... Nov 23 2015, 03:42 PM DirtyCossack After a weekend or two of measuring, fitting, and ... Dec 6 2015, 07:26 PM DirtyCossack I am disappointed in myself that I worked half day... Dec 27 2015, 07:35 PM mbseto
So here it is, the engine compartment long welded... Dec 28 2015, 10:28 AM DirtyCossack The outer suspension console would take some serio... Dec 28 2015, 01:58 PM DirtyCossack So today's short work was spent making a littl... Dec 28 2015, 06:10 PM DirtyCossack Question for the gurus:
When installing the moto... Dec 29 2015, 05:09 PM DirtyCossack It took a while to get it measured out and then he... Dec 29 2015, 07:21 PM DirtyCossack I spent the day off fitting and prepping the inner... Dec 31 2015, 06:32 PM mbseto Looks like you decided not to make a layer to go o... Jan 1 2016, 12:27 PM DirtyCossack I debated it for a while and wondered how sturdy I... Jan 1 2016, 08:10 PM DirtyCossack Today was a big day in that I closed up the passen... Jan 1 2016, 09:01 PM DirtyCossack Funniest part of the day was that I almost forgot ... Jan 1 2016, 09:03 PM DirtyCossack Non-car update:
No shoulder surgery to keep me ou... Jan 4 2016, 08:11 PM r_towle Get a second opinion so you don't waste a lot ... Jan 4 2016, 08:14 PM DirtyCossack I'm active duty Army so it won't cost me a... Jan 4 2016, 08:26 PM rick 918-S Nice to see your working through the process in sp... Jan 31 2016, 10:37 PM DirtyCossack This was the month of health chaos. First I missed... Feb 1 2016, 05:54 PM DirtyCossack It was a long weekend but more in-laws were in tow... Feb 15 2016, 11:36 AM DirtyCossack Other pics Feb 15 2016, 11:37 AM DirtyCossack We picked up a new class of students this week so ... Feb 21 2016, 07:32 PM DirtyCossack This weekend's goal was to tack the floor sect... Feb 28 2016, 07:58 PM DirtyCossack But the big event of the weekend was getting the f... Feb 28 2016, 08:02 PM DirtyCossack The story begins 2 weeks ago... I spent that Satur... Mar 20 2016, 01:21 PM Andyrew Really sorry to hear about your dog! Looks lik... Mar 20 2016, 04:35 PM trojanhorsepower Sorry about the loss of your dog. I have one that... Mar 20 2016, 05:47 PM DirtyCossack So it's been a long time... After the finger i... May 8 2016, 08:21 PM DirtyCossack This weekend was spent on one major job, a job I t... May 8 2016, 08:41 PM jkb944t Looks like you are making some good progress despi... May 9 2016, 10:26 AM mbseto Just catching up on your thread, quite a month... ... May 9 2016, 11:25 AM DirtyCossack Thanks! My only handicap (from the finger) I... May 9 2016, 05:10 PM DirtyCossack The "build off challenge" has turned int... May 15 2016, 09:05 AM Darren C Shit Joe, I'm real sorry to hear your news. I ... May 15 2016, 10:21 AM DirtyCossack I'm a Gulf War veteran myself who was invalide... May 21 2016, 07:31 PM DirtyCossack Thank you, I'm confident I'll be fine. Thi... May 15 2016, 10:37 AM Andyrew Really sorry to hear about your health issues... May 15 2016, 11:31 AM DirtyCossack Still fighting Army doctors for an MRI and referra... May 21 2016, 07:44 PM 2mAn man, that thing is collecting a lot of rust.... an... May 22 2016, 12:08 AM DirtyCossack What you see is 6 hours of work. This was probably... May 22 2016, 08:52 PM DirtyCossack You can also see in the pics (not really this one)... May 22 2016, 08:57 PM Garland Nice work, attention to detail will pay off. May 22 2016, 09:05 PM DirtyCossack Post for Friday 27 May:
Shop soundtrack: my Iron ... May 29 2016, 09:41 PM DirtyCossack Post for Saturday 28 May:
Shop soundtrack: my Wil... May 29 2016, 09:59 PM DirtyCossack Post for Sunday 29 May:
Shop soundtrack: my Littl... May 29 2016, 10:49 PM 914forme Wow looking good May 30 2016, 03:45 AM cary Looks very nice. Always a great since of accomplis... May 30 2016, 06:41 AM DirtyCossack
Looks very nice. Always a great since of accompli... May 30 2016, 09:44 AM trojanhorsepower Looks good! May 30 2016, 08:04 AM jmitro nice job especially with fabricating patches from ... May 30 2016, 04:00 PM DirtyCossack
nice job especially with fabricating patches from... May 30 2016, 07:35 PM Darren C Looking good Joe, rest that shoulder up, lift your... May 30 2016, 11:23 PM DirtyCossack Shop soundtrack: Euro 2016 matches and then Harry ... Jun 12 2016, 09:19 PM DirtyCossack For the second tie, I used the method from the abo... Jun 12 2016, 09:27 PM DirtyCossack On 2 other notes:
Those are some ugly ass welds..... Jun 12 2016, 09:29 PM DirtyCossack I'll start with a medical update: Physical the... Jun 26 2016, 09:39 PM Olympic 1.7 Great job on the fabrication.
I feel your pain,... Jun 27 2016, 09:12 AM DirtyCossack I posted a WTB ad in the classifieds in case someb... Jun 27 2016, 01:27 PM DirtyCossack It was a long weekend but that did not equate to a... Jul 4 2016, 09:06 PM DirtyCossack Pics of the other side of hell. Jul 4 2016, 09:09 PM DirtyCossack Is it crazy that after I drilled out and cut aroun... Jul 4 2016, 09:38 PM Andyrew Sorry to hear about your health issues! Hopefu... Jul 4 2016, 09:49 PM mbseto Shelf looks good. Hope they can do something good... Jul 5 2016, 10:35 AM DirtyCossack Shop soundtrack: Euro 2016 Final (Sunday), some ML... Jul 10 2016, 08:19 PM DirtyCossack Saturday 16 July.
A good day in the shop. I start... Jul 17 2016, 06:53 PM DirtyCossack Sunday. Shop soundtrack: Ramones discography.
It ... Jul 17 2016, 07:15 PM 914forme
Sunday. Shop soundtrack: Ramones discography.
... Jul 18 2016, 11:04 AM DirtyCossack It was a huge mess but seemed to spread and cover ... Jul 18 2016, 11:50 AM DirtyCossack Shop soundtrack: My Pandora psychobilly station
I... Jul 23 2016, 08:43 PM DirtyCossack Whoa, I just noticed that the angle on the first p... Jul 23 2016, 08:50 PM 914forme I did not see that until you pointed it out. We l... Jul 24 2016, 07:37 AM DirtyCossack Shop soundtrack: 3M: Motorhead, Metallica, Megadet... Jul 24 2016, 08:05 PM Vysoc Love the music thing, Mega Bands yesterday.
Keep ... Jul 25 2016, 07:32 PM DirtyCossack Well, the surgeon still won't touch the should... Jul 26 2016, 07:29 PM DirtyCossack I'm taking the weekend off to hang out with th... Jul 30 2016, 03:22 PM tygaboy
I'm taking the weekend off to hang out with t... Jul 30 2016, 03:25 PM Vysoc Is that a whippet or a retired Greyhound?
Vysoc :... Aug 10 2016, 09:20 AM DirtyCossack She's a retired racer with many races and wins... Aug 10 2016, 03:29 PM DirtyCossack I guess it's as good of a time as any to make ... Aug 10 2016, 05:31 PM  |
4 User(s) are reading this topic (4 Guests and 0 Anonymous Users)
0 Members:

|
Lo-Fi Version | Time is now: 24th June 2026 - 04:09 PM |
Invision Power Board
v9.1.4 © 2026 IPS, Inc.