|
|
|
Porsche, and the Porsche crest are registered trademarks of Dr. Ing. h.c. F. Porsche AG.
This site is not affiliated with Porsche in any way. Its only purpose is to provide an online forum for car enthusiasts. All other trademarks are property of their respective owners. |
|
|

  |

| Garland |
 Sep 30 2015, 10:39 PM Sep 30 2015, 10:39 PM
Post
#1
|
|
Restoration Fanatic  Group: Members Posts: 1,431 Joined: 8-January 04 From: ......Michigan...... Member No.: 1,535 Region Association: Upper MidWest |
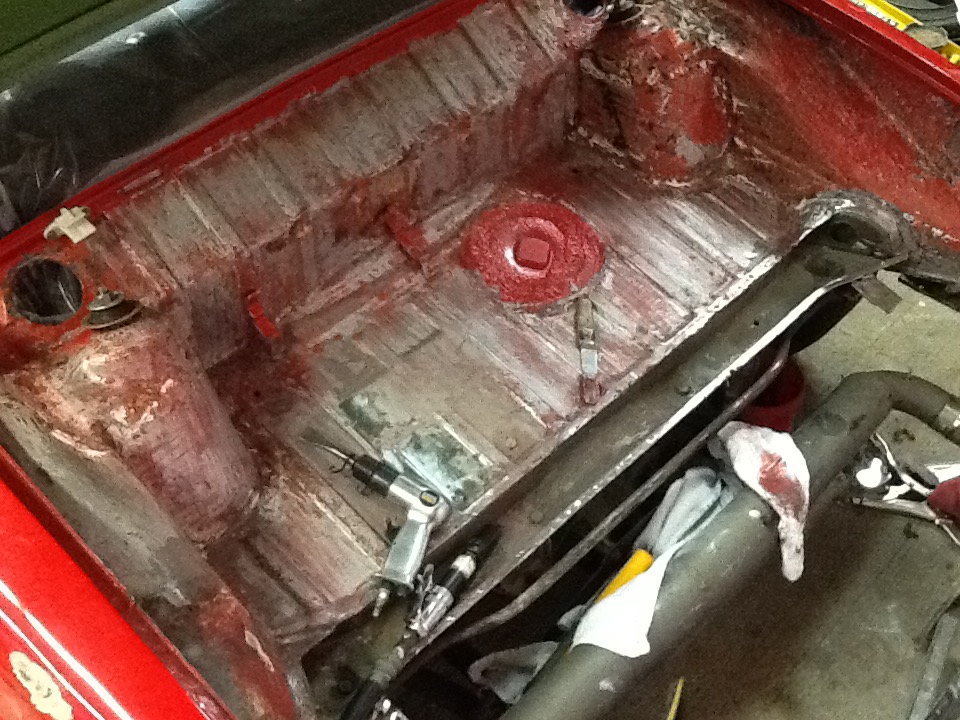
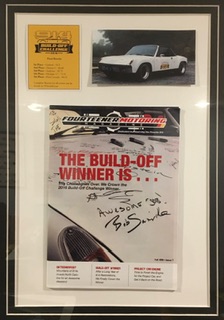 The start: 2016 Build-Off Here I go! I purchased the car on eBay in 1999 site unseen, and only two polorid's in the post. Looked great, sitting in a empty dusty old garage. I ask lots of questions, original paint? Factory new looking wheels? History, on and on. He couldn't tell me anything about the car, his buddy owned it and he new nothing. Singed over ownership 6 mts ago. He did say looks like a great car, and knows it was fast. Says 2.0 on it. 400 miles away, a buddy with a flat bed, it was worth the risk. Price was right. On arrival, I'm on it, all over the car. Long story short the thrill is gone! Repaint in somebody's garage, 50 footer, or a polorid. Rear end hit, hard, car pushed into something damaged the left front. Right front damage, not to bad. Engine runs on 2 cylinders, yet it is a 2.0, with carbs. Must have been the reason for the FIRE in the engine bay. One head is trashed from the fire, and theirs nothing else to talk about, except the A/C system they must have got on eBay and hacked into the car. (Key words: eBay, "was" fast, Polorid, and risk) I swapped in a 1.7 and a tail shift 2.0 exchangers with triad exhaust. 1971 complete interior (had one). Plus just about every other trim part. Polished the paint, cleaned up the wheels, and I drove it. Now it's time to fix It.   MICHIGAN BUILD (Short monthly update posts) @ Contest Link 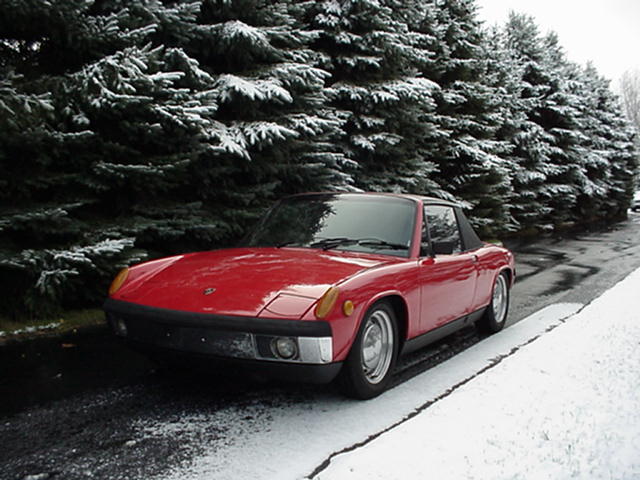 1973 Red 1.7 5 Major Tasks to complete during the Challenge: 1. Replace back half of rear trunk floor. (Rusted, rear ended, poorly patched) 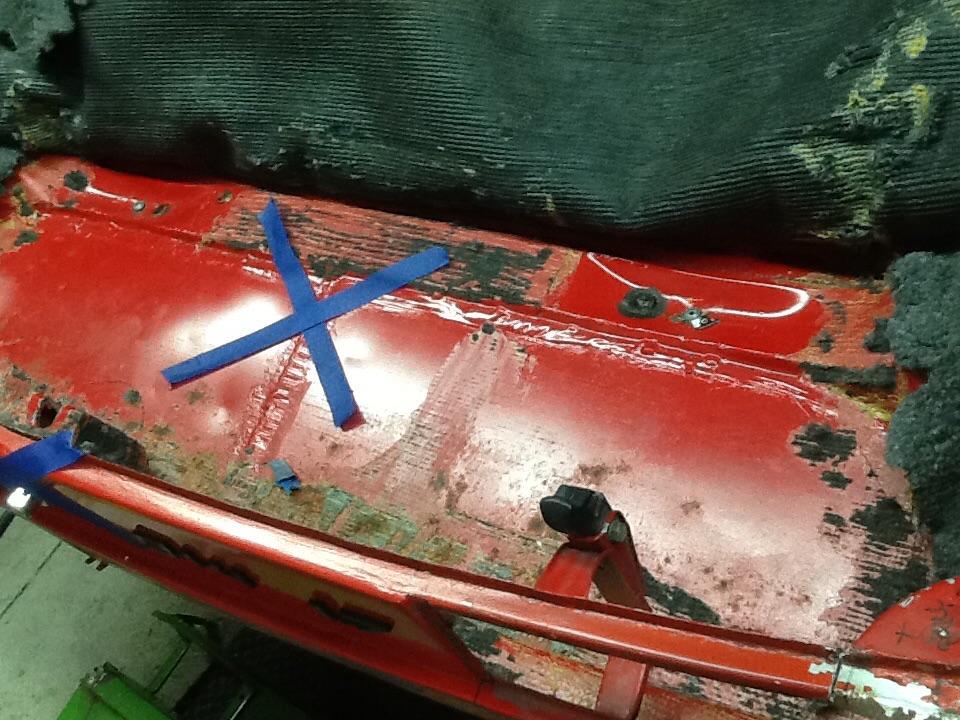 & Replace entire rear body panel, and Bumper. (Rear ended, poorly repaired) 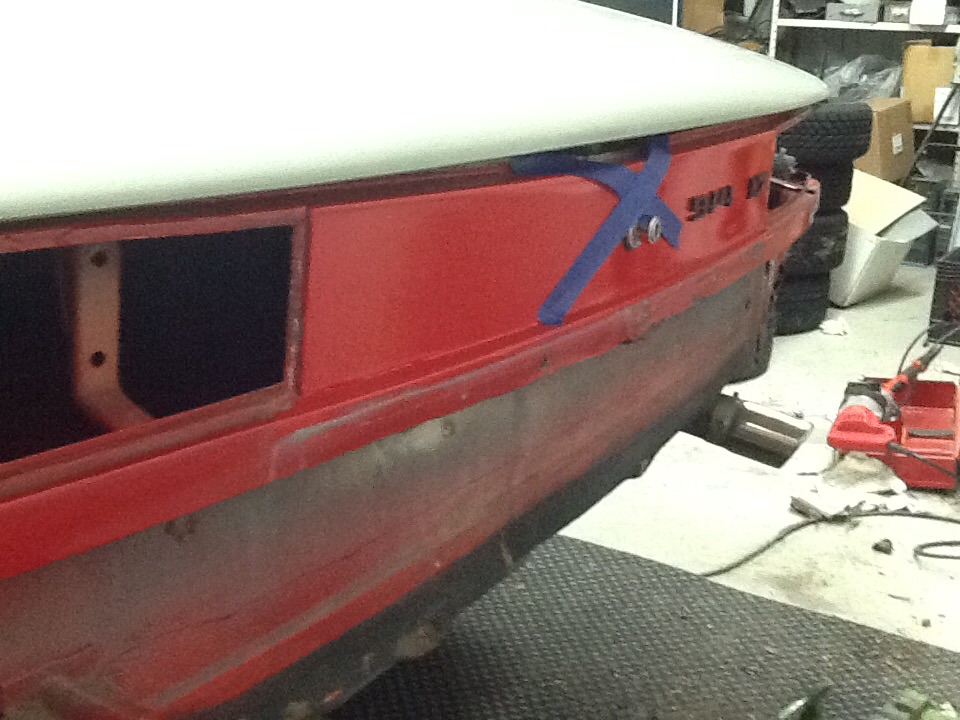 & Patch in 1/2 left front fender. (Poorly repaired) 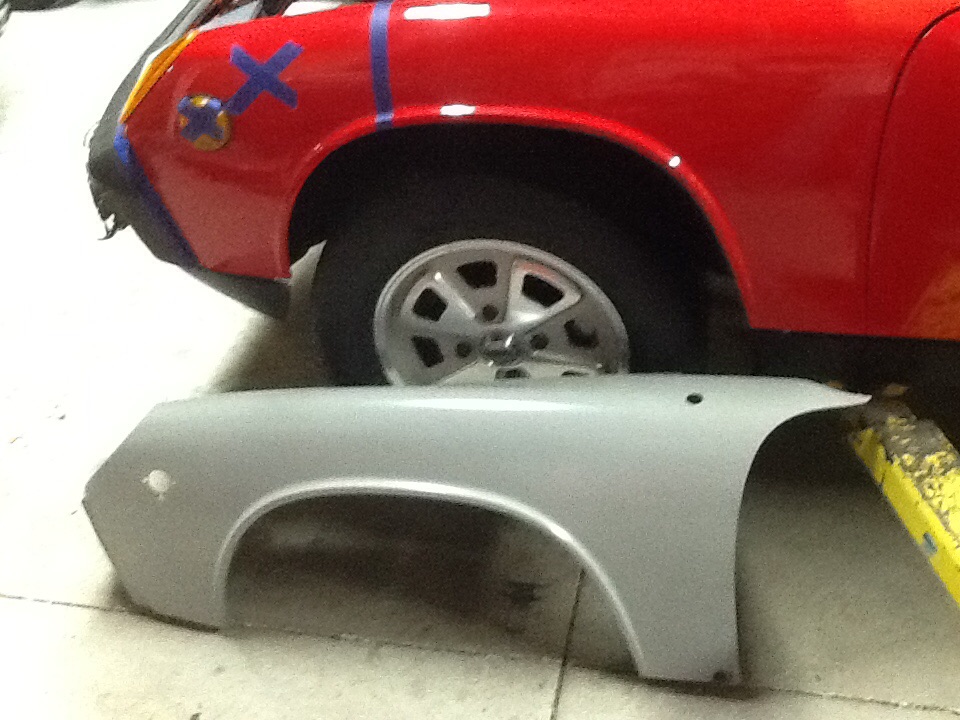 2. Delete headlamp doors, modify hood, and relocate headlamps. 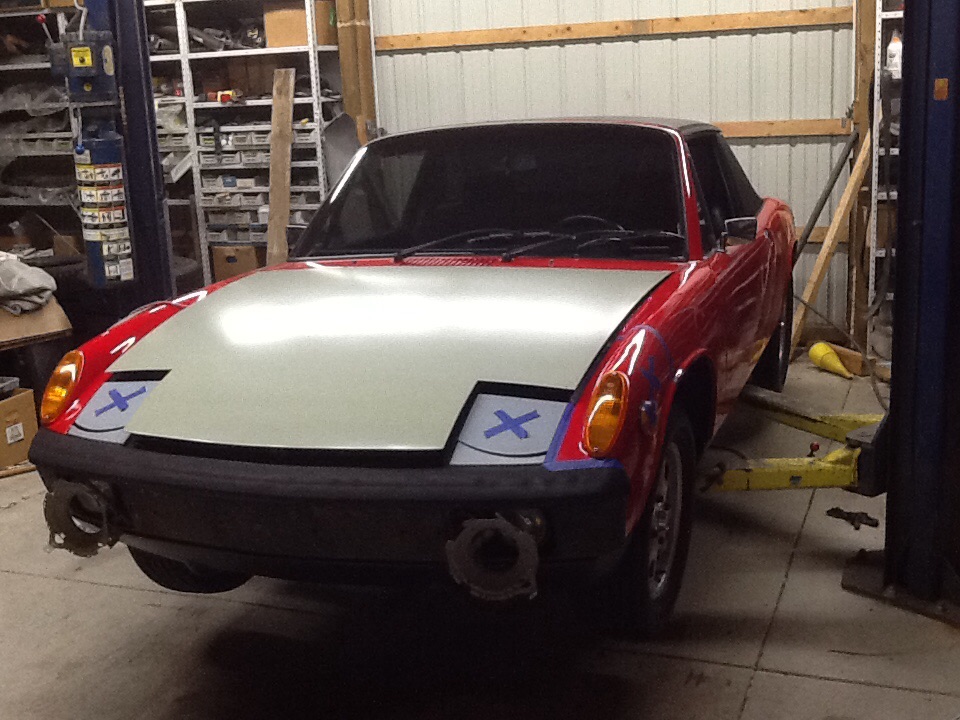 3. Install 4 steel flares, and modify all valances. 5 lug, and wheel tire package. 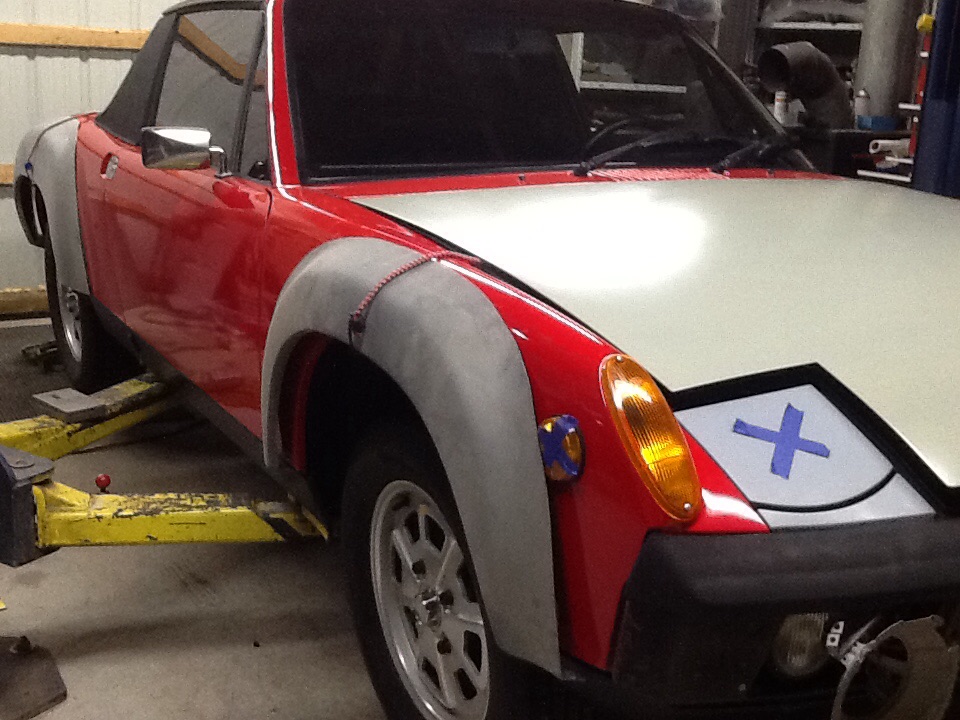 4. Build up, and replace engine. Installed now:  With: 1.7 914 Engine balanced 260 x 396 Cam .006 96mm Big Bore kit Mallory Unlite Distributor 14004 Weber 40 DCNF (w/ very short intakes) Air jet 1.80 Main 1.25 2.0 L exhaust Work in progress replacement. 5. Major interior renew. Still need to finish the engine, and start it. Purchased here from a member a few years ago. I have a 2nd 914 that I'm also working on, and been a owner of many since the 70's. I do all my own work. My enjoyment time. Attached image(s)  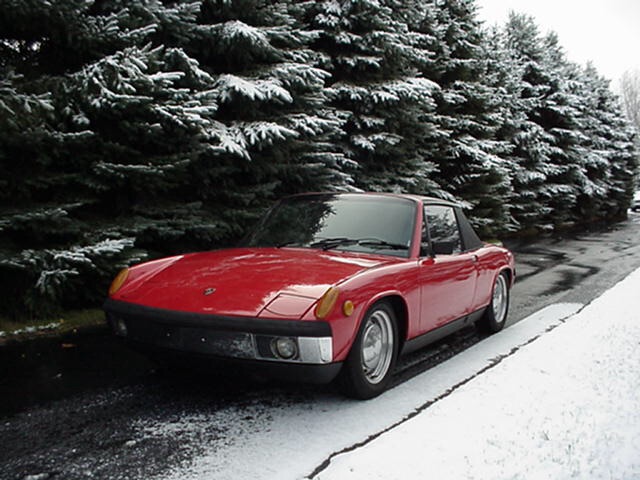
|
   |

 
|
| Garland |
Sep 30 2015, 11:42 PM
Post
#2
|
|
Restoration Fanatic Group: Members Posts: 1,431 Joined: 8-January 04 From: ......Michigan...... Member No.: 1,535 Region Association: Upper MidWest |
I replaced the hoods with ones of better quality, reason for primer. Got started on this last weekend.
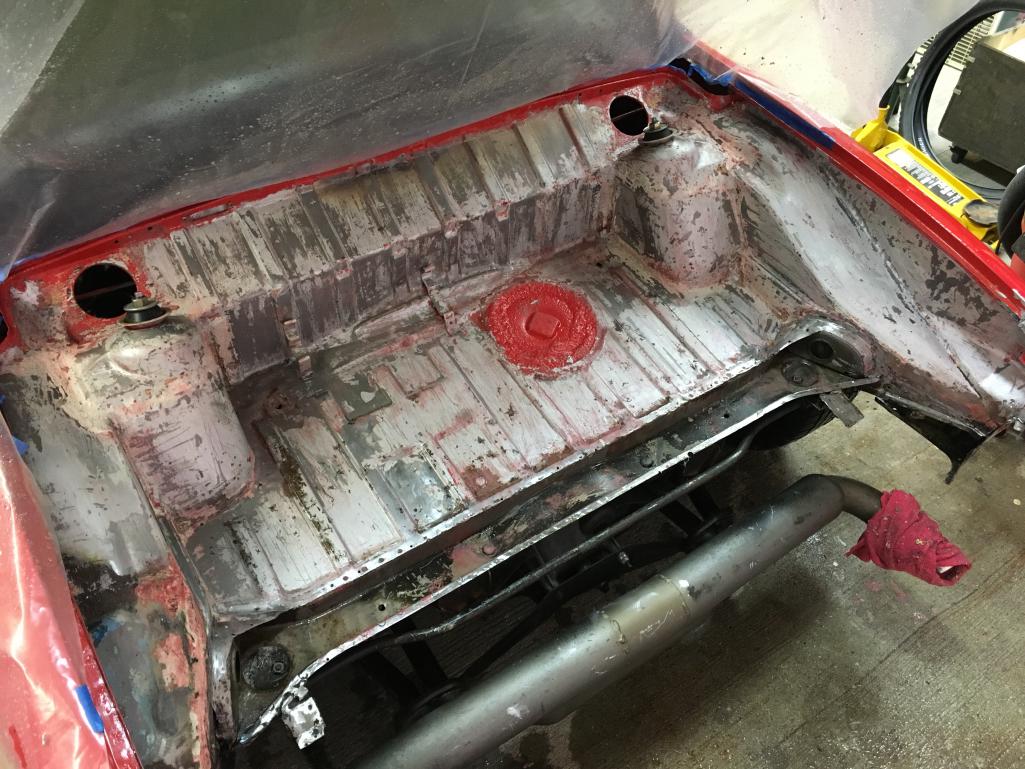
Remove the rear trunk have, and tail panel. Look at the amount of weld they used and lots of filler. No to mention the extra layer of sheet metal. 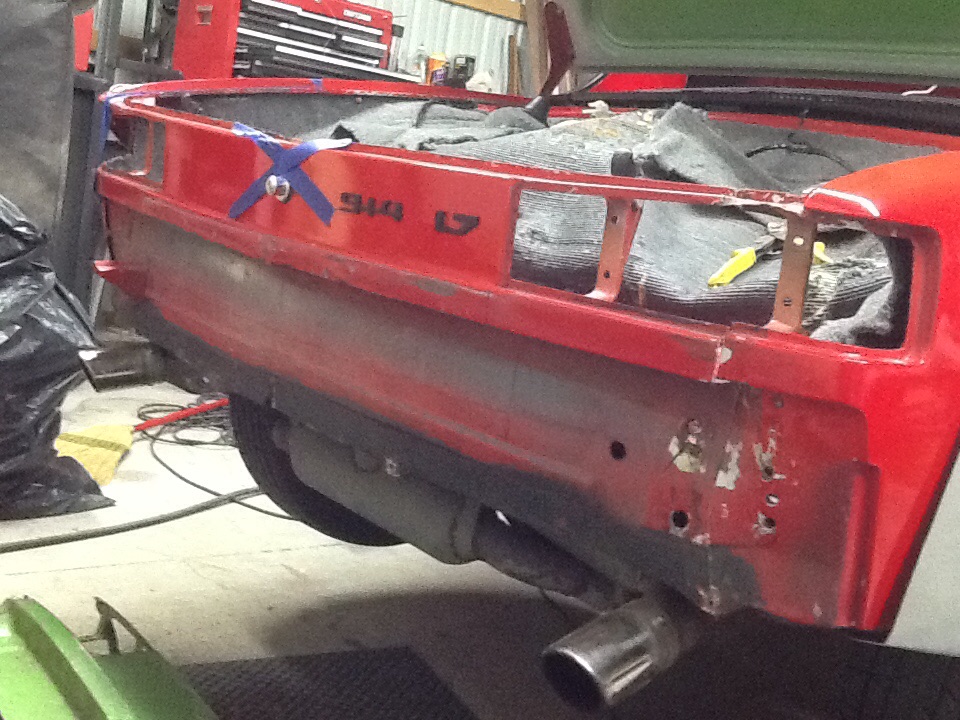 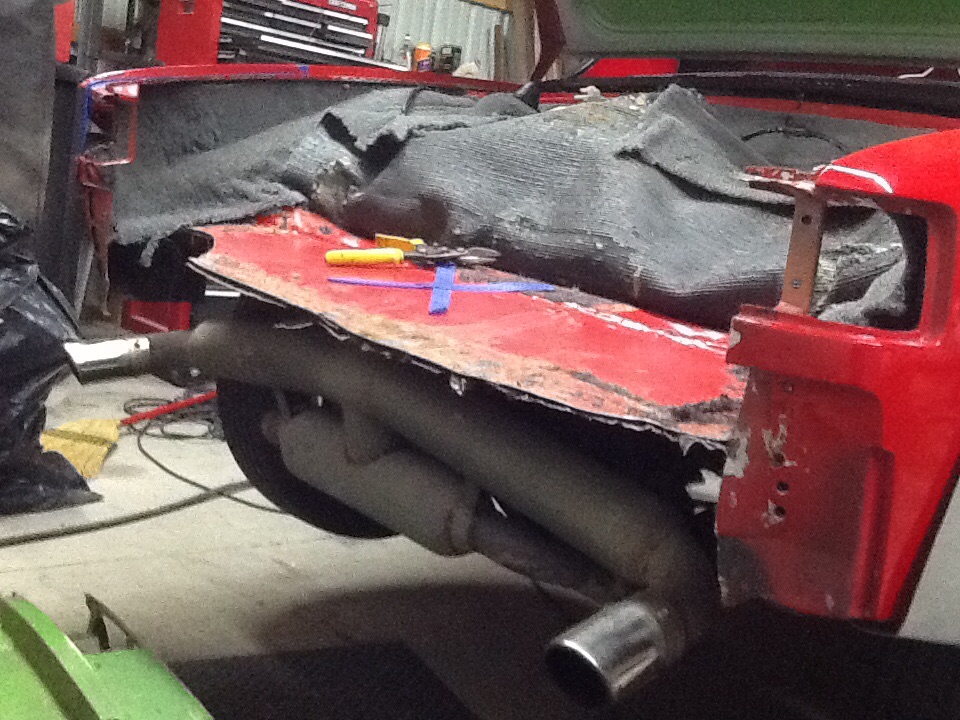 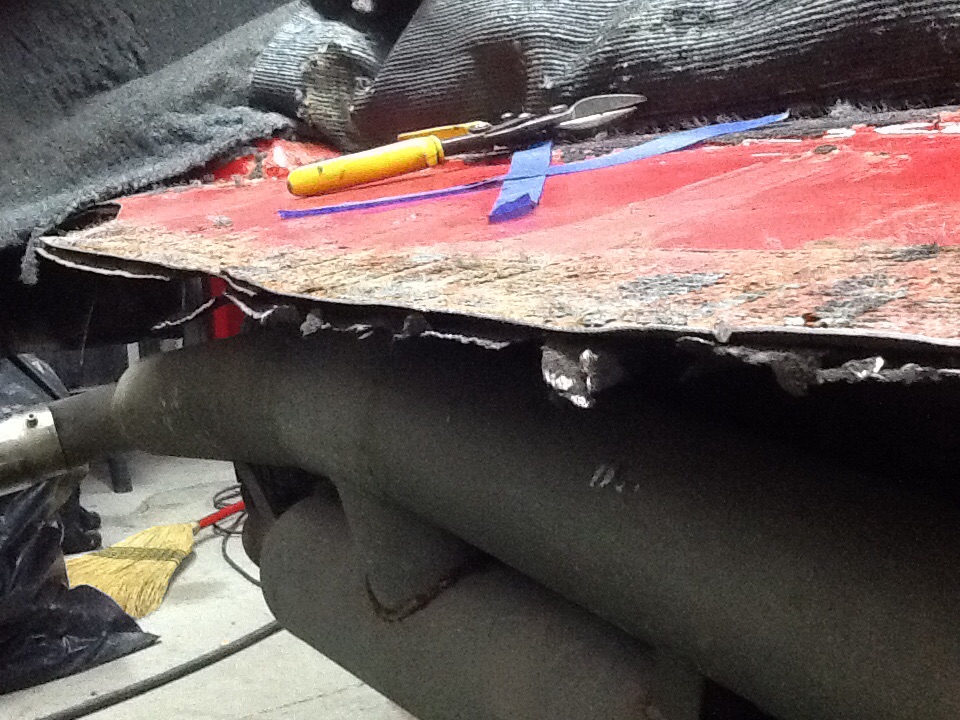 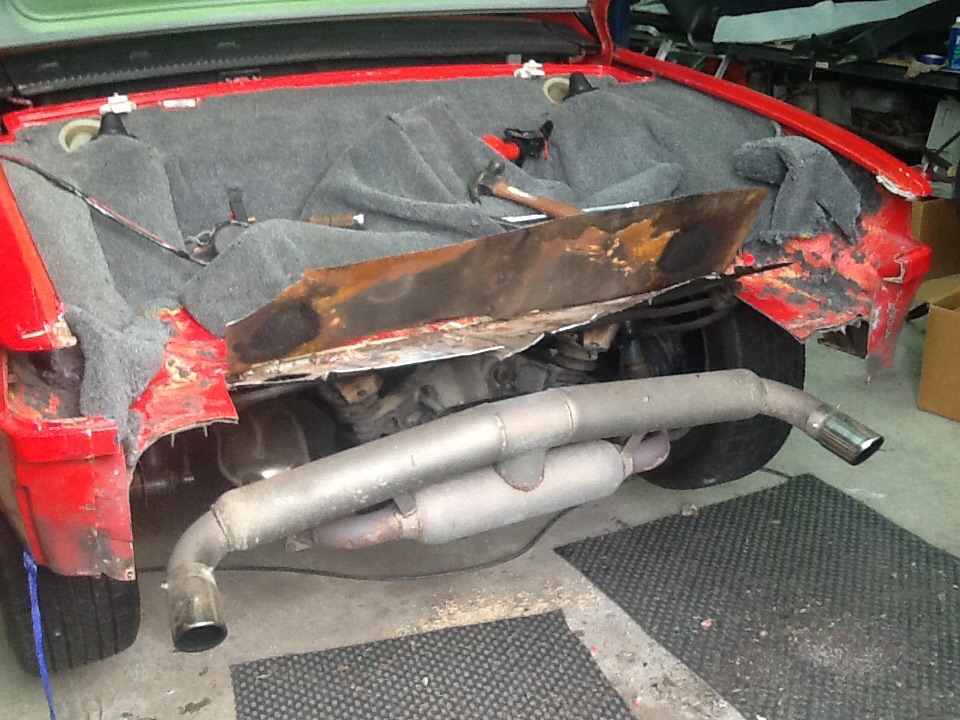 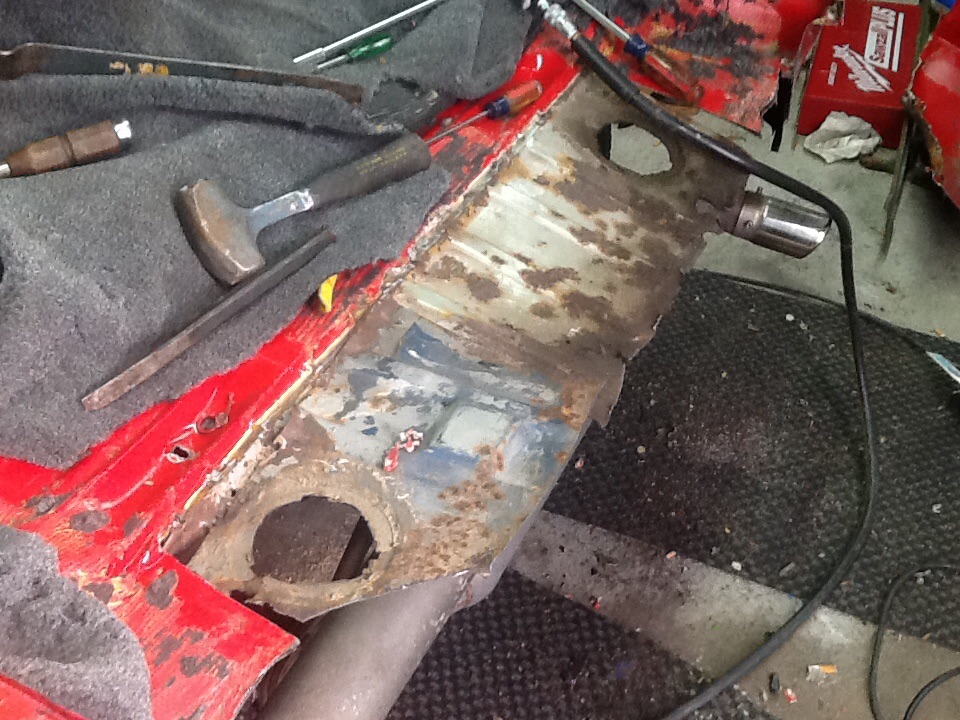  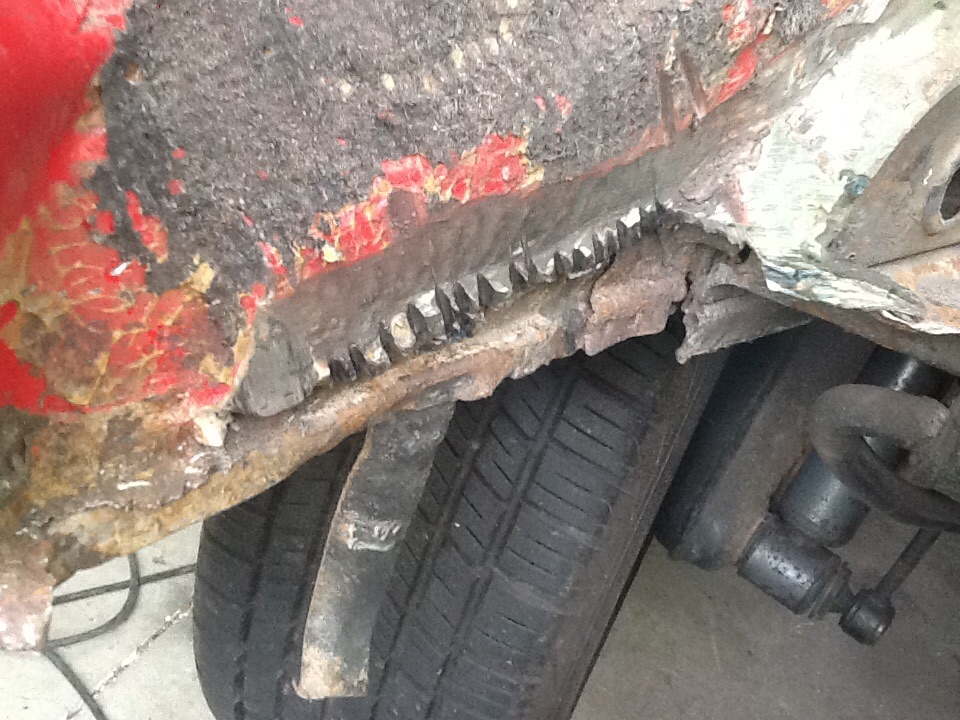 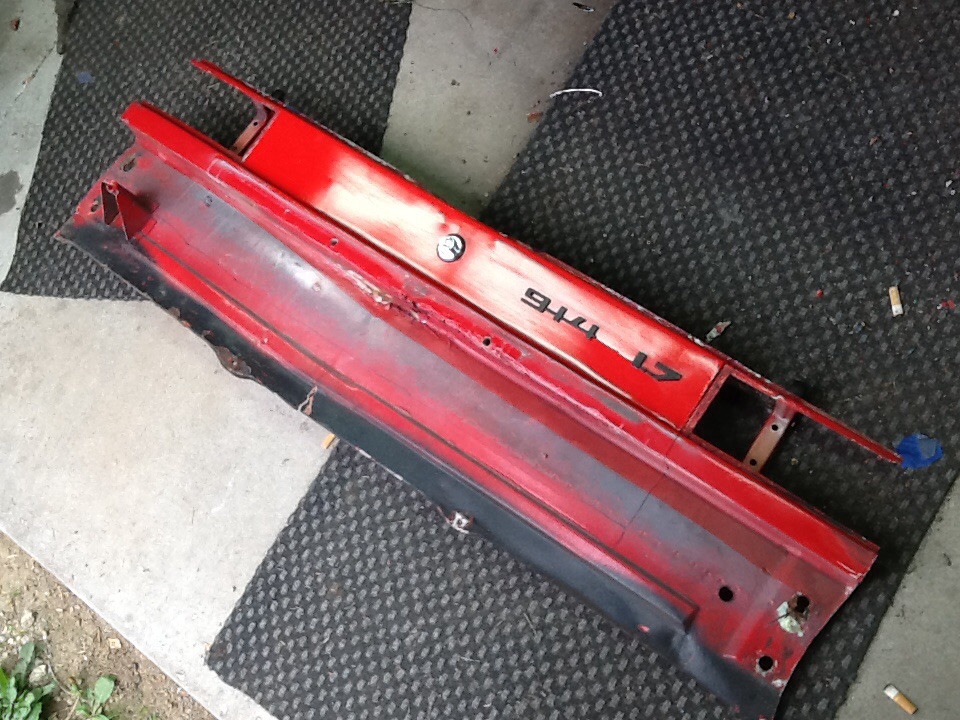 The tail was cut in hafe and re welded back, In turn the the panel holding the tail lights was flat across. No curve to meet the trunk. 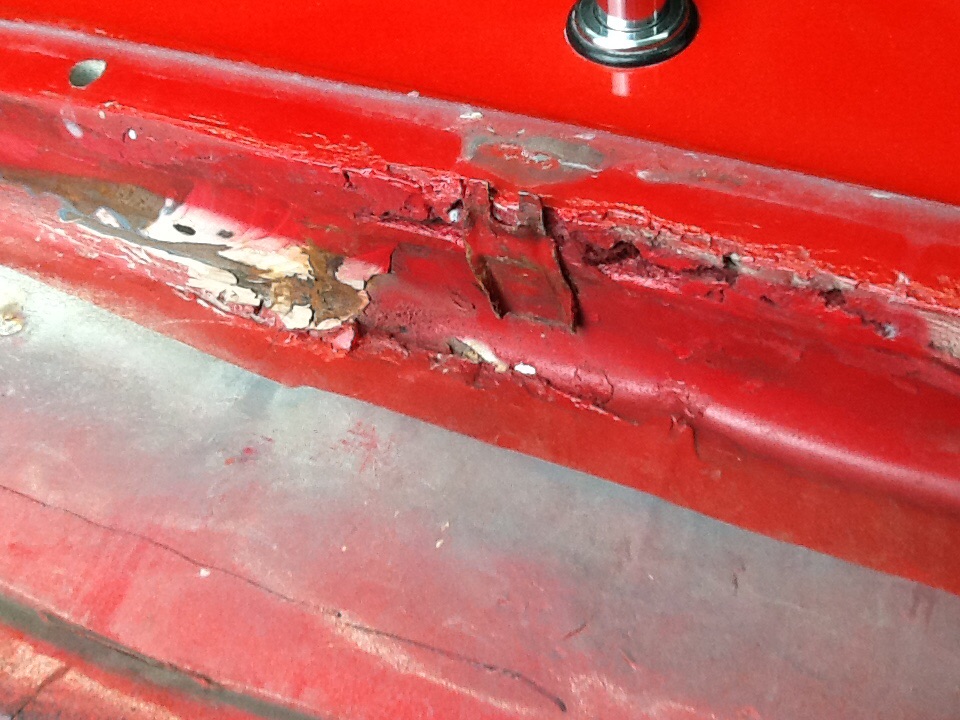 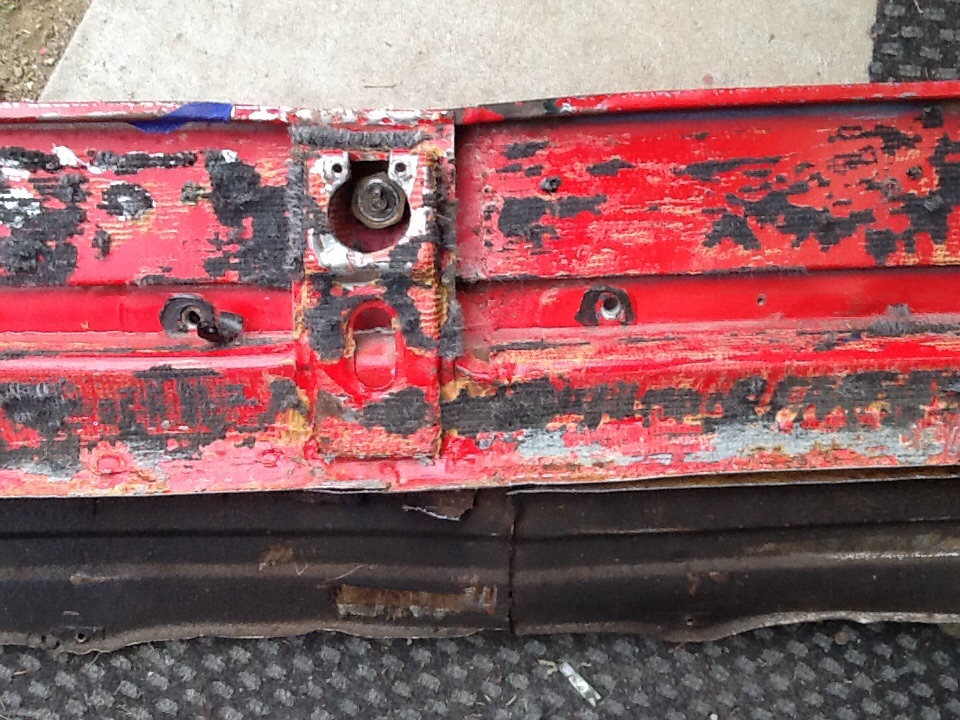 Used air punch from H.F. Worked very well. Lots of welds to do. 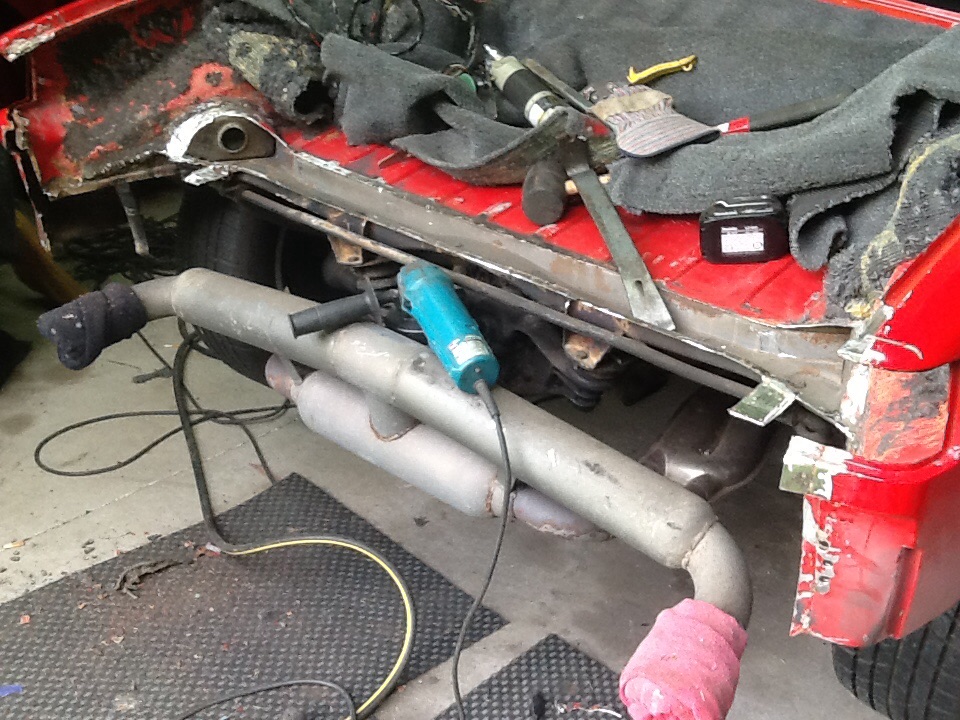 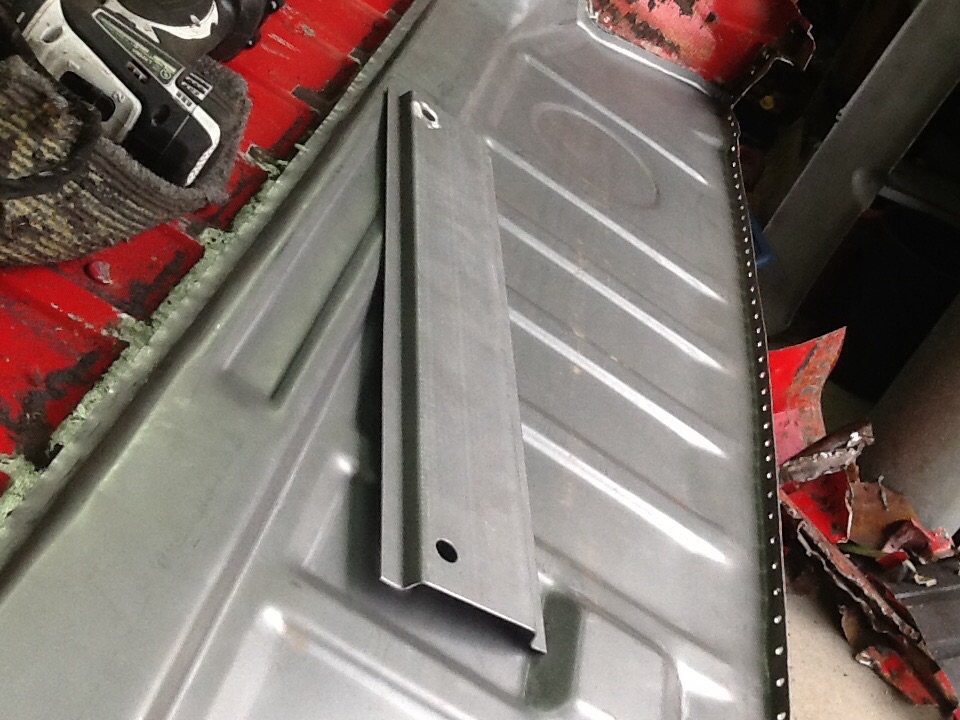 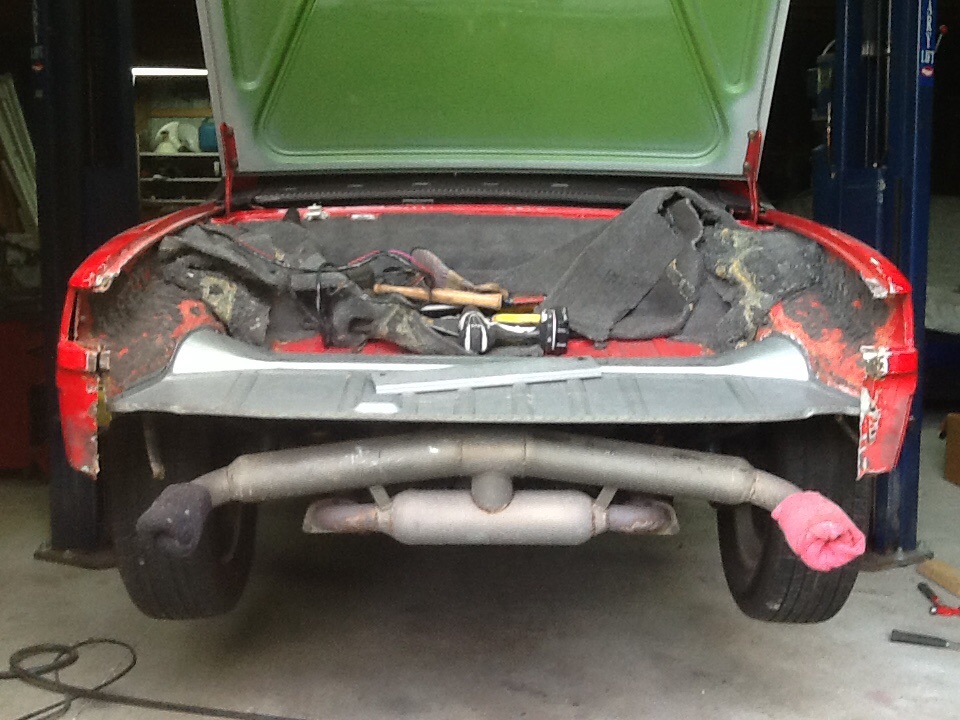 the tail and hood are from a green 70 (in the data base) 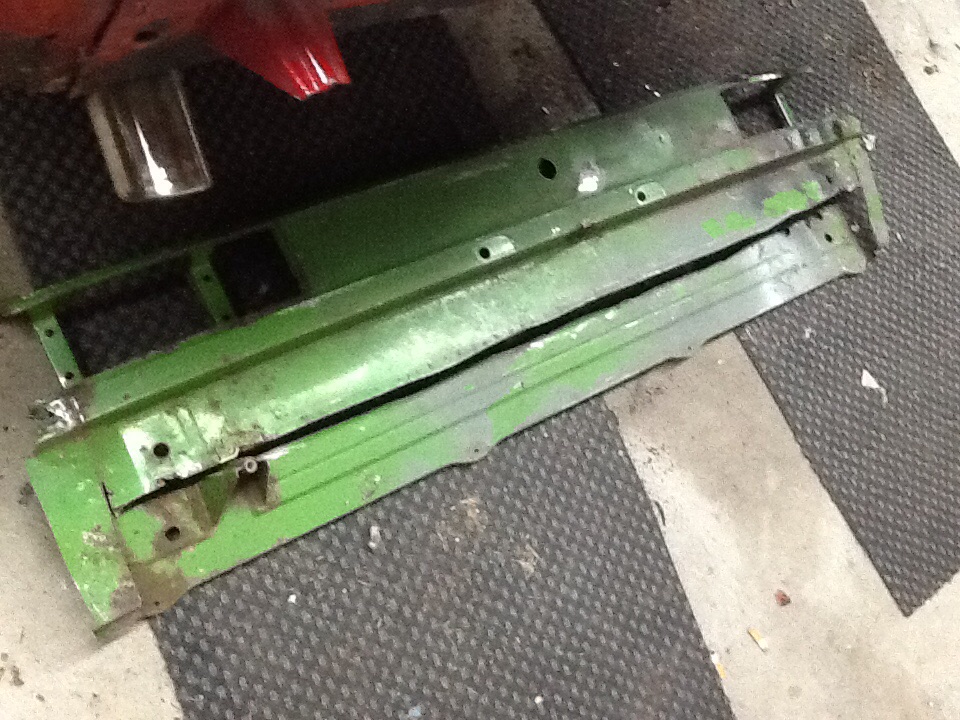 |
|
|
|
| Cairo94507 |
Oct 1 2015, 06:59 AM
Post
#3
|
|
Michael Group: Members Posts: 10,710 Joined: 1-November 08 From: Auburn, CA Member No.: 9,712 Region Association: Northern California |
Nice looking job. You will have a nice 914 when you get her done. Keep up the good work. (IMG:style_emoticons/default/biggrin.gif)
|
|
|
|
| Garland |
Oct 2 2015, 09:54 PM
Post
#4
|
|
Restoration Fanatic Group: Members Posts: 1,431 Joined: 8-January 04 From: ......Michigan...... Member No.: 1,535 Region Association: Upper MidWest |
Thanks Michael.
Well I rough trimmed and fitted the tail section, and worked on removing the glue for the carpeting. What a pain! 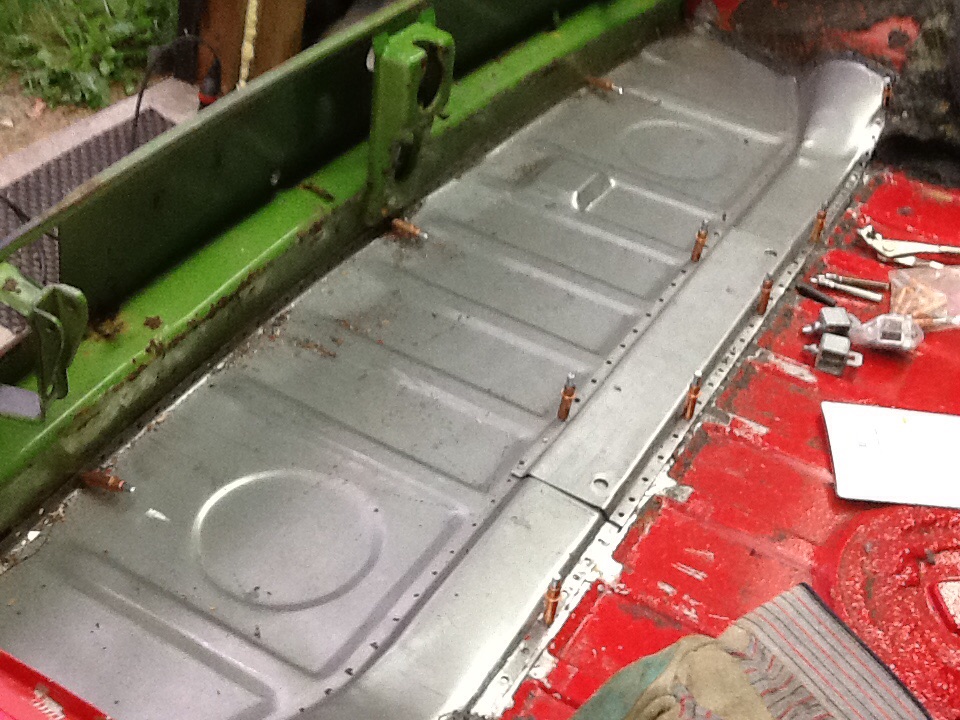 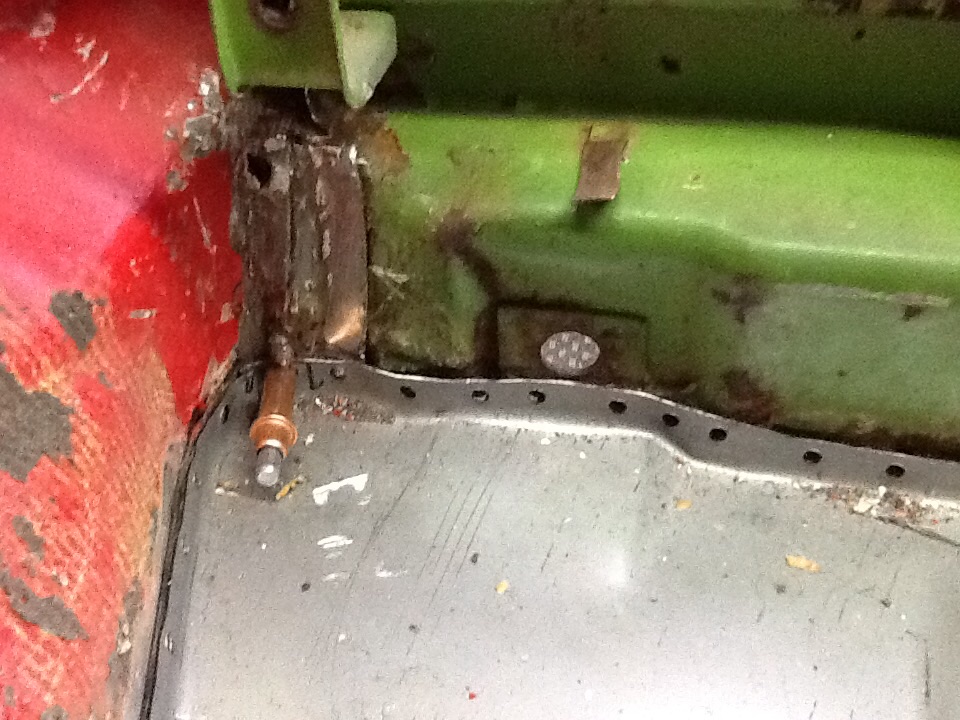 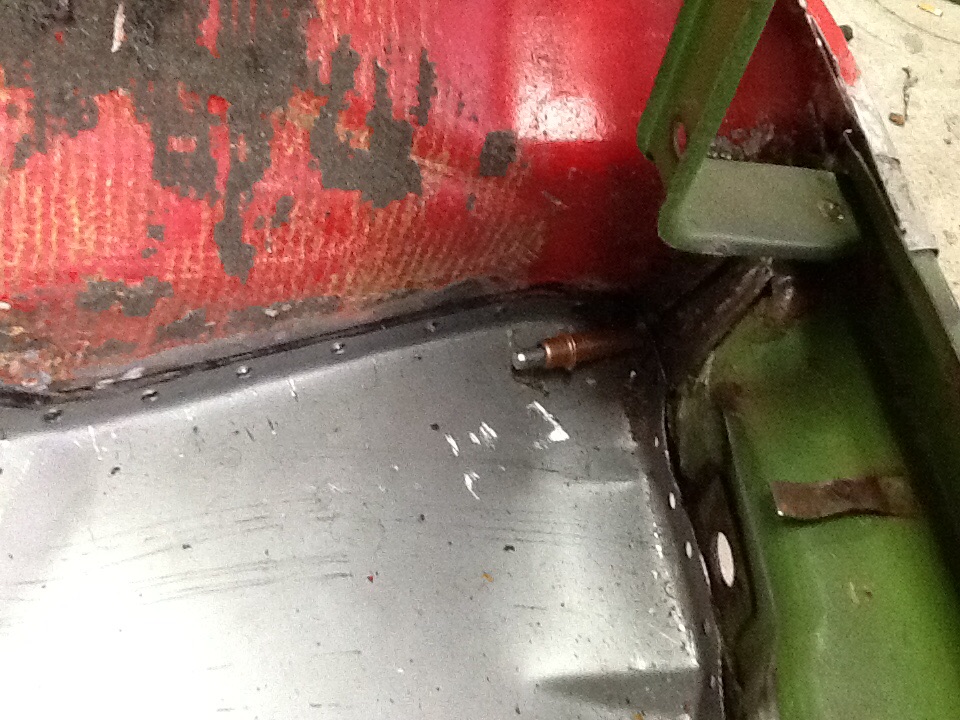 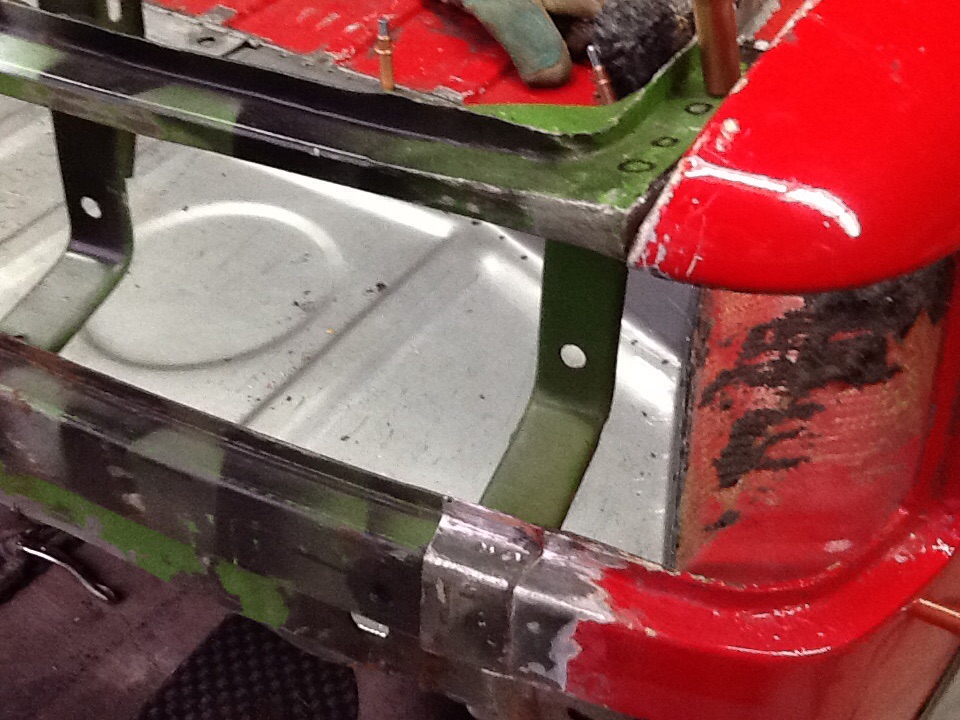  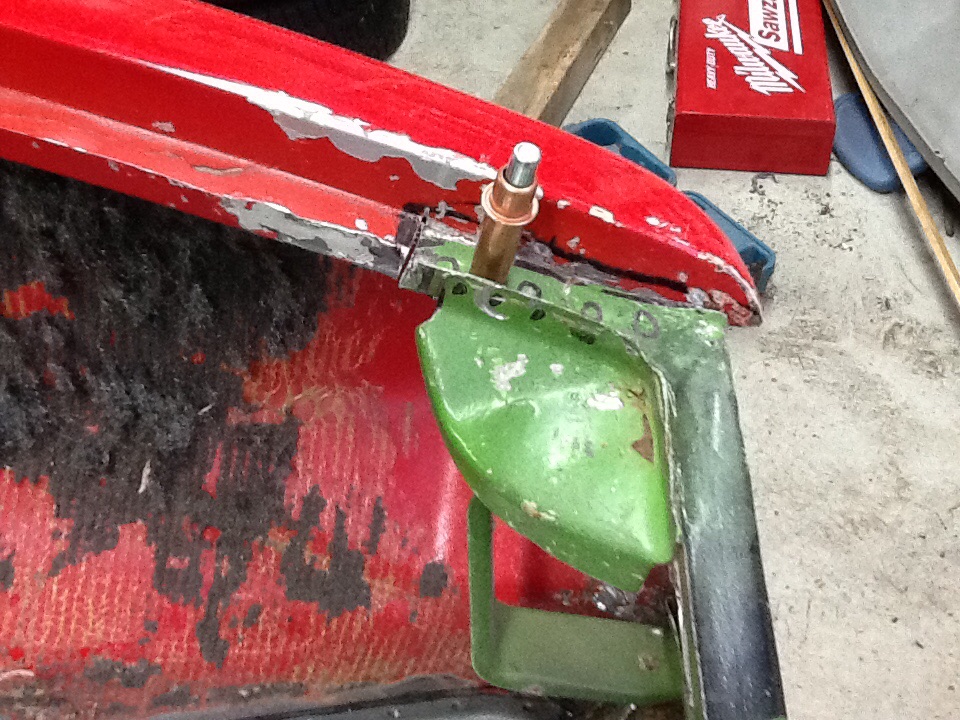 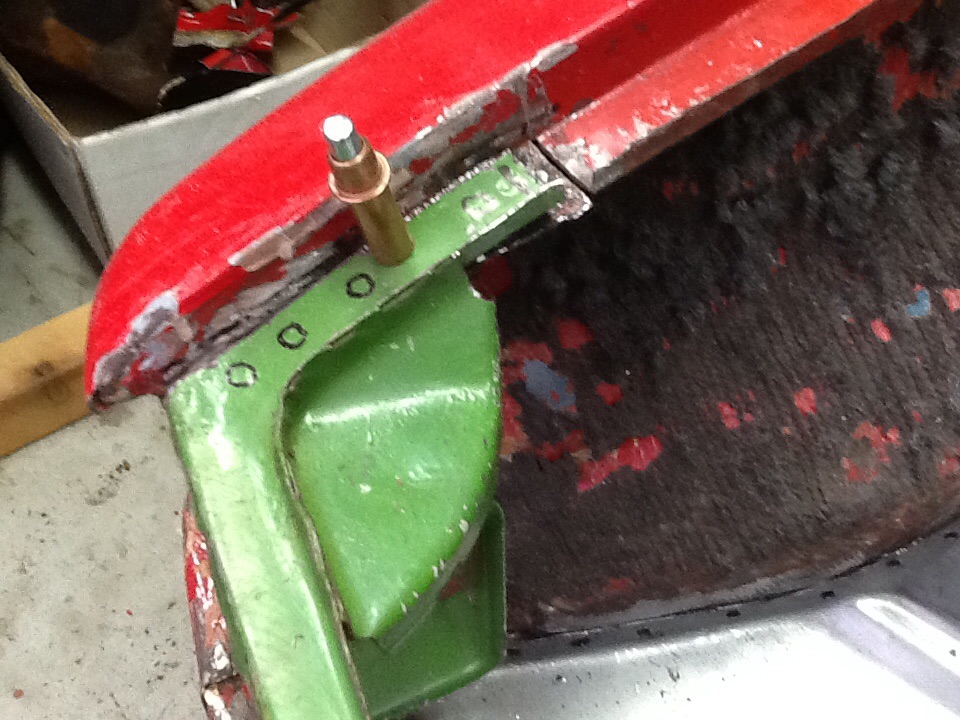 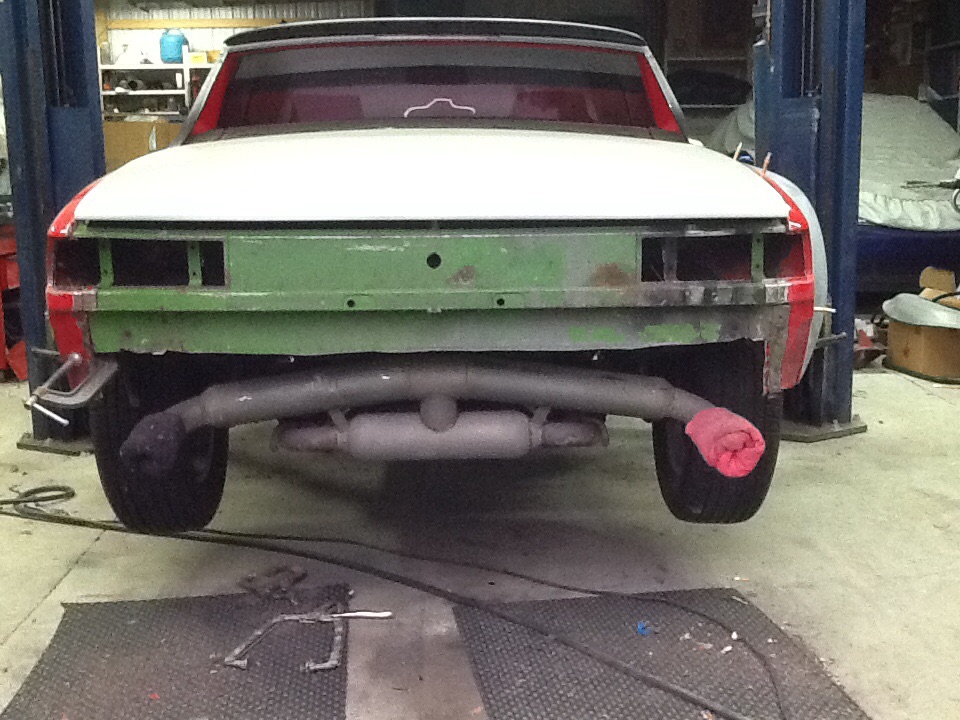 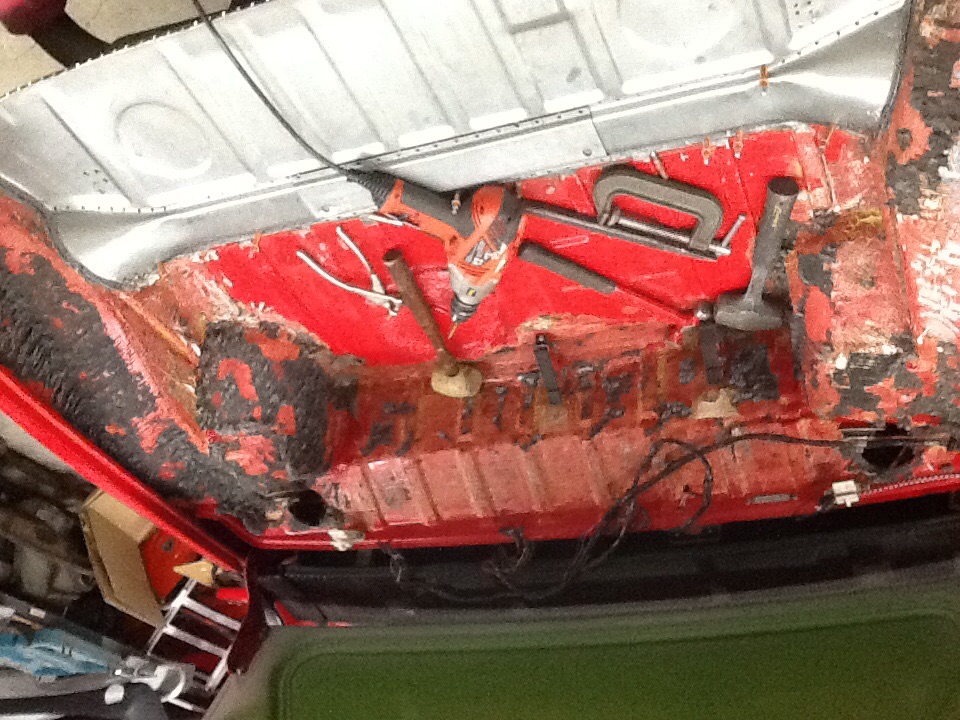 |
|
|
|
| Garland |
Oct 3 2015, 09:19 AM
Post
#5
|
|
Restoration Fanatic Group: Members Posts: 1,431 Joined: 8-January 04 From: ......Michigan...... Member No.: 1,535 Region Association: Upper MidWest |
Started cutting for the headlamps, and as I was putting this on the scrap pile I thought.....
This should be the teener torch. 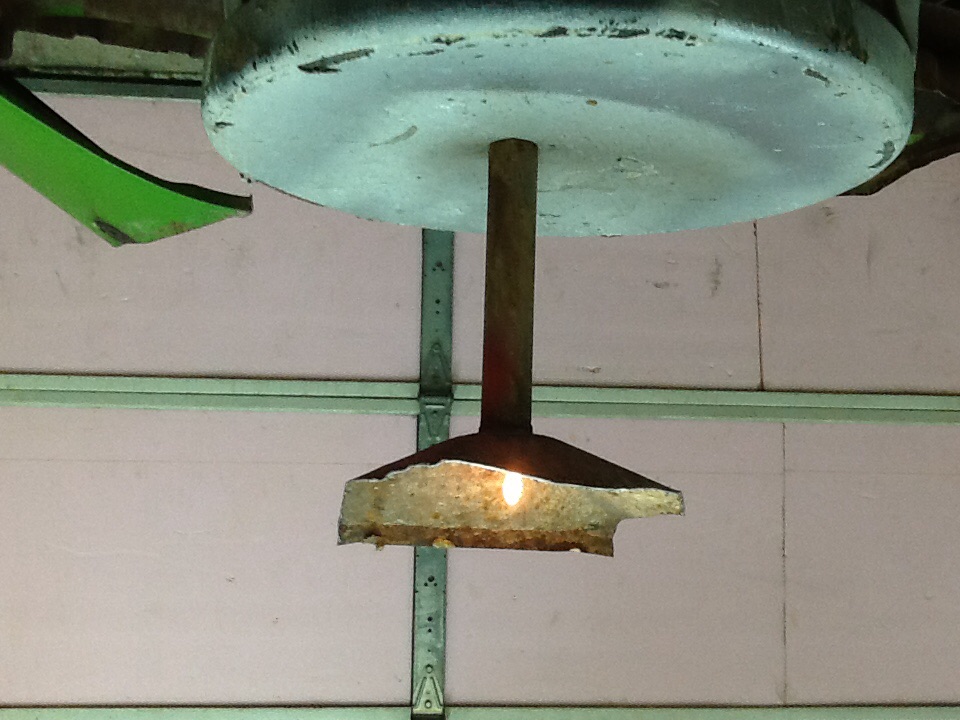 |
|
|
|
| 914forme |
Oct 3 2015, 05:24 PM
Post
#6
|
|
Times a wastin', get wrenchin'! Group: Members Posts: 3,899 Joined: 24-July 04 From: Dayton, Ohio Member No.: 2,388 Region Association: None |
Relocating the headlights (IMG:style_emoticons/default/popcorn[1].gif) wondering what you have in mind.
|
|
|
|
| DRPHIL914 |
Oct 3 2015, 05:34 PM
Post
#7
|
|
Dr. Phil Group: Members Posts: 5,952 Joined: 9-December 09 From: Kennesaw, GA Member No.: 11,106 Region Association: South East States |
I think that snow picture should be considered for the calendar.
|
|
|
|
| stevegm |
Oct 3 2015, 05:39 PM
Post
#8
|
|
Advanced Member Group: Members Posts: 2,111 Joined: 14-July 14 From: North Carolina Member No.: 17,633 Region Association: South East States |
QUOTE(Philip W. @ Oct 3 2015, 07:34 PM)  I think that snow picture should be considered for the calendar. (IMG:style_emoticons/default/agree.gif) If you have a high resolution version (8" by 10", at around 300 DPI) you should submit it - http://www.914world.com/bbs2/index.php?showtopic=265151 |
|
|
|
| Garland |
Oct 4 2015, 08:02 AM
Post
#9
|
|
Restoration Fanatic Group: Members Posts: 1,431 Joined: 8-January 04 From: ......Michigan...... Member No.: 1,535 Region Association: Upper MidWest |
The headlamps are going to a challenge in it self. I have a few ideas, fixed in the bumper opening, and reshape the bumper lower edge for room, and along the top edge of the valance. Also was looking into retractable, also in the bumper. More to come on this.
One other idea I have that's not listed in my build list. That is to rake the roof, a bit. What do you think? And have seen drastic rake of the roof, but I thinking just a bit like this. Just chop the roll bar 2 inches, adjust the body work to meet the targa top, and Windows. Not a cut and paste job. No metal roof.  |
|
|
|
| Garland |
Oct 4 2015, 08:07 AM
Post
#10
|
|
Restoration Fanatic Group: Members Posts: 1,431 Joined: 8-January 04 From: ......Michigan...... Member No.: 1,535 Region Association: Upper MidWest |
Scraped all carpet, glue and some seam sealer. .
 Attached image(s) 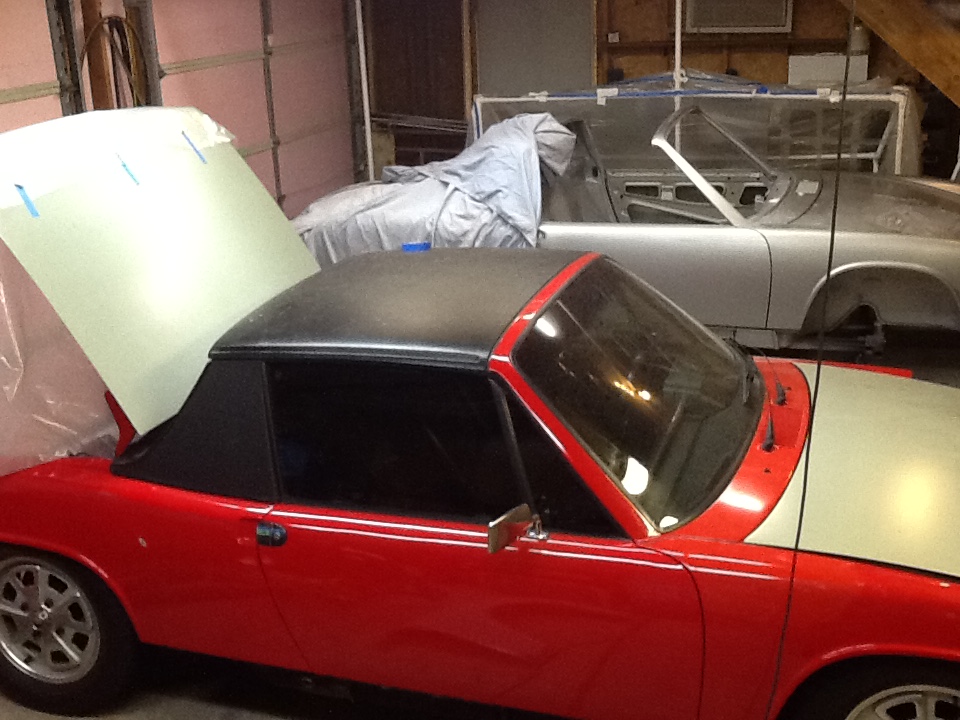
|
|
|
|
| Garland |
Oct 4 2015, 11:25 AM
Post
#11
|
|
Restoration Fanatic Group: Members Posts: 1,431 Joined: 8-January 04 From: ......Michigan...... Member No.: 1,535 Region Association: Upper MidWest |
Then paint remover, and a rinse
 |
|
|
|
| Garland |
Oct 4 2015, 12:41 PM
Post
#12
|
|
Restoration Fanatic Group: Members Posts: 1,431 Joined: 8-January 04 From: ......Michigan...... Member No.: 1,535 Region Association: Upper MidWest |
My 73 build off challenge car. "Michigan Build"
Sep 2015 now the Build off car. 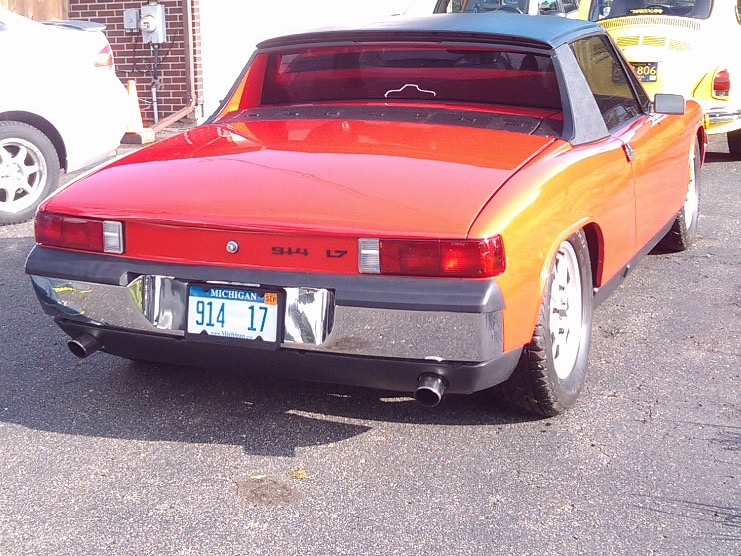 And At the Midwest classic in 2004 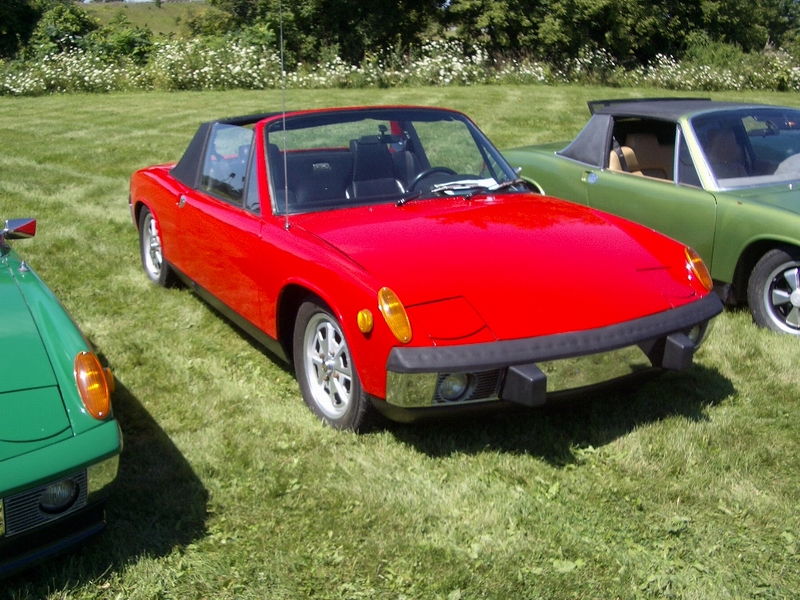 My inspirations for this build. The one I sold, 27 years ago. My 914 back in "80's sold in "88 Started as a club racer, then back to driver. Owned this one for ten or more years. 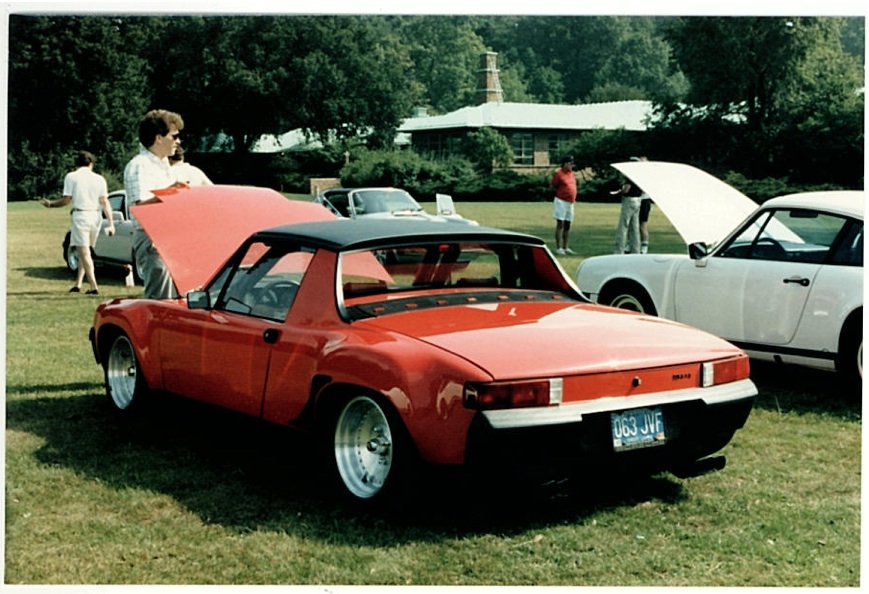 The garage were I did all the work. 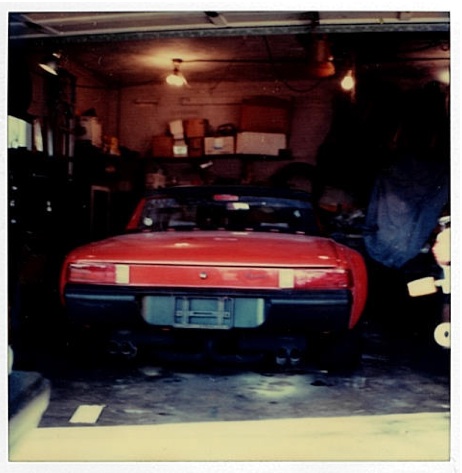 Converted back to road car 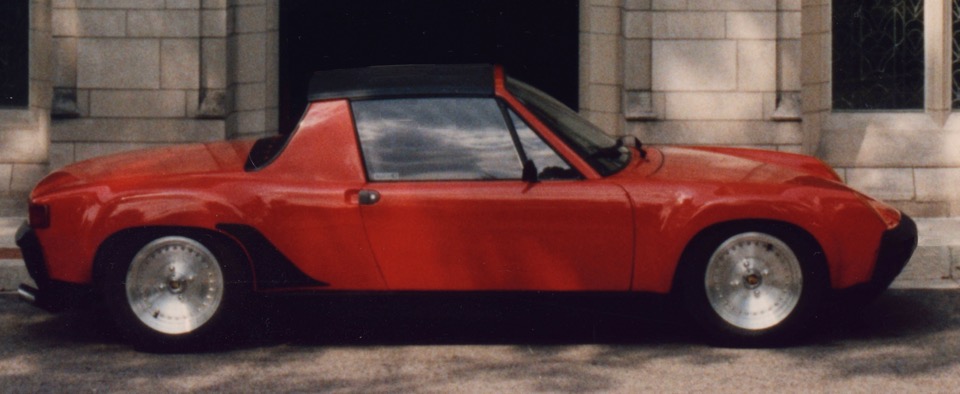 Club racing it in Oakland Michigan 1970-80 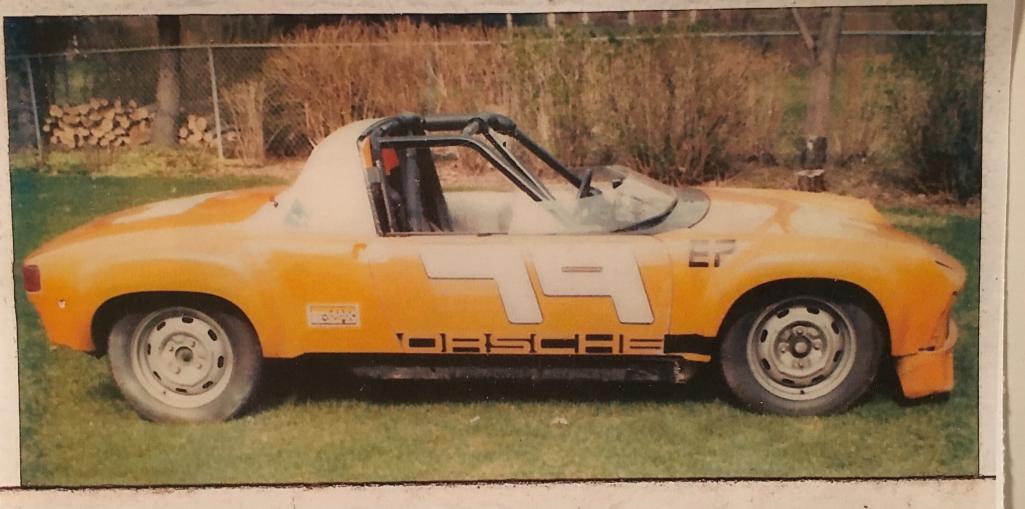 The black car we have all seen. 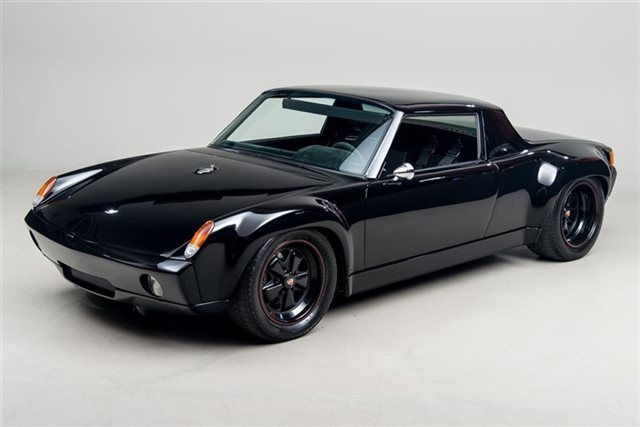 |
|
|
|
| Mike1981 |
Oct 9 2015, 06:51 PM
Post
#13
|
|
Member Group: Members Posts: 289 Joined: 21-July 14 From: Phoenix Member No.: 17,663 Region Association: South East States |
Nice Work John
I always thought your Red 1.7 looked great to me. Admire your skills and work ethic Mike |
|
|
|
| trojanhorsepower |
Oct 12 2015, 07:35 PM
Post
#14
|
|
Senior Member Group: Members Posts: 1,053 Joined: 21-September 03 From: Marion, NC Member No.: 1,179 Region Association: None |
John,
Who made your rear trunk floor patch panel? |
|
|
|
| Garland |
Oct 13 2015, 11:07 PM
Post
#15
|
|
Restoration Fanatic Group: Members Posts: 1,431 Joined: 8-January 04 From: ......Michigan...... Member No.: 1,535 Region Association: Upper MidWest |
Right here:
 Great products! They have molds. Family owned company. |
|
|
|
| trojanhorsepower |
Oct 14 2015, 09:48 AM
Post
#16
|
|
Senior Member Group: Members Posts: 1,053 Joined: 21-September 03 From: Marion, NC Member No.: 1,179 Region Association: None |
Humm. I have the same one, but mine does not have that lip over the cross brace. It just runs out straight. Did you fold it over to make the flange for the spot welds? Did you drill and weld in a nut in the cross brace, or just go with out it?
|
|
|
|
| Garland |
Oct 14 2015, 04:35 PM
Post
#17
|
|
Restoration Fanatic Group: Members Posts: 1,431 Joined: 8-January 04 From: ......Michigan...... Member No.: 1,535 Region Association: Upper MidWest |
I bent the lip, and made the flange. I did not add the nut. Just be sure to line it up tight, before you decide where to bend. And that the small center cap fits the width.
 |
|
|
|
| dakotaewing |
Oct 14 2015, 04:52 PM
Post
#18
|
|
Senior Member Group: Members Posts: 1,167 Joined: 8-July 03 From: DeSoto, Tx Member No.: 897 Region Association: Southwest Region |
You might consider striping all the paint off the inside of the rear panel, and priming most of it prior to welding that piece in...
it will be easier to treat the small areas of rust with the panel out as well - Looking good!! |
|
|
|
| Garland |
Oct 19 2015, 09:31 PM
Post
#19
|
|
Restoration Fanatic Group: Members Posts: 1,431 Joined: 8-January 04 From: ......Michigan...... Member No.: 1,535 Region Association: Upper MidWest |
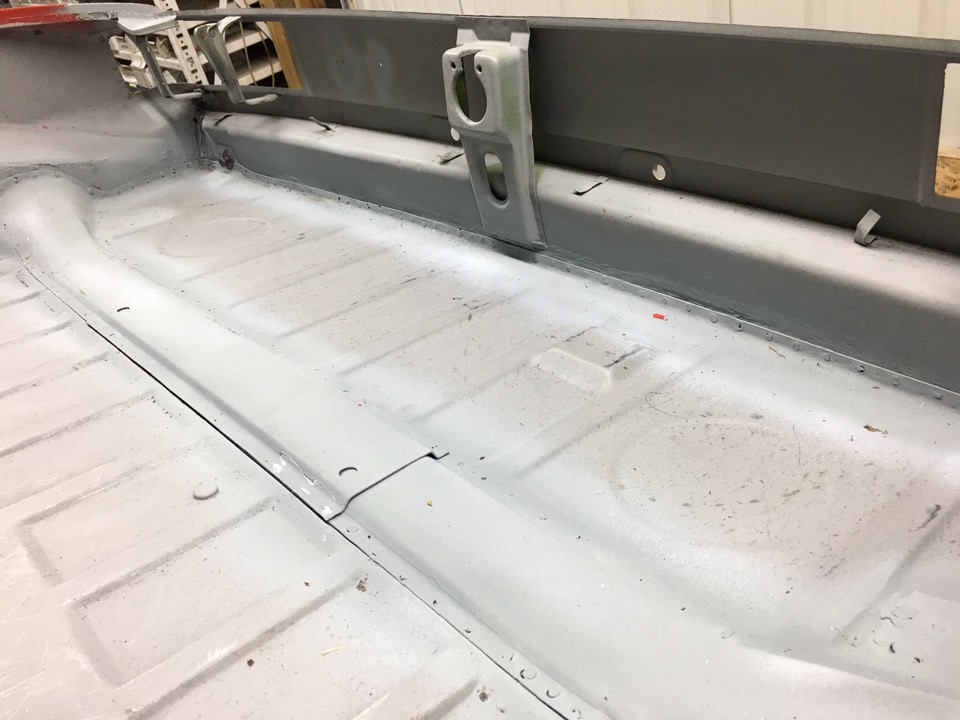
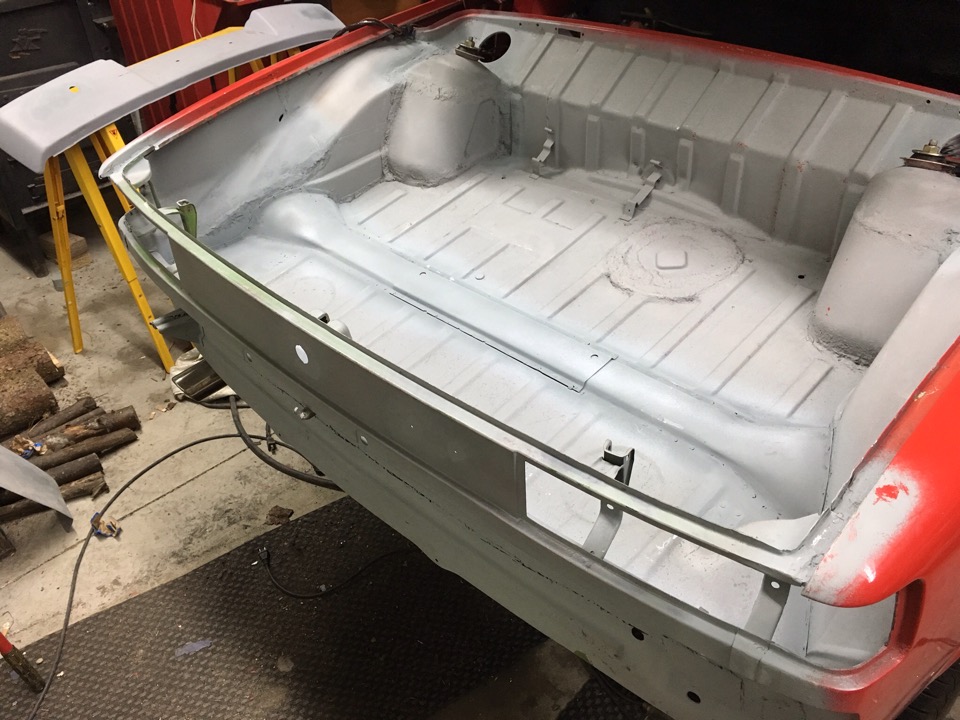
QUOTE(dakotaewing @ Oct 14 2015, 04:52 PM) You might consider striping all the paint off the inside of the rear panel, and priming most of it prior to welding that piece in... it will be easier to treat the small areas of rust with the panel out as well - Looking good!! Thank you, Update: 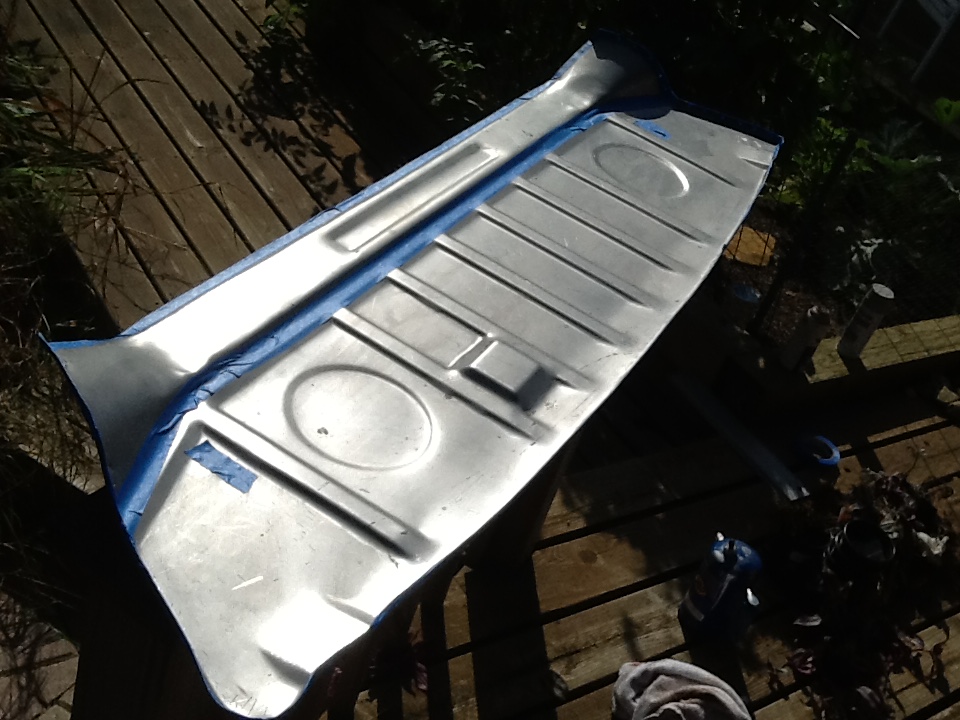 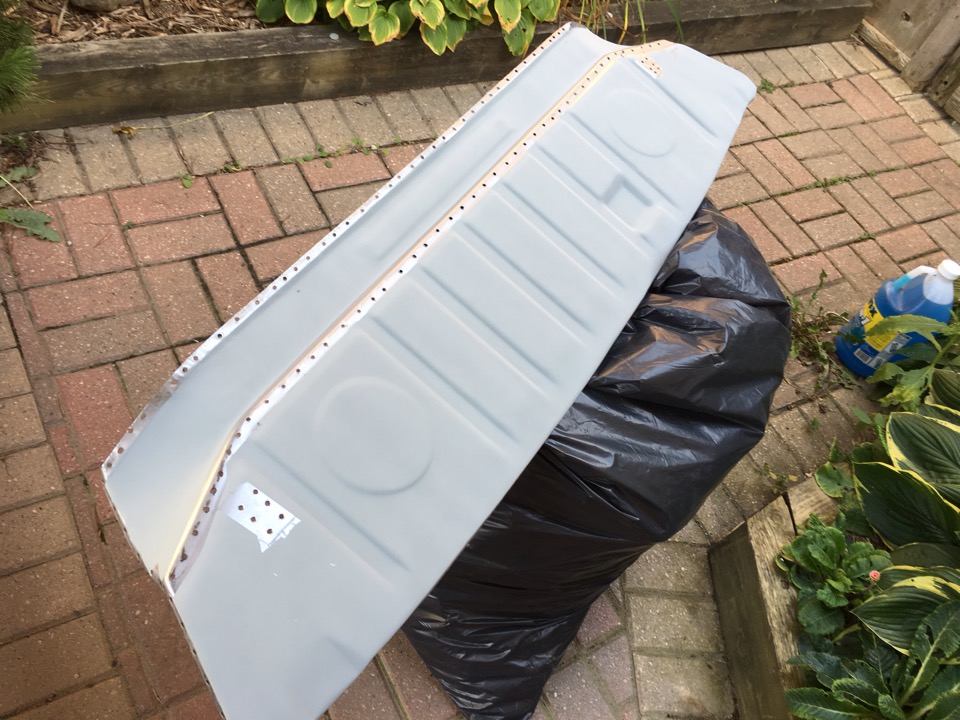 Weld primer only where needed, expensive stuff. 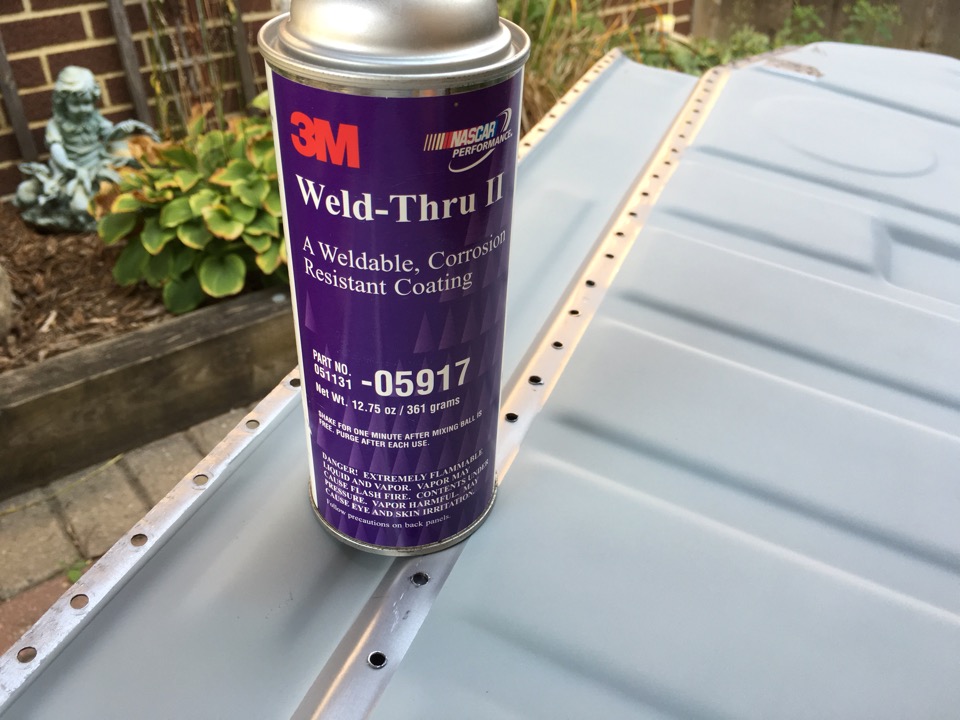 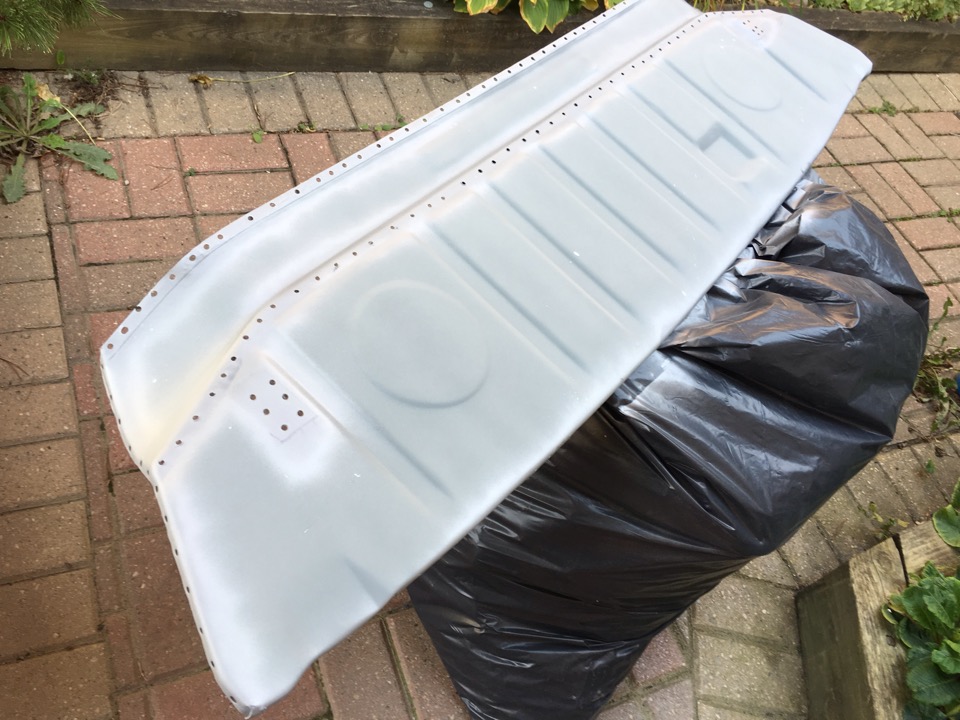 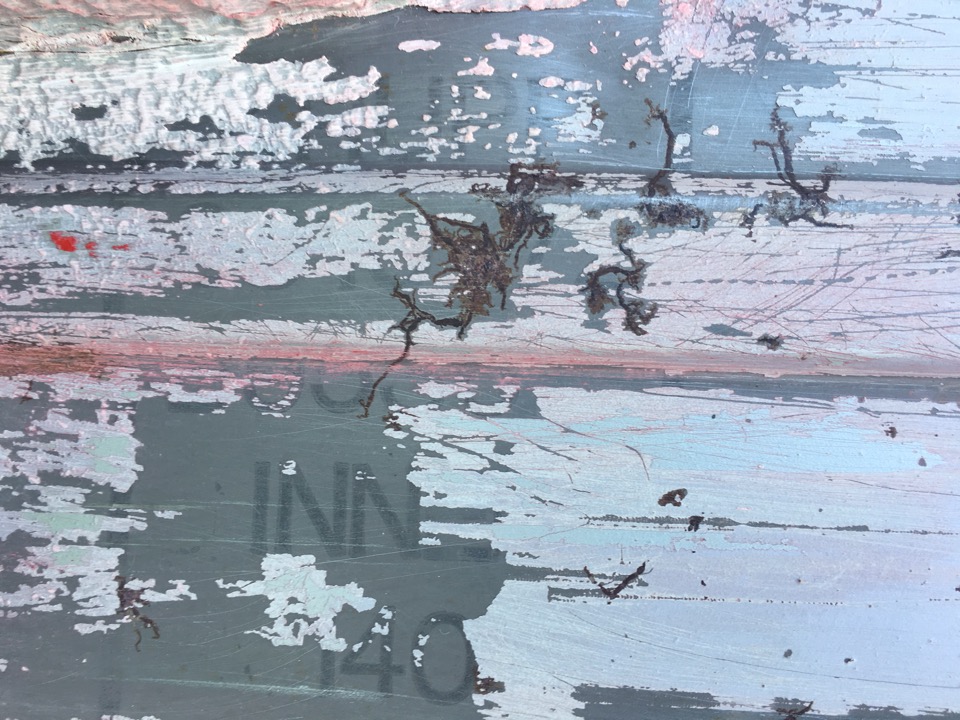 Printing found on the factor metal. 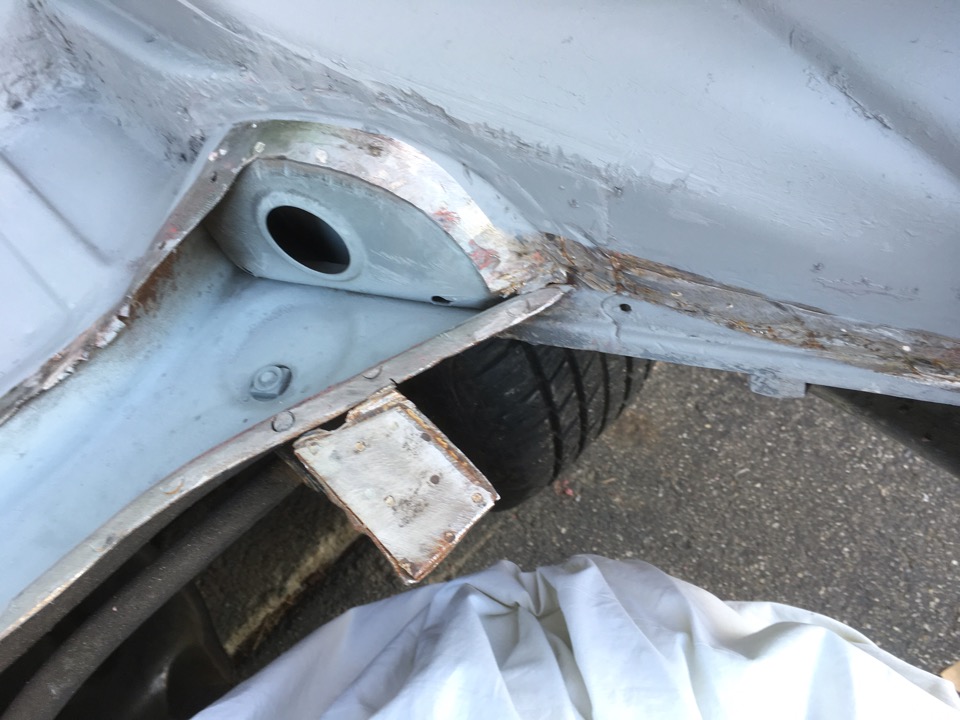 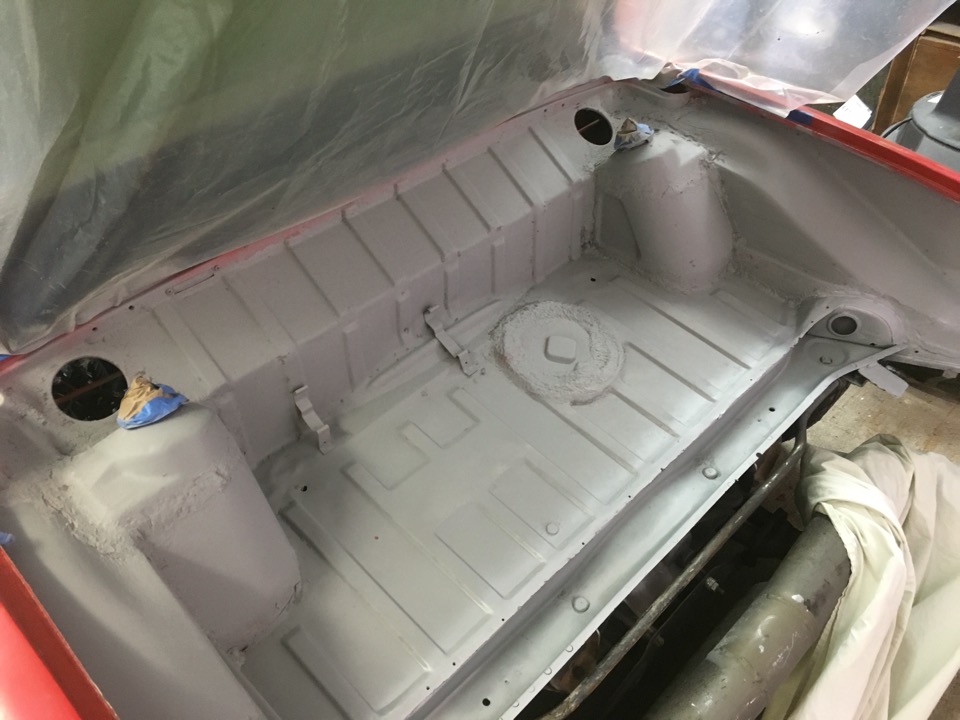 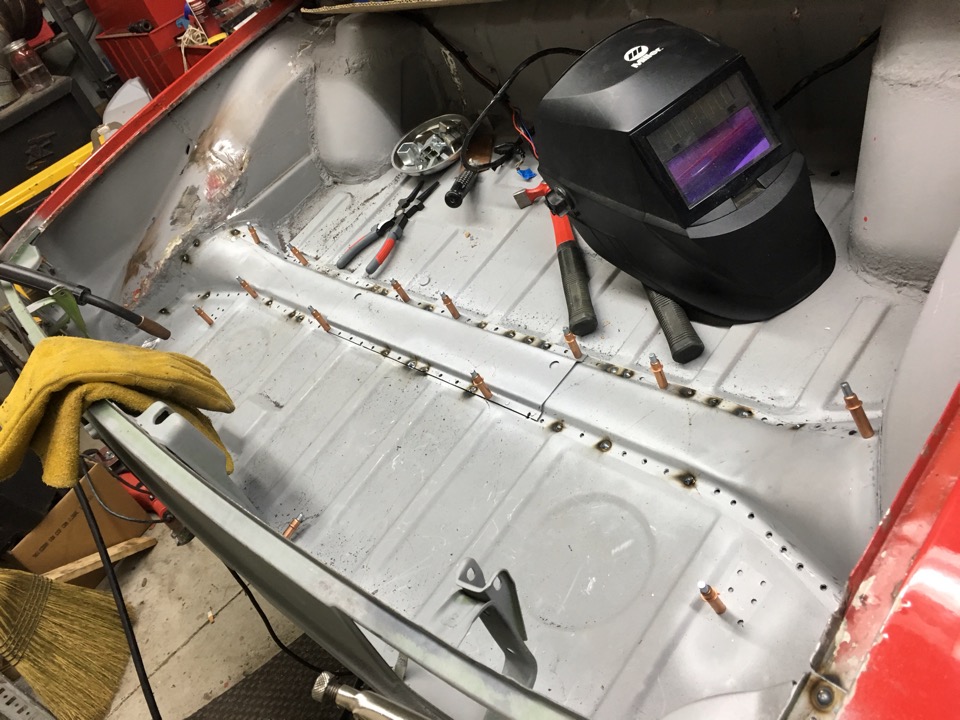 Very little experience at welding, but improving. 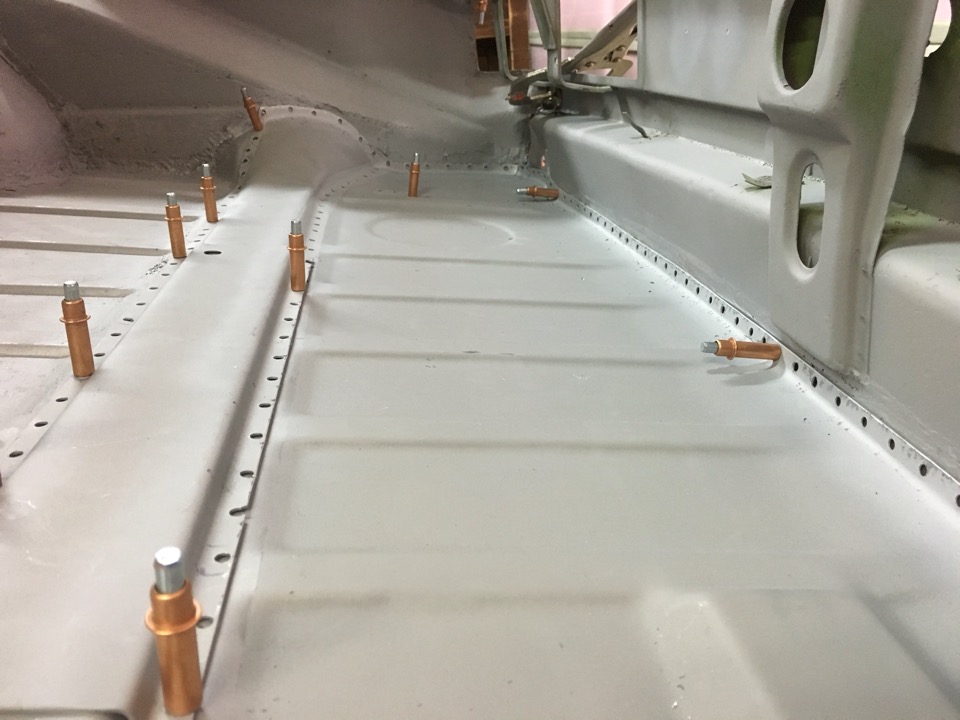 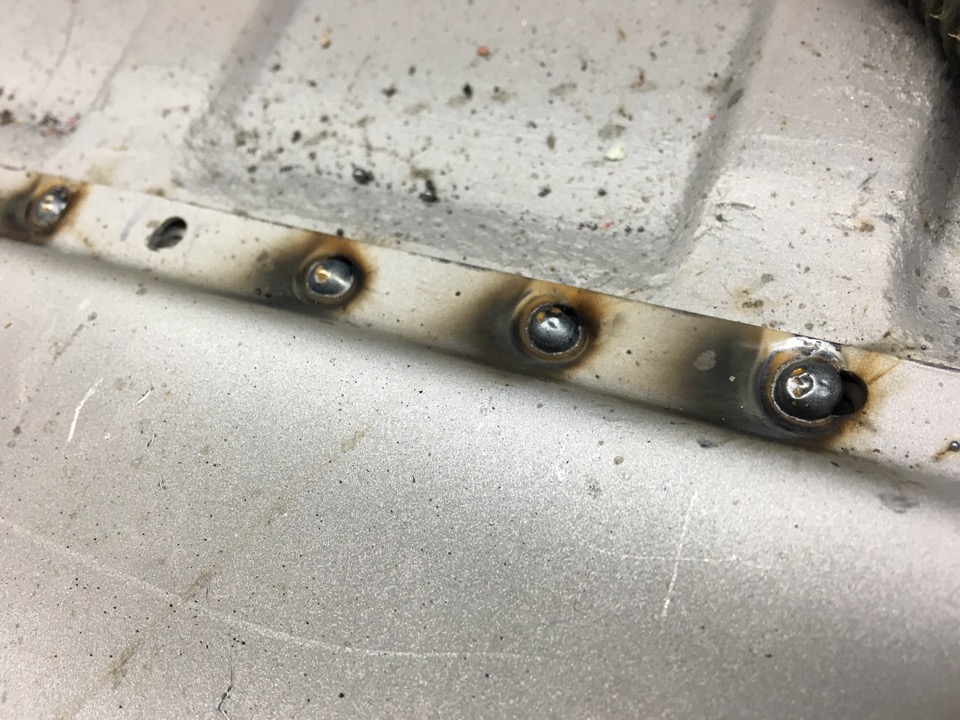 (IMG:style_emoticons/default/welder.gif) 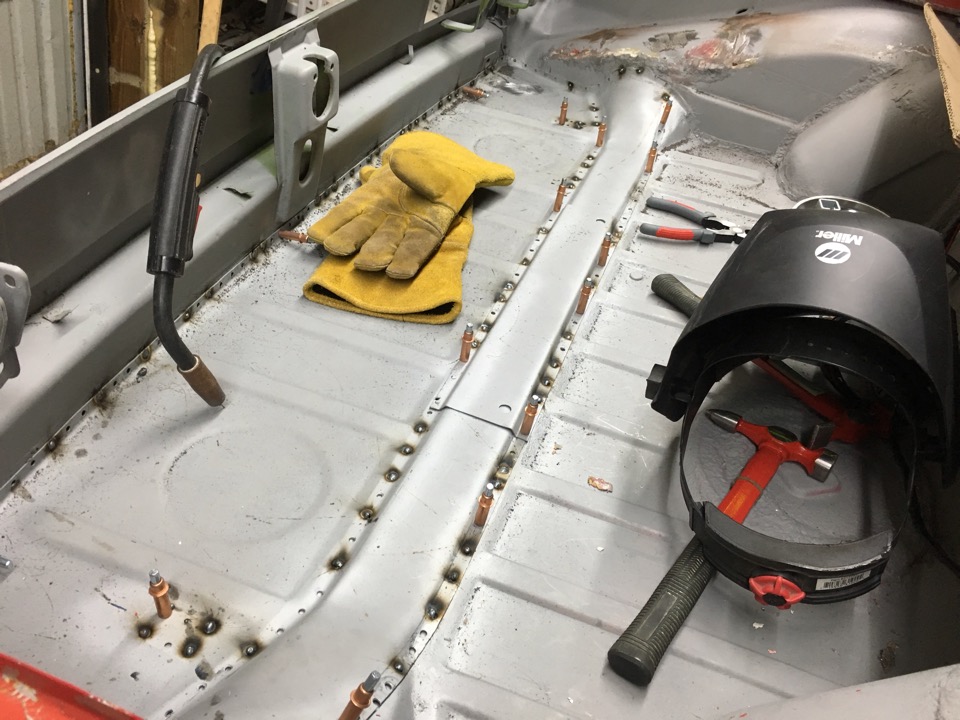 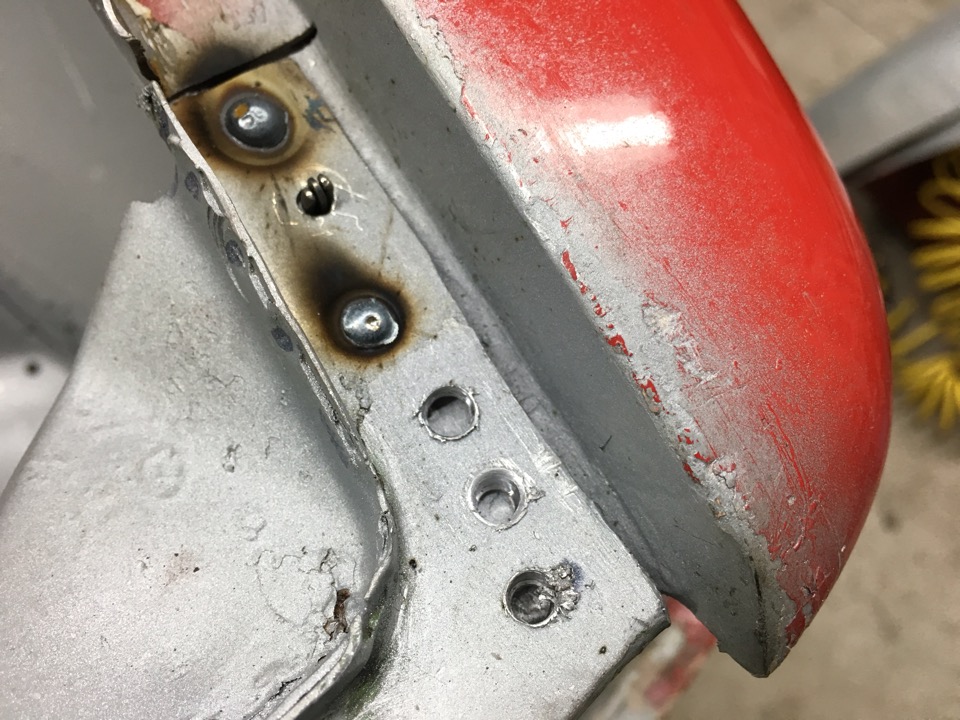 About 250 welds. 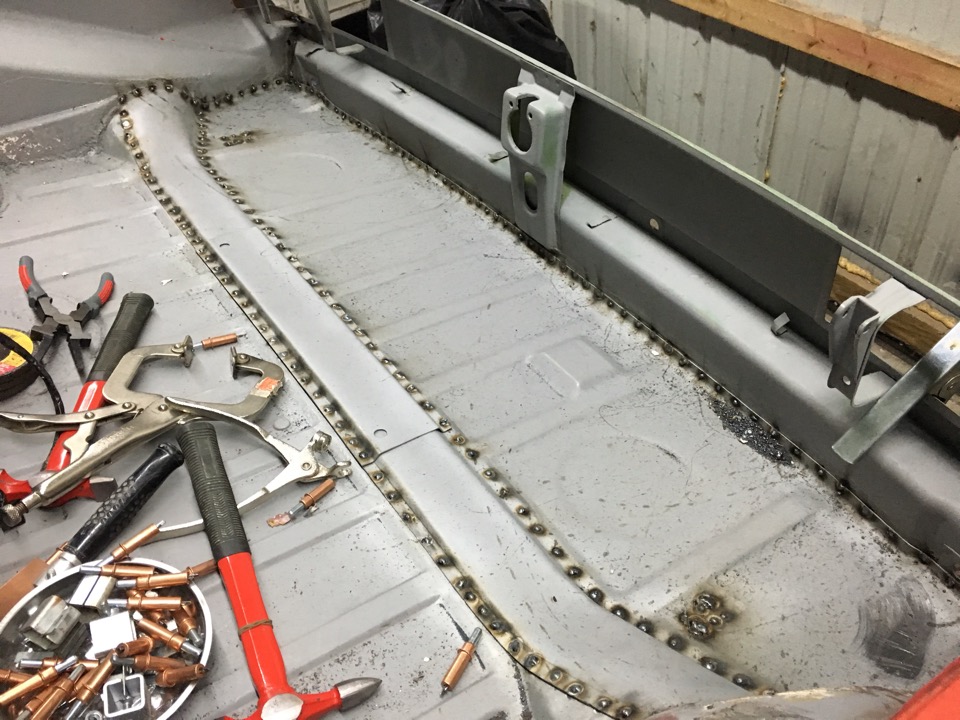 |
|
|
|
| Garland |
Oct 21 2015, 05:42 PM
Post
#20
|
|
Restoration Fanatic Group: Members Posts: 1,431 Joined: 8-January 04 From: ......Michigan...... Member No.: 1,535 Region Association: Upper MidWest |
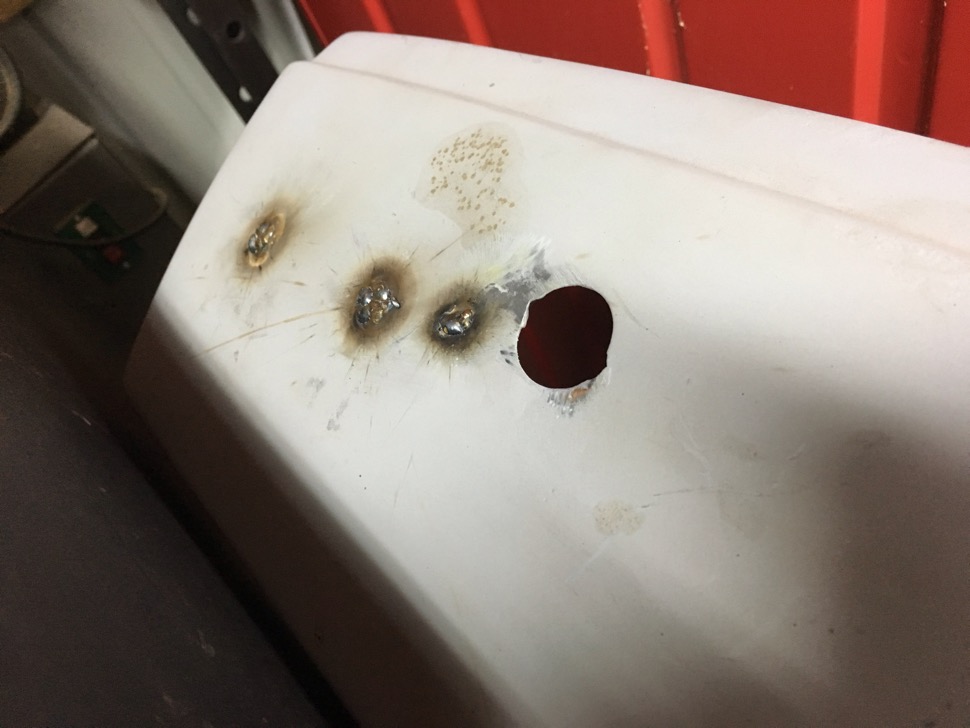
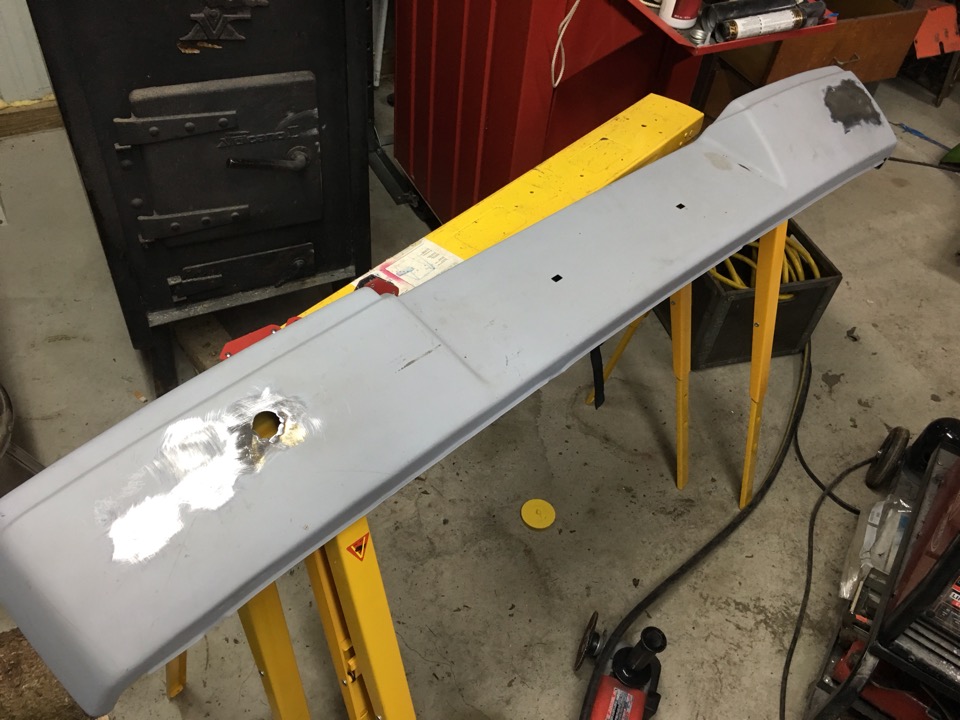
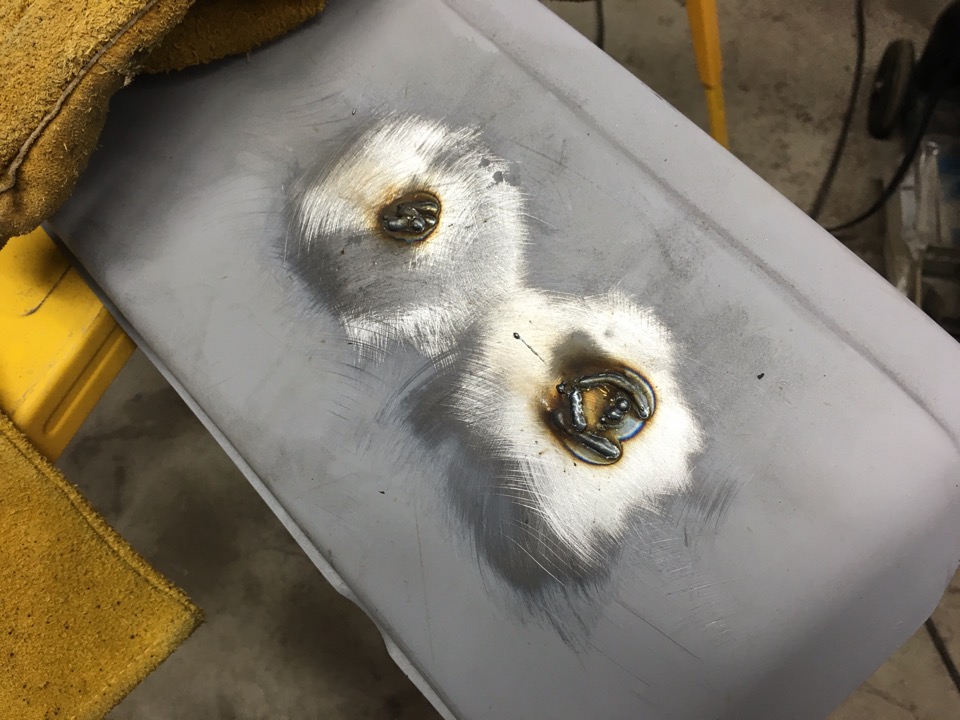
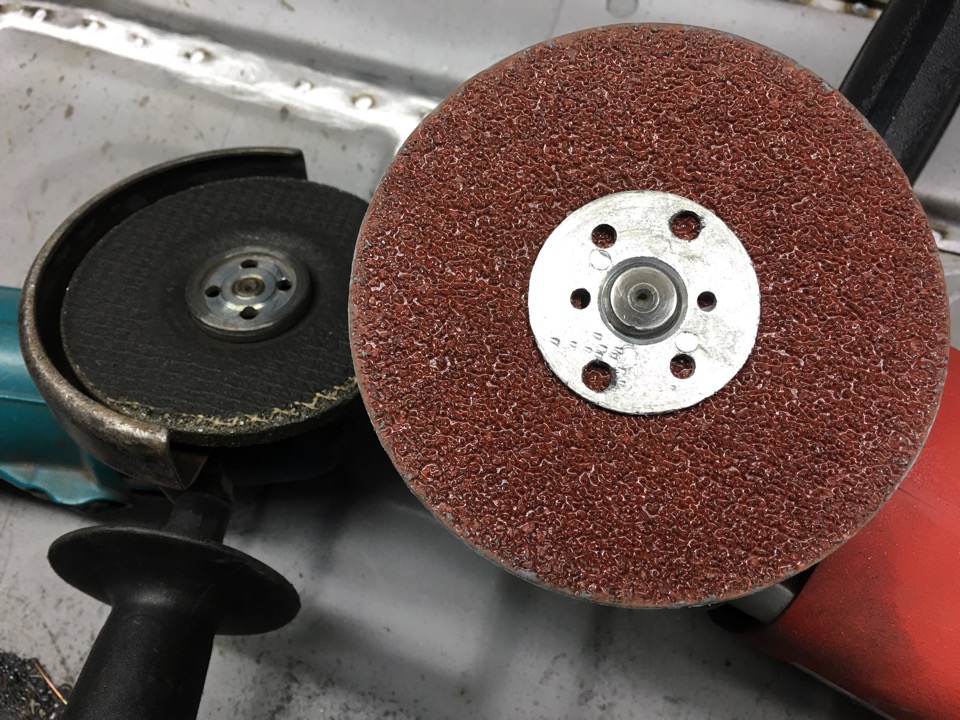
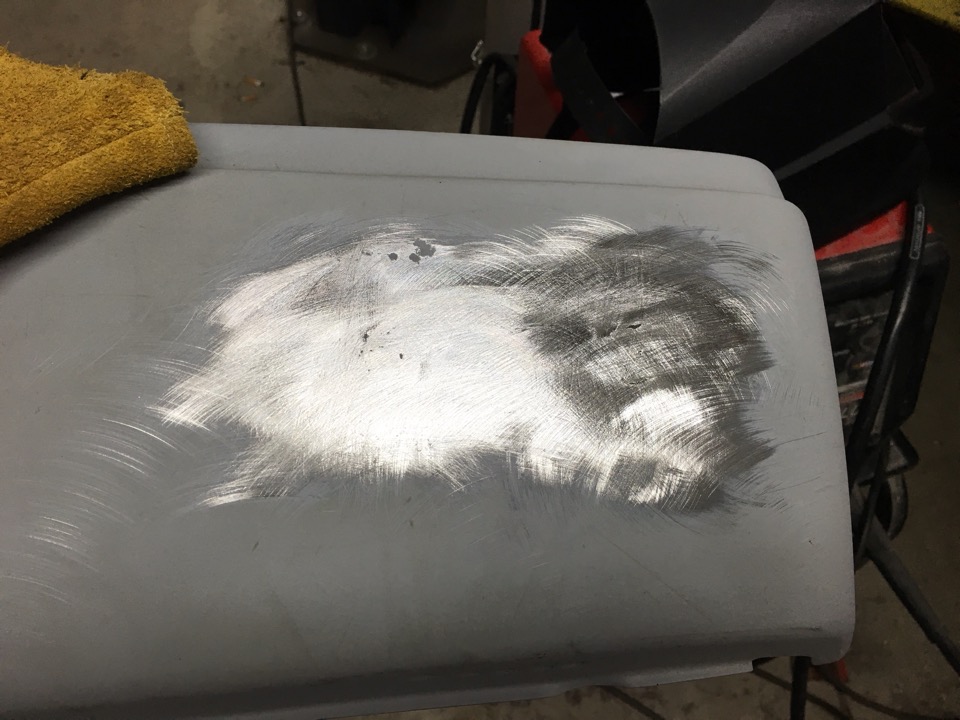
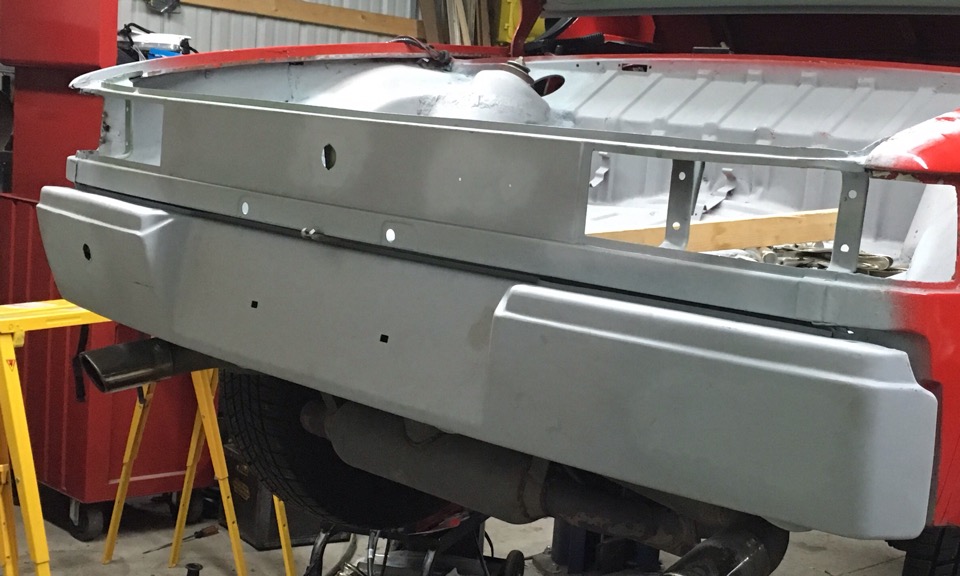
Finished up the rear early steel bumper. Needed to close up the holes from where some PO drilled to mount tits on a early bumper. I also used a wheel to knock down the weld, disc to removed 80% more, then a flapper disc to finish. Buy the time I get to the fenders, I think I will feel confident that they will turn out nice.
        |
|
|
|
|
1 User(s) are reading this topic (1 Guests and 0 Anonymous Users)
0 Members:

|
Lo-Fi Version | Time is now: 19th July 2026 - 07:43 AM |
Invision Power Board
v9.1.4 © 2026 IPS, Inc.