|
|
|
Porsche, and the Porsche crest are registered trademarks of Dr. Ing. h.c. F. Porsche AG.
This site is not affiliated with Porsche in any way. Its only purpose is to provide an online forum for car enthusiasts. All other trademarks are property of their respective owners. |
|
|

  |

| JoeDees |
 Oct 21 2015, 07:01 PM Oct 21 2015, 07:01 PM
Post
#21
|
|
Senior Member  Group: Members Posts: 515 Joined: 10-November 14 From: Northern Kentucky Member No.: 18,106 Region Association: None |
I'm looking at bumper hole filling in my future too, was the chrome already off of yours? Or did you remove it? If you removed it, how did you do it? Thanks.
|
   |

 
|
| Garland |
Oct 21 2015, 08:49 PM
Post
#22
|
|
Restoration Fanatic Group: Members Posts: 1,431 Joined: 8-January 04 From: ......Michigan...... Member No.: 1,535 Region Association: Upper MidWest |
This was never chromed, was steel painted black when new.
|
|
|
|
| Garland |
Nov 29 2015, 07:59 PM
Post
#23
|
|
Restoration Fanatic Group: Members Posts: 1,431 Joined: 8-January 04 From: ......Michigan...... Member No.: 1,535 Region Association: Upper MidWest |
Welded the rear fenders on, and the left front fender patch.
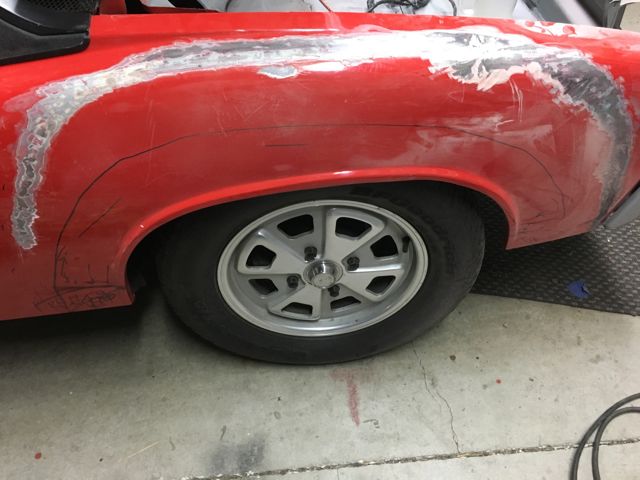 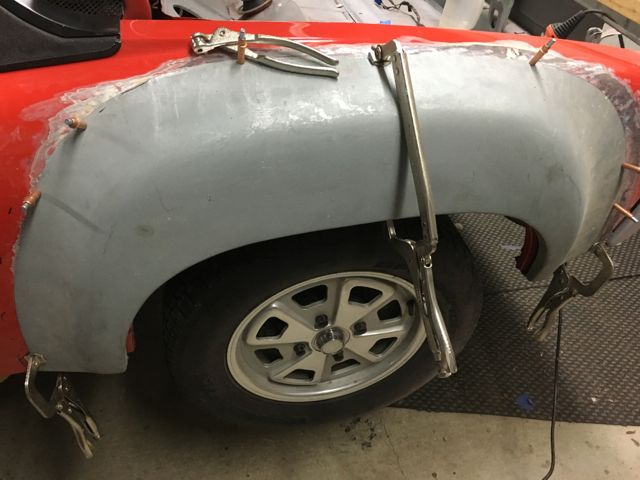      Getting cold in Michigan.  When lining up the fenders I start at the bottom of the fender and line up the bottom edge to the same height as the stock fender.  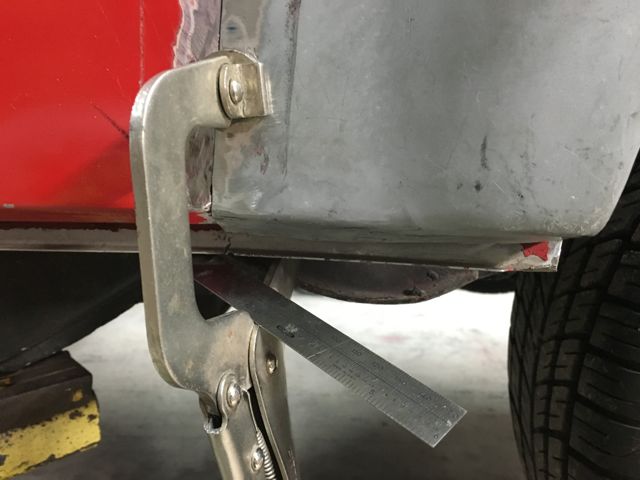 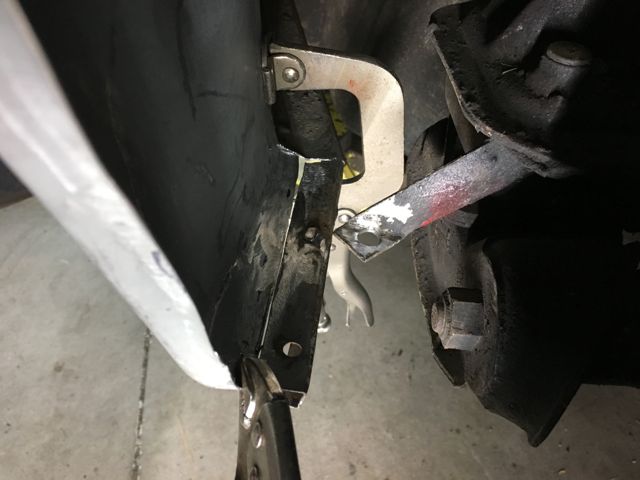 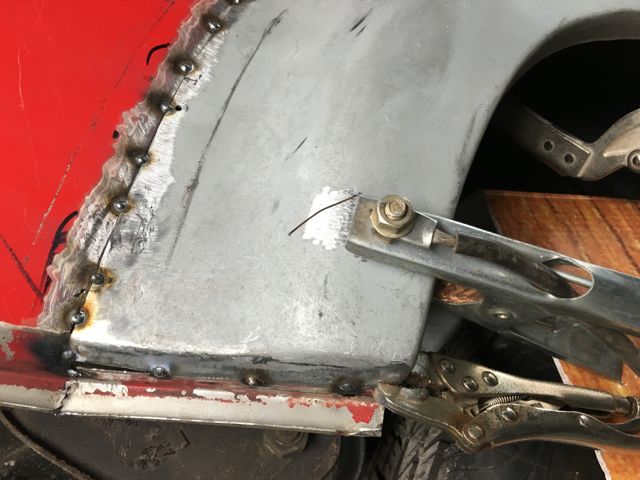 Cutting a wedge and angling out the valance mount channel. 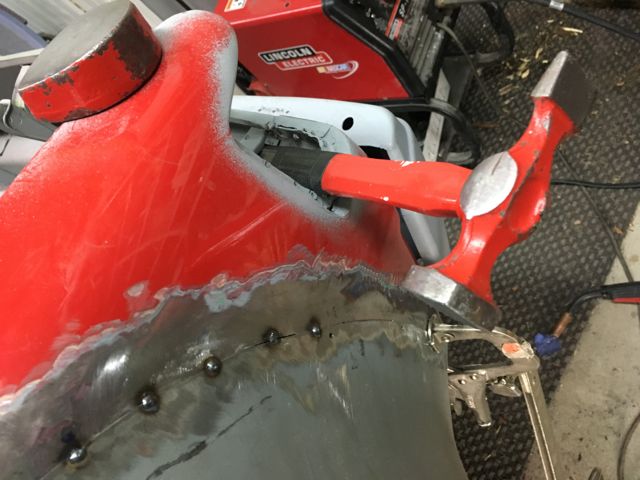 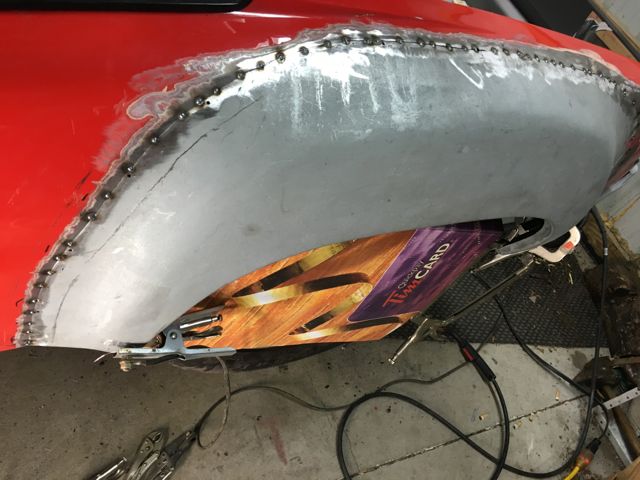 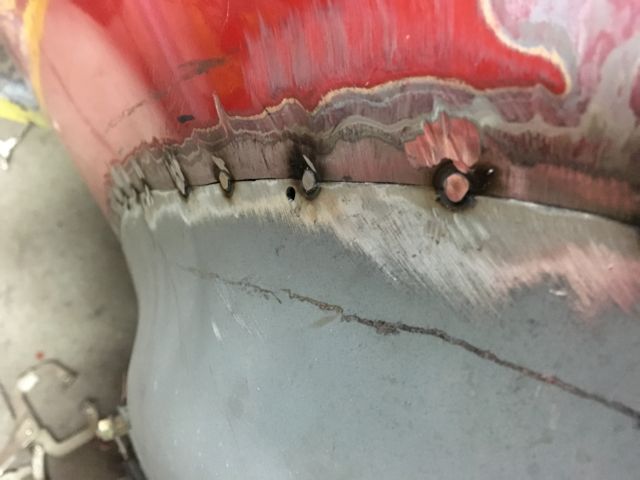 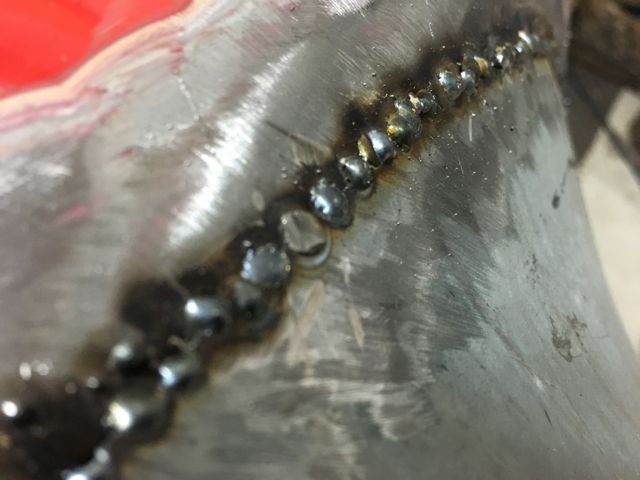 Im learning as I go. 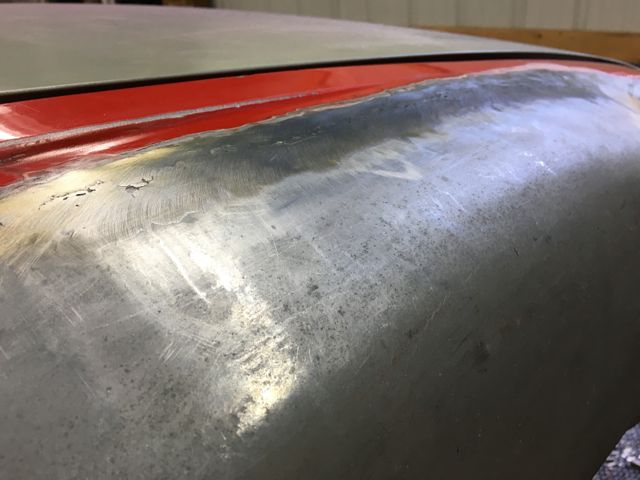 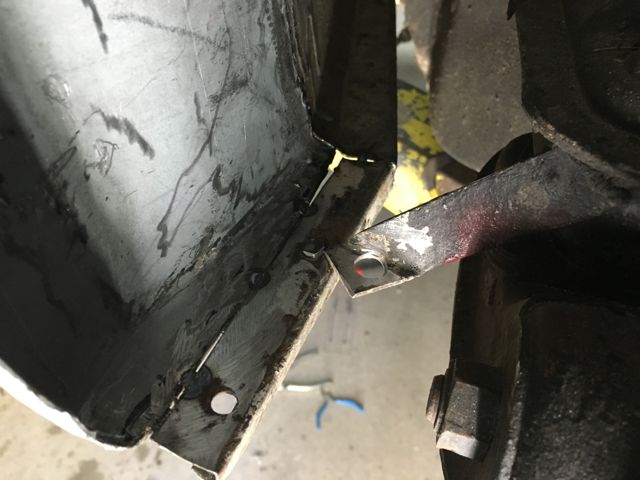 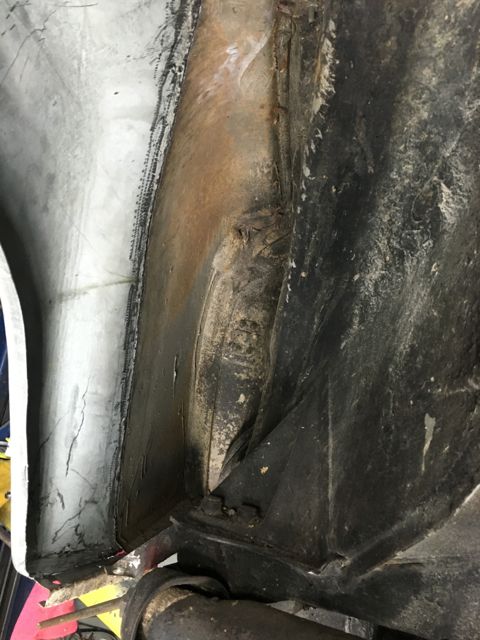 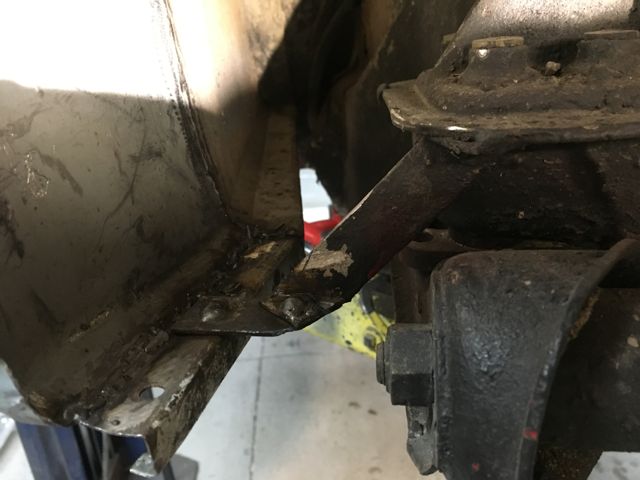 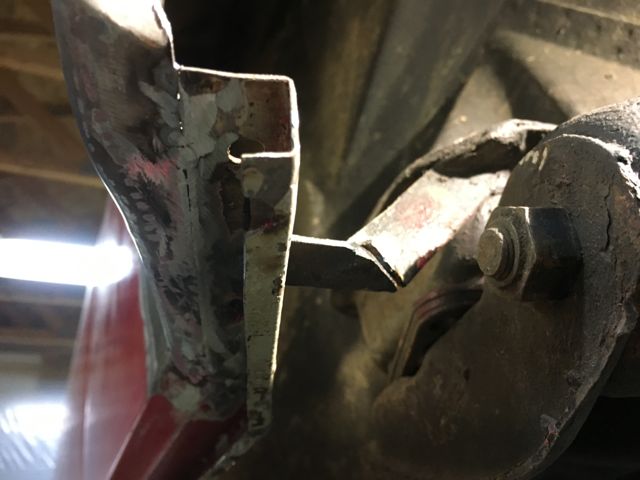 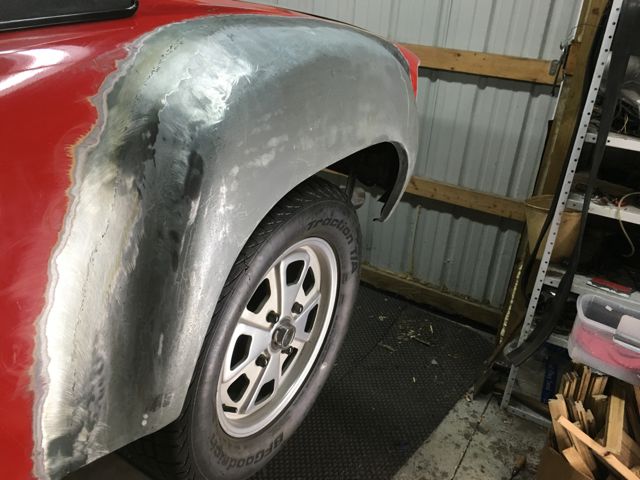 And did the right side. 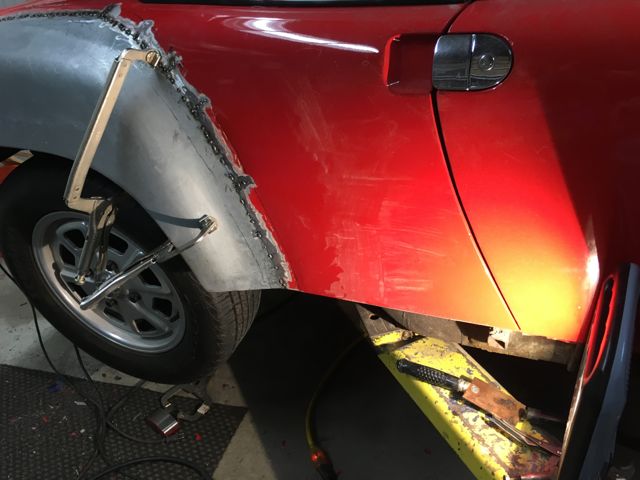 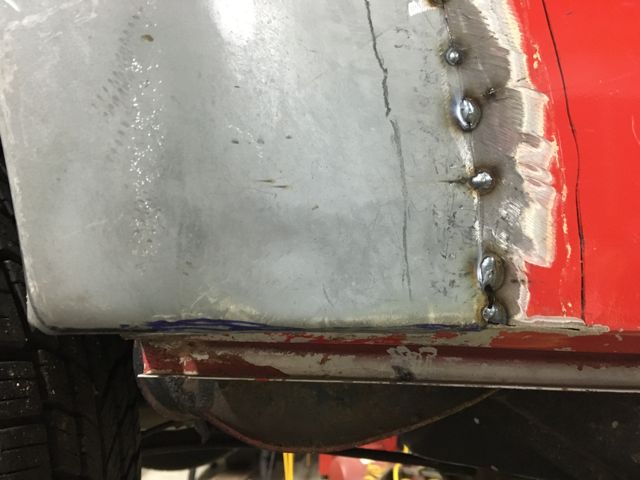 The left front fender patched in. 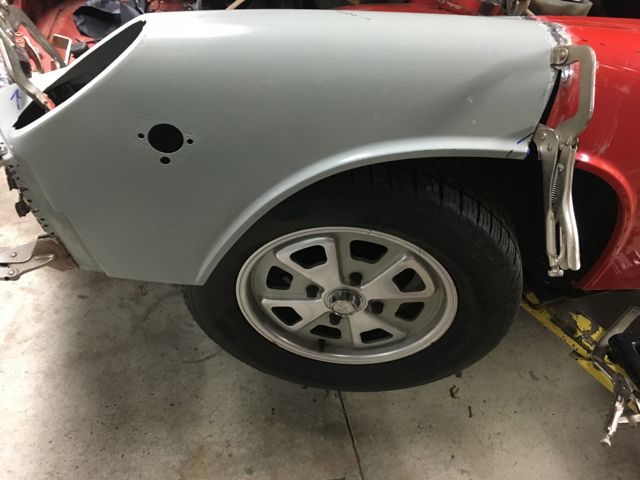 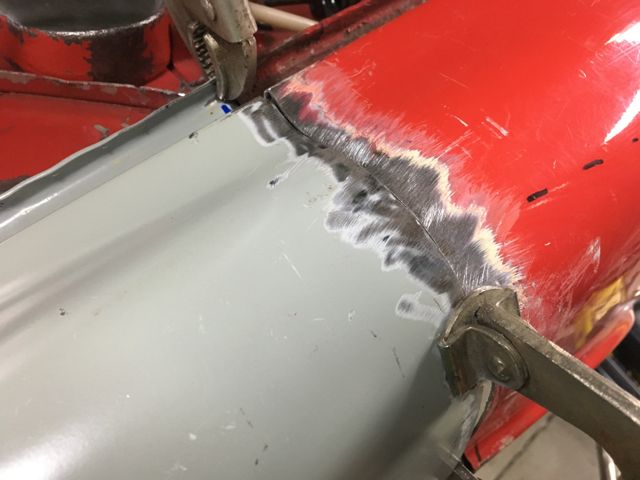 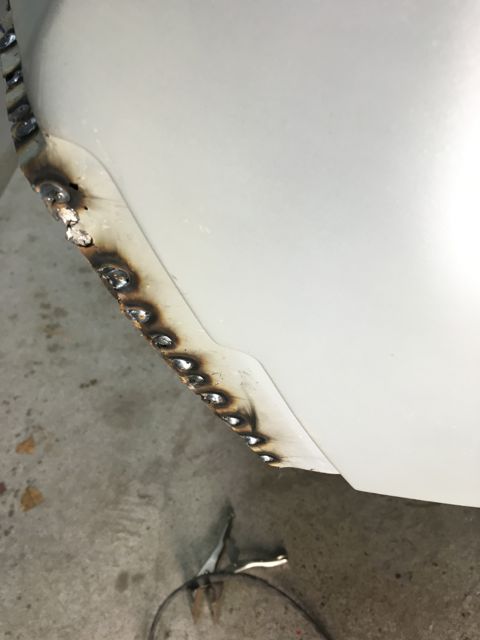 Now Ill move on to the fronts and the valances as I move forward. Attached image(s) 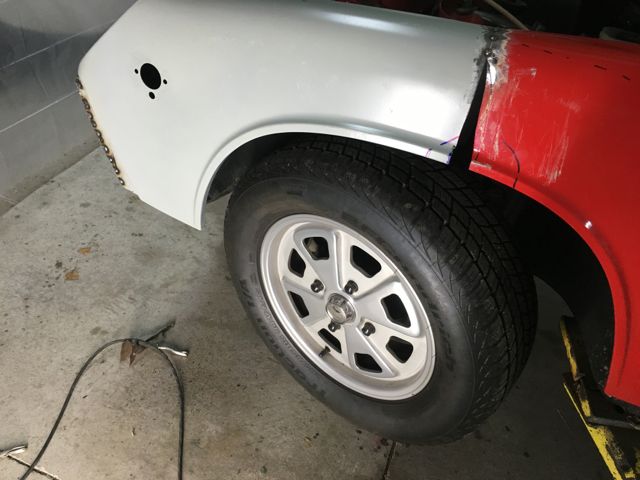
|
|
|
|
| Andyrew |
Nov 29 2015, 08:31 PM
Post
#24
|
|
Spooling.... Please wait Group: Members Posts: 13,381 Joined: 20-January 03 From: Riverbank, Ca Member No.: 172 Region Association: Northern California |
Did you purposefully make a notch in your front patch for your clamp?
Your work so far looks very good! |
 |
|
| Garland |
Nov 29 2015, 10:12 PM
Post
#25
|
|
Restoration Fanatic Group: Members Posts: 1,431 Joined: 8-January 04 From: ......Michigan...... Member No.: 1,535 Region Association: Upper MidWest |
QUOTE(Andyrew @ Nov 29 2015, 09:31 PM)  Did you purposefully make a notch in your front patch for your clamp? Your work so far looks very good! Thank you Yes, and the notch will be gone when I add the flare. |
|
|
|
| Garland |
Dec 31 2015, 08:01 PM
Post
#26
|
|
Restoration Fanatic Group: Members Posts: 1,431 Joined: 8-January 04 From: ......Michigan...... Member No.: 1,535 Region Association: Upper MidWest |
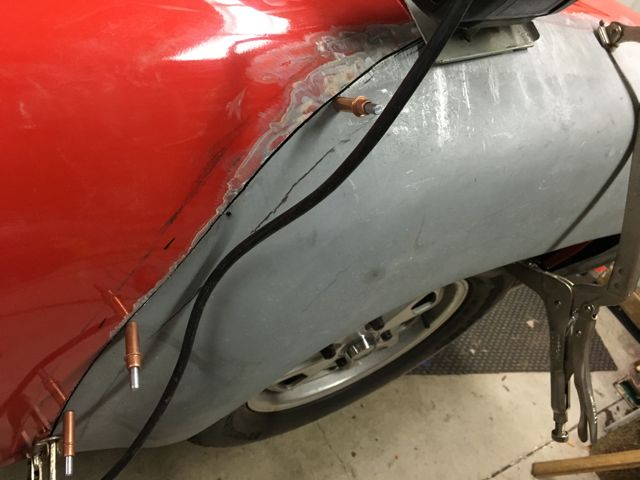
i finished up the front fenders, and the 3 of the 4 valances. Lots of time with the hammer on the fenders to keep the welds flat.
Heres the fenders, and the change to the bottom before installing. ( for some of you, yes I still have and use my Mid-west cup) 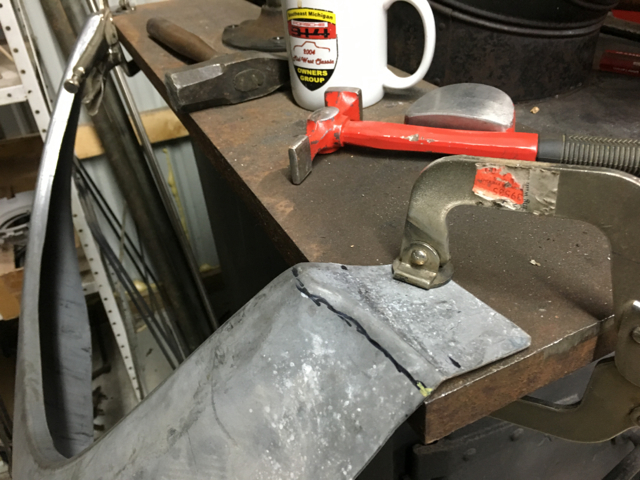 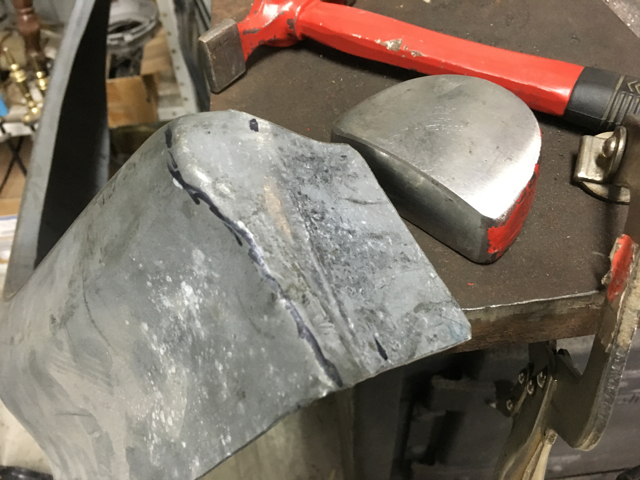 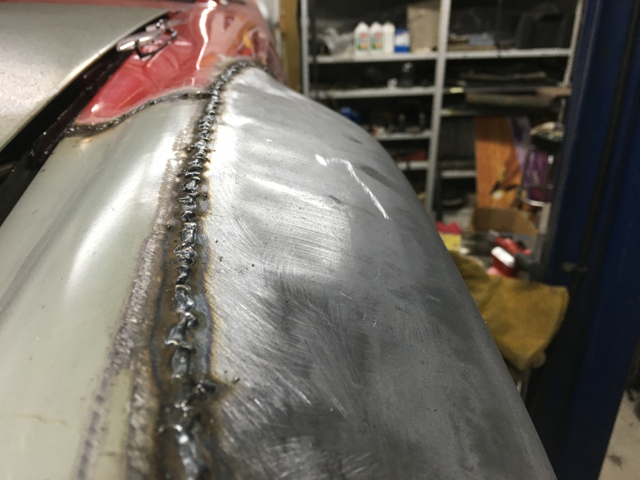 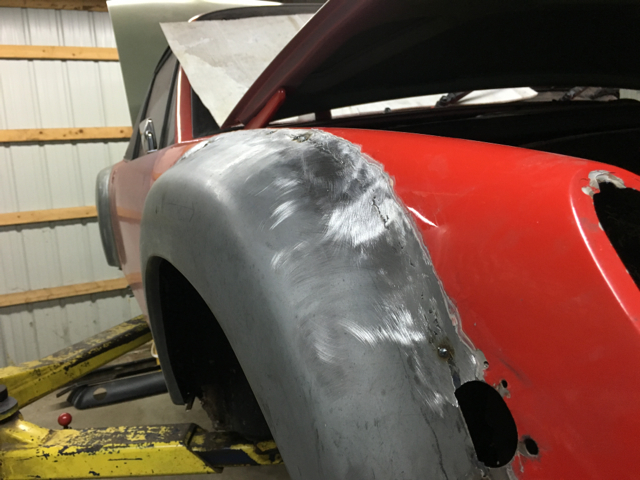 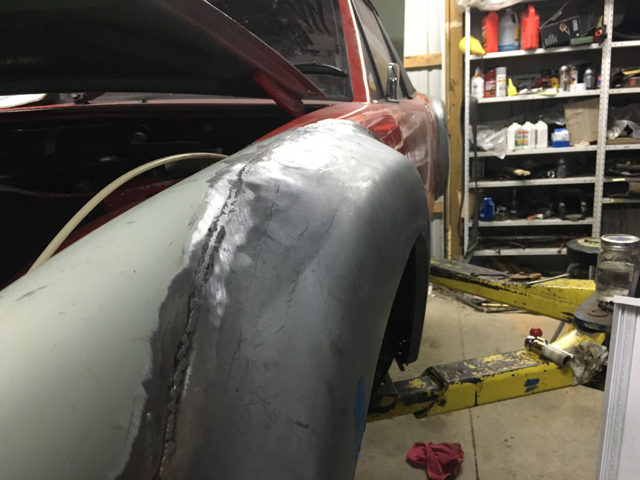 |
|
|
|
| wndsnd |
Dec 31 2015, 08:09 PM
Post
#27
|
|
You wanted a horse, but got a goat. Nobody wants a goat.... Group: Members Posts: 2,861 Joined: 12-February 12 From: North Shore, MA Member No.: 14,124 Region Association: North East States |
Nice Work!
|
|
|
|
| Garland |
Dec 31 2015, 08:18 PM
Post
#28
|
|
Restoration Fanatic Group: Members Posts: 1,431 Joined: 8-January 04 From: ......Michigan...... Member No.: 1,535 Region Association: Upper MidWest |
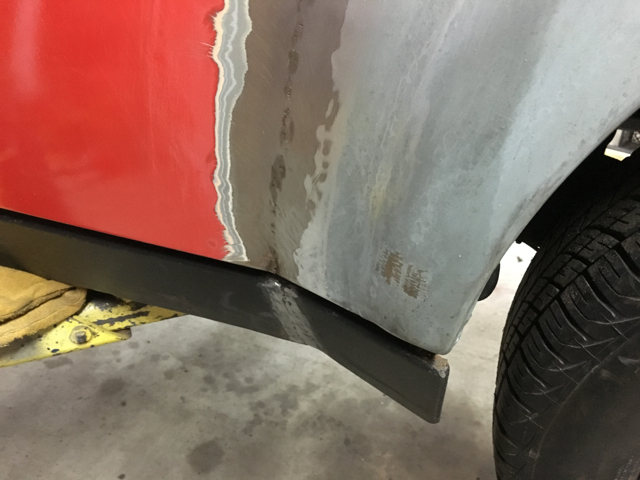
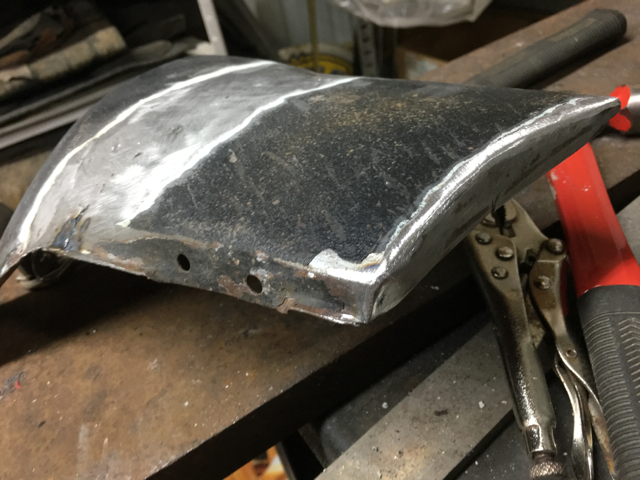
The side valance has to be more then bent to fit. Just bending would cause it to move down also. So I start with a cut, and a wedge.
    Then out come the close up lens for slightly (IMG:style_emoticons/default/shades.gif) improving my vision. 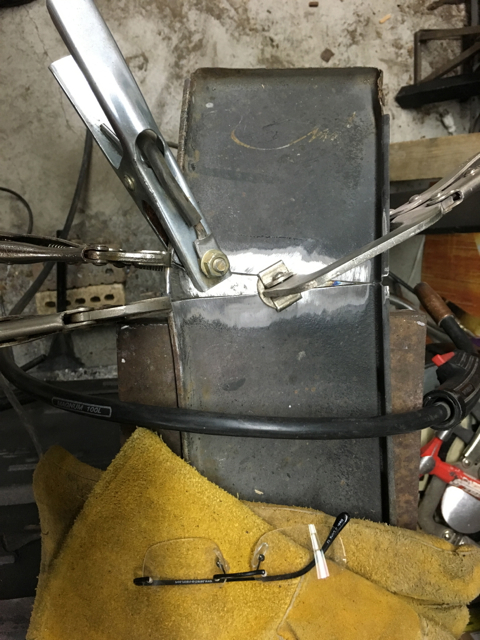 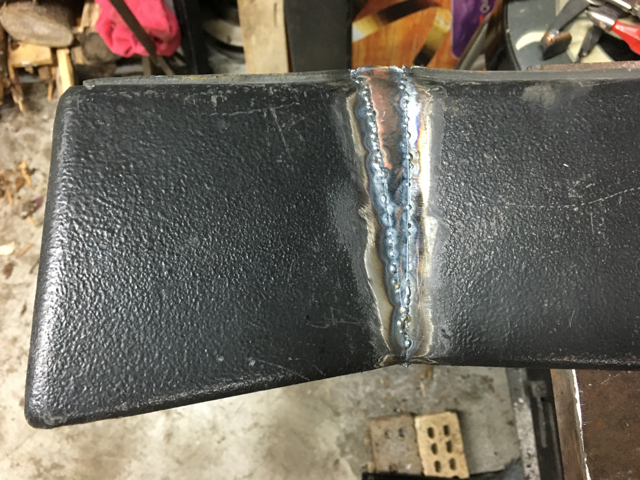 Hammering the curve to reach a bit of a curve. 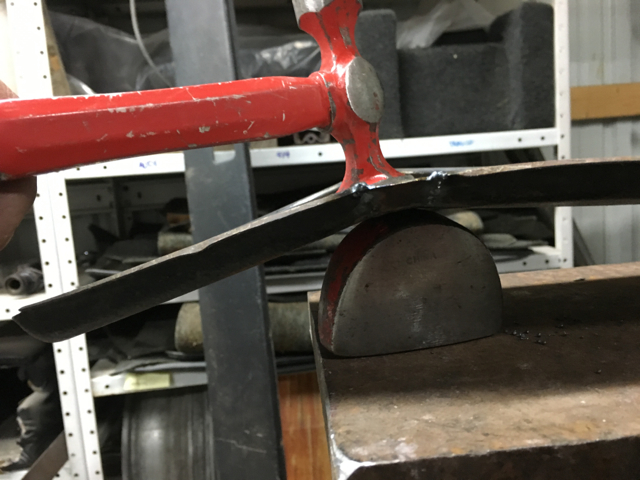 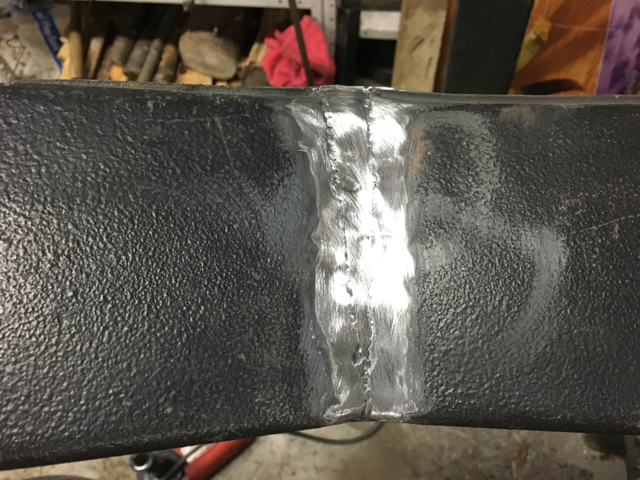 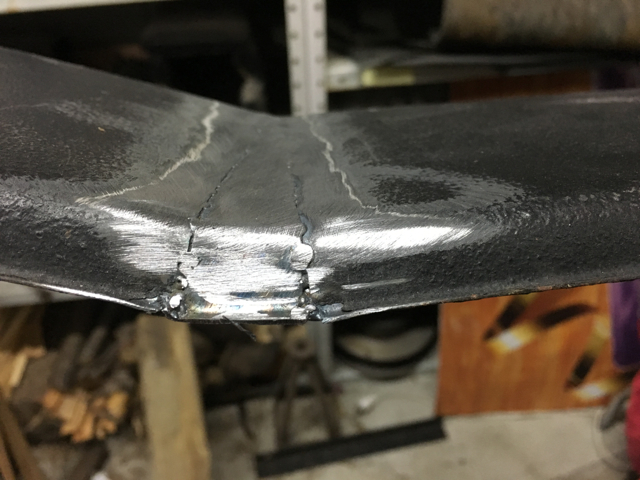 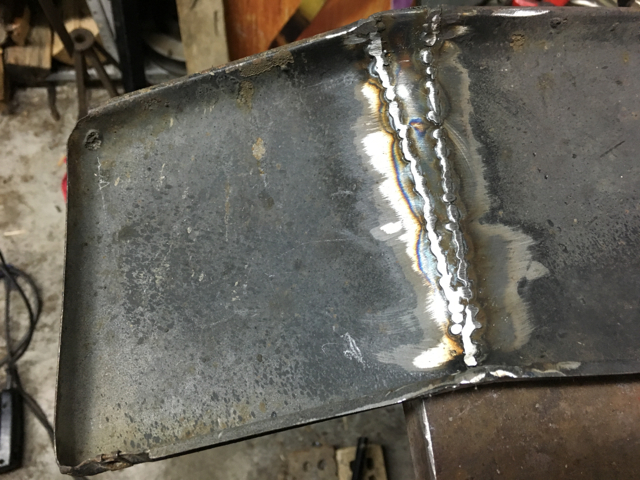 Need to change the angle of the lip on all , due to the wedge added change. I want these to line up correctly with the fenders. 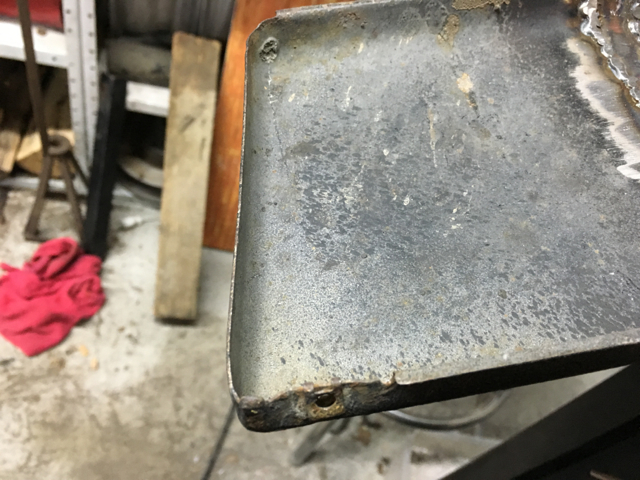 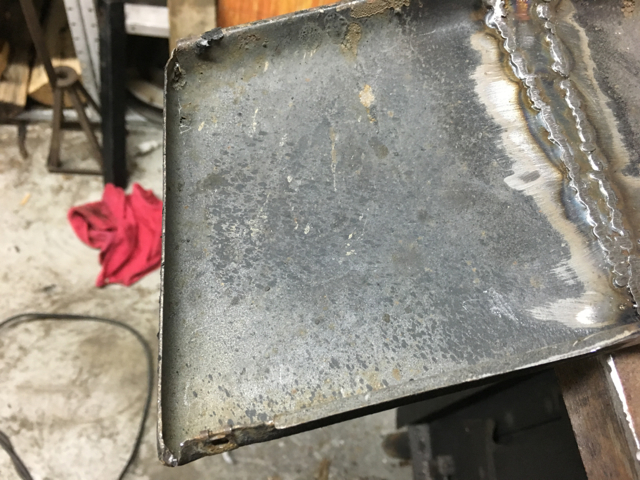 |
|
|
|
| Garland |
Dec 31 2015, 08:31 PM
Post
#29
|
|
Restoration Fanatic Group: Members Posts: 1,431 Joined: 8-January 04 From: ......Michigan...... Member No.: 1,535 Region Association: Upper MidWest |
Done with the side's. I feel that they will work out fine, with out having to do to much fabricating. I wanted to keep it simple, with a little flare! (IMG:style_emoticons/default/lol-2.gif)
  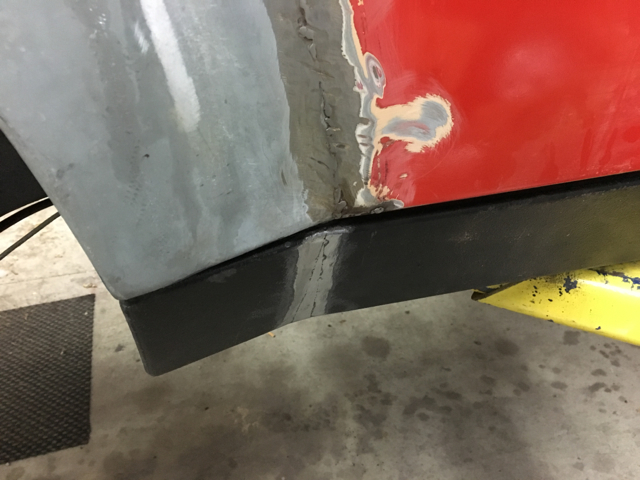  I was sure to think 10 times, measure twice, and cut once. I could have cut paper templets, and built it all up first, but in the end I find you always custom fit and work each corner for a good fit. |
|
|
|
| 914forme |
Dec 31 2015, 08:55 PM
Post
#30
|
|
Times a wastin', get wrenchin'! Group: Members Posts: 3,899 Joined: 24-July 04 From: Dayton, Ohio Member No.: 2,388 Region Association: None |
Nice Work, looking very good.
|
|
|
|
| Garland |
Dec 31 2015, 09:45 PM
Post
#31
|
|
Restoration Fanatic Group: Members Posts: 1,431 Joined: 8-January 04 From: ......Michigan...... Member No.: 1,535 Region Association: Upper MidWest |
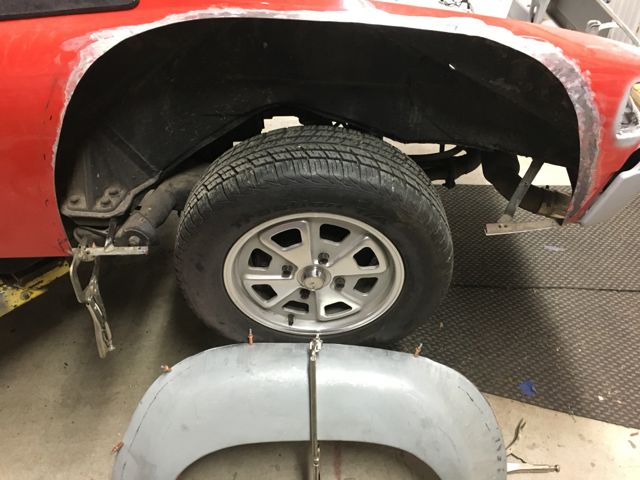
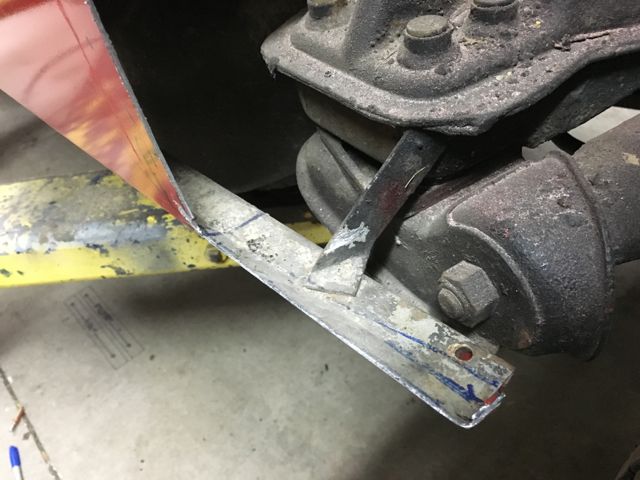
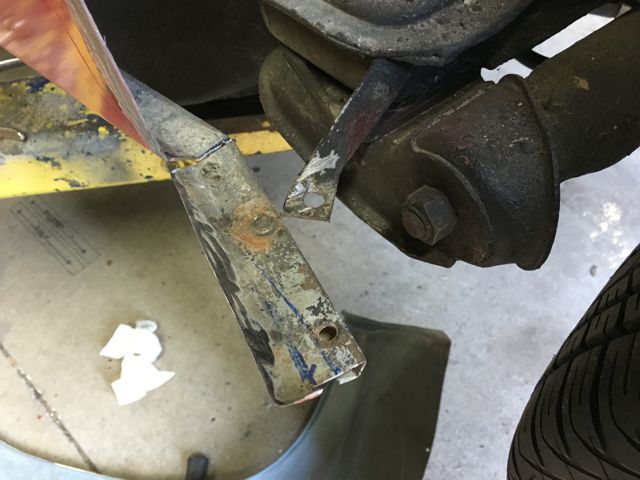
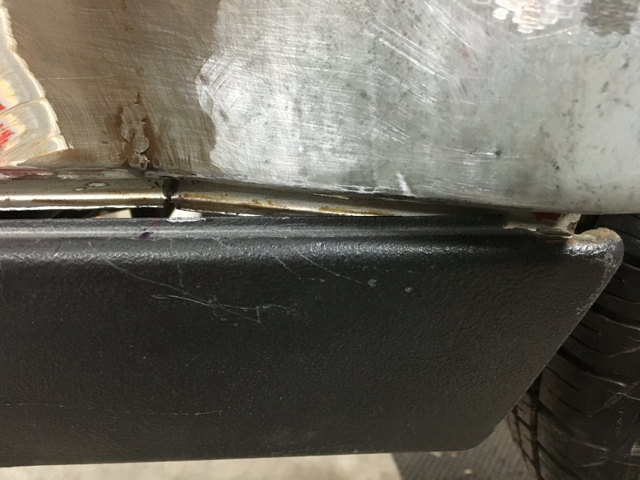
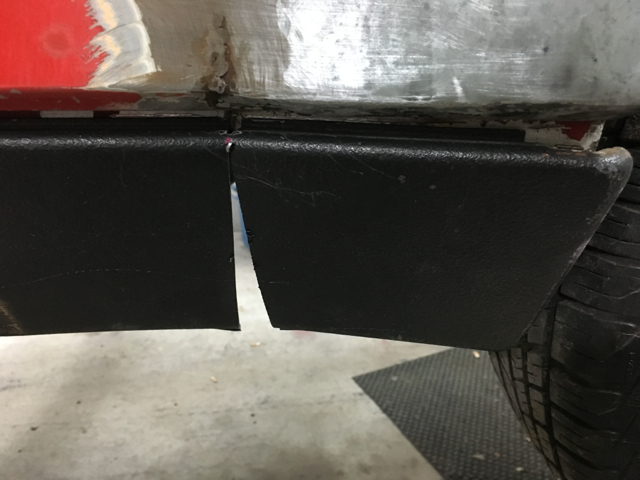
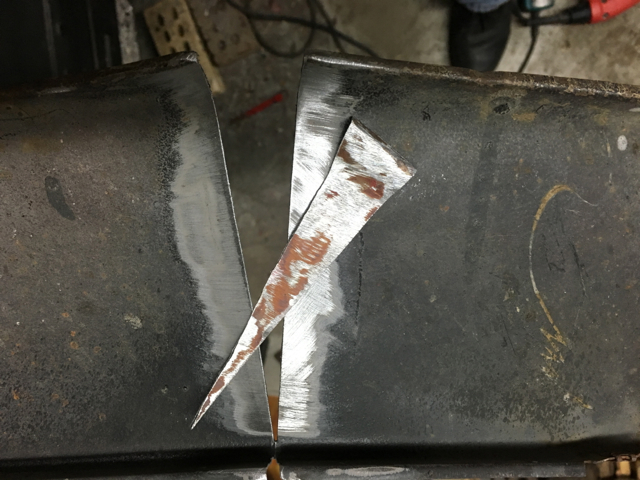
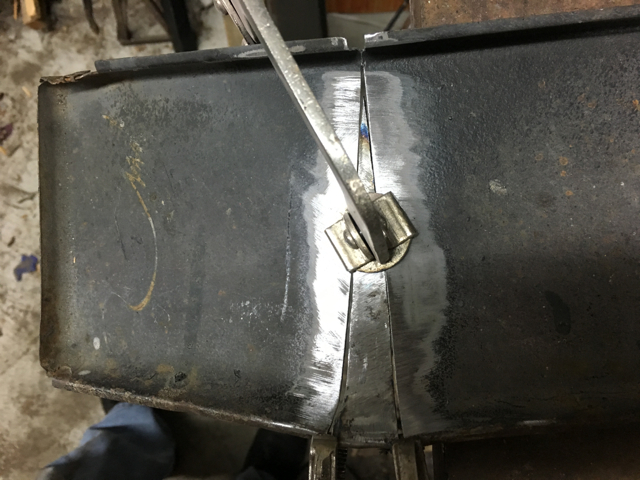
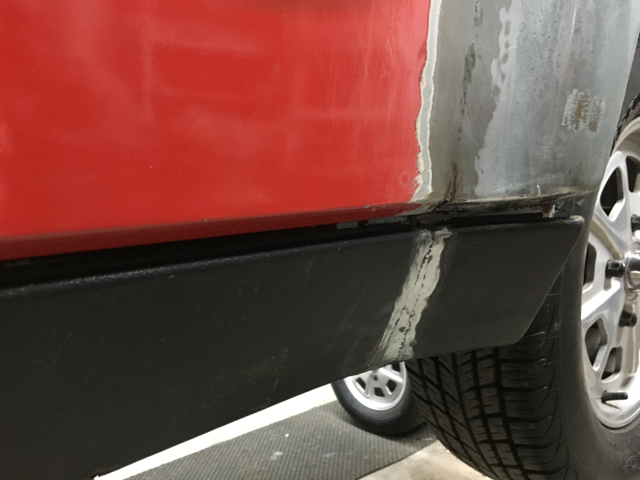
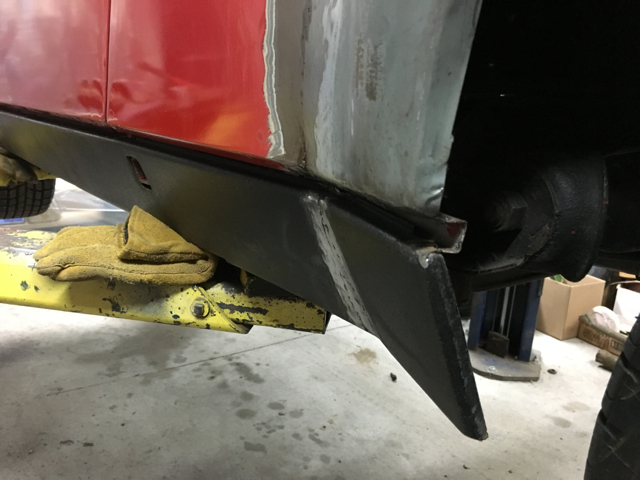
Now for the rear. I have a snow plow/scoop and have all ready modified it to a duel port. So same as with the side valances, need to use a wedge shape.
The rear valance. 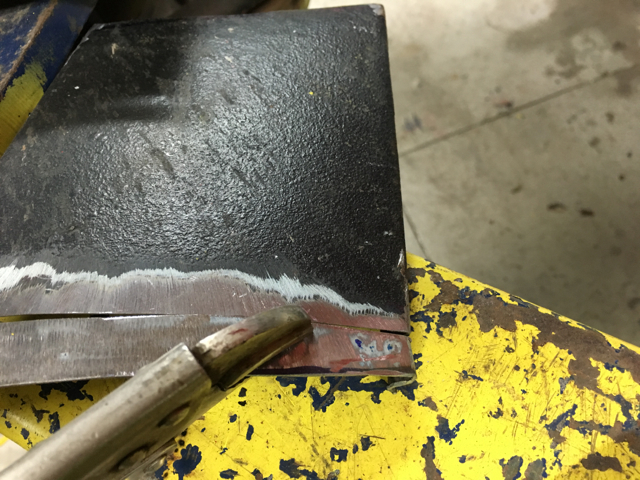 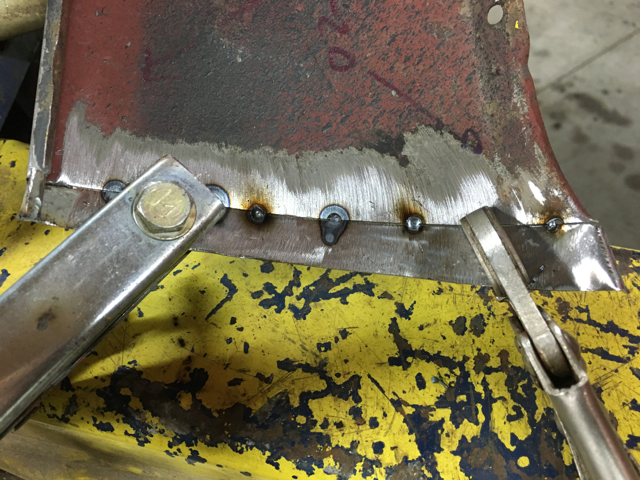 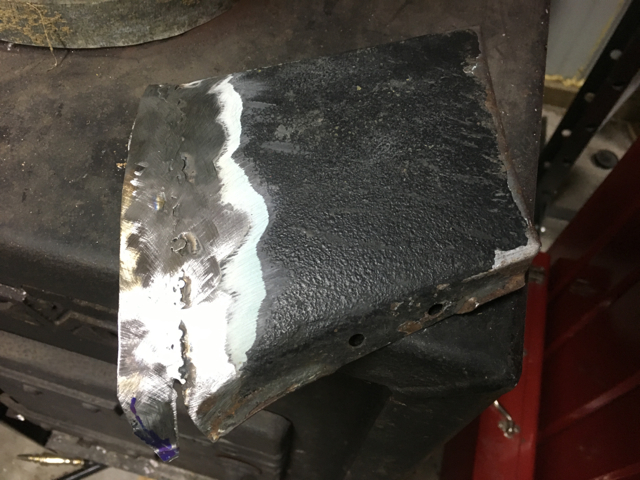 Had to check fit to the car, many times. 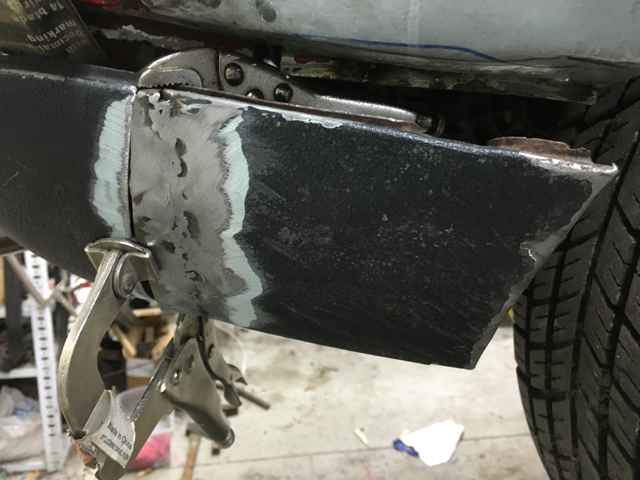 Clean up the first weld. 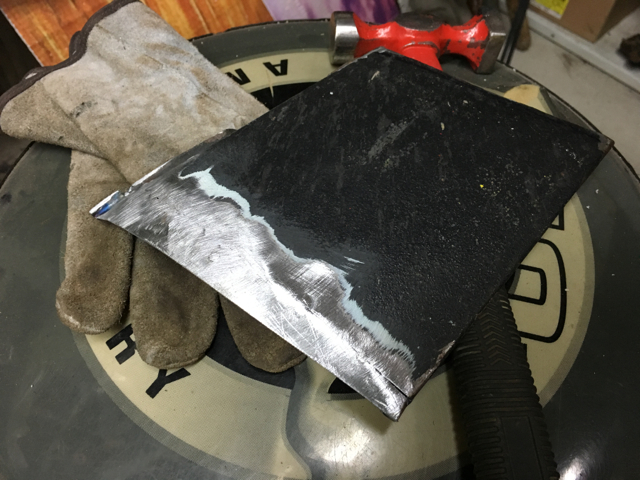 And the second weld. 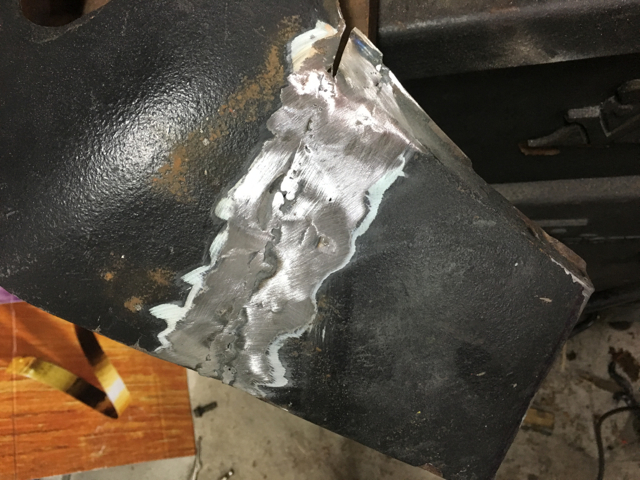  Working the edge to fit the curve of the fender. 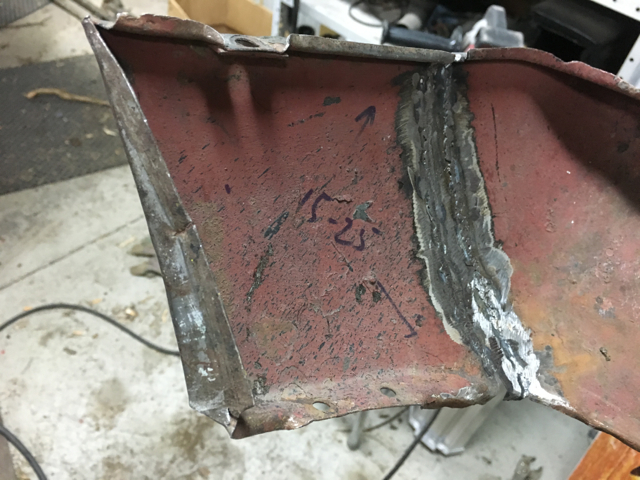  Attached image(s) 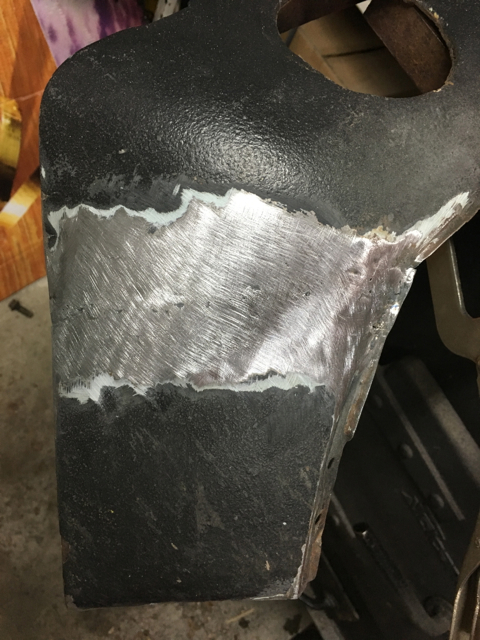
|
|
|
|
| Garland |
Dec 31 2015, 09:46 PM
Post
#32
|
|
Restoration Fanatic Group: Members Posts: 1,431 Joined: 8-January 04 From: ......Michigan...... Member No.: 1,535 Region Association: Upper MidWest |
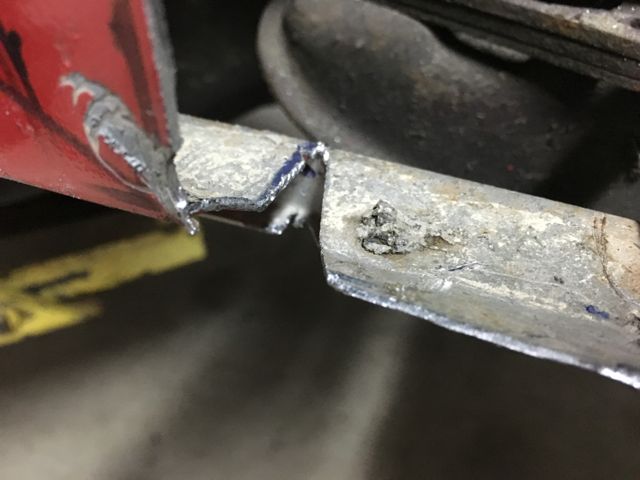
And the last adjustment and fit.
  3 done: Just arrived 2 weeks ago, and center caps at Christmas. 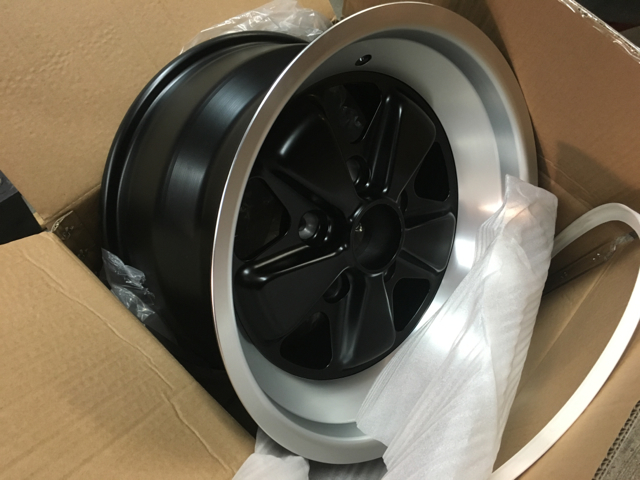 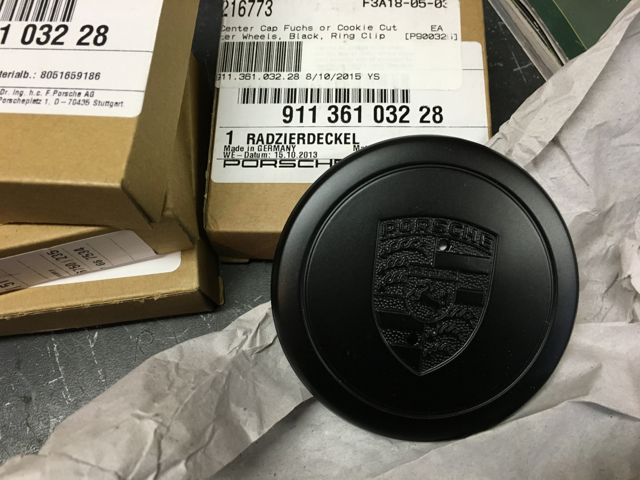 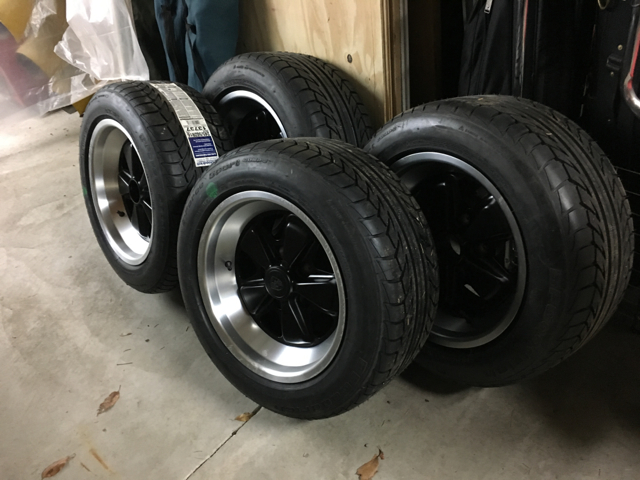 Now onto the 5 lug conversion. 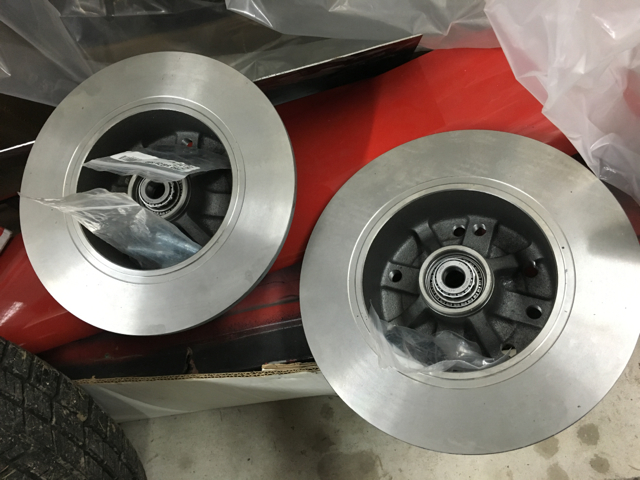 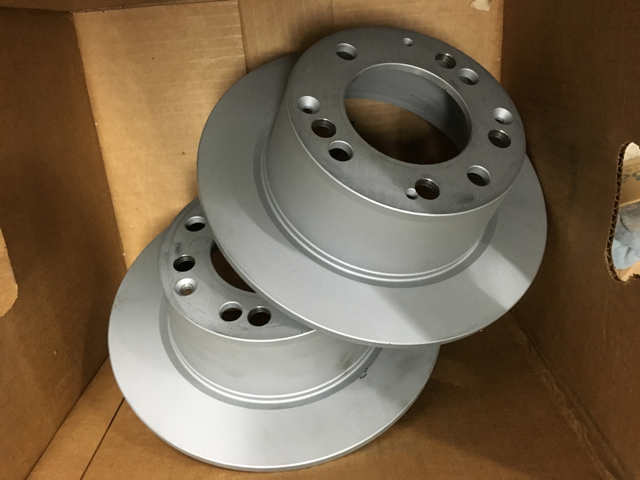 And seeing if my calculations were correct, on these I just got mounted up. I know I should have gotten the rims and tires first, but went on with carful measuring and fitting when installing the fenders. I think I got it correct based on this. 5" 13/16s inside clearance on the factory Fuchs 6" On the Euromiester 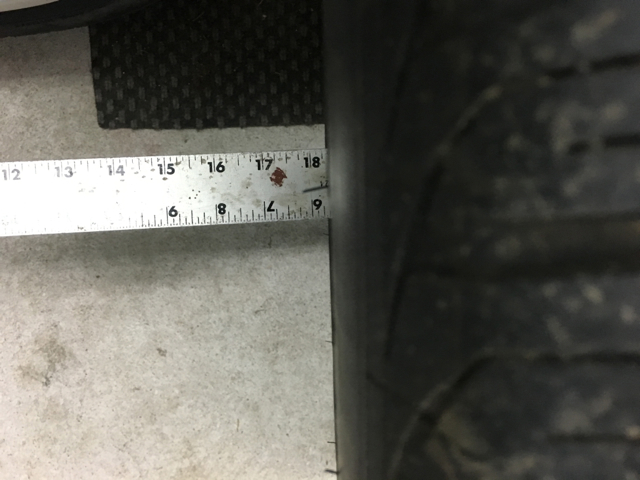 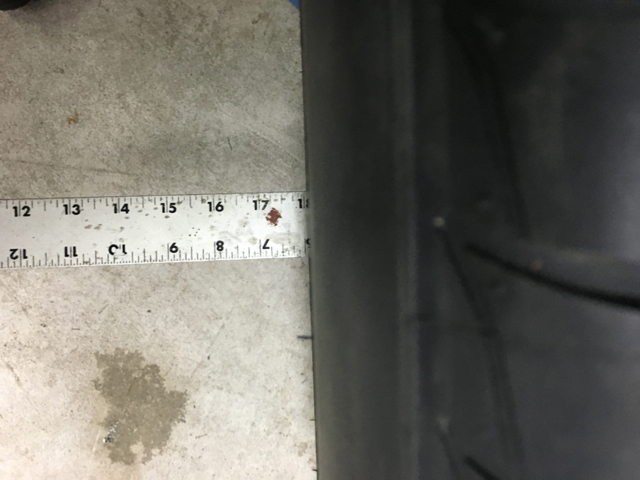 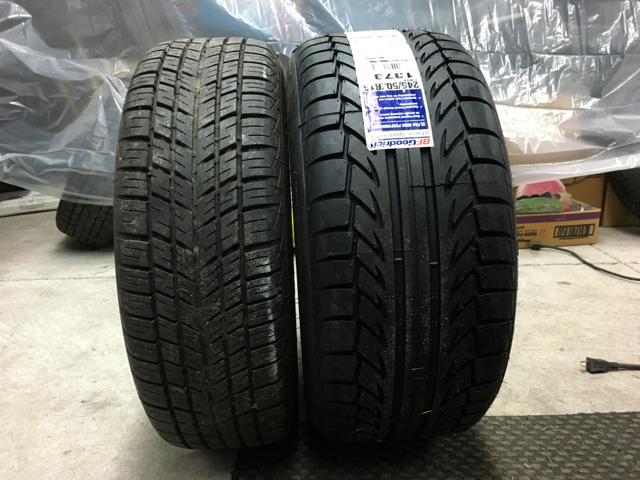 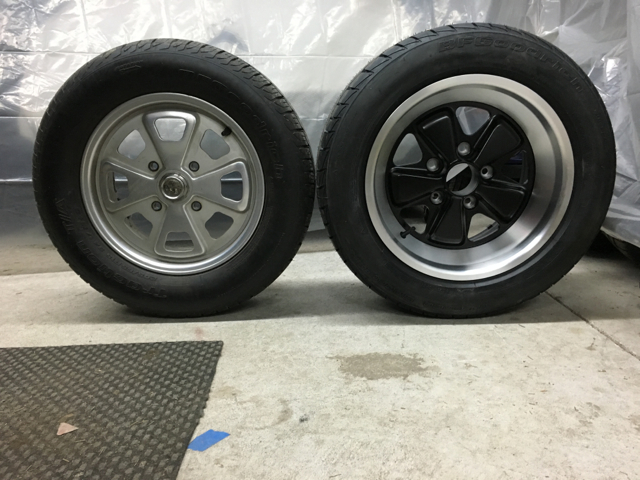 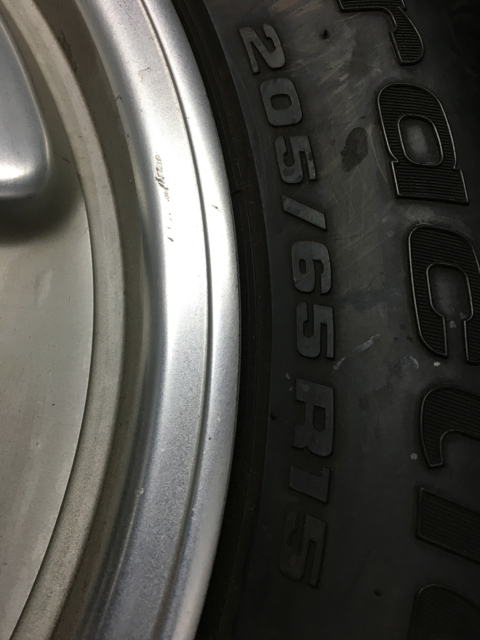 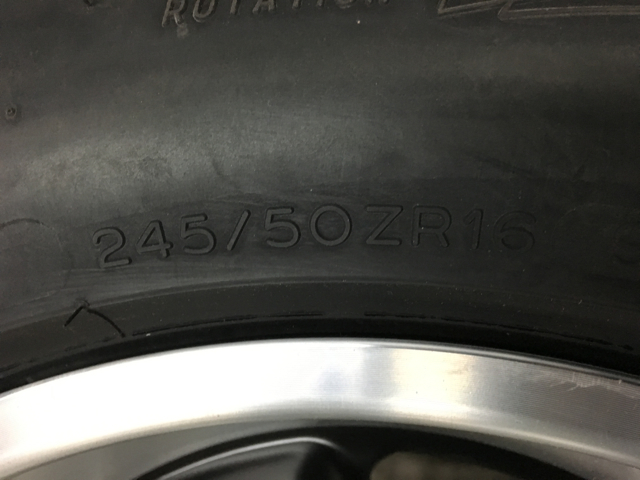 about 1/4" more on the inside. The 9" wheel, (Stock 5.5) that leaves 3 1/4 outside. Flares should add 2", Stock clearance is around 1" and I can work the lip for the last 1/4. Thats the plan…..at least for the rear. The front may require a spacer or a slight rework, to fit the also 9" rims up there. going with 9's, for the 1st time, on all 4. Happy New Year! (IMG:style_emoticons/default/driving.gif) Attached image(s) 
|
|
|
|
| Garland |
Dec 31 2015, 10:29 PM
Post
#33
|
|
Restoration Fanatic Group: Members Posts: 1,431 Joined: 8-January 04 From: ......Michigan...... Member No.: 1,535 Region Association: Upper MidWest |
All 3 done, now to change to 5 lug. And Turbo tie rod ends. I'll do the front valance when I attract the headlamps.
 |
|
|
|
| Andyrew |
Jan 1 2016, 10:40 AM
Post
#34
|
|
Spooling.... Please wait Group: Members Posts: 13,381 Joined: 20-January 03 From: Riverbank, Ca Member No.: 172 Region Association: Northern California |
Great metal work there! That looks very well done!
|
|
|
|
| mbseto |
Jan 1 2016, 11:36 AM
Post
#35
|
|
Senior Member Group: Members Posts: 1,257 Joined: 6-August 14 From: Cincy Member No.: 17,743 Region Association: North East States |
Nice work, looks like quick progress!
|
|
|
|
| Flipczak |
Jan 8 2016, 05:46 PM
Post
#36
|
|
Newbie Group: Members Posts: 1 Joined: 25-September 14 From: Detroit, MI Member No.: 17,953 Region Association: None |
Looks good, can't wait to see the finished product. (IMG:style_emoticons/default/biggrin.gif)
|
|
|
|
| Triaddave |
Jan 11 2016, 01:21 PM
Post
#37
|
|
Member Group: Members Posts: 244 Joined: 31-December 03 From: olympia,wa Member No.: 1,478 |
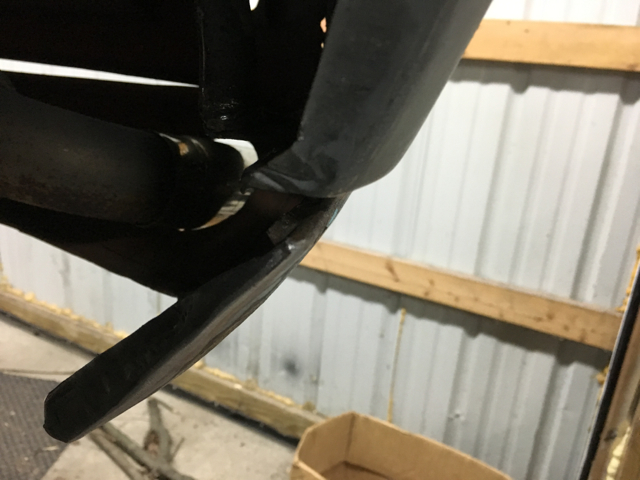
Hey, Nice exhaust. give me the serial number off the left flange (TW OOO) and I can give you some history on that... dave @ triad
|
|
|
|
| Andyrew |
Jan 11 2016, 01:30 PM
Post
#38
|
|
Spooling.... Please wait Group: Members Posts: 13,381 Joined: 20-January 03 From: Riverbank, Ca Member No.: 172 Region Association: Northern California |
|
|
|
|
| Old Yella |
Jan 11 2016, 05:17 PM
Post
#39
|
|
Old Yella Group: Members Posts: 158 Joined: 2-July 13 From: Canberra Australia Member No.: 16,086 Region Association: Southwest Region |
I like how you didn't complain about the original disappointment with the car. Didn't bullshit around and just dealt with the restoration and build. Good onya.
|
|
|
|
| Garland |
Jan 11 2016, 09:14 PM
Post
#40
|
|
Restoration Fanatic Group: Members Posts: 1,431 Joined: 8-January 04 From: ......Michigan...... Member No.: 1,535 Region Association: Upper MidWest |
QUOTE(Triaddave @ Jan 11 2016, 02:21 PM) Hey, Nice exhaust. give me the serial number off the left flange (TW OOO) and I can give you some history on that... dave @ triad Dave, I'll have to one up you on that. I purchased this from you back around 03. As I recall you had lived in Michigan and we're coming for a visit during the dream cruise. I talk up my Traid every time, it's sound great, and it is a fantastic quality build. Not sure on the build date, but it was around 03. Thing is, don't think it will ever ware out. Any other history on this one would be appreciated. It a 2.0 used with 2.0 headers, on a 1.7 engine, fits beautiful. Thanks, John 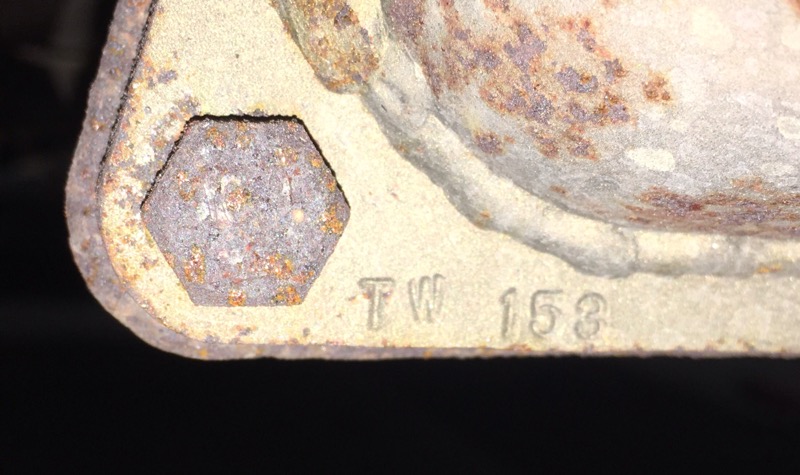 |
|
|
|
|
2 User(s) are reading this topic (2 Guests and 0 Anonymous Users)
0 Members:

|
Lo-Fi Version | Time is now: 19th July 2026 - 08:42 PM |
Invision Power Board
v9.1.4 © 2026 IPS, Inc.