|
|
|
Porsche, and the Porsche crest are registered trademarks of Dr. Ing. h.c. F. Porsche AG.
This site is not affiliated with Porsche in any way. Its only purpose is to provide an online forum for car enthusiasts. All other trademarks are property of their respective owners. |
|
|


| Garland |
 Sep 30 2015, 10:39 PM Sep 30 2015, 10:39 PM
Post
#81
|
|
Restoration Fanatic  Group: Members Posts: 1,431 Joined: 8-January 04 From: ......Michigan...... Member No.: 1,535 Region Association: Upper MidWest |
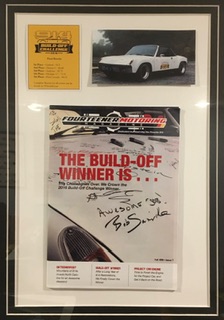 The start: 2016 Build-Off Here I go! I purchased the car on eBay in 1999 site unseen, and only two polorid's in the post. Looked great, sitting in a empty dusty old garage. I ask lots of questions, original paint? Factory new looking wheels? History, on and on. He couldn't tell me anything about the car, his buddy owned it and he new nothing. Singed over ownership 6 mts ago. He did say looks like a great car, and knows it was fast. Says 2.0 on it. 400 miles away, a buddy with a flat bed, it was worth the risk. Price was right. On arrival, I'm on it, all over the car. Long story short the thrill is gone! Repaint in somebody's garage, 50 footer, or a polorid. Rear end hit, hard, car pushed into something damaged the left front. Right front damage, not to bad. Engine runs on 2 cylinders, yet it is a 2.0, with carbs. Must have been the reason for the FIRE in the engine bay. One head is trashed from the fire, and theirs nothing else to talk about, except the A/C system they must have got on eBay and hacked into the car. (Key words: eBay, "was" fast, Polorid, and risk) I swapped in a 1.7 and a tail shift 2.0 exchangers with triad exhaust. 1971 complete interior (had one). Plus just about every other trim part. Polished the paint, cleaned up the wheels, and I drove it. Now it's time to fix It.   MICHIGAN BUILD (Short monthly update posts) @ Contest Link 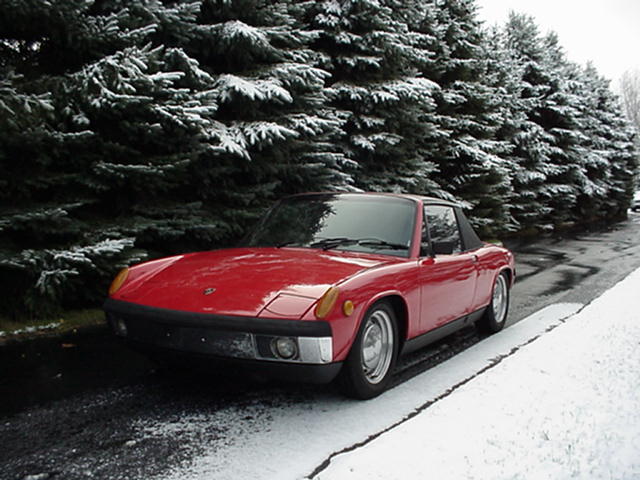 1973 Red 1.7 5 Major Tasks to complete during the Challenge: 1. Replace back half of rear trunk floor. (Rusted, rear ended, poorly patched) 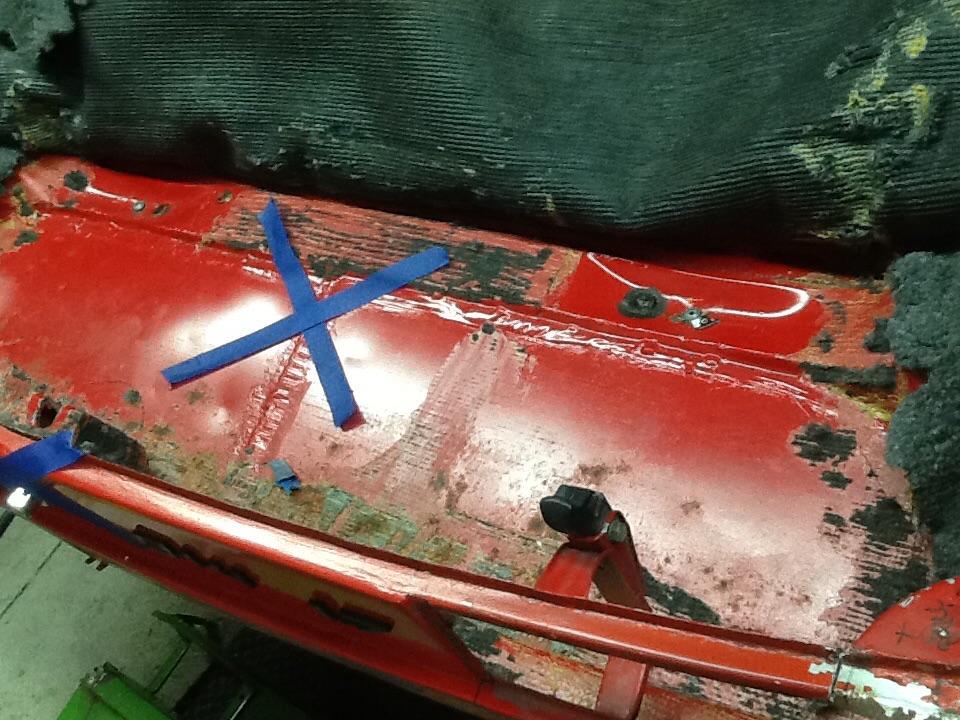 & Replace entire rear body panel, and Bumper. (Rear ended, poorly repaired) 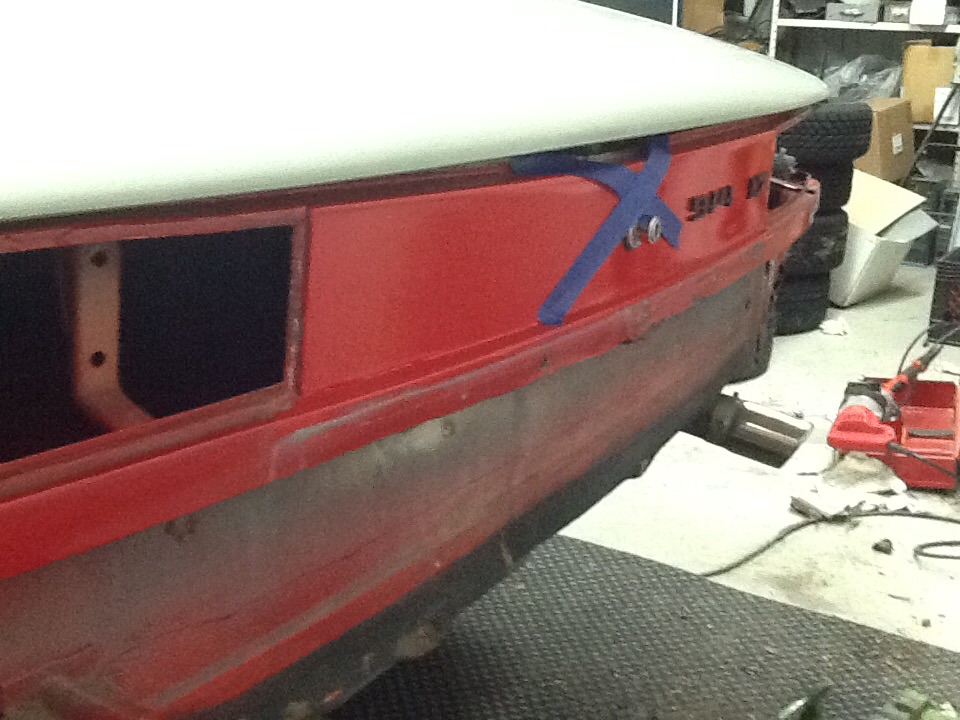 & Patch in 1/2 left front fender. (Poorly repaired) 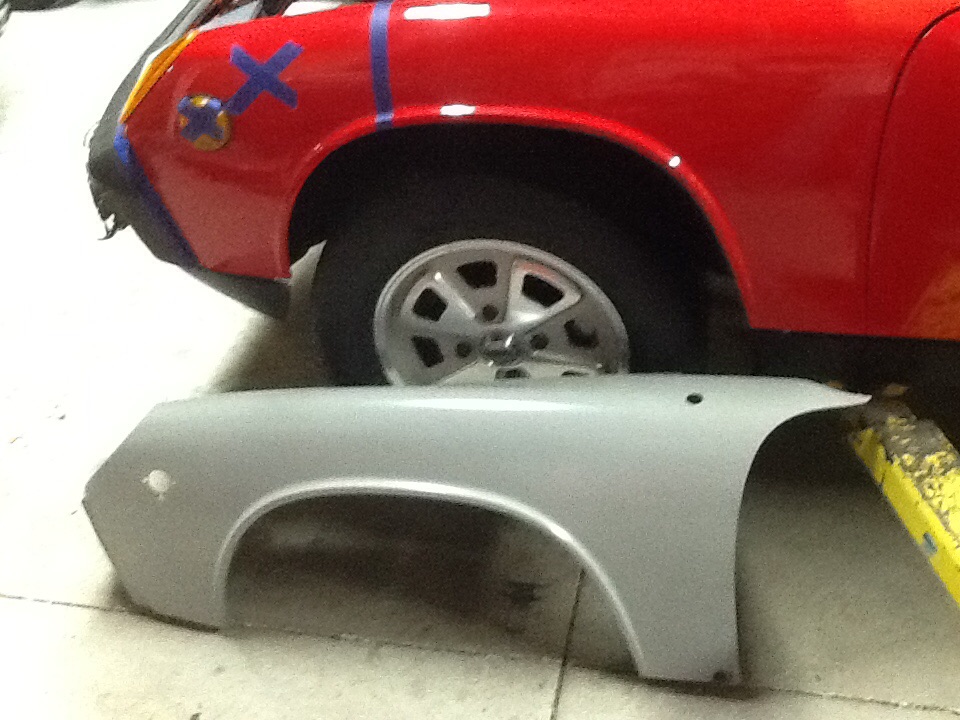 2. Delete headlamp doors, modify hood, and relocate headlamps. 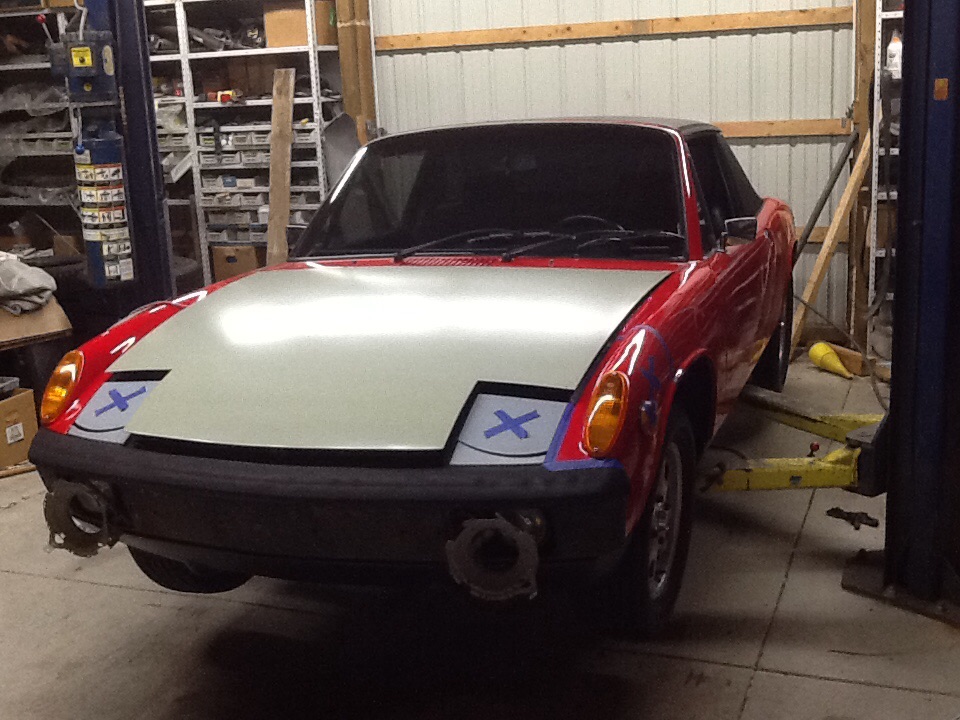 3. Install 4 steel flares, and modify all valances. 5 lug, and wheel tire package. 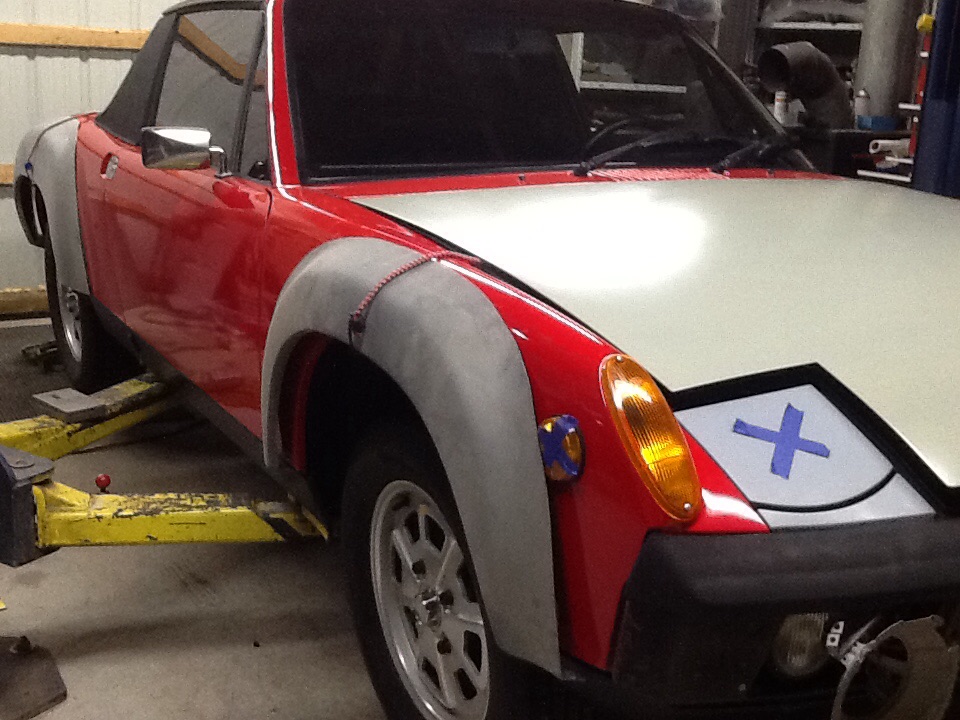 4. Build up, and replace engine. Installed now: 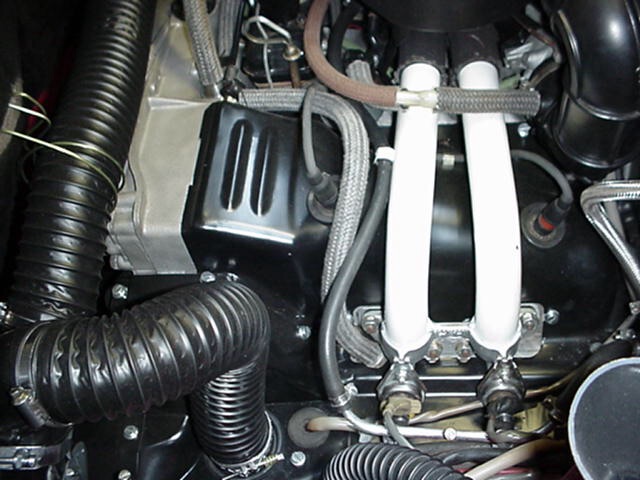 With: 1.7 914 Engine balanced 260 x 396 Cam .006 96mm Big Bore kit Mallory Unlite Distributor 14004 Weber 40 DCNF (w/ very short intakes) Air jet 1.80 Main 1.25 2.0 L exhaust Work in progress replacement. 5. Major interior renew. Still need to finish the engine, and start it. Purchased here from a member a few years ago. I have a 2nd 914 that I'm also working on, and been a owner of many since the 70's. I do all my own work. My enjoyment time. Attached image(s)  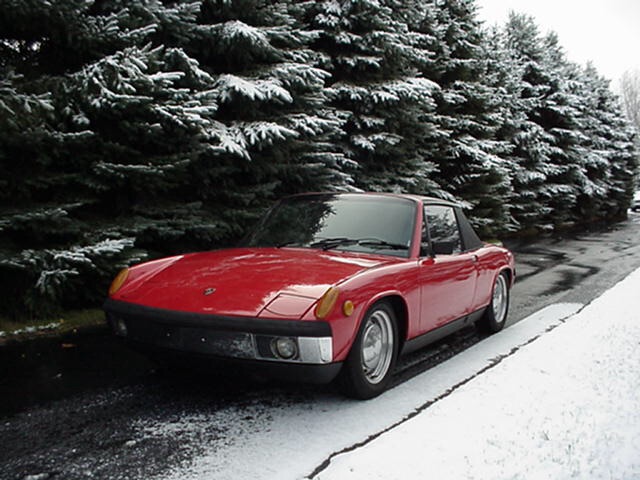
|
   |

 
|
Posts in this topic
 Garland BUILD-OFF CHALLENGE: Michigan Build, Garland Sep 30 2015, 10:39 PM
 Garland I replaced the hoods with ones of better quality, ... Sep 30 2015, 11:42 PM Cairo94507 Nice looking job. You will have a nice 914 when y... Oct 1 2015, 06:59 AM Garland Thanks Michael.
Well I rough trimmed and fitted ... Oct 2 2015, 09:54 PM Garland Started cutting for the headlamps, and as I was pu... Oct 3 2015, 09:19 AM 914forme Relocating the headlights :popcorn: wondering wha... Oct 3 2015, 05:24 PM Philip W. I think that snow picture should be considered for... Oct 3 2015, 05:34 PM
Garland I replaced the hoods with ones of better quality, ... Sep 30 2015, 11:42 PM Cairo94507 Nice looking job. You will have a nice 914 when y... Oct 1 2015, 06:59 AM Garland Thanks Michael.
Well I rough trimmed and fitted ... Oct 2 2015, 09:54 PM Garland Started cutting for the headlamps, and as I was pu... Oct 3 2015, 09:19 AM 914forme Relocating the headlights :popcorn: wondering wha... Oct 3 2015, 05:24 PM Philip W. I think that snow picture should be considered for... Oct 3 2015, 05:34 PM
 stevegm
I think that snow picture should be considered fo... Oct 3 2015, 05:39 PM Garland The headlamps are going to a challenge in it self.... Oct 4 2015, 08:02 AM Garland Scraped all carpet, glue and some seam sealer. . ... Oct 4 2015, 08:07 AM Garland Then paint remover, and a rinse
Oct 4 2015, 11:25 AM Garland My 73 build off challenge car. "Michigan Buil... Oct 4 2015, 12:41 PM Mike1981 Nice Work John
I always thought your Red 1.7 look... Oct 9 2015, 06:51 PM trojanhorsepower John,
Who made your rear trunk floor patch panel? Oct 12 2015, 07:35 PM Garland Right here:
Great products! They have molds... Oct 13 2015, 11:07 PM trojanhorsepower Humm. I have the same one, but mine does not have... Oct 14 2015, 09:48 AM Garland I bent the lip, and made the flange. I did not add... Oct 14 2015, 04:35 PM dakotaewing You might consider striping all the paint off the ... Oct 14 2015, 04:52 PM Garland
You might consider striping all the paint off the... Oct 19 2015, 09:31 PM Garland Finished up the rear early steel bumper. Needed to... Oct 21 2015, 05:42 PM Triaddave Hey, Nice exhaust. give me the serial number off t... Jan 11 2016, 01:21 PM Garland
Hey, Nice exhaust. give me the serial number off ... Jan 11 2016, 09:14 PM DirtyCossack I'm looking at bumper hole filling in my futur... Oct 21 2015, 07:01 PM Garland This was never chromed, was steel painted black wh... Oct 21 2015, 08:49 PM Garland Welded the rear fenders on, and the left front fen... Nov 29 2015, 07:59 PM Andyrew Did you purposefully make a notch in your front pa... Nov 29 2015, 08:31 PM Garland
Did you purposefully make a notch in your front p... Nov 29 2015, 10:12 PM Garland i finished up the front fenders, and the 3 of the ... Dec 31 2015, 08:01 PM wndsnd Nice Work! Dec 31 2015, 08:09 PM Garland The side valance has to be more then bent to fit. ... Dec 31 2015, 08:18 PM Garland Done with the side's. I feel that they will wo... Dec 31 2015, 08:31 PM 914forme Nice Work, looking very good. Dec 31 2015, 08:55 PM Garland Now for the rear. I have a snow plow/scoop and hav... Dec 31 2015, 09:45 PM Garland And the last adjustment and fit.
3 done:
J... Dec 31 2015, 09:46 PM Garland All 3 done, now to change to 5 lug. And Turbo tie ... Dec 31 2015, 10:29 PM Andyrew Great metal work there! That looks very well d... Jan 1 2016, 10:40 AM mbseto Nice work, looks like quick progress! Jan 1 2016, 11:36 AM Flipczak Looks good, can't wait to see the finished pro... Jan 8 2016, 05:46 PM Andyrew
Looks good, can't wait to see the finished pr... Jan 11 2016, 01:30 PM Old Yella I like how you didn't complain about the origi... Jan 11 2016, 05:17 PM Chris H. I agree, nice metal work :beer2: . You make it l... Jan 11 2016, 10:47 PM twistedstang Nice work and great pics! Following along in c... Jan 12 2016, 06:59 AM whitetwinturbo :popcorn:
:sawzall:
:welder: Jan 12 2016, 11:12 AM Garland Back at it over the last few weeks, installed 5 Lu... Jan 27 2016, 08:28 PM whitetwinturbo
Back at it over the last few weeks, installed 5 L... Mar 31 2016, 10:19 PM Garland I will be using spacers 2mm rear, and 15-20mm fron... Jan 27 2016, 08:36 PM 914forme very nice work sir, very nice. Jan 27 2016, 08:45 PM Vysoc Wow John,
I am very impressed with what you have ... Jan 28 2016, 04:03 PM Puebloswatcop It looks like the same "hack" did my rea... Jan 30 2016, 08:09 AM Garland Put together the rear struts. Old pair of Koni red... Jan 31 2016, 12:01 PM rick 918-S Nice work. Fat rubber. Jan 31 2016, 11:22 PM Garland Well, still on it. Worked on the hood to eliminate... Feb 29 2016, 09:05 PM trojanhorsepower Man you are making great progress, and it looks gr... Mar 1 2016, 06:49 AM whitetwinturbo :smash: :welder: :smash:
:worship: Mar 1 2016, 10:11 AM 914forme Nice hood work there :headbanger: Mar 1 2016, 10:48 AM Garland Thanks everybody,
I have slowed down a bit wi... Mar 2 2016, 07:57 PM Garland Change in plans. Im back working on the headlamps.... Mar 31 2016, 07:55 PM mgp4591 Okay, this looks really interesting.... :idea: :p... Mar 31 2016, 08:06 PM Garland Thank you, and on with the show :popcorn:
Posit... Mar 31 2016, 08:07 PM Andyrew Interesting! I take it you dont have headlight... Mar 31 2016, 08:15 PM Garland I have thought about that, and have a solution in ... Mar 31 2016, 08:17 PM Garland Yes and theres a picture of it installed also. Mar 31 2016, 10:48 PM whitetwinturbo ...........I must have missed the installed pic...... Mar 31 2016, 10:52 PM Garland
...........I must have missed the installed pic..... Apr 1 2016, 07:05 AM whitetwinturbo
[quote name='whitetwinturbo' post='2323387' date=... Apr 1 2016, 12:41 PM Garland Here is a idea that I tried, and it worked. The to... Apr 1 2016, 01:58 PM whitetwinturbo :idea: :idea: :idea: Apr 1 2016, 02:02 PM Garland Headlamps on hold, still working out the bugs.
On ... Apr 30 2016, 10:29 PM Garland Steam seemed the best idea, so out with the tea po... Apr 30 2016, 10:40 PM Garland Finishing up
Using a early interior, living i... Apr 30 2016, 10:49 PM Garland Headlamps have become a daunting task. Each time I... Jul 4 2016, 10:41 PM Garland Spent free time on the flares, and valances. Litt... Jul 4 2016, 11:06 PM Andyrew Lookin good! That texture is nice! Jul 4 2016, 11:58 PM Olympic 1.7
Lookin good! That texture is nice!
:a... Jul 5 2016, 06:35 AM 914forme :agree: thats what I love about build threads, get... Jul 5 2016, 08:46 AM Garland When spraying the Transtar, you can achieve differ... Jul 5 2016, 04:45 PM Garland Thank you to all that are following, and or commen... Jul 23 2016, 08:58 AM Garland OK, well here's a few sample cuts, drills, and... Jul 23 2016, 09:11 AM Garland Here I go
Jul 23 2016, 11:01 AM Darren C I can't bear to look.......That wood bit could... Jul 23 2016, 01:16 PM 76-914
I can't bear to look.......That wood bit coul... Jul 24 2016, 08:54 AM Garland Slow, and easy......don't want the bit to heat... Jul 23 2016, 02:49 PM jmitro yea, get a real hole saw. Jul 24 2016, 08:43 AM Garland Start to finish 10 minutes per cut. Shaving off ju... Jul 24 2016, 10:07 AM whitetwinturbo :popcorn: :popcorn: :popcorn: :popcorn: :popco... Jul 24 2016, 01:35 PM Darren C Too scary for me... ;-)
Well done!
Now, how ... Jul 24 2016, 01:43 PM Garland :idea:
Thinking brutal, but can make a mess. So w... Jul 24 2016, 02:29 PM raynekat
Those are definitely some "mad" skil... Jul 24 2016, 04:05 PM mb911 Looking good interested in how the rockers look co... Jul 24 2016, 03:00 PM whitetwinturbo REALLY nice lighting :beer1: :beer1: :beer1: Jul 24 2016, 03:01 PM Andyrew Awesome headlight solution!
But... Why did y... Jul 24 2016, 03:24 PM Garland
Awesome headlight solution!
But... Why did ... Jul 24 2016, 04:26 PM Garland I ran in to a bit of a problem when starting my bu... Aug 7 2016, 01:15 PM Garland I'm Back from the "Garage" engine is... Aug 13 2016, 10:05 AM Garland First here is a few pictures of my home powder coa... Aug 29 2016, 10:00 PM Garland Still on its way out.
A few items I had... Aug 29 2016, 11:06 PM Garland installed a jumper to fool the fuel pump relay.
... Aug 29 2016, 11:15 PM Garland First start in car looks good, the oil pressure is... Aug 29 2016, 11:20 PM 914forme Big day for sure, great job. I lost a Black and D... Aug 30 2016, 05:31 AM Garland Well that took a while. Now I need to decide if I... Aug 30 2016, 06:34 AM
stevegm
I think that snow picture should be considered fo... Oct 3 2015, 05:39 PM Garland The headlamps are going to a challenge in it self.... Oct 4 2015, 08:02 AM Garland Scraped all carpet, glue and some seam sealer. . ... Oct 4 2015, 08:07 AM Garland Then paint remover, and a rinse
Oct 4 2015, 11:25 AM Garland My 73 build off challenge car. "Michigan Buil... Oct 4 2015, 12:41 PM Mike1981 Nice Work John
I always thought your Red 1.7 look... Oct 9 2015, 06:51 PM trojanhorsepower John,
Who made your rear trunk floor patch panel? Oct 12 2015, 07:35 PM Garland Right here:
Great products! They have molds... Oct 13 2015, 11:07 PM trojanhorsepower Humm. I have the same one, but mine does not have... Oct 14 2015, 09:48 AM Garland I bent the lip, and made the flange. I did not add... Oct 14 2015, 04:35 PM dakotaewing You might consider striping all the paint off the ... Oct 14 2015, 04:52 PM Garland
You might consider striping all the paint off the... Oct 19 2015, 09:31 PM Garland Finished up the rear early steel bumper. Needed to... Oct 21 2015, 05:42 PM Triaddave Hey, Nice exhaust. give me the serial number off t... Jan 11 2016, 01:21 PM Garland
Hey, Nice exhaust. give me the serial number off ... Jan 11 2016, 09:14 PM DirtyCossack I'm looking at bumper hole filling in my futur... Oct 21 2015, 07:01 PM Garland This was never chromed, was steel painted black wh... Oct 21 2015, 08:49 PM Garland Welded the rear fenders on, and the left front fen... Nov 29 2015, 07:59 PM Andyrew Did you purposefully make a notch in your front pa... Nov 29 2015, 08:31 PM Garland
Did you purposefully make a notch in your front p... Nov 29 2015, 10:12 PM Garland i finished up the front fenders, and the 3 of the ... Dec 31 2015, 08:01 PM wndsnd Nice Work! Dec 31 2015, 08:09 PM Garland The side valance has to be more then bent to fit. ... Dec 31 2015, 08:18 PM Garland Done with the side's. I feel that they will wo... Dec 31 2015, 08:31 PM 914forme Nice Work, looking very good. Dec 31 2015, 08:55 PM Garland Now for the rear. I have a snow plow/scoop and hav... Dec 31 2015, 09:45 PM Garland And the last adjustment and fit.
3 done:
J... Dec 31 2015, 09:46 PM Garland All 3 done, now to change to 5 lug. And Turbo tie ... Dec 31 2015, 10:29 PM Andyrew Great metal work there! That looks very well d... Jan 1 2016, 10:40 AM mbseto Nice work, looks like quick progress! Jan 1 2016, 11:36 AM Flipczak Looks good, can't wait to see the finished pro... Jan 8 2016, 05:46 PM Andyrew
Looks good, can't wait to see the finished pr... Jan 11 2016, 01:30 PM Old Yella I like how you didn't complain about the origi... Jan 11 2016, 05:17 PM Chris H. I agree, nice metal work :beer2: . You make it l... Jan 11 2016, 10:47 PM twistedstang Nice work and great pics! Following along in c... Jan 12 2016, 06:59 AM whitetwinturbo :popcorn:
:sawzall:
:welder: Jan 12 2016, 11:12 AM Garland Back at it over the last few weeks, installed 5 Lu... Jan 27 2016, 08:28 PM whitetwinturbo
Back at it over the last few weeks, installed 5 L... Mar 31 2016, 10:19 PM Garland I will be using spacers 2mm rear, and 15-20mm fron... Jan 27 2016, 08:36 PM 914forme very nice work sir, very nice. Jan 27 2016, 08:45 PM Vysoc Wow John,
I am very impressed with what you have ... Jan 28 2016, 04:03 PM Puebloswatcop It looks like the same "hack" did my rea... Jan 30 2016, 08:09 AM Garland Put together the rear struts. Old pair of Koni red... Jan 31 2016, 12:01 PM rick 918-S Nice work. Fat rubber. Jan 31 2016, 11:22 PM Garland Well, still on it. Worked on the hood to eliminate... Feb 29 2016, 09:05 PM trojanhorsepower Man you are making great progress, and it looks gr... Mar 1 2016, 06:49 AM whitetwinturbo :smash: :welder: :smash:
:worship: Mar 1 2016, 10:11 AM 914forme Nice hood work there :headbanger: Mar 1 2016, 10:48 AM Garland Thanks everybody,
I have slowed down a bit wi... Mar 2 2016, 07:57 PM Garland Change in plans. Im back working on the headlamps.... Mar 31 2016, 07:55 PM mgp4591 Okay, this looks really interesting.... :idea: :p... Mar 31 2016, 08:06 PM Garland Thank you, and on with the show :popcorn:
Posit... Mar 31 2016, 08:07 PM Andyrew Interesting! I take it you dont have headlight... Mar 31 2016, 08:15 PM Garland I have thought about that, and have a solution in ... Mar 31 2016, 08:17 PM Garland Yes and theres a picture of it installed also. Mar 31 2016, 10:48 PM whitetwinturbo ...........I must have missed the installed pic...... Mar 31 2016, 10:52 PM Garland
...........I must have missed the installed pic..... Apr 1 2016, 07:05 AM whitetwinturbo
[quote name='whitetwinturbo' post='2323387' date=... Apr 1 2016, 12:41 PM Garland Here is a idea that I tried, and it worked. The to... Apr 1 2016, 01:58 PM whitetwinturbo :idea: :idea: :idea: Apr 1 2016, 02:02 PM Garland Headlamps on hold, still working out the bugs.
On ... Apr 30 2016, 10:29 PM Garland Steam seemed the best idea, so out with the tea po... Apr 30 2016, 10:40 PM Garland Finishing up
Using a early interior, living i... Apr 30 2016, 10:49 PM Garland Headlamps have become a daunting task. Each time I... Jul 4 2016, 10:41 PM Garland Spent free time on the flares, and valances. Litt... Jul 4 2016, 11:06 PM Andyrew Lookin good! That texture is nice! Jul 4 2016, 11:58 PM Olympic 1.7
Lookin good! That texture is nice!
:a... Jul 5 2016, 06:35 AM 914forme :agree: thats what I love about build threads, get... Jul 5 2016, 08:46 AM Garland When spraying the Transtar, you can achieve differ... Jul 5 2016, 04:45 PM Garland Thank you to all that are following, and or commen... Jul 23 2016, 08:58 AM Garland OK, well here's a few sample cuts, drills, and... Jul 23 2016, 09:11 AM Garland Here I go
Jul 23 2016, 11:01 AM Darren C I can't bear to look.......That wood bit could... Jul 23 2016, 01:16 PM 76-914
I can't bear to look.......That wood bit coul... Jul 24 2016, 08:54 AM Garland Slow, and easy......don't want the bit to heat... Jul 23 2016, 02:49 PM jmitro yea, get a real hole saw. Jul 24 2016, 08:43 AM Garland Start to finish 10 minutes per cut. Shaving off ju... Jul 24 2016, 10:07 AM whitetwinturbo :popcorn: :popcorn: :popcorn: :popcorn: :popco... Jul 24 2016, 01:35 PM Darren C Too scary for me... ;-)
Well done!
Now, how ... Jul 24 2016, 01:43 PM Garland :idea:
Thinking brutal, but can make a mess. So w... Jul 24 2016, 02:29 PM raynekat
Those are definitely some "mad" skil... Jul 24 2016, 04:05 PM mb911 Looking good interested in how the rockers look co... Jul 24 2016, 03:00 PM whitetwinturbo REALLY nice lighting :beer1: :beer1: :beer1: Jul 24 2016, 03:01 PM Andyrew Awesome headlight solution!
But... Why did y... Jul 24 2016, 03:24 PM Garland
Awesome headlight solution!
But... Why did ... Jul 24 2016, 04:26 PM Garland I ran in to a bit of a problem when starting my bu... Aug 7 2016, 01:15 PM Garland I'm Back from the "Garage" engine is... Aug 13 2016, 10:05 AM Garland First here is a few pictures of my home powder coa... Aug 29 2016, 10:00 PM Garland Still on its way out.
A few items I had... Aug 29 2016, 11:06 PM Garland installed a jumper to fool the fuel pump relay.
... Aug 29 2016, 11:15 PM Garland First start in car looks good, the oil pressure is... Aug 29 2016, 11:20 PM 914forme Big day for sure, great job. I lost a Black and D... Aug 30 2016, 05:31 AM Garland Well that took a while. Now I need to decide if I... Aug 30 2016, 06:34 AM  |
1 User(s) are reading this topic (1 Guests and 0 Anonymous Users)
0 Members:

|
Lo-Fi Version | Time is now: 30th July 2026 - 07:39 AM |
Invision Power Board
v9.1.4 © 2026 IPS, Inc.