|
|
|
Porsche, and the Porsche crest are registered trademarks of Dr. Ing. h.c. F. Porsche AG.
This site is not affiliated with Porsche in any way. Its only purpose is to provide an online forum for car enthusiasts. All other trademarks are property of their respective owners. |
|
|

  |

| Olympic 914 |
 Sep 20 2016, 09:51 AM Sep 20 2016, 09:51 AM
Post
#81
|
 Group: Members Posts: 1,780 Joined: 7-July 11 From: Pittsburgh PA Member No.: 13,287 Region Association: North East States |
[quote name='barefoot' date='Sep 20 2016, 06:51 AM' post='2400755']
I wanted to get it on the ground and started to look at tires to fit the 7 and 8 in Fuchs I wanted to run. Well in spite of getting the fenders flared it looks like the 8 inchers may not work, even with 225 / 50 -16. I really like these wheels though........ I have another idea but I will do a little more research before I decide what to run. But this will have to happen soon. I want to get it on the ground before I put the engine back in. Still Moving along. Tom [/quote] The way the trailing arm rotates will bring the wheel inboard slightly under load. Disconnect the Spring/shock with the wheel on and lift it up to a loaded position to see if fender clearance improves [/quote] Ok, This may work.... I leveled out my cart and disconnected the shock to enable it to move up to more of a running position and the clearance did increase. from 3/16 to about 3/4 inch. that should be enough to clear the 225/ 50 - 16 s This is with 2 inch vertical from rim to fender lip. I really just guessed on the ride height. 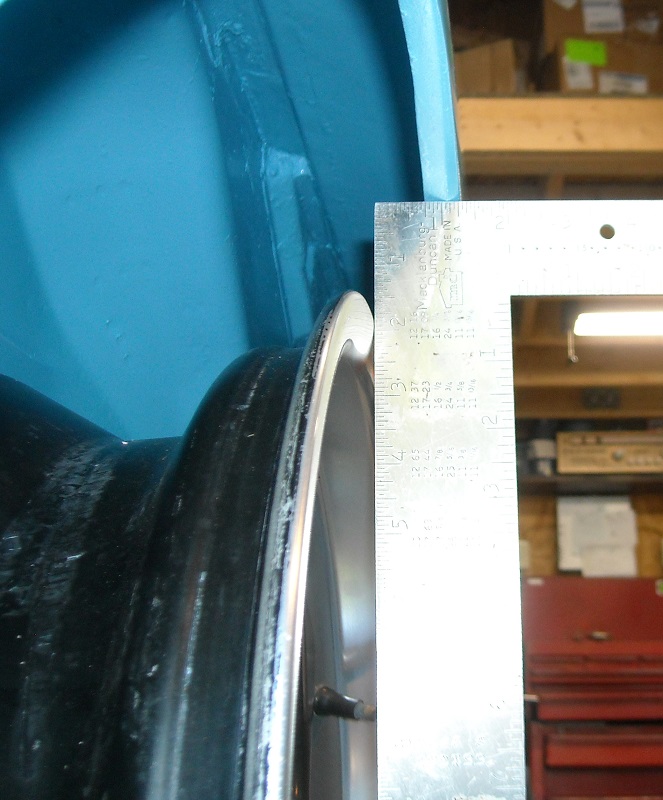 presently there is a 2mm shim installed and my rough measurement shows it to be around 2 deg negative camber 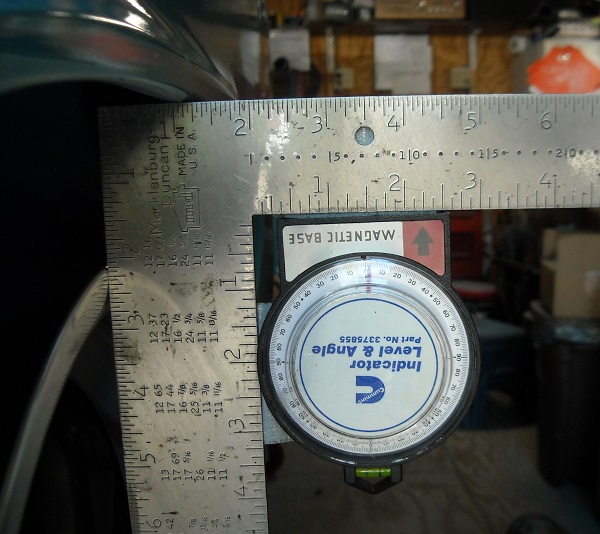 So I may be able to stay with Plan A , Plan B involves different wheels and it would be better if I didn't have to go there... |
   |

 
|
| Andyrew |
Sep 20 2016, 09:55 AM
Post
#82
|
|
Spooling.... Please wait Group: Members Posts: 13,380 Joined: 20-January 03 From: Riverbank, Ca Member No.: 172 Region Association: Northern California |
Go to a tire store and ask them to mount a used 225/50/16 because you want to check fitment. Tell them not to put any weights on it or anything and they can even write on the tire not for road use.
Then put the wheel on, take the shock off, and move it through the wheel arch. You should have 1/2" play on the inside and outside on a 50 series tire to prevent rubbing on load. |
|
|
|
| Andyrew |
Sep 20 2016, 09:57 AM
Post
#83
|
|
Spooling.... Please wait Group: Members Posts: 13,380 Joined: 20-January 03 From: Riverbank, Ca Member No.: 172 Region Association: Northern California |
Quick note. You CAN mount 205's on 8's if you need it. it'll have a little of the modern "Stretch" look to it, but it'll function all the same. If you have any stretch to those fenders then 225's might work.
|
|
|
|
| Olympic 914 |
Oct 7 2016, 06:45 PM
Post
#84
|
|
Group: Members Posts: 1,780 Joined: 7-July 11 From: Pittsburgh PA Member No.: 13,287 Region Association: North East States |
So I took a leap of faith and ordered the tires. BF Goodrich G-Force Comp 2
Fronts 205 50 16 on 7" rims Rear 225 50 16 on 8" rims QUOTE(Racer Chris @ Sep 20 2016, 09:46 AM)  The 8s with 225s should fit fine. And they do. (IMG:style_emoticons/default/mueba.gif) 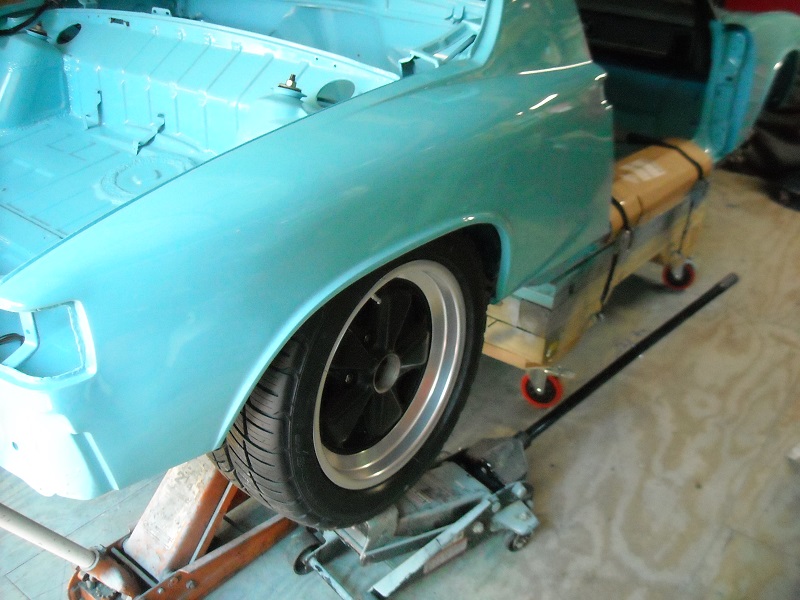  Still need an alignment to see where they really end up, But looking good now. 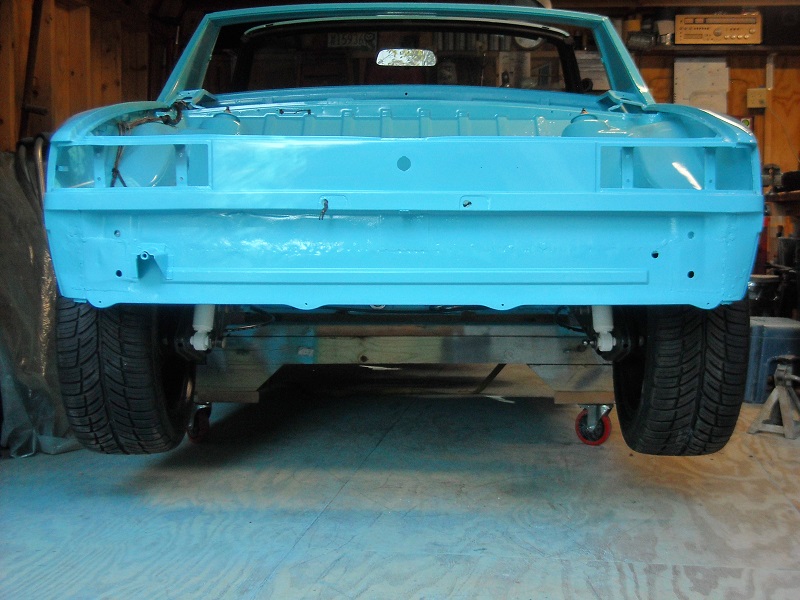 So its OFF of the cart and finally gets to stand on its own four feet. 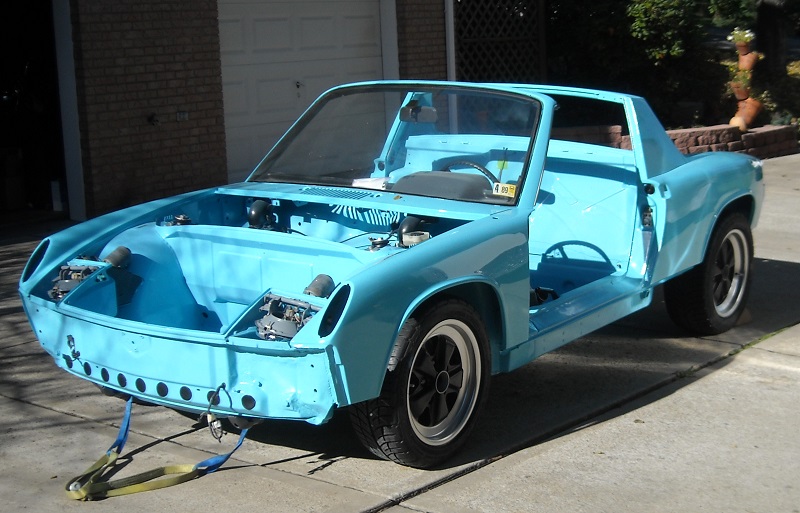 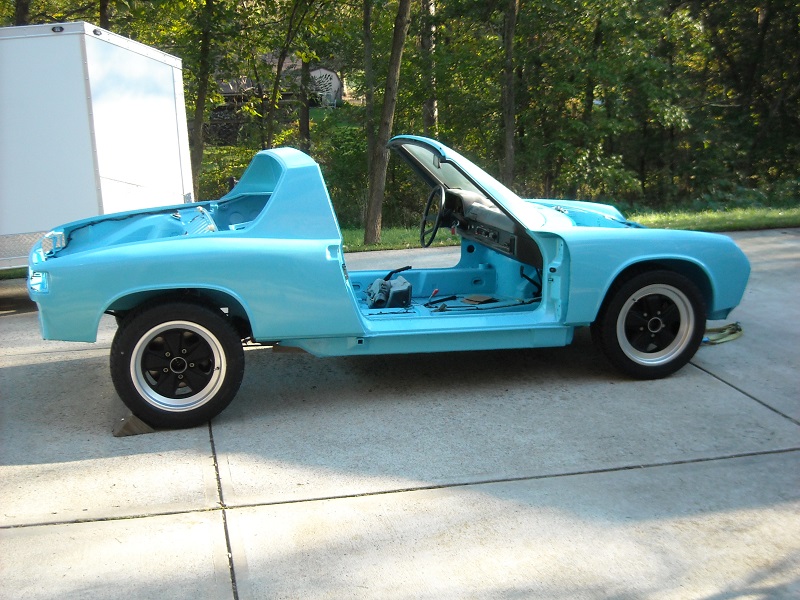 It starting to look like a car again. Just got the doors back from the blasters, So now I can start the bodywork on them. Painted up the hinge hardware too. So I can mount the rear trunk lid, the front lid still needs paint. I will do that when I get the doors ready. 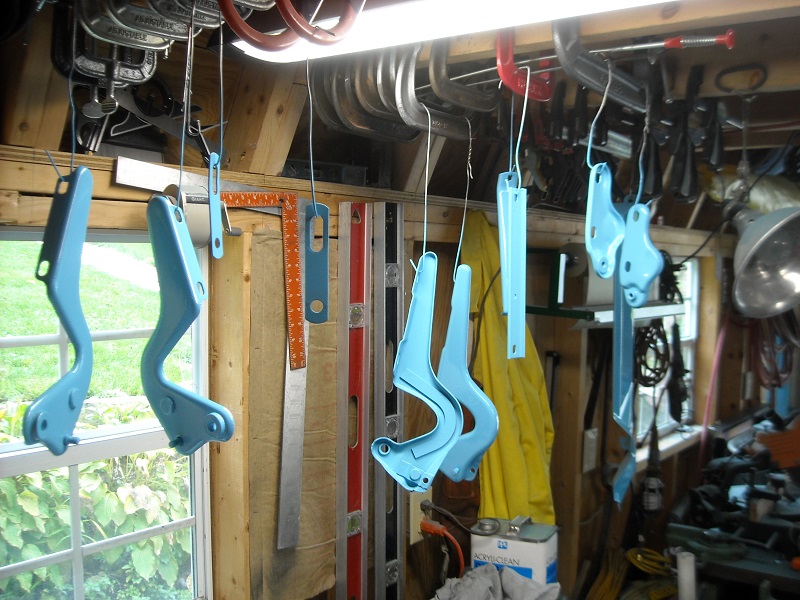 Little more progress.... |
|
|
|
| Olympic 914 |
Jan 31 2017, 08:37 AM
Post
#85
|
|
Group: Members Posts: 1,780 Joined: 7-July 11 From: Pittsburgh PA Member No.: 13,287 Region Association: North East States |
Well its been a while since I updated this thread, but I haven't quit on it.
In the last installment I had painted up the hinge hardware. then after mounting them with the new rollers I noticed a crack on the passenger side trunk lid mount. I had already repaired the drivers side before painting it and had looked at the pass side then and it looked ok. ..... Well it wasn't. Fortunately I found it while I could still get in there, unfortunately it was previously repaired by brazing it (IMG:style_emoticons/default/mad.gif) So I had to grind out all the brass and get in there with the mig to fix it right. I am still learning with this mig but did manage to get in there, it should hold up now. Then I had to fix the paint I just burned up with the mig.... (IMG:style_emoticons/default/dry.gif) 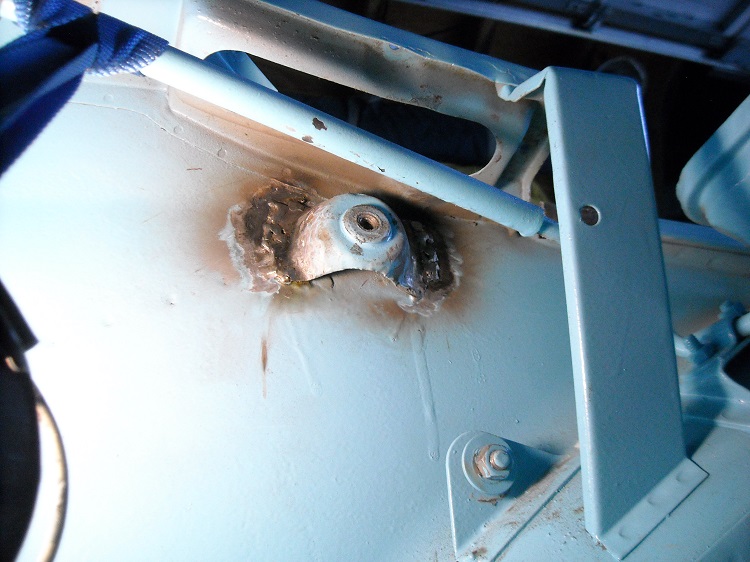 Since I had just picked up the doors from a local restoration shop that I had taken them to be blasted inside and out. I started on these. then found that the shop had added some warp to my doors when blasting them. (IMG:style_emoticons/default/headbang.gif) so they were going to need some more bodywork. They are ready now just waiting on some warmer temps to paint them (might be a couple months now) 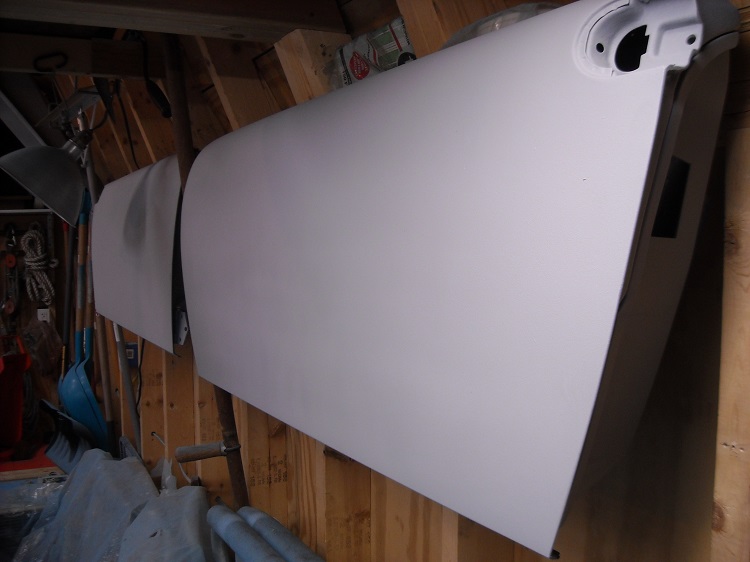 Worked on mounting the fuel pump and filter. not a lot of room with the sway bar there. 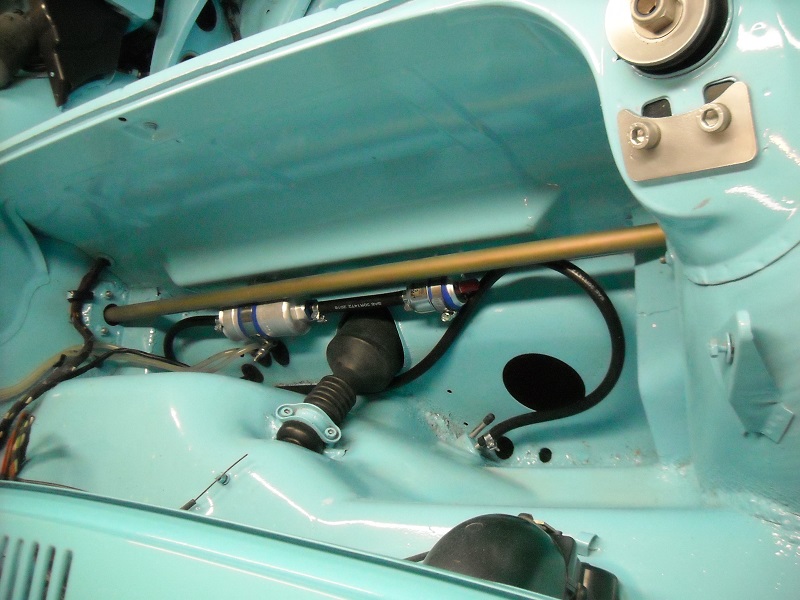 After joining the engine and trans and strapping it to a cart, it started on its journey from the garage to the shed. 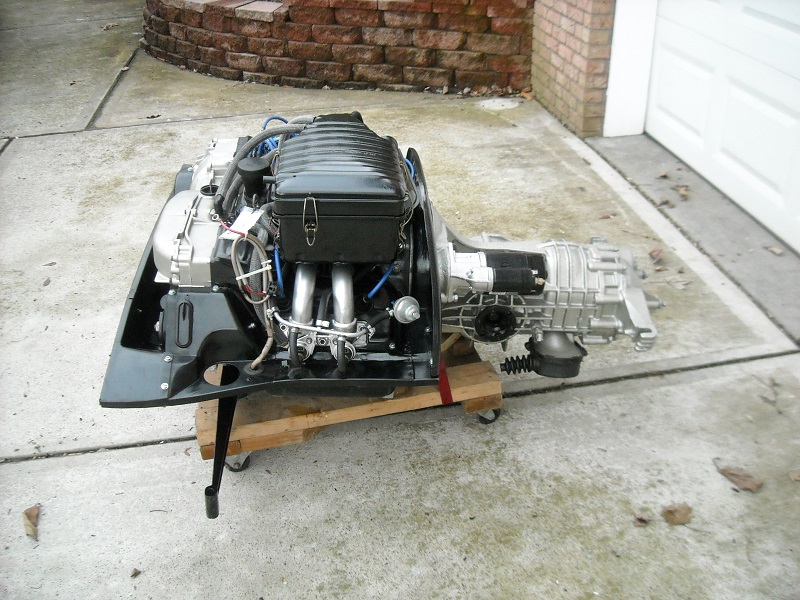 I had to use the winch to pull the combo up the ramp into the shed, and into place under the car. 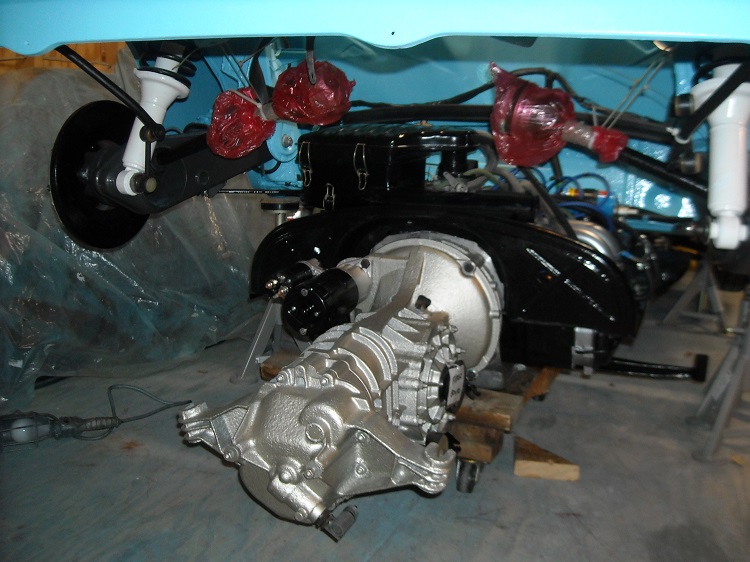 Using a couple pieces of allthread on the front motor mounts and a floor jack under the trans, I was able to get the engine raised into place without damaging anything. (IMG:style_emoticons/default/biggrin.gif) although this is a slow method it gave me a lot of opportunity to make sure everything was clearing. I angled up one side first to clear the fuel injector lines and clear the tins on the suspension bolts. 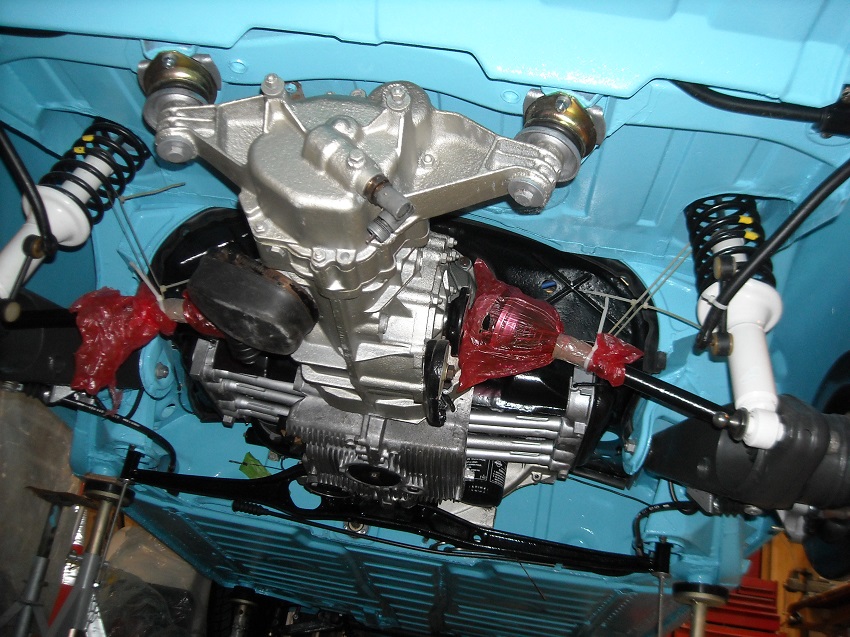 You can see the allthread still in place this picture above. It worked great..  |
|
|
|
| Olympic 914 |
Jan 31 2017, 11:00 AM
Post
#86
|
|
Group: Members Posts: 1,780 Joined: 7-July 11 From: Pittsburgh PA Member No.: 13,287 Region Association: North East States |
After much parts cleaner, elbow grease and a liberal dose of Barkeepers Friend my once cruddy looking Heat Exchangers shined up nicely.
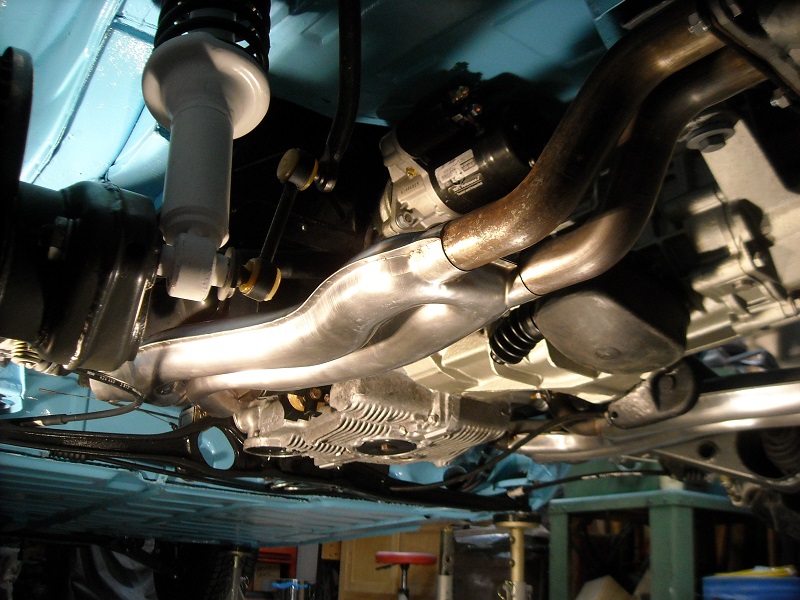 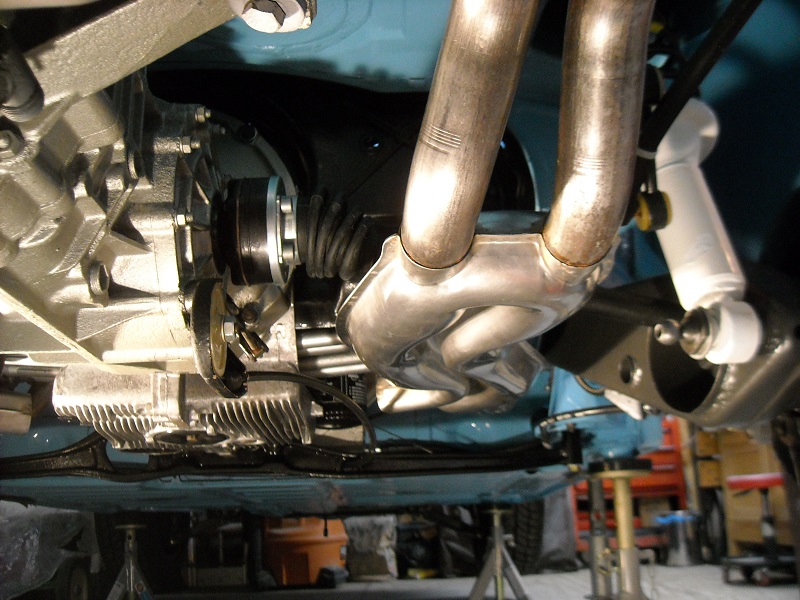 To keep the copper exhaust gaskets in place while I installed the HE's I sprayed them with some of this. it provided just enough stickiness to keep them in while I fitted the HE's 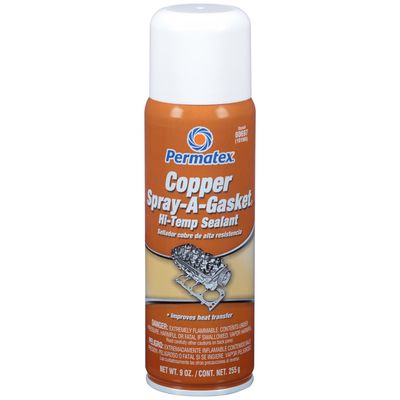 Then I could put on the Custom Deluxe Triad Exhaust System. I had a bung added for an AFR gauge. 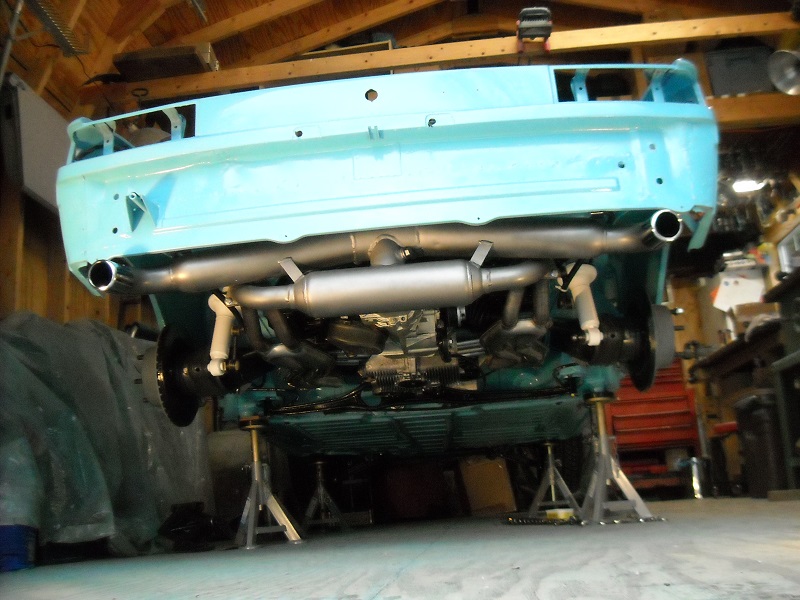 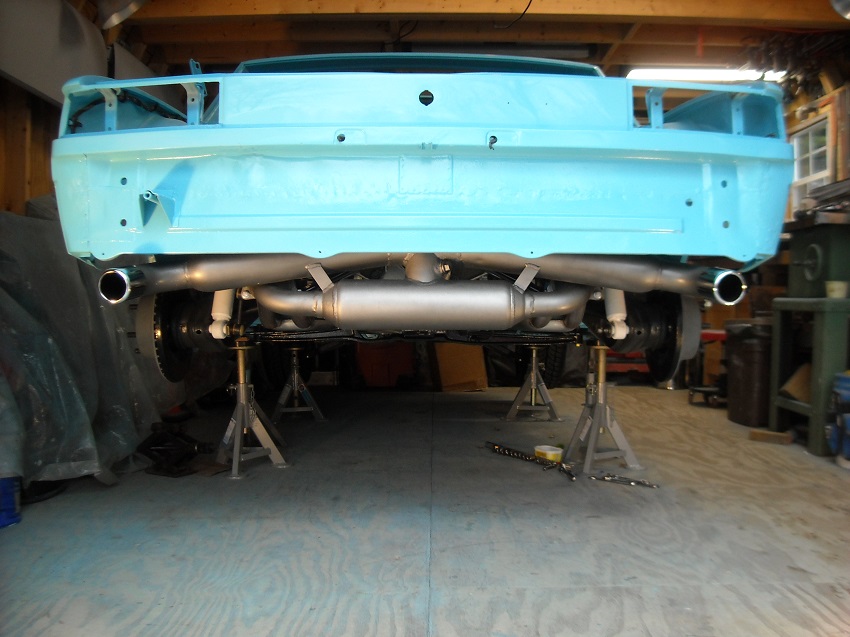 And some Chrome tips for a little extra Bling. 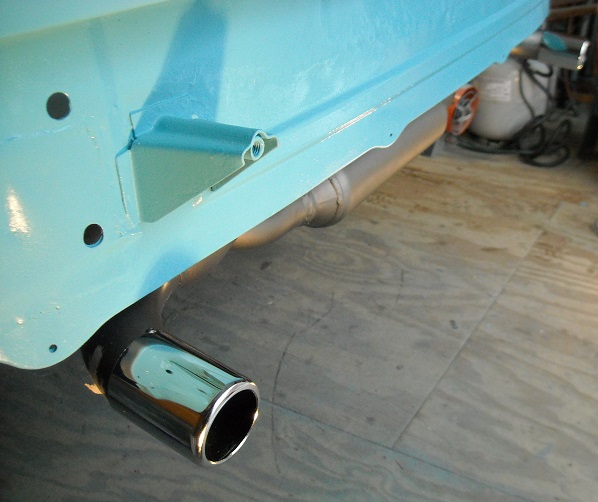 These pipes fit up PERFECTLY. Thanks Dave. very high quality, can't wait to hear how they sound. Just dropped off a couple heater parts for powder coat yesterday, and can finish up that stuff once I have everything back.. I keep putting off tackling the front airbox installation, having read what a PITA that job is. But know I will have to get to sometime. Still have to put the wiper motor and linkage in first of course. and dream up something for the windshield washers. But that all for now folks. |
|
|
|
| Curbandgutter |
Feb 1 2017, 08:54 AM
Post
#87
|
|
Senior Member Group: Members Posts: 566 Joined: 8-March 13 From: Murrieta CA Member No.: 15,637 Region Association: Southern California |
This is looking really clean. Great job. Keep it up.
|
|
|
|
| ndfrigi |
Feb 1 2017, 11:55 AM
Post
#88
|
|
Advanced Member Group: Members Posts: 2,983 Joined: 21-August 11 From: Orange County Member No.: 13,474 Region Association: Southern California |
beautiful!
|
|
|
|
| AZBanks |
May 23 2017, 10:56 AM
Post
#89
|
|
Senior Member Group: Members Posts: 1,079 Joined: 7-December 05 From: New River, AZ Member No.: 5,245 Region Association: Southwest Region |
Updates?
|
|
|
|
| Olympic 914 |
May 23 2017, 03:32 PM
Post
#90
|
|
Group: Members Posts: 1,780 Joined: 7-July 11 From: Pittsburgh PA Member No.: 13,287 Region Association: North East States |
QUOTE(AZBanks @ May 23 2017, 12:56 PM) Updates? Well its time I brought this thread up to date. So in preparation for the dreaded airbox install I decided to inspect, test, clean and lube the wiper mechanism. The lube part went ok but getting the wipers to park was another story. The instructions in both the Haynes and Clymer manual will not work to get the wiper into a park position for a bench test. I found I had rig a switch to mimic the column switch to get them into park. http://www.914world.com/bbs2/index.php?sho...=304921&hl= 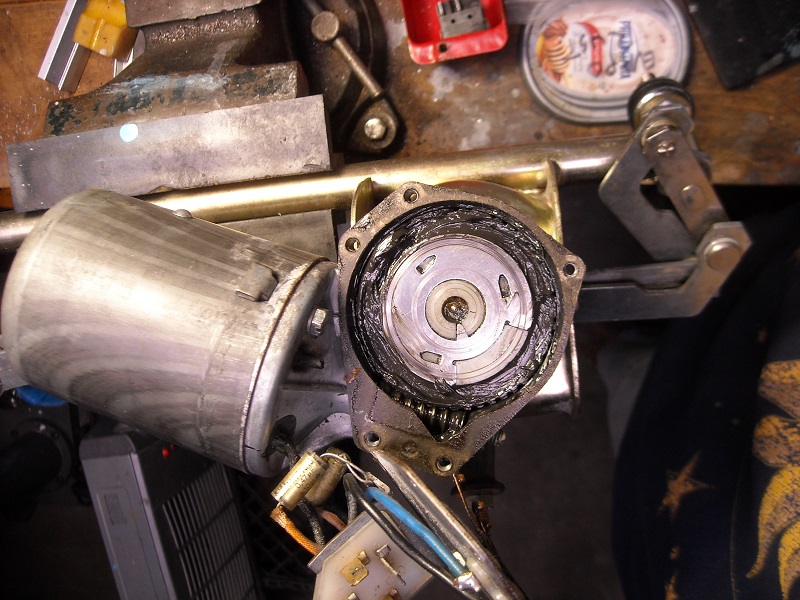 Then on to the air box install. The teener gods were with me that day as it only took about 1 ½ hours to get the airbox in. I admit I had to cheat a little and elongated the mounting holes. But it went in much better than I expected. 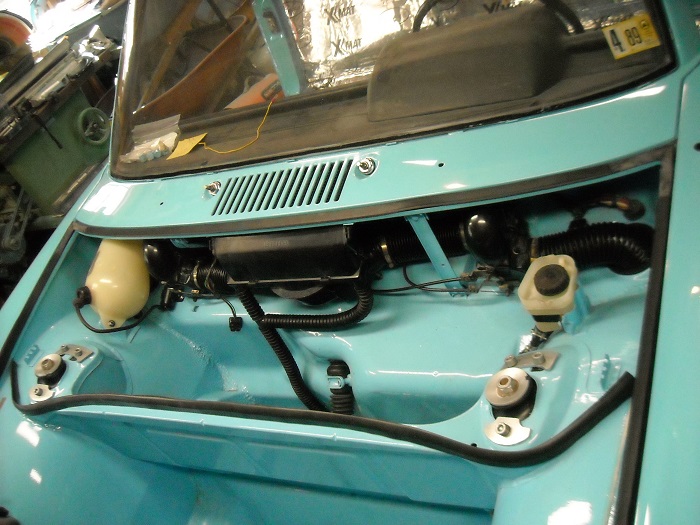 Moving to the interior I installed some Xmat sound deadner from Eastwood. Using paper I first made patterns and after getting a good fit transfer that to Xmat. It cuts easily with sharp scissors. Before putting it in place I waved it over my heater for a couple seconds to warm up the butyl rubber backing making it more flexible and stickier. 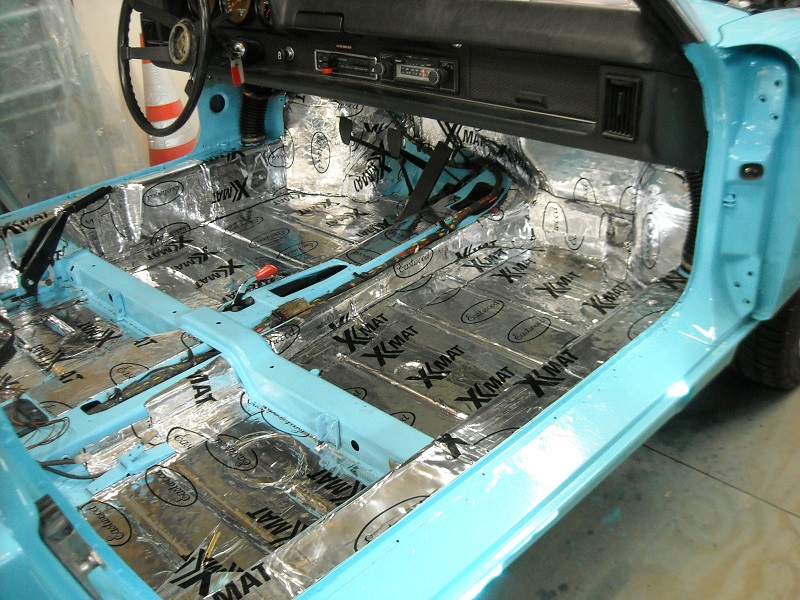 Then after waiting on a warm day I got the doors finally painted. 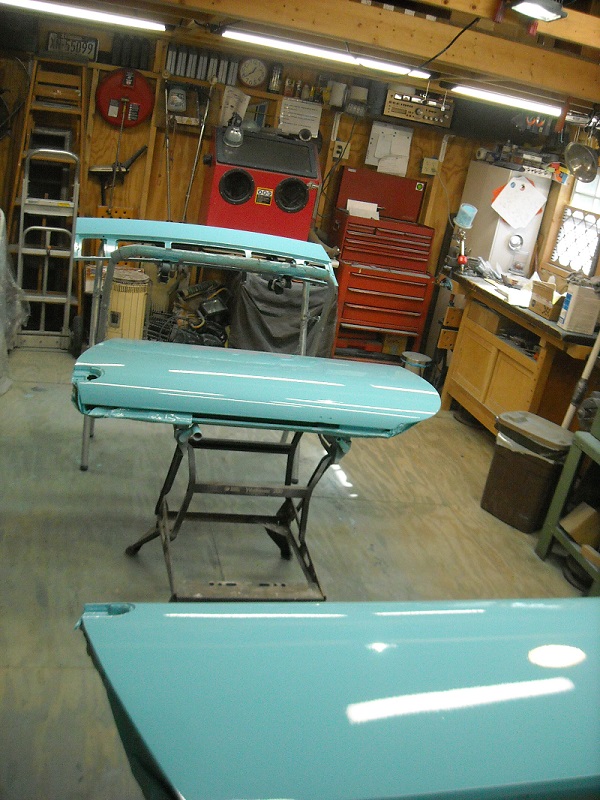 And had a friend help with the install. I put the tape on the edges to prevent nicks in the new paint while we were handling them. its coming along. 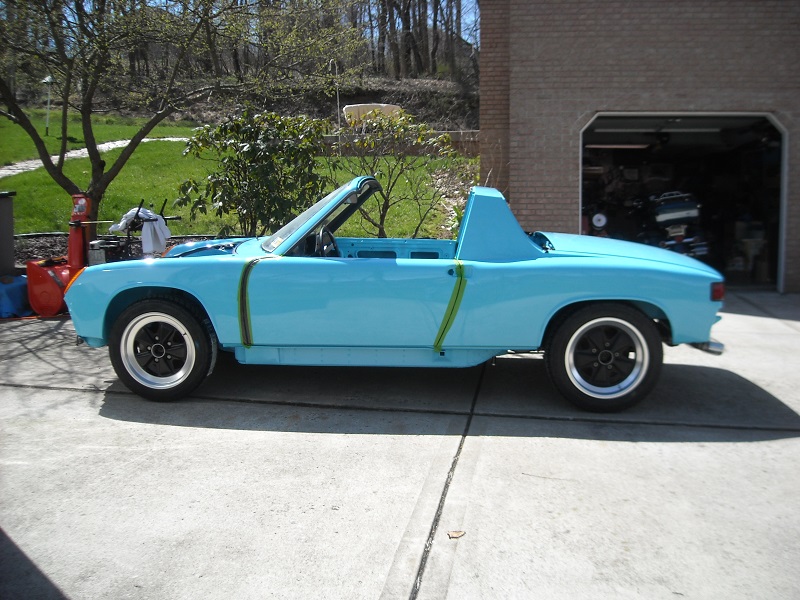 |
|
|
|
| Olympic 914 |
May 25 2017, 08:32 AM
Post
#91
|
|
Group: Members Posts: 1,780 Joined: 7-July 11 From: Pittsburgh PA Member No.: 13,287 Region Association: North East States |
With the airbox in place now I can work on the gas tank stuff.
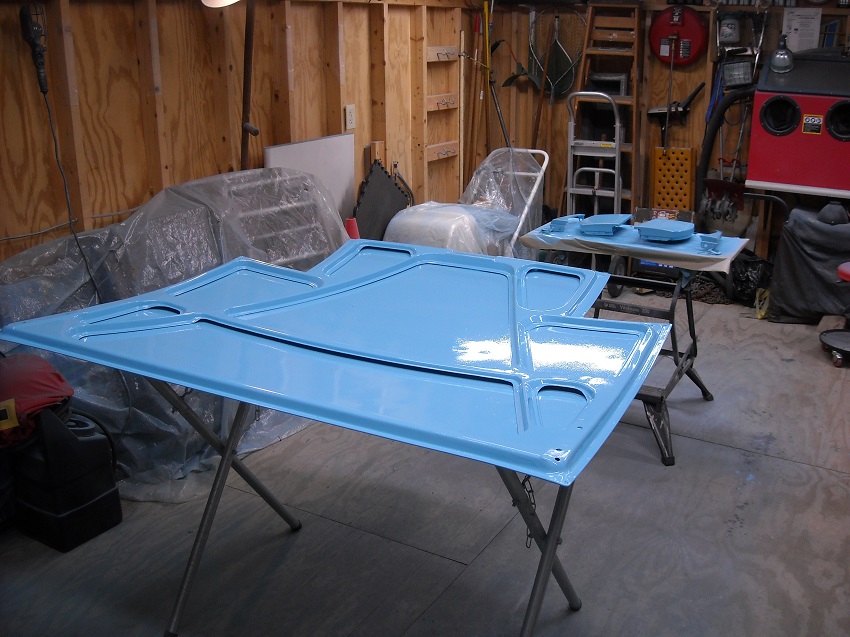
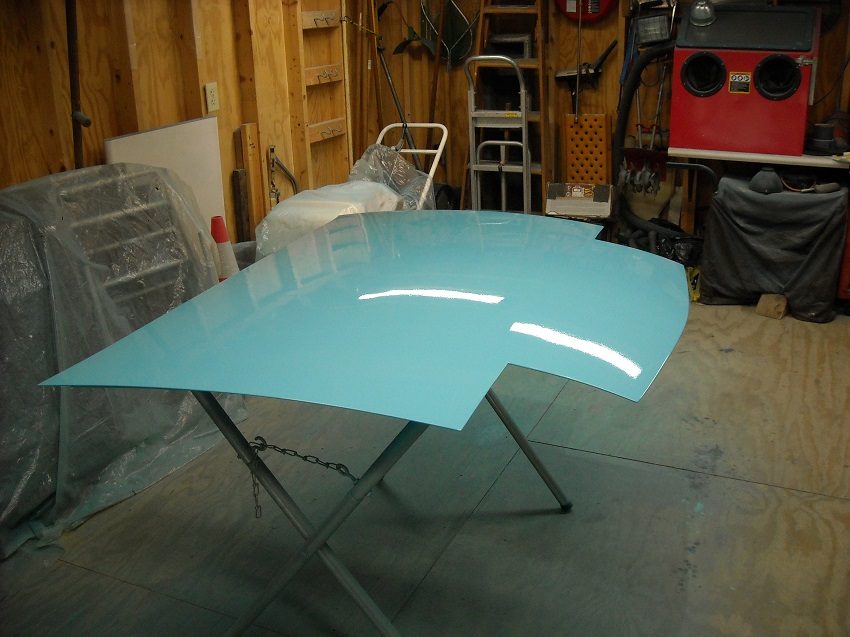
I had already installed the fuel pump, moving it to the front. its a tight fit with the front sway bar but everything clears nicely  the gas tank was pretty clean inside with just a little rust at the very bottom and when scraping this I uncovered a couple pin holes. so after having this professionally repaired at a local Tank Renew place and pressure tested it was ready for a coat of paint and install. 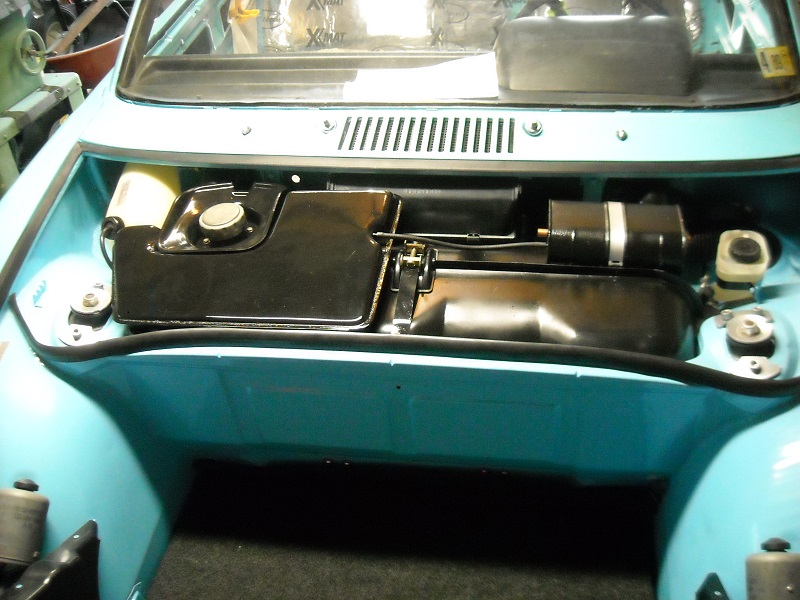 With the fuel taken care of it was time to move on to shifting. next up was the installation of this beautiful piece . Jwest Rennshifter. 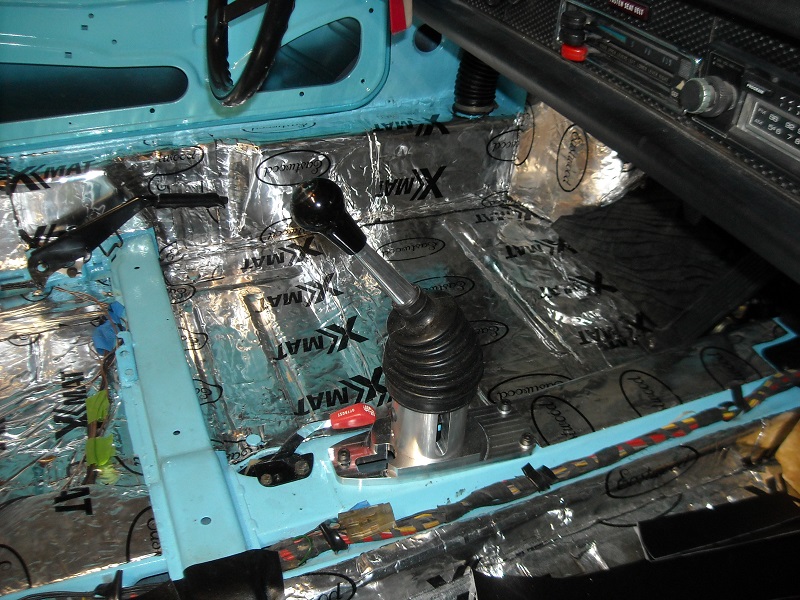 I think I have it adjusted correctly but won't really know until I try to move it under its own power. That day is coming soon. Still have a couple things left to paint and the front hood is the largest of these. also need to paint the headlight doors and the eyebrows. Since the hood still had the 30+ year old acrylic lacquer paint job on it I decided to strip it totally down and start from scratch. It looks good but I can feel some imperfections that will need to be leveled out. when cleaning up the underside I used my sandblaster and sand just KEPT ON coming out from under the ribs on the bottom. using a combination of air pressure and vacuum I managed to get most of it out, but I still find a couple pieces of black beauty creeping out. Little Hood humor > http://www.914world.com/bbs2/index.php?sho...=311019&hl= 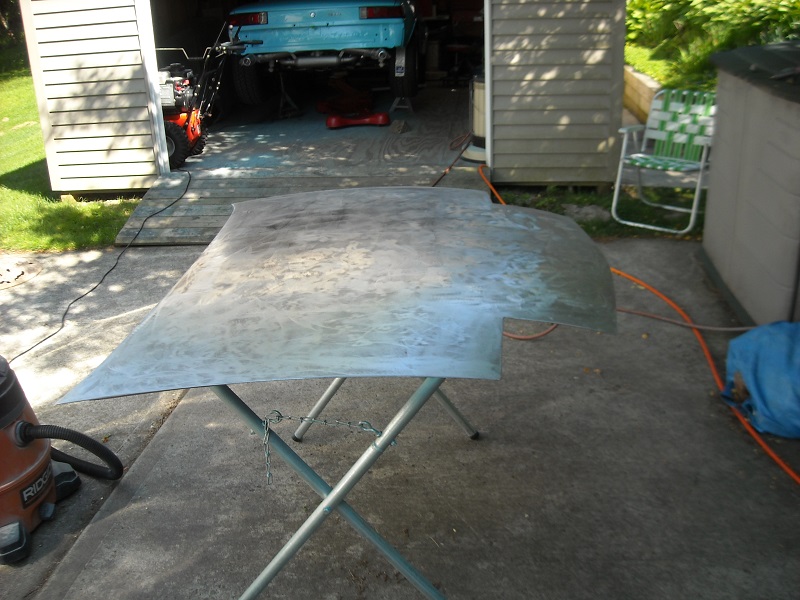 |
|
|
|
| Garland |
May 25 2017, 08:43 AM
Post
#92
|
|
Restoration Fanatic Group: Members Posts: 1,431 Joined: 8-January 04 From: ......Michigan...... Member No.: 1,535 Region Association: Upper MidWest |
Looking great!
|
|
|
|
| Olympic 914 |
Jun 16 2017, 06:41 AM
Post
#93
|
|
Group: Members Posts: 1,780 Joined: 7-July 11 From: Pittsburgh PA Member No.: 13,287 Region Association: North East States |
(IMG:style_emoticons/default/piratenanner.gif) (IMG:style_emoticons/default/piratenanner.gif) (IMG:style_emoticons/default/rocking nana.gif)
Drove the car yesterday. (IMG:style_emoticons/default/driving.gif) First time it has moved under its own power for 27+ years. After chasing a couple vacuum leaks that held the idle above 3000 and doing the cam break-in. I got the idle to settle down around 1100-1200 then after a little clutch adjustment I drove it up and down the driveway a few times. Then took it down the street, and when all went good ventured around the block. 3.1 miles Finally getting past the 137,000 mile mark 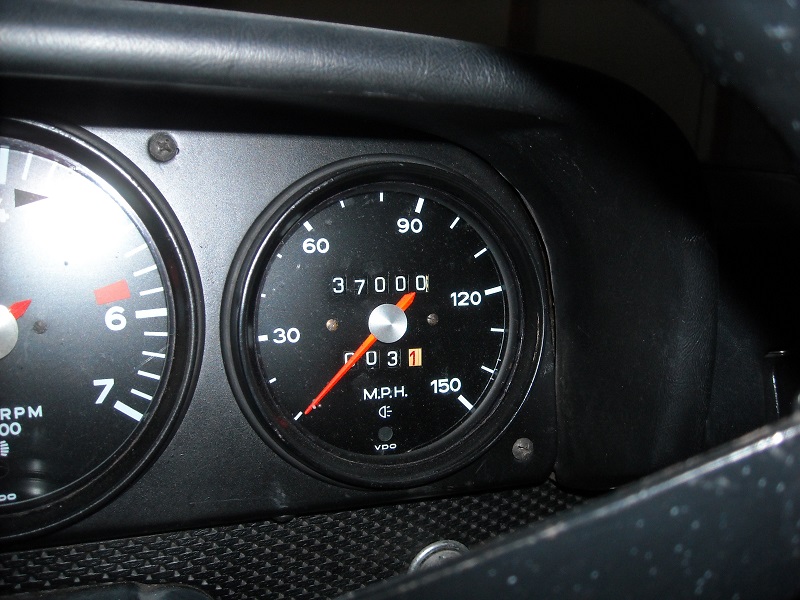 No hood, bumpers, rocker panels, or valences installed and just the drivers seat bolted in, no carpets, door panels, etc. I have a lot to finish. all the window mechanisms are lubed and installed and work smoothly. 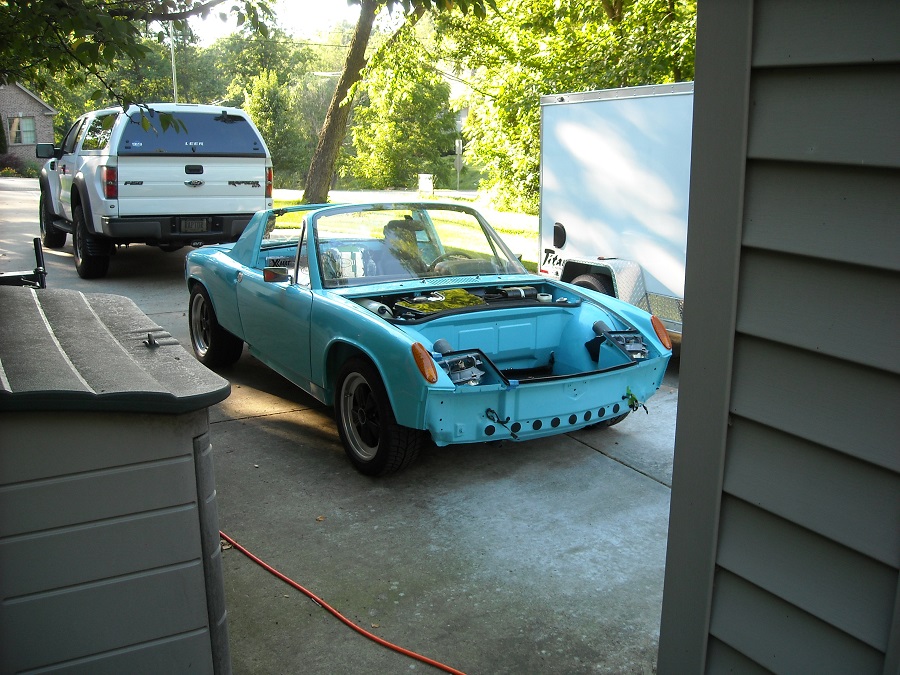 for the legal weenies out there, I do have new plates and insurance (they were in the trunk ) Unbelievably I seemed to have gotten the Rennshifter adjusted correctly the first time as I was easily able to shift. I don't think I took it past 3rd gear, there were too many things to try to monitor. It was a momentous day. Now back to work..... get sanding on that hood. |
|
|
|
| gereed75 |
Jun 16 2017, 07:47 AM
Post
#94
|
|
Senior Member Group: Members Posts: 1,433 Joined: 19-March 13 From: Pittsburgh PA Member No.: 15,674 Region Association: North East States |
Congrats on getting rolling. Great looking car. Mine will never look that good.
Where in the burgh are yinz?? I am in the south hills. |
|
|
|
| 76-914 |
Jun 16 2017, 07:58 AM
Post
#95
|
|
Repeat Offender & Resident Subaru Antagonist Group: Members Posts: 13,891 Joined: 23-January 09 From: Temecula, CA Member No.: 9,964 Region Association: Southern California |
A Big Congratulations. You earned it. Very clean work. (IMG:style_emoticons/default/smilie_pokal.gif)
|
 |
|
| Andyrew |
Jun 16 2017, 08:03 AM
Post
#96
|
|
Spooling.... Please wait Group: Members Posts: 13,380 Joined: 20-January 03 From: Riverbank, Ca Member No.: 172 Region Association: Northern California |
Congrats!!!! Sure is looking great!
|
|
|
|
| Olympic 914 |
Jun 16 2017, 10:42 AM
Post
#97
|
|
Group: Members Posts: 1,780 Joined: 7-July 11 From: Pittsburgh PA Member No.: 13,287 Region Association: North East States |
After blocking the hood, painted it along with the headlight doors and eyebrows.
  Then did some work on the bumpers, I built a couple wooden frames to hold the bumpers while I worked on them, they clamped securely into the workmate stands it made it a lot easier hammering and sanding on them. The rear needed some massaging from being hit by a Lincoln years ago. Put paint on them also. Used SEM euro black trim paint. If I would do it again I would use the SPI black epoxy and add acetone to get the satin look. the good thing about the SEM paint is you can just buy another quart or spray can and it will still match. I will be using it on all the other trim pieces, and the rocker covers. 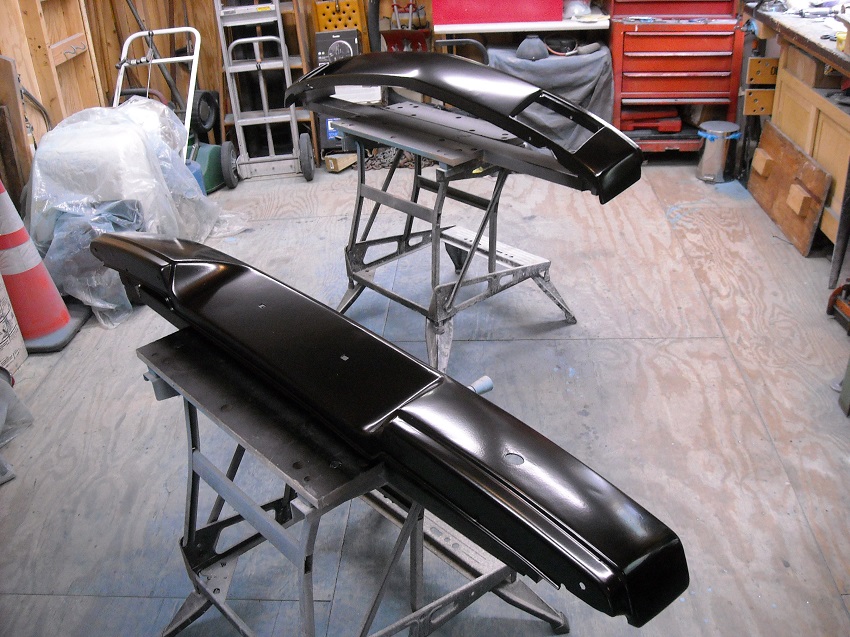 QUOTE(gereed75 @ Jun 16 2017, 09:47 AM) Congrats on getting rolling. Great looking car. Where in the burgh are yinz?? I am in the south hills. Thanks. Irwin now, bout 20 miles east of Da Burgh. Born a Yinzer, always a Yinzer. (IMG:style_emoticons/default/beerchug.gif) |
|
|
|
| 3d914 |
Jun 17 2017, 03:28 PM
Post
#98
|
|
Senior Member Group: Members Posts: 1,275 Joined: 24-September 03 From: Benson, AZ Member No.: 1,191 Region Association: Southwest Region |
QUOTE(Olympic 1.7 @ Oct 7 2016, 05:45 PM) So I took a leap of faith and ordered the tires. BF Goodrich G-Force Comp 2 Fronts 205 50 16 on 7" rims Rear 225 50 16 on 8" rims QUOTE(Racer Chris @ Sep 20 2016, 09:46 AM) The 8s with 225s should fit fine. And they do. (IMG:style_emoticons/default/mueba.gif) Tom, you're going to love those tires. I put a set on my LS400 and it now sticks to the road great. Hard to even squeel tires now they grab so good. Looking for the same wheel/tire combo for my project. Enjoy! |
|
|
|
| pete000 |
Jun 17 2017, 04:32 PM
Post
#99
|
|
Senior Member Group: Members Posts: 1,887 Joined: 23-August 10 From: Bradenton Florida Member No.: 12,094 Region Association: South East States |
What a great build !
|
|
|
|
| trojanhorsepower |
Jun 17 2017, 04:38 PM
Post
#100
|
|
Senior Member Group: Members Posts: 1,051 Joined: 21-September 03 From: Marion, NC Member No.: 1,179 Region Association: None |
Wow congrats! That is fantastic. The car looks great to.
|
|
|
|
|
3 User(s) are reading this topic (3 Guests and 0 Anonymous Users)
0 Members:

|
Lo-Fi Version | Time is now: 5th June 2026 - 10:57 AM |
Invision Power Board
v9.1.4 © 2026 IPS, Inc.