|
|
|
Porsche, and the Porsche crest are registered trademarks of Dr. Ing. h.c. F. Porsche AG.
This site is not affiliated with Porsche in any way. Its only purpose is to provide an online forum for car enthusiasts. All other trademarks are property of their respective owners. |
|
|

  |

| mb911 |
 Oct 3 2017, 01:24 PM Oct 3 2017, 01:24 PM
Post
#221
|
|
914 Guru  Group: Members Posts: 7,718 Joined: 2-January 09 From: Burlington wi Member No.: 9,892 Region Association: Upper MidWest |
Thanks coming along.. Slow progress but as I said welding still will be done primarly in a few weeks.. I think my new plan is to rough in everything, grind so things are close then epoxy prime so that I can better manage the bare metal and where I need to hammer , fill pin holes and reprime after shaping.. I am finding that if I don't do that the project sometimes feels like its not making progress..In reality it is.. Want it capable of being a roller by spring..
|
   |

 
|
| porschetub |
Oct 5 2017, 01:47 PM
Post
#222
|
|
914 Guru Group: Members Posts: 5,012 Joined: 25-July 15 From: New Zealand Member No.: 18,995 Region Association: None |
QUOTE(mb911 @ Sep 24 2017, 09:10 AM)  QUOTE(porschetub @ Sep 23 2017, 11:34 AM) QUOTE(mb911 @ Sep 22 2017, 12:22 PM) Where does it connect too.? I need to see both ends so I can start planning. (IMG:style_emoticons/default/biggrin.gif) Lever handle fits under the shifter in to a locating recess,handle go's up through the front of the shifter base,from memory my lever is the straight type,some are curved and maybe don't work,sorry don't know the year of my one. Front guide piece for the rod fits in a hole that all 914's have (?),I didn't use a bush in this piece as per original and it works fine ,mines adjusted for 1500rpm. I can measure all this up if you like as I have the assembly out of the car @ the moment (IMG:style_emoticons/default/beer.gif) . That would be great with a few pictures.. I would appreciate it.. PM sent, (IMG:style_emoticons/default/beer.gif) |
|
|
|
| mb911 |
Oct 5 2017, 06:21 PM
Post
#223
|
|
914 Guru Group: Members Posts: 7,718 Joined: 2-January 09 From: Burlington wi Member No.: 9,892 Region Association: Upper MidWest |
Thanks for help in the pm.. I am expecting to finish allot over the next 4 days then it will be time to work on the grinding again get it epoxy primed..
|
|
|
|
| drgouk |
Oct 5 2017, 06:23 PM
Post
#224
|
|
Newbie Group: Members Posts: 14 Joined: 7-March 15 From: NZ Member No.: 18,494 Region Association: None |
QUOTE(mb911 @ Sep 22 2017, 03:28 PM) And here is the shot of cmm checking roundness and diameter. They should'nt be round, A big end bearing is lensed. Oil wedge at the parting face. bearing clearence is checked at the 12 oclock position with a dial bore gauge. |
|
|
|
| mb911 |
Oct 6 2017, 12:06 PM
Post
#225
|
|
914 Guru Group: Members Posts: 7,718 Joined: 2-January 09 From: Burlington wi Member No.: 9,892 Region Association: Upper MidWest |
QUOTE(drgouk @ Oct 5 2017, 04:23 PM) QUOTE(mb911 @ Sep 22 2017, 03:28 PM) And here is the shot of cmm checking roundness and diameter. They should'nt be round, A big end bearing is lensed. Oil wedge at the parting face. bearing clearence is checked at the 12 oclock position with a dial bore gauge. I was just for reference |
|
|
|
| mb911 |
Oct 7 2017, 09:26 PM
Post
#226
|
|
914 Guru Group: Members Posts: 7,718 Joined: 2-January 09 From: Burlington wi Member No.: 9,892 Region Association: Upper MidWest |
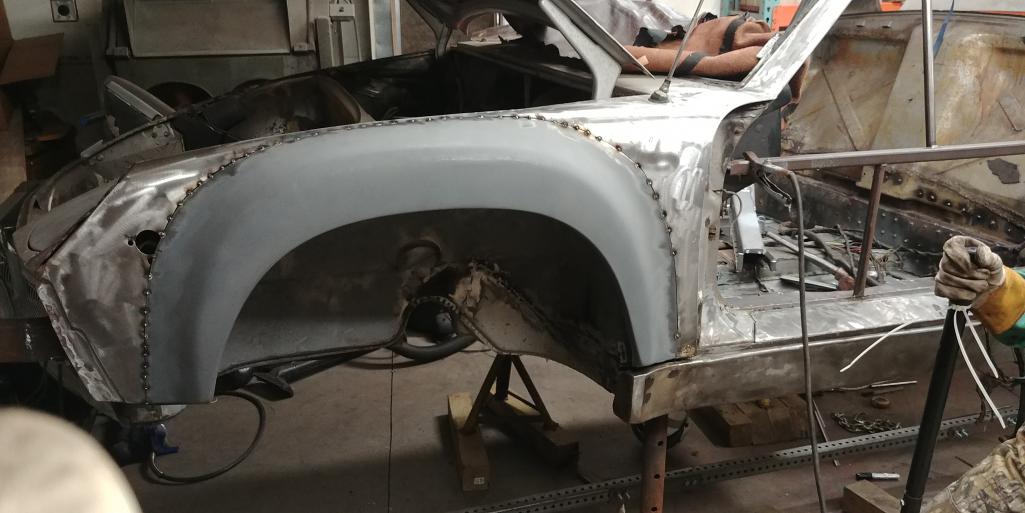
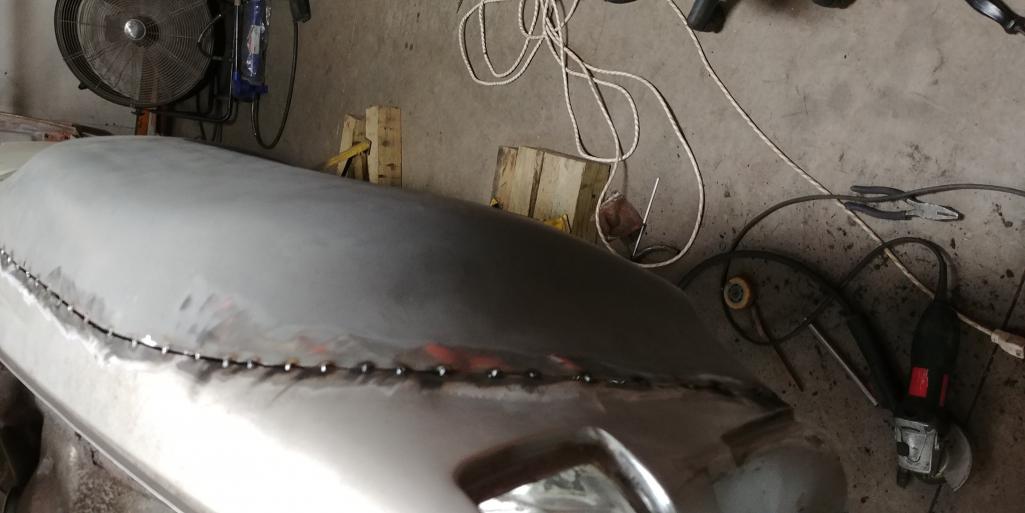
My 13yo and I went and tacked on 2 flares tonight.. He was mad I didn't let him weld more.. I want to prevent extra work if possible..
 |
|
|
|
| mb911 |
Oct 7 2017, 09:27 PM
Post
#227
|
|
914 Guru Group: Members Posts: 7,718 Joined: 2-January 09 From: Burlington wi Member No.: 9,892 Region Association: Upper MidWest |
 |
|
|
|
| defianty |
Oct 8 2017, 02:30 AM
Post
#228
|
|
Senior Member Group: Members Posts: 659 Joined: 9-August 06 From: Essex, UK Member No.: 6,621 Region Association: None |
Nice work, I'm at about the same point in my build now. Getting the first flare on is a great feeling as you can really start to see how the car's going to look once completed.
Great that your son is taking a keen interest - I bet my step-son couldn't even tell me what car it is. |
|
|
|
| 914dave |
Oct 8 2017, 05:33 AM
Post
#229
|
|
914 Addict Group: Members Posts: 730 Joined: 19-October 03 From: Willow Grove Pa. Member No.: 1,262 Region Association: North East States |
Looking good! Flares are a big milestone.
|
|
|
|
| mb911 |
Oct 8 2017, 05:51 AM
Post
#230
|
|
914 Guru Group: Members Posts: 7,718 Joined: 2-January 09 From: Burlington wi Member No.: 9,892 Region Association: Upper MidWest |
Thanks guys it feels good to not have them flopping around or just cleeco'd on.. Next is to clean up the area I have been working in as winter is coming I actually will have more room. Plus more parts are on the car then off on shelves and leaning against the wall(sheet metal) car is back on revised rotisserie so it is movable. Time to sell the sand blaster I have that I bought to use but end up using the one at work instead.. This will give me more room allow me to epoxy prime this winter..
Also you may note I fit the rocker on and these are my steel gt rocker flares. I actually need to cut and shorten the rocker by about 3/8". The flare arch is about that much wider at both sides of the arch.. I measured I swear a dozen times.. |
|
|
|
| mb911 |
Oct 9 2017, 05:32 AM
Post
#231
|
|
914 Guru Group: Members Posts: 7,718 Joined: 2-January 09 From: Burlington wi Member No.: 9,892 Region Association: Upper MidWest |
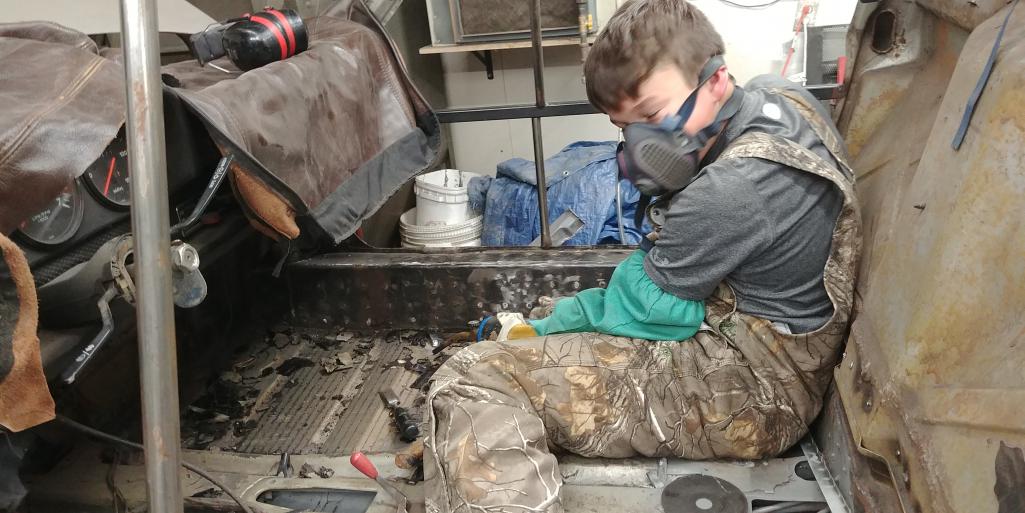
Last night my son and I spent another 2 hours on it.. My helper was tasked with scraping one the last spots of tar off the original floor.
 |
|
|
|
| JOEPROPER |
Oct 9 2017, 06:34 AM
Post
#232
|
|
The answer is "no" unless you ask... Group: Members Posts: 1,208 Joined: 21-November 15 From: White Plains New York Member No.: 19,387 Region Association: North East States |
So now we see how all this progress is being made... Nice work!
|
|
|
|
| mb911 |
Oct 9 2017, 07:13 AM
Post
#233
|
|
914 Guru Group: Members Posts: 7,718 Joined: 2-January 09 From: Burlington wi Member No.: 9,892 Region Association: Upper MidWest |
(IMG:style_emoticons/default/agree.gif) when he holds parts/panels in place it goes so much faster. That said he wants to do more and I have to work to find things for him to do.
|
|
|
|
| tygaboy |
Oct 9 2017, 08:30 AM
Post
#234
|
|
914 Guru Group: Members Posts: 5,754 Joined: 6-October 15 From: Petaluma, CA Member No.: 19,241 Region Association: Northern California |
QUOTE(mb911 @ Oct 9 2017, 06:13 AM) (IMG:style_emoticons/default/agree.gif) when he holds parts/panels in place it goes so much faster. That said he wants to do more and I have to work to find things for him to do. Ben - Send him out here! Installing my flares is coming up on the to-do list and anyone with experience in that area would be great! But seriously... Thanks for sharing that pic. What a great thing: not only building a cool car but, more importantly, building the father-son bond. Just wonderful. |
|
|
|
| mb911 |
Oct 9 2017, 09:21 AM
Post
#235
|
|
914 Guru Group: Members Posts: 7,718 Joined: 2-January 09 From: Burlington wi Member No.: 9,892 Region Association: Upper MidWest |
Chris happy yo share..
Regarding the flares I can share this wisdom with all of you. I had a pretty long conversation with George Hussey on these. He stated the best way to put the flares on is to clamp on to the narrow body arches a piece of steel in 3 locations and this will center the flare in the opening. I found this to be exactly the case. I also found that the gt flare arches are actually wider as I posted before. The flares really only fit on one way. I measured 11-7/8" on both rears at the same peak of the arch to the Gt chassis reinforcement. So proof in the pudding.. It took my son and I 1-1/2 hours to position and tack 2 flares on.. This was with some teaching/explanation along the way too.. |
|
|
|
| mepstein |
Oct 9 2017, 10:31 AM
Post
#236
|
|
914-6 GT in waiting Group: Members Posts: 20,371 Joined: 19-September 09 From: Landenberg, PA/Wilmington, DE Member No.: 10,825 Region Association: MidAtlantic Region |
QUOTE(mb911 @ Oct 9 2017, 11:21 AM) It took my son and I 1-1/2 hours to position and tack 2 flares on.. This was with some teaching/explanation along the way too.. So once he gets good at 914’s, he can start charging $100/hour to fix 911’s. |
|
|
|
| mb911 |
Oct 9 2017, 02:43 PM
Post
#237
|
|
914 Guru Group: Members Posts: 7,718 Joined: 2-January 09 From: Burlington wi Member No.: 9,892 Region Association: Upper MidWest |
Lol yup ..
So today he welded the cross brace in with allot of guidence. Turned out nice.. 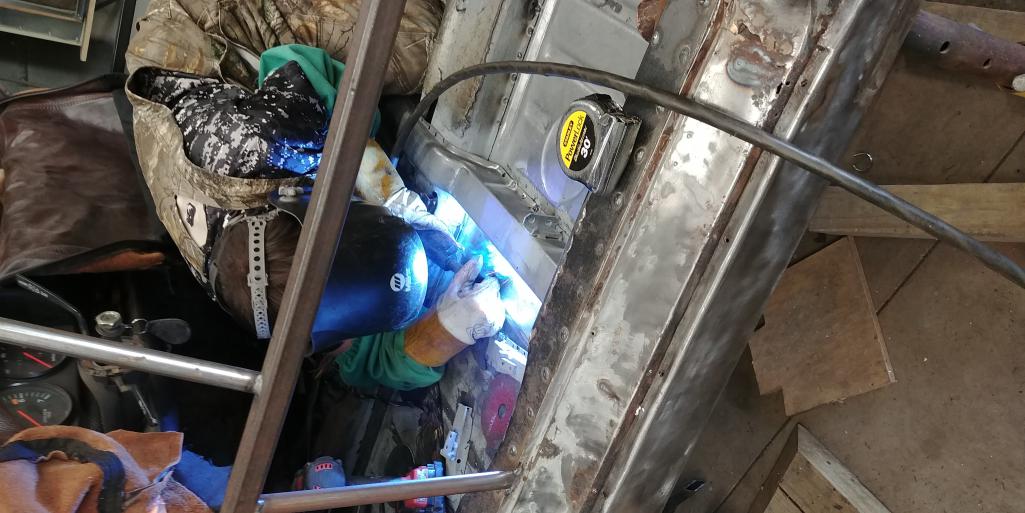 |
|
|
|
| GeorgeRud |
Oct 9 2017, 03:10 PM
Post
#238
|
|
Advanced Member Group: Members Posts: 3,725 Joined: 27-July 05 From: Chicagoland Member No.: 4,482 Region Association: Upper MidWest |
Spending this time with him is one of the best things you can do, and teaching him such a valuable skill is wonderful.
|
|
|
|
| mb911 |
Oct 10 2017, 05:28 AM
Post
#239
|
|
914 Guru Group: Members Posts: 7,718 Joined: 2-January 09 From: Burlington wi Member No.: 9,892 Region Association: Upper MidWest |
We both enjoy it.. He os already talking about the carpet install.. I think he is getting ahead of himself.
|
|
|
|
| mb911 |
Oct 13 2017, 12:04 PM
Post
#240
|
|
914 Guru Group: Members Posts: 7,718 Joined: 2-January 09 From: Burlington wi Member No.: 9,892 Region Association: Upper MidWest |
Well after allot of thought on how to reproduce the look of the factory inner longs as I used 14 gauge that I bent up I decided to reach out to a few that have done this and I came up with a simple buck.. My plan is to plug weld these over the longs.. I know that is how allot would do it as they prefer to hammer it out in the parent material but I cnc bent the longs and they were perfect so this is my answer. Also keep in mind this car won't ever be worth what a real six is or even a rust free original car..
This will be epoxy primed and then seam sealer over that and will be undetectable once completed.. The sample that is in the picture is 1st go at it.. Next week they will be more refined. 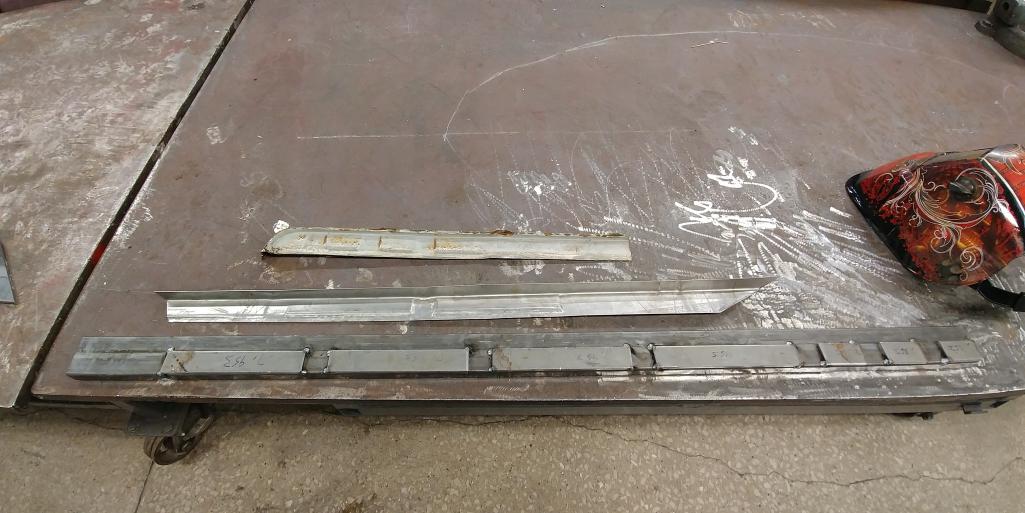 |
|
|
|
|
1 User(s) are reading this topic (1 Guests and 0 Anonymous Users)
0 Members:

|
Lo-Fi Version | Time is now: 2nd February 2026 - 08:04 AM |
Invision Power Board
v9.1.4 © 2026 IPS, Inc.