|
|
|
Porsche, and the Porsche crest are registered trademarks of Dr. Ing. h.c. F. Porsche AG.
This site is not affiliated with Porsche in any way. Its only purpose is to provide an online forum for car enthusiasts. All other trademarks are property of their respective owners. |
|
|

  |

| mb911 |
 Jan 4 2018, 05:43 AM Jan 4 2018, 05:43 AM
Post
#301
|
|
914 Guru  Group: Members Posts: 7,718 Joined: 2-January 09 From: Burlington wi Member No.: 9,892 Region Association: Upper MidWest |
I was finally able to work on this last night.. I cut a square groove and then ground the brass off.. Welded it up and went well.. The inner wheel well is almost done.. I also welded on one of the 2 rear suspension ear reinforcements.. Went well as well. Plugged amd ground a few more areas.. Almost ready for epoxy..
|
   |

 
|
| bbrock |
Jan 4 2018, 08:30 AM
Post
#302
|
|
914 Guru Group: Members Posts: 5,269 Joined: 17-February 17 From: Montana Member No.: 20,845 Region Association: Rocky Mountains |
QUOTE(mb911 @ Jan 4 2018, 04:43 AM)  I was finally able to work on this last night.. I cut a square groove and then ground the brass off.. Welded it up and went well.. The inner wheel well is almost done.. I also welded on one of the 2 rear suspension ear reinforcements.. Went well as well. Plugged amd ground a few more areas.. Almost ready for epoxy.. Did you happen to snap any pics of this? I'm not sure I have it figured out in my mind, and might want to steal this approach. (IMG:style_emoticons/default/beerchug.gif) |
 |
|
| mb911 |
Jan 4 2018, 06:04 PM
Post
#303
|
|
914 Guru Group: Members Posts: 7,718 Joined: 2-January 09 From: Burlington wi Member No.: 9,892 Region Association: Upper MidWest |
QUOTE(bbrock @ Jan 4 2018, 06:30 AM) QUOTE(mb911 @ Jan 4 2018, 04:43 AM) I was finally able to work on this last night.. I cut a square groove and then ground the brass off.. Welded it up and went well.. The inner wheel well is almost done.. I also welded on one of the 2 rear suspension ear reinforcements.. Went well as well. Plugged amd ground a few more areas.. Almost ready for epoxy.. Did you happen to snap any pics of this? I'm not sure I have it figured out in my mind, and might want to steal this approach. (IMG:style_emoticons/default/beerchug.gif) I will take a picture this weekend. |
|
|
|
| mb911 |
Jan 10 2018, 08:00 PM
Post
#304
|
|
914 Guru Group: Members Posts: 7,718 Joined: 2-January 09 From: Burlington wi Member No.: 9,892 Region Association: Upper MidWest |
Sorry haven't had a chance been extremely busy with work vut spent the last 2 mornings @5 am doing some welding and grinding all passenger side.. Went and bought a quart of epoxy primer, a roll of 8o grit for the da, and some kevlar reinforced filler for the weld seams. The stuff comes highly recommended as its 100% waterproof so no rust issues.. Getting very close to removing door braces..
New trunk floor is here and moving that direction next week.. |
|
|
|
| GeorgeRud |
Jan 10 2018, 08:04 PM
Post
#305
|
|
Advanced Member Group: Members Posts: 3,725 Joined: 27-July 05 From: Chicagoland Member No.: 4,482 Region Association: Upper MidWest |
Glad that it’s moving along. Hopefully you have good heat after the weather last week.
|
|
|
|
| bbrock |
Jan 10 2018, 08:32 PM
Post
#306
|
|
914 Guru Group: Members Posts: 5,269 Joined: 17-February 17 From: Montana Member No.: 20,845 Region Association: Rocky Mountains |
QUOTE(mb911 @ Jan 10 2018, 07:00 PM) and some kevlar reinforced filler for the weld seams. The stuff comes highly recommended as its 100% waterproof so no rust issues.. Is this the stuff? I'll be watching this closely. Sounds like a good idea. |
|
|
|
| mb911 |
Jan 11 2018, 05:13 AM
Post
#307
|
|
914 Guru Group: Members Posts: 7,718 Joined: 2-January 09 From: Burlington wi Member No.: 9,892 Region Association: Upper MidWest |
QUOTE(bbrock @ Jan 10 2018, 06:32 PM) QUOTE(mb911 @ Jan 10 2018, 07:00 PM) and some kevlar reinforced filler for the weld seams. The stuff comes highly recommended as its 100% waterproof so no rust issues.. Is this the stuff? I'll be watching this closely. Sounds like a good idea. 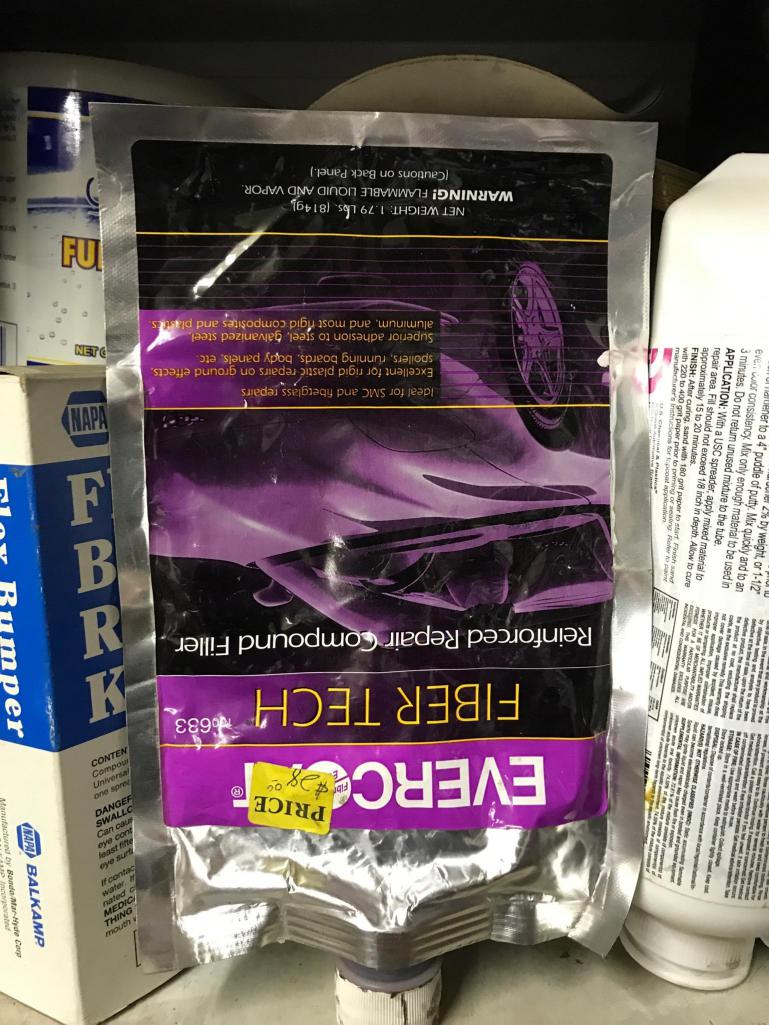 This stuff |
|
|
|
| mb911 |
Jan 11 2018, 08:36 AM
Post
#308
|
|
914 Guru Group: Members Posts: 7,718 Joined: 2-January 09 From: Burlington wi Member No.: 9,892 Region Association: Upper MidWest |
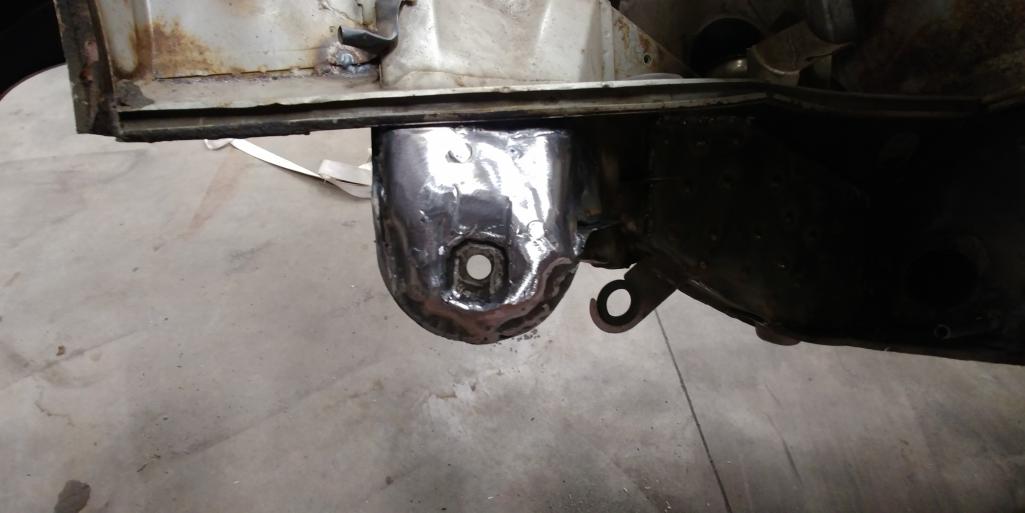
Completed one suspension ear reinforcements this morning.. Then off to work..
 |
|
|
|
| mb911 |
Jan 11 2018, 08:38 AM
Post
#309
|
|
914 Guru Group: Members Posts: 7,718 Joined: 2-January 09 From: Burlington wi Member No.: 9,892 Region Association: Upper MidWest |
This is the p.o. repair area.. I cut the brazing out and welded now have to hammer it flat..
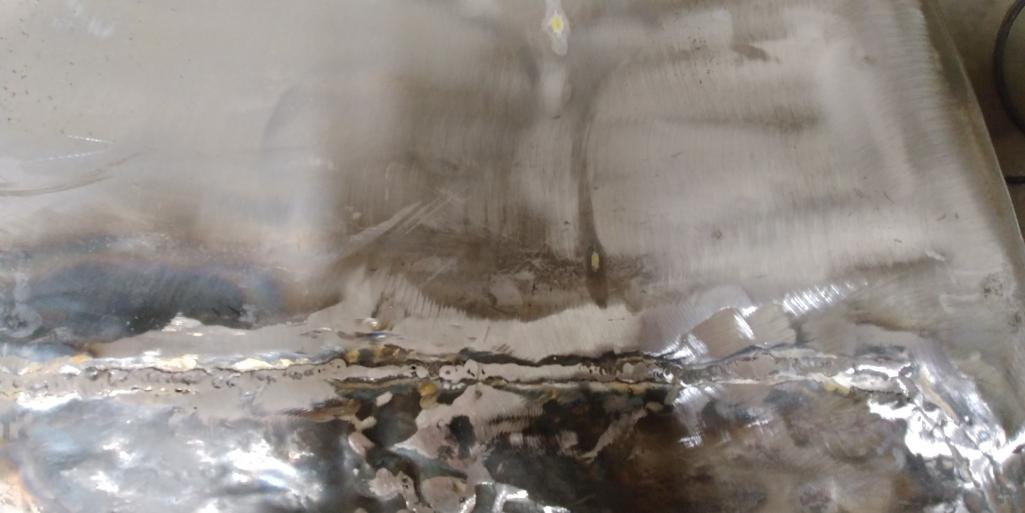 This is front wheel well passenger side.. |
|
|
|
| mb911 |
Jan 15 2018, 05:31 PM
Post
#310
|
|
914 Guru Group: Members Posts: 7,718 Joined: 2-January 09 From: Burlington wi Member No.: 9,892 Region Association: Upper MidWest |
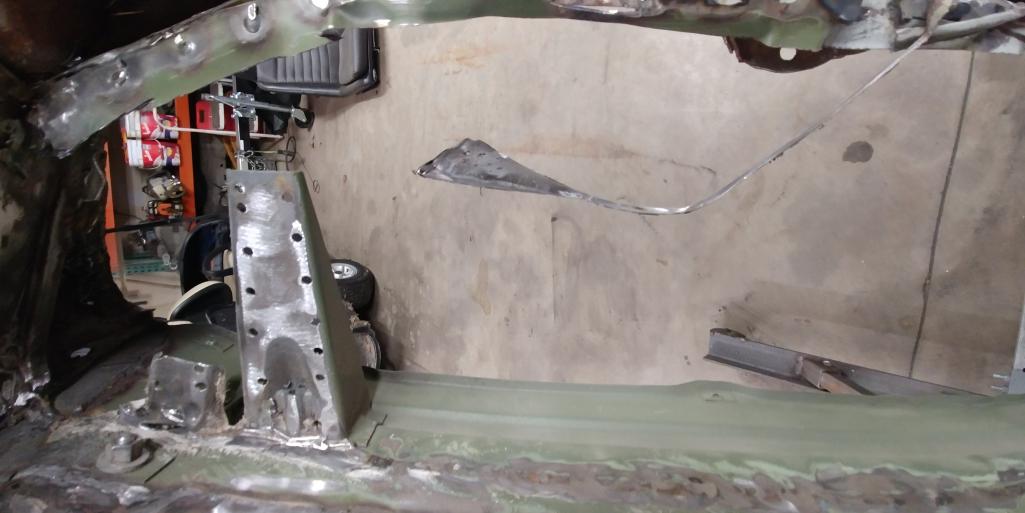
So I feel like I am skipping all over but I try to get the big chunks done.. The passenger side wheel well is almost all hammered out but my shoulder and forearm are pretty sore(getting old))? So I moved to the rear trunk so I could complete 1 area.. I think I am not going use the whole RD piece as it makes for an odd weld joint.. So if you look close you will see where I cut a line.. I chose that as a good area to butt joint because its the edge and will warp less. I going to bring the RD piece to work and use the vertical band saw to cut a nice straight line then put the piece in the trunk anf scribe a line for final cutting..
I plan to get the trunk done this week and then back to the wheel well.. But will feel better once the trunk is done.. 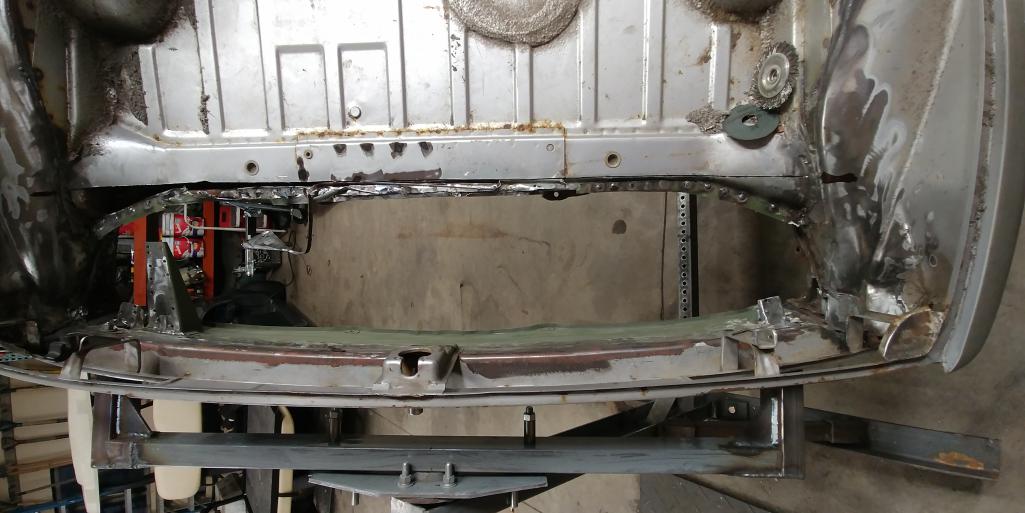 |
|
|
|
| mb911 |
Jan 15 2018, 05:32 PM
Post
#311
|
|
914 Guru Group: Members Posts: 7,718 Joined: 2-January 09 From: Burlington wi Member No.: 9,892 Region Association: Upper MidWest |
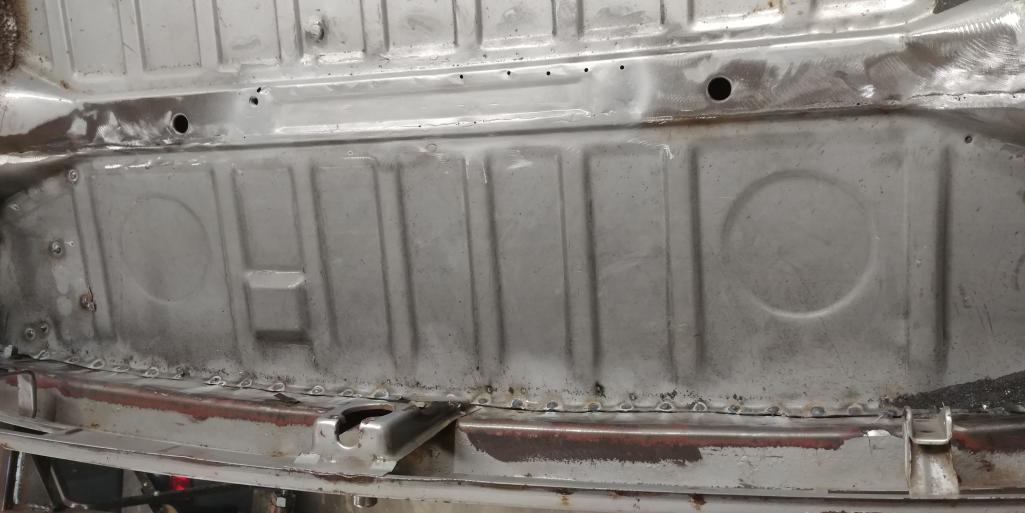
 Also note this is the second trunk panel I put in.. The 1st one was from a donor car but was not acceptable to me finished |
|
|
|
| mb911 |
Jan 16 2018, 02:47 PM
Post
#312
|
|
914 Guru Group: Members Posts: 7,718 Joined: 2-January 09 From: Burlington wi Member No.: 9,892 Region Association: Upper MidWest |
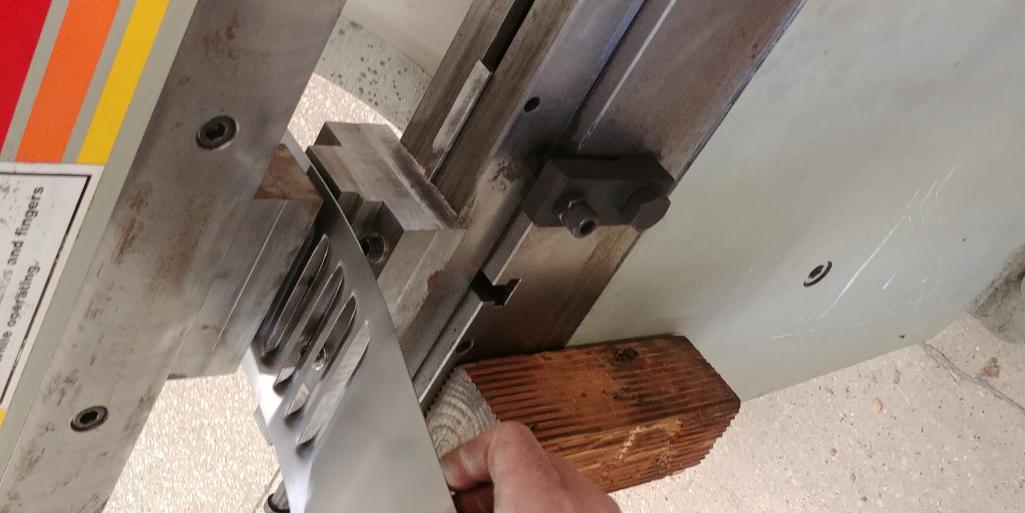
Just a little project that has been a year in the making.. I programmed everything today and thought you all would think its interesting.. This was done on a 130 ton brake press.
 |
|
|
|
| IronHillRestorations |
Jan 16 2018, 03:12 PM
Post
#313
|
|
I. I. R. C. Group: Members Posts: 6,910 Joined: 18-March 03 From: West TN Member No.: 439 Region Association: None |
QUOTE(GeorgeRud @ Dec 22 2017, 08:05 AM) What would have been the reason it was brazed instead of welded by the PO? Up until MIG welders got affordable it was the fastest and easiest way to go. There's a few places on the car where the factory used brazed seams. A weld joint will stress crack where a brass will not. Years ago shops would braze a horseshoe shim on a dented panel to pull it out, they brazed it because done right, it won't fail. |
|
|
|
| mepstein |
Jan 16 2018, 03:16 PM
Post
#314
|
|
914-6 GT in waiting Group: Members Posts: 20,371 Joined: 19-September 09 From: Landenberg, PA/Wilmington, DE Member No.: 10,825 Region Association: MidAtlantic Region |
QUOTE(mb911 @ Jan 16 2018, 03:47 PM) Just a little project that has been a year in the making.. I programmed everything today and thought you all would think its interesting.. This was done on a 130 ton brake press. I like this. |
|
|
|
| bbrock |
Jan 16 2018, 03:19 PM
Post
#315
|
|
914 Guru Group: Members Posts: 5,269 Joined: 17-February 17 From: Montana Member No.: 20,845 Region Association: Rocky Mountains |
QUOTE(Perry Kiehl @ Jan 16 2018, 02:12 PM) A weld joint will stress crack where a brass will not. Hmm, this runs a little counter to the logic I used to reinforce the clutch cable tube on my project yesterday. One of the braze joints at the front cracked and I added a series of tack welds to convince everything to stay in its right place. Wondering if I need to rethink that... (IMG:style_emoticons/default/confused24.gif) |
|
|
|
| IronHillRestorations |
Jan 16 2018, 03:56 PM
Post
#316
|
|
I. I. R. C. Group: Members Posts: 6,910 Joined: 18-March 03 From: West TN Member No.: 439 Region Association: None |
The problem with the clutch cable is age and stress cracks. I make a plate to go over the area, but I do weld it.
|
|
|
|
| mb911 |
Jan 16 2018, 04:09 PM
Post
#317
|
|
914 Guru Group: Members Posts: 7,718 Joined: 2-January 09 From: Burlington wi Member No.: 9,892 Region Association: Upper MidWest |
And now for some reason all my pictures are posting sideways..
Perry.. I still nees to call you.. Been busy.. |
|
|
|
| GeorgeRud |
Jan 16 2018, 08:16 PM
Post
#318
|
|
Advanced Member Group: Members Posts: 3,725 Joined: 27-July 05 From: Chicagoland Member No.: 4,482 Region Association: Upper MidWest |
Looks great! Will you use the louver punch to make a lower panel under the oil cooler?
|
|
|
|
| mb911 |
Jan 17 2018, 05:13 AM
Post
#319
|
|
914 Guru Group: Members Posts: 7,718 Joined: 2-January 09 From: Burlington wi Member No.: 9,892 Region Association: Upper MidWest |
QUOTE(GeorgeRud @ Jan 16 2018, 06:16 PM) Looks great! Will you use the louver punch to make a lower panel under the oil cooler? That part was actually done about a year ago.. Not sure yet what I will use the die for. |
|
|
|
| mb911 |
Jan 20 2018, 08:06 PM
Post
#320
|
|
914 Guru Group: Members Posts: 7,718 Joined: 2-January 09 From: Burlington wi Member No.: 9,892 Region Association: Upper MidWest |
Trunk is done.. Well less the 1 overlay.. That will be next week.
 |
|
|
|
|
3 User(s) are reading this topic (3 Guests and 0 Anonymous Users)
0 Members:

|
Lo-Fi Version | Time is now: 2nd February 2026 - 11:12 AM |
Invision Power Board
v9.1.4 © 2026 IPS, Inc.