|
|
|
Porsche, and the Porsche crest are registered trademarks of Dr. Ing. h.c. F. Porsche AG.
This site is not affiliated with Porsche in any way. Its only purpose is to provide an online forum for car enthusiasts. All other trademarks are property of their respective owners. |
|
|

  |

| mb911 |
 Feb 7 2018, 08:52 AM Feb 7 2018, 08:52 AM
Post
#361
|
|
914 Guru  Group: Members Posts: 7,718 Joined: 2-January 09 From: Burlington wi Member No.: 9,892 Region Association: Upper MidWest |
QUOTE(bbrock @ Feb 7 2018, 05:54 AM)  QUOTE(mb911 @ Feb 7 2018, 05:07 AM) Why do those butt welds look "different" to me? Any chance you are using EZ grind? I'm circling in on that same repair and hoping to poach your process to make it truly invisible. There is a spool of EZ grind sitting down at the welding shop but I haven't committed to buying it yet. Thinking I could use any little help on this one though. Sorry not easy grind just ER70S-6 .030.. remember I have taught welding for 17 years and welded my whole professional life so its experience.. |
   |

 
|
| bbrock |
Feb 7 2018, 09:32 AM
Post
#362
|
|
914 Guru Group: Members Posts: 5,269 Joined: 17-February 17 From: Montana Member No.: 20,845 Region Association: Rocky Mountains |
QUOTE(mb911 @ Feb 7 2018, 07:52 AM) QUOTE(bbrock @ Feb 7 2018, 05:54 AM) QUOTE(mb911 @ Feb 7 2018, 05:07 AM) Why do those butt welds look "different" to me? Any chance you are using EZ grind? I'm circling in on that same repair and hoping to poach your process to make it truly invisible. There is a spool of EZ grind sitting down at the welding shop but I haven't committed to buying it yet. Thinking I could use any little help on this one though. remember I have taught welding for 17 years and welded my whole professional life so its experience.. Yes, I know. But I haven't so I'm looking for anything to compensate. (IMG:style_emoticons/default/biggrin.gif) That said, the weld on that skin looks like it sits up a little more proud, like maybe you turned down the welder a bit? Sorry to keep pestering you but... (IMG:style_emoticons/default/pray.gif) |
|
|
|
| mb911 |
Feb 7 2018, 09:52 AM
Post
#363
|
|
914 Guru Group: Members Posts: 7,718 Joined: 2-January 09 From: Burlington wi Member No.: 9,892 Region Association: Upper MidWest |
QUOTE(bbrock @ Feb 7 2018, 07:32 AM) QUOTE(mb911 @ Feb 7 2018, 07:52 AM) QUOTE(bbrock @ Feb 7 2018, 05:54 AM) QUOTE(mb911 @ Feb 7 2018, 05:07 AM) Why do those butt welds look "different" to me? Any chance you are using EZ grind? I'm circling in on that same repair and hoping to poach your process to make it truly invisible. There is a spool of EZ grind sitting down at the welding shop but I haven't committed to buying it yet. Thinking I could use any little help on this one though. remember I have taught welding for 17 years and welded my whole professional life so its experience.. Yes, I know. But I haven't so I'm looking for anything to compensate. (IMG:style_emoticons/default/biggrin.gif) That said, the weld on that skin looks like it sits up a little more proud, like maybe you turned down the welder a bit? Sorry to keep pestering you but... (IMG:style_emoticons/default/pray.gif) Your not pestering at all.. I am set at the number 2 tap on my Hobart handler with about 75 on wirespeed.. This allows the penetration side to have good fusion as it will be ground flush.. |
|
|
|
| mb911 |
Feb 7 2018, 02:44 PM
Post
#364
|
|
914 Guru Group: Members Posts: 7,718 Joined: 2-January 09 From: Burlington wi Member No.: 9,892 Region Association: Upper MidWest |
Let me know if I can help any further.. I would be happy to talk through the weld set up as well over the phone so feel free to call.
|
|
|
|
| bbrock |
Feb 7 2018, 06:54 PM
Post
#365
|
|
914 Guru Group: Members Posts: 5,269 Joined: 17-February 17 From: Montana Member No.: 20,845 Region Association: Rocky Mountains |
QUOTE(mb911 @ Feb 7 2018, 01:44 PM) Let me know if I can help any further.. I would be happy to talk through the weld set up as well over the phone so feel free to call. Thanks, those setting help. I've seen my welding skills improve steadily during this project but those quarters will have a long length of butt weld to make disappear. I did notice that a lot of my earlier difficulty had more to do with being too timid with the grinder than the weld. I've gone back to some of those old welds and found I had still left the weld sitting proud of the parent material. When I know those off, most of the well blends away. Still a bit of shrink lines on those, but better than I originally thought. I know I can get it close enough that a very thin skim of filler would make it vanish. But hoping for perfection here. I may have to give you a shout. |
|
|
|
| mb911 |
Feb 7 2018, 07:41 PM
Post
#366
|
|
914 Guru Group: Members Posts: 7,718 Joined: 2-January 09 From: Burlington wi Member No.: 9,892 Region Association: Upper MidWest |
QUOTE(bbrock @ Feb 7 2018, 04:54 PM) QUOTE(mb911 @ Feb 7 2018, 01:44 PM) Let me know if I can help any further.. I would be happy to talk through the weld set up as well over the phone so feel free to call. Thanks, those setting help. I've seen my welding skills improve steadily during this project but those quarters will have a long length of butt weld to make disappear. I did notice that a lot of my earlier difficulty had more to do with being too timid with the grinder than the weld. I've gone back to some of those old welds and found I had still left the weld sitting proud of the parent material. When I know those off, most of the well blends away. Still a bit of shrink lines on those, but better than I originally thought. I know I can get it close enough that a very thin skim of filler would make it vanish. But hoping for perfection here. I may have to give you a shout. Sounds good.. Let me know if I can help. |
|
|
|
| mb911 |
Feb 8 2018, 06:51 AM
Post
#367
|
|
914 Guru Group: Members Posts: 7,718 Joined: 2-January 09 From: Burlington wi Member No.: 9,892 Region Association: Upper MidWest |
This morning I was able to get the front fender semi mounted. I need to pull into shape yet but the hood gaps is acceptable..
 |
|
|
|
| mb911 |
Feb 8 2018, 03:11 PM
Post
#368
|
|
914 Guru Group: Members Posts: 7,718 Joined: 2-January 09 From: Burlington wi Member No.: 9,892 Region Association: Upper MidWest |
The fender has shrunk a bit so I imagine I will have to pull it around allot.
|
|
|
|
| mb911 |
Feb 17 2018, 03:09 PM
Post
#369
|
|
914 Guru Group: Members Posts: 7,718 Joined: 2-January 09 From: Burlington wi Member No.: 9,892 Region Association: Upper MidWest |
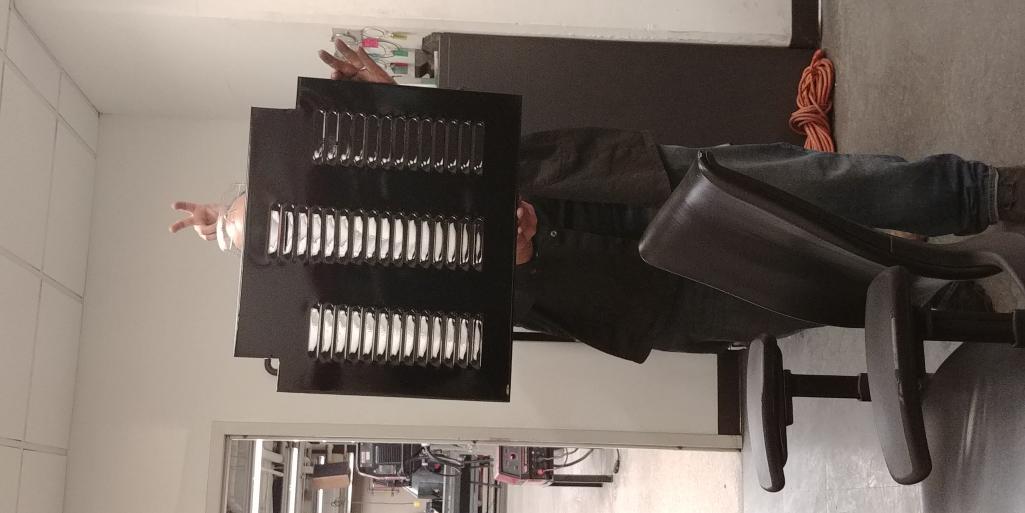
Well not much progress I was in Florida for most of the week then had to replace my DD as it was plain worn out with 207000 miles on it with a new lease.. Pretty happy with thr deal as very inexpensive.. Then Friday students made the louver panels and powdercoated them to take home..
 |
|
|
|
| mb911 |
Feb 17 2018, 03:09 PM
Post
#370
|
|
914 Guru Group: Members Posts: 7,718 Joined: 2-January 09 From: Burlington wi Member No.: 9,892 Region Association: Upper MidWest |
 |
|
|
|
| mb911 |
Feb 17 2018, 03:10 PM
Post
#371
|
|
914 Guru Group: Members Posts: 7,718 Joined: 2-January 09 From: Burlington wi Member No.: 9,892 Region Association: Upper MidWest |
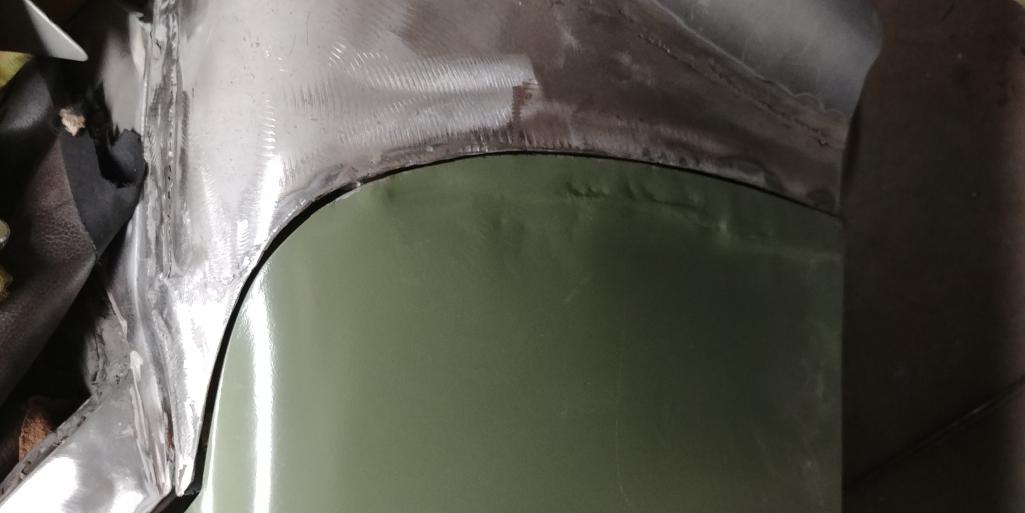
Did do a little bit of fittment on the front fender.. Got allot of work to do there yet.
 |
|
|
|
| GeorgeRud |
Feb 17 2018, 09:58 PM
Post
#372
|
|
Advanced Member Group: Members Posts: 3,725 Joined: 27-July 05 From: Chicagoland Member No.: 4,482 Region Association: Upper MidWest |
Looks like it’s coming together slowly. It always seems like you find other areas to finish, but eventually the metalwork will be done and it’ll be off to paint.
|
|
|
|
| mb911 |
Feb 18 2018, 09:51 AM
Post
#373
|
|
914 Guru Group: Members Posts: 7,718 Joined: 2-January 09 From: Burlington wi Member No.: 9,892 Region Association: Upper MidWest |
QUOTE(GeorgeRud @ Feb 17 2018, 07:58 PM) Looks like it’s coming together slowly. It always seems like you find other areas to finish, but eventually the metalwork will be done and it’ll be off to paint. Thats for sure.. I am trying to get the majore things done, welded, ground so I can epoxy prime before the humidity jumps up in spring. Then I can rework later as needed. |
|
|
|
| mb911 |
Feb 19 2018, 12:40 PM
Post
#374
|
|
914 Guru Group: Members Posts: 7,718 Joined: 2-January 09 From: Burlington wi Member No.: 9,892 Region Association: Upper MidWest |
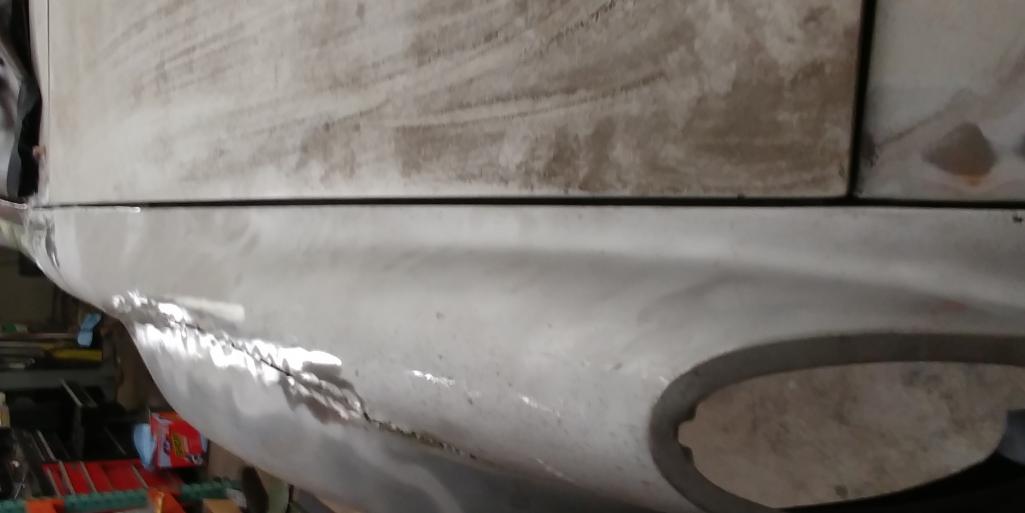
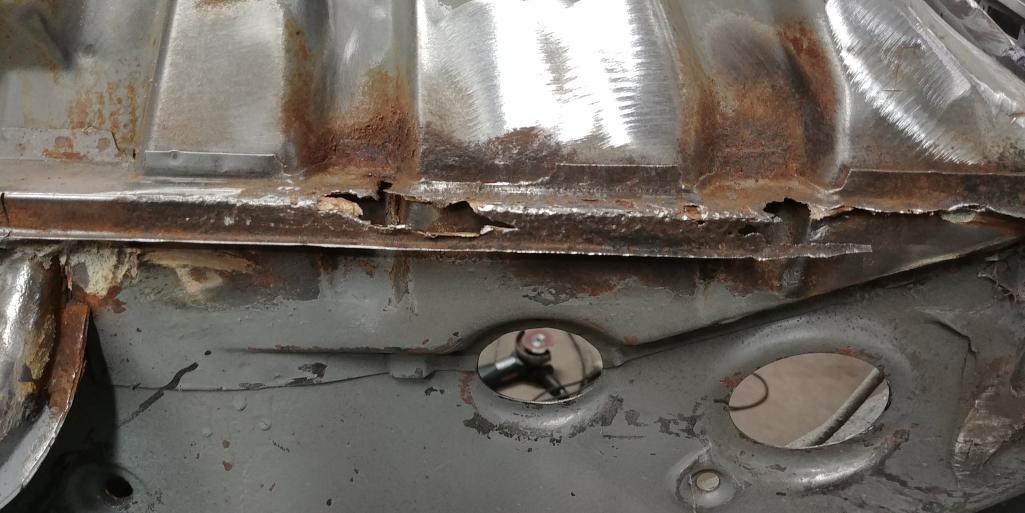
Cut the driverside sail off today.. Found a little rust.. Not sure if I should rebuild the ledge or cut it off as looks like a great spot to for water to sit.
 |
|
|
|
| mepstein |
Feb 19 2018, 12:52 PM
Post
#375
|
|
914-6 GT in waiting Group: Members Posts: 20,372 Joined: 19-September 09 From: Landenberg, PA/Wilmington, DE Member No.: 10,825 Region Association: MidAtlantic Region |
QUOTE(mb911 @ Feb 19 2018, 01:40 PM) Cut the driverside sail off today.. Found a little rust.. Not sure if I should rebuild the ledge or cut it off as looks like a great spot to for water to sit. Once you epoxy prime, you could probably hose it down with water every day and not have a problem. My feeling is the rust really resulted from the foam trapping moisture against the metal. |
 |
|
| bbrock |
Feb 19 2018, 12:59 PM
Post
#376
|
|
914 Guru Group: Members Posts: 5,269 Joined: 17-February 17 From: Montana Member No.: 20,845 Region Association: Rocky Mountains |
Worked on exactly the same thing over the weekend. I'm rebuilding mine as it looked like that shelf would provide backing for seam sealer and help prevent crap from flying up inside the sail panel. Also, where I live, that shelf looks like a necessary mouse barrier to prevent winding up with a nest inside the roll bar. If we don't pull our DD in the garage before dusk, then at least 3 mice come in with it.
I have a mystery on mine though. There was not any of the infamous foam inside my sail panels and zero evidence those panels had ever been replaced. Given the body work on the rest of the car, it's impossible to believe someone did such a perfect repair. Did that quit putting the foam in at some point? |
|
|
|
| mb911 |
Feb 19 2018, 01:42 PM
Post
#377
|
|
914 Guru Group: Members Posts: 7,718 Joined: 2-January 09 From: Burlington wi Member No.: 9,892 Region Association: Upper MidWest |
QUOTE(bbrock @ Feb 19 2018, 10:59 AM) Worked on exactly the same thing over the weekend. I'm rebuilding mine as it looked like that shelf would provide backing for seam sealer and help prevent crap from flying up inside the sail panel. Also, where I live, that shelf looks like a necessary mouse barrier to prevent winding up with a nest inside the roll bar. If we don't pull our DD in the garage before dusk, then at least 3 mice come in with it. I have a mystery on mine though. There was not any of the infamous foam inside my sail panels and zero evidence those panels had ever been replaced. Given the body work on the rest of the car, it's impossible to believe someone did such a perfect repair. Did that quit putting the foam in at some point? That is strange.. Regarding no foam for you.. My thoughts were that I going to do an oil tank in the fender along with fender liners so if it is properly painted it might work out to my benefit.. Now note that thr other side had nothing like this so was it driver side only? |
|
|
|
| mepstein |
Feb 19 2018, 02:12 PM
Post
#378
|
|
914-6 GT in waiting Group: Members Posts: 20,372 Joined: 19-September 09 From: Landenberg, PA/Wilmington, DE Member No.: 10,825 Region Association: MidAtlantic Region |
I cut up a ‘75 that had foam so I think yours was one that got skipped.
|
|
|
|
| bbrock |
Feb 19 2018, 02:20 PM
Post
#379
|
|
914 Guru Group: Members Posts: 5,269 Joined: 17-February 17 From: Montana Member No.: 20,845 Region Association: Rocky Mountains |
That makes sense if you will be adding a tank in there. Curious about your thoughts on the purpose of those shelves. They look like the are purely intended as a filler strip to close that gap to me. On mine, the driver's side is mostly in good shape - just a bit of rust at the rear edge. The passenger side is mostly rotted off. I made a replacement piece for it but decided I didn't like it and will make another. No foam on either side of mine. Strange, but I'm not complaining.
|
|
|
|
| bbrock |
Feb 19 2018, 02:34 PM
Post
#380
|
|
914 Guru Group: Members Posts: 5,269 Joined: 17-February 17 From: Montana Member No.: 20,845 Region Association: Rocky Mountains |
QUOTE(mb911 @ Feb 19 2018, 12:42 PM) Now note that thr other side had nothing like this so was it driver side only? Here's a pic of my pass side. I'm assuming this looked the same as the driver's originally. 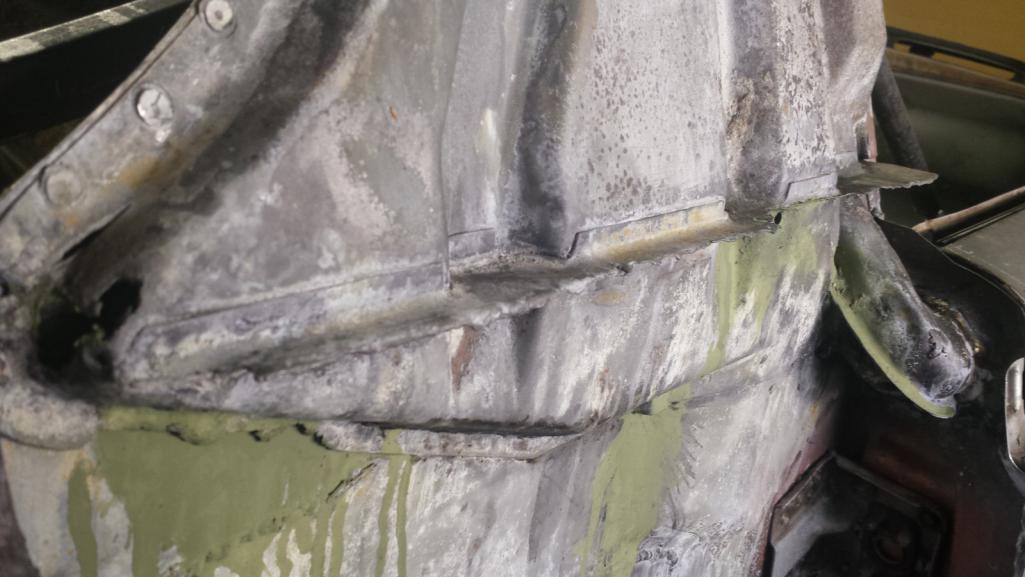 |
|
|
|
|
1 User(s) are reading this topic (1 Guests and 0 Anonymous Users)
0 Members:

|
Lo-Fi Version | Time is now: 2nd February 2026 - 12:47 PM |
Invision Power Board
v9.1.4 © 2026 IPS, Inc.