|
|
|
Porsche, and the Porsche crest are registered trademarks of Dr. Ing. h.c. F. Porsche AG.
This site is not affiliated with Porsche in any way. Its only purpose is to provide an online forum for car enthusiasts. All other trademarks are property of their respective owners. |
|
|

  |

| sdoolin |
 Sep 18 2016, 10:03 AM Sep 18 2016, 10:03 AM
Post
#181
|
|
Member  Group: Members Posts: 423 Joined: 1-May 14 From: LouKY Member No.: 17,299 Region Association: None |
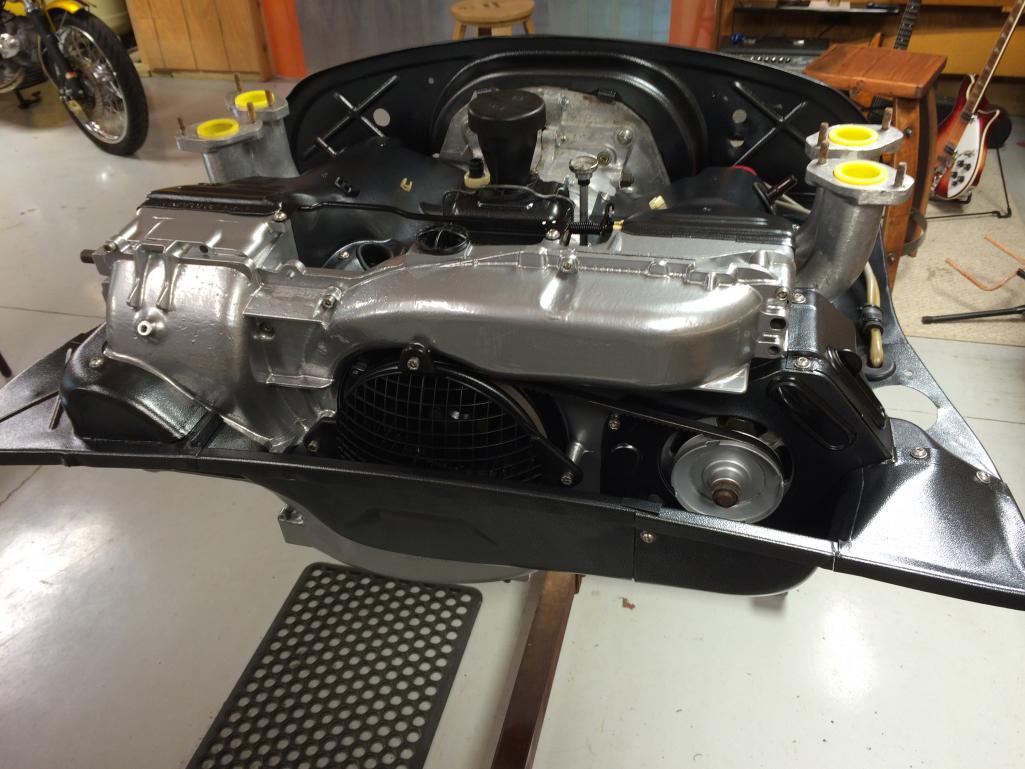
Fan, belt, and alternator pulley fitted. I fit a fan guard as was used in the buses. Not sure I will leave it there.
 |
   |

 
|
| sdoolin |
Sep 18 2016, 10:06 AM
Post
#182
|
|
Member Group: Members Posts: 423 Joined: 1-May 14 From: LouKY Member No.: 17,299 Region Association: None |
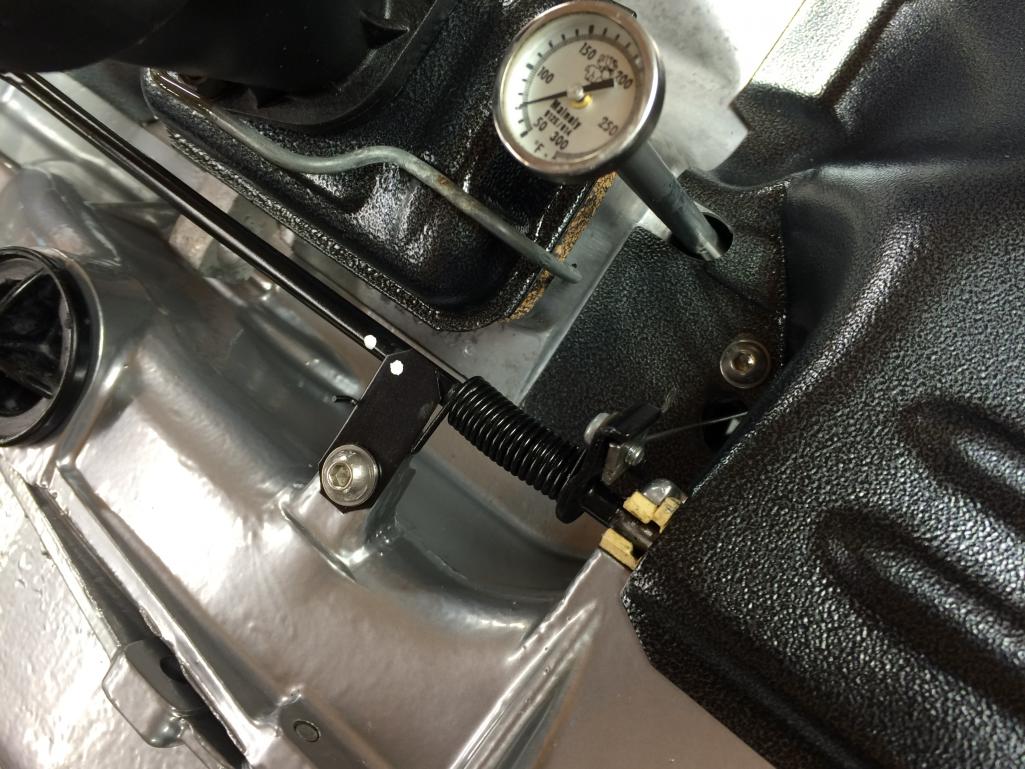
Close up of thermo cable & cooling flaps. I indexed the bar for the flaps, the two white dots mark the cold position when lined up. When warm they will (hopefully) become un-aligned and I'll know the flaps are operating at a glance.
 |
|
|
|
| Gearhead1432 |
Sep 18 2016, 03:12 PM
Post
#183
|
|
Member Group: Members Posts: 129 Joined: 21-December 05 From: Altus, OK Member No.: 5,304 Region Association: None |
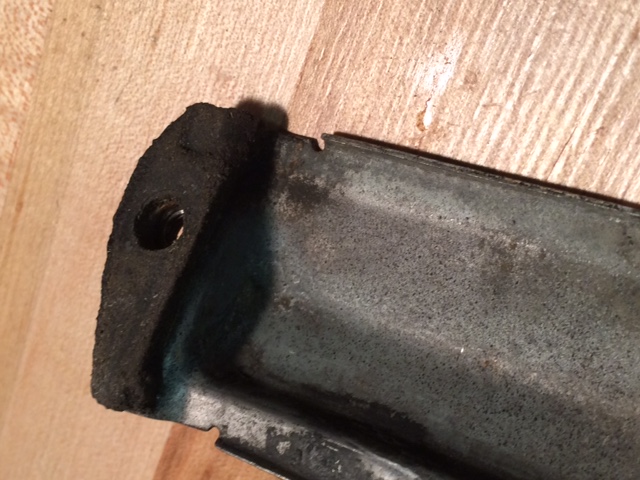
Cork seems like the right gasket material between the fan shroud and heat ducts. Here's a look at what's left of an original gasket.
 |
 |
|
| Garland |
Sep 18 2016, 11:30 PM
Post
#184
|
|
Restoration Fanatic Group: Members Posts: 1,431 Joined: 8-January 04 From: ......Michigan...... Member No.: 1,535 Region Association: Upper MidWest |
Cork is correct!
|
|
|
|
| sdoolin |
Sep 19 2016, 06:34 AM
Post
#185
|
|
Member Group: Members Posts: 423 Joined: 1-May 14 From: LouKY Member No.: 17,299 Region Association: None |
Cork it is then! Thanks gentlemen(?)...
|
|
|
|
| sdoolin |
Sep 22 2016, 12:21 PM
Post
#186
|
|
Member Group: Members Posts: 423 Joined: 1-May 14 From: LouKY Member No.: 17,299 Region Association: None |
How does the "world" feel about the Bosch 009 dizzy? I had one on my bus engine (all stock except for dual Dells) and while it worked OK, I always attributed a small and annoying flat spot right off idle to that dizzy.
I believe for a street ride some amount of vacuum advance is desirable? The 009 is purely mechanical advance. As always any/all advice appreciated. |
|
|
|
| sdoolin |
Oct 23 2016, 09:59 AM
Post
#187
|
|
Member Group: Members Posts: 423 Joined: 1-May 14 From: LouKY Member No.: 17,299 Region Association: None |
OT - if you ever (EVER) have the chance to turn laps at the Porsche Experience Center in Atlanta, DO IT!
Our local PCA Chapter was gifted 4 tickets to the PEC by our dealer and one of them landed in my pocket. I chose to drive the Macan GTS as I am likely going to buy one in the next few years. They gave me 90 mins. on track with a coach. I was allowed to drive as hard as I felt I could, and I pretty much shredded an expensive set of tires (I have done quite a few DEs in my 993, so going somewhat fast at the racetrack not entirely new to me). No complaints from my coach, no complaints from me. They have several "modules" at the facility including a "handling track (sorta high speed), 2 skid pads (one is wet), a low grip handling circuit, launch control and slalom straight, and a "kick-plate". All very much fun. They do have an off-road track but they would not let me drive the Macan on it, apparently there's a water crossing that is too deep. There is an on-site restaurant, bar, museum and Porsche Classic workshop. They are building a hotel on-site as well. The Macan and my ugly mug...  |
|
|
|
| sdoolin |
Oct 23 2016, 10:09 AM
Post
#188
|
|
Member Group: Members Posts: 423 Joined: 1-May 14 From: LouKY Member No.: 17,299 Region Association: None |
So now back on-topic. My 2056 build is nearly complete. I just need to finish a throttle cable bracket, pre-tune the carbs, double and triple check everything, and then I think I can install it back in the car and run it.
And yet I have a conundrum... 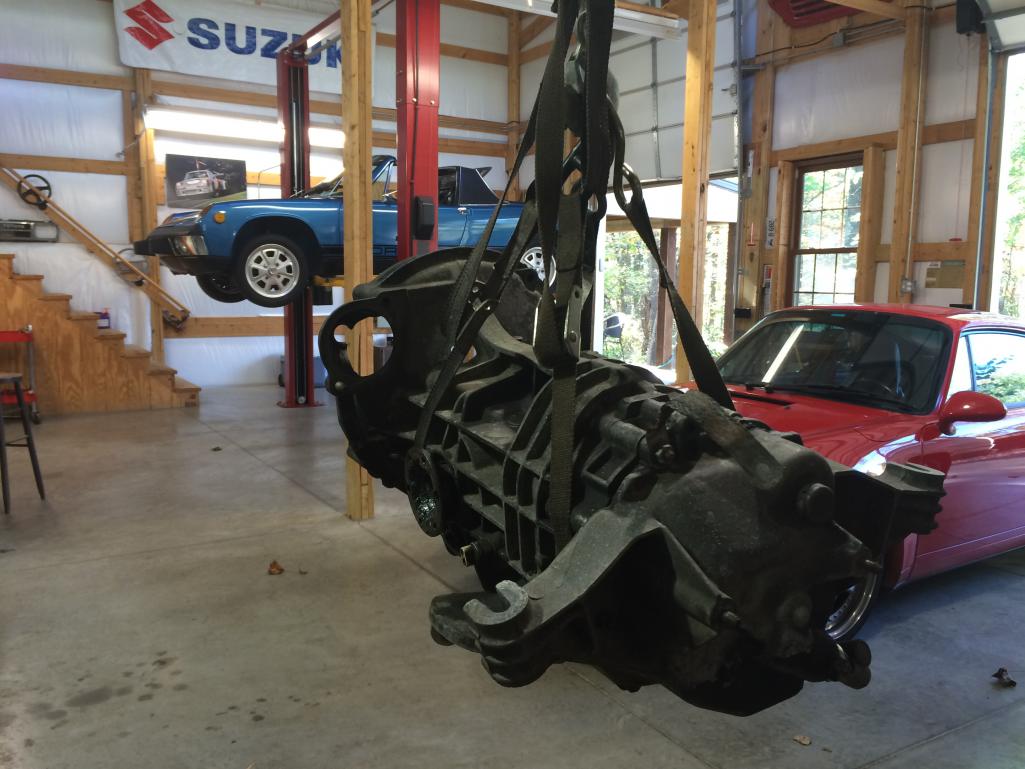 You can see that my transaxle is filthy, and I cannot bring myself to bolt it to the engine (which is spotless) in this condition. So, do I simply clean-up the exterior of it (which will be a painfull process with contact cleaner, simple green and toothbrushes), or do I rip it apart and make any needed repairs (it was working fine) and send the case(s) out to be beadblasted? I kinda hate to tear it apart just to clean it up. As seen here I have already spent more than an hour doing a rough cleaning, and I am discouraged by the results... |
|
|
|
| HAM Inc |
Oct 23 2016, 10:38 AM
Post
#189
|
|
Senior Member Group: Members Posts: 850 Joined: 24-July 06 From: Watkinsville,GA Member No.: 6,499 Region Association: None |
Steve, one of my customers with a large ultrasonic parts washer, like the one I use, recently sealed the vent on his own tranny and ran it through his large ultrasonic parts washer. It won't hurt the seals or gaskets, and if any fluid did get inside it won't hurt the internals, so why not.
It worked well for him. If you find a shop with one large enough, be sure to drain the lube before taking it in. |
|
|
|
| sdoolin |
Oct 23 2016, 11:14 AM
Post
#190
|
|
Member Group: Members Posts: 423 Joined: 1-May 14 From: LouKY Member No.: 17,299 Region Association: None |
QUOTE(HAM Inc @ Oct 23 2016, 12:38 PM)  Steve, one of my customers with a large ultrasonic parts washer, like the one I use, recently sealed the vent on his own tranny and ran it through his large ultrasonic parts washer. It won't hurt the seals or gaskets, and if any fluid did get inside it won't hurt the internals, so why not. It worked well for him. If you find a shop with one large enough, be sure to drain the lube before taking it in. Large ultrasonic parts washer. I will search locally for a shop. Thanks for the tip. |
|
|
|
| sdoolin |
Nov 4 2016, 06:20 AM
Post
#191
|
|
Member Group: Members Posts: 423 Joined: 1-May 14 From: LouKY Member No.: 17,299 Region Association: None |
Getting very close to being able to install the engine back into the car (just in time for winter of course).
Have distributor installed and timed at 5(ish) degrees BTDC for initial run and cam break in. Carbs are pre-tuned and synched by hand/ear. Am working on a throttle cable bracket that affixes to the right side engine tin (pic below). 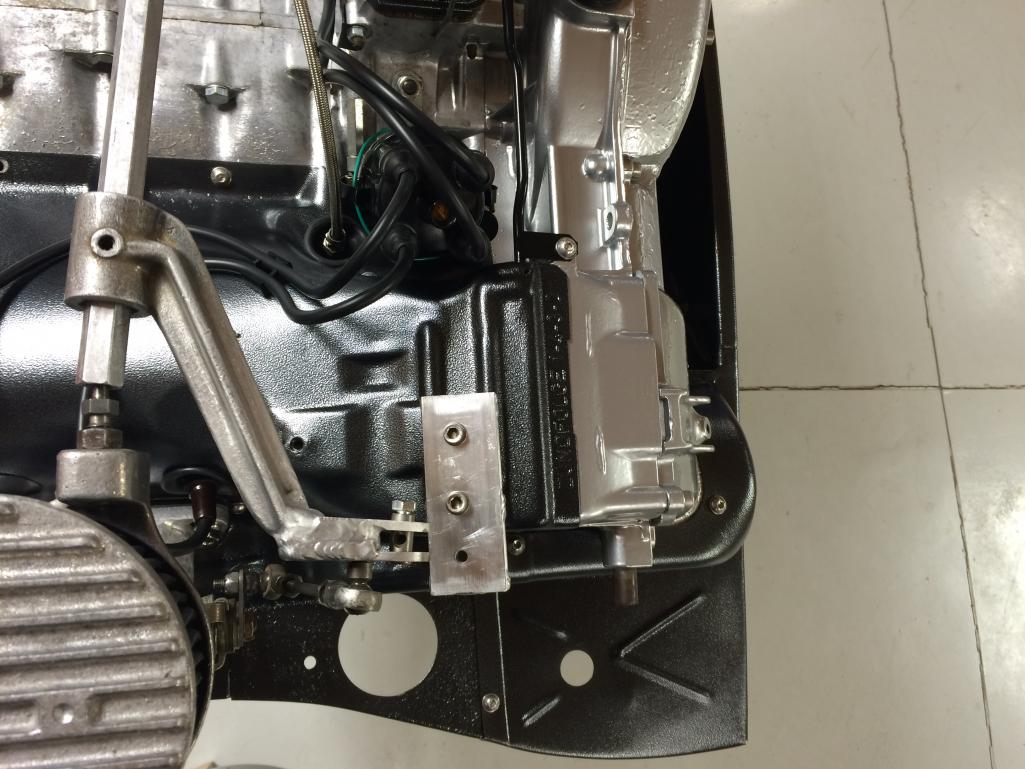 The plate bolts to an existing nut that was used for the coil mount and I added a rivnut next to that for additional stability. The throttle cable will affix to the outermost hole in the bracket. I welded a couple of extensions onto one of the throttle linkage arms to accept the barrel nut. I'm not finished dressing it up yet, but you get the idea. Very clean install, and when I'm done dressing it up it should look pretty much like a factory bit. Question for those with carbs - do you install carbs before engine in car or do you wait until engine in place and then install? I ask because the carbs are just incrementally wider than the engine tins and it appears that they may hinder installation. |
|
|
|
| sdoolin |
Dec 11 2016, 04:47 PM
Post
#192
|
|
Member Group: Members Posts: 423 Joined: 1-May 14 From: LouKY Member No.: 17,299 Region Association: None |
Life keeps getting in the way of me completing this. Plus as soon as I put it back in the car I won't be able to look at it as much...
Throttle cable bracket slotted to match carb tops, linkage lever-arm modified to accept throttle cable. All bits bead blasted to look as if they came together. I am trying hard to get the engine back in the car this week. Might even hear it run. 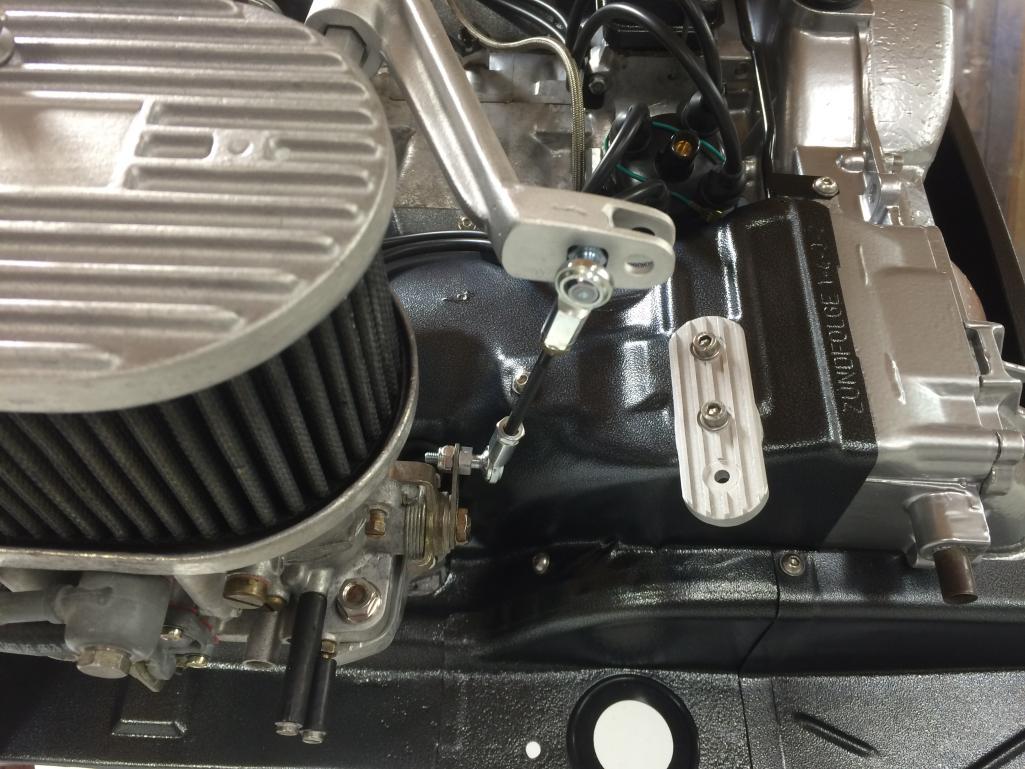 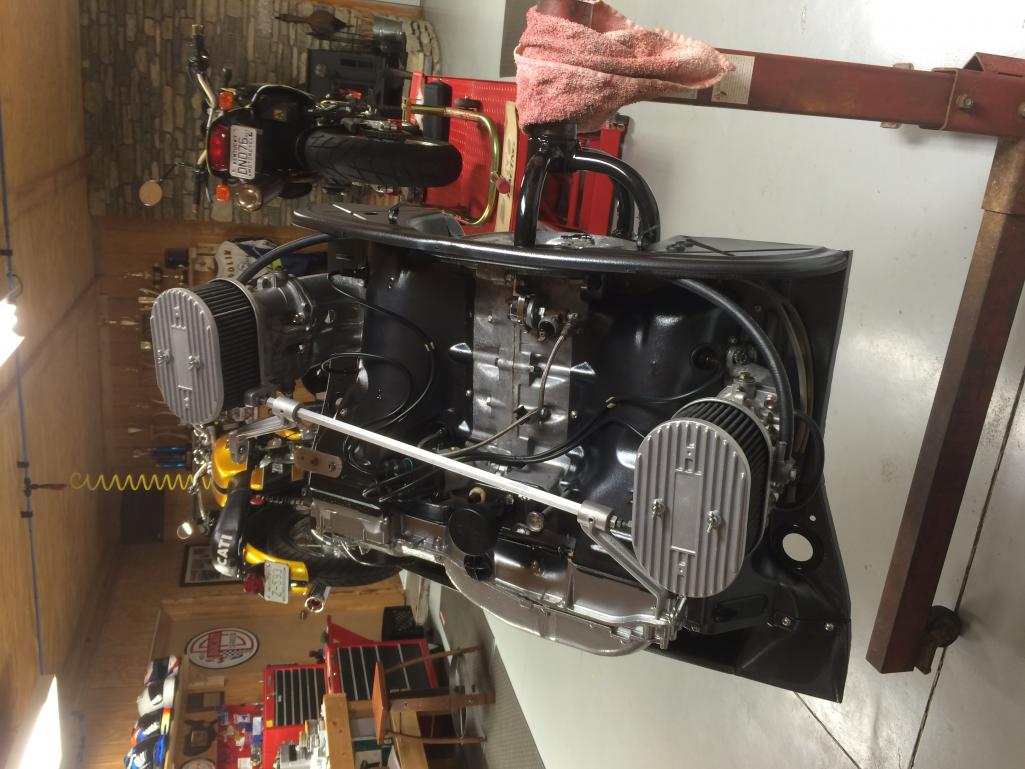 This picture rotated by "the World" for unknown reasons... I think I saw a thread here on "the World" about a wiring harness "fix" wherein there is a jumper to ground from the relay board. I think I have that handled. I have a low PSI pump to install and I will run return fuel from carbs to tank. Ignition timing set to (about) 5 degrees BTDC for initial running, cam break-in and first heat-cycle. BradPenn break in oil ready to go. Anymore "gotchas" I need to know about before firing her up? |
|
|
|
| sdoolin |
Dec 20 2016, 10:52 AM
Post
#193
|
|
Member Group: Members Posts: 423 Joined: 1-May 14 From: LouKY Member No.: 17,299 Region Association: None |
I am getting really close now. These cases haven't seen a transmission in nearly 30 years, so this is a big step.
It is quite aggrevating to me that the "world" rotates pics on a whim. This is a cool pic (in my opinion), but the "world" screws it all up. Stupid. 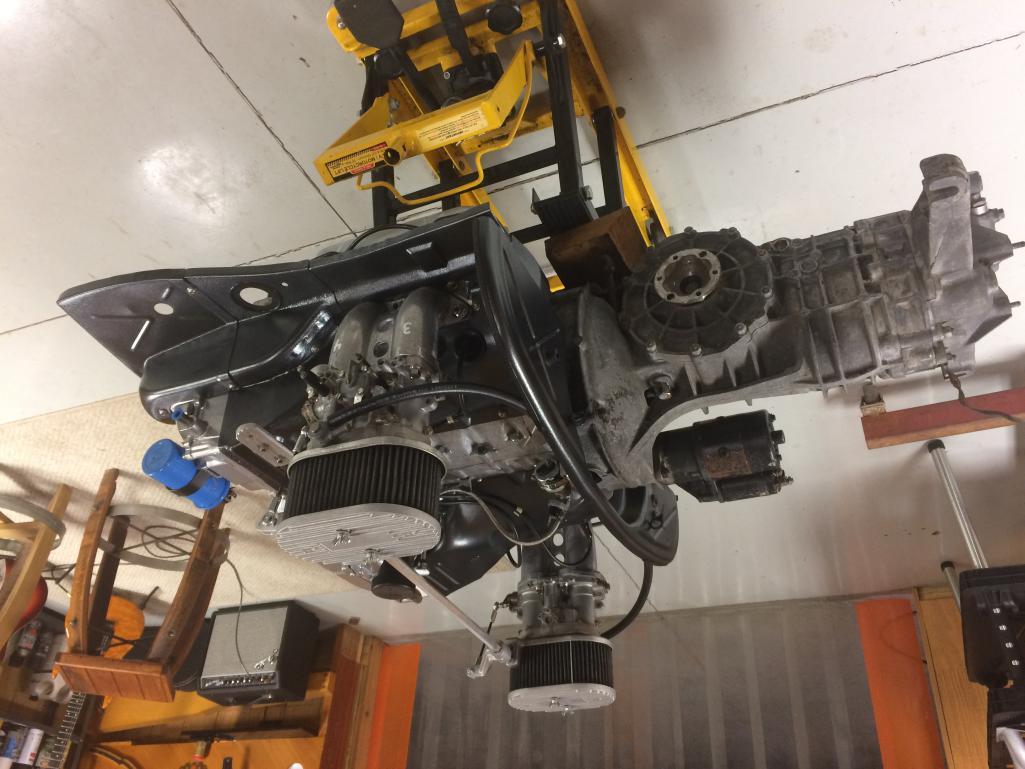 For all you carb experts, is this an acceptable way to block off the vacuum ports? I won't use vacuum signal for anything. I do realize that the mixture screws are missing, they are on the bench. 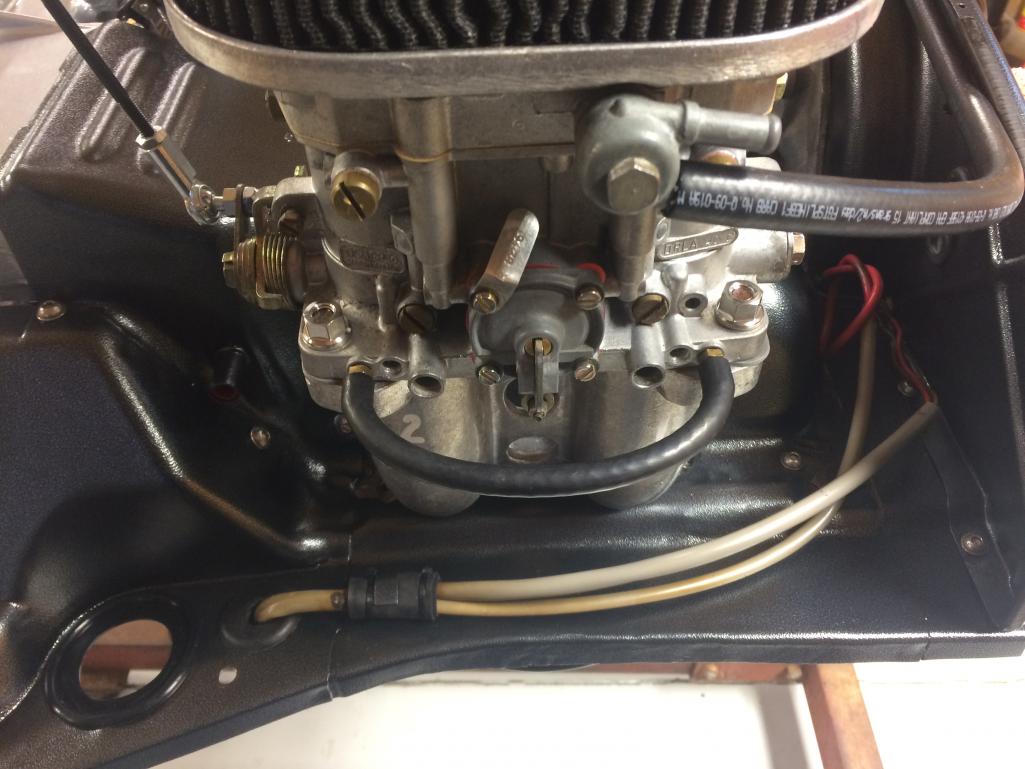 Also wondering about transaxle lube and what is recommended? I'll do a search for it but in the meantime if you happen upon this post and know an answer, feel free to shout it out. Mounting low pressure fuel pump tonight, re-installing engine bay rubber gaskets, repairing a broken rear trunk hinge, and then I think I can install the engine and transaxle. |
|
|
|
| barefoot |
Dec 20 2016, 11:27 AM
Post
#194
|
|
Senior Member Group: Members Posts: 1,512 Joined: 19-March 13 From: Charleston SC Member No.: 15,673 Region Association: South East States |
[And yet I have a conundrum...
You can see that my transaxle is filthy, and I cannot bring myself to bolt it to the engine (which is spotless) in this condition. So, do I simply clean-up the exterior of it (which will be a painfull process with contact cleaner, simple green and toothbrushes), or do I rip it apart and make any needed repairs (it was working fine) and send the case(s) out to be beadblasted? I kinda hate to tear it apart just to clean it up. As seen here I have already spent more than an hour doing a rough cleaning, and I am discouraged by the results... [/quote] I cleaned my tranny case without dipping the whole thing, used a plastic tub and just sprayed simple green type cleaners around and scrubbed & scrubbed till all the grease was gone, then painted it with hi temp aluminum paint, it's still staying clean. i also put a length of plastic tubing stuck into the top breather fitting and ducted it down to just below the tranny case. Will save future gunk build-up |
|
|
|
| sdoolin |
Dec 20 2016, 08:38 PM
Post
#195
|
|
Member Group: Members Posts: 423 Joined: 1-May 14 From: LouKY Member No.: 17,299 Region Association: None |
I ask questions, but don't get many answers. I'm trying not to get a complex over it...
|
|
|
|
| iankarr |
Dec 20 2016, 09:18 PM
Post
#196
|
|
The wrencher formerly known as Cuddy_K Group: Members Posts: 2,600 Joined: 22-May 15 From: Heber City, UT Member No.: 18,749 Region Association: Intermountain Region |
QUOTE(sdoolin @ Nov 4 2016, 07:20 AM) \ Question for those with carbs - do you install carbs before engine in car or do you wait until engine in place and then install? I ask because the carbs are just incrementally wider than the engine tins and it appears that they may hinder installation. Also wondering about transaxle lube and what is recommended? I'll do a search for it but in the meantime if you happen upon this post and know an answer, feel free to shout it out. Between the width and height of the carbs, I find it's easier to leave them bolted to the manifolds, and just unbolt the manifolds for installation. And, as for the transmission lube, I go with Dr. Evil's recommendation for plain ole 90 wt dino. I need to clean and paint my transmission as well. Any more tips on that? What kind of brush did you use and what did you cover/plug/protect? |
|
|
|
| snakemain |
Dec 20 2016, 09:54 PM
Post
#197
|
|
Ronin Member Group: Members Posts: 583 Joined: 14-January 10 From: Aviano, Italy Member No.: 11,232 Region Association: None |
First time seeing your thread bc I'm not on much, but yeah I'd get a complex too! (IMG:style_emoticons/default/smile.gif)
All the times I've pulled/installed the engine, I removed carbs/manifolds together. Gets rid of the extra height and seems just simpler for me. Tranny, I think the way you did is probably what most people end up doing. My wife and I both super enjoy our Macan S! After 2 years and 35K miles, it's been flawless and is a great combination of super fun to drive, nice on long trips, and fits our 2 kids and stuff in the back if we need to travel. And it'll tow a 914 without protest. |
|
|
|
| sdoolin |
Dec 21 2016, 06:54 AM
Post
#198
|
|
Member Group: Members Posts: 423 Joined: 1-May 14 From: LouKY Member No.: 17,299 Region Association: None |
Got it on the carbs, I'll pull the manifolds with carbs intact before installation. I did see the info about old school dino oil for transaxle (80W/90 or straight 90W).
Cleaning transaxle - what a chore. I spent the national debt on contact cleaner and started with that and a couple of very stiff bristle brushes (Kroger). The only thing I covered was the vent. That got the really heavy grimy stuff off. Next step was a toothbrush(es) with more contact cleaner. Finally I went after it with simple green. Using a spray bottle I soaked it for an hour or so - repeatedly spraying it down and finished up with more toothbrush work. Took the better part of a day on again off again. It came out about as well as I could've expected. Good also to know about the Macan S. I have heard nothing but good things about them and in the next year or 2 I'll pick up a lightly used one. |
|
|
|
| sdoolin |
Dec 21 2016, 12:43 PM
Post
#199
|
|
Member Group: Members Posts: 423 Joined: 1-May 14 From: LouKY Member No.: 17,299 Region Association: None |
Any advice or tips on installing new engine compartment rubber seals? I have reconnoitered this briefly and seems like it will be quite painful. Not sure if better to start the rubber bit into the channel and slide along, or just start the upper bit of the rubber all along the channel and press fit the lower lip of the rubber. Kind of hard to explain.
I searched, didn't find anything specific. |
|
|
|
| BeatNavy |
Dec 21 2016, 02:13 PM
Post
#200
|
|
Certified Professional Scapegoat Group: Members Posts: 2,963 Joined: 26-February 14 From: Easton, MD Member No.: 17,042 Region Association: MidAtlantic Region |
QUOTE(sdoolin @ Dec 21 2016, 01:43 PM) Any advice or tips on installing new engine compartment rubber seals? I have reconnoitered this briefly and seems like it will be quite painful. Not sure if better to start the rubber bit into the channel and slide along, or just start the upper bit of the rubber all along the channel and press fit the lower lip of the rubber. Kind of hard to explain. I searched, didn't find anything specific. Don't try to slide the seal. Place the lower lip in the channel and press upper lip in with a blunt tool (preferably something that WON'T puncture the seal). It takes a little time but it is only a minor PITA. |
|
|
|
|
2 User(s) are reading this topic (2 Guests and 0 Anonymous Users)
0 Members:

|
Lo-Fi Version | Time is now: 13th May 2026 - 09:31 AM |
Invision Power Board
v9.1.4 © 2026 IPS, Inc.