Yep, I am building a 2056. Have ordered very nearly a complete 2056 engine kit from Type IV Store (LN Engineering). Some questions (I have searched and read MANY threads)...
I have a "spare" 1976 VW Bus short block (no cyl. heads). Assume this will work for a starting point? Issues with oil dipstick? The bus was an automatic so I assume once I remove the "flex plate" that the flywheel from by 914 engine (in car) will bolt up to the crank without issues? Any issues with engine carrier? The bus used a "moustache bar" for mounting to the frame and I am hoping that the cases from the bus/914 are the same for engine mounting?
Will re-use existing Crank/rods
New crank/rod bearings
Will re-use existing cylinders (overbored)
KB 96 mm flat topped pistons with Hastings rings
Webcam cam (9130 kit from Type IV Store)
Type IV Store pushrods, pushrod ends, parkerized lifters, rocker shafts
Type IV Store cam bearings
Re-use rockers from bus engine? Not sure about this...
HAM (Len Hoffman) RS+ spec cylinder heads
New Oil pump from Type IV Store
New clutch & pressure plate.
Re-use flywheel from 914 engine (in the car)
Dellorto Dual 40mm carbs, CB Perf manifolds & linkage
SSI heat exchangers & Bursch exhaust
New fuel pump - will run return lines (have CFR SS Lines in car now and will re-use)
Not sure what dizzy to run?
I believe I need to check/verify deck height and valve clearance (I know how, just not positive this is required for a 2056 build).
I have read a few threads about "setting" compression ration, but do not understand it yet? Anyone have a compression ratio for dummies guide?
Anything else I'm missing?
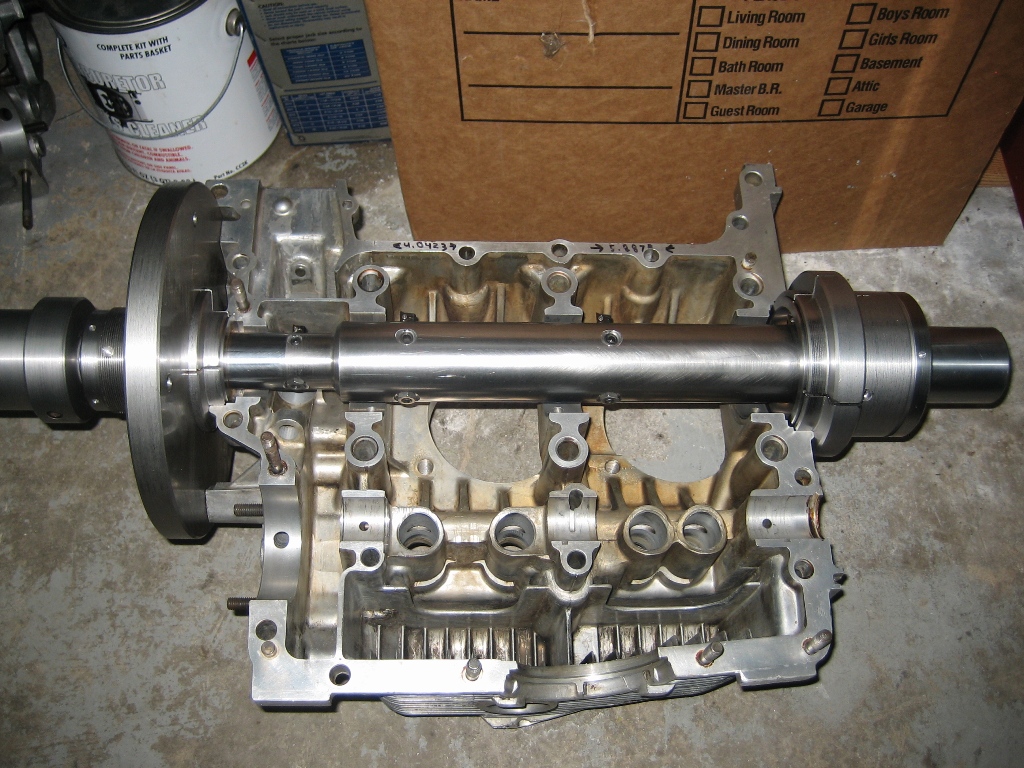
Progress so far...
Click to view attachment
Full Version: Just another 2056 build
Block off the bus oil dipstick hookup and install a 914 dipstick.
See my signature for the gaskets you need on the block-off plate.
See my signature for the gaskets you need on the block-off plate.
QUOTE(sdoolin @ Jan 13 2016, 02:29 PM) 
I have read a few threads about "setting" compression ration, but do not understand it yet?
You set the compression ratio by moving the cylinder heads outward (lowers compression) or inward (raises compression). Moving the heads out can be done by adding spacers under the cylinders. Moving them inward is usually done by fly-cutting the heads, though machining the cylinders probably can work too.
The simple version is that the compression ratio is the ratio of volume of the whole chamber plus cylinder at BDC to the volume of the same stuff at TDC. You can calculate that in a few ways, the most common is:
(swept_volume + fixed_volume) / (fixed_volume)
The swept volume is determined by the bore and stroke of one cylinder, with a 2056cc that would be (96/2)*(96/2) * 71 * 3.14159 / 1000 ~= 514cc. (Or 2056cc / 4.)
The fixed volume is measured in several parts that are added together. The combustion chamber volume is measured using your cylinder heads and your spark plugs and your valves and such. The height of the cylinder above the piston is measured, and used to calculate the volume of the space left above the piston. Dished or domed pistons get measured for volume (how depends on the piston) and that volume gets added to (dished) or subtracted from (domed) the fixed volume.
Then you plug the numbers in and see what your compression ratio is. Then see how much you need to add to the fixed volume to lower the number to where you want it, or how much you need to remove from the fixed volume to raise the number.
... Or you take the whole shebang to a good machine shop and tell them you want X for the compression ratio and they do it all for you...

--DD
Valy - thanks for the info. The case I am hoping to use does not have a hole for a dipstick. I suppose I can drill one?
See pic...
Click to view attachment
DD - thanks for the "compression ratio for dummies" guide. That is quite helpful.
See pic...
Click to view attachment
DD - thanks for the "compression ratio for dummies" guide. That is quite helpful.
Why not source a 914 case?
QUOTE(The Cabinetmaker @ Jan 14 2016, 08:14 AM)
Why not source a 914 case?
Good question. I had this laying around and hoped to use it (free and all). I may have to buy cases...
Check to make sure it's straight, the crank journals are straight and the deck (where the cylinders sit) is one flat plane.
Most machine shops will tell you to line bore the case without bothering to measure it.
You can measure everything I said above on your own with a good set of tools.
Most machine shops will tell you to line bore the case without bothering to measure it.
You can measure everything I said above on your own with a good set of tools.
Yup, check condition of the case before you put more work into it. You can drill a new dipstick hole if the case is good.
Sorry I did not read thru the whole post and all comments.... maybe I won't cover something mentioned. But my 2 cents:
I have read that if you have a choice,
1. start with a 1.7 case. Clearance is required to build over a 1.8 with it, but I believe they are beefier all 'round.
2. You will hear it all the time... Bus engines push heavy buses, you might be starting with a more worn case mile for mile.
3. Study up on the benefits of using 911 rockers with swivel feet, not a big expense, but you should decide.
4. buy the kit and pull the pressed in oil galley plugs with screw in type. once I put a drill bit on the big ones, they FELL out. Imagine what would happen with oil pressure....
5. I re-used the PP, FW and resurfaced the clutch in my daily driver. Took them all to a shop that specializes in clutches and they made them like new for about $150.
6. on your CR question, Len will be able to tell you the volume of the combustion area in the head. If he is supplying. IIRC mine was something like 55cc? He wrote it with a sharpie on the head.
7. find a copy of Jake's video to go with all the books you should have also purchased...
I have read that if you have a choice,
1. start with a 1.7 case. Clearance is required to build over a 1.8 with it, but I believe they are beefier all 'round.
2. You will hear it all the time... Bus engines push heavy buses, you might be starting with a more worn case mile for mile.
3. Study up on the benefits of using 911 rockers with swivel feet, not a big expense, but you should decide.
4. buy the kit and pull the pressed in oil galley plugs with screw in type. once I put a drill bit on the big ones, they FELL out. Imagine what would happen with oil pressure....
5. I re-used the PP, FW and resurfaced the clutch in my daily driver. Took them all to a shop that specializes in clutches and they made them like new for about $150.
6. on your CR question, Len will be able to tell you the volume of the combustion area in the head. If he is supplying. IIRC mine was something like 55cc?
He wrote it with a sharpie on the head.7. find a copy of Jake's video to go with all the books you should have also purchased...
You should be able to buy a 914 case cheap. Like maybe $50.
The other factor if if you take a little bit of time to find the right case for your car, I will make your car a little more valuable. If it were me, and I did , find a GA case so you have a 2.0 case as you are building a 2.0 engine. You can put "correct 2.0 case" in your sales ad, it all gets sold eventually.
To give you an idea if what I have paid over the past year, a fresh long block 2.0 case, 1.8 heads for $1600, a 2.0 case and crank from a generous 914 world member for $380, and a 2.0 case I picked up with some parts from another 914 world member for $50.
QUOTE(Sedonut @ Jan 15 2016, 03:39 PM)
You should be able to buy a 914 case cheap. Like maybe $50.
The other factor if if you take a little bit of time to find the right case for your car, I will make your car a little more valuable. If it were me, and I did , find a GA case so you have a 2.0 case as you are building a 2.0 engine. You can put "correct 2.0 case" in your sales ad, it all gets sold eventually.
To give you an idea if what I have paid over the past year, a fresh long block 2.0 case, 1.8 heads for $1600, a 2.0 case and crank from a generous 914 world member for $380, and a 2.0 case I picked up with some parts from another 914 world member for $50.
My car has a running (numbers matching and original) 2.0l in it, all stock FI and all. So I will keep that engine in house should I ever decide to go full concourse with this car (which will NEVER happen). The 2056 I'm building is just for "fun" and I am hoping to use this set of bus cases.
Thanks for the suggestions, I agree correct and numbers matching engine increases value.
QUOTE(malcolm2 @ Jan 15 2016, 01:31 PM)
Sorry I did not read thru the whole post and all comments.... maybe I won't cover something mentioned. But my 2 cents:
I have read that if you have a choice,
1. start with a 1.7 case. Clearance is required to build over a 1.8 with it, but I believe they are beefier all 'round.
2. You will hear it all the time... Bus engines push heavy buses, you might be starting with a more worn case mile for mile.
3. Study up on the benefits of using 911 rockers with swivel feet, not a big expense, but you should decide.
4. buy the kit and pull the pressed in oil galley plugs with screw in type. once I put a drill bit on the big ones, they FELL out. Imagine what would happen with oil pressure....
5. I re-used the PP, FW and resurfaced the clutch in my daily driver. Took them all to a shop that specializes in clutches and they made them like new for about $150.
6. on your CR question, Len will be able to tell you the volume of the combustion area in the head. If he is supplying. IIRC mine was something like 55cc?
He wrote it with a sharpie on the head.7. find a copy of Jake's video to go with all the books you should have also purchased...
Thanks for suggestions.
I am starting with a known 2.0l case (from a bus).
Agree on your number 2, cases will get measured before any new parts installed.
Will certainly study the 911 swivel feet rockers, my Cam kit came from Type IV Store does include ball-ends for the pushrods.
Oil galley plugs will be removed/replaced
I have new clutch, PP, and will re-use existing FW (assuming it will bolt to crank - witch I gotta believe it does_
I will speak with Len on CC volume, he and I have already exchanged several messages.
I have Raby's video - it is gospel I belive.
Thanks again.
The 914 flywheel will bolt to the Bus crank. There is a difference about where the pilot bearing lives, but on the 914 it lives in the flywheel so it just goes in the 914 flywheel. I don't remember if you need to plug the hole in the Bus crank or not.
The oil galleries may be slightly different on a Bus case, particularly if it was a hydro-lifter case. But even if they are different, they're still useable.
--DD
The oil galleries may be slightly different on a Bus case, particularly if it was a hydro-lifter case. But even if they are different, they're still useable.
--DD
I also have a 2.0 engine and am in the process of purchasing a spare engine to learn to rebuild and make into a 2056 to use a spare. Strange thing is that we live in the same town too....
You should be able to buy a 914 case cheap. Like maybe $50.
The other factor if if you take a little bit of time to find the right case for your car, I will make your car a little more valuable. If it were me, and I did , find a GA case so you have a 2.0 case as you are building a 2.0 engine. You can put "correct 2.0 case" in your sales ad, it all gets sold eventually.
To give you an idea if what I have paid over the past year, a fresh long block 2.0 case, 1.8 heads for $1600, a 2.0 case and crank from a generous 914 world member for $380, and a 2.0 case I picked up with some parts from another 914 world member for $50.
My car has a running (numbers matching and original) 2.0l in it, all stock FI and all. So I will keep that engine in house should I ever decide to go full concourse with this car (which will NEVER happen). The 2056 I'm building is just for "fun" and I am hoping to use this set of bus cases.
Thanks for the suggestions, I agree correct and numbers matching engine increases value.
QUOTE(sdoolin @ Jan 15 2016, 07:13 PM)
QUOTE(Sedonut @ Jan 15 2016, 03:39 PM)
You should be able to buy a 914 case cheap. Like maybe $50.
The other factor if if you take a little bit of time to find the right case for your car, I will make your car a little more valuable. If it were me, and I did , find a GA case so you have a 2.0 case as you are building a 2.0 engine. You can put "correct 2.0 case" in your sales ad, it all gets sold eventually.
To give you an idea if what I have paid over the past year, a fresh long block 2.0 case, 1.8 heads for $1600, a 2.0 case and crank from a generous 914 world member for $380, and a 2.0 case I picked up with some parts from another 914 world member for $50.
My car has a running (numbers matching and original) 2.0l in it, all stock FI and all. So I will keep that engine in house should I ever decide to go full concourse with this car (which will NEVER happen). The 2056 I'm building is just for "fun" and I am hoping to use this set of bus cases.
Thanks for the suggestions, I agree correct and numbers matching engine increases value.
Thats a solid combo. Put it at 9:1 and it'll be sweet! Thats a 135HP combo on most days, it'll optimize with a 140 main, and 60 idles with the 40 Dells with 34mm ventures. It'll love 14* initial advance, with a 28* full advance.
BTW_ that video is now 16 years old, and I am 45 pounds heavier... :-)
BTW_ that video is now 16 years old, and I am 45 pounds heavier... :-)
To be sure you want to make sure that before you do anything else the Bores for the crankshaft bearings are round AND in line with each other. I don't see anything that is "just fine go ahead and run it" We do a lot of line bore on Type IV cases and we are having to to clean the cylinder spigots about 0.010 to make them flat and match side to side on average. A precision straight edge will tell you what is going on with #1, #2, and #3, but you'll need a little more to see how #4 lines up. We invested a lot of time and money making better tooling.
Good luck let me know if I can be of help.
John
Good luck let me know if I can be of help.
John
OK then. Lots of good/useful info - thanks everyone.
I will have my local shop measure all that has been suggested, he is capable.
ericoneal - we are very close - I am just north and east of LaGrange off Hwy 42.
I will be taking the bus cases to the machine shop early next week for cleaning, inspecting & measuring. I'm sure that will take a couple of weeks (one man show). Then if they check out I will begin building.
The beauty of this plan is that I still get to the drive the car while I am building.
Stay tuned...
QUOTE(McMark @ Jan 15 2016, 06:47 AM)
Yup, check condition of the case before you put more work into it. You can drill a new dipstick hole if the case is good.
sdoolin,
Here is a link to the quick and easy dipstick tube fix. It's super easy and very good quality. I've done several. Best part is you can do it locally.
Good luck on your build. It is post #18 down at the bottom of the thread.
http://www.914world.com/bbs2/index.php?sho...stick+tube+fix#
I believe the gentleman that just posted, Jesco Reinent also has several cases that are align-bored and decked, ready to go. He does great work, perhaps he'll share his pictures in this thread.
QUOTE(ThePaintedMan @ Jan 16 2016, 10:41 AM)
I believe the gentleman that just posted, Jesco Reinent also has several cases that are align-bored and decked, ready to go. He does great work, perhaps he'll share his pictures in this thread.
In fact when I build a new engine in the near future, I WILL be contacting Jesco_Reient for a case/crank combo (even though I have a case).
For what he charges for a case, crank, and bearings with the specialty machining already done, you cannot beat that price.
OK OK OK OK y'all are scaring me!
I don't believe my local shop can perform the align-bore. He can measure the thing, but he didn't seem comfortable align-boring it if it is out. And from what the experts here say this thing WILL need align-bored.
I will either send it out for that work, or source (maybe?) a set of cases & crank already done.
It's just money after all - and I can't take it with me when I depart this reality/dimension...
QUOTE(ThePaintedMan @ Jan 16 2016, 12:41 PM)
I believe the gentleman that just posted, Jesco Reinent also has several cases that are align-bored and decked, ready to go. He does great work, perhaps he'll share his pictures in this thread.
Jesco R. - if this is true, I'd like to talk. I saw your dipstick tube fix (thanks) and if I end up using these cases I can do that work in-house.
QUOTE(malcolm2 @ Jan 15 2016, 01:31 PM)
Sorry I did not read thru the whole post and all comments.... maybe I won't cover something mentioned. But my 2 cents:
I have read that if you have a choice,
1. start with a 1.7 case. Clearance is required to build over a 1.8 with it, but I believe they are beefier all 'round.
2. You will hear it all the time... Bus engines push heavy buses, you might be starting with a more worn case mile for mile.
3. Study up on the benefits of using 911 rockers with swivel feet, not a big expense, but you should decide.
4. buy the kit and pull the pressed in oil galley plugs with screw in type. once I put a drill bit on the big ones, they FELL out. Imagine what would happen with oil pressure....
5. I re-used the PP, FW and resurfaced the clutch
my daily driver. Took them all to a shop that specializes in clutches and they made them like new for about $150.
6. on your CR question, Len will be able to tell you the volume of the combustion area in the head. If he is supplying. IIRC mine was something like 55cc?
He wrote it with a sharpie on the head.7. find a copy of Jake's video to go with all the books you should have also purchased...
In reference to item one. I was thoroughly chastised by the late Capn when I posted that the 1.7 case registers needed to be opened to accept the 2.0 cylinders. They do not!
Item 3. 911 rockers will not work in a type 4. You can use 911 swivel feet adjusters on 1.7 rockers with a small modification. Well worth the effort.
I agree about the bus engines. They've been rode hard and put away wet.
QUOTE(Jesco Reient @ Jan 16 2016, 12:25 AM)
To be sure you want to make sure that before you do anything else the Bores for the crankshaft bearings are round AND in line with each other. I don't see anything that is "just fine go ahead and run it" We do a lot of line bore on Type IV cases and we are having to to clean the cylinder spigots about 0.010 to make them flat and match side to side on average. A precision straight edge will tell you what is going on with #1, #2, and #3, but you'll need a little more to see how #4 lines up. We invested a lot of time and money making better tooling.
Good luck let me know if I can be of help.
John
Could you post a link to your website?
A ready to go case and crank is certainly a tempting way to start a build.
QUOTE(r_towle @ Jan 16 2016, 01:48 PM)
QUOTE(Jesco Reient @ Jan 16 2016, 12:25 AM)
To be sure you want to make sure that before you do anything else the Bores for the crankshaft bearings are round AND in line with each other. I don't see anything that is "just fine go ahead and run it" We do a lot of line bore on Type IV cases and we are having to to clean the cylinder spigots about 0.010 to make them flat and match side to side on average. A precision straight edge will tell you what is going on with #1, #2, and #3, but you'll need a little more to see how #4 lines up. We invested a lot of time and money making better tooling.
Good luck let me know if I can be of help.
John
Could you post a link to your website?
A ready to go case and crank is certainly a tempting way to start a build.
Rich your getting lazy

QUOTE(sdoolin @ Jan 16 2016, 01:04 PM)
QUOTE(ThePaintedMan @ Jan 16 2016, 12:41 PM)
I believe the gentleman that just posted, Jesco Reinent also has several cases that are align-bored and decked, ready to go. He does great work, perhaps he'll share his pictures in this thread.
Jesco R. - if this is true, I'd like to talk. I saw your dipstick tube fix (thanks) and if I end up using these cases I can do that work in-house.
I'll send you a PM, give me a call I'd be glad to talk about your crankcase.
John
QUOTE(r_towle @ Jan 16 2016, 01:48 PM)
QUOTE(Jesco Reient @ Jan 16 2016, 12:25 AM)
To be sure you want to make sure that before you do anything else the Bores for the crankshaft bearings are round AND in line with each other. I don't see anything that is "just fine go ahead and run it" We do a lot of line bore on Type IV cases and we are having to to clean the cylinder spigots about 0.010 to make them flat and match side to side on average. A precision straight edge will tell you what is going on with #1, #2, and #3, but you'll need a little more to see how #4 lines up. We invested a lot of time and money making better tooling.
Good luck let me know if I can be of help.
John
Could you post a link to your website?
A ready to go case and crank is certainly a tempting way to start a build.
I keep getting asked about a website, and have yet to make a website. I'll find a link to the cases I had ready to go, I'm getting ready to run some more through the process. However they will be ready to go,except for balancing, With bearings, crankshaft, and line bored.
Here are pictures of one of the past cases I had ready to go.

Before semi-retirement I built Rolls Royce Merlin V-12 engines and large Curtiss Wright 18 Cylinder radial engines for unlimited airplane racing. The tooling available that I was looking at was in my opinion substandard for the result I wanted. Even well known Type IV builders regarding line boring the Type IV case suggested finding one that did not need to be line bored. So as I did with the aircraft engines when a challenge came along, I studied the process, looked at what was being done and what it was going to take to get the result I wanted to achieve. So I made a new boring bar out of very stable linear way tool steel I made it as large as possible allowing the best available 90 degree cutting plane, Hard chromed the wear areas, used the highest quality indexable carbide boring tooling available and built a new bar with tapered expandable colletts on each end to locate the bar accurately. The total run-out on each of the expandable colletts was less than .0001 thousandths of an inch. I have done several cases up to this point with excellent results. I thought possibly it was time to explain this, and perhaps you will all understand the reason for the pricing. I also made the tooling for cutting the cylinder registers while torqued to a plate so the torque stresses are correct for those areas also.
The tooling laid into a case to show it's fitment.
John
Wow. That's the way to do it. 
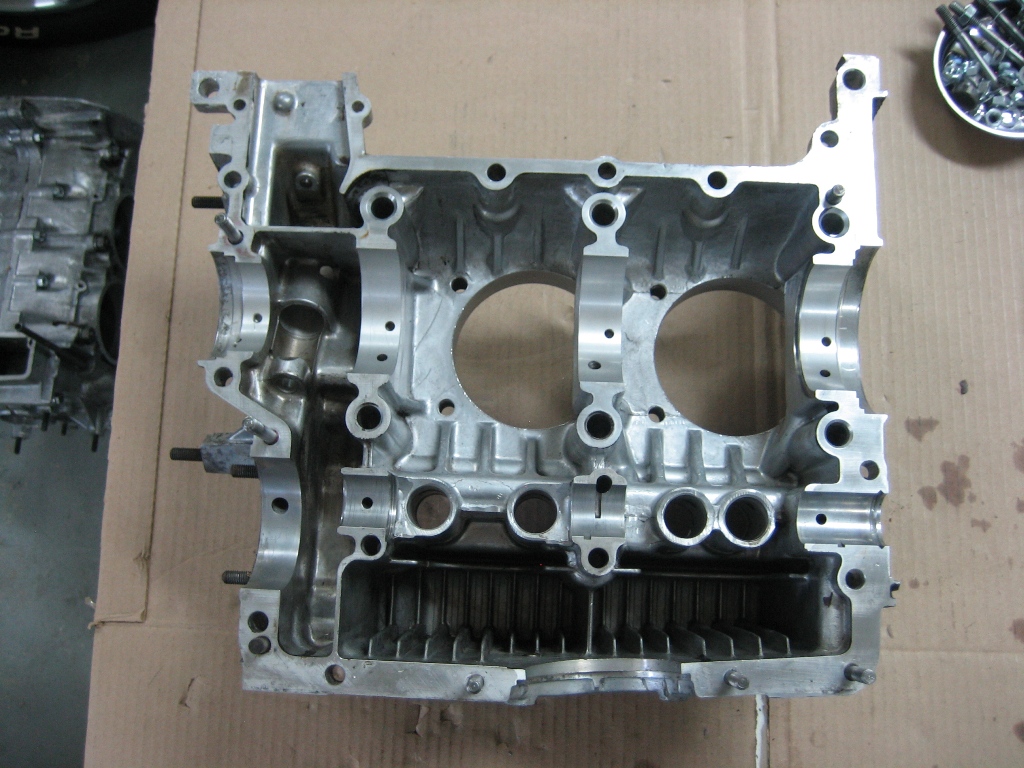
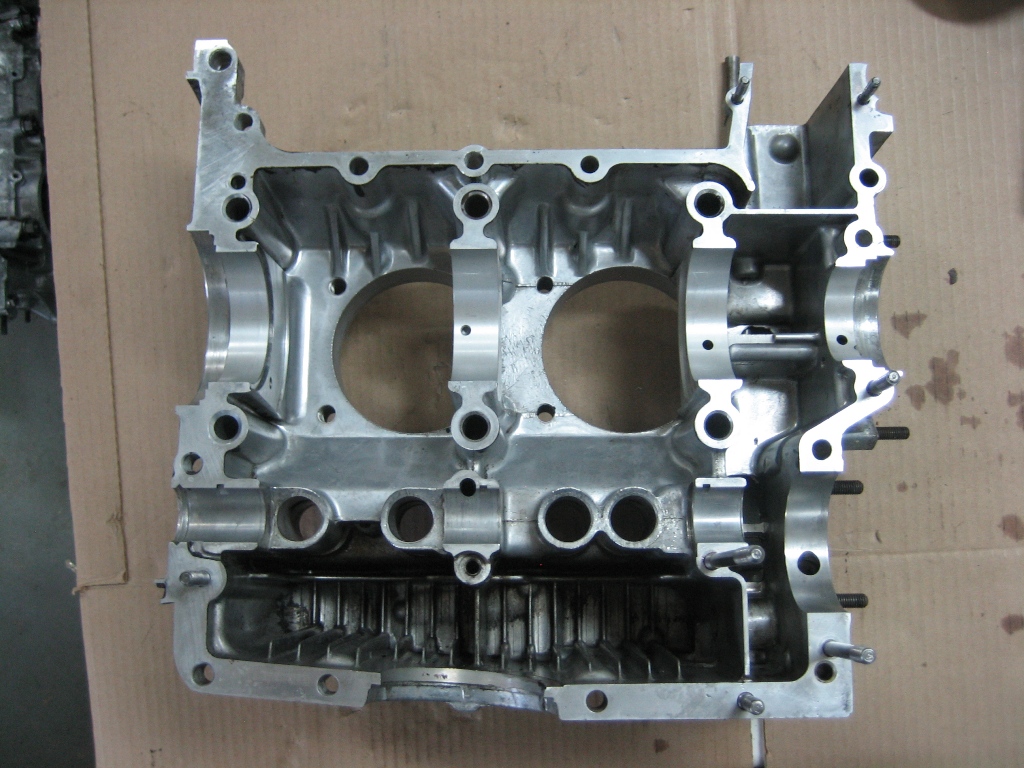
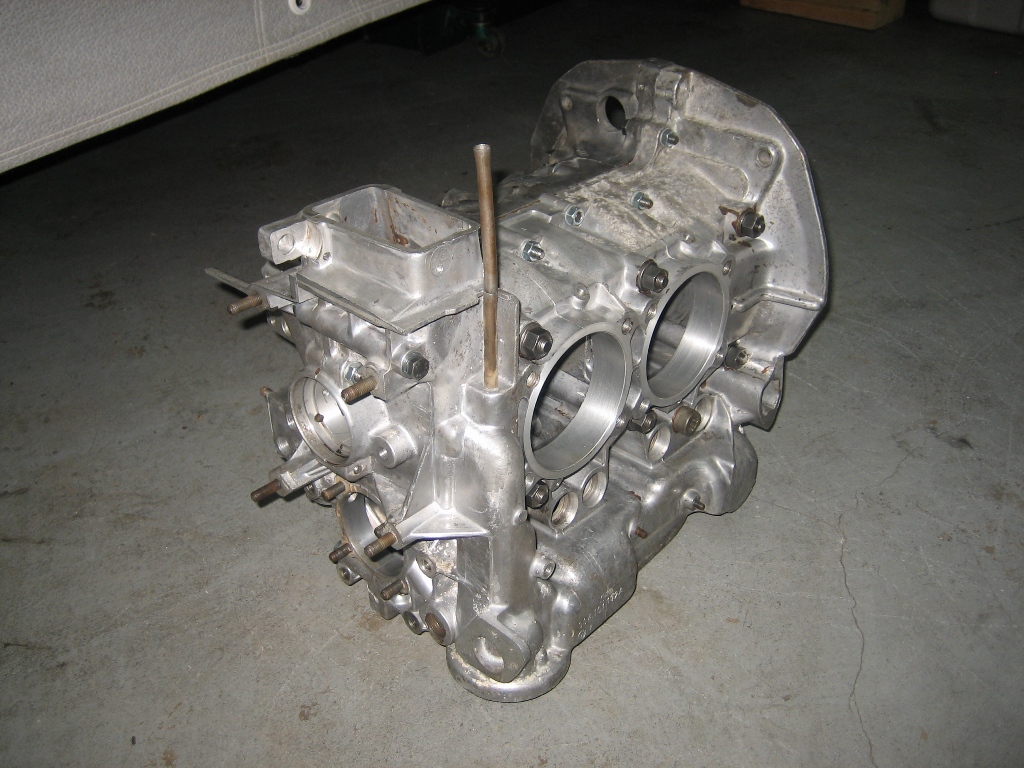
Today's progress. Cleaned case halves (to the best of my abilities)...
Click to view attachment
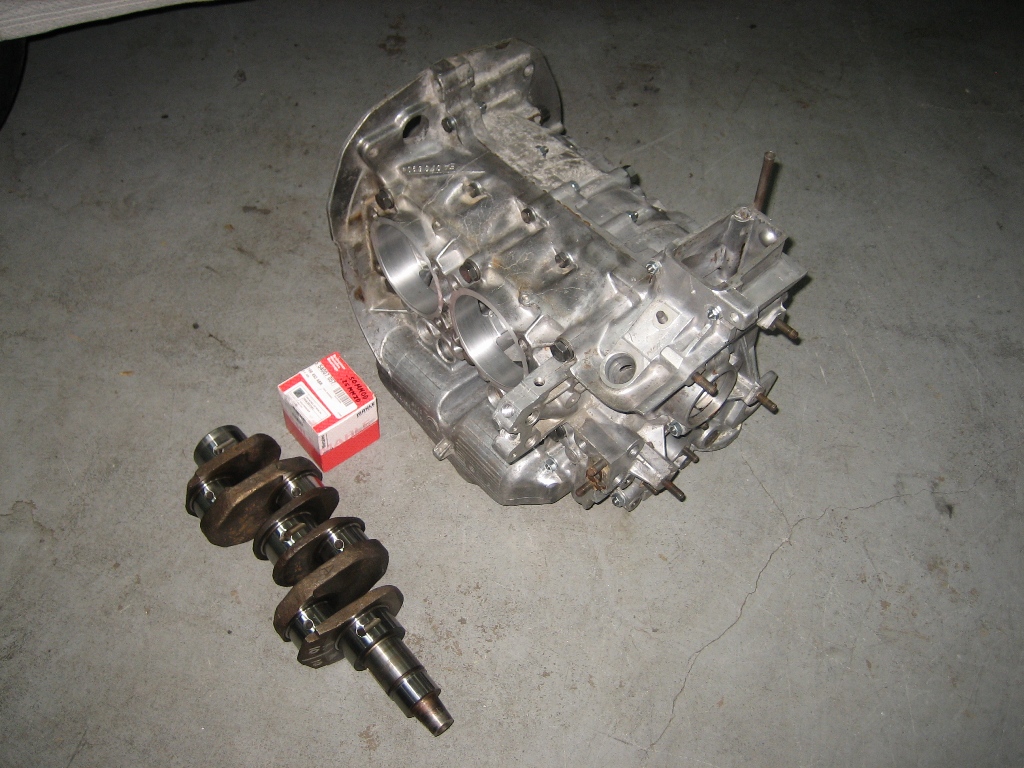
Crank doesn't look too bad...
Click to view attachment
Next step is to send these case halves out to a pro for measuring and align-boring and decking (if needed)...
Click to view attachment
Crank doesn't look too bad...
Click to view attachment
Next step is to send these case halves out to a pro for measuring and align-boring and decking (if needed)...
Unusual damage to #4 cylinder deck. I must not be the first one in here which is a little strange because this engine came from a single owner bus that I purchased 30 some years ago...
Click to view attachment
Click to view attachment
Still looking for an East coast/local shop to measure and machine my cases, looks like I may have to send them out West (Jesco Reient).
In the mean time I have been researching valvetrain set up. Have read all that I can on 914world (searches on "valvetrain geometry" yield 4 - 5 decent results) and these threads generally reference Raby's article(s) on this subject. Which I can't seem to find. Which I am SURE I need to read.
Anyone have a link to that information?
QUOTE(sdoolin @ Jan 24 2016, 07:45 AM)
Anyone have a link to that information?
PM sent
QUOTE(sdoolin @ Jan 24 2016, 06:45 AM)
Still looking for an East coast/local shop to measure and machine my cases, looks like I may have to send them out West (Jesco Reient).
Len Hoffman......here's a link: http://www.hamincgroup.com/services.php
QUOTE(wndsrfr @ Jan 24 2016, 08:00 PM)
QUOTE(sdoolin @ Jan 24 2016, 06:45 AM)
Still looking for an East coast/local shop to measure and machine my cases, looks like I may have to send them out West (Jesco Reient).
Len Hoffman......here's a link: http://www.hamincgroup.com/services.php
Thanks for the tip. I emailed Len about a week ago and have not heard back from him. So - still looking...
Update - cases are out being measured (crank bore & cylinder decks). Jugs are also in shop for boring to accept 96mm peestons.
Reading - reading - reading...
My "kit" from Type IV Store includes the 911 swivel feet valve adjusters/nuts along with rocker shafts/studs. I did not order an adjustable pushrod from them - but will do so before I get to that stage of the build.
To use the swivel feet adjusters I believe (OK - I KNOW) I will need 1.7 rockers (and they will need to be modified). Best place for these? Just place a WTB in classifieds?
You might check with Brad Mayeur at 914 LTD about the 1.7 rockers....I got a set from him. http://914ltd.com
QUOTE(Java2570 @ Jan 27 2016, 12:13 PM)
You might check with Brad Mayeur at 914 LTD about the 1.7 rockers....I got a set from him. http://914ltd.com
Thank you - sent them an email.
So the news is in...
My local guy says that these cases do NOT need align bored or decked. I imagine this is hard to believe?
My local guy says that these cases do NOT need align bored or decked. I imagine this is hard to believe?
Just received a pair of HAM RS+ Spec Cyl. Heads. Those of you that have observed these beautiful pieces know how sweet they are, and how well they work. Cases are ready for me from local machine shop and I will pick-up Monday. So I can begin (again) the build.
2 Beautiful new heads...
Click to view attachment
Old/Stock head vs HAM RS+ note the squish/quench area differences, plug hole has been re-angled for chamber shape...
Click to view attachment
2 Beautiful new heads...
Click to view attachment
Old/Stock head vs HAM RS+ note the squish/quench area differences, plug hole has been re-angled for chamber shape...
Click to view attachment
More RS+ Porn...
Notice the machinng/work done at the intake manifold surface...
Click to view attachment
Work done to re-angle spark plugs...
Click to view attachment
Notice the machinng/work done at the intake manifold surface...
Click to view attachment
Work done to re-angle spark plugs...
Click to view attachment
QUOTE(sdoolin @ Feb 3 2016, 06:57 PM)
My local guy says that these cases do NOT need align bored or decked. I imagine this is hard to believe?
Does he mean your specific case, or all Type IVs in general?
Conventional wisdom used to be that they didn't need align-boring. They are, after all, built tougher than the magnesium Type I case, which is pretty much always align-bored out of hand--because just about all of them need it. So we got used to saying, "These don't usually need it, check before you cut, OK?"
That was a couple decades ago, though. Now they've run more miles and have more heat cycles and seen more wear. More than a few do need align-boring. It is best to have the case checked.
--DD
QUOTE
Does he mean your specific case, or all Type IVs in general?
He means my specific case. He measured the crank bore and the cylinder decks and he says all OK. He is balancing all moving parts (crank/rods/pistons), verifying all cylinder/head bolt threads are good (it came apart well), installing new threaded galley plugs and generally cleaning the cases up. I get it all beck next week.
Then the real fun begins...
Also, this set of cases hasn't seen a crankshaft turn in them for at least 20 years (closer to 30), so do not have the wear and tear or heat cycles that would've been associated with those years of operation.
So I finally picked up my cleaned/measured cases/crank and rods. Doing pre-assembly tonight. What is the conventional wisdom on re-installing the cylinder/head studs into the cases? Threadlock (Loctite) or no threadlock?
I have built 3 bus engines and have never used threadlock on the cylinder/head studs, but then I've never removed them in those builds. My thought has always been less threadlock is better, but I want to build this engine the best I can.
Is there a torques spec for installing the cylinder/head studs?
All opinions appreciated (I think)...
Right off the top of my head:
You will almost certainly take the case halves apart many times, so dont use any sealant on the mating halves till youre sure.
The #1 mistake made is letting the bearings come unseated from the dowel pins that hold the bearings. This results in brand new, ruined bearings.
As you torque the sides together rotate the crank & cam they should turn like butter even at full case torque.
Once you have the rods attached, be careful when you rotate the assembly and dont let the rods slap on the case.
Once you have the jugs on you will be measuring your deck height.
I have an old thread where I struggled with this for a long time before getting it right. I'll see if I can dig it up.
There are some tools provided by a member on this site (yeahmag) that makes the measurement 'almost' idiot-proof.
Here it is:
http://www.914world.com/bbs2/index.php?showtopic=196177
Yes, thanks for all of that (no disrespect intended). I have built a few of these engines for buses, so am familiar with the basics of crankshaft build-up and case mating. Definitely want things to spin free.
My specific question has to do with the long studs for the cylinders/heads. I removed them from the case halves before I sent them (the case halves) for measurement. Now, on re-assembly, is there a torque spec to re-install them to the cases, and, do we all think that threadlock is required for these? The cases have excellent threads and no helicoils were needed (as is often the case with type I engines).
I generally avoid threadlock where possible, but not sure if these should be "loctited" or not. They have very nice "bite" into the threads/cases.
Hope to have the cases all assembled by the end of this weekend. Crankshaft was balanced, rods were balanced (big-ends and small-ends), and new KB 96mm pistons were weight matched.
Click to view attachment
Then working out of town for a week, then next weekend hope to work on deck height and compression ratio...
Click to view attachment
Then working out of town for a week, then next weekend hope to work on deck height and compression ratio...
Oil Dipstick Tube fitment. Bus engine cases need to be drilled. I am using 5/16" hydraulic brake line press fit into a 5/16" hole in the case. Will secure with some JB Weld (or other) when complete.
Anyone know exact height of dipstick tube from top of case to top of tube?
Click to view attachment
Accomplished on the crude side of the shop, but I am comfortable with the solution...
Anyone know exact height of dipstick tube from top of case to top of tube?
Click to view attachment
Accomplished on the crude side of the shop, but I am comfortable with the solution...
QUOTE(sdoolin @ Mar 12 2016, 10:11 AM)
Oil Dipstick Tube fitment. Bus engine cases need to be drilled. I am using 5/16" hydraulic brake line press fit into a 5/16" hole in the case. Will secure with some JB Weld (or other) when complete.
Anyone know exact height of dipstick tube from top of case to top of tube?
I'm seeing 85 mm on a known stock case....3 & 3/8" .....
This is a "lo-fi" version of our main content. To view the full version with more information, formatting and images, please click here.