|
|
|
Porsche, and the Porsche crest are registered trademarks of Dr. Ing. h.c. F. Porsche AG.
This site is not affiliated with Porsche in any way. Its only purpose is to provide an online forum for car enthusiasts. All other trademarks are property of their respective owners. |
|
|

  |

| zambezi |
 Mar 19 2016, 10:18 PM Mar 19 2016, 10:18 PM
Post
#21
|
|
Senior Member  Group: Members Posts: 711 Joined: 14-April 08 From: Lafayette, LA Member No.: 8,920 Region Association: South East States |
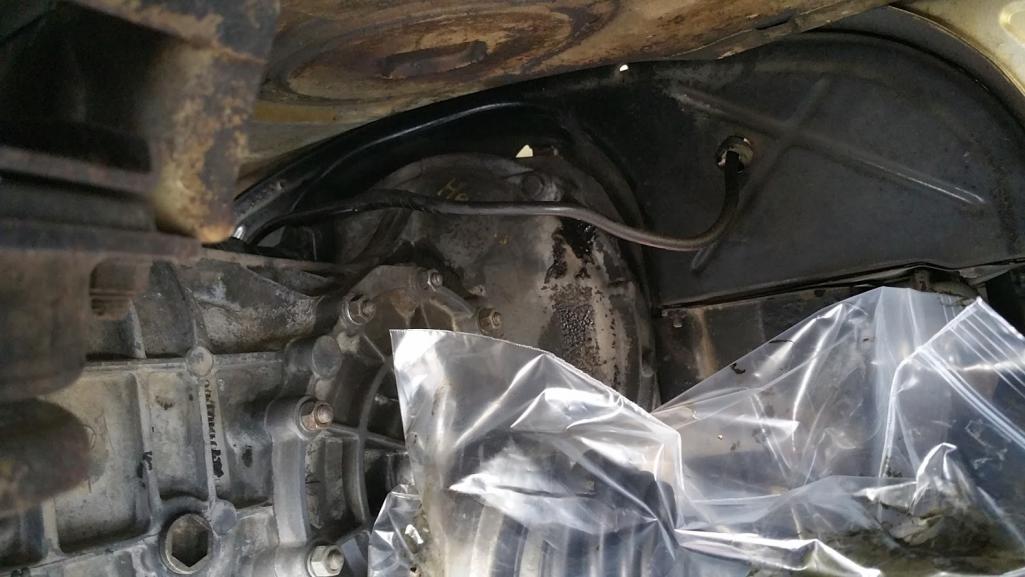
watch out on the reverse light switch. There should be a small rod in the hole that pushes into the switch to activate the switch. Look in the hole in the trans to see if it is still there. If it is it may fall out and you won't notice it.
|
   |

 
|
| Dr Evil |
Mar 20 2016, 10:55 AM
Post
#22
|
|
Send me your transmission! Group: Members Posts: 22,995 Joined: 21-November 03 From: Loveland, OH 45140 Member No.: 1,372 Region Association: MidAtlantic Region |
Looking good!
Brad is a great guy and will always takes good care of people. I messaged you back about the DVD. Ill help however I can. (IMG:style_emoticons/default/smile.gif) |
|
|
|
| Jameel |
Mar 20 2016, 11:38 AM
Post
#23
|
|
Member Group: Members Posts: 98 Joined: 6-October 15 From: Iowa Member No.: 19,239 Region Association: None |
QUOTE(zambezi @ Mar 19 2016, 08:18 PM)  watch out on the reverse light switch. There should be a small rod in the hole that pushes into the switch to activate the switch. Look in the hole in the trans to see if it is still there. If it is it may fall out and you won't notice it. Great info! I read about that in the Haynes manual, but sort of spaced it out. Going to fetch it now. Thanks Dr. Evil. DVD ordered, $ sent. |
|
|
|
| Jameel |
Mar 21 2016, 09:36 PM
Post
#24
|
|
Member Group: Members Posts: 98 Joined: 6-October 15 From: Iowa Member No.: 19,239 Region Association: None |
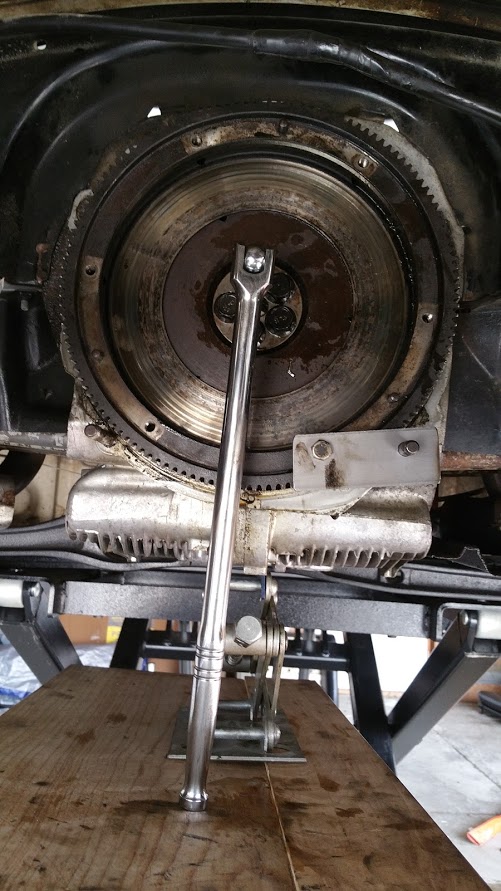
Had an hour today to fiddle with this. First up, I loosened the four bolts holding the front end of the trans to the engine.
 Then supported the trans and engine. I later swapped the jack and block of wood so the jack was under the engine. Gave me more adjustability. 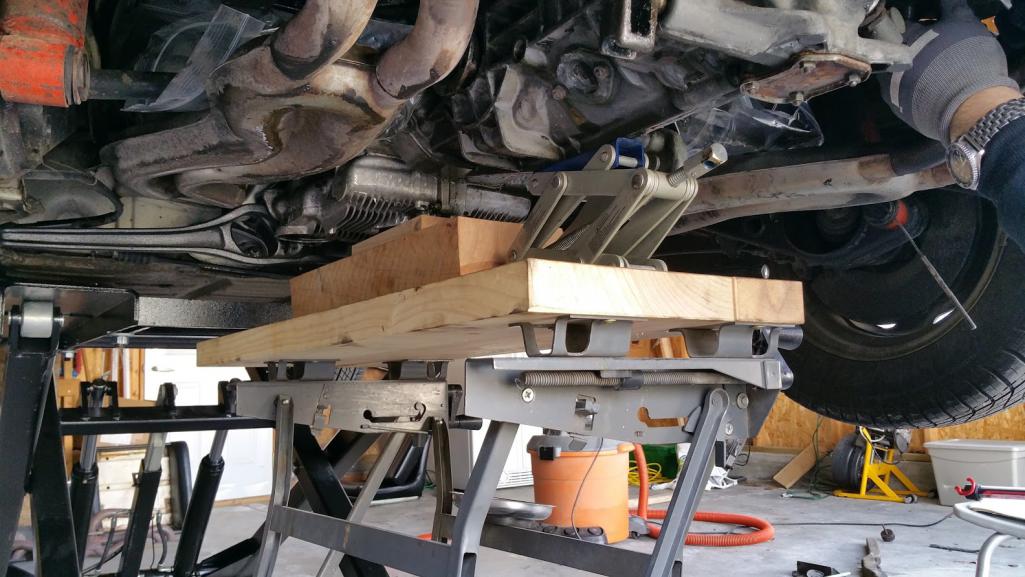 Then I unbolted the rear trans mounts.  Then with some help from my brother and a few rearward tugs, the trans was out. 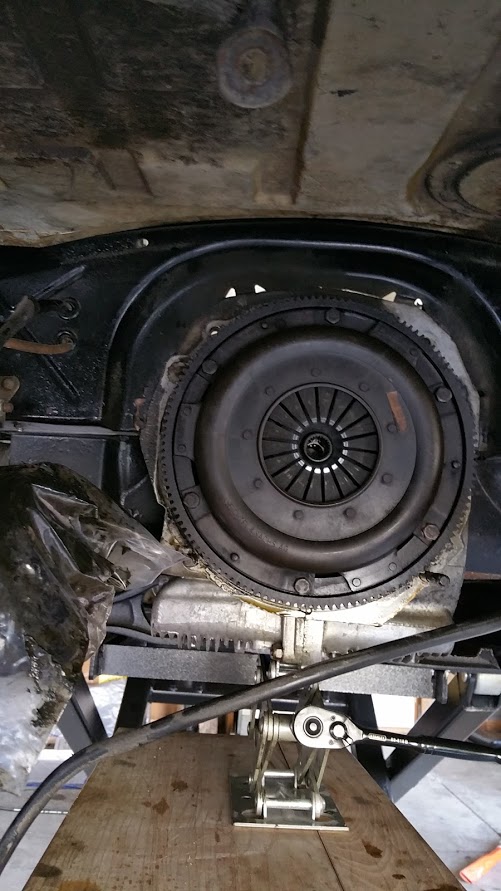 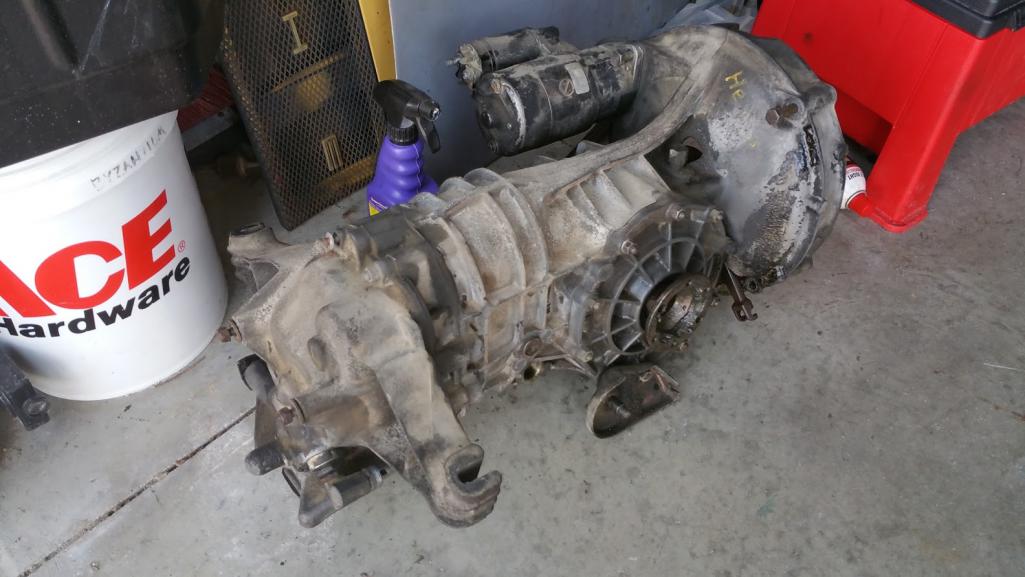 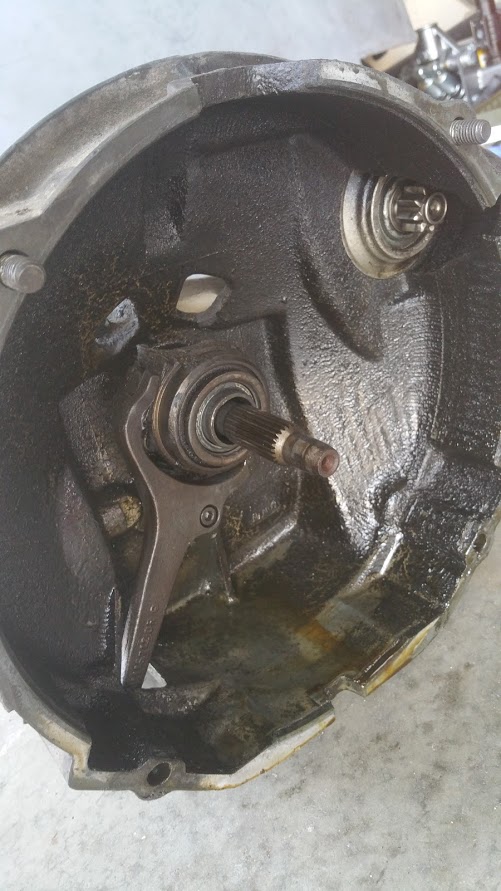 Next up, evaluating the condition of my pressure plate, friction disc and flywheel. Something tells me they need a little attention.... 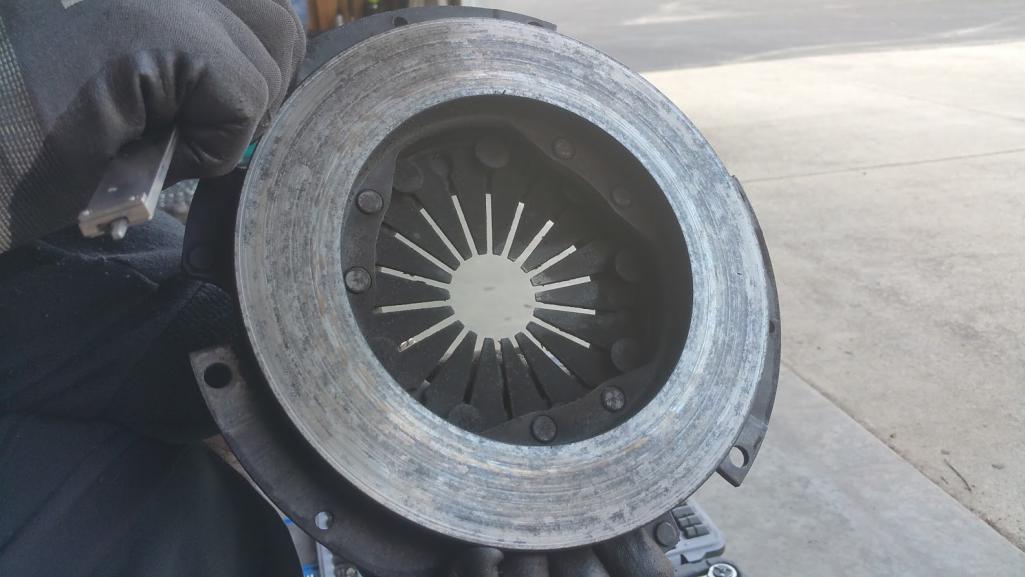 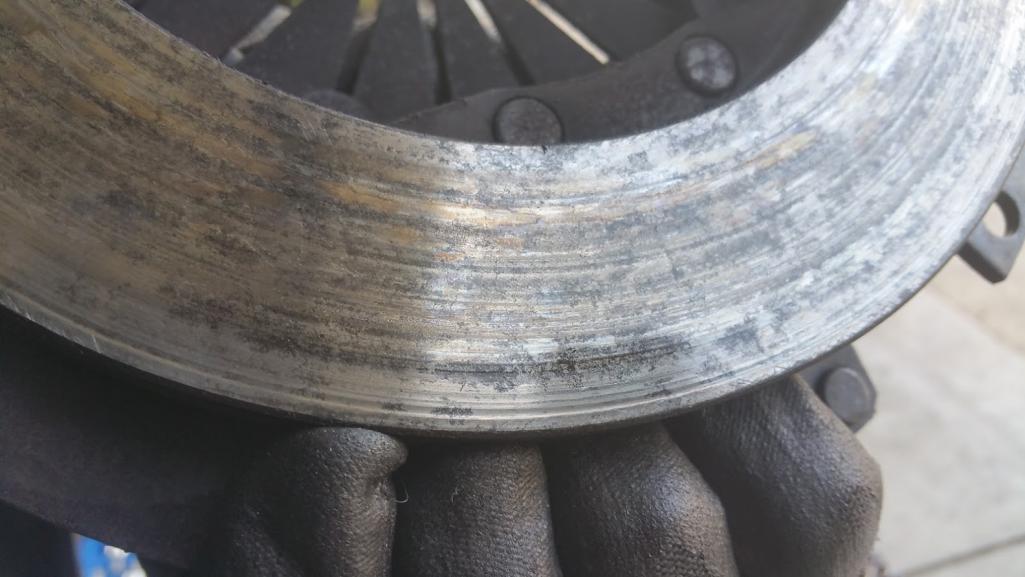 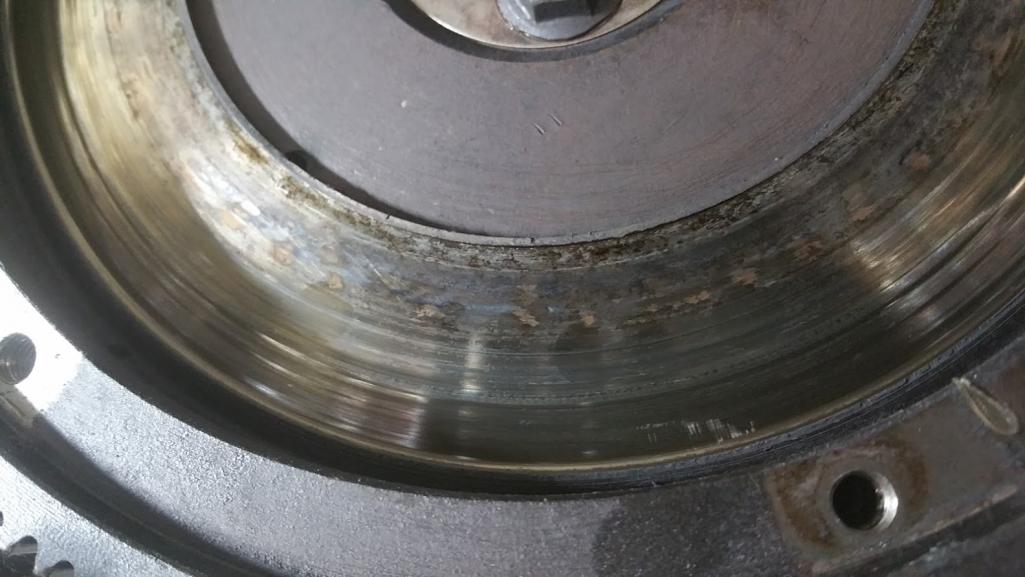  |
|
|
|
| Jameel |
Mar 26 2016, 08:44 AM
Post
#25
|
|
Member Group: Members Posts: 98 Joined: 6-October 15 From: Iowa Member No.: 19,239 Region Association: None |
Moving along....I removed the side cover plate which is attached to the fork piece.
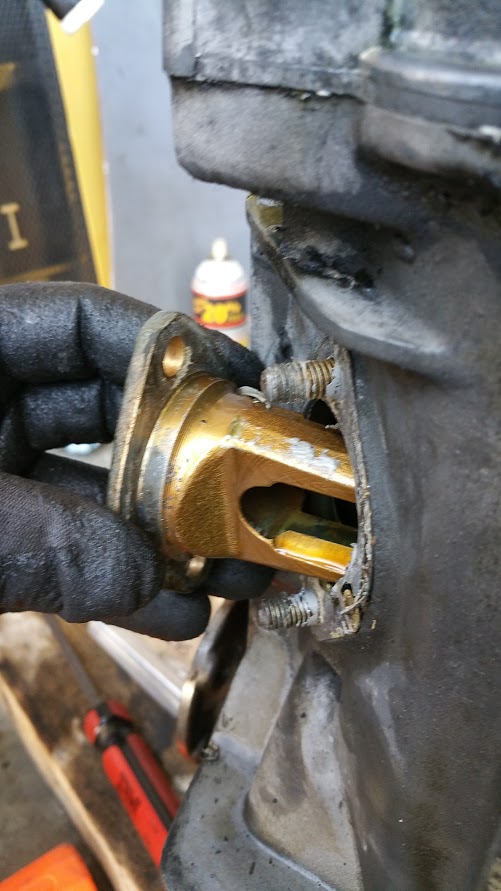 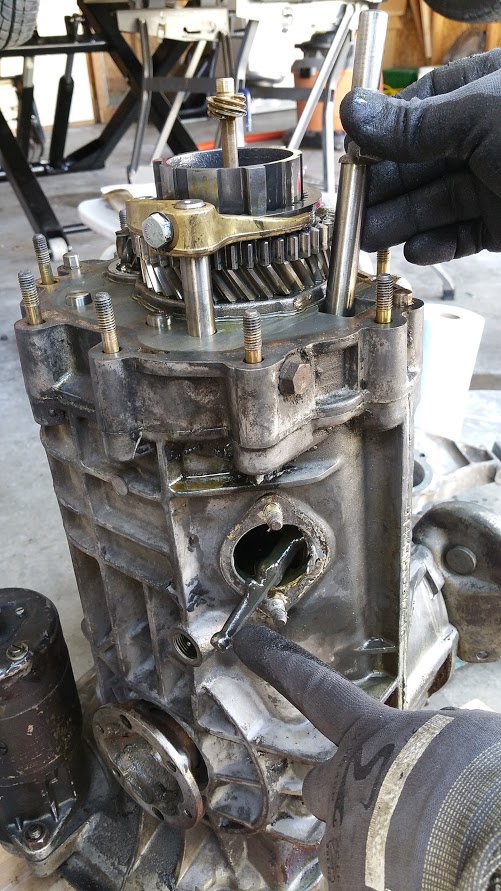 I tried lifting the intermediate plate out of the case, but it would lift up maybe 2 inches before encountering resistance. I called Brad Mayeur and he said to press the end of the shift rod for 2nd/3rd gear a little bit (the lower one that just protrudes out the int. plate, just above the rod for 1st/rev). I did that and the whole plate and guts lifted right out. Awesome! With the gears out, I could disassemble the internal shift rod by removing the cotter pin and driving out the pin. This was a little tricky. Thankfully I had a helper to hold the rod steady while I drove it out with a punch and hammer.  With the intermediate plate out I carefully measured the two gaskets from a section of the casting that fell between the bearing surfaces to get a good measurement from gasket that had not been compressed. It was still a bit tricky. One round of measuring showed one shim at .005 and one at .004. Another round of measuring showed .004 and .003. So I'm not sure what I've got here. I'll try again. Not sure what the tolerances here are, as the Haynes manual doesn't mention this. I'll do a little searching. 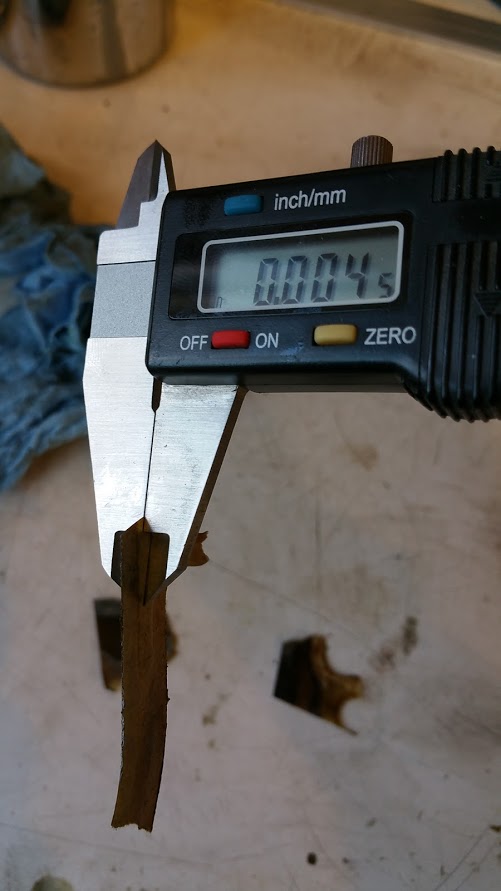 Here's my pinion gear. Looks really nice to me. But that's probably just wishful thinking. I'm heading out to the garage now to take my flywheel off. https://www.youtube.com/watch?v=RYFn5VvpZ4U |
|
|
|
| Dr Evil |
Mar 26 2016, 09:31 AM
Post
#26
|
|
Send me your transmission! Group: Members Posts: 22,995 Joined: 21-November 03 From: Loveland, OH 45140 Member No.: 1,372 Region Association: MidAtlantic Region |
Hard to tell in the video, there looks to be some material missing on the teeth face. Normal wear. You will have a hard time finding a perfect R/P that is 40yrs used. If you are not blasting lots of power through it then it is fine. Gasket tolerance is +/-0.03mm. Consider that is with new bearings in perfect shape. Used bearings are going to have some serious play so close enough is good for the gaskets. Consider that the kits only come with 0.24-25mm gaskets, you get as close as you can with that and roll with it. Sounds crazy, I know. Next question would be, "What if you change to new, tight bearings?" Well, there are other size gaskets that you can order. Also, there are shims under the pinion that you adjust. Now, you can rebuild the box using the standard kit with the 0.25 gaskets, get close enough, and things are all good. How? My only educated guess is that the R/P are worn and the tolerance on them is much looser than new which allows for there to be wider tolerance range. What happens if you are not spot on? Noise. What happens in an old transmission usually? Noise. So, you can be pretty bold in assembly if you just get real close. Thats kind of a gist of the stuff mentioned in the DVD.
|
|
|
|
| Jameel |
Mar 26 2016, 03:03 PM
Post
#27
|
|
Member Group: Members Posts: 98 Joined: 6-October 15 From: Iowa Member No.: 19,239 Region Association: None |
Thanks for the info. As for recognizing noise, I have very little experience with the 901 tranny (I've driven three 914's, and a 71' 911S) and my own car has dual 40IDF Webers and a loud exhaust. I guess I could try coasting downhill in gear off the throttle to hear the possibly noise. I can see myself making improvements to this car little by little, and now that I've removed the transaxle once, I'm not afraid to do it again. I'm going to have the tranny looked at by the gents down at Stalltek next week, get some experienced eyes on this thing. Can't wait to get the DVD and learn more.
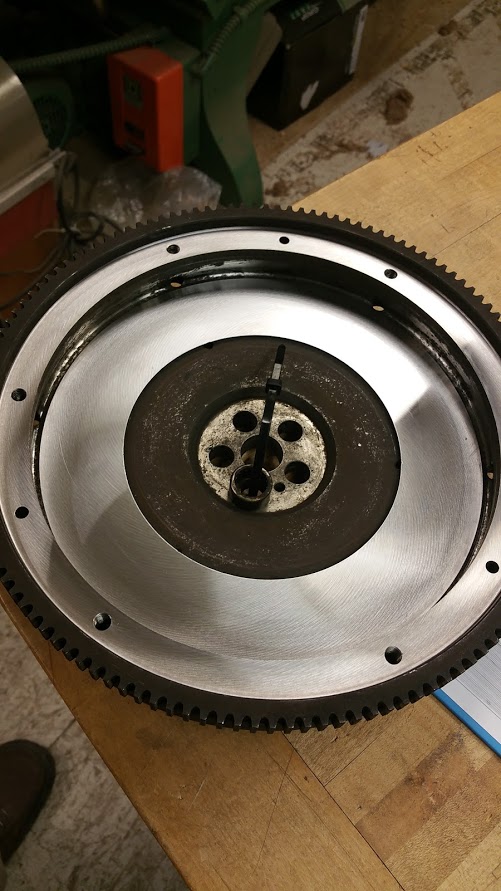
 I did get the flywheel off this morning after making a quick and dirty locking plate. I like not having to deal with a 300lb. torqued gland nut! The five bolts came off relatively easily with my breaker bar. 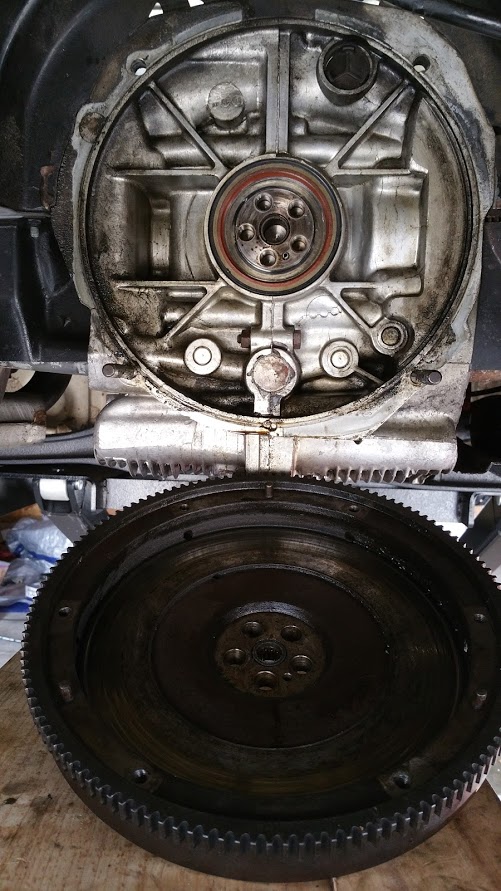 Cleaned up the flywheel and put a straight edge across the face. Wow. No wonder my clutch didn't feel very grippy. I hope I've got enough trough at the perimeter for a resurface. I was hoping to not have to buy a new flywheel. 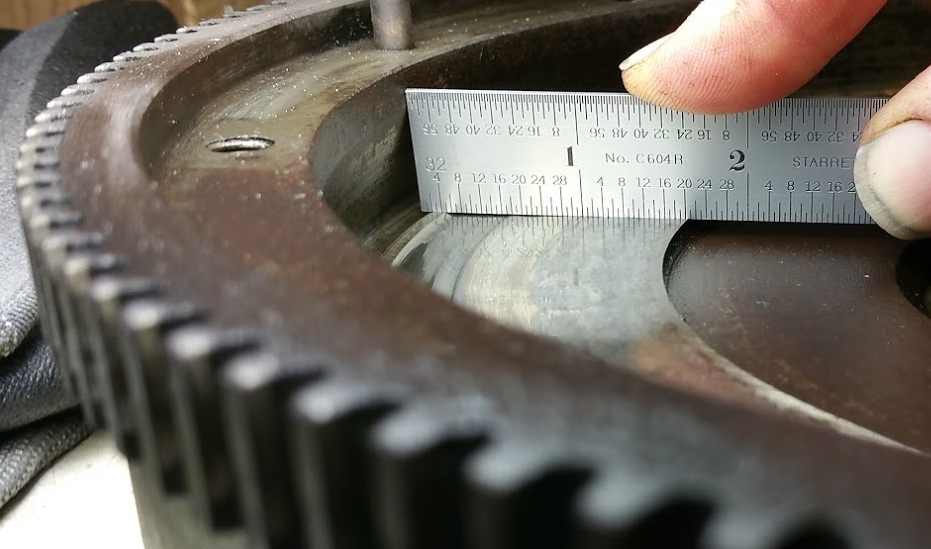 |
|
|
|
| Jameel |
Mar 29 2016, 09:46 PM
Post
#28
|
|
Member Group: Members Posts: 98 Joined: 6-October 15 From: Iowa Member No.: 19,239 Region Association: None |
Dropped my flywheel off this morning, got it back the same day!
 |
|
|
|
| mepstein |
Mar 29 2016, 09:57 PM
Post
#29
|
|
914-6 GT in waiting Group: Members Posts: 19,254 Joined: 19-September 09 From: Landenberg, PA/Wilmington, DE Member No.: 10,825 Region Association: MidAtlantic Region |
I just resurfaced mine for my six conversion. For $40 bucks there's no reason not to. Also replaced the bearing. It's just a couple dollars.
|
|
|
|
| Dr Evil |
Mar 29 2016, 10:41 PM
Post
#30
|
|
Send me your transmission! Group: Members Posts: 22,995 Joined: 21-November 03 From: Loveland, OH 45140 Member No.: 1,372 Region Association: MidAtlantic Region |
Things to consider:
1) Was the flywheel finished to within spec? 2) You may need to grind down, ever so specifically, the tops of the new flywheel bolts as the clutch disk will sit closer to the crank and will often hit the bolt heads after an aggressive resurface such as what looks like you needed. 3) You will need to put another washer under the pivot ball. Use teflon tape as the threads with two washers will seep oil pretty easily. |
|
|
|
| Dr Evil |
Mar 29 2016, 10:44 PM
Post
#31
|
|
Send me your transmission! Group: Members Posts: 22,995 Joined: 21-November 03 From: Loveland, OH 45140 Member No.: 1,372 Region Association: MidAtlantic Region |
Specs
Attached image(s) 
|
|
|
|
| Dave_Darling |
Mar 30 2016, 04:23 PM
Post
#32
|
|
914 Idiot Group: Members Posts: 14,981 Joined: 9-January 03 From: Silicon Valley / Kailua-Kona Member No.: 121 Region Association: Northern California |
One thing I spotted early on--one of the wires going to the interior light is always "hot". So either disconnect the battery or tape up the black wire so it doesn't short to ground.
--DD |
|
|
|
| Jameel |
Mar 30 2016, 07:24 PM
Post
#33
|
|
Member Group: Members Posts: 98 Joined: 6-October 15 From: Iowa Member No.: 19,239 Region Association: None |
QUOTE(mepstein @ Mar 29 2016, 07:57 PM) I just resurfaced mine for my six conversion. For $40 bucks there's no reason not to. Also replaced the bearing. It's just a couple dollars. I didn't get off quite so cheap. Mine was $73. But I ain't complaining! QUOTE(Dr Evil @ Mar 29 2016, 08:41 PM) Things to consider: 1) Was the flywheel finished to within spec? ***Yes. I got the print from one of your old threads. And confirmed with Brad M. before heading to the shop. 2) You may need to grind down, ever so specifically, the tops of the new flywheel bolts as the clutch disk will sit closer to the crank and will often hit the bolt heads after an aggressive resurface such as what looks like you needed. ***They took off 0.023". And I still got groove. I was planning on grinding off .023" 3) You will need to put another washer under the pivot ball. Use teflon tape as the threads with two washers will seep oil pretty easily. ***Ok, will do. QUOTE(Dave_Darling @ Mar 30 2016, 02:23 PM) One thing I spotted early on--one of the wires going to the interior light is always "hot". So either disconnect the battery or tape up the black wire so it doesn't short to ground. --DD I disconnected the batt. But I'll remember that! |
|
|
|
| 76-914 |
Mar 31 2016, 08:09 AM
Post
#34
|
|
Repeat Offender & Resident Subaru Antagonist Group: Members Posts: 13,494 Joined: 23-January 09 From: Temecula, CA Member No.: 9,964 Region Association: Southern California |
|
|
|
|
| Jameel |
Mar 31 2016, 06:22 PM
Post
#35
|
|
Member Group: Members Posts: 98 Joined: 6-October 15 From: Iowa Member No.: 19,239 Region Association: None |
While studying the good Dr.'s DVD I've been trying to examine my trans without taking it completely apart. I'm just not ready for that yet. So here's some things I've observed so far.
First gear dog teeth look to be nice and pointed. 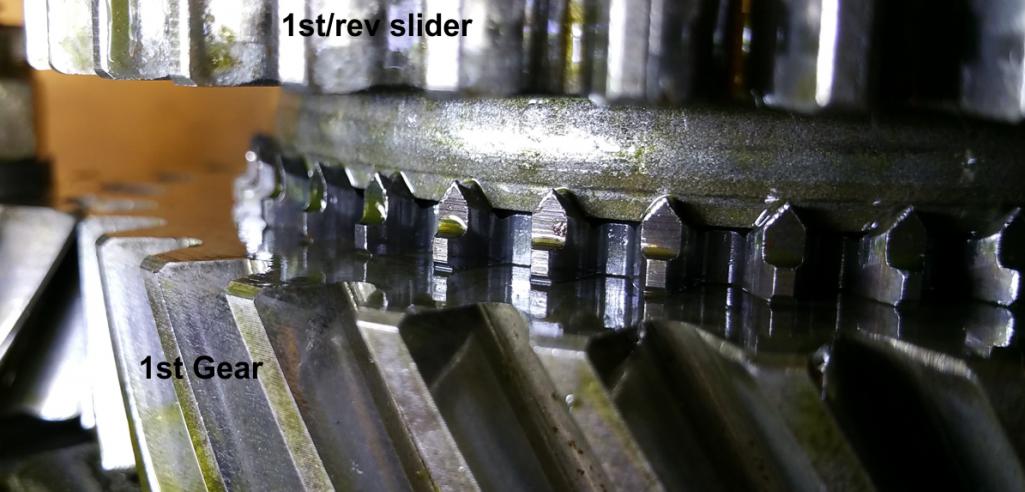 Here's another grouping of teeth. The synchro ring is worn. 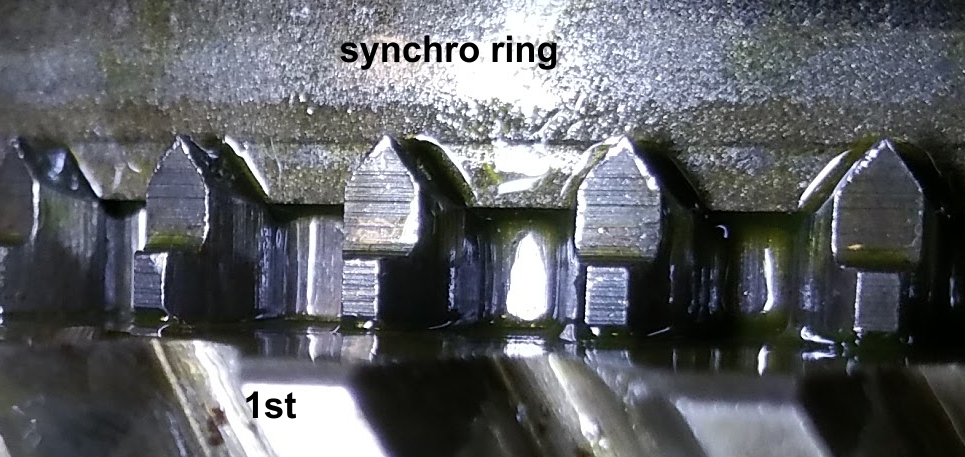 The 1st/rev slider teeth are definitely worn in comparison. 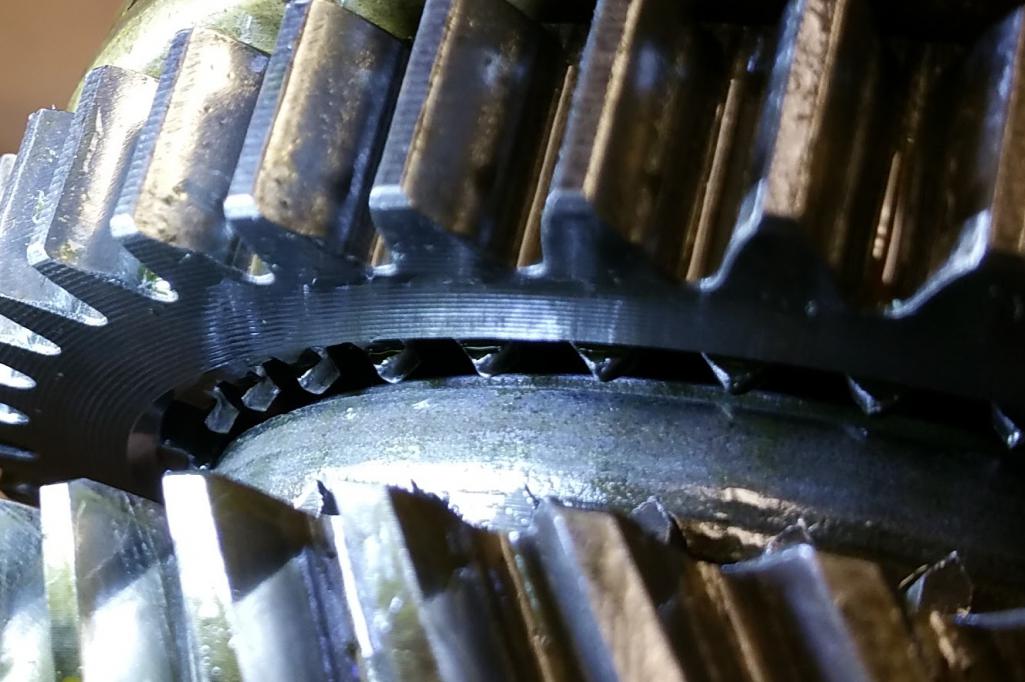 And here are the 3rd gear teeth. 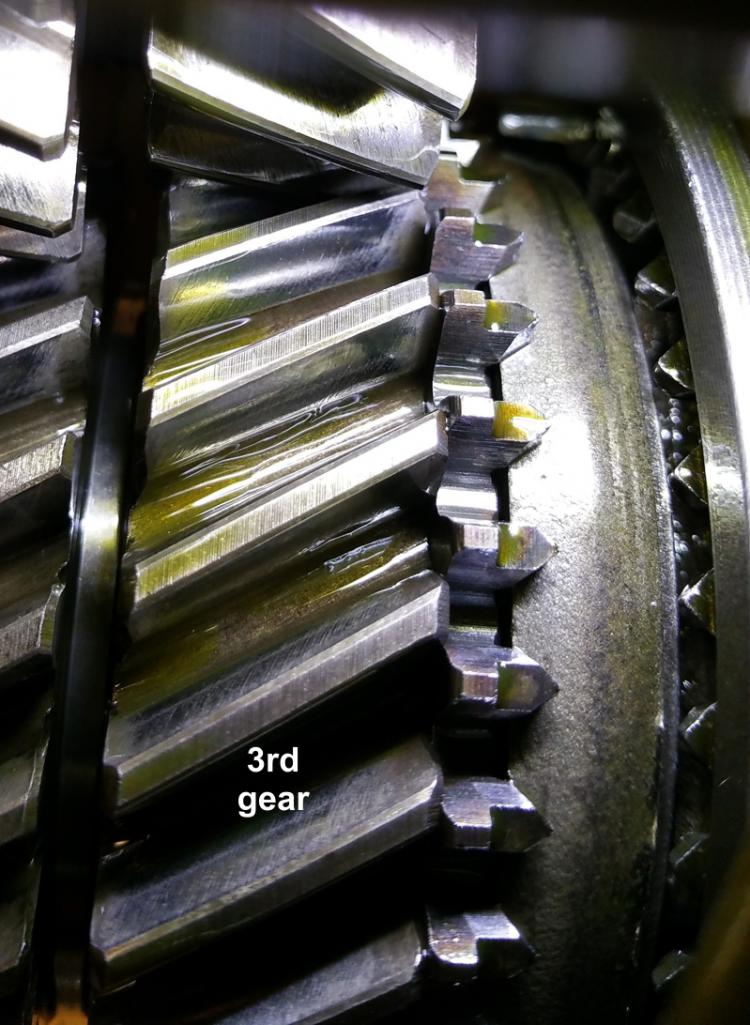 And here's a video of my pinion shaft. What do you think of the play there? https://www.youtube.com/watch?v=E_7_PfFhaYI |
|
|
|
| forrestkhaag |
Mar 31 2016, 06:30 PM
Post
#36
|
|
Senior Member Group: Members Posts: 935 Joined: 21-April 14 From: Scottsdale, Arizona Member No.: 17,273 Region Association: Southwest Region |
Amen on Tangerine's products RE: side shift conversions
And Dr. Evil's work is unparalleled in the rebuild of the 901 area. You can pluck the gear stack and he will tune that up to spec and with a little educated effort, you can reassemble your gearbox after enduring his video set as a baseline edu......... Who is the gal in Dr. Evil's Hollywood production?... |
|
|
|
| stugray |
Mar 31 2016, 07:17 PM
Post
#37
|
|
Advanced Member Group: Members Posts: 3,824 Joined: 17-September 09 From: Longmont, CO Member No.: 10,819 Region Association: None |
The dog teeth in those pics look pretty good.
One more thing to consider checking: When I installed the side shift in a tail shift car, I also installed a rennshifter. When the shifter was in the extreme 4th/5th plane, the bottom of the lever on the rennshifter was dragging on the clutch cable tube. I ground the side of the rennshifter a little and moved the shifter up 1/4" with an aluminum plate. I was reminded of this when I was in my tunnel checking for a clearance issue where you cut into the tunnel above. There WAS an interference at that point you identified, so I enlarged that hole a little towards the driver's side. I used a 3" hole saw instead of your angle grinder above and had enough room to fit a 90deg porting tool in there. Thanks for showing that or I wouldnt have known to check it. I always could hear something rubbing beside the seat when I shifted it without the engine drowning out the sound |
|
|
|
| Jameel |
Apr 6 2016, 08:30 AM
Post
#38
|
|
Member Group: Members Posts: 98 Joined: 6-October 15 From: Iowa Member No.: 19,239 Region Association: None |
QUOTE(stugray @ Mar 31 2016, 05:17 PM) The dog teeth in those pics look pretty good. One more thing to consider checking: When I installed the side shift in a tail shift car, I also installed a rennshifter. When the shifter was in the extreme 4th/5th plane, the bottom of the lever on the rennshifter was dragging on the clutch cable tube. I ground the side of the rennshifter a little and moved the shifter up 1/4" with an aluminum plate. I was reminded of this when I was in my tunnel checking for a clearance issue where you cut into the tunnel above. There WAS an interference at that point you identified, so I enlarged that hole a little towards the driver's side. I used a 3" hole saw instead of your angle grinder above and had enough room to fit a 90deg porting tool in there. Thanks for showing that or I wouldnt have known to check it. I always could hear something rubbing beside the seat when I shifted it without the engine drowning out the sound Wow! I helped somebody. Cool. I guess they are right, although slow and dangerous behind the wheel, senior citizens can still serve a purpose. So what are we doing with a firewall boot for side shift conversions since neither style work with a conversion? I hunted around for a pic, but didn't find one. 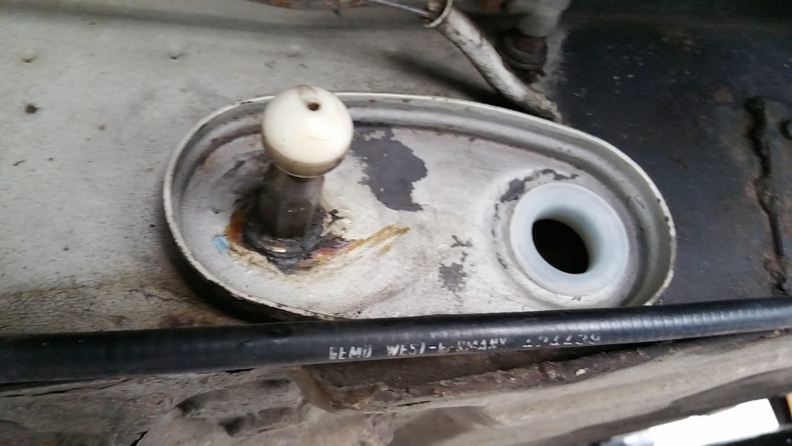 |
|
|
|
| Phoenix-MN |
Apr 6 2016, 09:02 AM
Post
#39
|
|
Senior Member Group: Members Posts: 927 Joined: 23-January 04 From: ST. Bonifacius,MN Member No.: 1,590 |
QUOTE(Jameel @ Apr 6 2016, 06:30 AM) QUOTE(stugray @ Mar 31 2016, 05:17 PM) The dog teeth in those pics look pretty good. One more thing to consider checking: When I installed the side shift in a tail shift car, I also installed a rennshifter. When the shifter was in the extreme 4th/5th plane, the bottom of the lever on the rennshifter was dragging on the clutch cable tube. I ground the side of the rennshifter a little and moved the shifter up 1/4" with an aluminum plate. I was reminded of this when I was in my tunnel checking for a clearance issue where you cut into the tunnel above. There WAS an interference at that point you identified, so I enlarged that hole a little towards the driver's side. I used a 3" hole saw instead of your angle grinder above and had enough room to fit a 90deg porting tool in there. Thanks for showing that or I wouldnt have known to check it. I always could hear something rubbing beside the seat when I shifted it without the engine drowning out the sound Wow! I helped somebody. Cool. I guess they are right, although slow and dangerous behind the wheel, senior citizens can still serve a purpose. So what are we doing with a firewall boot for side shift conversions since neither style work with a conversion? I hunted around for a pic, but didn't find one. There was an article in Panorama many years ago on making an adapter plate to use the late style boot, I'll see if I can find it. Found it (IMG:style_emoticons/default/smile.gif) http://www.914world.com/bbs2/index.php?showtopic=88401 |
|
|
|
| Jameel |
Apr 6 2016, 01:31 PM
Post
#40
|
|
Member Group: Members Posts: 98 Joined: 6-October 15 From: Iowa Member No.: 19,239 Region Association: None |
My Panoramas only go back to '92. Any chance you've got a scan?
|
|
|
|
|
1 User(s) are reading this topic (1 Guests and 0 Anonymous Users)
0 Members:

|
Lo-Fi Version | Time is now: 3rd May 2024 - 07:11 AM |
Invision Power Board
v9.1.4 © 2024 IPS, Inc.