|
|
|
Porsche, and the Porsche crest are registered trademarks of Dr. Ing. h.c. F. Porsche AG.
This site is not affiliated with Porsche in any way. Its only purpose is to provide an online forum for car enthusiasts. All other trademarks are property of their respective owners. |
|
|

  |

| SKL1 |
 May 30 2016, 04:50 PM May 30 2016, 04:50 PM
Post
#1
|
|
Senior Member  Group: Members Posts: 1,598 Joined: 19-February 11 From: north Scottsdale Member No.: 12,732 Region Association: Upper MidWest |
Replacing tie-rods after getting the new ones discussed here elsewhere.
Working on the first one on driver's side- when turning the castellated nut on top the whole thing turns. Thought about trying to put some pressure on the shaft with vise grips but the shaft and nut still turn as a unit... Any ideas? I'm stuck before I've almost gotten started! 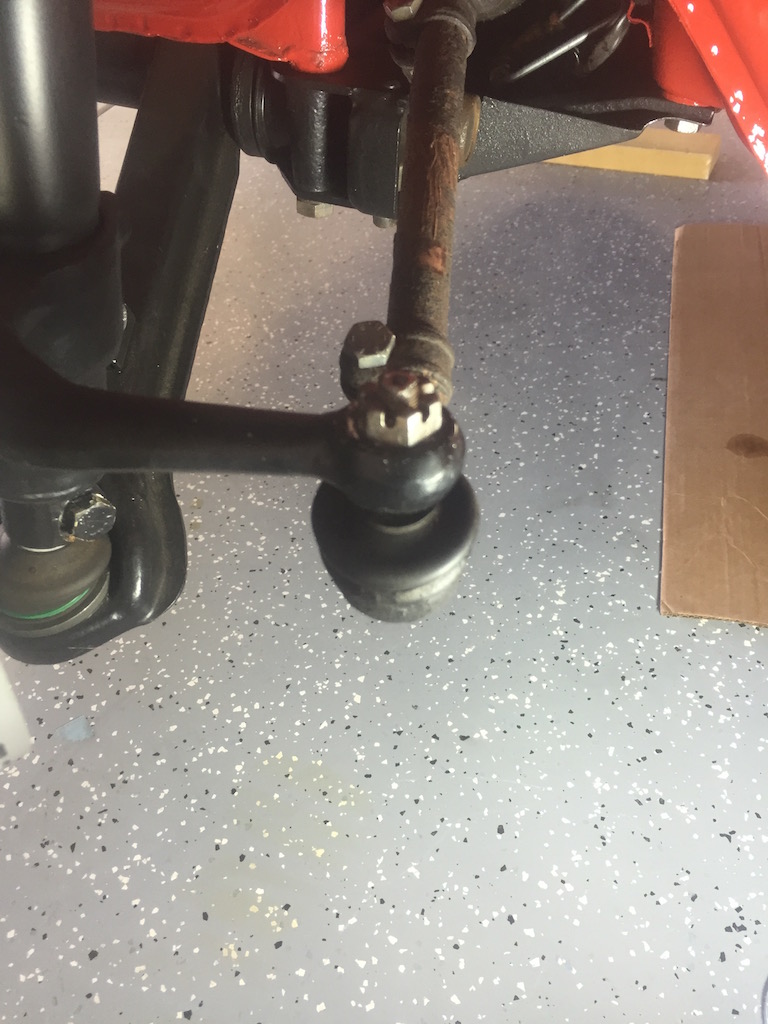 |
   |

 
|
| ejm |
May 30 2016, 05:02 PM
Post
#2
|
|
I can see the light at the end of the tunnel Group: Members Posts: 2,690 Joined: 3-February 03 From: Massachusetts Member No.: 224 Region Association: None |
An air gun would spin the nut right off. Since you are replacing the tie rod you could use a cutoff tool or hacksaw to remove the nut by making a couple of cuts so it can be split with a chisel. Lacking those tools try putting a jack under the tie rod to force the tie rod end taper up into the steering arm and see if the nut turns.
|
|
|
|
| rhodyguy |
May 30 2016, 05:16 PM
Post
#3
|
|
Chimp Sanctuary NW. Check it out. Group: Members Posts: 22,075 Joined: 2-March 03 From: Orion's Bell. The BELL! Member No.: 378 Region Association: Galt's Gulch |
I don't see signs of any penetrant.
|
|
|
|
| jim_hoyland |
May 30 2016, 05:16 PM
Post
#4
|
|
Get that VIN ? Group: Members Posts: 9,277 Joined: 1-May 03 From: Sunset Beach, CA Member No.: 643 Region Association: Southern California |
Overnight application of PB Blaster....
Keep posting your progress; several of us are getting ready to do this. Any 1st hand tips will be appreciatef |
 |
|
| SKL1 |
May 30 2016, 06:02 PM
Post
#5
|
|
Senior Member Group: Members Posts: 1,598 Joined: 19-February 11 From: north Scottsdale Member No.: 12,732 Region Association: Upper MidWest |
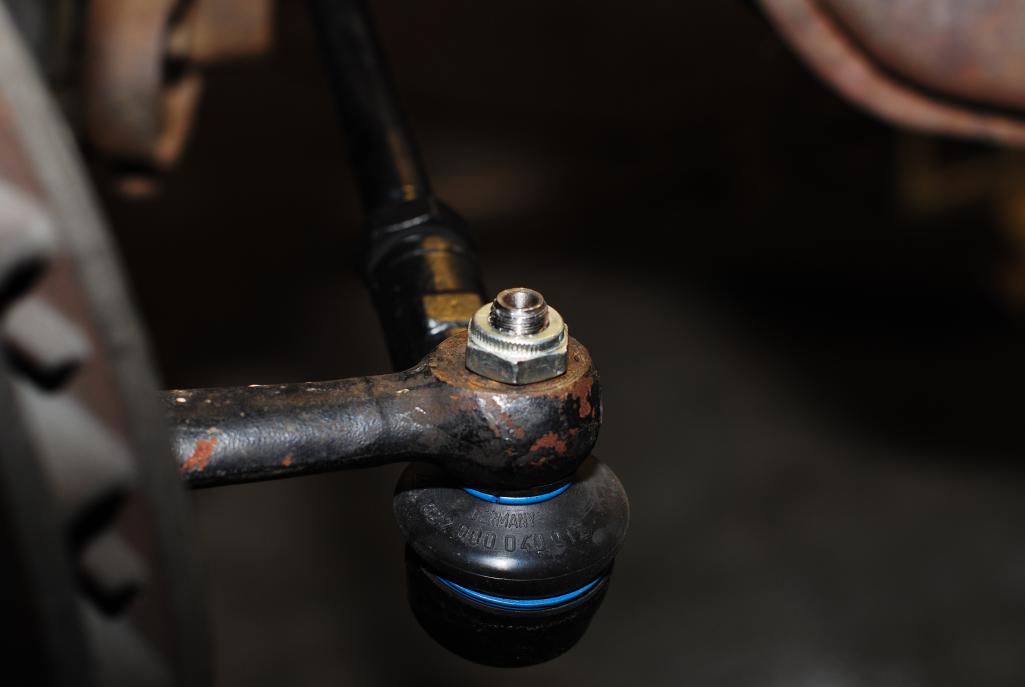
Penetrating oil on the driver's side- pass nut came off easily. Put on separator tool and turned it pretty damned tight and it hasn't popped off yet.
Will keep trying. As per usual, it is taking a lot longer than I thought... I'm sure Murphy is alive and well- he usually is.  |
|
|
|
| ejm |
May 30 2016, 06:06 PM
Post
#6
|
|
I can see the light at the end of the tunnel Group: Members Posts: 2,690 Joined: 3-February 03 From: Massachusetts Member No.: 224 Region Association: None |
That tool is doing nothing. Flip it around so it's trying to push the threaded stud out of the arm.
|
|
|
|
| ndfrigi |
May 30 2016, 06:15 PM
Post
#7
|
|
Advanced Member Group: Members Posts: 2,928 Joined: 21-August 11 From: Orange County Member No.: 13,474 Region Association: Southern California |
QUOTE(ejm @ May 30 2016, 05:06 PM)  That tool is doing nothing. Flip it around so it's trying to push the threaded stud out of the arm. yup not the right tool. |
|
|
|
| somd914 |
May 30 2016, 06:20 PM
Post
#8
|
|
Member Group: Members Posts: 1,171 Joined: 21-February 11 From: Southern Maryland Member No.: 12,741 Region Association: MidAtlantic Region |
On the driver's side, agree to soak it with PB Blaster or Kroil, don't waste your time with WD-40 or Liquid Wrench. Try putting heat to also, and don't worry about melting the boot since you are replacing it.
In case like yours I've had limited luck putting a jack under the ball joint to force it tighter, have had great luck cutting them off with a cutoff wheel on a grinder. Also in some cases I've been able to grab the shaft under the boot with vice grips and prevent the shaft from turning while getting the top nut off. |
|
|
|
| jack20 |
May 30 2016, 06:32 PM
Post
#9
|
|
Member Group: Members Posts: 406 Joined: 7-November 14 From: Granite Bay, CA Member No.: 18,099 Region Association: Northern California |
I used an impact wrench to spin the nut off and an $8 splitter from Harbor Freight. Worked great.
|
|
|
|
| rhodyguy |
May 30 2016, 09:37 PM
Post
#10
|
|
Chimp Sanctuary NW. Check it out. Group: Members Posts: 22,075 Joined: 2-March 03 From: Orion's Bell. The BELL! Member No.: 378 Region Association: Galt's Gulch |
Put the nut on flush with the threads, block the arm tight close to the balljoint, spray it good, and strike the nut medium hard with a hammer. Repeat. Take your time, be patient.
It will just about fall out using an pneumatic air chisel with a pointed bit working the top of the stud. |
|
|
|
| mgp4591 |
May 30 2016, 09:55 PM
Post
#11
|
|
914 Guru Group: Members Posts: 5,369 Joined: 1-August 12 From: Salt Lake City Ut Member No.: 14,748 Region Association: Intermountain Region |
QUOTE(ejm @ May 30 2016, 06:06 PM) That tool is doing nothing. Flip it around so it's trying to push the threaded stud out of the arm. I wuz thinkin' that looked mighty peculiar... (IMG:style_emoticons/default/blink.gif) If you're not trying to save the end, you could take some vice grips and grab the upper part of the stud and use your open end to get it started... (IMG:style_emoticons/default/idea.gif) |
|
|
|
| SKL1 |
May 30 2016, 10:00 PM
Post
#12
|
|
Senior Member Group: Members Posts: 1,598 Joined: 19-February 11 From: north Scottsdale Member No.: 12,732 Region Association: Upper MidWest |
Thanks for the tips- that embarassing I had the tool upside down (IMG:style_emoticons/default/sad.gif)
Oh well, after doing this stuff for 40+ years you can still learn something!! Will play with both sides tomorrow! |
|
|
|
| 914_teener |
May 31 2016, 08:05 AM
Post
#13
|
|
914 Guru Group: Members Posts: 5,197 Joined: 31-August 08 From: So. Cal Member No.: 9,489 Region Association: Southern California |
I am in the camp of getting the cut off wheel and carefully grinding off the end of the tie rod stud. I then soaked it overnight with PB Blaster and with a ball joint seperator popped out the stud end of the ties rod. I really think it is how badly rusted the tie rod end is to the strut arm end. Looks like you have already done the ball joint.
One other thing, while you are soaking the PB Blaster on the tie rod ends...soak the other ends that go into the rack end so that they will spin out easily. This is one of those jobs that you will probably only do once...hopefully. So take your time. |
|
|
|
| SKL1 |
May 31 2016, 03:01 PM
Post
#14
|
|
Senior Member Group: Members Posts: 1,598 Joined: 19-February 11 From: north Scottsdale Member No.: 12,732 Region Association: Upper MidWest |
This is becoming quite the project... got the first one off but couldn't back the bolt out of the inner part so unscrewed it from the rack. I'm not putting the turbo tie rods on this car but rather the OEM type so was hoping not to remove the fitting from the rack itself.
The bolt seems to be stripped as it turns but obviously bent the U shaped fitting as noted in the picture. And it won't back out! Looks like a trip to Lowes to get a Dremel or hacksaw and some new 10mm bolts for the new tie-rod... 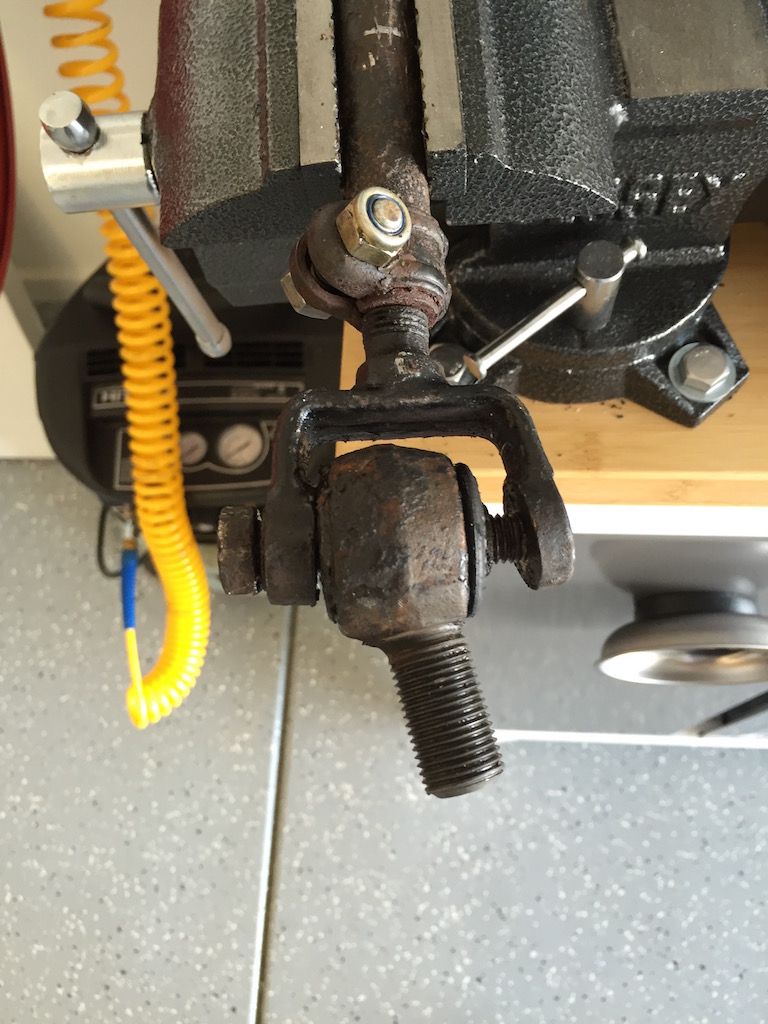 |
|
|
|
| ndfrigi |
May 31 2016, 03:12 PM
Post
#15
|
|
Advanced Member Group: Members Posts: 2,928 Joined: 21-August 11 From: Orange County Member No.: 13,474 Region Association: Southern California |
QUOTE(SKL1 @ May 31 2016, 02:01 PM) This is becoming quite the project... got the first one off but couldn't back the bolt out of the inner part so unscrewed it from the rack. I'm not putting the turbo tie rods on this car but rather the OEM type so was hoping not to remove the fitting from the rack itself. The bolt seems to be stripped as it turns but obviously bent the U shaped fitting as noted in the picture. And it won't back out! Looks like a trip to Lowes to get a Dremel or hacksaw and some new 10mm bolts for the new tie-rod... you mentioned sir you are installing turbo tie rod, i dont think you need that whole part from u-joint to the other end of the tie rod. turbo tie rod is a complete from tie rod to other end to replace ujoint to single or with middle bolt screwed to the inner steering. 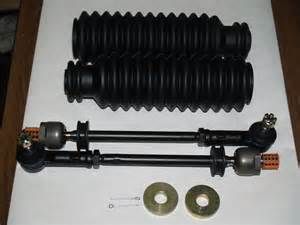 ooops mis read, you are installing oem part, sir why not just install turbo tie rod? i'm sure several members recommend turbo tie rod. |
|
|
|
| SKL1 |
May 31 2016, 03:23 PM
Post
#16
|
|
Senior Member Group: Members Posts: 1,598 Joined: 19-February 11 From: north Scottsdale Member No.: 12,732 Region Association: Upper MidWest |
I got a turbo kit for my '71 but think I'll go ahead and put it on the '73 and not screw with those inner parts!
If anyone needs new 2 OEM style tie rods, I'll give 'em a good deal! |
|
|
|
| whitetwinturbo |
May 31 2016, 03:41 PM
Post
#17
|
|
Honey, does this wing make my ass look fat? Group: Members Posts: 1,391 Joined: 22-October 11 From: Newport Beach/Kalefornya/USA Member No.: 13,704 Region Association: Southern California |
The bolt has a slight tapper where it's wider at the bottom generating friction to "seat" it tightly. Rust on the exposed bolt has even greater friction when it "freezes" to the old castle nut. PB Blaster overnight worked well.
 I have been searching for a thread that describes torque specs for the newer apparently 'one-use' [non-castle/cottor pin] for replacement turbo tie rod nut. Where's that information/thread? |
|
|
|
| 914_teener |
May 31 2016, 03:43 PM
Post
#18
|
|
914 Guru Group: Members Posts: 5,197 Joined: 31-August 08 From: So. Cal Member No.: 9,489 Region Association: Southern California |
QUOTE(SKL1 @ May 31 2016, 02:23 PM) I got a turbo kit for my '71 but think I'll go ahead and put it on the '73 and not screw with those inner parts! If anyone needs new 2 OEM style tie rods, I'll give 'em a good deal! I put mine in the round plastic container.....40 gallon type container. |
|
|
|
| whitetwinturbo |
May 31 2016, 03:45 PM
Post
#19
|
|
Honey, does this wing make my ass look fat? Group: Members Posts: 1,391 Joined: 22-October 11 From: Newport Beach/Kalefornya/USA Member No.: 13,704 Region Association: Southern California |
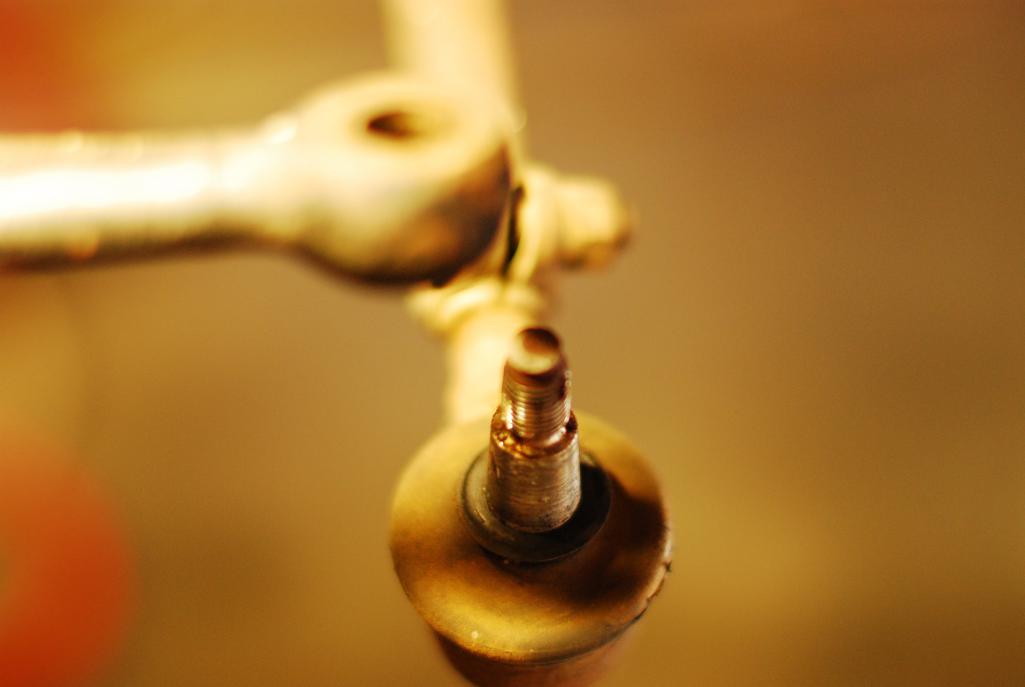
Here's the newer "one use" nut that replaces the castle nut. I can not find a source for the correct torque spec for this item and no directions came with the kit. Who knows where to find the correct torque spec?
 |
|
|
|
| 914_teener |
May 31 2016, 05:02 PM
Post
#20
|
|
914 Guru Group: Members Posts: 5,197 Joined: 31-August 08 From: So. Cal Member No.: 9,489 Region Association: Southern California |
You know......after a tiny bit of thought...my turbo kit used a castlated nut and cotter pin. I bought the kit almost more than a year ago from PMB. Couple of things crossed my mind using a jam or nylock nut. First is that you can't get a reliable torque setting using a nut like that and referencing a factory value. The other is that while the nut won't have a tendency to back off and get loose....I.d sleep better knowing there is a cotter pin there and or at least checking them from time to time if I was aggressively driving the car a lot.
Just saying. |
|
|
|
|
1 User(s) are reading this topic (1 Guests and 0 Anonymous Users)
0 Members:

|
Lo-Fi Version | Time is now: 8th May 2024 - 05:16 PM |
Invision Power Board
v9.1.4 © 2024 IPS, Inc.