|
|
|
Porsche, and the Porsche crest are registered trademarks of Dr. Ing. h.c. F. Porsche AG.
This site is not affiliated with Porsche in any way. Its only purpose is to provide an online forum for car enthusiasts. All other trademarks are property of their respective owners. |
|
|

  |

| Dion |
 Jul 23 2020, 06:56 AM Jul 23 2020, 06:56 AM
Post
#81
|
|
RN  Group: Members Posts: 2,926 Joined: 16-September 04 From: Audubon,PA Member No.: 2,766 Region Association: MidAtlantic Region |
Looking great there Frank. Enjoy seeing your posts. I don’t know if there’s a wrong way
with regards to the jack. Mines been apart so long I don’t remember. Have a look at the manual or originality forum. I guess as long as it’s secured and tidy your good to go. Keep at it. (IMG:style_emoticons/default/beerchug.gif) |
   |

 
|
| Frankvw |
Jul 29 2020, 12:13 PM
Post
#82
|
|
working on my first 914 ! Group: Members Posts: 653 Joined: 13-April 16 From: Holland, the Netherlands Member No.: 19,896 Region Association: Europe |
Ok, time for the next thing on the list. Removal/disassembly of the front brakes.
Something I kept on moving forward on the list, but since the list is getting shorter, I can almost not do any cherrypicking anymore. So.....frontbrakes. I have to say up front that disassembly of the frontcalipers was by far one the most challenging things I have done sofar. I rather do the flexible hoses in the rear again (IMG:style_emoticons/default/smile.gif) These sucker-pistons were stuck. And that after sitting for 2,5 year or so ? wow, that went fast. I first removed the caliper and watching it sitting on the bench I thought : how can I ever get them out ? I remounted them on the car and 'kicked' them loose using the brakepedal with a pad in between. then took them off the car again, removed the pad, and with a lot of swearing and blocking and holding and pushing with the airmethod....they came out. Speed of sound. I read online they could come flying out using the airmethod and that you have to watch your fingers. Well...all I can say is that I was happy I did not put my finger in between the pistons when one side came out. Wow. We are talking E=MC2 force kind of thing with the speed of sound. You cannot see it come out, a loud bang is all that tells you it came out, which is of course the breaking of the soundbarrier, that is obvious. 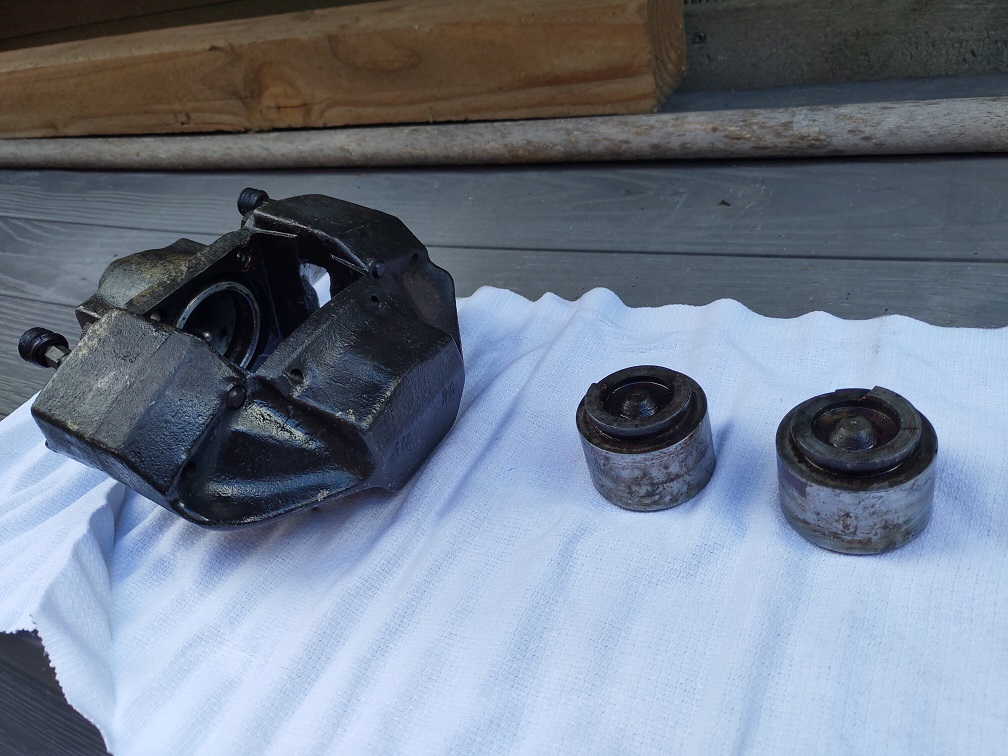 |
|
|
|
| Frankvw |
Aug 12 2020, 01:38 PM
Post
#83
|
|
working on my first 914 ! Group: Members Posts: 653 Joined: 13-April 16 From: Holland, the Netherlands Member No.: 19,896 Region Association: Europe |
Ok, time for the front brakes. In my last post I already took off the calipers and took the pistons out. My ears are still recovering from the loud bang they came out with.....
So....All sorted, cleaned, new parts and seals. ATE brakepiston grease for internals is used. Caliper could not be 'zinced' this time, because of corona they do not accept 'walk-ins' at the moment. But for the rest all redone. As a quick reminder : This is what it looked like before the start:  Wheel could not be turned at this point. Calipers stuck. This car drove and braked when I bought it, standstill did not do it good...that goes very fast I have to say. Then after the cleaning and repacking and turning etc: 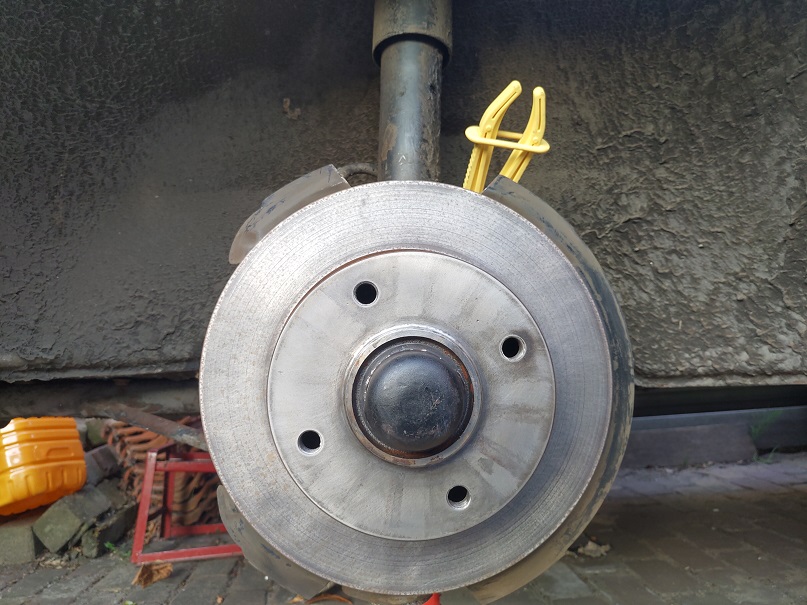 Spins already much better. Clean look without the caliper. Shaved look. But we need a caliper. The new parts for the caliper, pads, hardware and flexline: 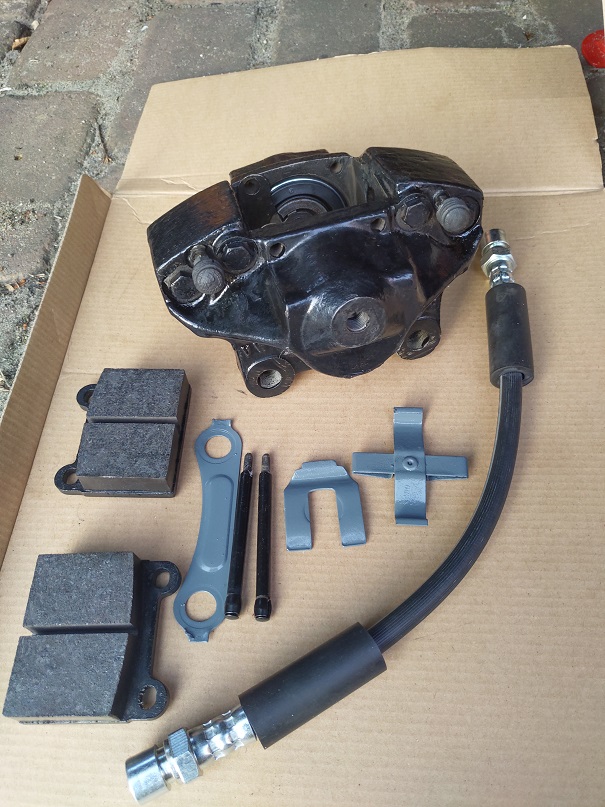 And I dealt with the 20degree myth (IMG:style_emoticons/default/smile.gif) I had the positioners, so that helped me already 50% And then all together. You see the new flexline as well in the picture. 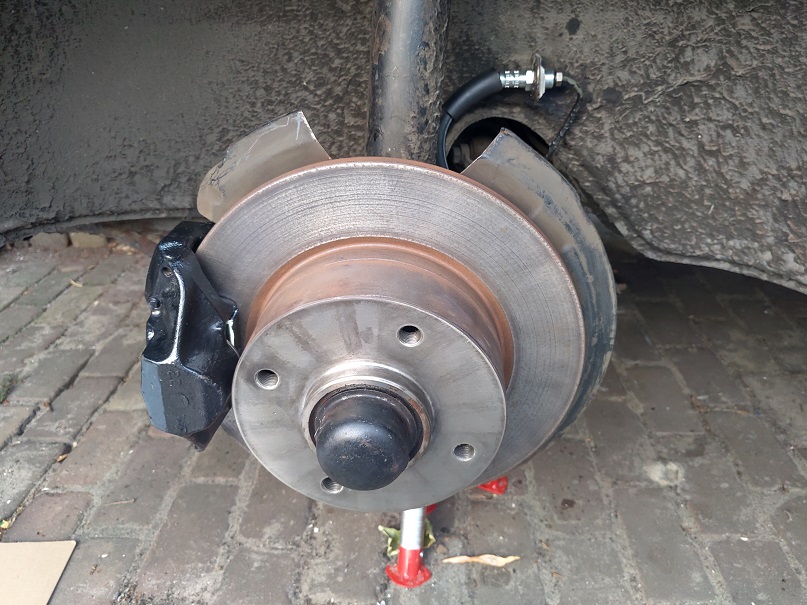 A very rewarding job. I still have to bleed the brakes, but first the other side must undergo the same procedure, all stuff is prepared, so the other side will be next soon. It feels really good that after this the wheel spins so freely by hand....yeah baby ! |
|
|
|
| SirAndy |
Aug 12 2020, 02:03 PM
Post
#84
|
|
Resident German Group: Admin Posts: 42,479 Joined: 21-January 03 From: Oakland, Kalifornia Member No.: 179 Region Association: Northern California |
|
|
|
|
| bkrantz |
Aug 12 2020, 08:48 PM
Post
#85
|
|
914 Guru Group: Members Posts: 8,683 Joined: 3-August 19 From: SW Colorado Member No.: 23,343 Region Association: Rocky Mountains |
QUOTE(Frankvw @ Aug 12 2020, 01:38 PM)  As a quick reminder : This is what it looked like before the start: Wheel could not be turned at this point. Calipers stuck. This car drove and braked when I bought it, standstill did not do it good...that goes very fast I have to say. You need to move to a place with less humidity! |
|
|
|
| Frankvw |
Aug 23 2020, 09:47 AM
Post
#86
|
|
working on my first 914 ! Group: Members Posts: 653 Joined: 13-April 16 From: Holland, the Netherlands Member No.: 19,896 Region Association: Europe |
talking about humidity:
BEFORE 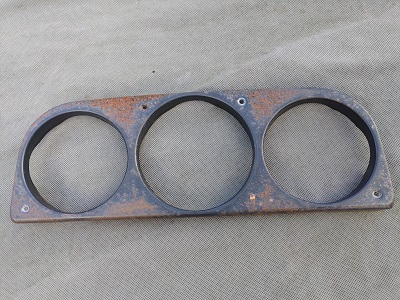 and AFTER 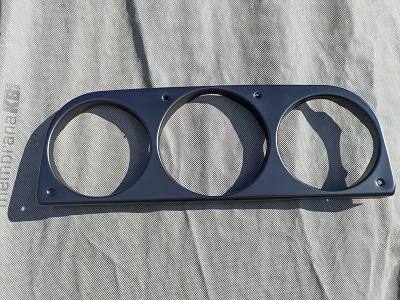 super difference !  another rewarding job and another tick on the to-do list ! |
|
|
|
| fiacra |
Aug 23 2020, 12:18 PM
Post
#87
|
|
Person.Woman.Man.Camera.TV. = MCI Group: Members Posts: 725 Joined: 1-March 19 From: East Bay Region - California Member No.: 22,920 Region Association: Northern California |
Looks great!
|
|
|
|
| Mikey914 |
Aug 23 2020, 01:11 PM
Post
#88
|
|
The rubber man Group: Members Posts: 12,782 Joined: 27-December 04 From: Hillsboro, OR Member No.: 3,348 Region Association: None |
Lookin great, keep it up. (IMG:style_emoticons/default/beer3.gif)
|
|
|
|
| Frankvw |
Sep 2 2020, 09:36 AM
Post
#89
|
|
working on my first 914 ! Group: Members Posts: 653 Joined: 13-April 16 From: Holland, the Netherlands Member No.: 19,896 Region Association: Europe |
Ok, time for something else !
The Curse Of The Rattling Rear Window Rattling rear window, so interior is out, and rear window is out. Old seal between window and car came out hard, in 1 piece. I did not have the 2 small pieces that are below the window on the lower sill, so I guess it was out before at some point in time. 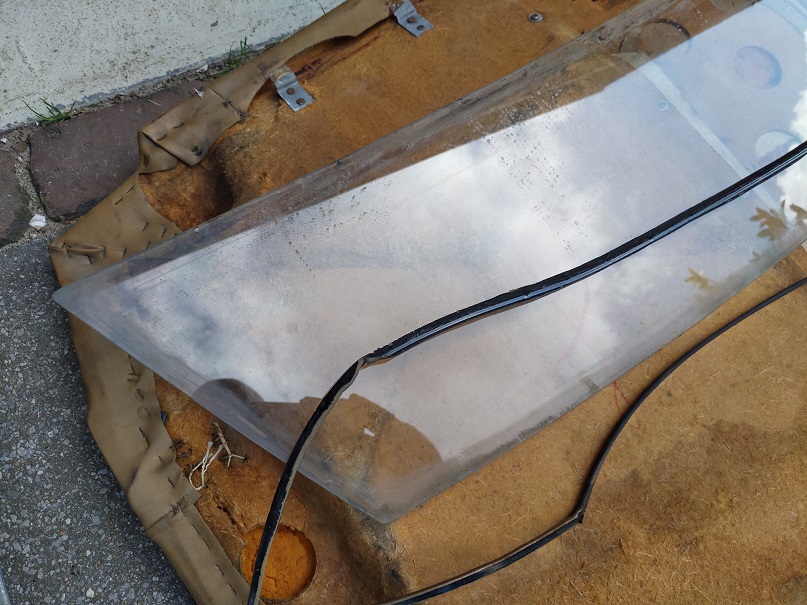 Backpad needs some love and care, I will see how to repair it a bit, lower part backside is a bit crusty at some parts. The old rubber bewteen window and engine lid was not re-usable (IMG:style_emoticons/default/biggrin.gif) 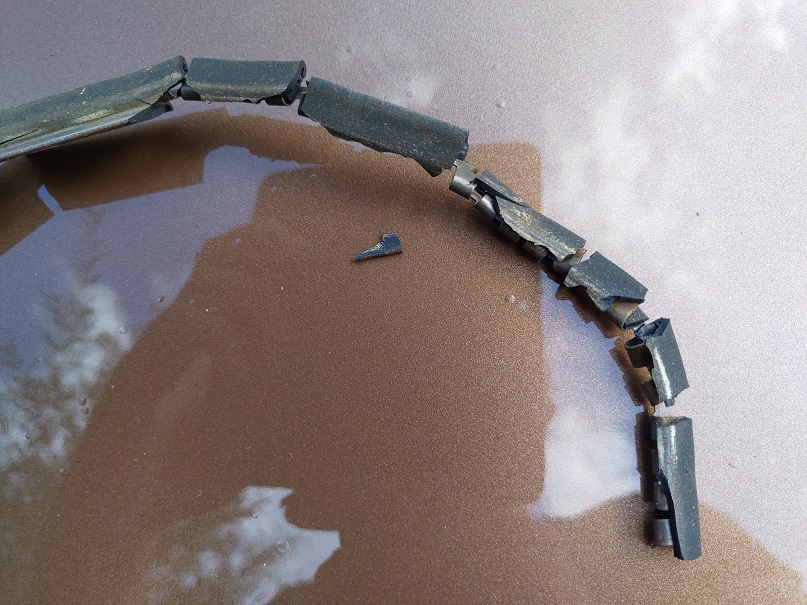 So, enter the dragon, a new one ! 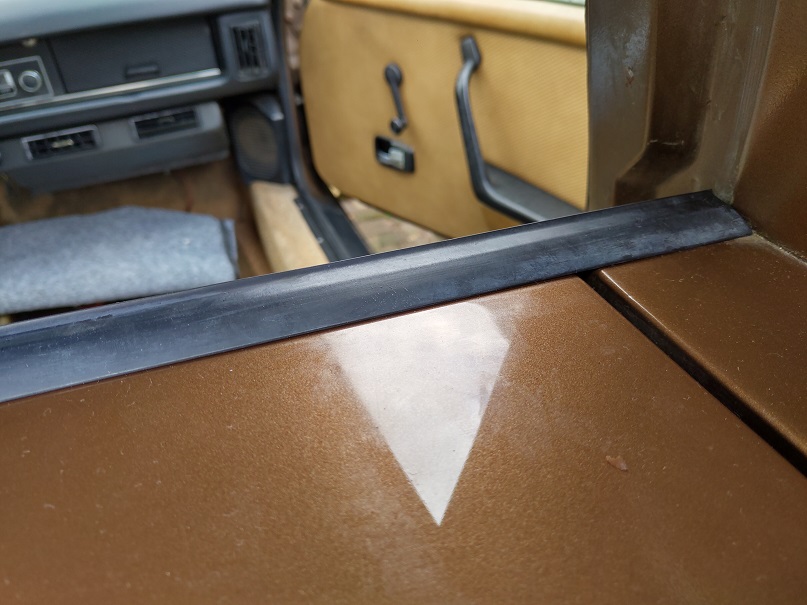 to be continued ! |
|
|
|
| brcacti |
Sep 2 2020, 02:14 PM
Post
#90
|
|
1974 914 1.8 Group: Members Posts: 674 Joined: 17-July 19 From: PHX AZ 60 miles south Member No.: 23,302 Region Association: Southwest Region |
Good luck with your purchase
(IMG:style_emoticons/default/welcome.png) I also did what you're doing about fixing many little things when you buy the car. So far I have fixed 25 tiny to small things, mechanic one too to try to get it as perfect as I can. Not perfect but I have a good survivor. |
|
|
|
| Frankvw |
Sep 5 2020, 04:38 AM
Post
#91
|
|
working on my first 914 ! Group: Members Posts: 653 Joined: 13-April 16 From: Holland, the Netherlands Member No.: 19,896 Region Association: Europe |
While the interior was out for the re-sticking of the rear window, I noticed that behind the backpad I had some hungry rodents in the past over there.
They were not there for long, no droppings or smell but I guess they were a bit hungry. Porsche wires are a delicacy ! 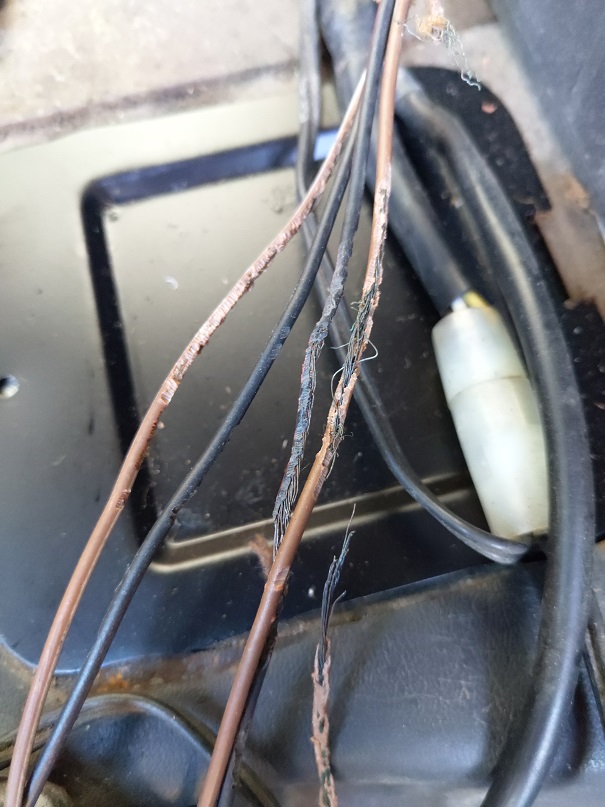 Interesting they even chewed total through one wire, they are not thick, but still a challenge for a small rodent you would think. I guess if you are really hungry you also eat copper ! But a new piece is already created, a great little job for a rainy day. I ordered 'color-correct' wires to work with, at least the colors match up with the original situation. I did not remember which terminal was 12V so I did use isolated endclamps on all to be sure. 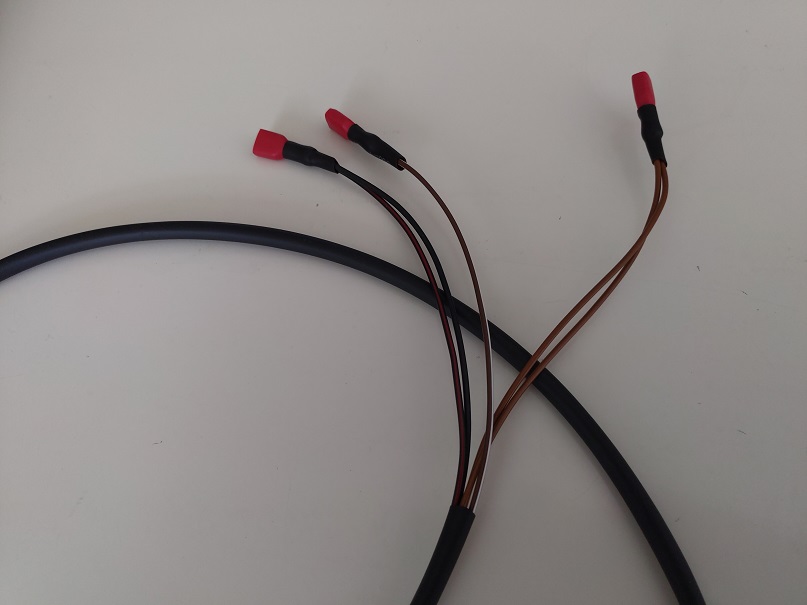 So, this was a job NOT on the list. Always a surprise where one job leads to ! |
|
|
|
| porschetub |
Sep 6 2020, 12:26 AM
Post
#92
|
|
914 Guru Group: Members Posts: 5,099 Joined: 25-July 15 From: New Zealand Member No.: 18,995 Region Association: None |
Wow great progress,I stopped making lists of jobs I just forge on as s#it happens and I'am slowly getting ahead and so happy doing it that way,works for me.
One of my fav colours you have,keep up the good work. |
 |
|
| Frankvw |
Sep 17 2020, 07:36 AM
Post
#93
|
|
working on my first 914 ! Group: Members Posts: 653 Joined: 13-April 16 From: Holland, the Netherlands Member No.: 19,896 Region Association: Europe |
so, rear window is in again, tape across the lower horizontal glass (forgot that first) and the surrounding parts are back in, new seatbelts and also the new wiring for the backpad/interior light (see earlier post where the mice ate it) ....backpad back in....and the test to see if the light did work now....
Funny fact : @DRPHIL914 did his interior light work on the same day as me. So....same(*) picture as @DRPHIL914 (IMG:style_emoticons/default/smile.gif) 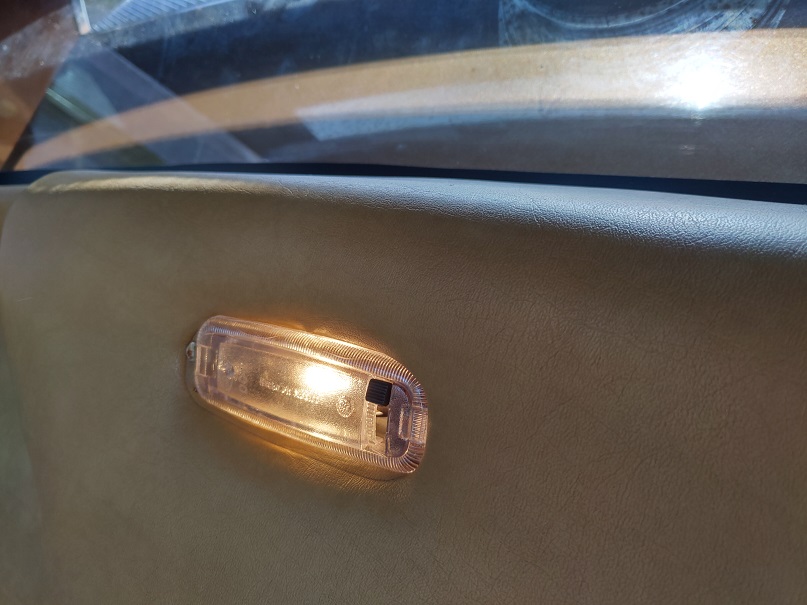 (*) not really the same, his came from sierraMadre and my interiorlight was what came with the car and clearly states 'made in mexico' and that is what is really noticable. No idea what person designed this part, but what was he thinking ?? just put 'made in mexico'it all across the front lense ?? (I guess it is a beetle part) |
|
|
|
| DRPHIL914 |
Sep 17 2020, 09:18 AM
Post
#94
|
|
Dr. Phil Group: Members Posts: 5,930 Joined: 9-December 09 From: Kennesaw, GA Member No.: 11,106 Region Association: South East States |
QUOTE(Frankvw @ Sep 17 2020, 09:36 AM) so, rear window is in again, tape across the lower horizontal glass (forgot that first) and the surrounding parts are back in, new seatbelts and also the new wiring for the backpad/interior light (see earlier post where the mice ate it) ....backpad back in....and the test to see if the light did work now.... Funny fact : @DRPHIL914 did his interior light work on the same day as me. So....same(*) picture as @DRPHIL914 (IMG:style_emoticons/default/smile.gif) (*) not really the same, his came from sierraMadre and my interiorlight was what came with the car and clearly states 'made in mexico' and that is what is really noticable. No idea what person designed this part, but what was he thinking ?? just put 'made in mexico'it all across the front lense ?? (I guess it is a beetle part) looks good Frank! i left mine undone for a year, the upholstery guy didn’t cut the hole in the back pad material so i had to get brave enough to cut the hole in vinyl. fun to complete small projects like that! |
|
|
|
| Frankvw |
Sep 22 2020, 05:38 AM
Post
#95
|
|
working on my first 914 ! Group: Members Posts: 653 Joined: 13-April 16 From: Holland, the Netherlands Member No.: 19,896 Region Association: Europe |
@DRPHIL914 (and others) so, the 'made in Mexico' did bother me the whole week. And I sorted it out and bought a used original 914 Hella one. Way better for the ease of mind (IMG:style_emoticons/default/smile.gif)
Made in Germany. 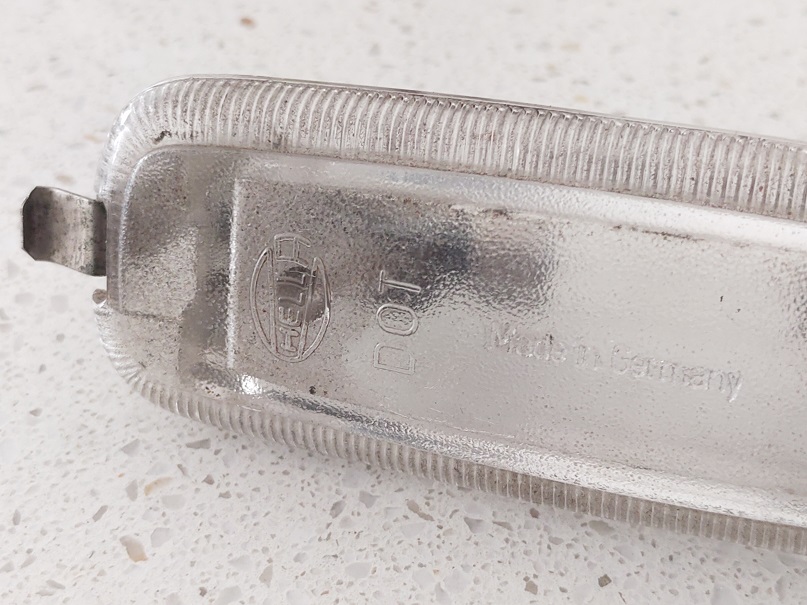 |
|
|
|
| DRPHIL914 |
Sep 22 2020, 06:35 AM
Post
#96
|
|
Dr. Phil Group: Members Posts: 5,930 Joined: 9-December 09 From: Kennesaw, GA Member No.: 11,106 Region Association: South East States |
QUOTE(Frankvw @ Sep 22 2020, 07:38 AM) @DRPHIL914 (and others) so, the 'made in Mexico' did bother me the whole week. And I sorted it out and bought a used original 914 Hella one. Way better for the ease of mind (IMG:style_emoticons/default/smile.gif) Made in Germany. well done! it would not matter to most, but what matters to you is what matters.... now for the trivia of the day, name that tune.... "the lights are one, but no one's home" - name that tune! oh what year, dont google it, first hint- i am a child of the 80's, and it shows when songs like this pop into my head... @Frankvw , my car went in yesterday and is getting Xpel treatment to front of car today! btw the Sierra Madre light i got is a perfect fit, i had 2 other lights that were VW ones that didnt and my original one cracked so wiould not hold the one clip, i could try and JB weld it , but wanted a light in place for the OkteenerPalooza that i am now not going to, (IMG:style_emoticons/default/sad.gif) #kidneystonesuck |
|
|
|
| Frankvw |
Sep 22 2020, 11:21 AM
Post
#97
|
|
working on my first 914 ! Group: Members Posts: 653 Joined: 13-April 16 From: Holland, the Netherlands Member No.: 19,896 Region Association: Europe |
Another job from the list: Operation H4 (or maybe call it Operation Agent Orange, see below)
Operation H4: I still had the USA sealed beams in the headlights, and they are not allowed in the Netherlands and since I have to go for the government official testing to get a Dutch registration on the car, I had to change it to H4 units. It was actually a straight forward job to swap them over, but the small screws that hold the Hella chrome ring were rusted stuck (1 one 1 side, 2 on other side) so I had to drill them out. Nevertheless....all done and result is there ! 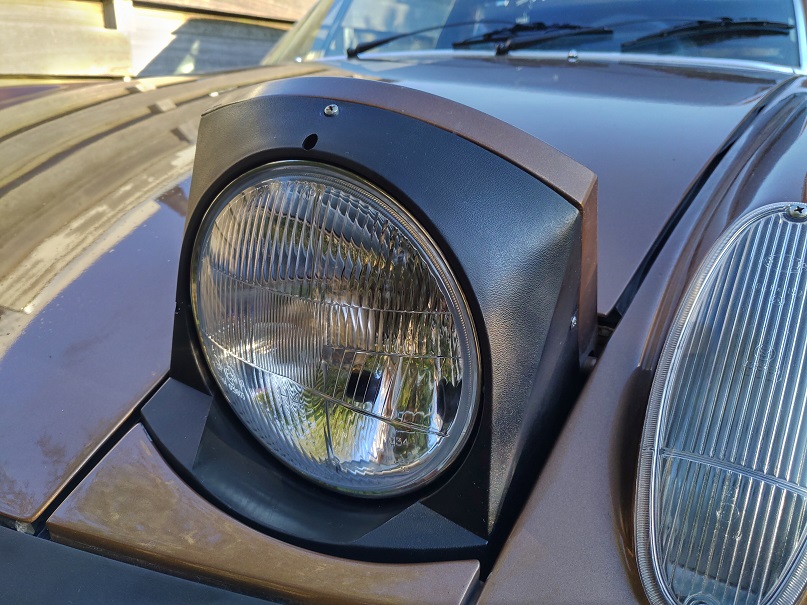 Small tip for the person who is going to work on his/her headlights: place a small rag on the bottom of the headlight bucket before you take out the small screws. They can disappear in the draintube...... As you can see I have black plastic headlight surroundings, not painted and with 914 nrs in it. I followed the post about the white ones, but these are black and look original. Oh yeah....Why Operation Agent Orange ? Because I had to de-leave the headlight buckets, a lot more sand, dirt and leaves than expected in there.... since units, holder and ring were out, easy access to do some vacuumcleaning in there ! Now a clean space again. 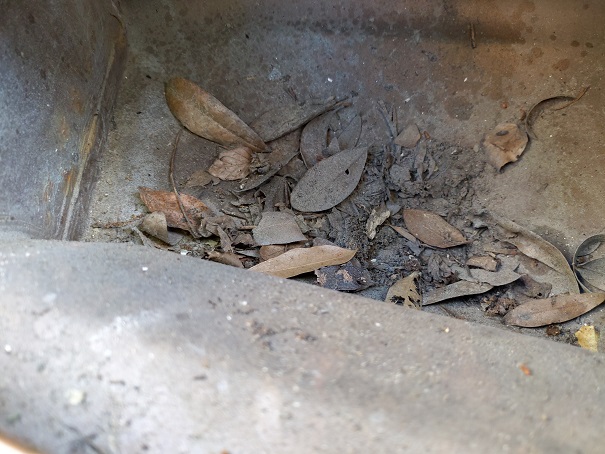 |
|
|
|
| Slam254 |
Sep 22 2020, 12:30 PM
Post
#98
|
|
Newbie Group: Members Posts: 14 Joined: 1-September 20 From: Orinda, CA Member No.: 24,647 Region Association: Northern California |
Love the color and love the wheels ! Great score ! and welcome to 914 World |
|
|
|
| 7TPorsh |
Sep 22 2020, 12:44 PM
Post
#99
|
|
7T Porsh Group: Members Posts: 2,691 Joined: 27-March 06 From: Glendale Ca Member No.: 5,782 Region Association: Southern California |
Did the originals say Made in WEST Germany?
|
|
|
|
| Frankvw |
Oct 2 2020, 03:05 AM
Post
#100
|
|
working on my first 914 ! Group: Members Posts: 653 Joined: 13-April 16 From: Holland, the Netherlands Member No.: 19,896 Region Association: Europe |
many small to-do's are done, worth a lot to me but not really worth a lot of pictures to you.
Interior work.....I already did some work on the backpad and interiorlight, plus I added new securitybelts (the original ones did not retract in a good way anymore and that is a major thingie on the test that is coming) plus: - handbrakelever re-painted - seat handles re-painted - placed back carpets, seats and mats - refitted the gearshiftknob and speakerholders - new pedal rubber - new driverdoor rubber - plastic sills back in place (it looks like a car again instead of a project (IMG:style_emoticons/default/smile.gif) which motivated a lot) I also bought a Momo 8002 adapter I came across online, the solid version, to be used later.... After the Dutch inspection/Test end this month I first focus on the issues found (they always find something on an old car of course) But before I am done to the point to be ready for the test, I still have some work to do........but the to-do list is getting smaller ! @Slam254 Thanks. Wheels are Pacific Italia's, with the 82mm PI caps (I put the caps on my search/wanted-list for some nicer ones) @7TPorsh I will check the headlightsurrounds for the markings later, they will come off again at some point. |
|
|
|
|
1 User(s) are reading this topic (1 Guests and 0 Anonymous Users)
0 Members:

|
Lo-Fi Version | Time is now: 8th May 2026 - 10:45 PM |
Invision Power Board
v9.1.4 © 2026 IPS, Inc.