|
|
|
Porsche, and the Porsche crest are registered trademarks of Dr. Ing. h.c. F. Porsche AG.
This site is not affiliated with Porsche in any way. Its only purpose is to provide an online forum for car enthusiasts. All other trademarks are property of their respective owners. |
|
|

  |

| Cairo94507 |
 Mar 11 2018, 06:30 AM Mar 11 2018, 06:30 AM
Post
#121
|
|
Michael  Group: Members Posts: 10,687 Joined: 1-November 08 From: Auburn, CA Member No.: 9,712 Region Association: Northern California |
In for a penny, in for a pound. (IMG:style_emoticons/default/beerchug.gif)
|
   |

 
|
| Mitox |
Mar 18 2018, 08:07 AM
Post
#122
|
|
Senior Member Group: Members Posts: 549 Joined: 26-October 15 From: SW Virginia Member No.: 19,302 Region Association: South East States |
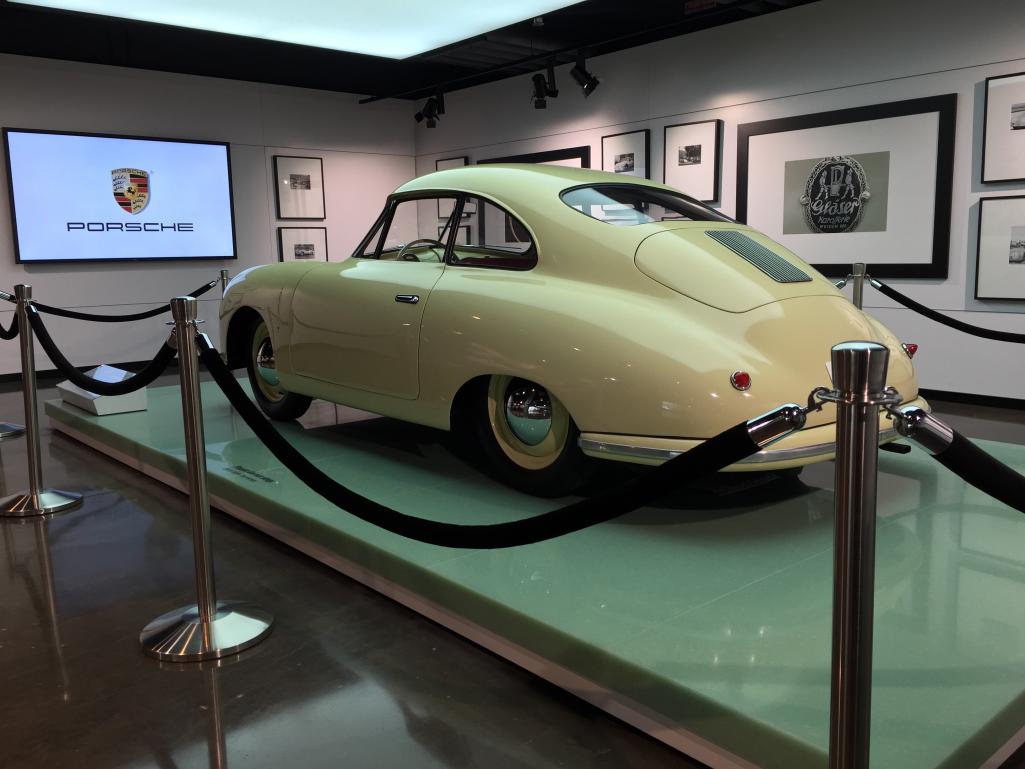
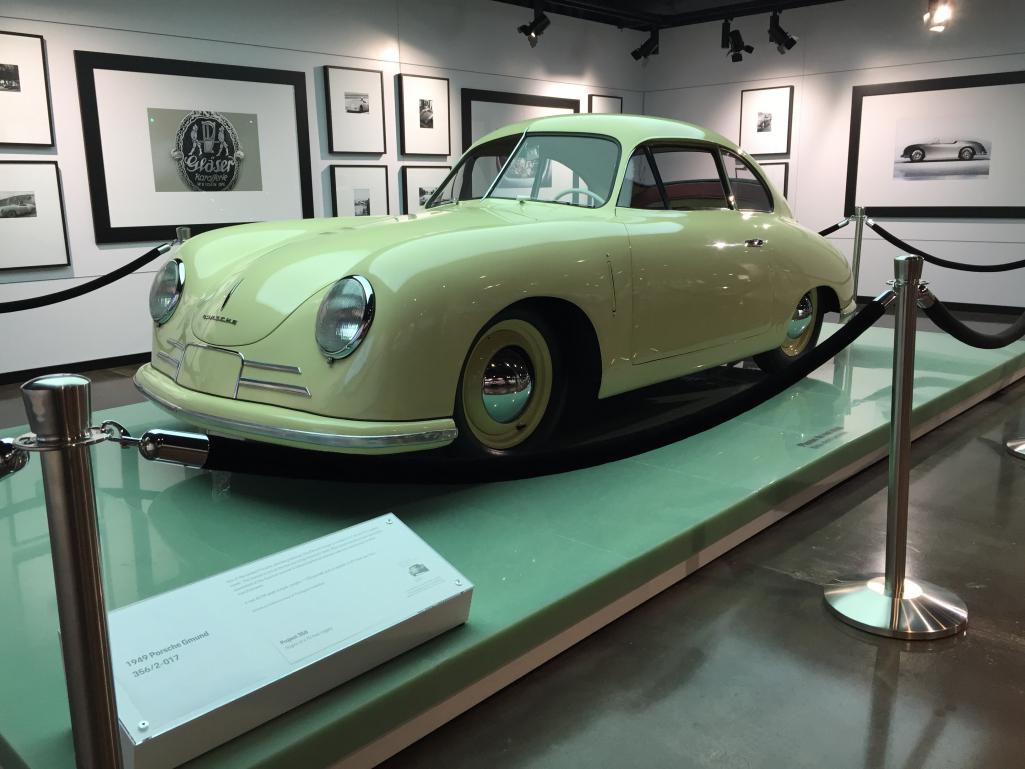
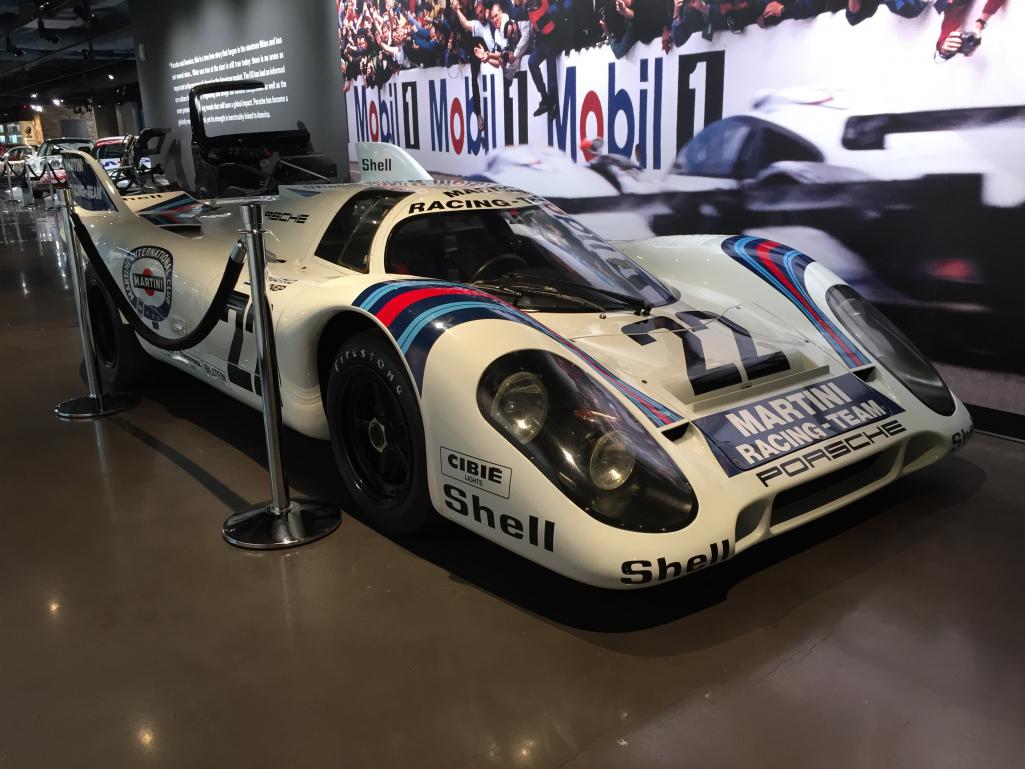
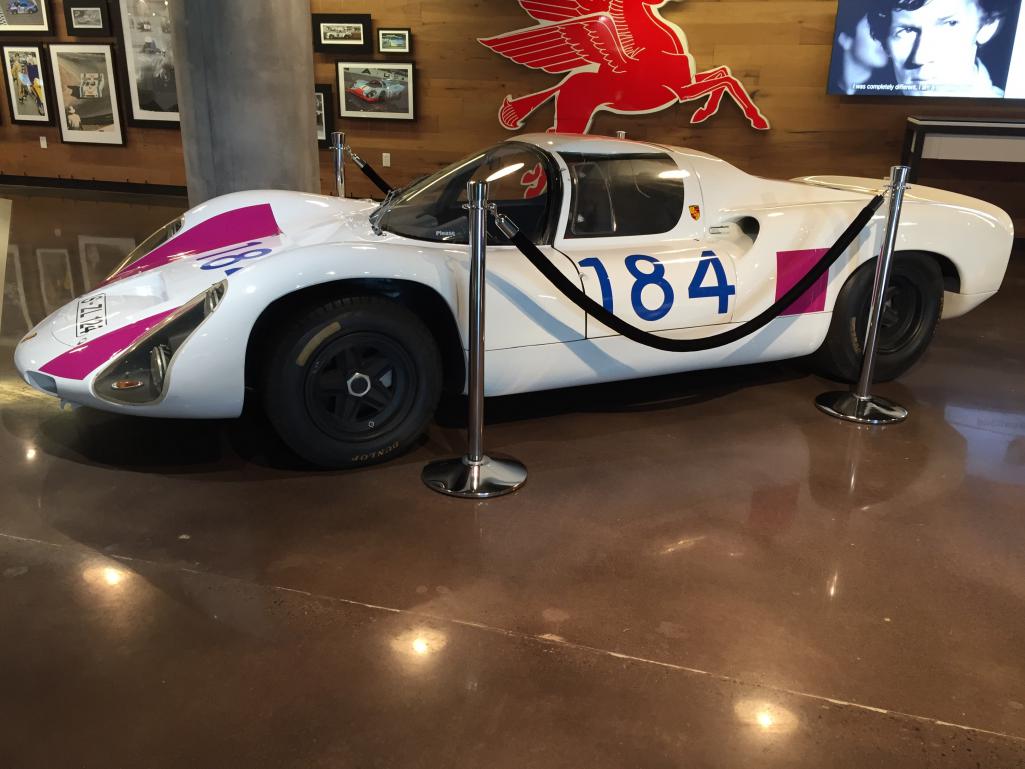
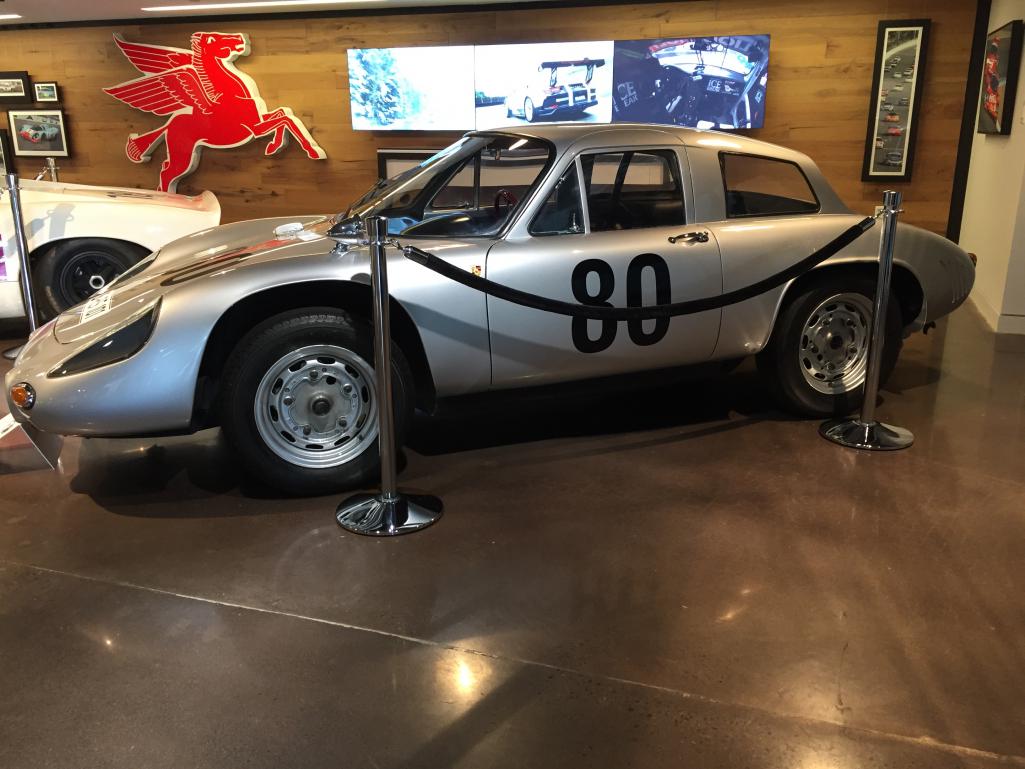
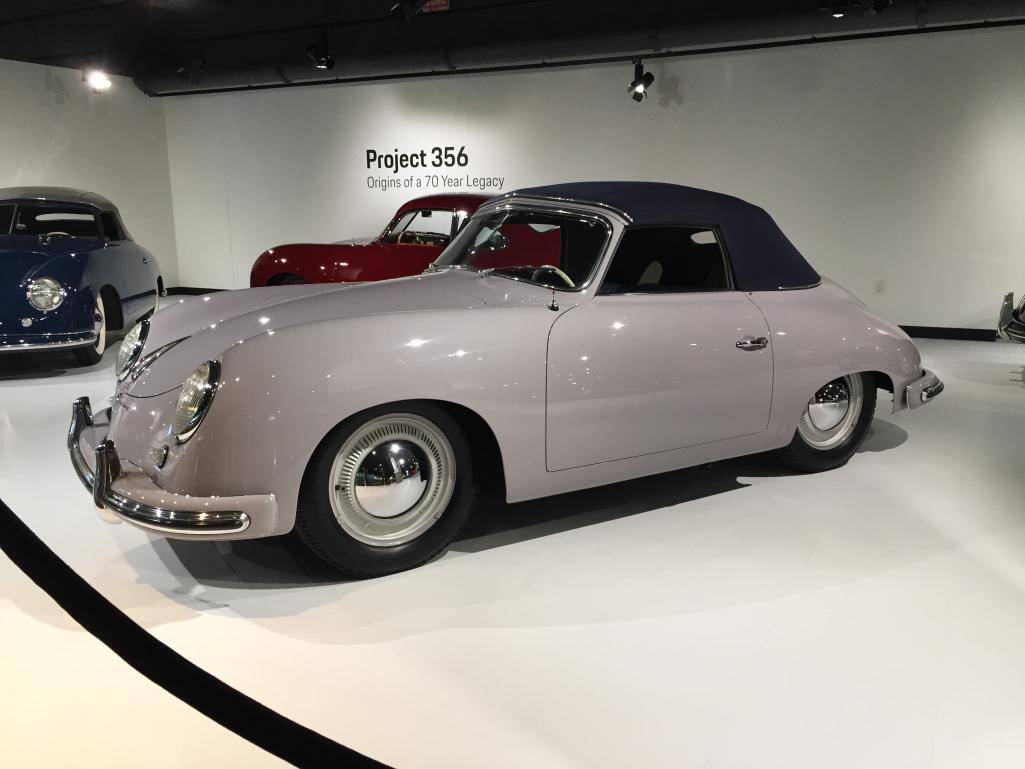
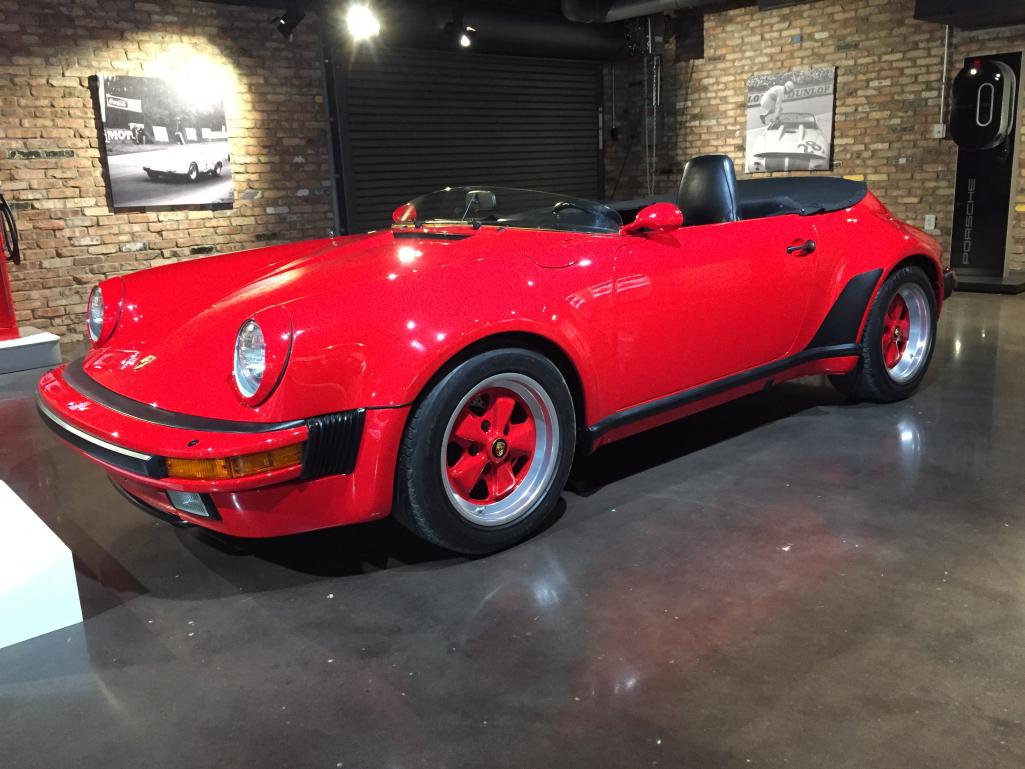
I didn't make any progress on the GT this week due to work travel, but I did get to spend an afternoon at the Porsche headquarters in Atlanta. Here's a few pic from the museum. Next time I'll plan ahead, so I can take a few laps on the track.
  |
|
|
|
| Mitox |
Mar 18 2018, 08:08 AM
Post
#123
|
|
Senior Member Group: Members Posts: 549 Joined: 26-October 15 From: SW Virginia Member No.: 19,302 Region Association: South East States |
  |
|
|
|
| Mitox |
Mar 18 2018, 08:09 AM
Post
#124
|
|
Senior Member Group: Members Posts: 549 Joined: 26-October 15 From: SW Virginia Member No.: 19,302 Region Association: South East States |
  |
|
|
|
| Mitox |
Mar 18 2018, 08:11 AM
Post
#125
|
|
Senior Member Group: Members Posts: 549 Joined: 26-October 15 From: SW Virginia Member No.: 19,302 Region Association: South East States |
  |
|
|
|
| Mitox |
Mar 18 2018, 08:11 AM
Post
#126
|
|
Senior Member Group: Members Posts: 549 Joined: 26-October 15 From: SW Virginia Member No.: 19,302 Region Association: South East States |
 |
|
|
|
| Mitox |
Jul 5 2018, 09:10 PM
Post
#127
|
|
Senior Member Group: Members Posts: 549 Joined: 26-October 15 From: SW Virginia Member No.: 19,302 Region Association: South East States |
It’s been a few months, and most progress isn’t very noticeable. After many hours of heating-scraping-heating-scraping, all of the seam sealer is gone.
Now I get to work on the fun stuff; welding pieces back on. The front jack points and seat/ floor reinforcements were replaced a couple days ago, and I just removed the pedal support bracket. This bracket seems to double as a water scoop, directing water into the hole under the pedals; great design to ensure the area rusts adequately. Maybe I should weld this hole closed instead of relying on the seem sealer method. 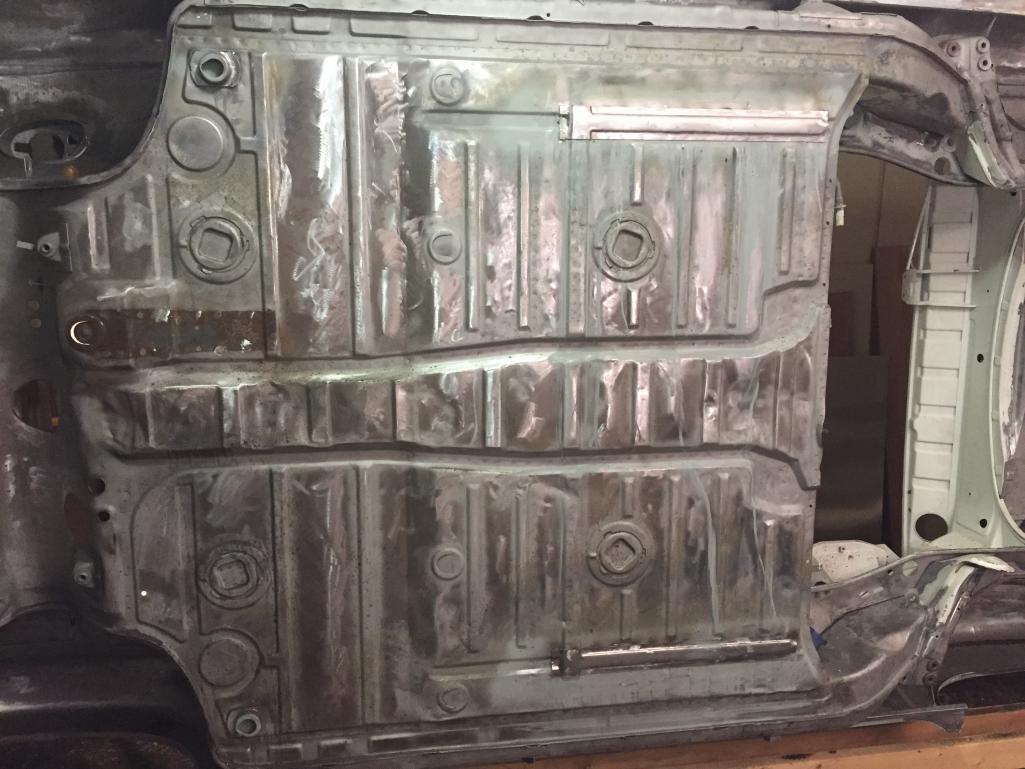 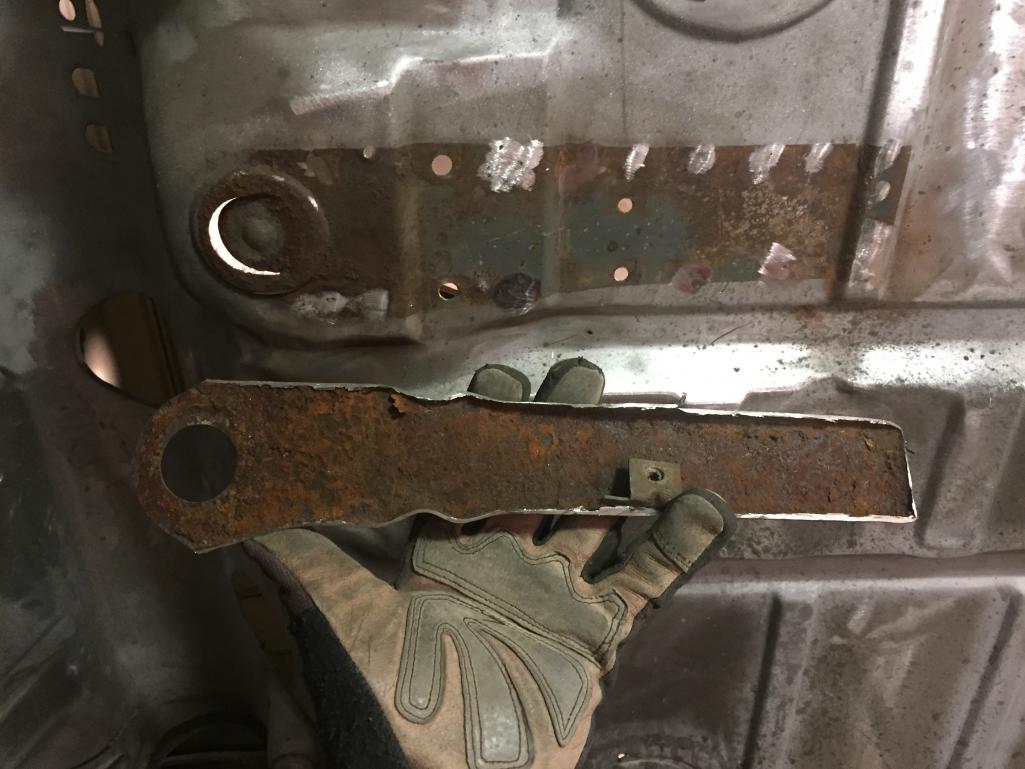 |
|
|
|
| Mitox |
Jul 5 2018, 09:11 PM
Post
#128
|
|
Senior Member Group: Members Posts: 549 Joined: 26-October 15 From: SW Virginia Member No.: 19,302 Region Association: South East States |
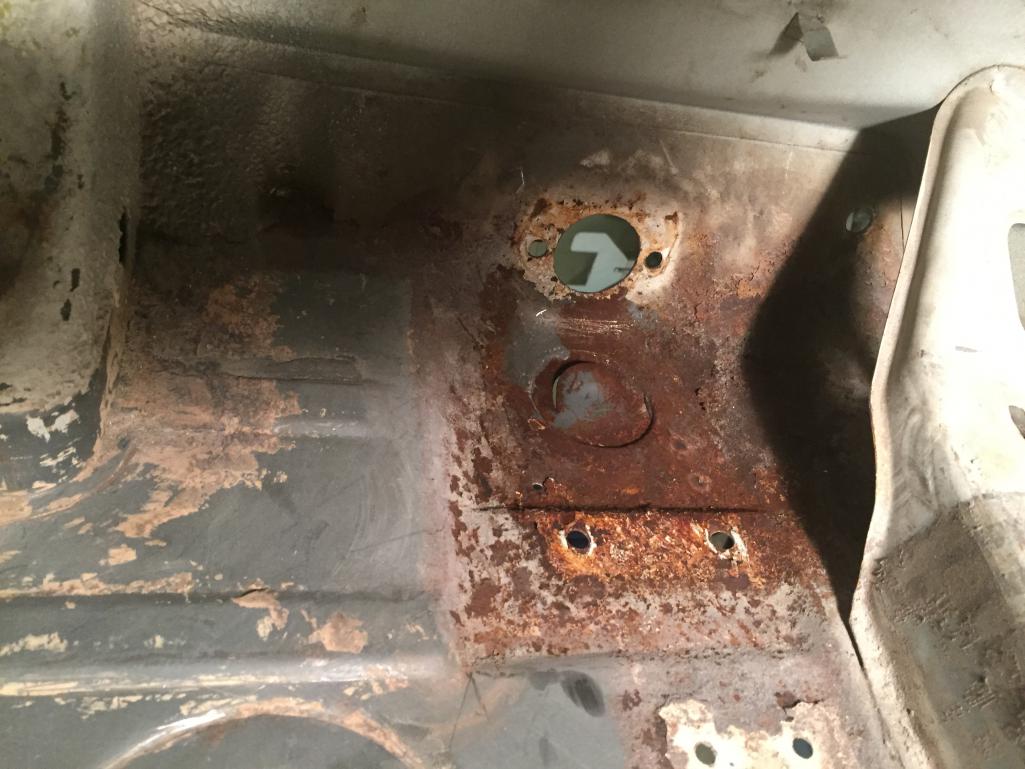
Rust under pedal cluster to clean out. No rust through though.
 |
|
|
|
| bbrock |
Jul 5 2018, 09:22 PM
Post
#129
|
|
914 Guru Group: Members Posts: 5,269 Joined: 17-February 17 From: Montana Member No.: 20,845 Region Association: Rocky Mountains |
That pedal reinforcement is certainly a curious design and I wrestled with what to do about it too. Another issue is that water from wet feet is sure to accumulate around the pedal cluster and migrate through that drain slot or bolt holes into the reinforcement piece. I think the piece is engineered to let that water drain out but it sure is a dumb design. In the end, I just sprayed the inside area with 2 coats of 2K epoxy and put it back together, figuring I'll be dead by the time it becomes a problem again. (IMG:style_emoticons/default/beerchug.gif)
|
|
|
|
| Mitox |
Jul 9 2018, 09:14 PM
Post
#130
|
|
Senior Member Group: Members Posts: 549 Joined: 26-October 15 From: SW Virginia Member No.: 19,302 Region Association: South East States |
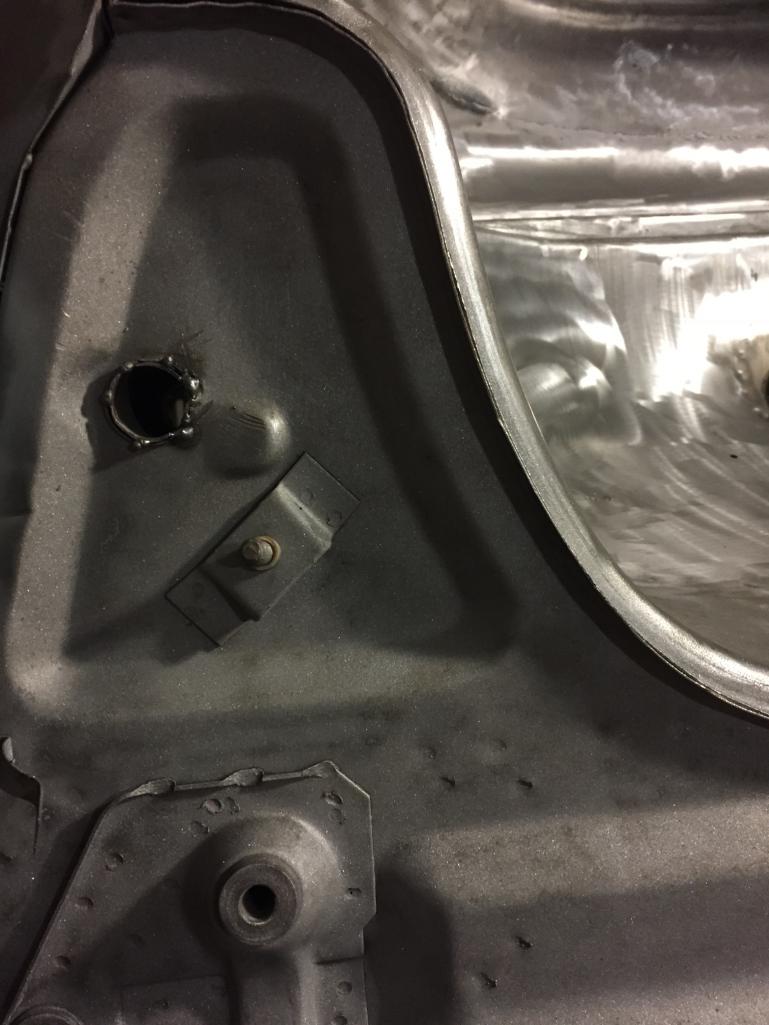
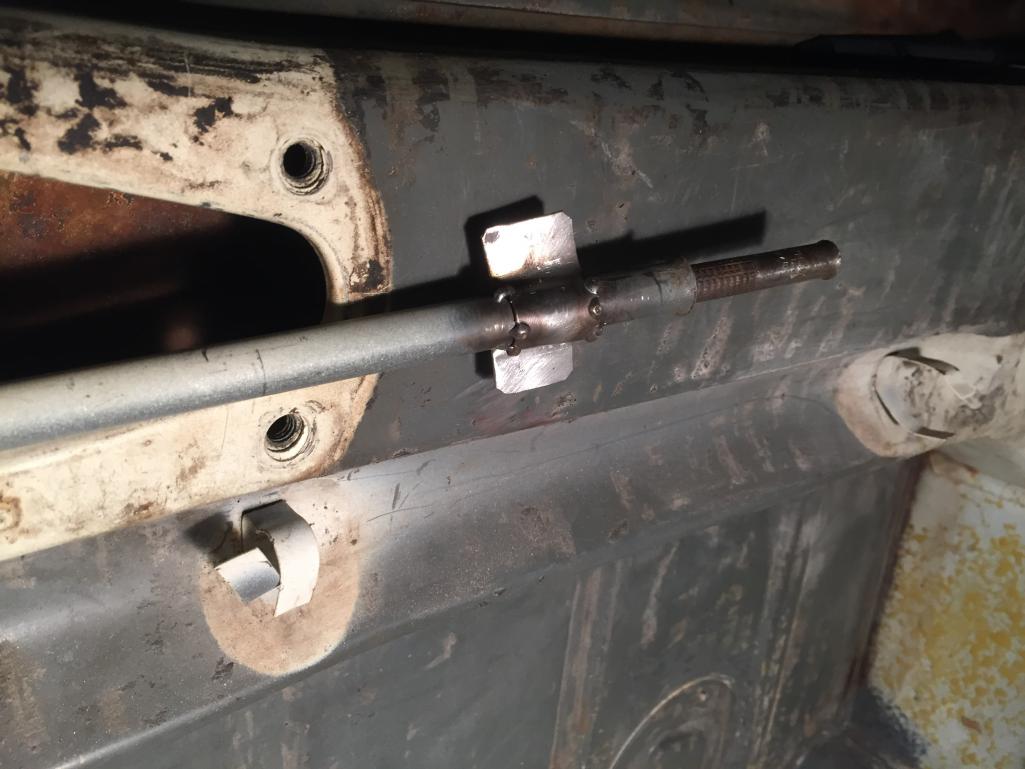
Just a question this time. Can someone tell me what this bracket with stud is for? It is on the drivers side front corner, and there isn’t a matching part on the other corner.
 |
|
|
|
| Mitox |
Jul 10 2018, 09:45 PM
Post
#131
|
|
Senior Member Group: Members Posts: 549 Joined: 26-October 15 From: SW Virginia Member No.: 19,302 Region Association: South East States |
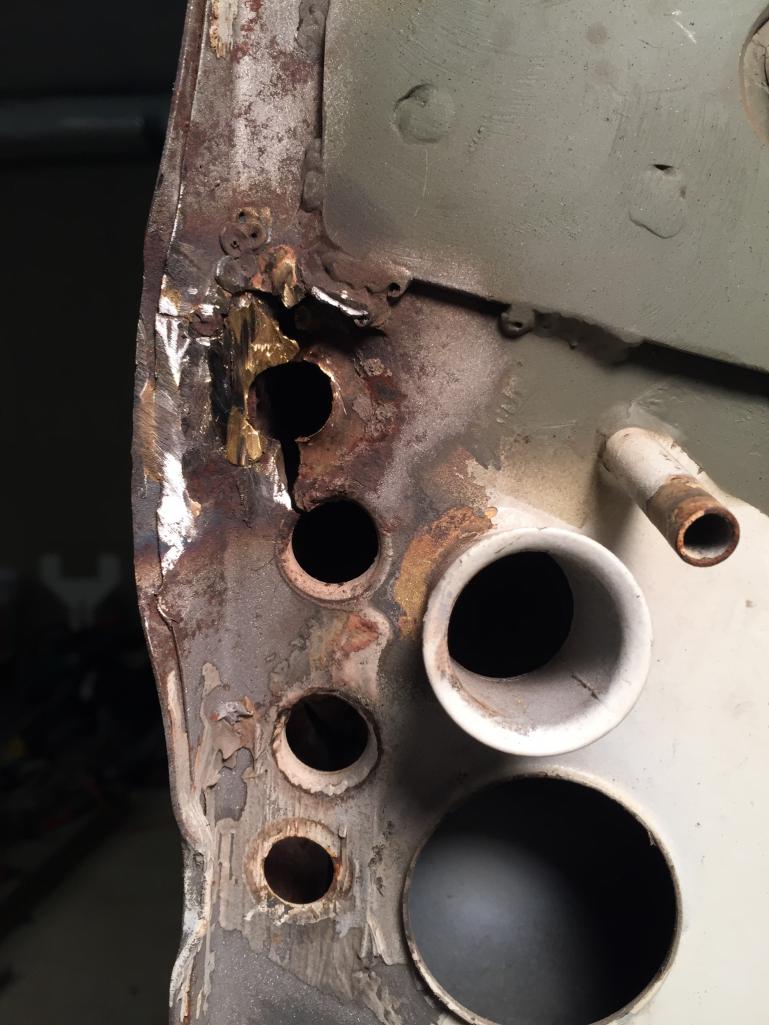
My list of items to complete before paint had another one added today. I knew I needed to fix an ugly repair on the firewall, but learned from looking through other posts here that the real problem is the clutch tube.
Found a few threads detailing the repair, so that’s next. 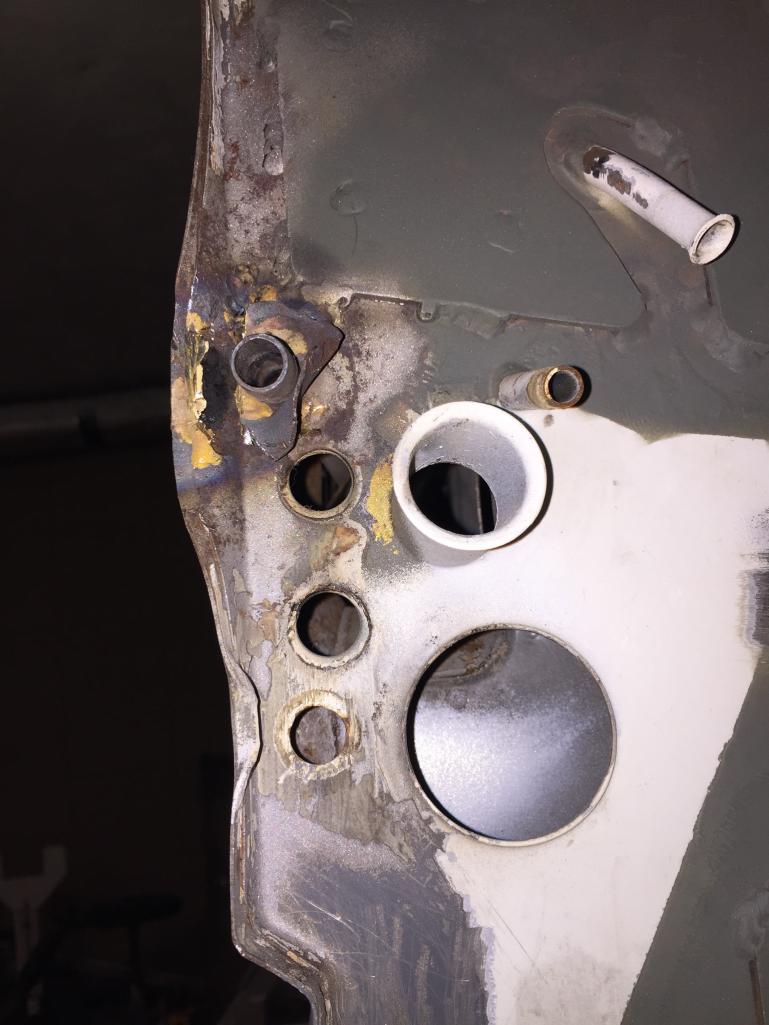 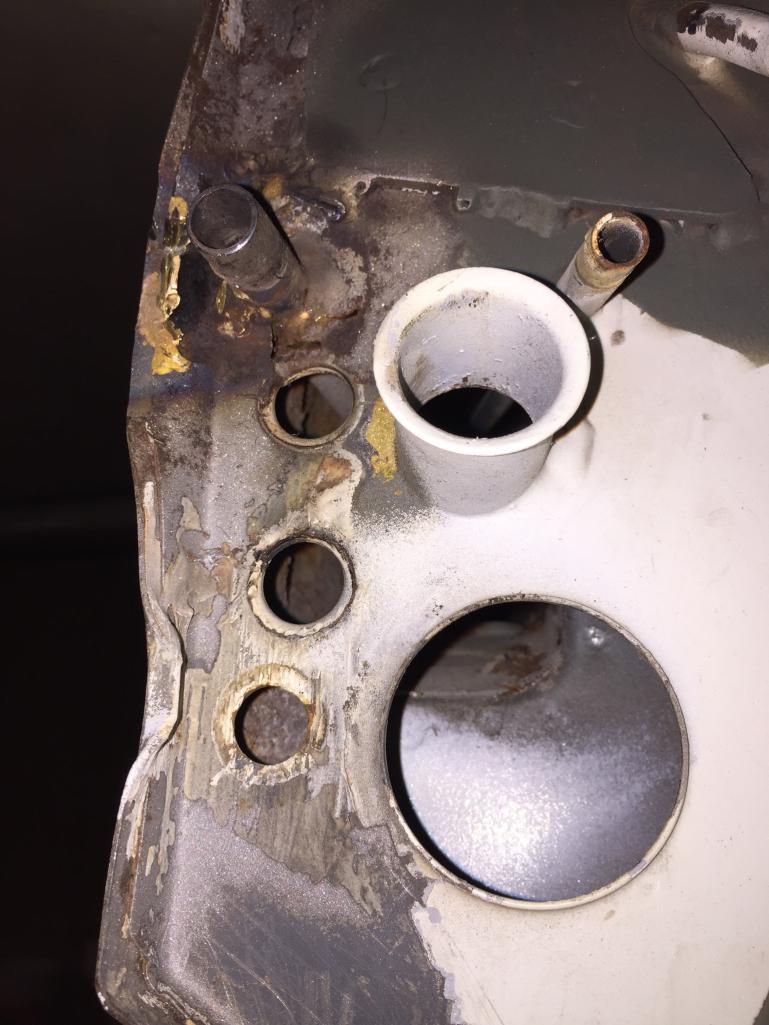 |
|
|
|
| Mitox |
Jul 12 2018, 08:29 PM
Post
#132
|
|
Senior Member Group: Members Posts: 549 Joined: 26-October 15 From: SW Virginia Member No.: 19,302 Region Association: South East States |
Yeah, this is a problem ... what to do
 |
|
|
|
| sixnotfour |
Jul 12 2018, 08:31 PM
Post
#133
|
|
914 Wizard Group: Members Posts: 11,277 Joined: 12-September 04 Member No.: 2,744 Region Association: NineFourteenerVille |
horn mount 75-76
|
|
|
|
| Mitox |
Jul 12 2018, 09:48 PM
Post
#134
|
|
Senior Member Group: Members Posts: 549 Joined: 26-October 15 From: SW Virginia Member No.: 19,302 Region Association: South East States |
QUOTE(sixnotfour @ Jul 12 2018, 10:31 PM)  horn mount 75-76 OK, thanks. Guess I’ll keep it there. |
|
|
|
| Mitox |
Jul 14 2018, 06:53 PM
Post
#135
|
|
Senior Member Group: Members Posts: 549 Joined: 26-October 15 From: SW Virginia Member No.: 19,302 Region Association: South East States |
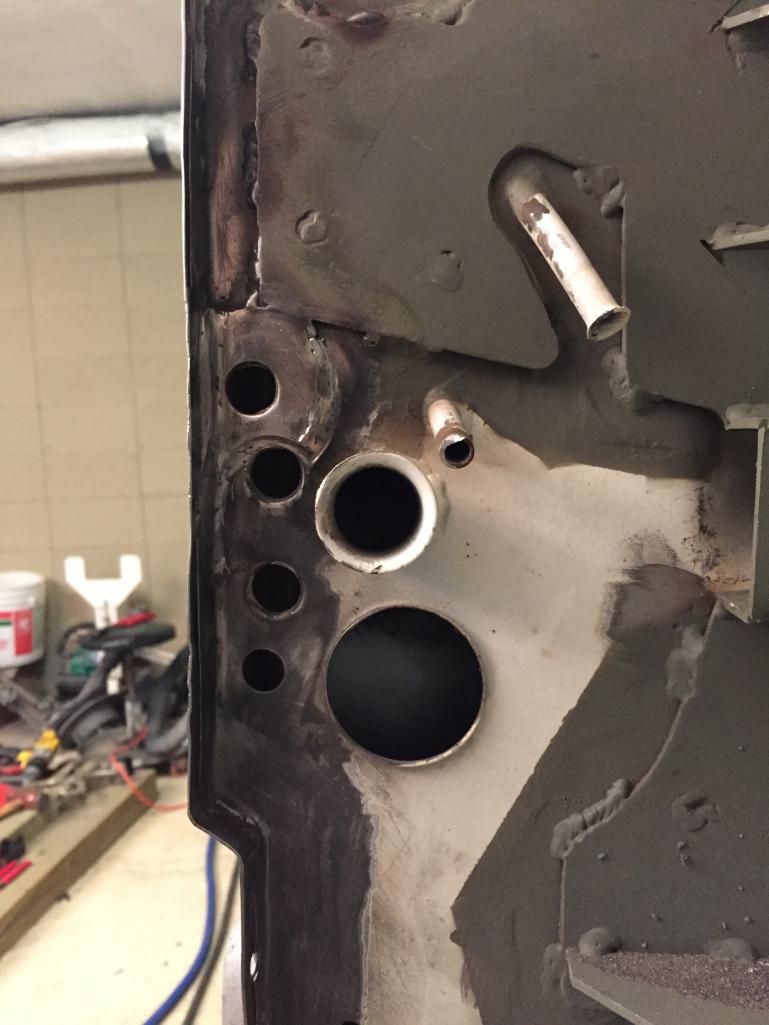
A little progress today. Fixed the crack/break on the firewall where the clutch tube exits.
 |
|
|
|
| Mitox |
Jul 14 2018, 06:59 PM
Post
#136
|
|
Senior Member Group: Members Posts: 549 Joined: 26-October 15 From: SW Virginia Member No.: 19,302 Region Association: South East States |
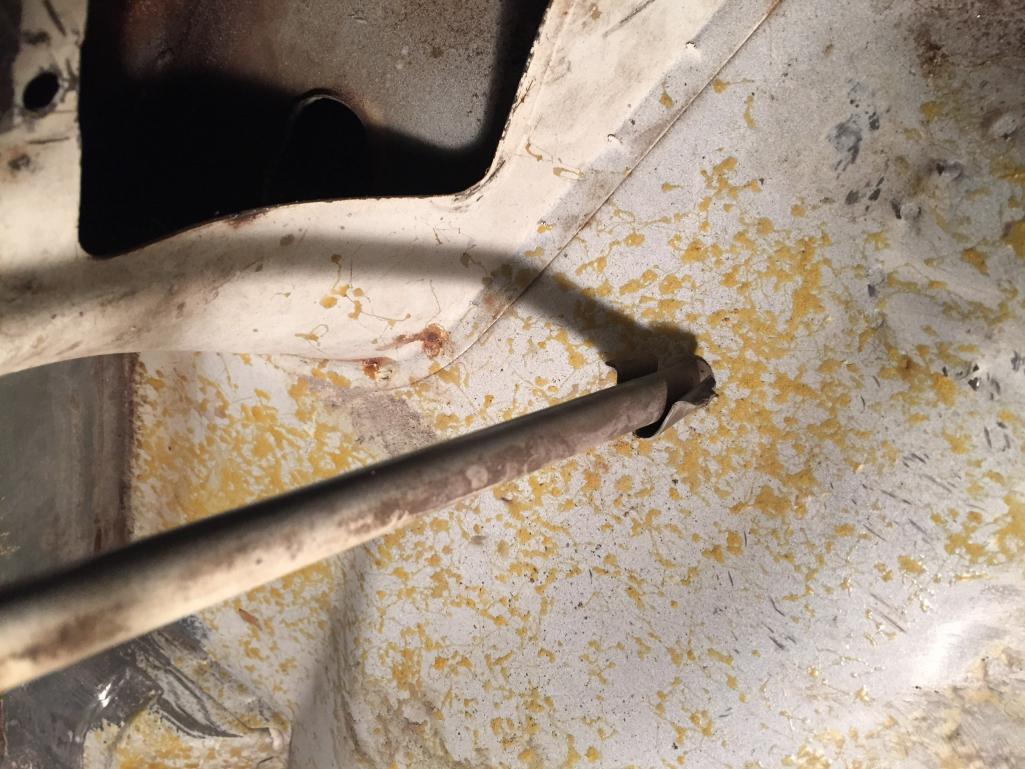
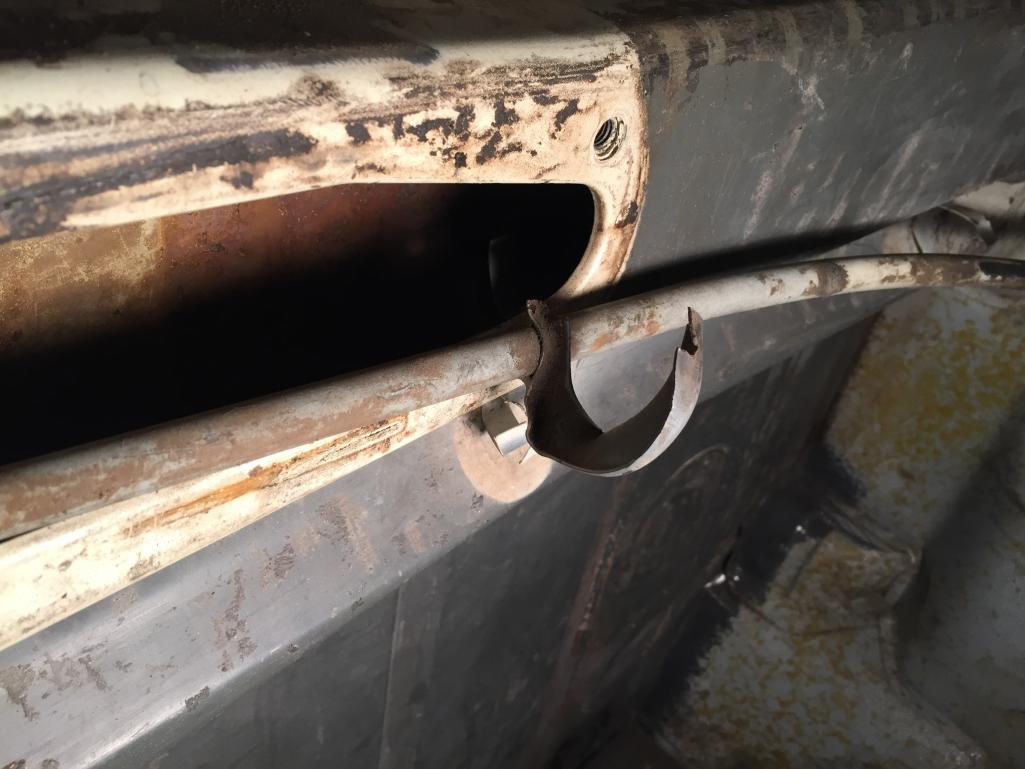
Now to fix the tube that is completely loose. From the other posts on this subject, I have an idea how to fix the front clamp. However, there is some sort of bracket at the middle of the tube. It looks like it may be broken, but I can’t see how or if it should be attached anywhere in the tunnel.
  |
|
|
|
| Mitox |
Jul 14 2018, 07:36 PM
Post
#137
|
|
Senior Member Group: Members Posts: 549 Joined: 26-October 15 From: SW Virginia Member No.: 19,302 Region Association: South East States |
I found a pic of the inside of the 914 tunnel. Looks like I have a broken bracket: not sure I’ll secure the tube there.
 |
|
|
|
| rgalla9146 |
Jul 15 2018, 06:20 PM
Post
#138
|
|
Advanced Member Group: Members Posts: 4,977 Joined: 23-November 05 From: Paramus NJ Member No.: 5,176 Region Association: None |
With a 3" holesaw open a hole on the top of the tunnel for adequate access.
Weld the plug back in when the repair is complete |
|
|
|
| Mitox |
Jul 16 2018, 02:27 PM
Post
#139
|
|
Senior Member Group: Members Posts: 549 Joined: 26-October 15 From: SW Virginia Member No.: 19,302 Region Association: South East States |
QUOTE(rgalla9146 @ Jul 15 2018, 08:20 PM) With a 3" holesaw open a hole on the top of the tunnel for adequate access. Weld the plug back in when the repair is complete I think your suggestion is likely the best path forward. There's no other way to get inside the tunnel very well. Thanks |
|
|
|
| Mitox |
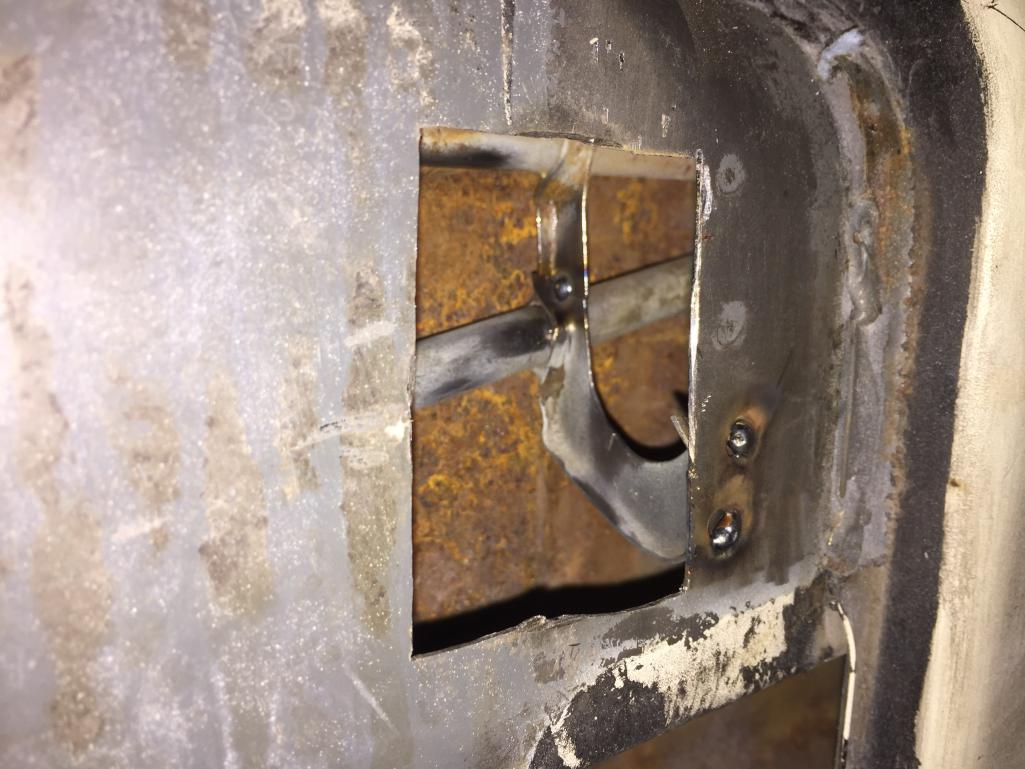
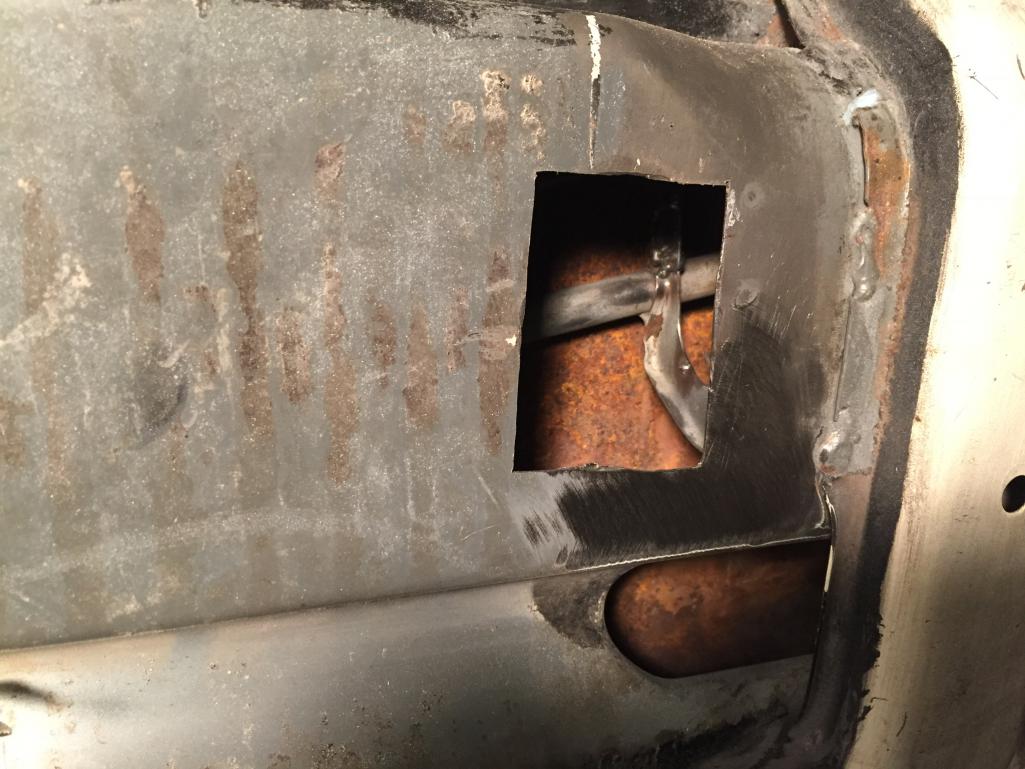
Jul 25 2018, 09:13 PM
Post
#140
|
|
Senior Member Group: Members Posts: 549 Joined: 26-October 15 From: SW Virginia Member No.: 19,302 Region Association: South East States |
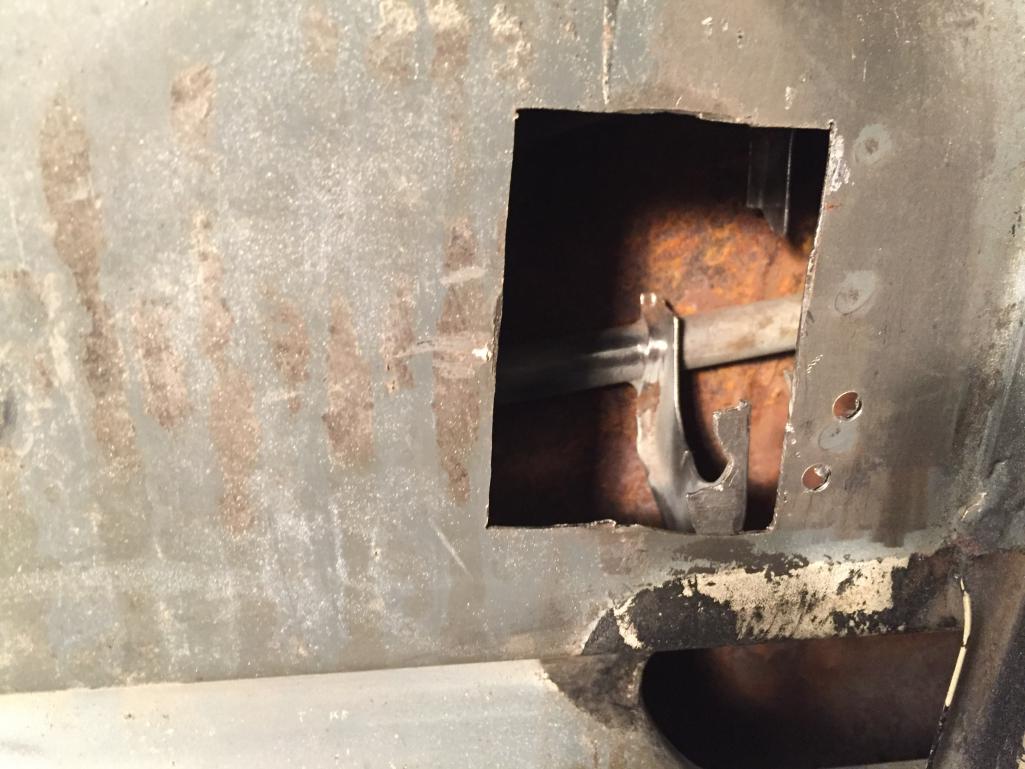
Clutch tube repaired - hopefully forever. Made a new front bracket,and had to cut a hole to access the middle bracket to weld it back together.
     |
|
|
|
|
3 User(s) are reading this topic (3 Guests and 0 Anonymous Users)
0 Members:

|
Lo-Fi Version | Time is now: 6th July 2026 - 12:13 AM |
Invision Power Board
v9.1.4 © 2026 IPS, Inc.