|
|
|
Porsche, and the Porsche crest are registered trademarks of Dr. Ing. h.c. F. Porsche AG.
This site is not affiliated with Porsche in any way. Its only purpose is to provide an online forum for car enthusiasts. All other trademarks are property of their respective owners. |
|
|

  |

| Mitox |
 Jul 25 2018, 09:17 PM Jul 25 2018, 09:17 PM
Post
#141
|
|
Senior Member  Group: Members Posts: 549 Joined: 26-October 15 From: SW Virginia Member No.: 19,302 Region Association: South East States |
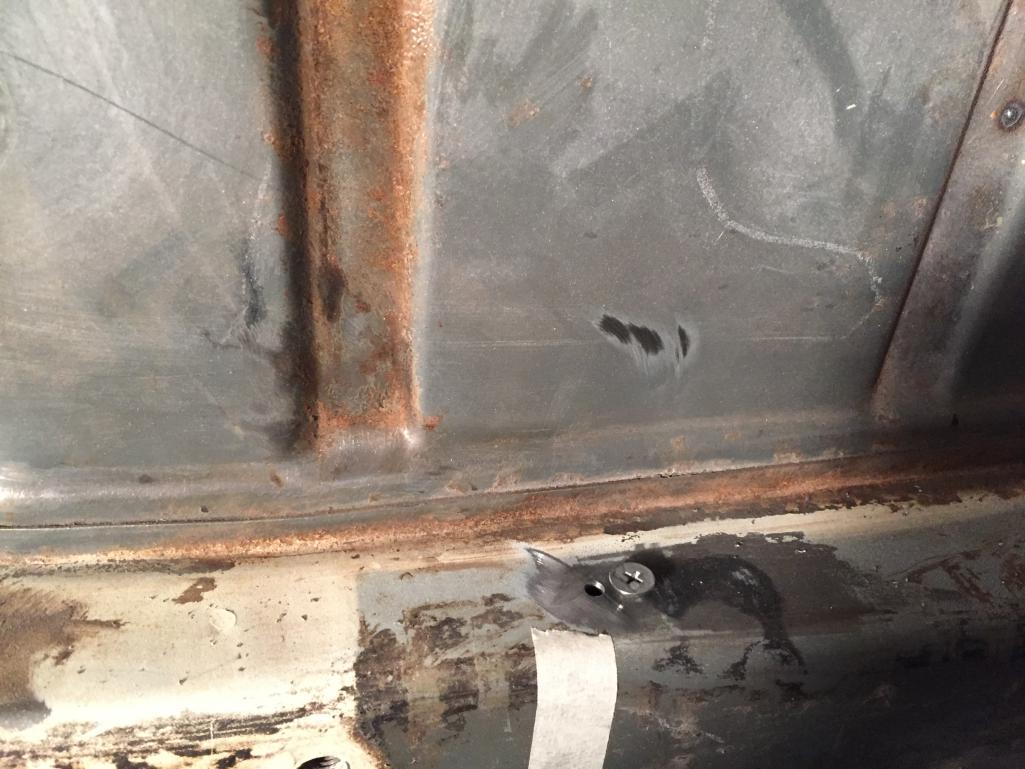
Had a little difficulty locating the front bracket tight to the wall, so finally decided to pull it into place with a screw so I could weld the first hole.
  |
   |

 
|
| Mitox |
Jul 25 2018, 09:19 PM
Post
#142
|
|
Senior Member Group: Members Posts: 549 Joined: 26-October 15 From: SW Virginia Member No.: 19,302 Region Association: South East States |
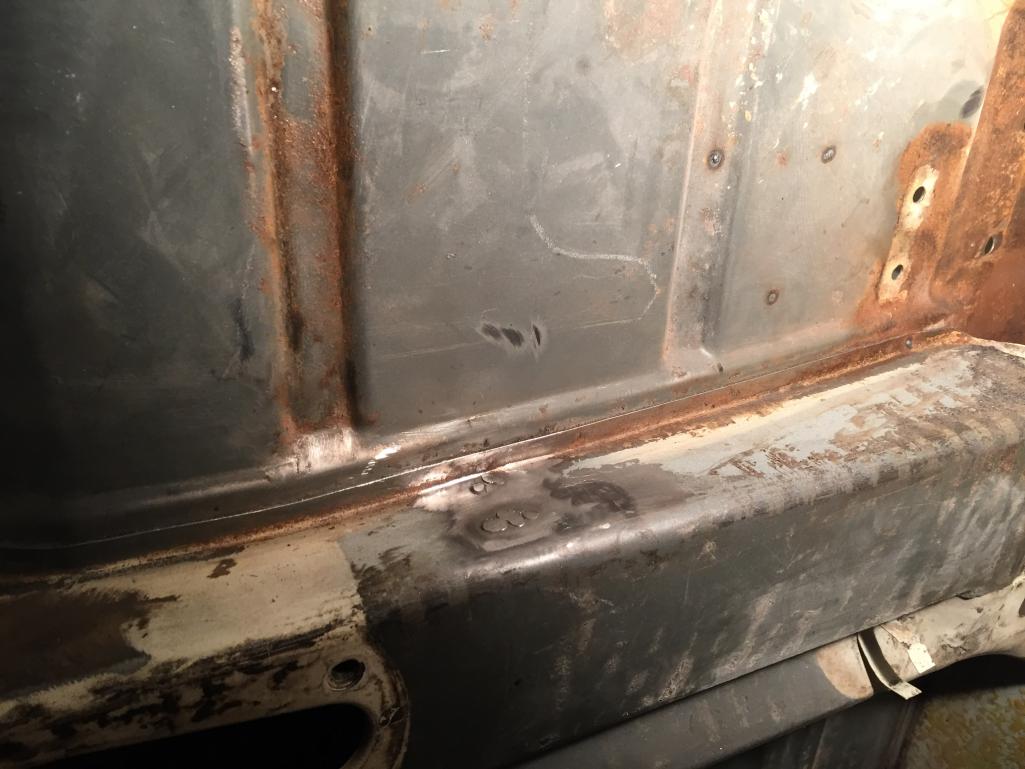
Here’s the repair at the firewall.
 |
|
|
|
| mepstein |
Jul 26 2018, 06:06 AM
Post
#143
|
|
914-6 GT in waiting Group: Members Posts: 20,798 Joined: 19-September 09 From: Landenberg, PA/Wilmington, DE Member No.: 10,825 Region Association: MidAtlantic Region |
looking good.
|
|
|
|
| Mitox |
Jul 27 2018, 09:28 PM
Post
#144
|
|
Senior Member Group: Members Posts: 549 Joined: 26-October 15 From: SW Virginia Member No.: 19,302 Region Association: South East States |
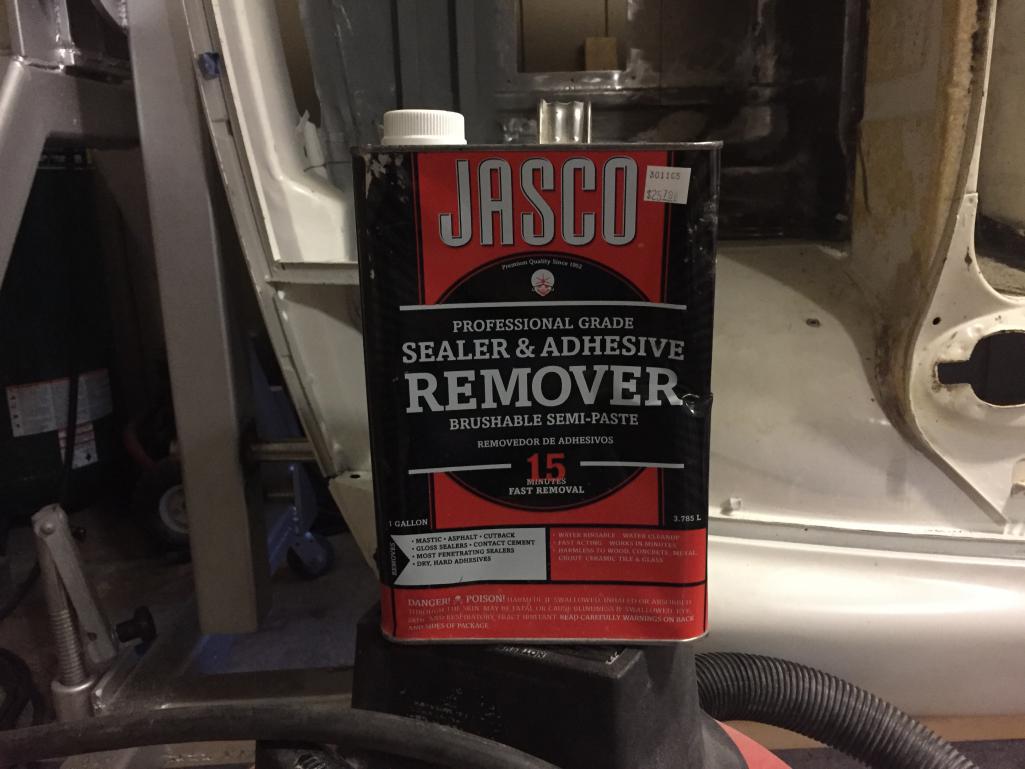
Decided to change up today and work on removing the adhesive from the interior. Sanding and scraping doesn’t work well, so I tried adhesive remover. Well, it removed the adhesive...and the paint, and remaining seam sealer.
I think I’ll do the rest of the inside with this stuff. 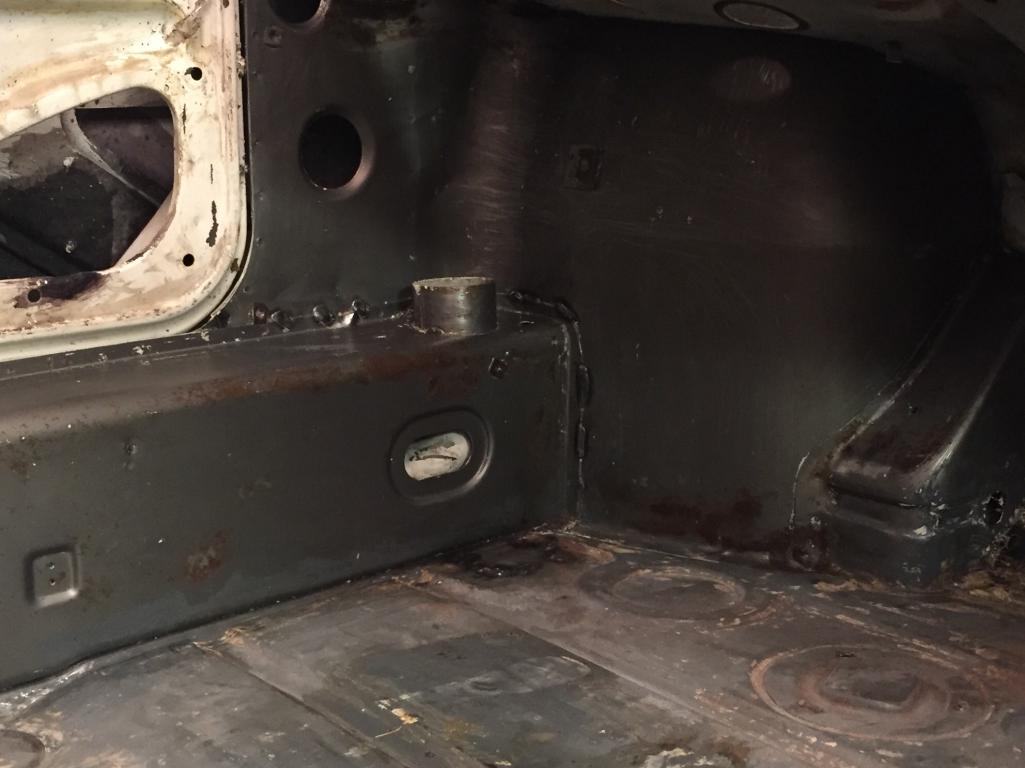 |
|
|
|
| bbrock |
Jul 27 2018, 11:20 PM
Post
#145
|
|
914 Guru Group: Members Posts: 5,269 Joined: 17-February 17 From: Montana Member No.: 20,845 Region Association: Rocky Mountains |
QUOTE(Mitox @ Jul 27 2018, 09:28 PM)  Decided to change up today and work on removing the adhesive from the interior. Sanding and scraping doesn’t work well, so I tried adhesive remover. Well, it removed the adhesive...and the paint, and remaining seam sealer. I think I’ll do the rest of the inside with this stuff. Great tip!!! Can you share the specific product you are using? |
|
|
|
| Mitox |
Jul 28 2018, 06:41 AM
Post
#146
|
|
Senior Member Group: Members Posts: 549 Joined: 26-October 15 From: SW Virginia Member No.: 19,302 Region Association: South East States |
Yep, here it is. I purchased it about six years ago to remove carpet glue from concrete. Glad it works well on the 914 also.
 |
|
|
|
| mepstein |
Jul 28 2018, 07:20 AM
Post
#147
|
|
914-6 GT in waiting Group: Members Posts: 20,798 Joined: 19-September 09 From: Landenberg, PA/Wilmington, DE Member No.: 10,825 Region Association: MidAtlantic Region |
QUOTE(Mitox @ Jul 28 2018, 08:41 AM) Yep, here it is. I purchased it about six years ago to remove carpet glue from concrete. Glad it works well on the 914 also. I use their paint remover. Good stuff. |
|
|
|
| Mitox |
Sep 23 2018, 08:36 PM
Post
#148
|
|
Senior Member Group: Members Posts: 549 Joined: 26-October 15 From: SW Virginia Member No.: 19,302 Region Association: South East States |
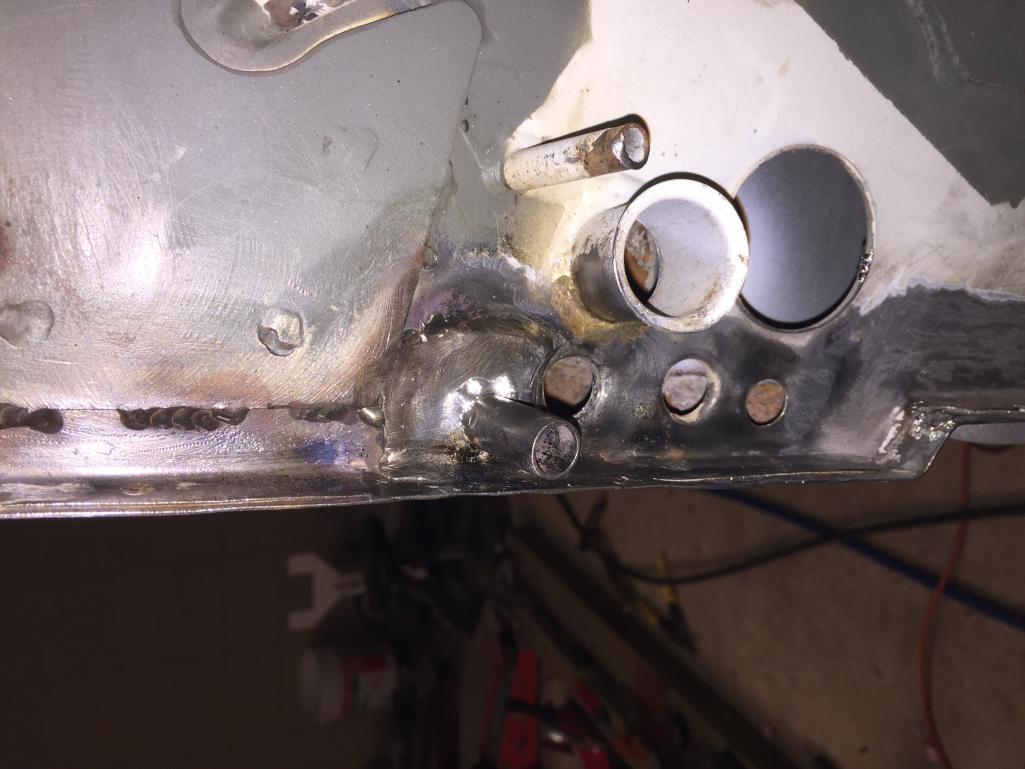
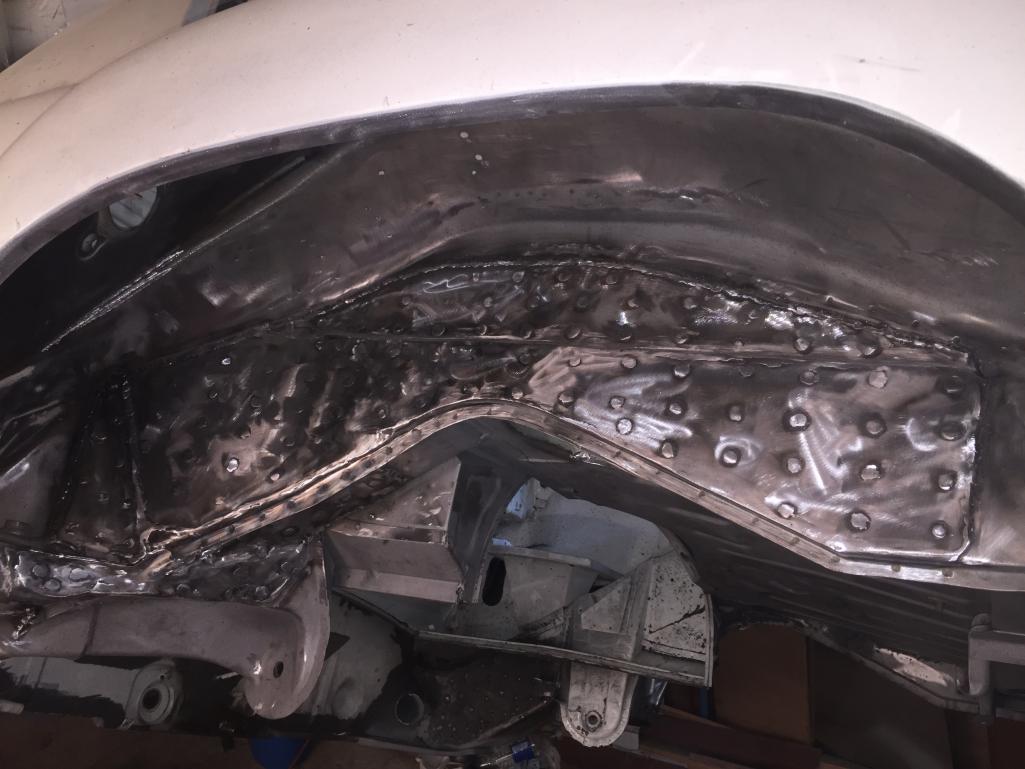
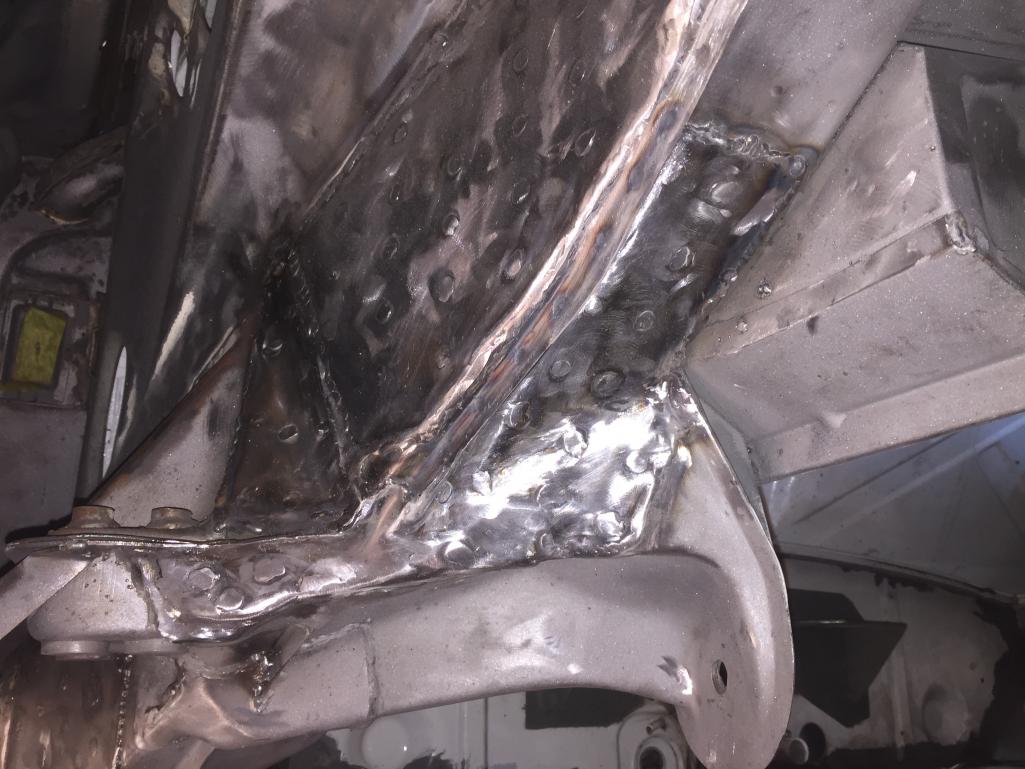
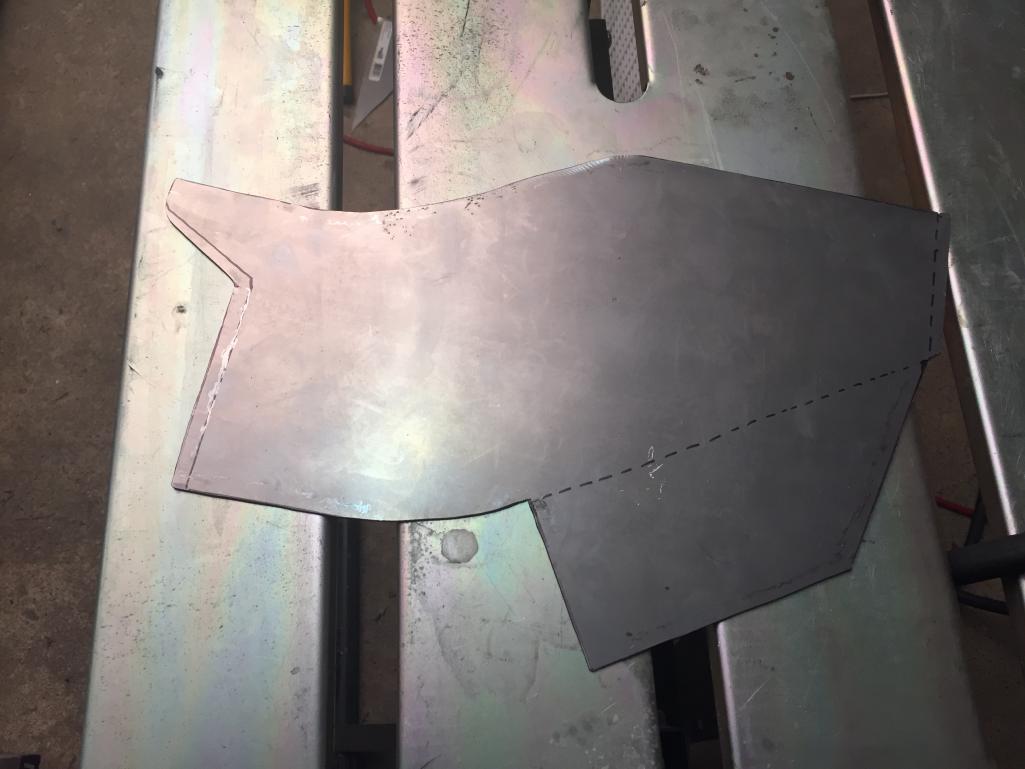
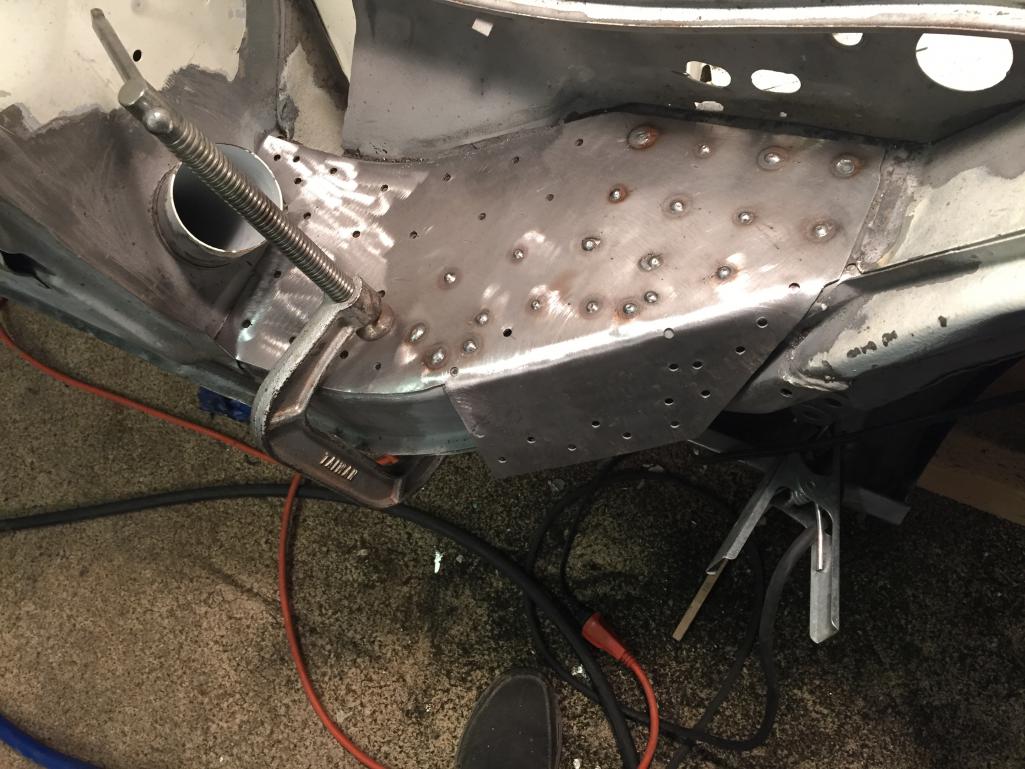
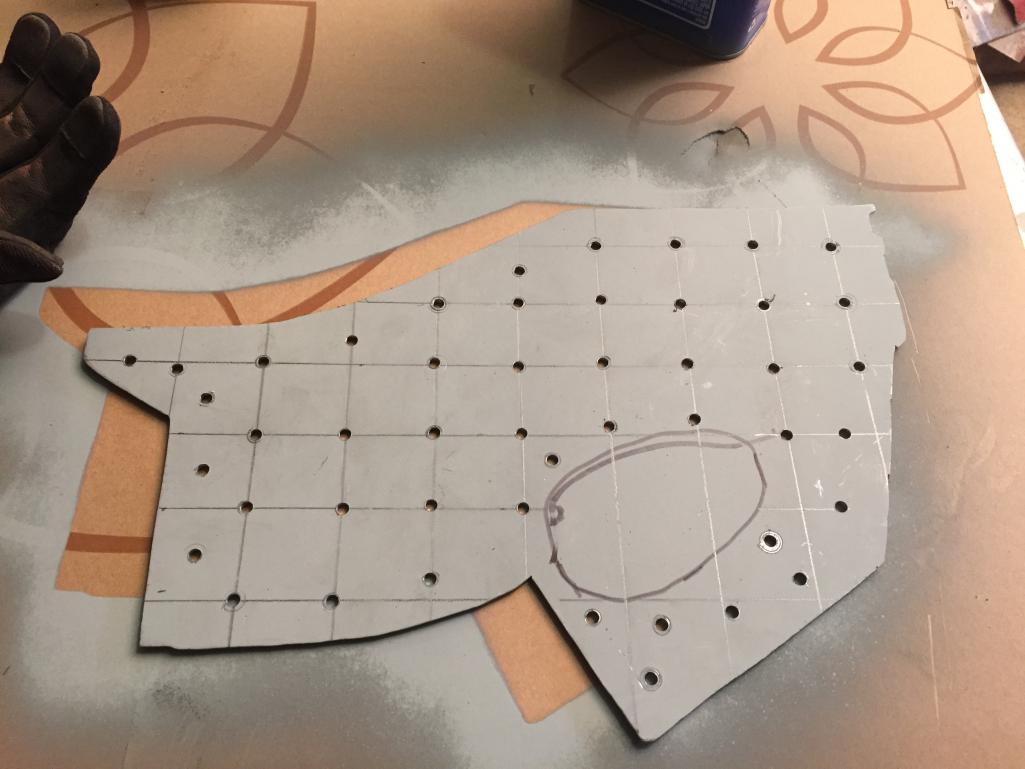
Catching up on posting my progress. I’ve welded in the GT chassis kit, and made additional panels to go over the area where I removed the 4 jug engine mounts. Also had to replace the brake line mount due to the added panel, and welded on new rear jack plates after cleaning out the rust.
 |
|
|
|
| Mitox |
Sep 23 2018, 08:38 PM
Post
#149
|
|
Senior Member Group: Members Posts: 549 Joined: 26-October 15 From: SW Virginia Member No.: 19,302 Region Association: South East States |
Pics
 |
|
|
|
| Mitox |
Sep 23 2018, 08:40 PM
Post
#150
|
|
Senior Member Group: Members Posts: 549 Joined: 26-October 15 From: SW Virginia Member No.: 19,302 Region Association: South East States |
Mo pics
  |
|
|
|
| Mitox |
Sep 23 2018, 08:43 PM
Post
#151
|
|
Senior Member Group: Members Posts: 549 Joined: 26-October 15 From: SW Virginia Member No.: 19,302 Region Association: South East States |
And more
 |
|
|
|
| Mitox |
Sep 23 2018, 08:46 PM
Post
#152
|
|
Senior Member Group: Members Posts: 549 Joined: 26-October 15 From: SW Virginia Member No.: 19,302 Region Association: South East States |
One side done
 |
|
|
|
| Mitox |
Sep 23 2018, 08:50 PM
Post
#153
|
|
Senior Member Group: Members Posts: 549 Joined: 26-October 15 From: SW Virginia Member No.: 19,302 Region Association: South East States |
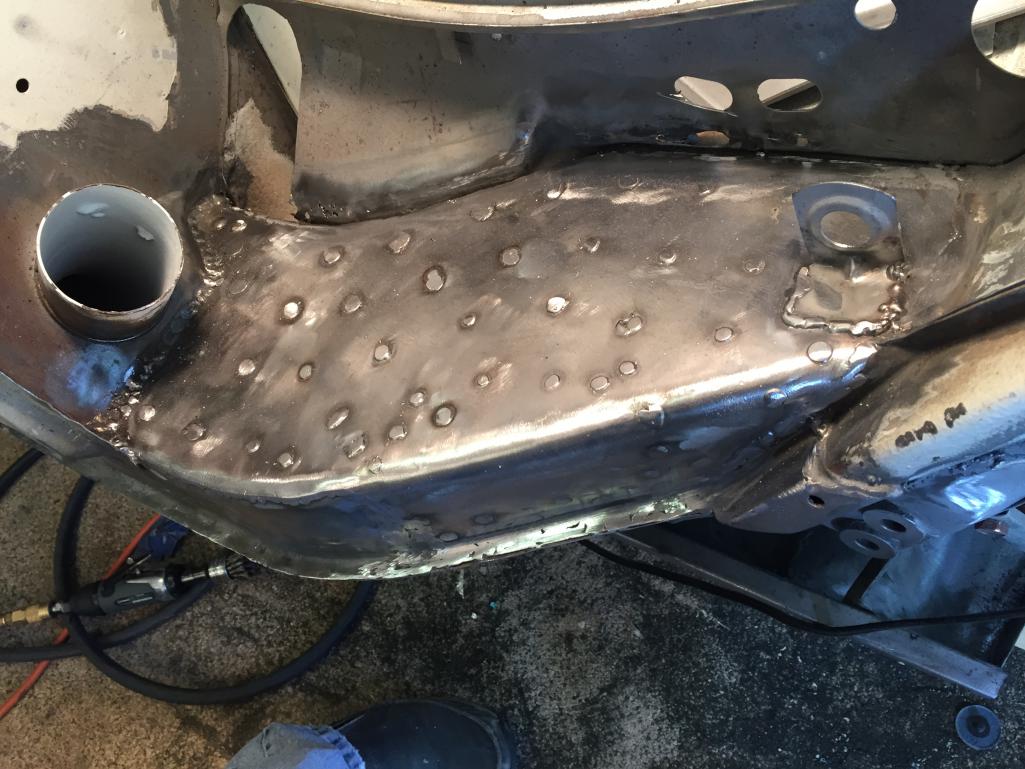
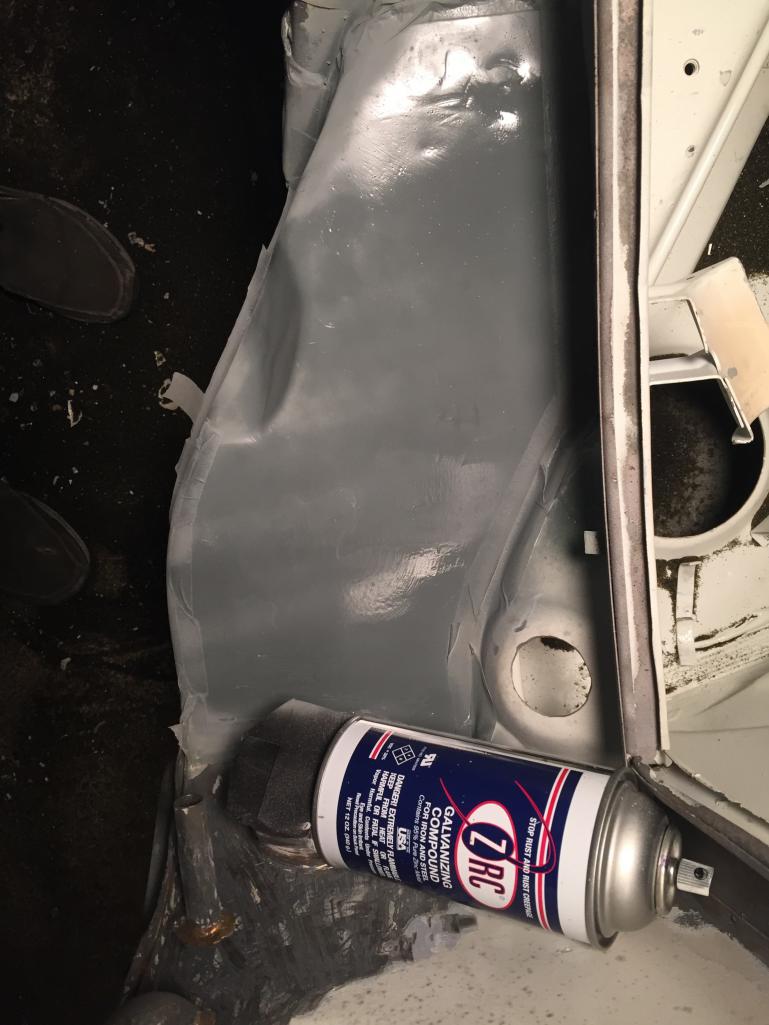
I think the second side looks better. This one shows the zinc I put between everything I’m welding onto the car.
  |
|
|
|
| Mitox |
Sep 23 2018, 08:55 PM
Post
#154
|
|
Senior Member Group: Members Posts: 549 Joined: 26-October 15 From: SW Virginia Member No.: 19,302 Region Association: South East States |
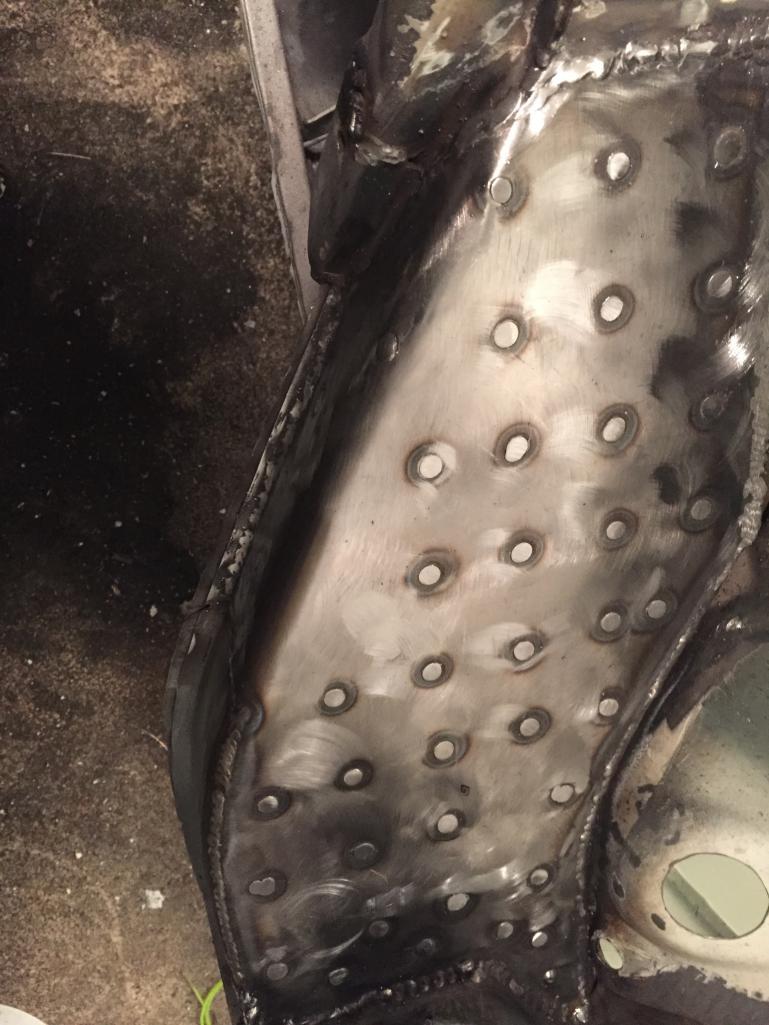
Second side finished.
 |
|
|
|
| Mitox |
Sep 23 2018, 09:01 PM
Post
#155
|
|
Senior Member Group: Members Posts: 549 Joined: 26-October 15 From: SW Virginia Member No.: 19,302 Region Association: South East States |
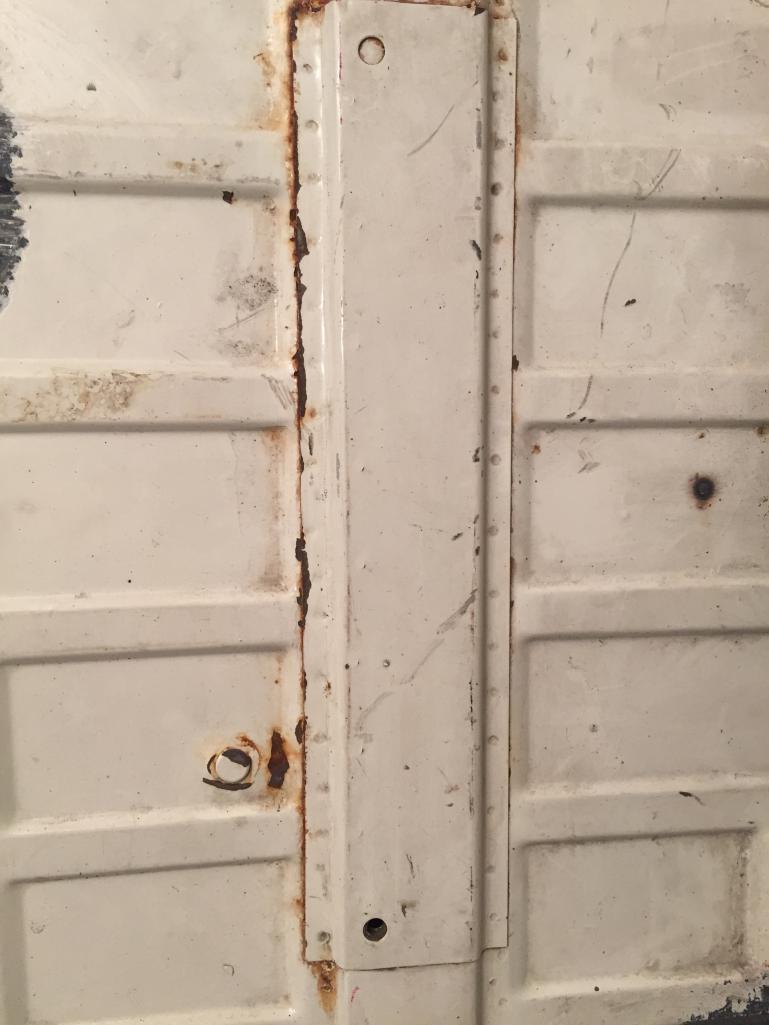
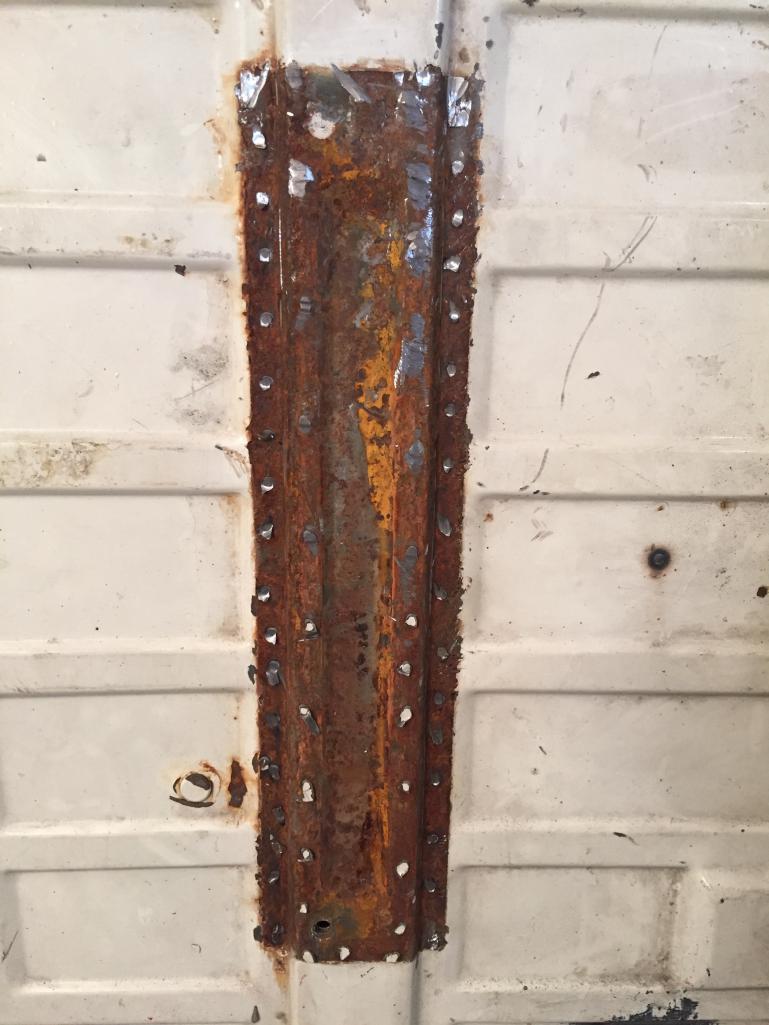
And the rust paranoia continues. Here is the plate in the rear trunk before and after removal. I have a replacement from RD that needs to go on after cleaning the rust off.
  |
|
|
|
| Lucky9146 |
Sep 24 2018, 07:54 AM
Post
#156
|
|
Always Wanted A Bigger Go Cart Group: Members Posts: 1,711 Joined: 22-September 14 From: Poway California Member No.: 17,942 Region Association: Southern California |
QUOTE(Mitox @ Sep 23 2018, 07:36 PM) Catching up on posting my progress. I’ve welded in the GT chassis kit, and made additional panels to go over the area where I removed the 4 jug engine mounts. Also had to replace the brake line mount due to the added panel, and welded on new rear jack plates after cleaning out the rust. Cool shot! Nice work!! (IMG:style_emoticons/default/beerchug.gif) I was fortunate in that my car came with this work completed so I will tuck this shot away in my files. Love it. (IMG:style_emoticons/default/driving.gif) (IMG:style_emoticons/default/white914.jpg) |
|
|
|
| bbrock |
Sep 24 2018, 08:30 AM
Post
#157
|
|
914 Guru Group: Members Posts: 5,269 Joined: 17-February 17 From: Montana Member No.: 20,845 Region Association: Rocky Mountains |
QUOTE(Mitox @ Sep 23 2018, 09:01 PM) And the rust paranoia continues. Here is the plate in the rear trunk before and after removal. I have a replacement from RD that needs to go on after cleaning the rust off. Ugh! That's about the only piece of metal I didn't replace on my resto. Now I'm going to have nightmares (IMG:style_emoticons/default/yikes.gif) Hoping I can get enough rust converter and internal frame coating to seep into there to kill the rust. (IMG:style_emoticons/default/unsure.gif) Beautiful work on the car. Love watching the progress (IMG:style_emoticons/default/thumb3d.gif) |
|
|
|
| Cairo94507 |
Sep 24 2018, 08:33 AM
Post
#158
|
|
Michael Group: Members Posts: 10,687 Joined: 1-November 08 From: Auburn, CA Member No.: 9,712 Region Association: Northern California |
Yeah, the rust worm never sleeps. (IMG:style_emoticons/default/beerchug.gif)
|
|
|
|
| TravisNeff |
Sep 24 2018, 09:30 AM
Post
#159
|
|
914 Guru Group: Members Posts: 5,082 Joined: 20-March 03 From: Mesa, AZ Member No.: 447 Region Association: Southwest Region |
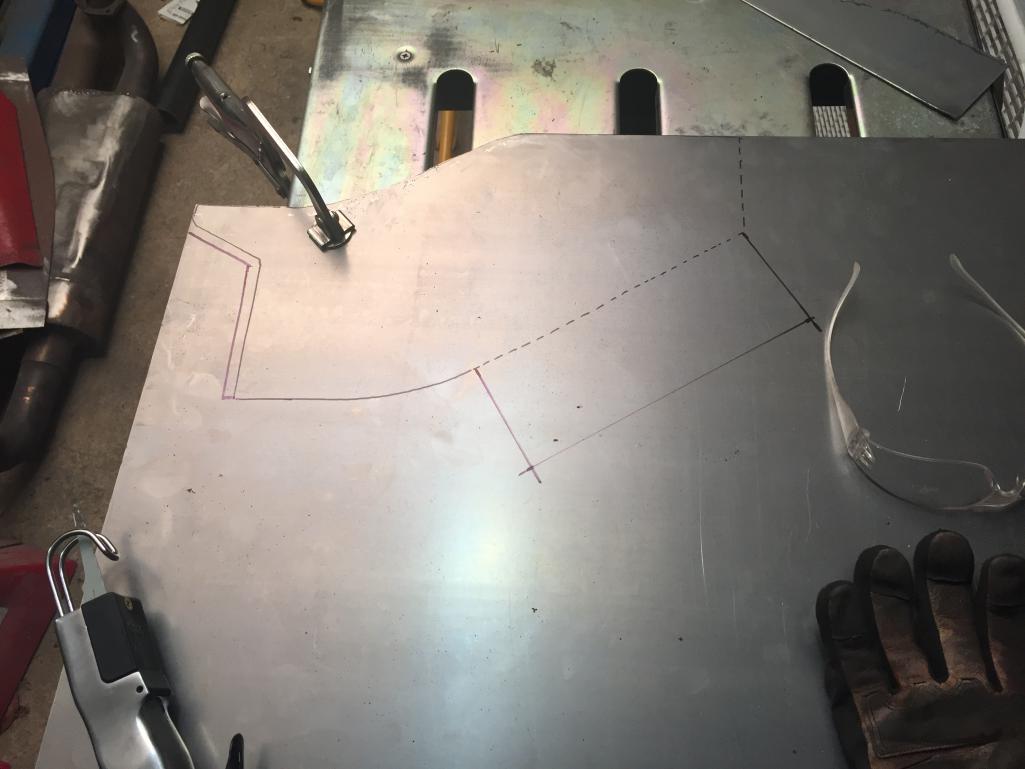
Thanks for sharing the detail pics of the reinforcements. I was starting to make the same yesterday, and it is great to see another perspective.
|
|
|
|
| mb911 |
Sep 24 2018, 01:31 PM
Post
#160
|
|
914 Guru Group: Members Posts: 7,794 Joined: 2-January 09 From: Burlington wi Member No.: 9,892 Region Association: Upper MidWest |
Looks great.. The rust worm is interesting to say the least. I plan to spray. Corrosion x in all the cavitys as that will creep into every potential spot on the car..
Its an avaition protectant. |
|
|
|
|
2 User(s) are reading this topic (2 Guests and 0 Anonymous Users)
0 Members:

|
Lo-Fi Version | Time is now: 6th July 2026 - 12:12 AM |
Invision Power Board
v9.1.4 © 2026 IPS, Inc.