|
|
|
Porsche, and the Porsche crest are registered trademarks of Dr. Ing. h.c. F. Porsche AG.
This site is not affiliated with Porsche in any way. Its only purpose is to provide an online forum for car enthusiasts. All other trademarks are property of their respective owners. |
|
|

  |

| Mitox |
 Jul 3 2025, 08:40 AM Jul 3 2025, 08:40 AM
Post
#361
|
|
Senior Member  Group: Members Posts: 551 Joined: 26-October 15 From: SW Virginia Member No.: 19,302 Region Association: South East States |
Question: can anyone tell me the correct gray paint to use on the headlight buckets?
Thanks 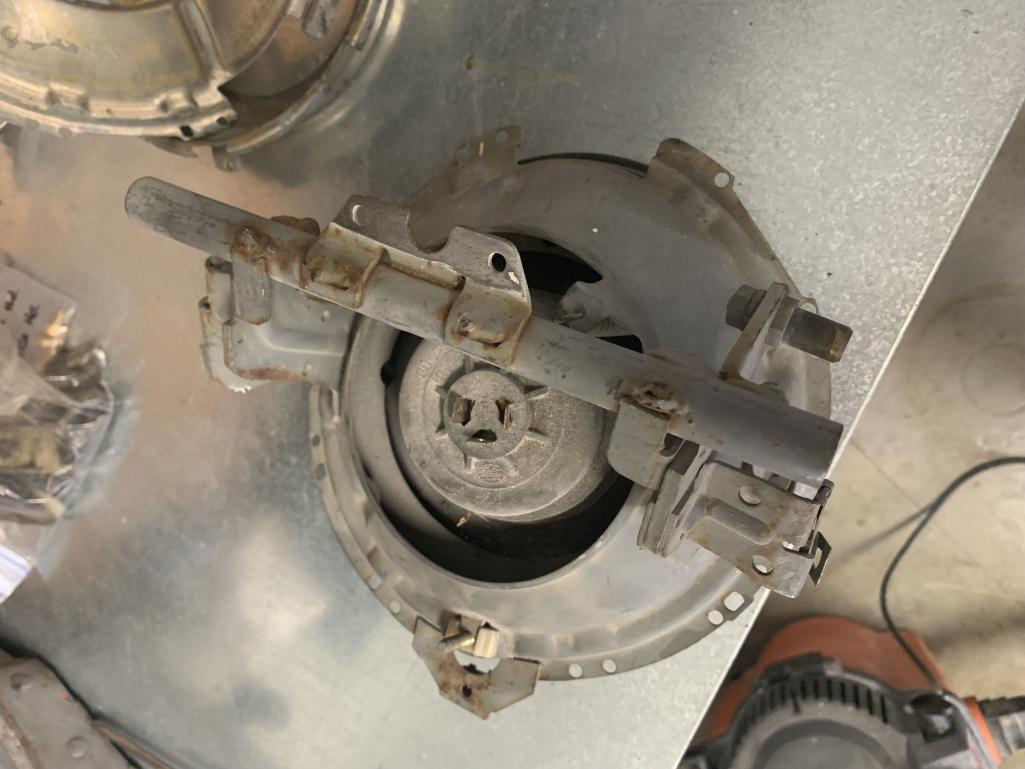 |
   |

 
|
| ctc911ctc |
Jul 3 2025, 11:41 AM
Post
#362
|
|
Senior Member Group: Members Posts: 1,344 Joined: 9-June 18 From: boston Member No.: 22,206 Region Association: North East States |
I like the prep work on the FW, could you let us know what you did and the products used? (IMG:style_emoticons/default/confused24.gif)
QUOTE(Mitox @ Feb 24 2025, 07:13 PM)  |
|
|
|
| Mitox |
Jul 3 2025, 12:41 PM
Post
#363
|
|
Senior Member Group: Members Posts: 551 Joined: 26-October 15 From: SW Virginia Member No.: 19,302 Region Association: South East States |
QUOTE(ctc911ctc @ Jul 3 2025, 01:41 PM) I like the prep work on the FW, could you let us know what you did and the products used? (IMG:style_emoticons/default/confused24.gif) QUOTE(Mitox @ Feb 24 2025, 07:13 PM) The silver Firewall sound deadening is Resonix Mega. It comes in 1square foot panels of their “formula” butyl rubber with a relatively thick layer of aluminum. You need to clean the surface before application, and it sticks very well - you won’t get it off. I made paper templates for the complex contoured areas - this helped tremendously. Mainly, it required a lot of patience. I also used the thickest aluminum tape I could find with a 3M adhesive to cover the seams (5.9 mil tape). |
|
|
|
| Mitox |
Jul 3 2025, 02:47 PM
Post
#364
|
|
Senior Member Group: Members Posts: 551 Joined: 26-October 15 From: SW Virginia Member No.: 19,302 Region Association: South East States |
QUOTE(ctc911ctc @ Jul 3 2025, 01:41 PM) I like the prep work on the FW, could you let us know what you did and the products used? (IMG:style_emoticons/default/confused24.gif) QUOTE(Mitox @ Feb 24 2025, 07:13 PM) I guess I answered the question incorrectly - the pictures of the area you asked about didn’t pop up on the posting. Anyway, the coating is a two part spray product called Raptor by U-pol. |
|
|
|
| rgalla9146 |
Jul 3 2025, 03:39 PM
Post
#365
|
|
Advanced Member Group: Members Posts: 4,984 Joined: 23-November 05 From: Paramus NJ Member No.: 5,176 Region Association: None |
What a beautiful job you've done ! The contacts on your climate controls are beautiful. Removable battery tray ? did the same on both my cars. Used welded in nuts on the first version and riv-nuts on the second. Tray gets rusty ?...take it out ...blast and repaint. I wish I had made some NHV effort on my bulkhead but didn't. Now regret it. Considering options now. Your choice is excellent. |
 |
|
| Mitox |
Jul 6 2025, 04:28 PM
Post
#366
|
|
Senior Member Group: Members Posts: 551 Joined: 26-October 15 From: SW Virginia Member No.: 19,302 Region Association: South East States |
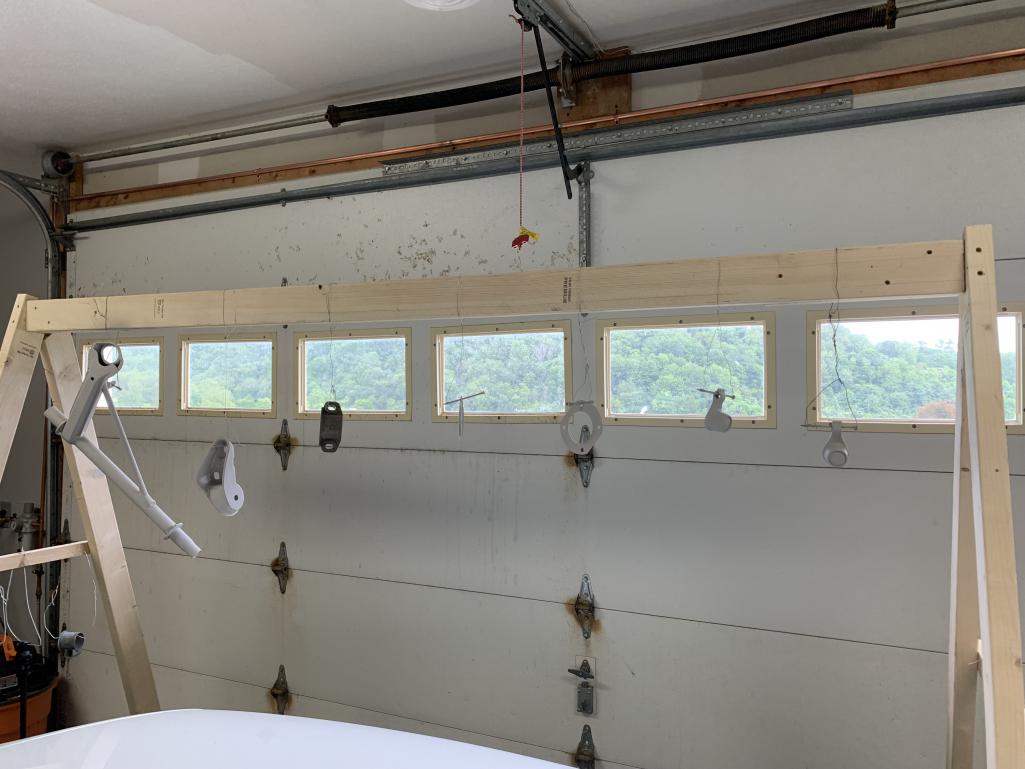
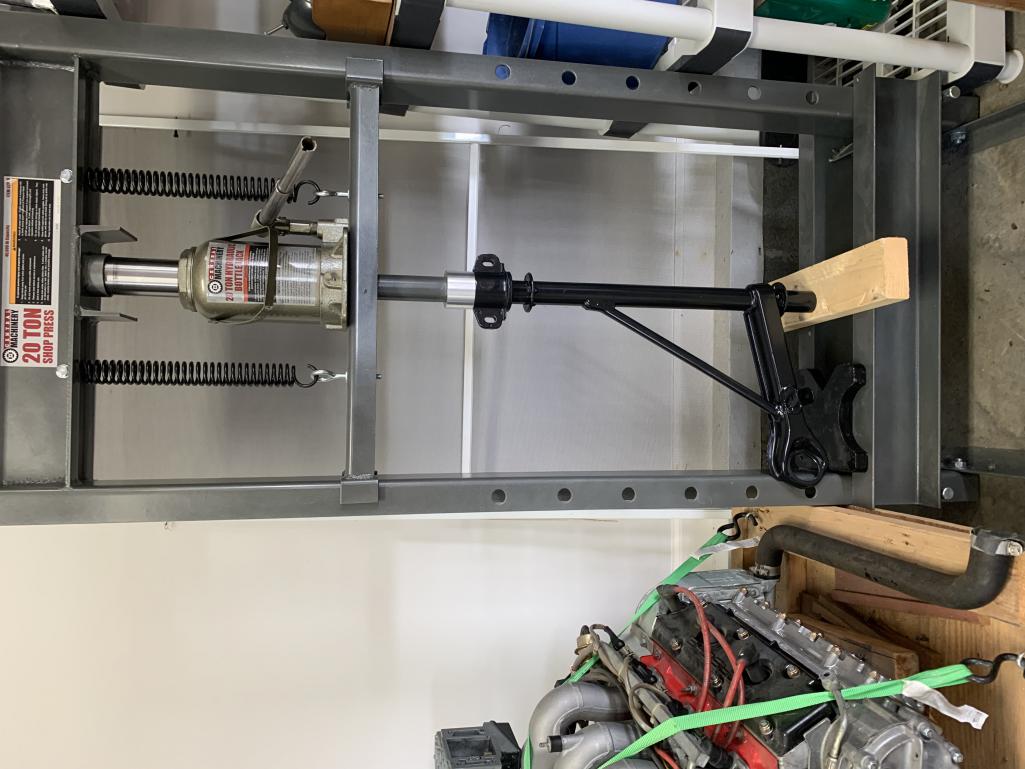
A few more parts in primer - will have them in paint tomorrow. Also received the steering coupler parts, so put everything onto the rack that 914Rubber rebuilt for me (3 years ago (IMG:style_emoticons/default/blink.gif) )
 |
|
|
|
| Mitox |
Jul 6 2025, 04:30 PM
Post
#367
|
|
Senior Member Group: Members Posts: 551 Joined: 26-October 15 From: SW Virginia Member No.: 19,302 Region Association: South East States |
 |
|
|
|
| Mitox |
Jul 6 2025, 04:30 PM
Post
#368
|
|
Senior Member Group: Members Posts: 551 Joined: 26-October 15 From: SW Virginia Member No.: 19,302 Region Association: South East States |
 |
|
|
|
| Robarabian |
Jul 7 2025, 08:47 AM
Post
#369
|
|
914 A Roo Group: Members Posts: 743 Joined: 11-February 19 From: Simi Valley, Kalifornia Member No.: 22,865 Region Association: Southern California |
This thread is amazing and your work is inspiring.
I am in the process of figuring out the front mount oil cooler. Did you photo where you will be running the lines through the firewall? I may have missed it but that is the part I am sort of looking to understand better, process wise. I will be following this till you complete this beautiful car. Rob |
|
|
|
| Mitox |
Jul 7 2025, 01:49 PM
Post
#370
|
|
Senior Member Group: Members Posts: 551 Joined: 26-October 15 From: SW Virginia Member No.: 19,302 Region Association: South East States |
QUOTE(Robarabian @ Jul 7 2025, 10:47 AM) This thread is amazing and your work is inspiring. I am in the process of figuring out the front mount oil cooler. Did you photo where you will be running the lines through the firewall? I may have missed it but that is the part I am sort of looking to understand better, process wise. I will be following this till you complete this beautiful car. Rob Thanks - I’m enjoying the process. For the oil cooler lines, I decided to use the Elephant Racing system. It exits the front trunk under the passenger light box into the wheel well, then down the passenger side longs. I’ll be working on it soon - before the struts go in. I liked the path it takes better than; the typical GT path, but it has its own drawbacks. Also looks like it has doubled in price since I purchased it. https://www.elephantracing.com/porsche/914/...r-plumbing-kit/ |
|
|
|
| Mitox |
Jul 7 2025, 01:55 PM
Post
#371
|
|
Senior Member Group: Members Posts: 551 Joined: 26-October 15 From: SW Virginia Member No.: 19,302 Region Association: South East States |
QUOTE(Mitox @ Jul 3 2025, 10:40 AM) Question: can anyone tell me the correct gray paint to use on the headlight buckets? Thanks Well, I think I’ve read every site on the internet that talks about the paint color. It seems that the color is - gray - just gray. I ordered a can of 2K Automotive light gray from 66 Autocolor. We’ll see how it works. |
|
|
|
| Mitox |
Jul 18 2025, 08:14 PM
Post
#372
|
|
Senior Member Group: Members Posts: 551 Joined: 26-October 15 From: SW Virginia Member No.: 19,302 Region Association: South East States |
I’ve been sidetracked for several days - been waiting a year to get a pad pored for a garage addition. Today, it’s down. Walls are next.
The wife will be able to park in the garage soon; first time ever. 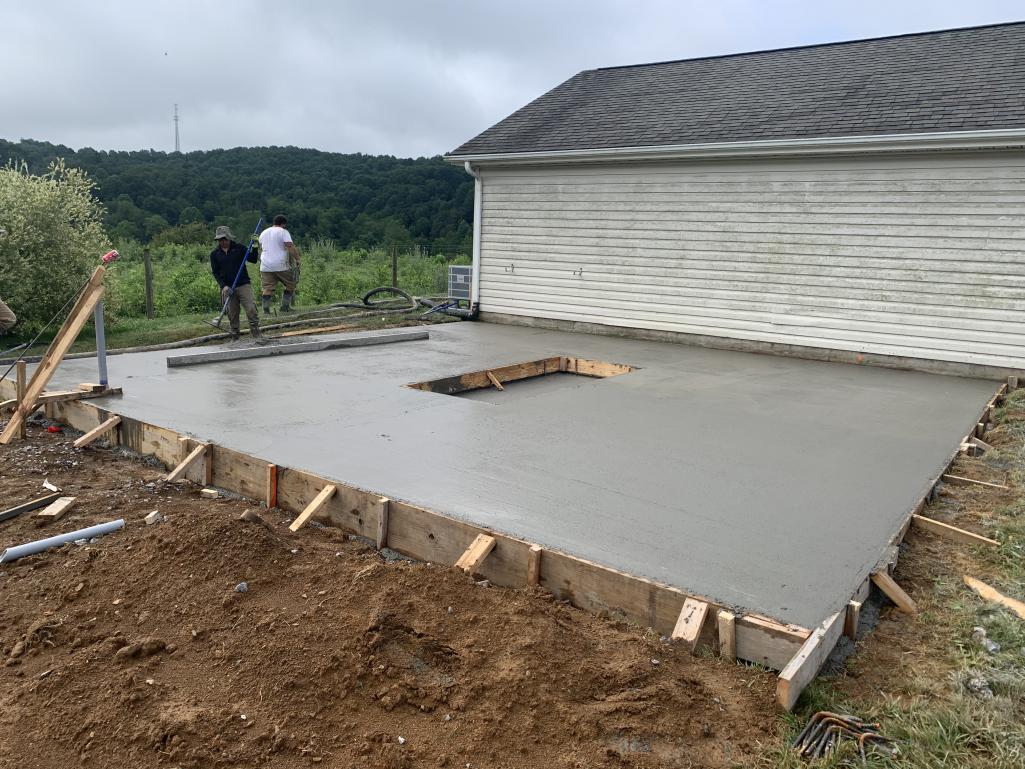 |
|
|
|
| Montreal914 |
Jul 18 2025, 09:10 PM
Post
#373
|
|
Advanced Member Group: Members Posts: 2,177 Joined: 8-August 10 From: Claremont, CA Member No.: 12,023 Region Association: Southern California |
Nice! Is the floor recess for a flush mount lift? (IMG:style_emoticons/default/smile.gif)
|
|
|
|
| Mitox |
Jul 18 2025, 09:53 PM
Post
#374
|
|
Senior Member Group: Members Posts: 551 Joined: 26-October 15 From: SW Virginia Member No.: 19,302 Region Association: South East States |
QUOTE(Montreal914 @ Jul 18 2025, 11:10 PM) The recess is for a mid rise scissor lift that is 7” tall when fully lowered. I’ll need to figure out a cover for when it’s not in use. |
|
|
|
| Mitox |
Aug 11 2025, 01:56 PM
Post
#375
|
|
Senior Member Group: Members Posts: 551 Joined: 26-October 15 From: SW Virginia Member No.: 19,302 Region Association: South East States |
Well, I’m not sure this is going to give me the ability to lower the rear as needed.
The Ground control setup will go down about 2 inches for the helper springs, but the adjuster is on the bottom. Suppose I’ll see what happens when the car gets on the ground. 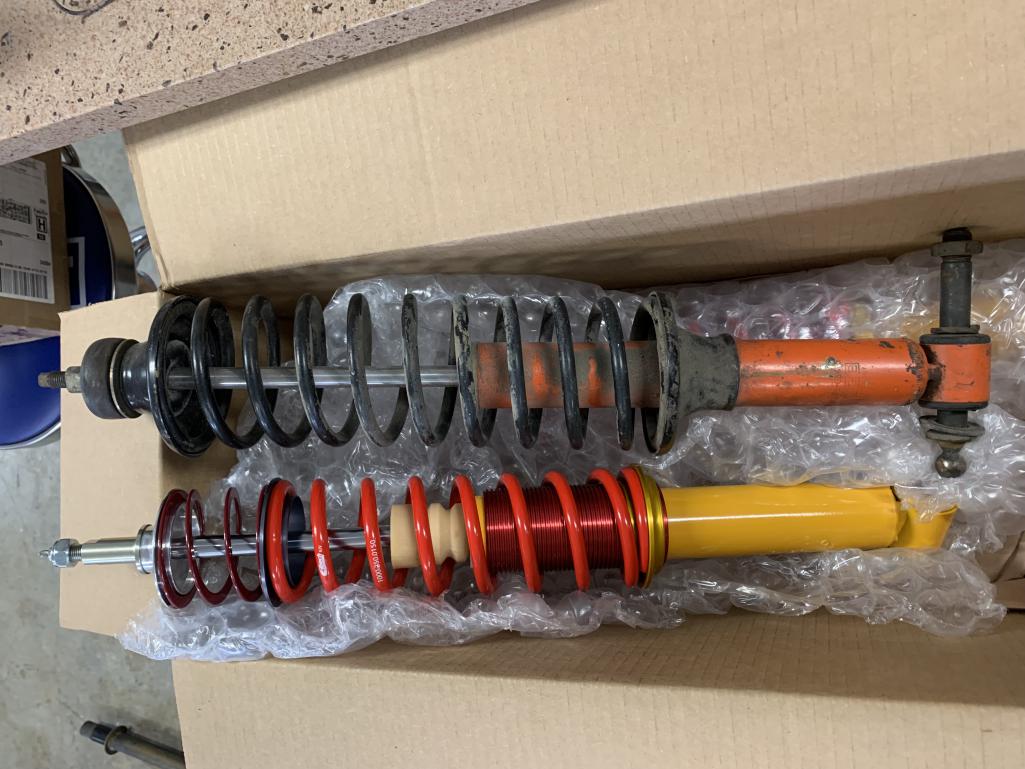 |
|
|
|
| Mitox |
Aug 11 2025, 02:36 PM
Post
#376
|
|
Senior Member Group: Members Posts: 551 Joined: 26-October 15 From: SW Virginia Member No.: 19,302 Region Association: South East States |
FYI - this may save you some frustration and wasted money.
The brake line grommet from URO for the front and rear exits from body is incorrect and will not work - easily. There are two diameters on the original grommet, both are wrong on the URO part. It is too large for the body hole, and too small for the original spring clamp. The original grommet is on the right in the pic below. 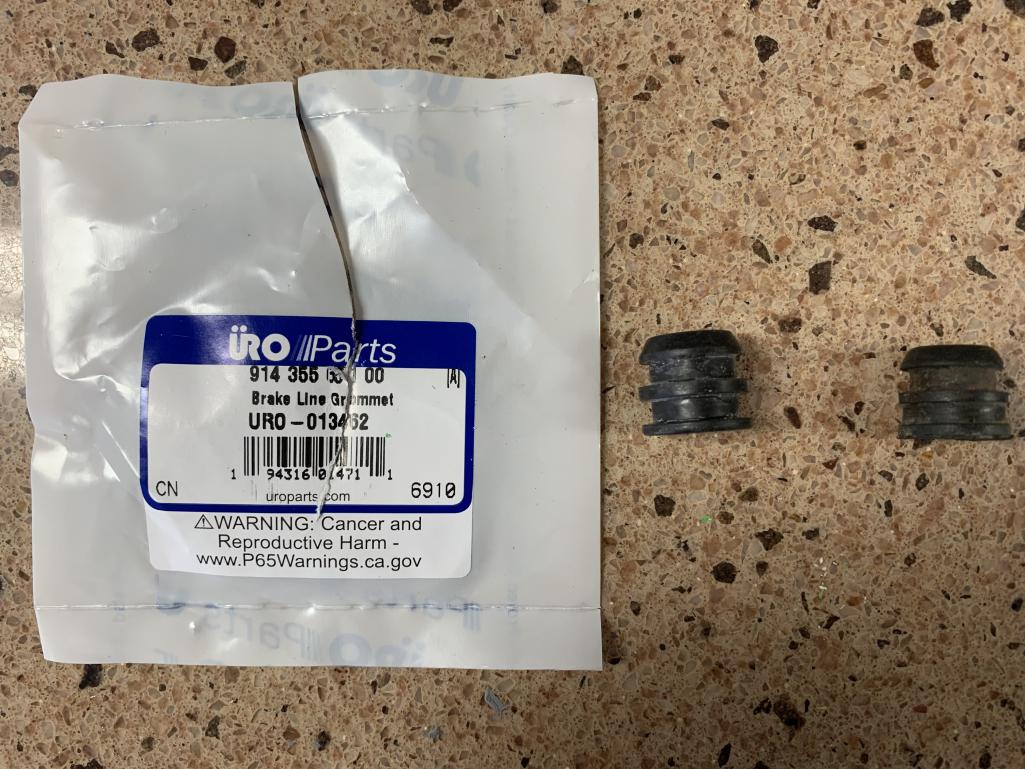 |
|
|
|
| Mitox |
Oct 28 2025, 04:24 PM
Post
#377
|
|
Senior Member Group: Members Posts: 551 Joined: 26-October 15 From: SW Virginia Member No.: 19,302 Region Association: South East States |
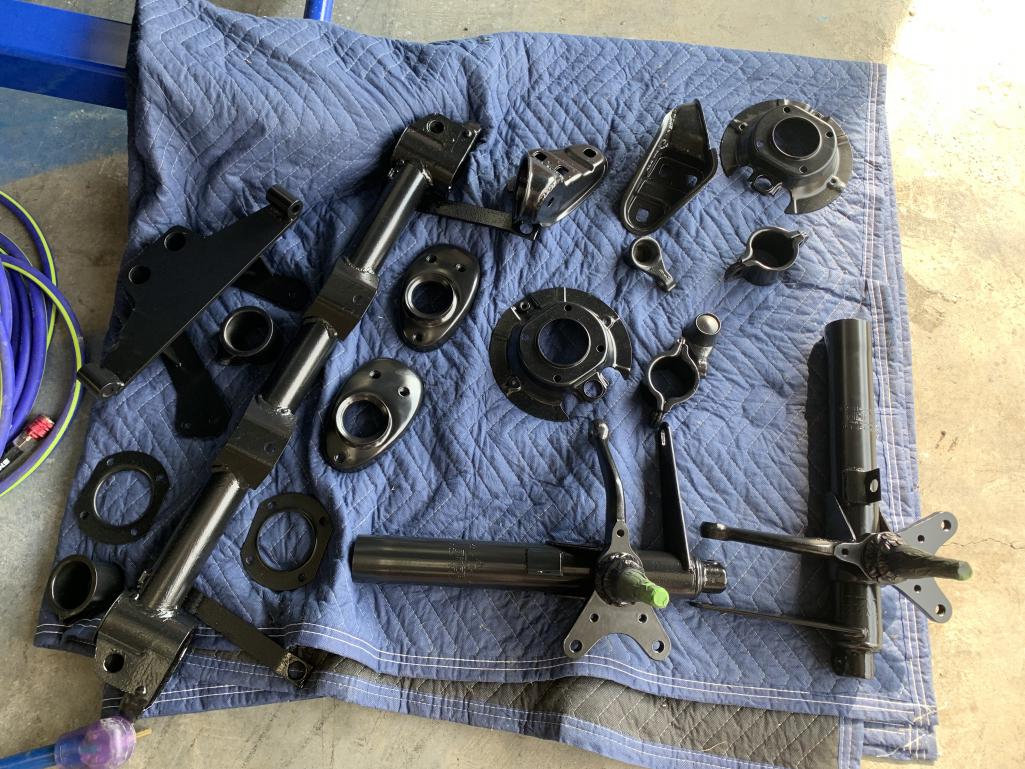
Time for a catch up post. Lost of parts are painted, and started putting parts together.
 |
|
|
|
| Mitox |
Oct 28 2025, 04:34 PM
Post
#378
|
|
Senior Member Group: Members Posts: 551 Joined: 26-October 15 From: SW Virginia Member No.: 19,302 Region Association: South East States |
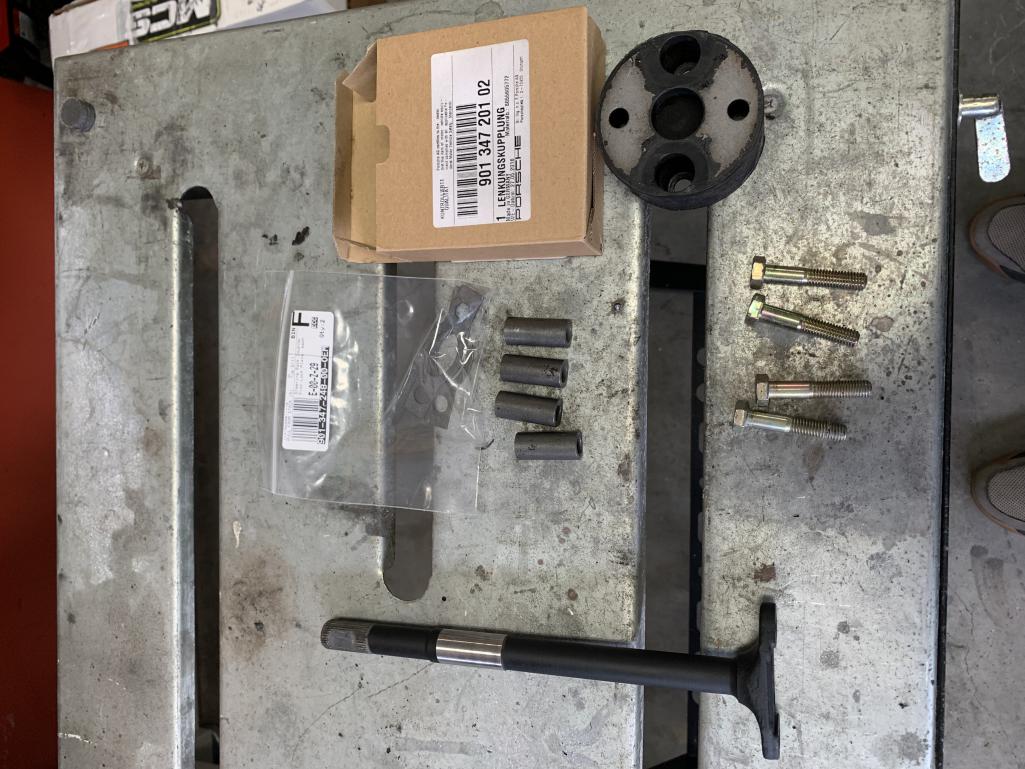
The cross member and steering rack was first to be assembled.
914Rubber rebuilt my rack Lemforder turbo tie rods New coupler and steering shaft bearing 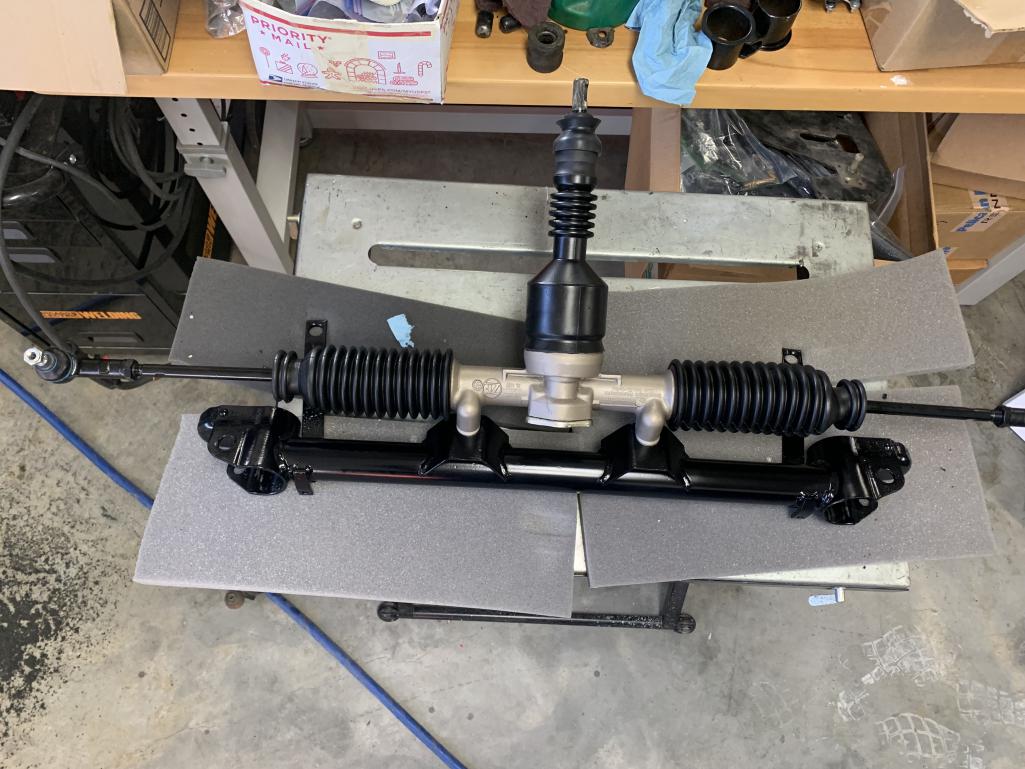 |
|
|
|
| Mitox |
Oct 28 2025, 04:38 PM
Post
#379
|
|
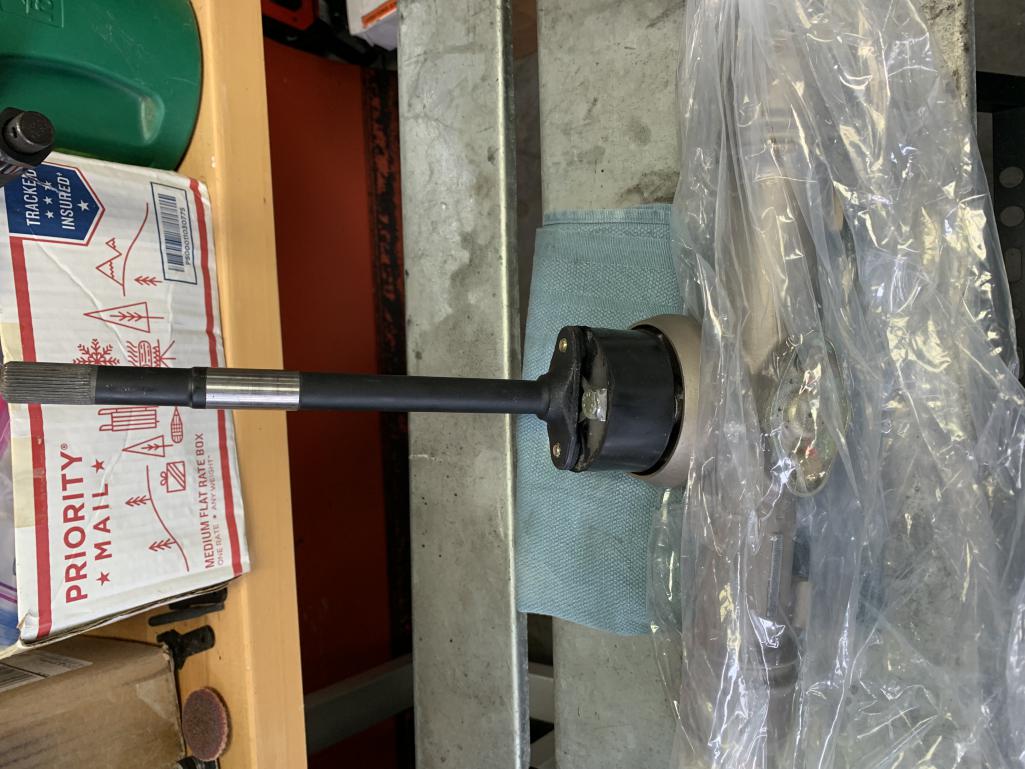
Senior Member Group: Members Posts: 551 Joined: 26-October 15 From: SW Virginia Member No.: 19,302 Region Association: South East States |
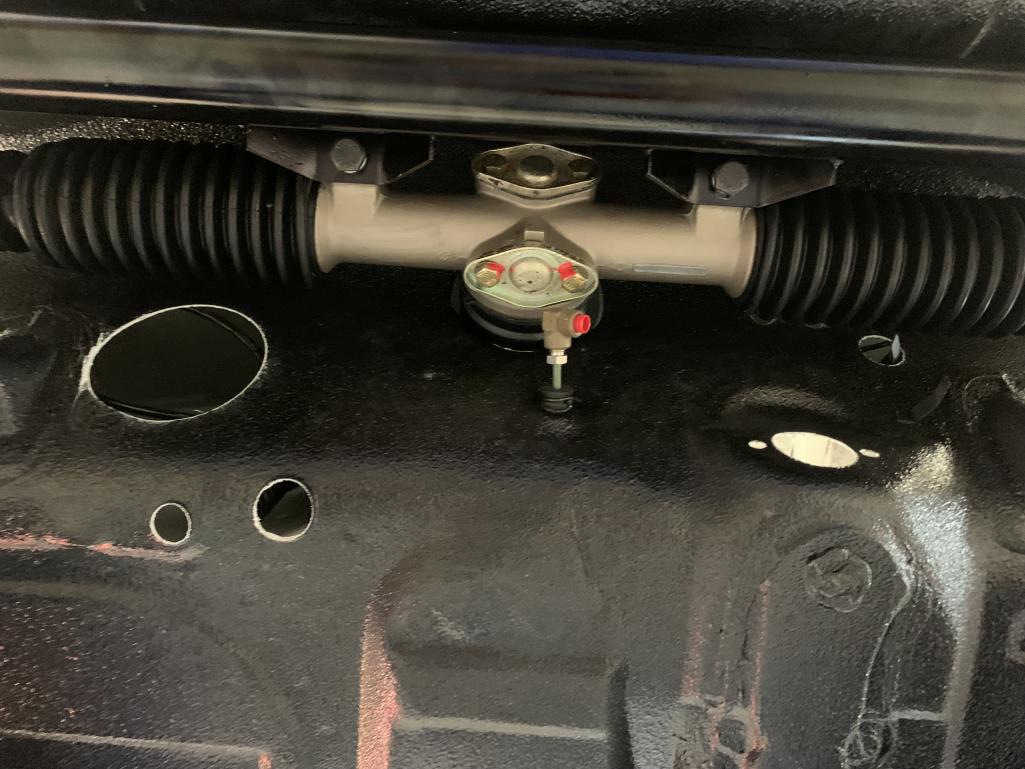
Steering rack is installed - next comes the control arms
 |
|
|
|
| Mitox |
Oct 28 2025, 04:44 PM
Post
#380
|
|
Senior Member Group: Members Posts: 551 Joined: 26-October 15 From: SW Virginia Member No.: 19,302 Region Association: South East States |
The bushing install wasn’t too difficult with the press and the Elephant Racing parts/tools. I might do it differently if I ever do it again - hopefully I won’t need to. I should have taken a few more in-process pics of these.
 |
|
|
|
|
1 User(s) are reading this topic (1 Guests and 0 Anonymous Users)
0 Members:

|
Lo-Fi Version | Time is now: 29th July 2026 - 01:22 AM |
Invision Power Board
v9.1.4 © 2026 IPS, Inc.