|
|
|
Porsche, and the Porsche crest are registered trademarks of Dr. Ing. h.c. F. Porsche AG.
This site is not affiliated with Porsche in any way. Its only purpose is to provide an online forum for car enthusiasts. All other trademarks are property of their respective owners. |
|
|

  |

| Mitox |
 Dec 14 2025, 11:54 AM Dec 14 2025, 11:54 AM
Post
#421
|
|
Senior Member  Group: Members Posts: 551 Joined: 26-October 15 From: SW Virginia Member No.: 19,302 Region Association: South East States |
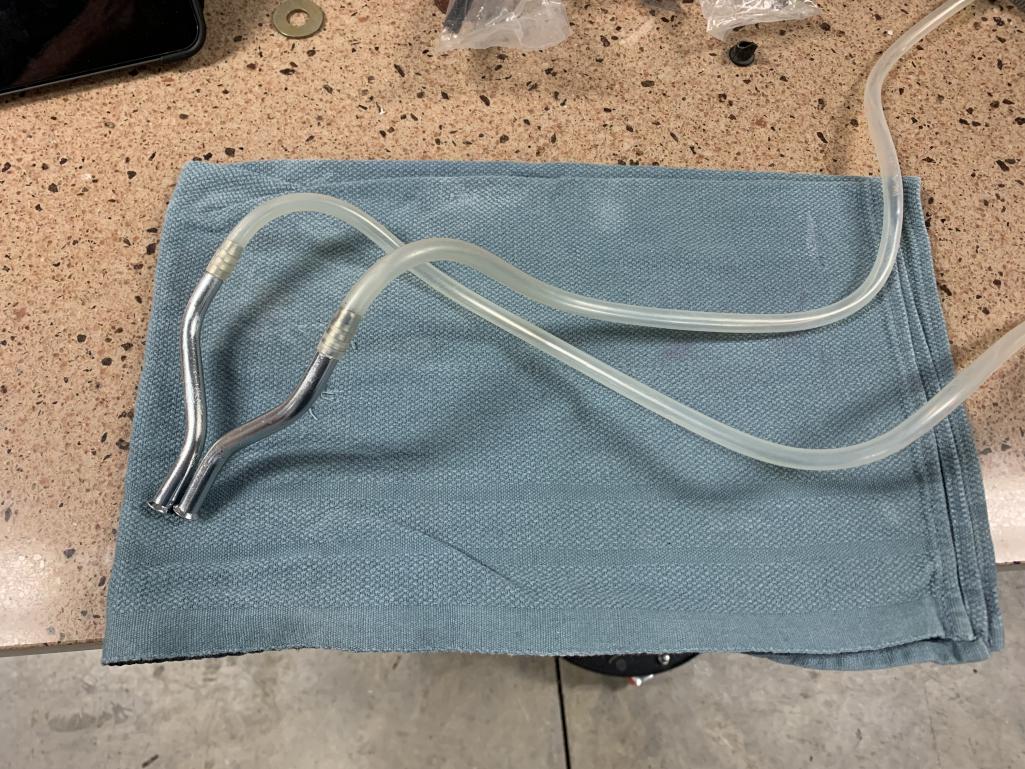
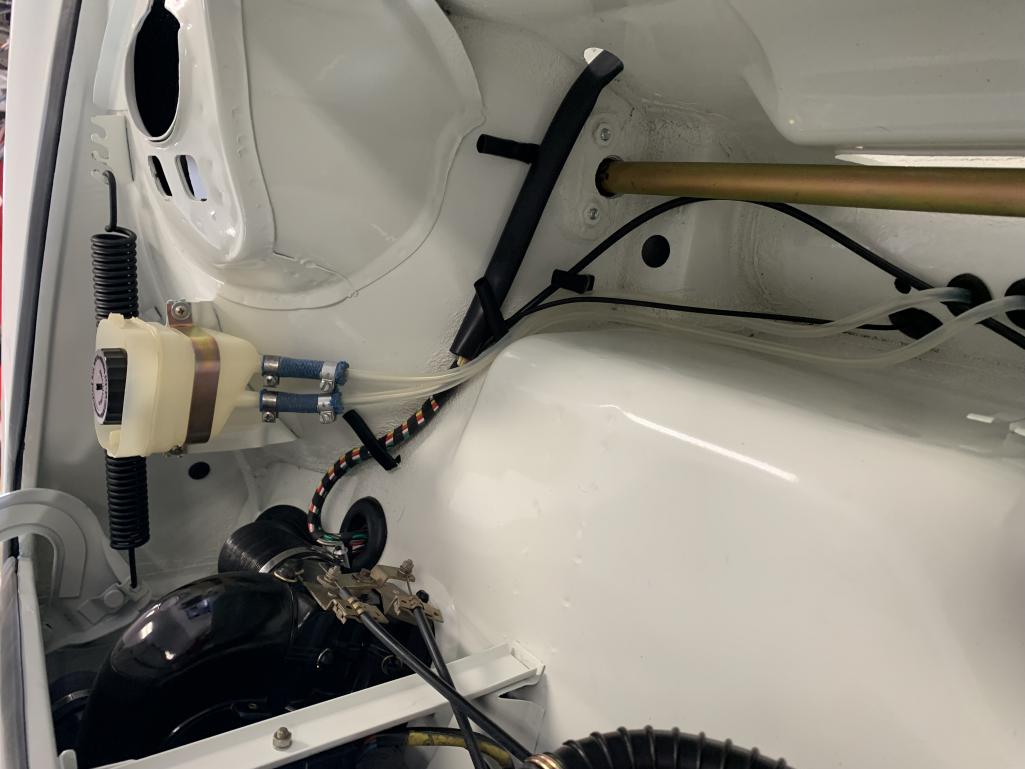
The banjo bolt for the master cylinder came in yesterday, so the brake lines are all in except for the connections to the calipers. I was able to reuse the reservoir to master cylinder clear plastic lines with the metal sections I had plated.
 |
   |

 
|
| Mitox |
Dec 14 2025, 11:55 AM
Post
#422
|
|
Senior Member Group: Members Posts: 551 Joined: 26-October 15 From: SW Virginia Member No.: 19,302 Region Association: South East States |
 |
|
|
|
| Mitox |
Dec 14 2025, 11:56 AM
Post
#423
|
|
Senior Member Group: Members Posts: 551 Joined: 26-October 15 From: SW Virginia Member No.: 19,302 Region Association: South East States |
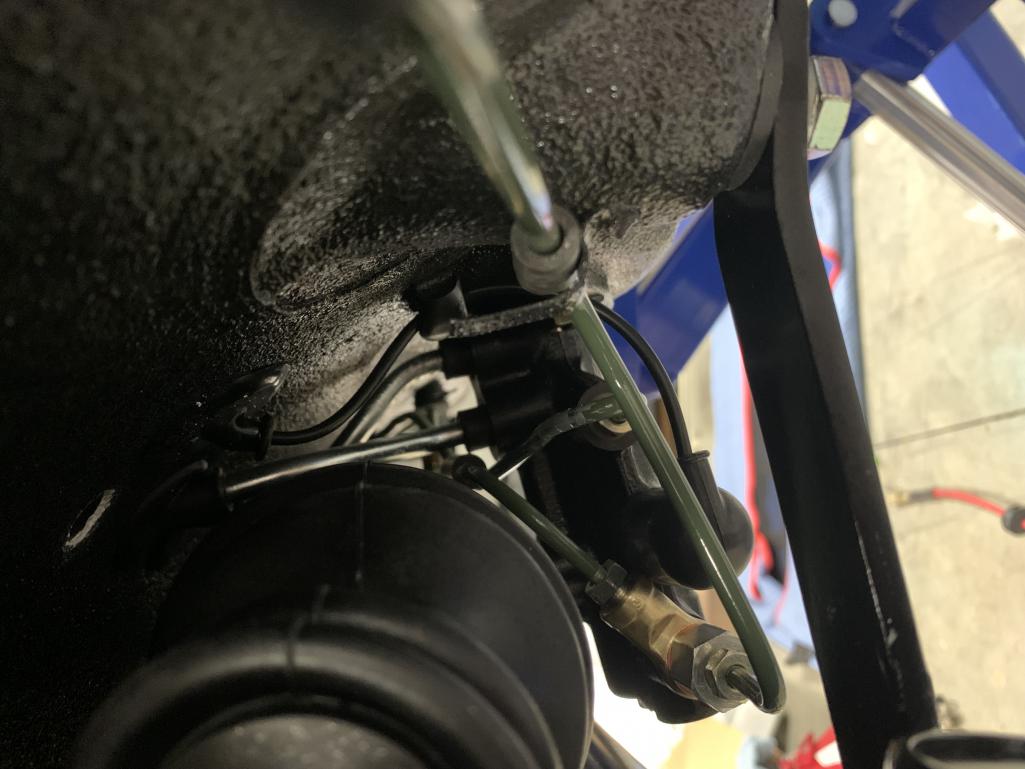
Master cylinder shot
 |
|
|
|
| Mitox |
Dec 14 2025, 12:05 PM
Post
#424
|
|
Senior Member Group: Members Posts: 551 Joined: 26-October 15 From: SW Virginia Member No.: 19,302 Region Association: South East States |
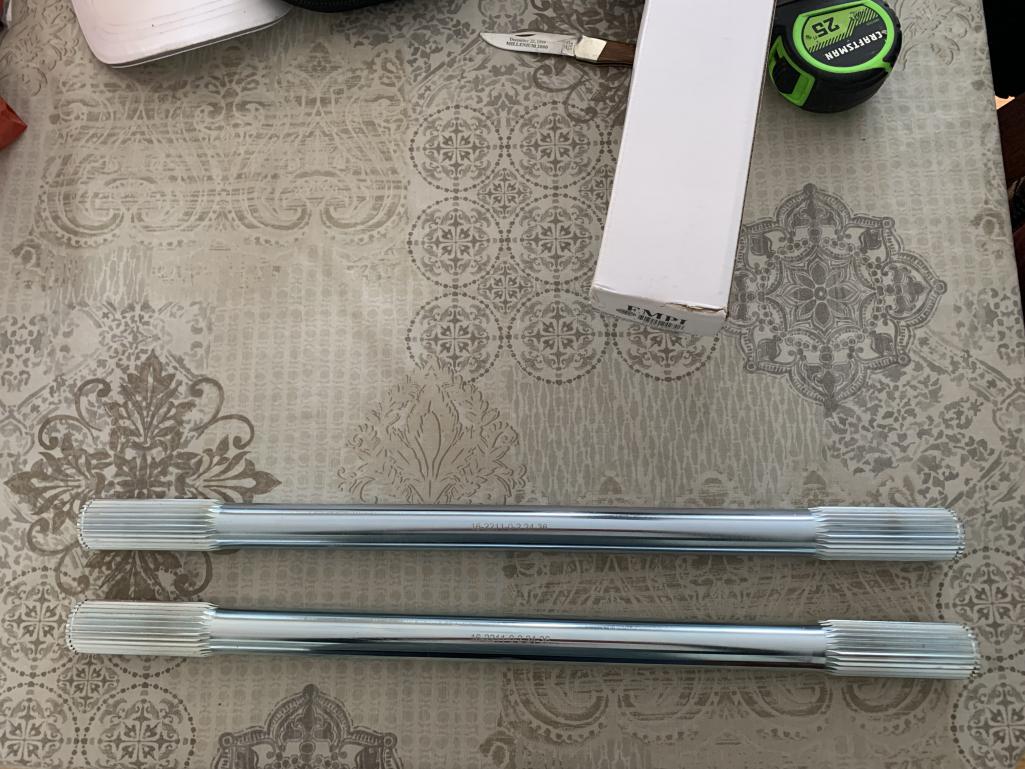
Also, decided to go with the Empi axles from PMB.
 |
|
|
|
| Mitox |
Dec 14 2025, 01:24 PM
Post
#425
|
|
Senior Member Group: Members Posts: 551 Joined: 26-October 15 From: SW Virginia Member No.: 19,302 Region Association: South East States |
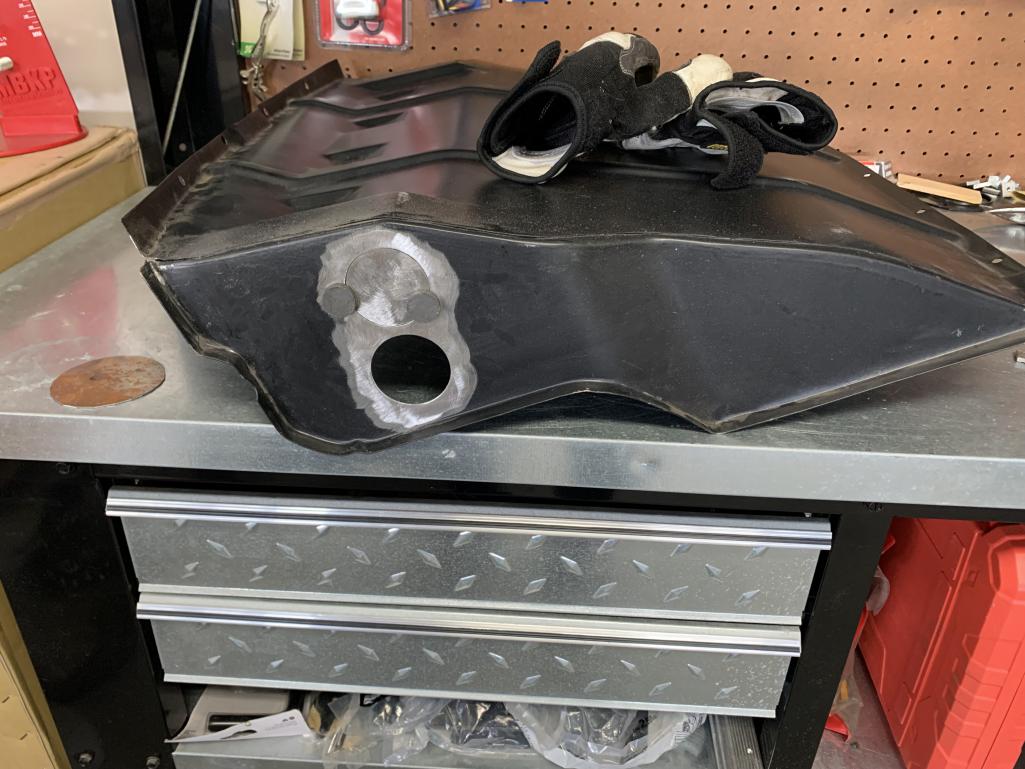
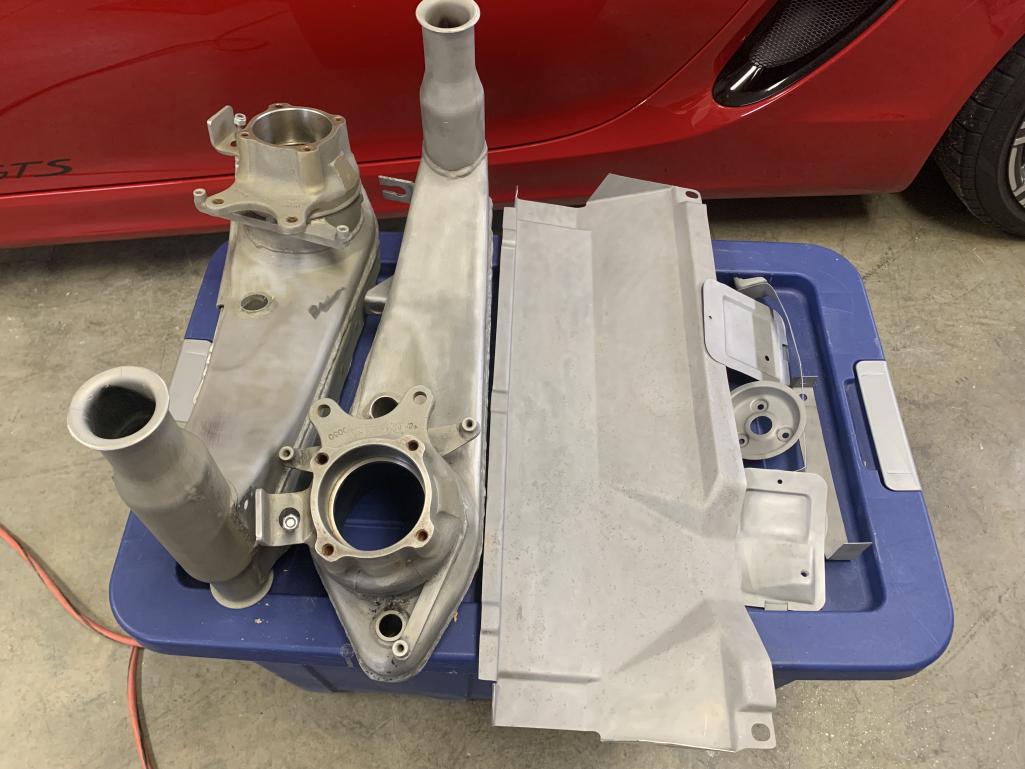
Before moving on with the oil lines, the oil cooler and shroud needs to be fitted better. The lines are coming in from the passenger side, so patching the original holes is in work.
 |
|
|
|
| Mitox |
Dec 21 2025, 03:02 PM
Post
#426
|
|
Senior Member Group: Members Posts: 551 Joined: 26-October 15 From: SW Virginia Member No.: 19,302 Region Association: South East States |
I have an odd question for anyone that knows:
I think one of these holes should remain open on the trailing arm. Does anyone remember which one? The hole on the trailing tip next to the shock mount, or the hole on the bottom? I filled one of them, then doubted my memory 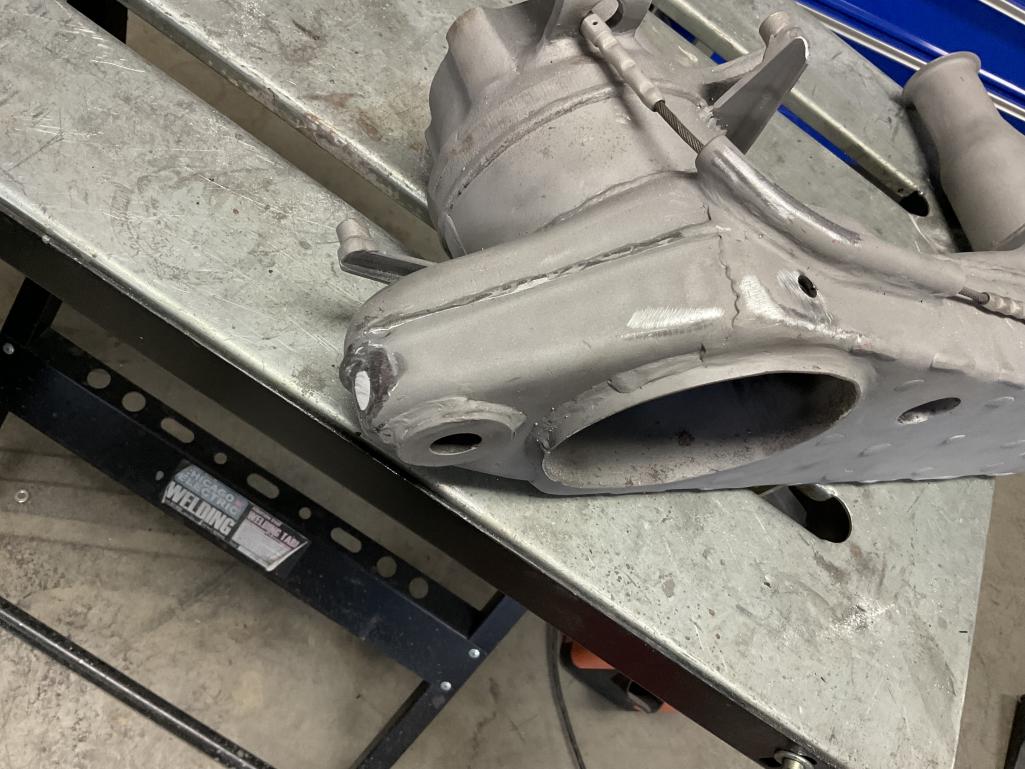 |
|
|
|
| rgalla9146 |
Dec 22 2025, 06:57 AM
Post
#427
|
|
Advanced Member Group: Members Posts: 4,984 Joined: 23-November 05 From: Paramus NJ Member No.: 5,176 Region Association: None |
Both remain open. What are the added brackets that extend away on the far side in the pic ? |
|
|
|
| Luke M |
Dec 22 2025, 07:24 AM
Post
#428
|
|
Senior Member Group: Members Posts: 1,563 Joined: 8-February 05 From: WNY Member No.: 3,574 Region Association: North East States |
QUOTE(rgalla9146 @ Dec 22 2025, 05:57 AM)  Both remain open. What are the added brackets that extend away on the far side in the pic ? Looks like added brackets to hold a dust shield in place? Any updates on the oil cooler install? |
|
|
|
| Mitox |
Dec 22 2025, 10:50 AM
Post
#429
|
|
Senior Member Group: Members Posts: 551 Joined: 26-October 15 From: SW Virginia Member No.: 19,302 Region Association: South East States |
QUOTE(rgalla9146 @ Dec 22 2025, 07:57 AM) Both remain open. What are the added brackets that extend away on the far side in the pic ? Thanks for the response on the holes. The added brackets are to mount the dust shield; I’m using the 911 e-brake setup, so the original mounts and shield can’t be used. |
|
|
|
| Mitox |
Dec 22 2025, 11:04 AM
Post
#430
|
|
Senior Member Group: Members Posts: 551 Joined: 26-October 15 From: SW Virginia Member No.: 19,302 Region Association: South East States |
QUOTE(Luke M @ Dec 22 2025, 08:24 AM) QUOTE(rgalla9146 @ Dec 22 2025, 05:57 AM) Both remain open. What are the added brackets that extend away on the far side in the pic ? Looks like added brackets to hold a dust shield in place? Any updates on the oil cooler install? Oil cooler update: I’ve been manipulating the metal shroud trying to get a better fit to the car’s contour with some success. The gaps are minimized to where a gasket should seal everything; I just purchased a gasket I’ll be trying out today. The shroud should be plug and play, but there are significant mismatches - maybe the shape is slightly different from the early cars? Also, the Elephant Racing kit terminates in the front fender well, so I need to figure out the tube, hose, connections to the oil cooler. I would like to continue the plumbing with the 30mm connections, but that will require custom tube and or hose, so I may need to switch over to AN stuff. |
|
|
|
| mepstein |
Dec 22 2025, 11:53 AM
Post
#431
|
|
914-6 GT in waiting Group: Members Posts: 20,840 Joined: 19-September 09 From: Landenberg, PA/Wilmington, DE Member No.: 10,825 Region Association: MidAtlantic Region |
It’s usually easier to use some metric to a/n adaptors than keep it metric all the way through.
|
|
|
|
| Mitox |
Dec 23 2025, 01:18 PM
Post
#432
|
|
Senior Member Group: Members Posts: 551 Joined: 26-October 15 From: SW Virginia Member No.: 19,302 Region Association: South East States |
Tried out the gasket today; it is 3/8” thick. I’ll need to try 1/4”, it takes to much force to compress the 3/8”.
After this is worked out, I’ll locate and install rivnuts. I’m thinking a few loadspreaders similar to what is used on valve covers would be useful also. 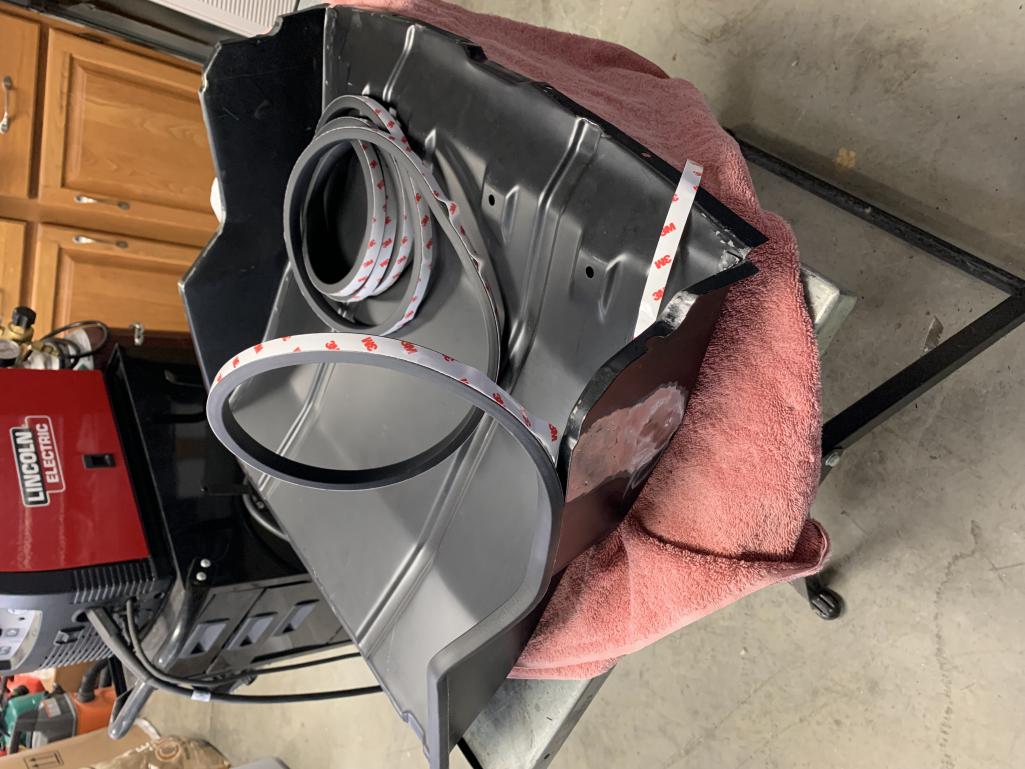 |
|
|
|
| Mitox |
Dec 29 2025, 03:46 PM
Post
#433
|
|
Senior Member Group: Members Posts: 551 Joined: 26-October 15 From: SW Virginia Member No.: 19,302 Region Association: South East States |
Yep, the 1/4” seal works very well. I located a few holes and klecos, but still need the rivnuts to complete the full install.
I’m also thinking of performing a little surgery in the shroud to make it removable without disconnecting the cooler hoses. 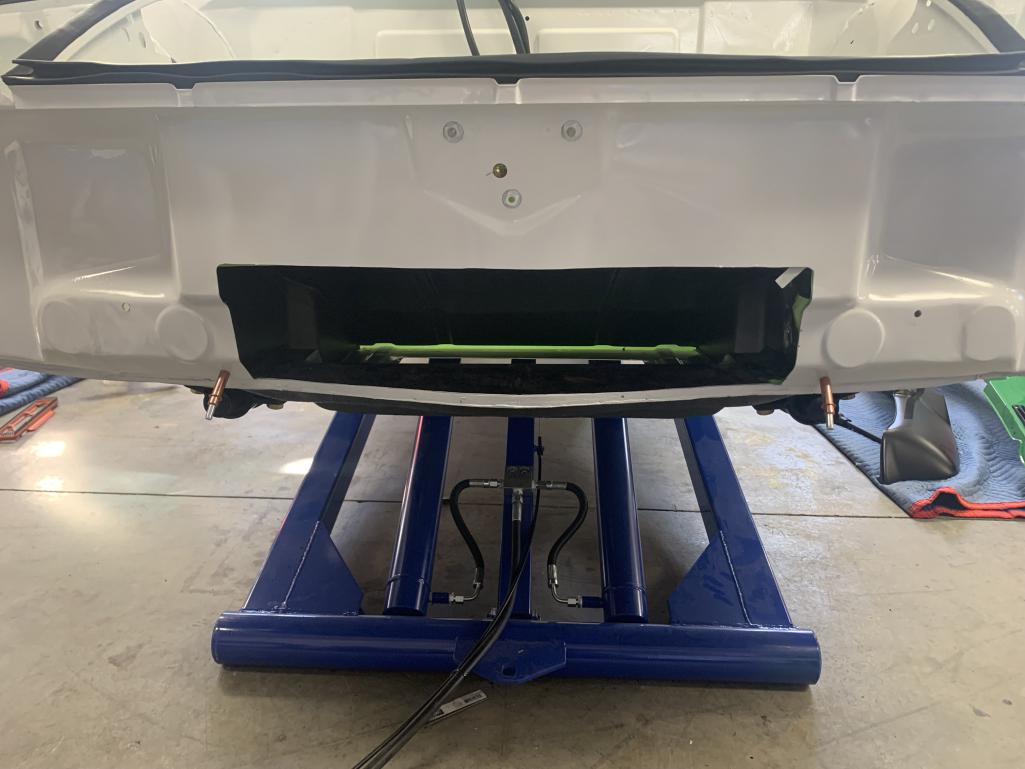 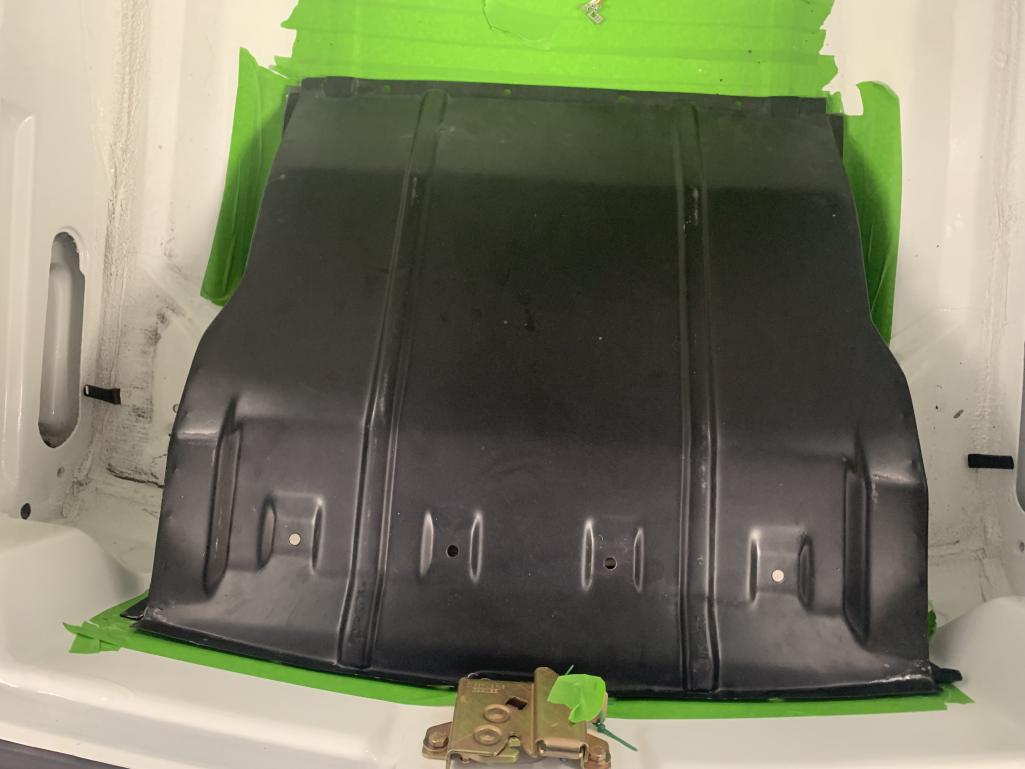 |
|
|
|
| Mitox |
Dec 29 2025, 08:38 PM
Post
#434
|
|
Senior Member Group: Members Posts: 551 Joined: 26-October 15 From: SW Virginia Member No.: 19,302 Region Association: South East States |
And, of course, the holes for attaching it to the oil cooler are randomly located.
Be prepared for rework if you get one of these metal shrouds - but that’s likely true of the fiberglass units also. 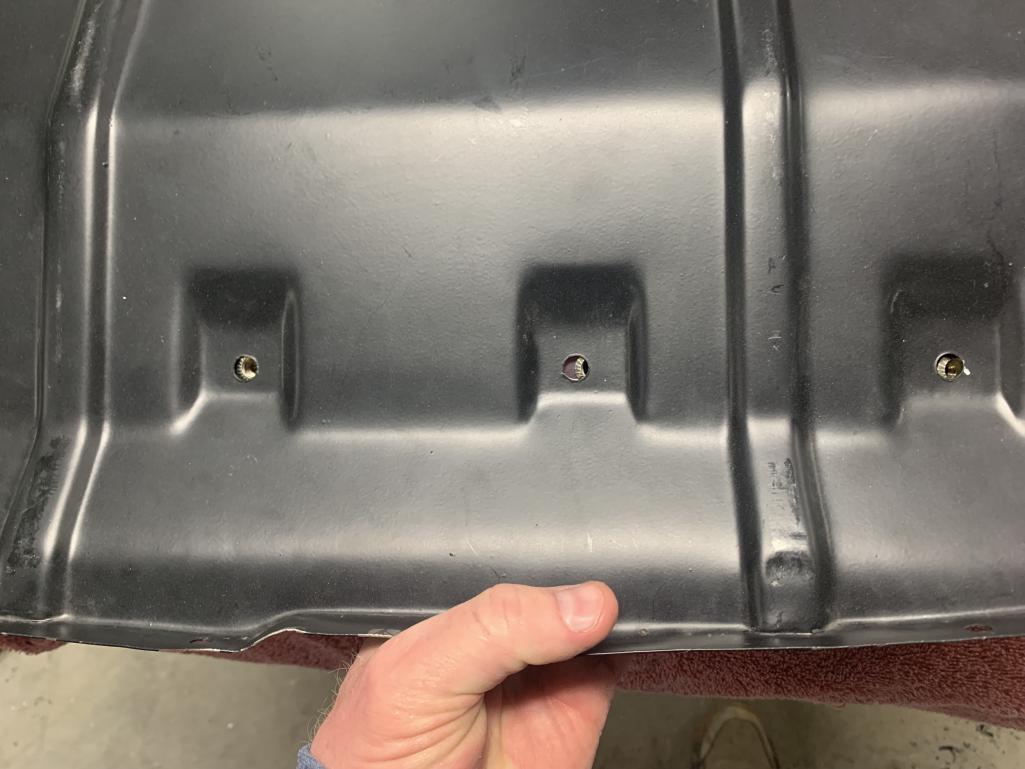 |
|
|
|
| Mitox |
Dec 29 2025, 08:43 PM
Post
#435
|
|
Senior Member Group: Members Posts: 551 Joined: 26-October 15 From: SW Virginia Member No.: 19,302 Region Association: South East States |
So, with the oil cooler connection holes relocated, and the screw holes modified, the oil cooler is in place for the first trial.
Now to make a mount under the oil cooler. 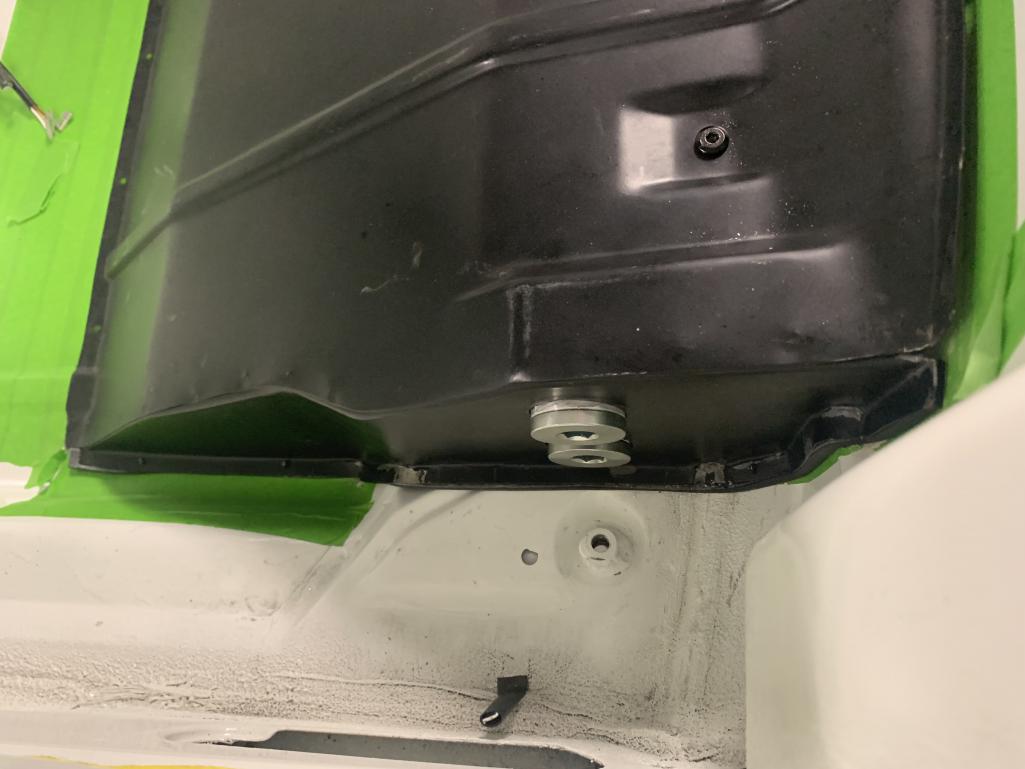 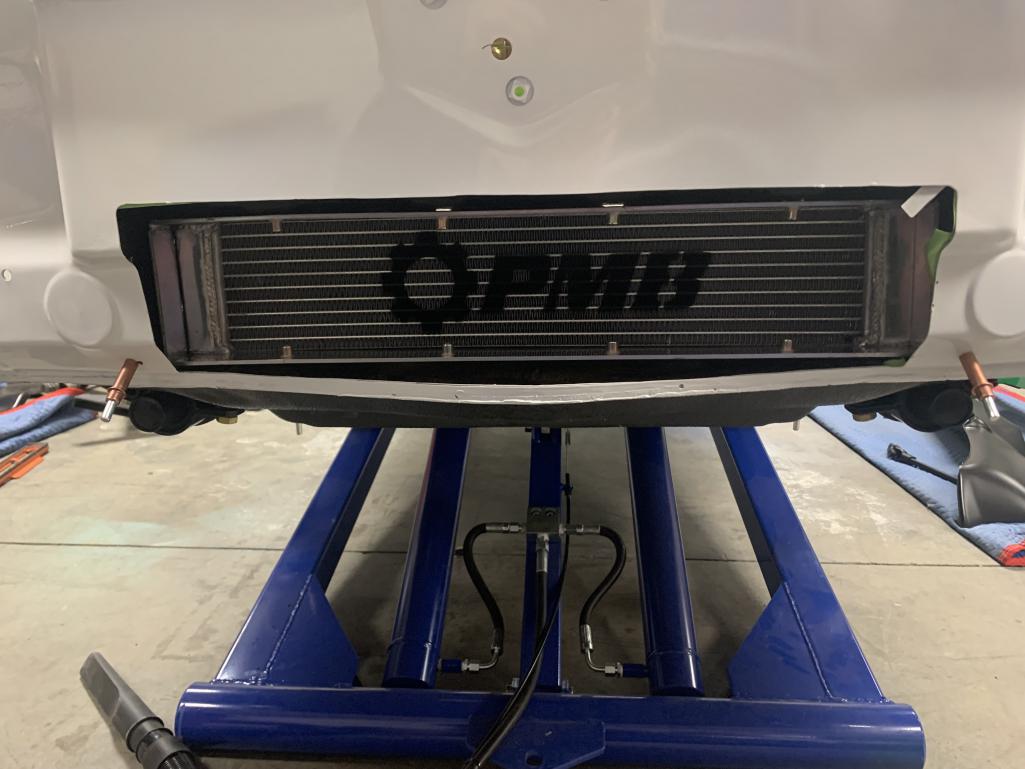 |
|
|
|
| Mitox |
Jan 3 2026, 04:44 PM
Post
#436
|
|
Senior Member Group: Members Posts: 551 Joined: 26-October 15 From: SW Virginia Member No.: 19,302 Region Association: South East States |
Oil cooler bottom mount is complete; the rivnuts will come soon.
Also, started installing the rivnuts for the shroud; they’re installed wet with ZRC. I’ll get the shroud back in place this evening to locate the remaining holes and plan for the intake grill. 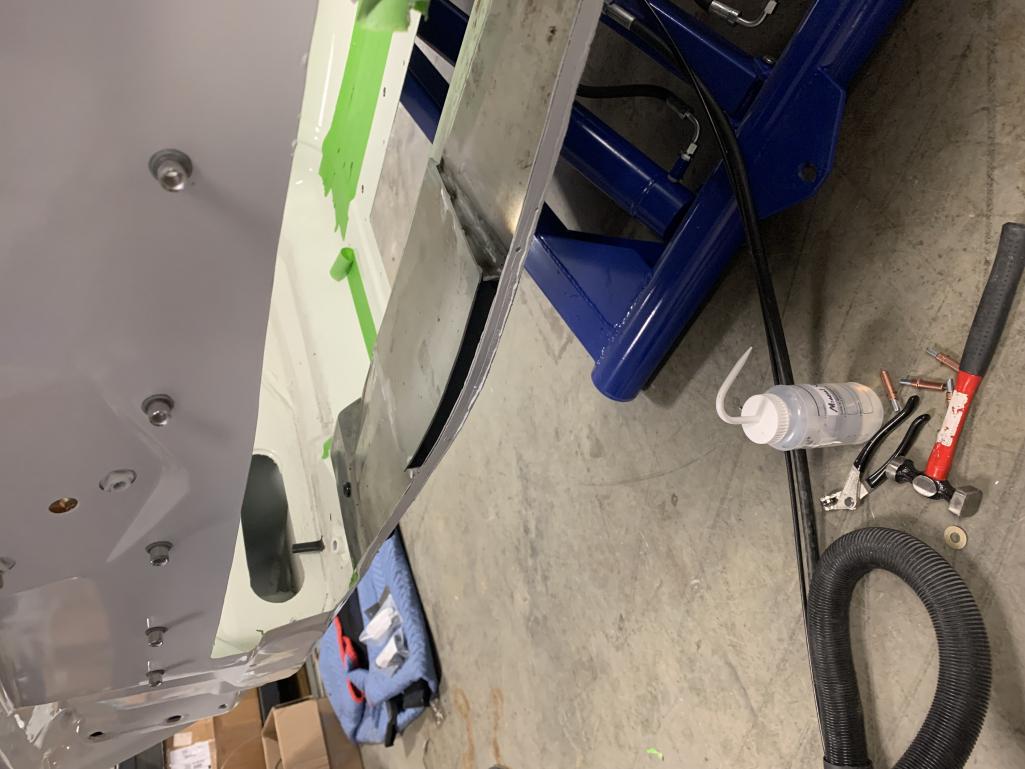 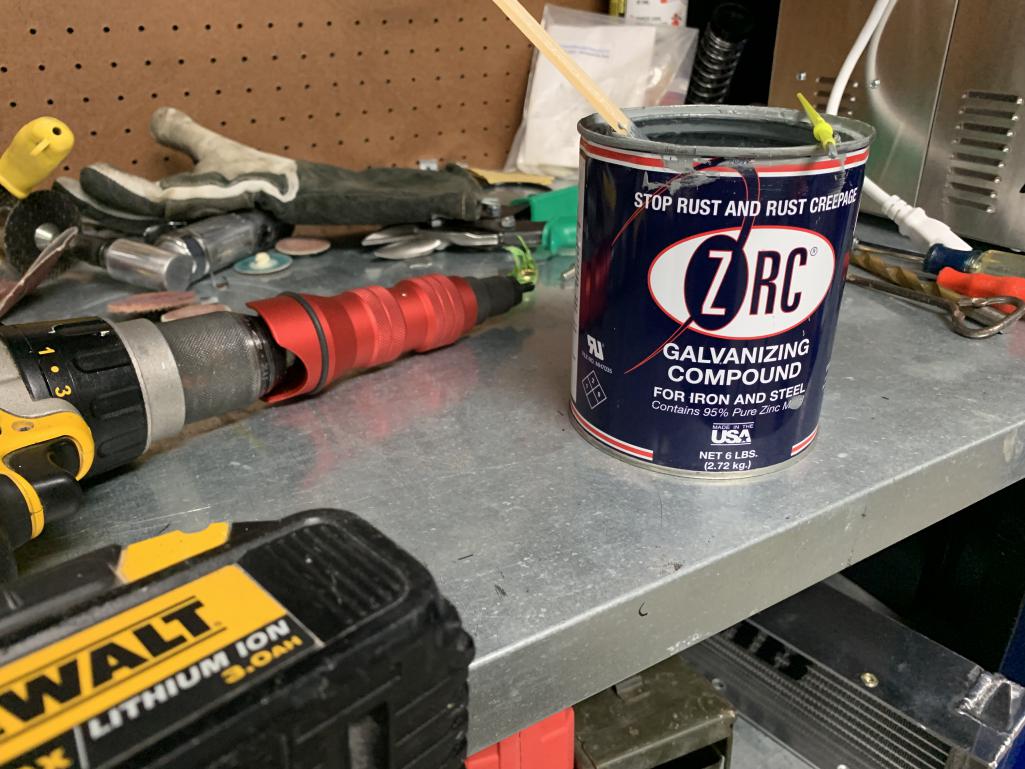 |
|
|
|
| Mitox |
Jan 6 2026, 02:17 PM
Post
#437
|
|
Senior Member Group: Members Posts: 551 Joined: 26-October 15 From: SW Virginia Member No.: 19,302 Region Association: South East States |
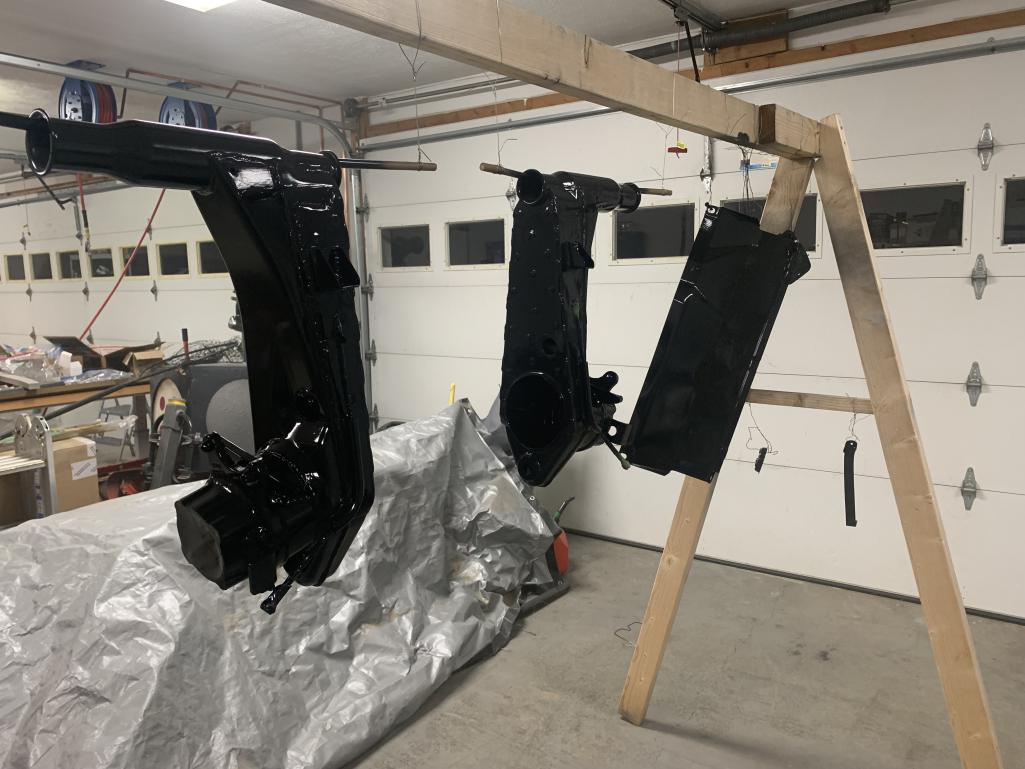
Schedule change to get some parts painted- we’re having warm weather for a few days in the mountains of Virginia. I decided against powder coat on the trailing arms, so I’ll paint them and a few others parts I’ve been blasting. I think that only leaves the oil cooling ducting to paint.
 |
|
|
|
| Cairo94507 |
Jan 7 2026, 08:07 AM
Post
#438
|
|
Michael Group: Members Posts: 10,723 Joined: 1-November 08 From: Auburn, CA Member No.: 9,712 Region Association: Northern California |
Nice progress. (IMG:style_emoticons/default/beerchug.gif)
|
 |
|
| Mitox |
Jan 7 2026, 05:22 PM
Post
#439
|
|
Senior Member Group: Members Posts: 551 Joined: 26-October 15 From: SW Virginia Member No.: 19,302 Region Association: South East States |
A little more today - painting parts feels good
Epoxy primer and top coat 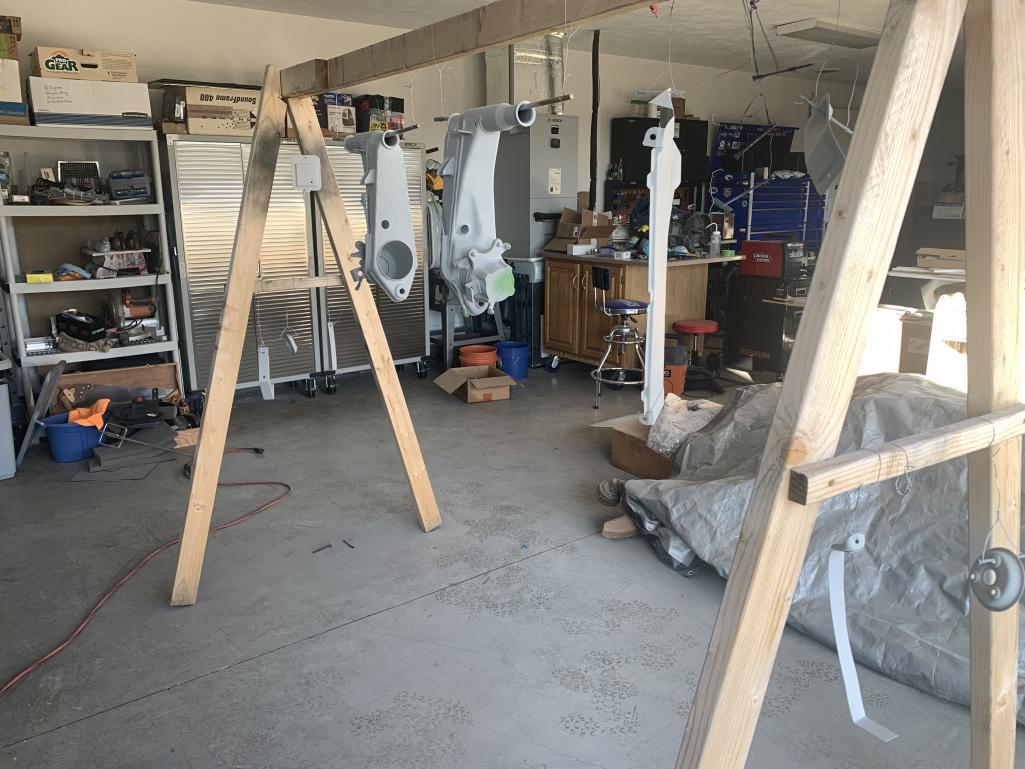 |
|
|
|
| Mitox |
Jan 7 2026, 05:23 PM
Post
#440
|
|
Senior Member Group: Members Posts: 551 Joined: 26-October 15 From: SW Virginia Member No.: 19,302 Region Association: South East States |
 |
|
|
|
|
2 User(s) are reading this topic (2 Guests and 0 Anonymous Users)
0 Members:

|
Lo-Fi Version | Time is now: 28th July 2026 - 10:51 PM |
Invision Power Board
v9.1.4 © 2026 IPS, Inc.