|
|
|
Porsche, and the Porsche crest are registered trademarks of Dr. Ing. h.c. F. Porsche AG.
This site is not affiliated with Porsche in any way. Its only purpose is to provide an online forum for car enthusiasts. All other trademarks are property of their respective owners. |
|
|

  |

| raynekat |
 Dec 4 2018, 01:06 AM Dec 4 2018, 01:06 AM
Post
#201
|
|
Advanced Member  Group: Members Posts: 2,169 Joined: 30-December 14 From: Coeur d'Alene, Idaho Member No.: 18,263 Region Association: Pacific Northwest |
Epic in many ways....the work, the move and change in life, the results so far, etc.
Nice work. |
   |

 
|
| aggiezig |
Feb 6 2019, 02:13 AM
Post
#202
|
|
Porsche Wannabe Group: Members Posts: 319 Joined: 13-January 16 From: Los Angeles, CA Member No.: 19,557 Region Association: Southern California |
Thanks for the feedback, everyone. I would love to meet up with some of you SoCal folk one of these days soon. I'm going to try and make it to the show in El Segundo this March. I was hoping to meet some people at the PCA show in the valley this last Sunday but it was rained out (so did the VW show at Santa Monica Pier).
Man, time just keeps flying by. Small update this time, just pecking away at little projects when I get a few minutes here and there. Color sanding and buffing has taken way more time then I ever imagined. Once I knock out the paint correction, my goal is to finish up controls and all the other mechanicals. I did manage to get the engine and transmission back out of the car so that I can install a new pressure plate, clutch and throw out bearing. I am not in love with the look of the transmission and contemplating painting it with some high-temp aluminum paint. Will see if I can muster the motivation. If it ain't broke… (IMG:http://www.914world.com/bbs2/uploads_offsite/i.imgur.com-19557-1549440780.1.jpg) I reassembled the headlight buckets (without bulbs yet, thinking LEDs) using powder coated and re-plated hardware. I had the chrome bezels coated satin black and the framework a gloss gray. The original plastic housings cleaned up really well with a coat of CQuartz Dlux ceramic. I think I will try to save as many original plastic pieces this way instead of using plastic paint. (IMG:http://www.914world.com/bbs2/uploads_offsite/i.imgur.com-19557-1549440780.2.jpg) (IMG:http://www.914world.com/bbs2/uploads_offsite/i.imgur.com-19557-1549440781.3.jpg) Also rebuilt the door catch mechanisms with original re-plated parts and rebuild kits from 914rubber. Top is before, bottom is after. (IMG:http://www.914world.com/bbs2/uploads_offsite/i.imgur.com-19557-1549440781.4.jpg) Seat tracks and bases were rebuilt with re-plated and powder coated hardware. Seat bases were rebuilt with a kit from 914rubber, although I had to drill out a couple of holes to make their included roll pins work in my cast pieces. I think I have the release handles installed the wrong way here in this pic. (IMG:http://www.914world.com/bbs2/uploads_offsite/i.imgur.com-19557-1549440781.5.jpg) (IMG:http://www.914world.com/bbs2/uploads_offsite/i.imgur.com-19557-1549440781.6.jpg) Installed knock off dynamat from Noico. I bought this stuff on amazon a few years ago for another project and it never got used so I decided to roll it out for the 914. Instead of covering every square inch, I'm trying to strategically place it in places with the most flex and / or resonance. The interior is pretty much complete and I plan to roll a strip under both trunk lids and also on the backside of the firewall. (IMG:http://www.914world.com/bbs2/uploads_offsite/i.imgur.com-19557-1549440782.7.jpg) But mostly, I've spent a lot of time color sanding and buffing the paint job. Everything is looking great for essentially a garage booth job. There are a few small imperfections that I know by heart but the average bystander would be hard pressed to point out without a detail light. (IMG:http://www.914world.com/bbs2/uploads_offsite/i.imgur.com-19557-1549440782.8.jpg) Unfortunately, I wasn't able to save the runs in the driver's side door and it will eventually need a re-spray. I sanded through the outermost layer of color trying to get the run to level out. I'm going to post another thread about it to see if I can get some advice from more experienced paint / body folks. --- On an unrelated note, I came across a 914 at a dealership in Sherman Oaks the other day and had to stop and look at this '74 1.8L. I added it to the VIN database. Pretty clean car and gives me inspiration to finish mine out. (IMG:http://www.914world.com/bbs2/uploads_offsite/i.imgur.com-19557-1549440782.9.jpg) --- Lastly, some other car-related news. After relocating to the city, I was tired of bottoming out and scraping on these LA roads. So, I sold my extremely fun DD (2008 M3 6 speed) and joined another vehicle cult (Jeep Owners). Sale Ad Pic: (IMG:http://www.914world.com/bbs2/uploads_offsite/i.imgur.com-19557-1549440782.10.jpg) The morning I said goodbye: (IMG:http://www.914world.com/bbs2/uploads_offsite/i.imgur.com-19557-1549440782.11.jpg) New (to me) ride: (IMG:http://www.914world.com/bbs2/uploads_offsite/i.imgur.com-19557-1549440783.12.jpg) (IMG:http://www.914world.com/bbs2/uploads_offsite/i.imgur.com-19557-1549440783.13.jpg) That's all for now. I'm enjoying sunny SoCal and will try to keep you all posted more regularly! |
|
|
|
| Peashooter |
Feb 6 2019, 08:38 AM
Post
#203
|
|
Member Group: Members Posts: 165 Joined: 17-December 11 From: SW Ohio Member No.: 13,903 Region Association: None |
If you have enough, add a square of the sound deadener inside the doors on the outer skin. When you shut the doors, they will give a nice thunk.
|
|
|
|
| bbrock |
Feb 6 2019, 10:27 AM
Post
#204
|
|
914 Guru Group: Members Posts: 5,269 Joined: 17-February 17 From: Montana Member No.: 20,845 Region Association: Rocky Mountains |
Glad to see you've been plugging away at it (IMG:style_emoticons/default/aktion035.gif) Looking good.
You are right that you have the seat release lever on backwards. Also, I'm pretty sure the release handles go on the tunnel side of the seats. I need to ask how you handled replating the tracks. I would really like to replate mine, but lost my nerve when it looked like rivets would need to be drilled out to take them apart. Huge bummer about your color sanding. Hopefully you can get a good match on the resprayed panels. |
|
|
|
| aggiezig |
Feb 6 2019, 08:30 PM
Post
#205
|
|
Porsche Wannabe Group: Members Posts: 319 Joined: 13-January 16 From: Los Angeles, CA Member No.: 19,557 Region Association: Southern California |
QUOTE(Peashooter @ Feb 6 2019, 09:38 AM)  If you have enough, add a square of the sound deadener inside the doors on the outer skin. When you shut the doors, they will give a nice thunk. This is a great idea but I have the "crash bars" inside my doors. I'll have to see if I can find some space for it, I have plenty of extra left over. QUOTE(bbrock @ Feb 6 2019, 11:27 AM) Glad to see you've been plugging away at it (IMG:style_emoticons/default/aktion035.gif) Looking good. You are right that you have the seat release lever on backwards. Also, I'm pretty sure the release handles go on the tunnel side of the seats. I need to ask how you handled replating the tracks. I would really like to replate mine, but lost my nerve when it looked like rivets would need to be drilled out to take them apart. Huge bummer about your color sanding. Hopefully you can get a good match on the resprayed panels. Thanks, Brent. I've been watching your thread whenever I need the inspiration to get out there and do some work. On the tracks... I went ahead and drilled out the rivets. I replaced using pop-rivets and used roll pins for the pivots. Send me a PM if that's not clear and I'll shoot you some pics. Yep, the color sanding issue really sucks. I'm putting it in the back of my mind for now and going to fix that dead last so that I can keep making progress. The hood is easy enough to bolt on and off and so is the door, thankfully. |
|
|
|
| aggiezig |
Feb 24 2019, 11:57 PM
Post
#206
|
|
Porsche Wannabe Group: Members Posts: 319 Joined: 13-January 16 From: Los Angeles, CA Member No.: 19,557 Region Association: Southern California |
Well, I don't know about the rest of you, but it's been nasty and rainy here in SoCal for a few weeks. Folks around here keep telling me this kind of weather isn't normal and I do have to admit I miss the sunshine. At any rate, time for another small update! I'm chugging along with small stuff, trying to knock out paint correction so I can focus on other bits.
Window regulators were cleaned up, treated for rust and painted gloss black. You'll never see 'em but at least they'll be clean during reassembly. Does anyone know if you can buy replacement nylon rollers for these regulators? (IMG:http://www.914world.com/bbs2/uploads_offsite/i.imgur.com-19557-1551074247.1.jpg) Also decided to polish up the heat exchangers, only took about five minutes because they really weren't too bad. Used some fine steel wool then 2000 grit with WD40 to lube. Before on left, after right. Still need to paint the non-stainless pipes with some exhaust paint. I believe this is a 1.8L exhaust, not sure if I'll run with it or try and swap for a 2.0L. (IMG:http://www.914world.com/bbs2/uploads_offsite/i.imgur.com-19557-1551074248.2.jpg) Sprayed the stain black under the engine grilles with some SEM Trim Black. I think the finish is pretty spot on. (IMG:http://www.914world.com/bbs2/uploads_offsite/i.imgur.com-19557-1551074248.3.jpg) (IMG:http://www.914world.com/bbs2/uploads_offsite/i.imgur.com-19557-1551074248.4.jpg) Spent some time wire wheeling the paint off of the transmission. The PO had sprayed it a dull gray and blue. Would like to just do a bright aluminum look. (IMG:http://www.914world.com/bbs2/uploads_offsite/i.imgur.com-19557-1551074249.5.jpg) Next up was the targa top. I decided to clean up the donor top I stole from a 72 a while back because it was in better shape than the original top from my car. Here is its state before refinishing. (IMG:http://www.914world.com/bbs2/uploads_offsite/i.imgur.com-19557-1551074249.6.jpg) First, I sanded everything down with 220 grit. I smoothed out all of the knicks and scratches along the edges by re-shaping the profiles. There was only one spot I decided to fill with a bit of putty. Here is after sanding: (IMG:http://www.914world.com/bbs2/uploads_offsite/i.imgur.com-19557-1551074249.7.jpg) After that, I sprayed 2-3 coats of raptor liner in black thinned about 15% with urethane reducer. I used one complete bottle with a tiny bit leftover. You can buy a single back on Amazon for about $40 and I think it's well worth it. Bottom side sprayed first, did not completely spray where headliner glues (IMG:http://www.914world.com/bbs2/uploads_offsite/i.imgur.com-19557-1551074249.8.jpg) (IMG:http://www.914world.com/bbs2/uploads_offsite/i.imgur.com-19557-1551074250.9.jpg) Close up of texture: (IMG:http://www.914world.com/bbs2/uploads_offsite/i.imgur.com-19557-1551074250.10.jpg) Lastly, here are some pictures of the paint correction. Everything is being color sanded down smooth to remove orange peel. Then correcting with Menzerna 400 heavy cut on a dual action (15mm throw) with a heavy cutting pad. The DA can take out the sanding scratches almost completely. If anything is left over, I can hit it with my rotary and wool pad. After cut is a polish with Menzerna Super Finish 3800. Then a pass with Meguairs #7 show car glaze. Then Menzerna power lock sealant and lastly some Collinite 845 insulator wax. Here are the results: (IMG:http://www.914world.com/bbs2/uploads_offsite/i.imgur.com-19557-1551074250.11.jpg) (IMG:http://www.914world.com/bbs2/uploads_offsite/i.imgur.com-19557-1551074250.12.jpg) (IMG:http://www.914world.com/bbs2/uploads_offsite/i.imgur.com-19557-1551074250.13.jpg) (IMG:http://www.914world.com/bbs2/uploads_offsite/i.imgur.com-19557-1551074251.14.jpg) Pretty happy with how it's turning out. Not perfect and truthfully the paint is probably an 8/10 but for a garage warrior and first-time painter it's not too bad. Side note - stopped by Cars & Coffee this morning by Griffith Park. Lots of sweet rides, below are a few of my favorites. (IMG:http://www.914world.com/bbs2/uploads_offsite/i.imgur.com-19557-1551074251.15.jpg) (IMG:http://www.914world.com/bbs2/uploads_offsite/i.imgur.com-19557-1551074251.16.jpg) (IMG:http://www.914world.com/bbs2/uploads_offsite/i.imgur.com-19557-1551074251.17.jpg) Believe this is a member's ride, the car is in the VIN database (IMG:http://www.914world.com/bbs2/uploads_offsite/i.imgur.com-19557-1551074251.18.jpg) Alright, that's all for now! Hope you enjoyed reading |
|
|
|
| bbrock |
Feb 26 2019, 12:17 AM
Post
#207
|
|
914 Guru Group: Members Posts: 5,269 Joined: 17-February 17 From: Montana Member No.: 20,845 Region Association: Rocky Mountains |
That roof came out really nice! I have to be honest, when I read you used Raptor, I wasn't expecting that good of a result. Nicely done.
Now as for your weather... you are welcome to come up here and enjoy -15F with a stiff east wind kicking snow in your face all day. (IMG:style_emoticons/default/poke.gif) |
|
|
|
| aggiezig |
Apr 20 2020, 02:32 PM
Post
#208
|
|
Porsche Wannabe Group: Members Posts: 319 Joined: 13-January 16 From: Los Angeles, CA Member No.: 19,557 Region Association: Southern California |
Hello 914World!
Wow, it's been more than a year since my last update. I did not mean to leave you guys hanging. Life has certainly gotten in the way of my 914 restoration. Some quick, personal news - my wife and I tied the knot last July and my 914 made a big debut… well, sort of. (IMG:http://www.914world.com/bbs2/uploads_offsite/i.imgur.com-19557-1587414751.1.jpg) (IMG:http://www.914world.com/bbs2/uploads_offsite/i.imgur.com-19557-1587414752.2.jpg) (IMG:http://www.914world.com/bbs2/uploads_offsite/i.imgur.com-19557-1587414752.3.jpg) (IMG:http://www.914world.com/bbs2/uploads_offsite/i.imgur.com-19557-1587414752.4.jpg) It was the next best thing to actually having the car at our wedding! The cake shop did a really great job. Ok, now back to the real Porsche. I told myself that 2020 would be the year she is back on the road - and so far, it's looking good! While this COVID business has affected a lot of people, I will admit that I am loving the extra time I have to work on the car. Combining that along with a new wrenching buddy (my neighbor, who also has a p-car project) and I think my 2020 goal might just be attainable! Here are some updates since I last posted… GENERAL UPDATES I had a few more parts and pieces plated in yellow zinc: (IMG:http://www.914world.com/bbs2/uploads_offsite/i.imgur.com-19557-1587414752.5.jpg) Spent way too much money at 914Rubber: (IMG:http://www.914world.com/bbs2/uploads_offsite/i.imgur.com-19557-1587414752.6.jpg) Installed the pedal assembly and (loosely) steering column: (IMG:http://www.914world.com/bbs2/uploads_offsite/i.imgur.com-19557-1587414752.7.jpg) For anyone wondering, here's what my "shop" looks like. It's a 2 bay garage under our house. It was built in 1922 or so, meaning the size is pretty small and there's a line of support columns running down the middle. The ceiling has been "modified" with several botched plumbing repairs in the past and is about 7' tall (good thing I'm pretty short). But, for LA, this is a prized possession. I added some LED lights to the ceiling to see better. I sure do miss TX sized workspaces. (IMG:http://www.914world.com/bbs2/uploads_offsite/i.imgur.com-19557-1587414752.8.jpg) WIRING I purchased a complete wiring harness kit for a 1972 & up deluxe VW beetle from Rebel Wire. As many of you know, the beetle and 914 of this era share many of the same electrical components. My intentions are to re-wire the car with this kit, modifying as necessary to incorporate factory and aftermarket pieces. I chose this kit because it uses "GM Style" wiring with separate fuses for each circuit. Additionally, it will have all new wire and they are labeled every 6". I'll document this process as I go for anyone else out there looking to do the same. For reference, the kit was around $300 and I'll have another $1-200 in supplies when I'm done. A lot less than a replacement harness and a lot safer with less mess. (IMG:http://www.914world.com/bbs2/uploads_offsite/i.imgur.com-19557-1587414752.9.jpg) TRANSMISSION I painted the transmission silver and completed it with nice, refreshed goodies: (IMG:http://www.914world.com/bbs2/uploads_offsite/i.imgur.com-19557-1587414752.10.jpg) (IMG:http://www.914world.com/bbs2/uploads_offsite/i.imgur.com-19557-1587414752.11.jpg) (IMG:http://www.914world.com/bbs2/uploads_offsite/i.imgur.com-19557-1587414752.12.jpg) FUEL TANK I finished the fuel tank with a new sender, refreshed wiring, fresh paint on the plastic and new seals: (IMG:http://www.914world.com/bbs2/uploads_offsite/i.imgur.com-19557-1587414752.13.jpg) (IMG:http://www.914world.com/bbs2/uploads_offsite/i.imgur.com-19557-1587414752.14.jpg) I also added new metal lines and nuts for the bottom. I'm not using the return line with my carbs but didn't want to epoxy it shut or completely block it off in case of future need. There are a ton of rubber caps online but none seemed to be for certain fuel rated. So, this is my cheap fix. It works fine for me and allows future flexibility. (IMG:http://www.914world.com/bbs2/uploads_offsite/i.imgur.com-19557-1587414752.15.jpg) BRAKES A new 914Rubber master cylinder was installed with re-plated/polished line fittings: (IMG:http://www.914world.com/bbs2/uploads_offsite/i.imgur.com-19557-1587414752.16.jpg) A rebuilt proportioning valve (PMB Performance) was installed and a rubber guard/grommet was added to the line after this picture: (IMG:http://www.914world.com/bbs2/uploads_offsite/i.imgur.com-19557-1587414753.17.jpg) I wasn't thrilled with the condition of my re-plated calipers as compared to the rest of the car. So, I broke down and splurged on rebuilt units from PMB Performance. They sure are pretty: (IMG:http://www.914world.com/bbs2/uploads_offsite/i.imgur.com-19557-1587414753.18.jpg) Rears installed: (IMG:http://www.914world.com/bbs2/uploads_offsite/i.imgur.com-19557-1587414753.19.jpg) Fronts installed: (I believe I have the clips in the right position, but correct me if I'm wrong) (IMG:http://www.914world.com/bbs2/uploads_offsite/i.imgur.com-19557-1587414753.20.jpg) ENGINE COMPARTMENT I've spent a fair amount of time crawling in and out of the engine compartment over the last few months. Turns out, the space is just big enough to fit my rolling shop stool (ask me how I know). I wanted to button up as much as possible in here before putting the drivetrain back in place. For whatever reason, this shift rod guide bushing was a total b*tch to get installed: (IMG:http://www.914world.com/bbs2/uploads_offsite/i.imgur.com-19557-1587414753.21.jpg) I followed @simonjb 's build as a guide for my fuel pump and filter: (IMG:http://www.914world.com/bbs2/uploads_offsite/i.imgur.com-19557-1587414753.22.jpg) I wired my fuel pump in with a relay that grounds through a crash circuit interrupter. I'm not sure that the placement is optimal, but the idea is that in the extremely unfortunate event of a crash, the fuel pump will be cut off. Also, I'm using a Miata sized AGM battery - need to fab up some sort of hold down still. (IMG:http://www.914world.com/bbs2/uploads_offsite/i.imgur.com-19557-1587414753.23.jpg) (IMG:http://www.914world.com/bbs2/uploads_offsite/i.imgur.com-19557-1587414753.24.jpg) I purchased a new firewall pad from 914Rubber and it is installed in the pic below but not currently in the car. I'm having difficulty using any sort of velcro to attach it - nothing wants to stick to the backside of the pad. Does anyone have a suggestion for some very strong adhering tape? Additionally, the pad (in my case at least) needs to be trimmed for proper fitment as it is too tall and won't allow the decklid to properly close. Kind of bummed that such an expensive replacement requires modification to install but I understand this is an aftermarket replacement. (IMG:http://www.914world.com/bbs2/uploads_offsite/i.imgur.com-19557-1587414753.25.jpg) I finally got around to painting the piece that holds the decklid catch mechanism to the rear trunk firewall. For whatever reason, the PO had removed this on my car and I didn't realize it was missing until after paint. So, I sourced a replacement, painted it to match and used aluminum rivets to hold it in place. It's very strong and not going anywhere. Yes, you see the rivets in the trunk, but it's a pretty clean look overall for not being factory. I still have to fabricate a sleeve of some sort to hold the release cable in place because that, too, was missing from my car. I am thinking about using a nylon sleeve like the front trunk guide and using some clamps to hold it in place. (IMG:http://www.914world.com/bbs2/uploads_offsite/i.imgur.com-19557-1587414753.26.jpg) (IMG:http://www.914world.com/bbs2/uploads_offsite/i.imgur.com-19557-1587414753.27.jpg) While I had the paint gun out, I also repaired the rear valence that had been chafed by the tie down straps I used when we trailered the car here two years ago. It's not perfect, but it's completely hidden by the bumper and I bet you can't tell where it was repaired in this picture: (IMG:http://www.914world.com/bbs2/uploads_offsite/i.imgur.com-19557-1587414753.28.jpg) We also sprayed my buddy's 944 front valence since we had some extra paint… This is his track car and will be repainted anyways, but it looks pretty cool! I love Mexico Blue! (IMG:http://www.914world.com/bbs2/uploads_offsite/i.imgur.com-19557-1587414753.29.jpg) Last, but not least, here is the engine decklid finally re-installed. I'm noticing now that I have some blue paint to cover up with black under the smaller, side grilles. The decklid has been reinstalled with the factory spring bars and rain tray. (IMG:http://www.914world.com/bbs2/uploads_offsite/i.imgur.com-19557-1587414754.30.jpg) DRIVETRAIN Ok, onto the main event. After more than a year of sitting on a dolly on the floor - it was time to marry the engine and transmission back up to the car. If you recall, I had pulled it out to install a new pressure plate and clutch. Well, in the process I learned that the PO had shaved the flywheel down so far that the new pressure plate would not bolt up properly. So, I purchased a new flywheel from AA Performance and had it machine balanced (it was actually pretty close already). I also learned in the process that the engine builder had used a rear main seal that wasn't the full 12mm deep and I was already getting a slow oil leak from the back. This was replaced with the proper size RMS and endplay was reset with the new flywheel. Then the new pressure plate and clutch were mated to the engine with new socket-heat bolts. (IMG:http://www.914world.com/bbs2/uploads_offsite/i.imgur.com-19557-1587414754.31.jpg) Finally, I was able to re-install the transmission along with the starter and new ground strap: (IMG:http://www.914world.com/bbs2/uploads_offsite/i.imgur.com-19557-1587414754.32.jpg) Here is everything ready to go back up into the car (note my TX flag that I waive proudly here in CA). I use the two jacks method of raising and lowering the car without wheels on to attach the engine and trans in place. (IMG:http://www.914world.com/bbs2/uploads_offsite/i.imgur.com-19557-1587414754.33.jpg) (IMG:http://www.914world.com/bbs2/uploads_offsite/i.imgur.com-19557-1587414754.34.jpg) After the engine was reinstalled and I was riding the high of accomplishment, I set out to run some wires and get her running again. I purchased new 1 gauge welding wire and made my own battery and ground cables. After hooking everything up, I wanted to test the starter and roll the engine over. Of course, no good deed goes unpunished… The starter was cranking very, very slow. So, I went through the troubleshoot list. I checked grounds, battery voltage, even swapped starters to no avail. After a few times of trying to start, I realized it wasn't just cranking slow - but I was also hearing what sounded like a grinding noise. Sh!t. (IMG:style_emoticons/default/headbang.gif) With much reluctance, I decided to pull the tranny and investigate further. Of course, all sorts of dangerous thoughts are running through my head at this point and I have no idea what's causing the issue. We jacked up the engine and removed just the tranny. I do have to say this was very easy - clutch jobs must be pretty quick on these cars. After a quick glance, we found the grinding right away. The trans was showing metal shavings and the pressure plate clearly had witness marks. See the ring around the edge in the picture below: (IMG:http://www.914world.com/bbs2/uploads_offsite/i.imgur.com-19557-1587414754.35.jpg) With a little further investigation, it turns out the clutch fork arm was rubbing against the pressure plate. The PO had shimmed the pivot ball with (3) washers and as a result, the fork was sticking way too far out. (IMG:http://www.914world.com/bbs2/uploads_offsite/i.imgur.com-19557-1587414754.36.jpg) This was an easy fix, and it could have been a lot worse. I removed two of the washers and reinstalled the pivot ball with just one washer. After another hour or so, the transmission was back up in place and the grinding was gone. I could have stopped there for the day, but being so close was just too tempting. So, we ran to get some fresh gas and installed and filled the gas tank for the first time. After some fiddling with wiring, it was time for a test fire. As a reminder, the engine was rebuilt in May 2018 and broken in at that time. It has sat (sadly) un-used on my garage floor since then. This was going to be the first fire in about two years. I was pretty certain that I would have carb issues from letting the old gas sit and evaporate out of them. But, after a few cranks… SHE'S ALIVE! (IMG:style_emoticons/default/piratenanner.gif) https://www.youtube.com/watch?v=HBqEaXaETHQ Obviously, I'm over the moon to hear her run again. Yes, I need to adjust timing and tune - but she sounds great (especially without a muffler) and it's great to have a throbbing heartbeat in the car for the first time since the mid-90's. I couldn't have gotten this far without watching all of your builds for motivation and support and I've definitely leaned on my new wrenching buddy (neighbor) a ton throughout. WHAT'S NEXT? My ambitious goal is to take her out on a "test drive" before the end of April… we'll see if that happens or not. I need to bleed brakes, hook up the emergency brake, tighten down the steering u-joints, torque all suspension bolts to spec, adjust the clutch cable, connect the shift rod, connect the accelerator cable (and fab a bracket), and install the latches / catches for the trunk lids. So, that gives me ten days to start wrenching… Here goes nothing! (IMG:style_emoticons/default/driving.gif) Stay tuned, I promise it won't take 14 months for my next update! |
|
|
|
| bbrock |
Apr 21 2020, 07:41 AM
Post
#209
|
|
914 Guru Group: Members Posts: 5,269 Joined: 17-February 17 From: Montana Member No.: 20,845 Region Association: Rocky Mountains |
Woo freakin' hoo!!!! (IMG:style_emoticons/default/piratenanner.gif) I think about your build often and wonder how you are getting on. Congrats on you wedding and all the progress on the car. Very, very exciting! (IMG:style_emoticons/default/beerchug.gif)
|
|
|
|
| Cairo94507 |
Apr 21 2020, 08:20 AM
Post
#210
|
|
Michael Group: Members Posts: 10,382 Joined: 1-November 08 From: Auburn, CA Member No.: 9,712 Region Association: Northern California |
You have done beautiful work and your car looks terrific. I like the documentation and start-up video. Great work. I look forward to the driving video. (IMG:style_emoticons/default/beerchug.gif)
|
|
|
|
| siverson |
Apr 21 2020, 10:00 AM
Post
#211
|
|
Advanced Member Group: Benefactors Posts: 2,458 Joined: 5-May 03 From: San Diego, CA Member No.: 654 Region Association: Southern California |
Wow looks great!!!
-Steve |
|
|
|
| mbseto |
Apr 21 2020, 02:19 PM
Post
#212
|
|
Senior Member Group: Members Posts: 1,257 Joined: 6-August 14 From: Cincy Member No.: 17,743 Region Association: North East States |
That's a gorgeous car, congrats on the first start up! I've been thinking about what to do about my own harness and your kit idea is very intriguing... If you do document that process, I will be paying attention.
|
|
|
|
| aggiezig |
Apr 22 2020, 11:15 AM
Post
#213
|
|
Porsche Wannabe Group: Members Posts: 319 Joined: 13-January 16 From: Los Angeles, CA Member No.: 19,557 Region Association: Southern California |
Thanks, everyone, for all of the kind words. It's hard to describe just how great it felt to hear her start up again. I've been tinkering away most nights this week, so hoping to have another exciting update here soon.
@mbseto - I will definitely keep track of what I am doing with the harness for you. I'm not a master electrician but I've used this kit in the past on a VW project and was pleased with the results. I may start a separate thread altogether with that information. |
|
|
|
| aggiezig |
Apr 30 2020, 10:27 PM
Post
#214
|
|
Porsche Wannabe Group: Members Posts: 319 Joined: 13-January 16 From: Los Angeles, CA Member No.: 19,557 Region Association: Southern California |
Well, today is officially the last day of April and while I haven't taken her out for the maiden voyage, I am very close! Here are a few updates since my last post…
Before I get started, just a quick shot of my second home lately. Man, I've probably spent a totally of 8-10 hours underneath this rear end over the last couple of weeks. Don't worry there are jack stands behind the jacks. Man, I envy you guys with lifts! (IMG:http://www.914world.com/bbs2/uploads_offsite/i.imgur.com-19557-1588307253.1.jpg) Here are a few shots of the rear end after installing and adjusting clutch cable, throttle cable (more on that later), emergency brake cables, shift rod, CV axles, etc. (IMG:http://www.914world.com/bbs2/uploads_offsite/i.imgur.com-19557-1588307253.2.jpg) (IMG:http://www.914world.com/bbs2/uploads_offsite/i.imgur.com-19557-1588307254.3.jpg) Man, those CV axles were a HUGE pain in the butt to get installed because of how deep they sit in the trailing arm. The CV joints are the ones that came with the car, but completely taken apart, inspected and re-greased with new boots and C-clips. I replaced what would have originally been clevis pins and clips for the emergency brake levers with a shoulder bolt from McMaster-Carr. I was having a hard time tracking down the right hardware and these will be easier to remove in the future and technically safer. (IMG:http://www.914world.com/bbs2/uploads_offsite/i.imgur.com-19557-1588307254.4.jpg) (IMG:http://www.914world.com/bbs2/uploads_offsite/i.imgur.com-19557-1588307254.5.jpg) ----- No pics to share, but I used a motive power bleeder to bleed the brakes with DOT4 fluid. This being my first 914, I had no idea about adjusting rear disc vent clearance first - so, imagine my frustration with a soft pedal and no idea why. After adjusting that down to .004" and bleeding several more times, I have a pretty firm pedal. I'll bleed again after a bit of driving as I suspect there's still some air trapped in the pressure regulator. I have a slight leak from one of my rear bleeder screws and they are brand new, so I'll also be watching that to see if I can get it seated properly. One word of advice, be sure to pressurize your system and do a leak down test first. I found quite a few loose fittings that I swore were tight when doing so. ----- I've also been working my way around the car and torqueing down all of the suspension fasteners. I found a PDF of a technical service manual and have converted all of the torque values to ft lbs in a google sheet. I'll share this in a separate thread for anyone who needs the values. I'm also marking bolts as I go with a paint pen, very racecar-esque (and it looks cool). (IMG:http://www.914world.com/bbs2/uploads_offsite/i.imgur.com-19557-1588307254.6.jpg) ----- A small side project and not related to being road worthy, but I followed @bbrock 's lead and "fixed" the 914Rubber door stop arms. For those that aren't aware, 914Rubber makes a new set of arms and pins and they are very good quality, but drilled for 1/4" holes and not 6MM like the factory. This is an issue if your holes aren't super worn out because drilling the pin holes in the door jamb would be near impossible. So, here's the "fix" - it's pretty simple. I purchased a set of 5/16" x 7/32" aluminum spacers from McMaster-Carr. This size has a slightly bigger O.D. than the new arms. So, drill the new arms out and then use some JB Weld to hold the new bushings in place. (IMG:http://www.914world.com/bbs2/uploads_offsite/i.imgur.com-19557-1588307254.7.jpg) (IMG:http://www.914world.com/bbs2/uploads_offsite/i.imgur.com-19557-1588307254.8.jpg) After it has cured, then use a 6MM drill bit to drill out the spacer to fit the stock pins. Lastly, file down the surface so it is flat. (IMG:http://www.914world.com/bbs2/uploads_offsite/i.imgur.com-19557-1588307254.9.jpg) Now, @bbrock uses spring roll pins instead of the OE clevis pins. I think that's a really slick install and I ordered a set of 6mm stainless roll pins, but I could not get them to squeeze tight enough to fit my doors, so I will have to order a new size and try again. ----- I also got around to "fixing" the lack of a sleeve for my decklid pull cable. I ordered some 6MM O.D. nylon tubing and cut this to length, held in place with adel clamps. After some adjustment and lubing, it all works as intended. Just need to adjust my gaps now because the rear trunk cannot open with the decklid shut. (IMG:http://www.914world.com/bbs2/uploads_offsite/i.imgur.com-19557-1588307254.10.jpg) (IMG:http://www.914world.com/bbs2/uploads_offsite/i.imgur.com-19557-1588307254.11.jpg) Looks great with the decklid on! (IMG:http://www.914world.com/bbs2/uploads_offsite/i.imgur.com-19557-1588307254.12.jpg) ----- We spent some time this afternoon doing a string alignment to get the toe set before taking her out on the road (and it's a good thing, because the toe-in was nearly 1"). I've never done an alignment before, nonetheless with the string method, but this is pretty neat to setup and see in action. (IMG:http://www.914world.com/bbs2/uploads_offsite/i.imgur.com-19557-1588307254.13.jpg) We ended up with just about 1/8" (or 3mm) of overall toe-in on the front and just between neutral and 1mm toe-in on the rear. (IMG:http://www.914world.com/bbs2/uploads_offsite/i.imgur.com-19557-1588307254.14.jpg) The priority for the test drive is just to get toe "set" as camber and caster would require an flat and level surface (which my garage is not) and preferably some additional equipment. However, we did do a quick adjustment and measurement with digital angle finders and the front camber is about neutral, caster is neutral in the slots, and rear has a very slight negative camber. This is good enough for me to test drive. ----- With the car up on jack stands, I've tested the clutch, all gears, brakes and speedometer. The throttle cable isn't perfect and I'm going to have to re-engineer how to use the stock cable with the CSP bell crank linkage. I'm having an issue with the car returning down to idle after any throttle input, but I think the issue is actually with the CSP linkage and not with the throttle cable. I've adjusted about a dozen times but it's still not working quite right. Also, threw the dash in-place temporarily for the upcoming test drive. Starting to look like a real car! (IMG:http://www.914world.com/bbs2/uploads_offsite/i.imgur.com-19557-1588307254.15.jpg) Yes, I've spent a few minutes sitting behind the wheel playing speed racer in my head. If you can't tell, I am ready to drive this thing already! Stay tuned because the first drive is just around the corner… |
|
|
|
| 76-914 |
May 1 2020, 08:38 AM
Post
#215
|
|
Repeat Offender & Resident Subaru Antagonist Group: Members Posts: 13,737 Joined: 23-January 09 From: Temecula, CA Member No.: 9,964 Region Association: Southern California |
Beautiful work! (IMG:style_emoticons/default/beerchug.gif)
|
|
|
|
| bbrock |
May 1 2020, 10:32 AM
Post
#216
|
|
914 Guru Group: Members Posts: 5,269 Joined: 17-February 17 From: Montana Member No.: 20,845 Region Association: Rocky Mountains |
The suspense is killing me! (IMG:style_emoticons/default/popcorn[1].gif)
FWIW, I had a helluva time getting my roll pins in my hinges too. I had to squeeze them in a vice as tight as they would go. After releasing them, they sprang back to just enough smaller diameter that I could tap them in place. |
|
|
|
| Root_Werks |
May 1 2020, 11:13 AM
Post
#217
|
|
Village Idiot Group: Members Posts: 8,739 Joined: 25-May 04 From: About 5NM from Canada Member No.: 2,105 Region Association: Pacific Northwest |
Everything is so clean! My 914 is dirty, used and abused. (IMG:style_emoticons/default/biggrin.gif)
|
|
|
|
| aggiezig |
May 2 2020, 05:42 PM
Post
#218
|
|
Porsche Wannabe Group: Members Posts: 319 Joined: 13-January 16 From: Los Angeles, CA Member No.: 19,557 Region Association: Southern California |
Alright, gents, ask and you shall receive. For the first time in 25+ years, she is officially back on the road under her own power!!!
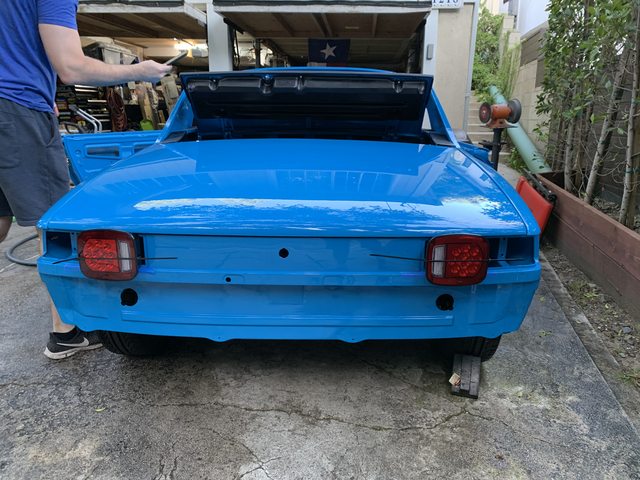
https://www.youtube.com/watch?v=YcsNQB5Z7Vw Link: https://youtu.be/YcsNQB5Z7Vw So not only was this my first time driving this car, but it's also my first time ever driving a 914. Pretty cool little car, I am over the moon. (ignore the crappy video quality, I'll shoot a better video one day soon when I have a muffler and windshield) Before the test drive, I gave her a good wash for the first time in a long time. She cleans up nicely! Paint definitely needs another polish, will probably ceramic coat this time. (IMG:http://www.914world.com/bbs2/uploads_offsite/i.imgur.com-19557-1588462975.1.jpg) Also took the chance to install the sill plates and rocker covers. I may change these rivets to black later, but for now, I like the contrast. (IMG:http://www.914world.com/bbs2/uploads_offsite/i.imgur.com-19557-1588462976.2.jpg) My original tail light housings were not powering up (too corroded) so, yes, these are tail lights from my other project (Jeep CJ7) zip-tied in place. (IMG:http://www.914world.com/bbs2/uploads_offsite/i.imgur.com-19557-1588462976.3.jpg) Here she is, ready to roll: (IMG:http://www.914world.com/bbs2/uploads_offsite/i.imgur.com-19557-1588462976.4.jpg) The test drive was a hoot and total success. We got her up to about 45 mph and blasted through first and second on a couple of pulls. The steering is fantastic and the suspension feels great. Brakes still pretty soft, so that will need some attention. Accelerator linkage is FUBAR... not sure what's going on but I'm going to take off the CSP and make sure everything is actuating properly. Also, the clutch is releasing pretty darn high so I think that I must have the cable too tight. These are all easy fixes and I'm just glad to have hit this milestone. It's all downhill from here, right? I'm going to enjoy the moment for a bit then start attacking the few small issues before moving on to finishing up the wiring. Who needs lights anyways? Also going to order a Triad West exhaust and get the engine buttoned up. But, hey, it sure is great to not have to push the car into the garage anymore! (IMG:style_emoticons/default/beerchug.gif) |
|
|
|
| 914forme |
May 4 2020, 06:50 AM
Post
#219
|
|
Times a wastin', get wrenchin'! Group: Members Posts: 3,896 Joined: 24-July 04 From: Dayton, Ohio Member No.: 2,388 Region Association: None |
|
|
|
|
| porschetub |
May 4 2020, 03:10 PM
Post
#220
|
|
Advanced Member Group: Members Posts: 4,883 Joined: 25-July 15 From: New Zealand Member No.: 18,995 Region Association: None |
[quote name='aggiezig' date='Feb 7 2019, 02:30 PM' post='2686928']
[quote name='Peashooter' post='2686726' date='Feb 6 2019, 09:38 AM'] If you have enough, add a square of the sound deadener inside the doors on the outer skin. When you shut the doors, they will give a nice thunk. [/quote] This is a great idea but I have the "crash bars" inside my doors. I'll have to see if I can find some space for it, I have plenty of extra left over. [quote] I noticed the same issue with my car ,I found it easier to cut 75mm strips ,I put 4 top to bottom ,huge difference even without the door panel on,no more tinny noise,even better with the panel on ,still have RH side to do but I now know it works (IMG:style_emoticons/default/beerchug.gif) . Nice to see your progressing well,nice car (IMG:style_emoticons/default/smilie_pokal.gif) . |
|
|
|
|
2 User(s) are reading this topic (2 Guests and 0 Anonymous Users)
0 Members:

|
Lo-Fi Version | Time is now: 12th July 2025 - 02:26 AM |
Invision Power Board
v9.1.4 © 2025 IPS, Inc.