|
|
|
Porsche, and the Porsche crest are registered trademarks of Dr. Ing. h.c. F. Porsche AG.
This site is not affiliated with Porsche in any way. Its only purpose is to provide an online forum for car enthusiasts. All other trademarks are property of their respective owners. |
|
|


| Garland |
 Apr 9 2005, 10:20 PM Apr 9 2005, 10:20 PM
Post
#41
|
|
Restoration Fanatic  Group: Members Posts: 1,431 Joined: 8-January 04 From: ......Michigan...... Member No.: 1,535 Region Association: Upper MidWest |
Well can you see it?
Attached image(s) 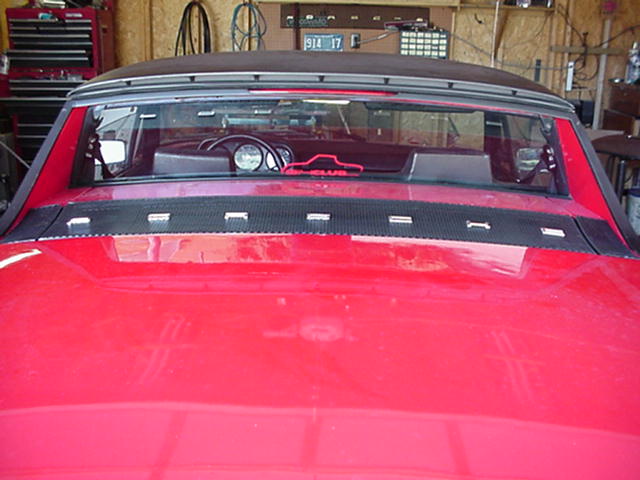
|
   |

 
|
Posts in this topic
Garland 3rd Brake Lamp, my best try... Apr 9 2005, 10:20 PM Garland Ask, and you will see more! Apr 9 2005, 10:24 PM scott thacher http://www.914world.com/bbs2/... Apr 9 2005, 10:25 PM Aaron Cox pretty cool...
wheer did you put the wires>? Apr 9 2005, 10:27 PM Garland A little closer look. Apr 9 2005, 10:38 PM Garland Wires are inside the stock roll bar. Then behind t... Apr 9 2005, 10:40 PM Garland Cut the hole in the trim to fit the face of the la... Apr 9 2005, 10:44 PM Garland Light on Apr 9 2005, 10:46 PM Garland DOT approved lamp, brightest light on the car. Apr 9 2005, 10:48 PM Garland Top off. Apr 9 2005, 10:50 PM Garland Again flush, almost with trim. Did not want to hav... Apr 9 2005, 10:53 PM Garland This picture just was cool. Apr 9 2005, 10:54 PM SGB Most certainly a keeper! It is great. Where... Apr 9 2005, 10:57 PM Flat VW Will that illuminate on deceleration as well as wi... Apr 9 2005, 10:58 PM Andyrew Who
What
When
Where
How much?
Are you reproductin... Apr 9 2005, 11:04 PM Garland Apr 9 2005, 11:10 PM Andyrew I dono.. that car looks expensive.....
what is i... Apr 9 2005, 11:14 PM Garland You can just see it at the top of the rear glass. ... Apr 9 2005, 11:14 PM Garland Ford GT Apr 9 2005, 11:16 PM Andyrew How the heck did you get that part???
How much??
... Apr 9 2005, 11:18 PM Garland <... Apr 9 2005, 11:22 PM lagunero Apr 9 2005, 11:23 PM Aaron Cox that is AWESOME Apr 9 2005, 11:24 PM Garland Apr 10 2005, 12:38 AM neo914-6 Demick did similar some time ago for not much less... Apr 10 2005, 01:10 AM Garland Wow I did the same lamp last year. I wanted someth... Apr 10 2005, 08:11 AM Elliot Cannon So I can just walk into any Ford dealer and order ... Apr 10 2005, 09:03 AM Garland ht... Apr 10 2005, 10:40 AM Jeroen wow! excellent job! Apr 10 2005, 10:45 AM GeorgeRud Got the part from my local Ford Dealer today. The... Aug 19 2005, 02:44 PM Ferg wow, that looks great, and I happen to have a spar... Aug 19 2005, 02:54 PM redshift http://www.914world.com/bbs2/html/e... Aug 19 2005, 03:02 PM Garland Duplicate post Aug 20 2005, 09:10 PM Garland Duplicate post Aug 21 2005, 10:37 PM Garland Duplicate post Aug 21 2005, 10:38 PM Garland Duplicate post Aug 21 2005, 10:40 PM Garland The trim needs to be cut out of the top 2/3 for th... Aug 21 2005, 10:41 PM Garland This shot shows the trim bar upside down. Notice t... Aug 21 2005, 10:42 PM Garland This is from the back side of the trim. The black ... Aug 21 2005, 10:43 PM Garland Another view of the backside. Aug 21 2005, 10:43 PM Garland The wiring comes out the back of the lamp through ... Aug 21 2005, 10:44 PM Garland Down the sail behind the sail trim, Aug 21 2005, 10:44 PM Garland and between the left grill end piece, Aug 21 2005, 10:45 PM Garland into the trunk. Along the left side wiring harness... Aug 21 2005, 10:46 PM Garland I hope that will help anyone doing this 3rd brake ... Aug 21 2005, 10:47 PM SpecialK NICELY DONE!! Looks like it should have b... Aug 22 2005, 08:33 PM Garland A few more shots. Aug 22 2005, 09:18 PM Garland Parking lamps are on also. Aug 22 2005, 09:22 PM lotus_65 could a guy feed the wiring into the interior bols... Aug 28 2005, 09:24 AM Harpo I agree that this is the best looking high mounted... Oct 4 2013, 04:05 PM StratPlayer That's where I located mine Oct 4 2013, 07:09 PM Harpo Thanks for the heads up. I just bought one off EB... Oct 5 2013, 07:14 AM Garland I’ve been wanting to extend the third brake lamp... Jul 23 2019, 05:59 PM Garland More, and it’s very bright.
Jul 23 2019, 06:03 PM Tdskip Very neat installation, well done. Jul 23 2019, 08:27 PM euro911 I have a spare crossbar trim piece and plan to do ... Jul 23 2019, 08:59 PM Garland Are used a router bit, in a drill press. It’s a... Jul 23 2019, 09:42 PM
Garland Ask, and you will see more! Apr 9 2005, 10:24 PM scott thacher http://www.914world.com/bbs2/... Apr 9 2005, 10:25 PM Aaron Cox pretty cool...
wheer did you put the wires>? Apr 9 2005, 10:27 PM Garland A little closer look. Apr 9 2005, 10:38 PM Garland Wires are inside the stock roll bar. Then behind t... Apr 9 2005, 10:40 PM Garland Cut the hole in the trim to fit the face of the la... Apr 9 2005, 10:44 PM Garland Light on Apr 9 2005, 10:46 PM Garland DOT approved lamp, brightest light on the car. Apr 9 2005, 10:48 PM Garland Top off. Apr 9 2005, 10:50 PM Garland Again flush, almost with trim. Did not want to hav... Apr 9 2005, 10:53 PM Garland This picture just was cool. Apr 9 2005, 10:54 PM SGB Most certainly a keeper! It is great. Where... Apr 9 2005, 10:57 PM Flat VW Will that illuminate on deceleration as well as wi... Apr 9 2005, 10:58 PM Andyrew Who
What
When
Where
How much?
Are you reproductin... Apr 9 2005, 11:04 PM Garland Apr 9 2005, 11:10 PM Andyrew I dono.. that car looks expensive.....
what is i... Apr 9 2005, 11:14 PM Garland You can just see it at the top of the rear glass. ... Apr 9 2005, 11:14 PM Garland Ford GT Apr 9 2005, 11:16 PM Andyrew How the heck did you get that part???
How much??
... Apr 9 2005, 11:18 PM Garland <... Apr 9 2005, 11:22 PM lagunero Apr 9 2005, 11:23 PM Aaron Cox that is AWESOME Apr 9 2005, 11:24 PM Garland Apr 10 2005, 12:38 AM neo914-6 Demick did similar some time ago for not much less... Apr 10 2005, 01:10 AM Garland Wow I did the same lamp last year. I wanted someth... Apr 10 2005, 08:11 AM Elliot Cannon So I can just walk into any Ford dealer and order ... Apr 10 2005, 09:03 AM Garland ht... Apr 10 2005, 10:40 AM Jeroen wow! excellent job! Apr 10 2005, 10:45 AM GeorgeRud Got the part from my local Ford Dealer today. The... Aug 19 2005, 02:44 PM Ferg wow, that looks great, and I happen to have a spar... Aug 19 2005, 02:54 PM redshift http://www.914world.com/bbs2/html/e... Aug 19 2005, 03:02 PM Garland Duplicate post Aug 20 2005, 09:10 PM Garland Duplicate post Aug 21 2005, 10:37 PM Garland Duplicate post Aug 21 2005, 10:38 PM Garland Duplicate post Aug 21 2005, 10:40 PM Garland The trim needs to be cut out of the top 2/3 for th... Aug 21 2005, 10:41 PM Garland This shot shows the trim bar upside down. Notice t... Aug 21 2005, 10:42 PM Garland This is from the back side of the trim. The black ... Aug 21 2005, 10:43 PM Garland Another view of the backside. Aug 21 2005, 10:43 PM Garland The wiring comes out the back of the lamp through ... Aug 21 2005, 10:44 PM Garland Down the sail behind the sail trim, Aug 21 2005, 10:44 PM Garland and between the left grill end piece, Aug 21 2005, 10:45 PM Garland into the trunk. Along the left side wiring harness... Aug 21 2005, 10:46 PM Garland I hope that will help anyone doing this 3rd brake ... Aug 21 2005, 10:47 PM SpecialK NICELY DONE!! Looks like it should have b... Aug 22 2005, 08:33 PM Garland A few more shots. Aug 22 2005, 09:18 PM Garland Parking lamps are on also. Aug 22 2005, 09:22 PM lotus_65 could a guy feed the wiring into the interior bols... Aug 28 2005, 09:24 AM Harpo I agree that this is the best looking high mounted... Oct 4 2013, 04:05 PM StratPlayer That's where I located mine Oct 4 2013, 07:09 PM Harpo Thanks for the heads up. I just bought one off EB... Oct 5 2013, 07:14 AM Garland I’ve been wanting to extend the third brake lamp... Jul 23 2019, 05:59 PM Garland More, and it’s very bright.
Jul 23 2019, 06:03 PM Tdskip Very neat installation, well done. Jul 23 2019, 08:27 PM euro911 I have a spare crossbar trim piece and plan to do ... Jul 23 2019, 08:59 PM Garland Are used a router bit, in a drill press. It’s a... Jul 23 2019, 09:42 PM euro911 That sounds like a good method. Thanks :thumbsup: Jul 23 2019, 11:58 PM
  |
1 User(s) are reading this topic (1 Guests and 0 Anonymous Users)
0 Members:

|
Lo-Fi Version | Time is now: 24th June 2026 - 09:03 AM |
Invision Power Board
v9.1.4 © 2026 IPS, Inc.