|
|

|
Porsche, and the Porsche crest are registered trademarks of Dr. Ing. h.c. F. Porsche AG.
This site is not affiliated with Porsche in any way. Its only purpose is to provide an online forum for car enthusiasts. All other trademarks are property of their respective owners. |
|
|
  |
| porschetub |
 Mar 19 2017, 08:37 PM Mar 19 2017, 08:37 PM
Post
#101
|
|
914 Guru      Group: Members Posts: 5,009 Joined: 25-July 15 From: New Zealand Member No.: 18,995 Region Association: None |
All good,you are on the right track without me sticking my nose in ,however,we have same coloured car,both our engines came from a VW bus,and we have same coloured engine fan ,we are miles apart but maybe not (IMG:style_emoticons/default/lol-2.gif) (IMG:style_emoticons/default/lol-2.gif) (IMG:style_emoticons/default/lol-2.gif) (IMG:style_emoticons/default/lol-2.gif) .
|
| Dion |
 Mar 19 2017, 09:27 PM Mar 19 2017, 09:27 PM
Post
#102
|
|
RN     Group: Members Posts: 2,922 Joined: 16-September 04 From: Audubon,PA Member No.: 2,766 Region Association: MidAtlantic Region 

|
(IMG:style_emoticons/default/beerchug.gif) my brother in the South Pacific!
Heheh that is funny! |
| Dion |
 May 22 2017, 06:33 AM May 22 2017, 06:33 AM
Post
#103
|
|
RN     Group: Members Posts: 2,922 Joined: 16-September 04 From: Audubon,PA Member No.: 2,766 Region Association: MidAtlantic Region 

|
Been a while. Time to update.
Removed both front suspension spindle/brake/strut assemblies. They will be replaced by the 911 assemblies I renewed earlier. I was also able to get on with the welding. First up was a small area on the left inner wheel well, beginning of the left long. It was right at the corner where it gets pelted with debris and water. My goal is to get some welding done every week. See what outside influences will disrupt that! (IMG:style_emoticons/default/dry.gif) . (IMG:style_emoticons/default/welder.gif) (IMG:style_emoticons/default/welder.gif) Attached thumbnail(s) 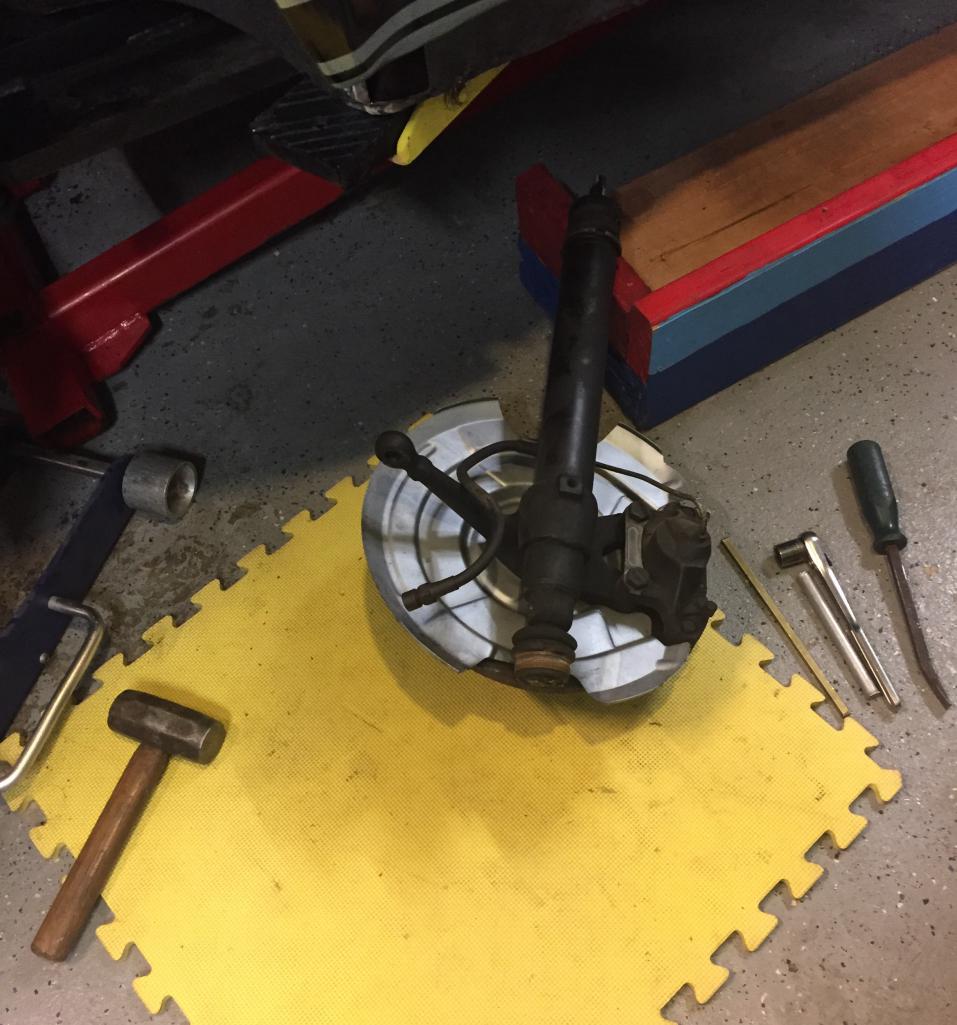 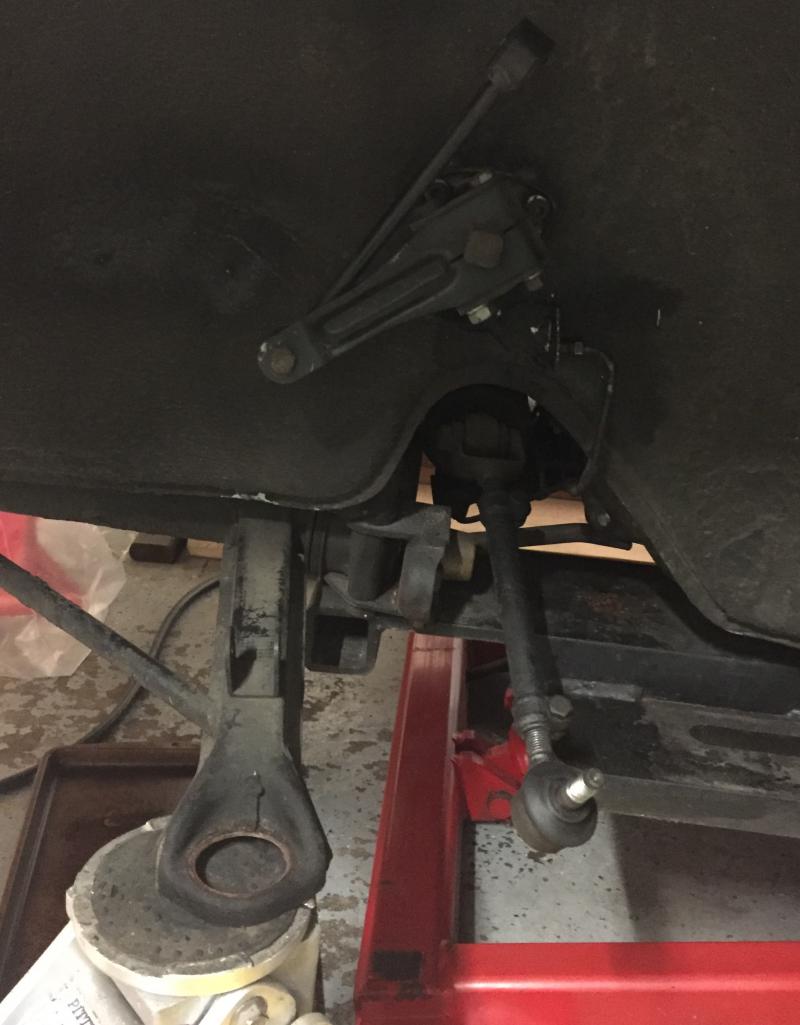 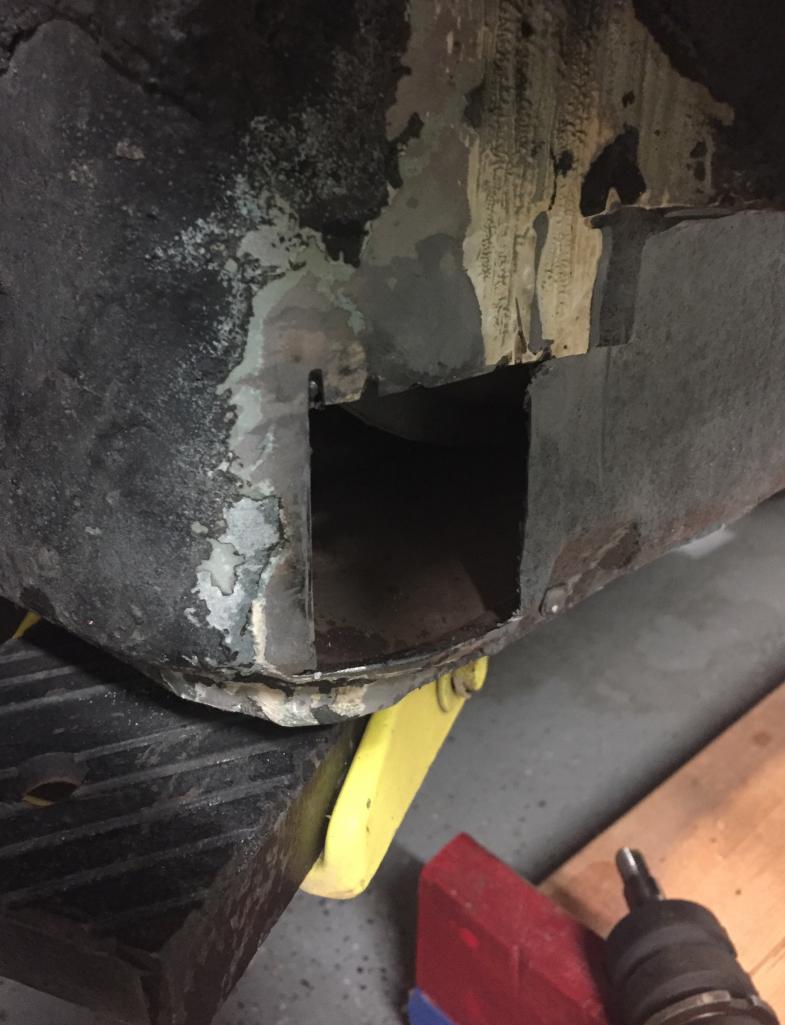
|
| Dion |
 May 22 2017, 06:34 AM May 22 2017, 06:34 AM
Post
#104
|
|
RN     Group: Members Posts: 2,922 Joined: 16-September 04 From: Audubon,PA Member No.: 2,766 Region Association: MidAtlantic Region 

|
Patch:
Attached thumbnail(s) 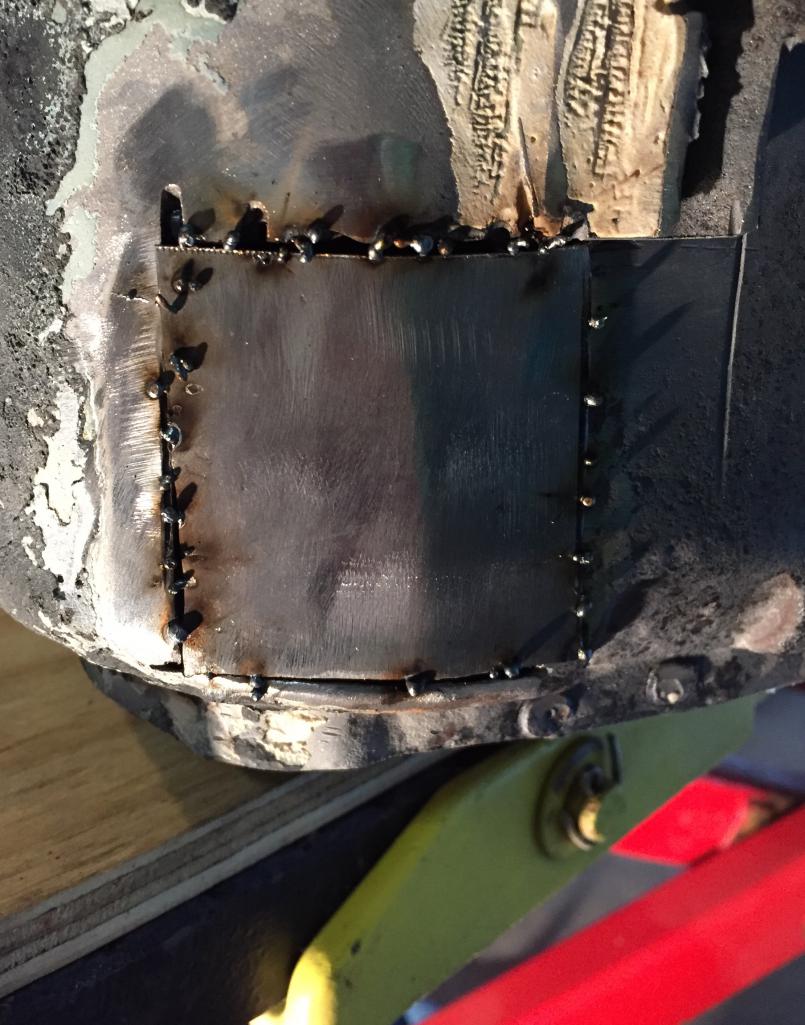 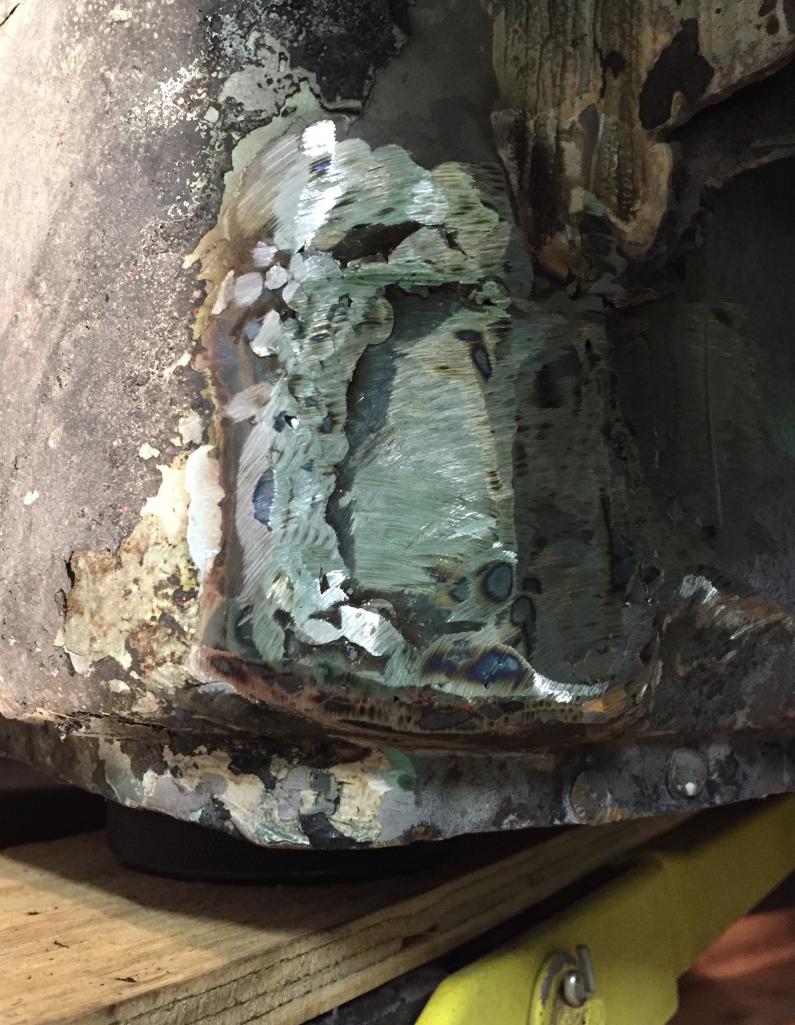 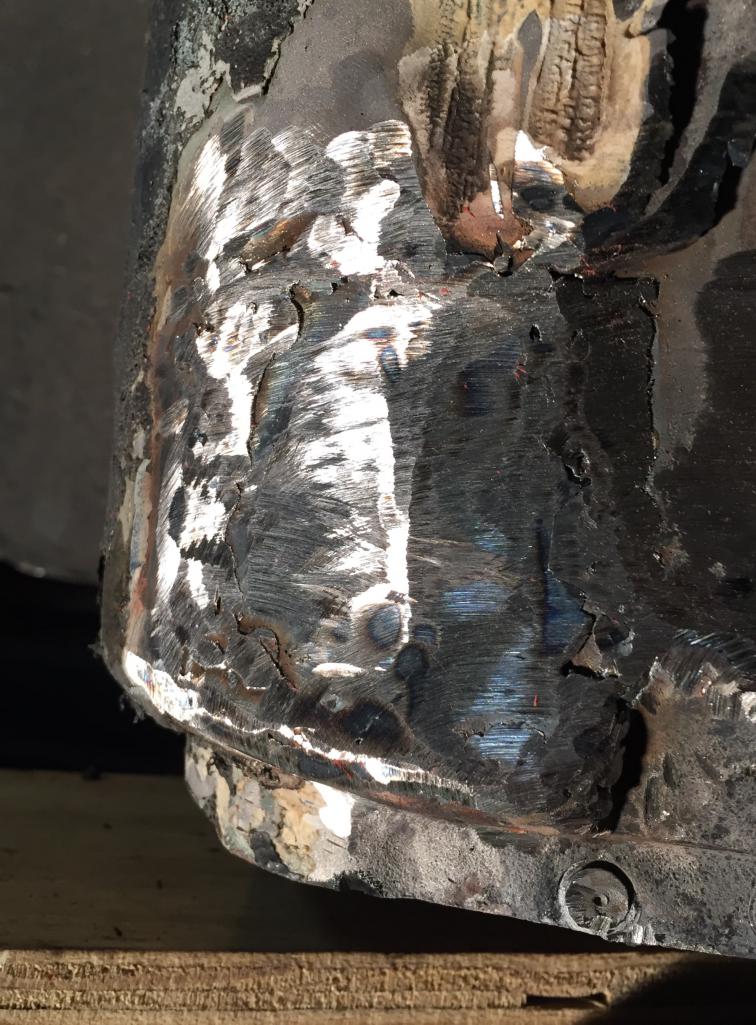
|
| Dion |
 May 22 2017, 06:50 PM May 22 2017, 06:50 PM
Post
#105
|
|
RN     Group: Members Posts: 2,922 Joined: 16-September 04 From: Audubon,PA Member No.: 2,766 Region Association: MidAtlantic Region 

|
This evening, welded all my "ventilation" holes in the firewall.
Holes were for previous harnesses and electrical "clothes lines" (IMG:style_emoticons/default/dry.gif) as my bud Dave termed them. Heheh. All wires will now be routed properly through tunnel. Not the best pics but I'm pleased with my amateur work. The smell of seam sealer burning is quite distinctive. Hope to work on "timing" access door for firewall soon. Getting the little things done while Dave finishes his car. I'll need his assistance taking the trailing arm suspension console out. He has a "buck" to form the additional metal I'll need to fix that area. Attached thumbnail(s) 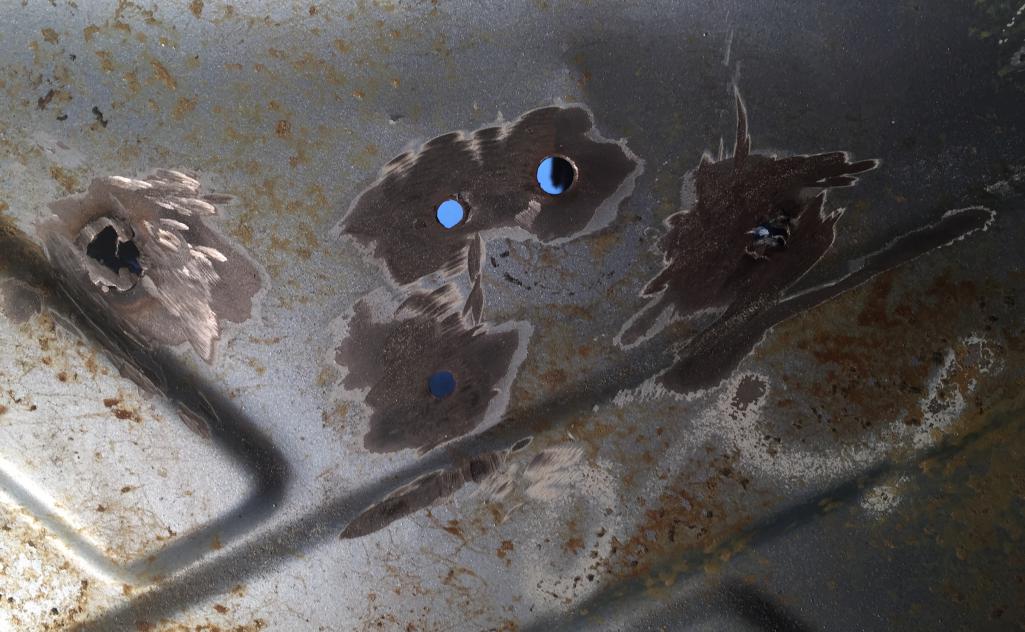
|
| Dion |
 May 22 2017, 06:53 PM May 22 2017, 06:53 PM
Post
#106
|
|
RN     Group: Members Posts: 2,922 Joined: 16-September 04 From: Audubon,PA Member No.: 2,766 Region Association: MidAtlantic Region 

|
Closed holes:
Attached thumbnail(s) 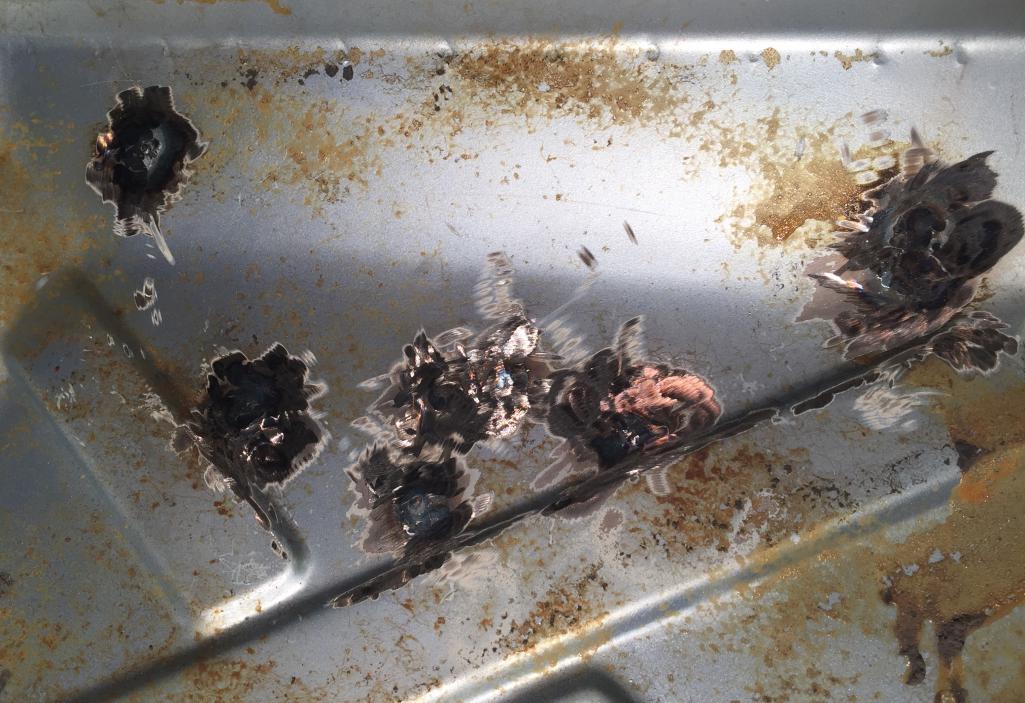 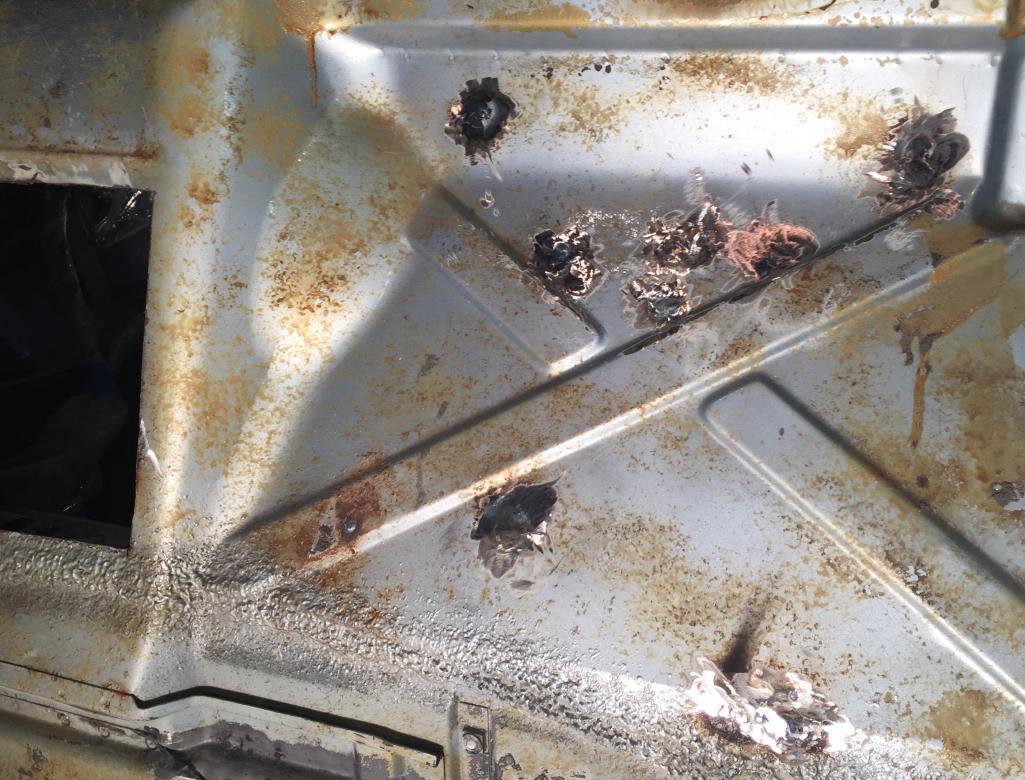
|
| Dion |
 May 27 2017, 04:26 PM May 27 2017, 04:26 PM
Post
#107
|
|
RN     Group: Members Posts: 2,922 Joined: 16-September 04 From: Audubon,PA Member No.: 2,766 Region Association: MidAtlantic Region 

|
Added some self etching primer to the recently repaired hole on
Left front long radius. I also repaired a similar hole on right front long. Attached thumbnail(s) 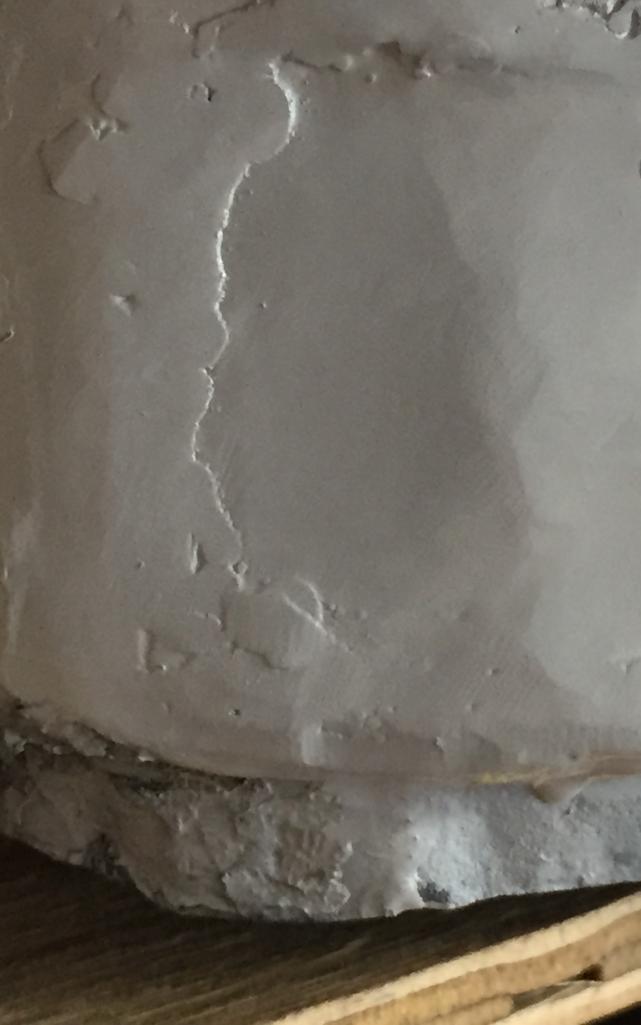
|
| Dion |
 May 27 2017, 04:27 PM May 27 2017, 04:27 PM
Post
#108
|
|
RN     Group: Members Posts: 2,922 Joined: 16-September 04 From: Audubon,PA Member No.: 2,766 Region Association: MidAtlantic Region 

|
Right front side long:
Attached thumbnail(s) 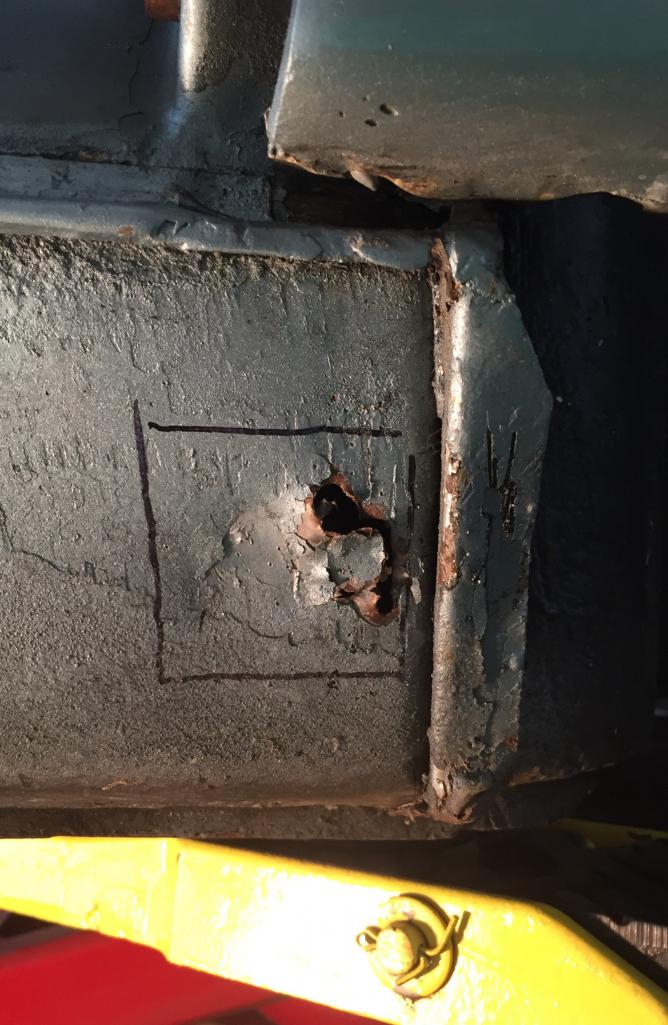 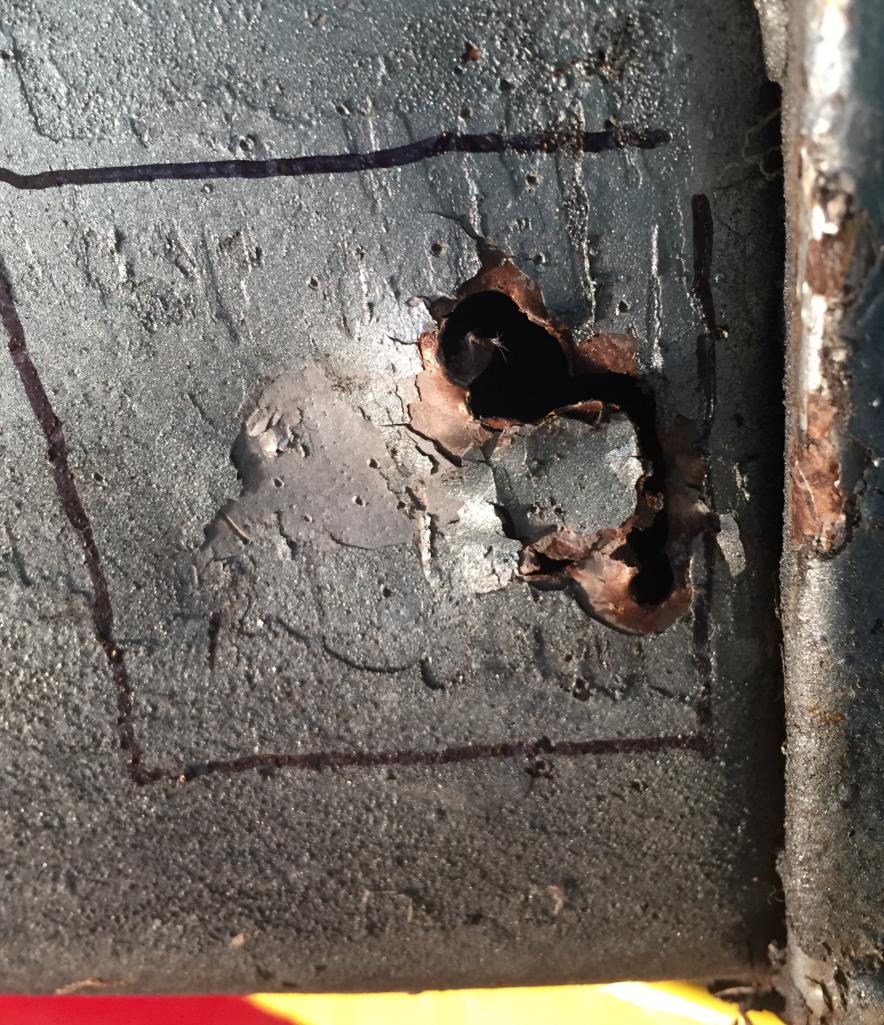 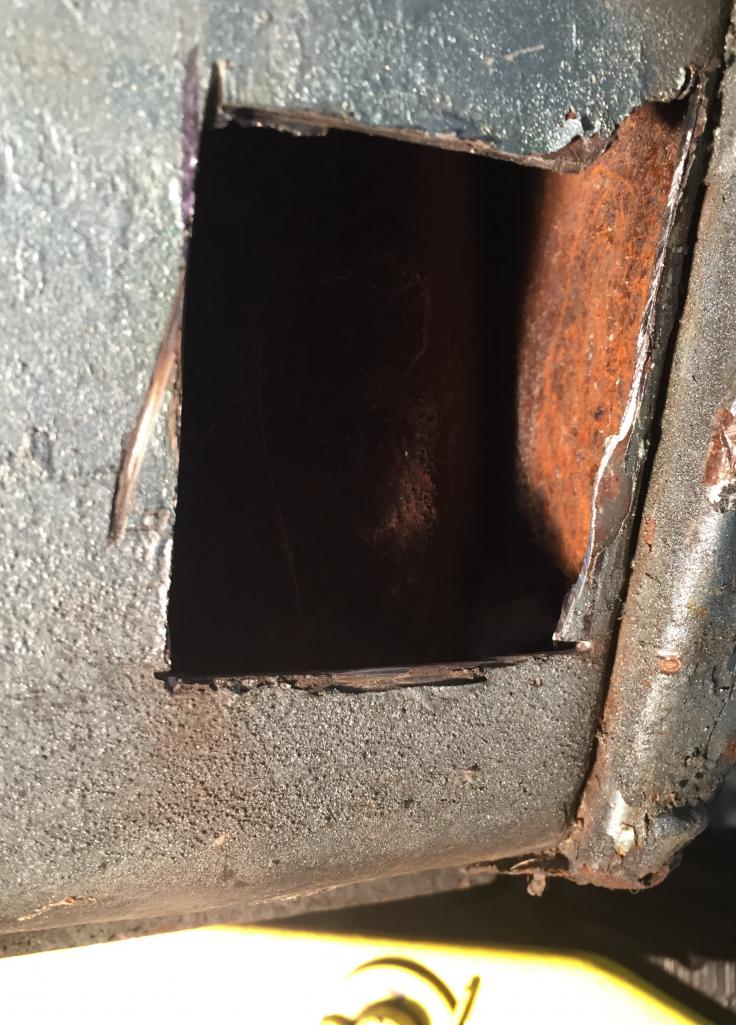
|
| Dion |
 May 27 2017, 04:29 PM May 27 2017, 04:29 PM
Post
#109
|
|
RN     Group: Members Posts: 2,922 Joined: 16-September 04 From: Audubon,PA Member No.: 2,766 Region Association: MidAtlantic Region 

|
"Green" frame coating, and welds.
Attached thumbnail(s) 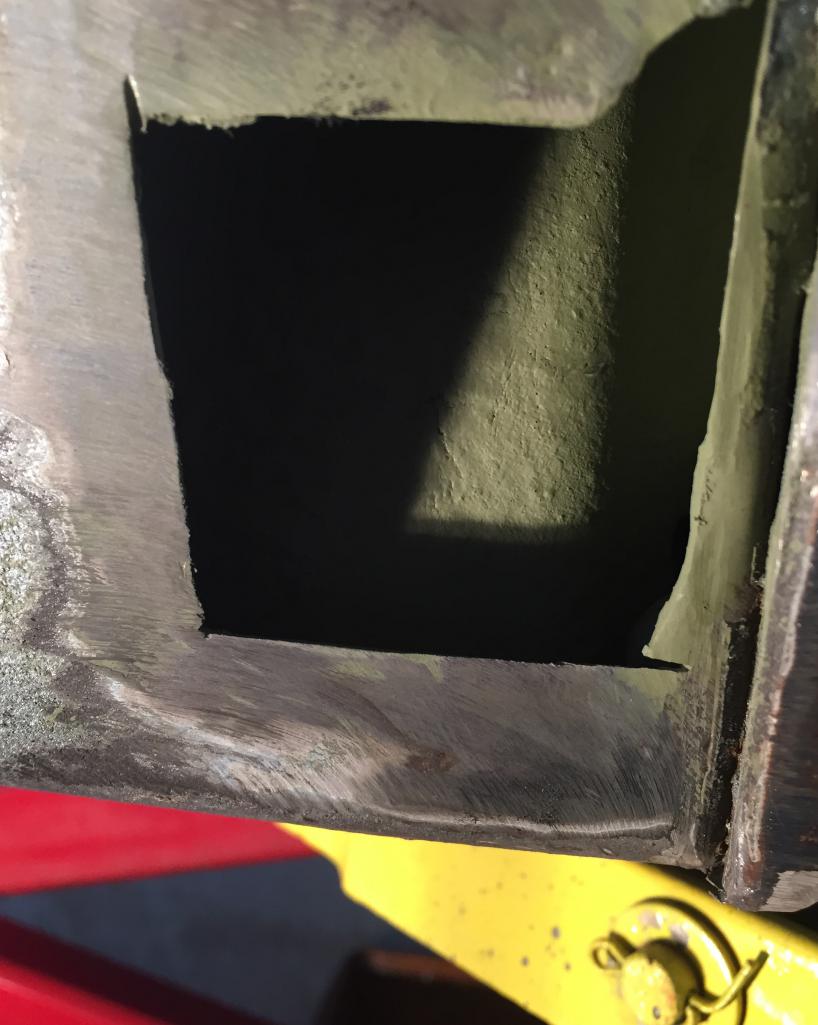 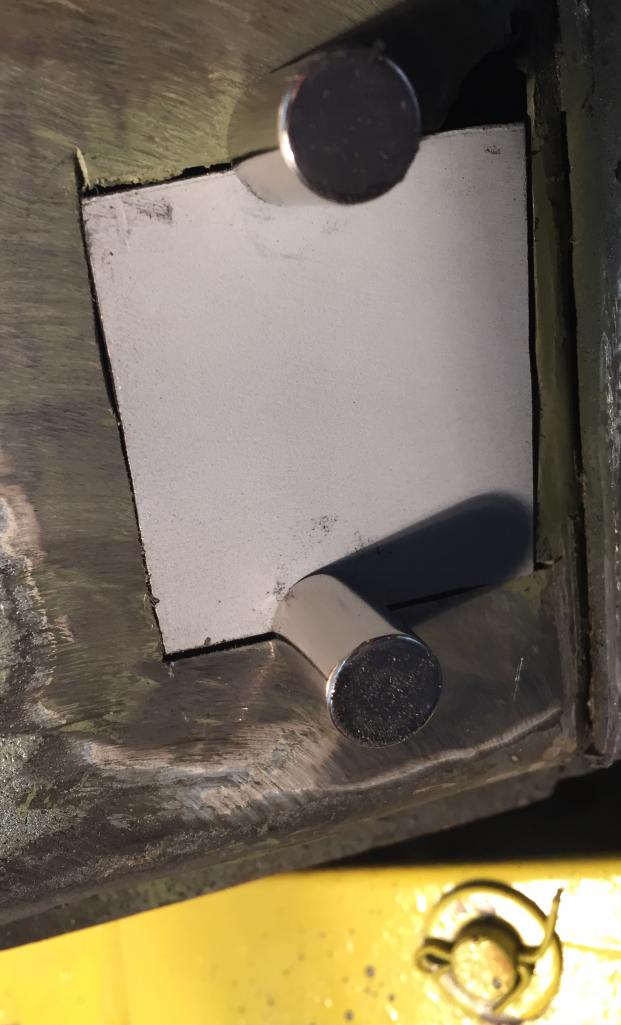 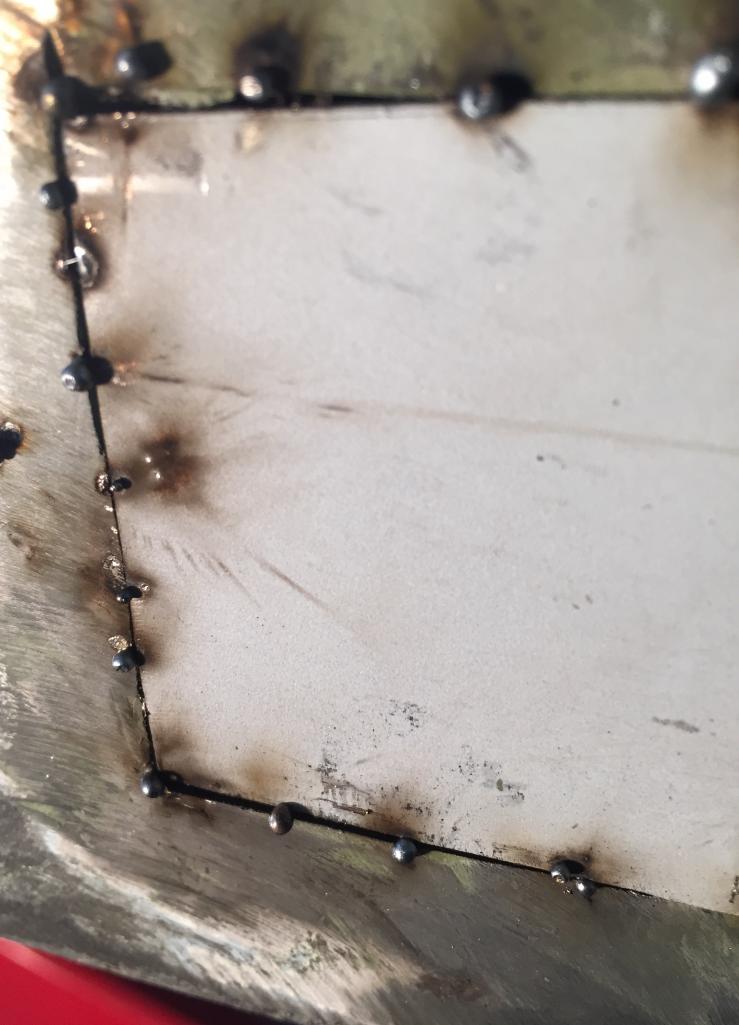 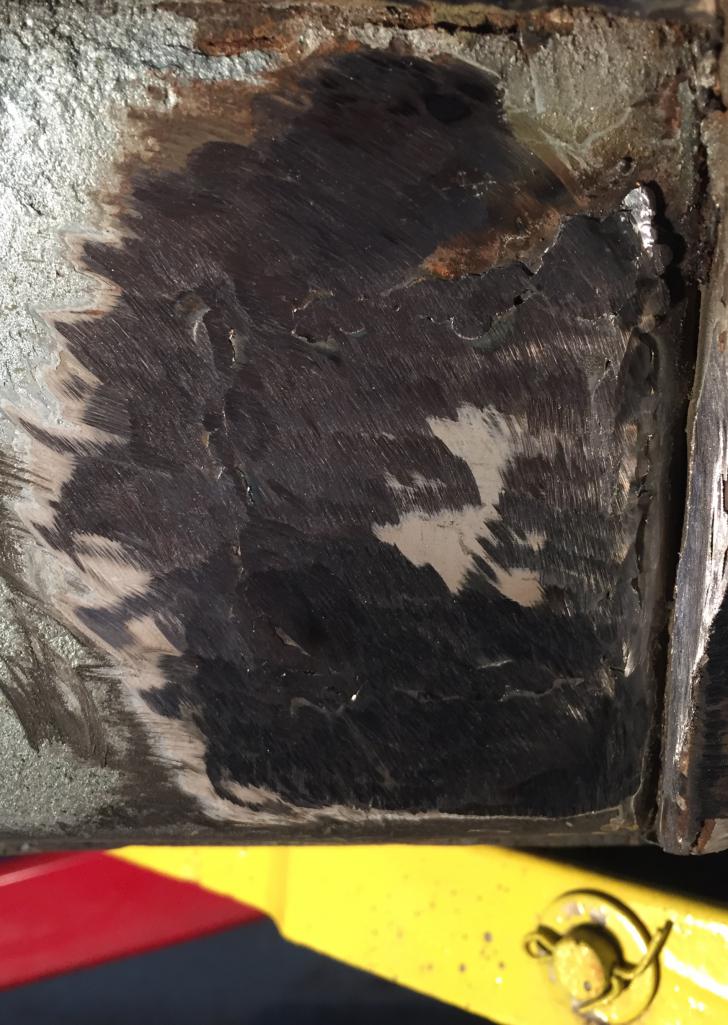
|
| Dion |
 May 27 2017, 04:30 PM May 27 2017, 04:30 PM
Post
#110
|
|
RN     Group: Members Posts: 2,922 Joined: 16-September 04 From: Audubon,PA Member No.: 2,766 Region Association: MidAtlantic Region 

|
Primered
Attached thumbnail(s) 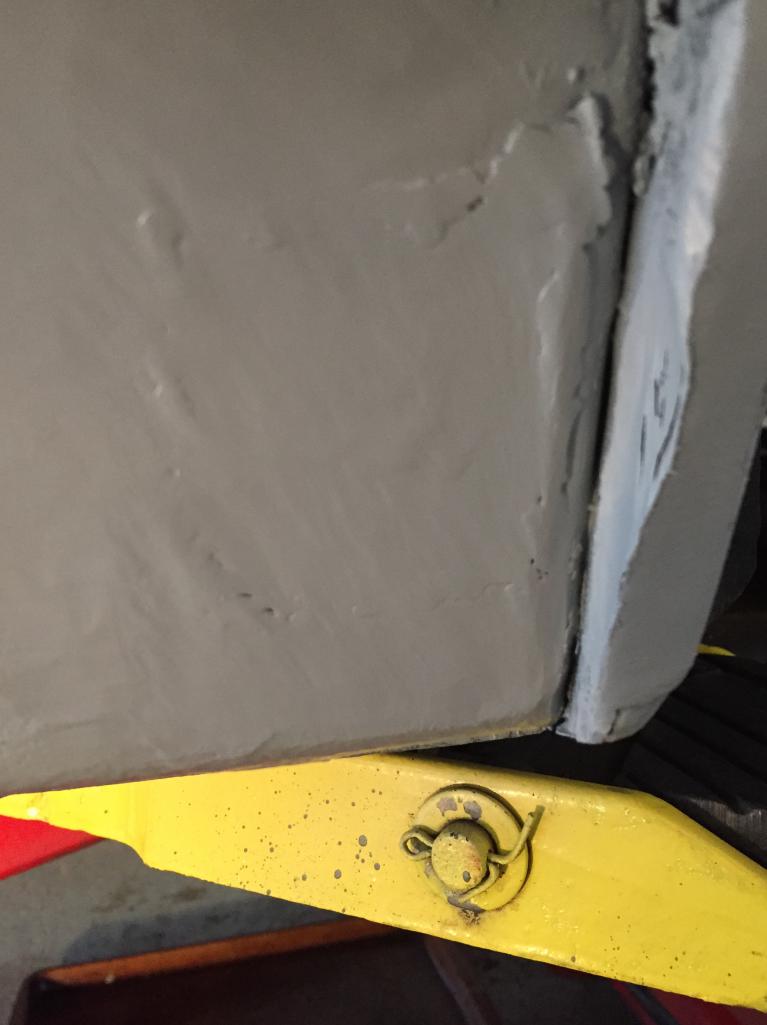
|
| Dion |
 May 28 2017, 01:47 PM May 28 2017, 01:47 PM
Post
#111
|
|
RN     Group: Members Posts: 2,922 Joined: 16-September 04 From: Audubon,PA Member No.: 2,766 Region Association: MidAtlantic Region 

|
Well after watching a decent Monaco F1 race,
headed into garage to get dirty. I'm taping Indy for later and to have a (IMG:style_emoticons/default/beer3.gif) . I'm gonna need it after playing with the welder. I'm slowly improving. I have a lot of admiration for you guys doing it so well. Trunk hole had to be made even larger cause there was a nice mix of filler and steel combined. Yeah and filler doesn't weld so well. Stinks like hell to. The metal was very thin in this area. I'm guessing because of previous repair and grinding away of the steel. So here is what was done today. Attached thumbnail(s) 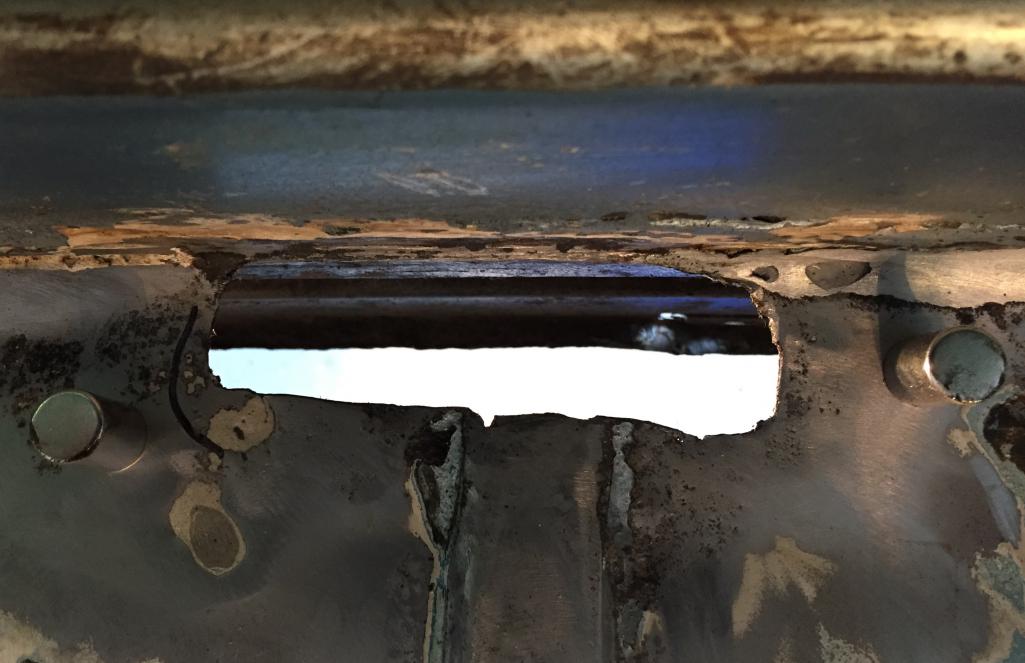 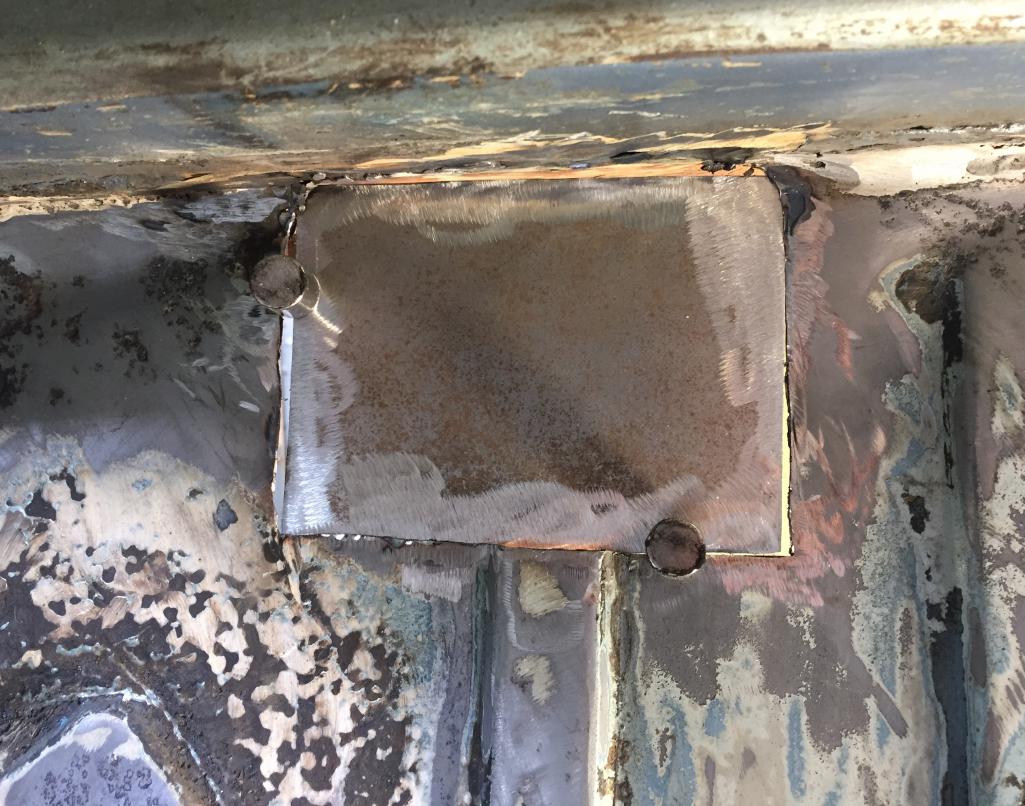
|
| Dion |
 May 28 2017, 01:48 PM May 28 2017, 01:48 PM
Post
#112
|
|
RN     Group: Members Posts: 2,922 Joined: 16-September 04 From: Audubon,PA Member No.: 2,766 Region Association: MidAtlantic Region 

|
Welded piece. Will primer later. Thanks for lookin'
Attached thumbnail(s) 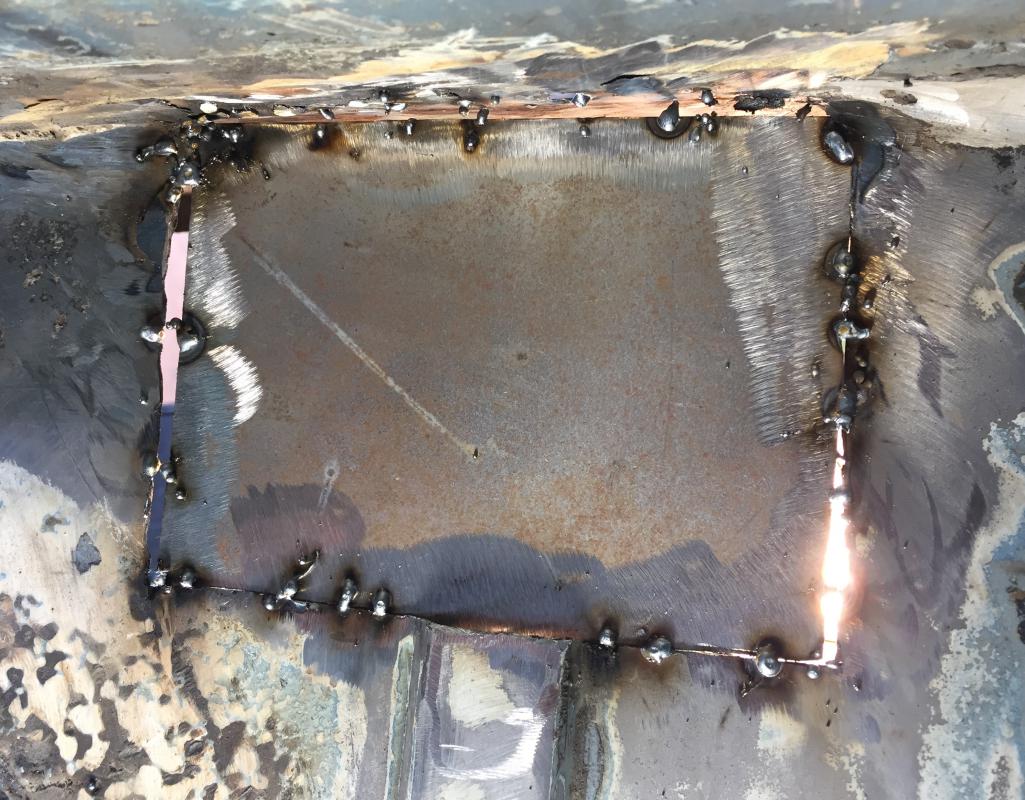 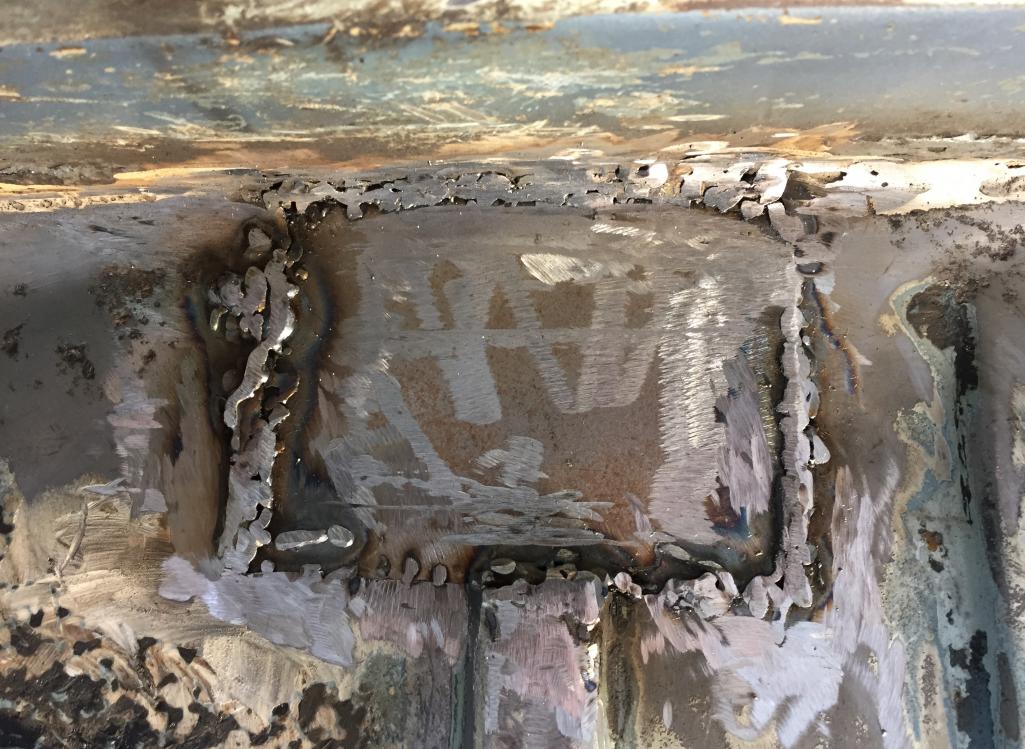
|
| Dion |
 Jun 4 2017, 05:39 PM Jun 4 2017, 05:39 PM
Post
#113
|
|
RN     Group: Members Posts: 2,922 Joined: 16-September 04 From: Audubon,PA Member No.: 2,766 Region Association: MidAtlantic Region 

|
I had a very nice phone call recently with Keith Von-Laws,
we were discussing my welding skills or lack of. I've been working with a mig welder machine that is prolly over 20 yrs old. Keith (who has welded for a living) was noticing a few things when checking out my build. The settings on my welder may no longer be what it says on the rotating dials. He suggested a "newer", If not , new welder. Keeping in mind we have budgets. Also discussed what settings would be used for difference situations. Talked about this also with my bro Dave. All in agreement that a newer one could make life a wee bit easier. I'm going to try and pick up an Eastwood model that will not kill the budget. Looking forward to see if this helps me improve. Need a refill on the mig bottle anyway I'll treat it to a new machine. Thanks Keith for the pointers and encouragement. Dave did say that with the new welder he was able to make noticeable cleaner work. Thus improving the skills. Practice,practice right? Thanks Dave. Having the right tools should help. Stay tuned. |
| Dion |
 Jun 11 2017, 05:31 PM Jun 11 2017, 05:31 PM
Post
#114
|
|
RN     Group: Members Posts: 2,922 Joined: 16-September 04 From: Audubon,PA Member No.: 2,766 Region Association: MidAtlantic Region 

|
Alright picked up a new Mig! Early Father's Day gift!
Keith you were right. Life became much easier with the new welder. Thanks for the pointers. Now I can improve on technique. Attached thumbnail(s) 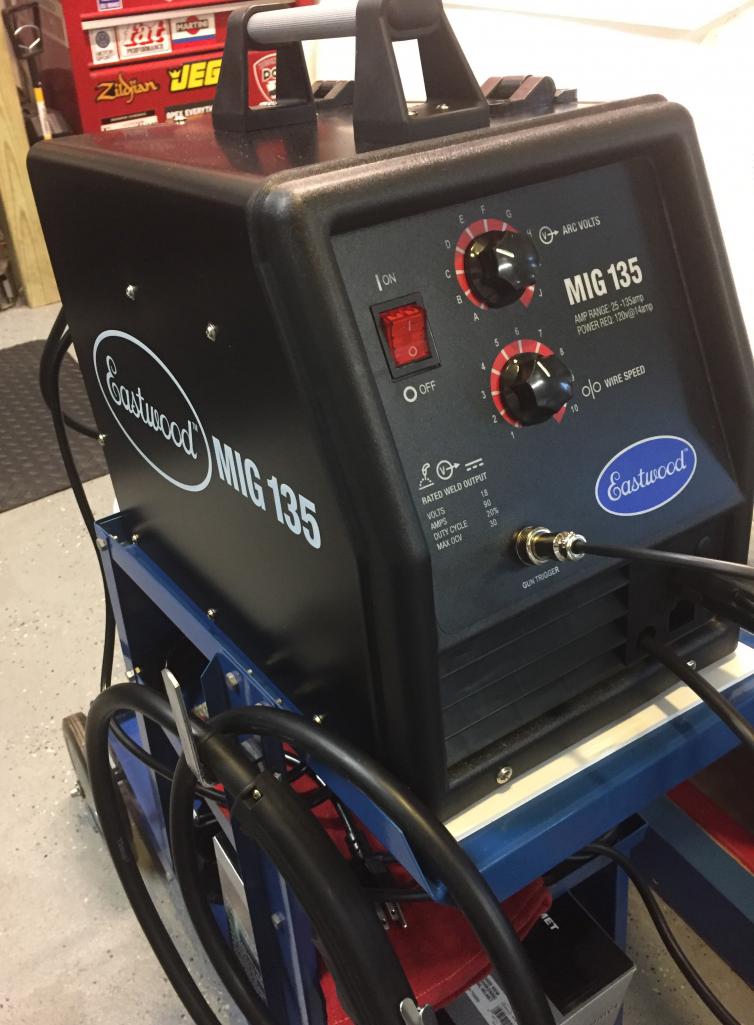
|
| Dion |
 Jun 11 2017, 05:34 PM Jun 11 2017, 05:34 PM
Post
#115
|
|
RN     Group: Members Posts: 2,922 Joined: 16-September 04 From: Audubon,PA Member No.: 2,766 Region Association: MidAtlantic Region 

|
Made a patch for the spot where the old "snorkel" was for fresh air and pressure relief.
That area was rotted. I'll be adding a new snorkel later. Attached thumbnail(s) 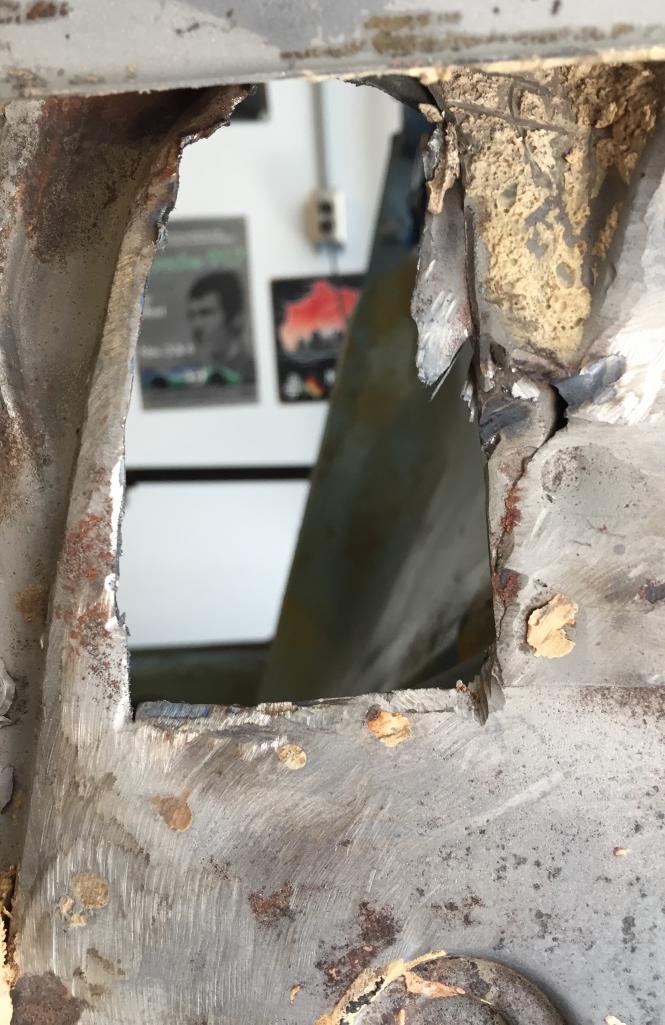 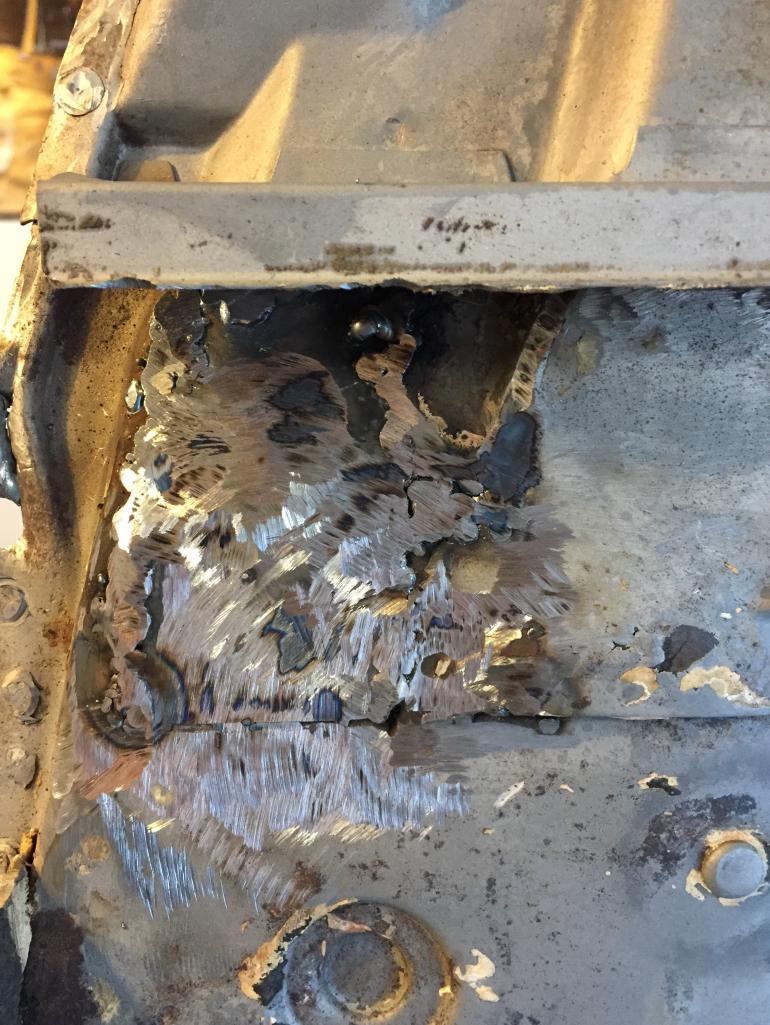
|
| Dion |
 Jun 11 2017, 05:35 PM Jun 11 2017, 05:35 PM
Post
#116
|
|
RN     Group: Members Posts: 2,922 Joined: 16-September 04 From: Audubon,PA Member No.: 2,766 Region Association: MidAtlantic Region 

|
Also repaired the ratty edge of inner sail panel.
Attached thumbnail(s) 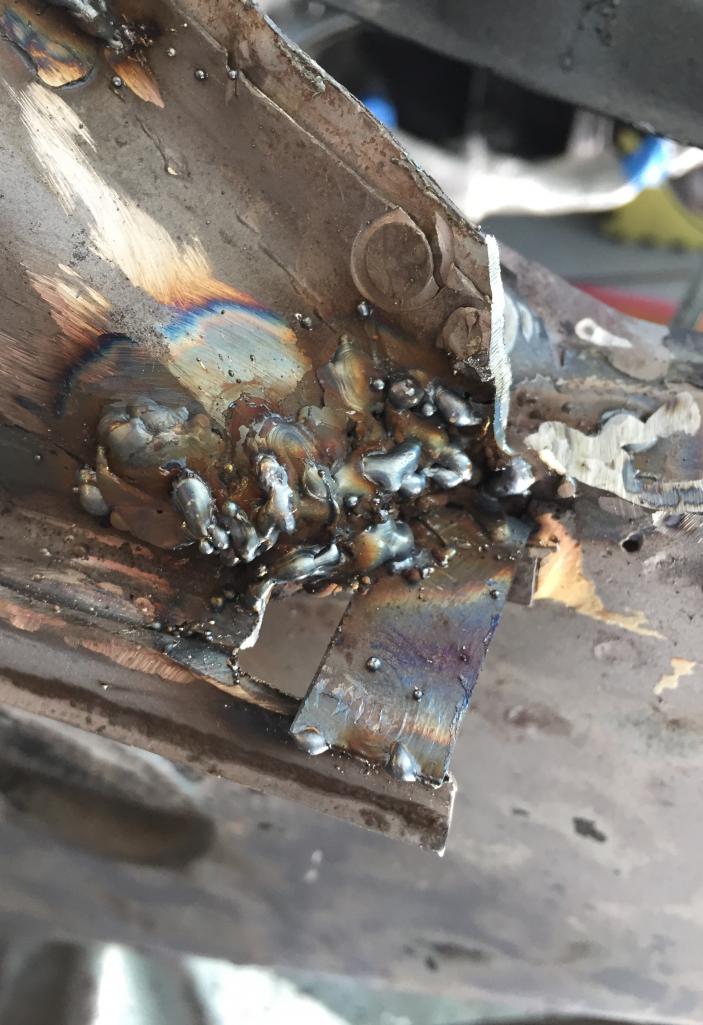 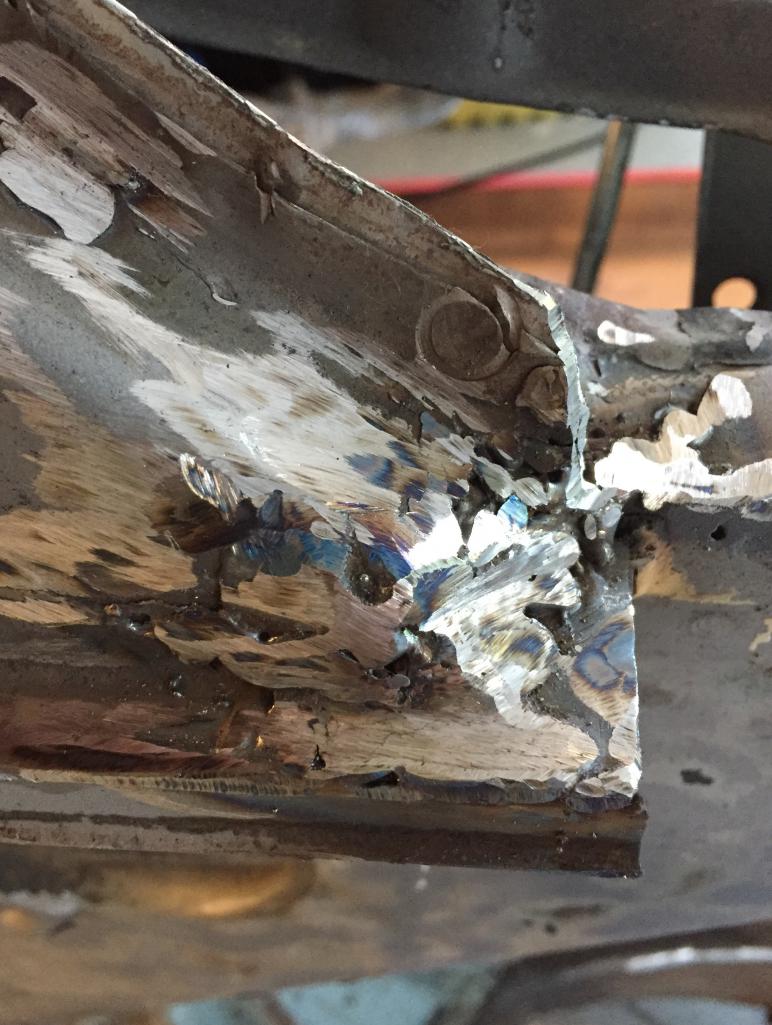
|
| Dion |
 Jun 11 2017, 05:37 PM Jun 11 2017, 05:37 PM
Post
#117
|
|
RN     Group: Members Posts: 2,922 Joined: 16-September 04 From: Audubon,PA Member No.: 2,766 Region Association: MidAtlantic Region 

|
Closed the holes on the old insignia spot.
I'll be mounting the 914-6 emblem here. This area had a lot of filler on it. Attached thumbnail(s) 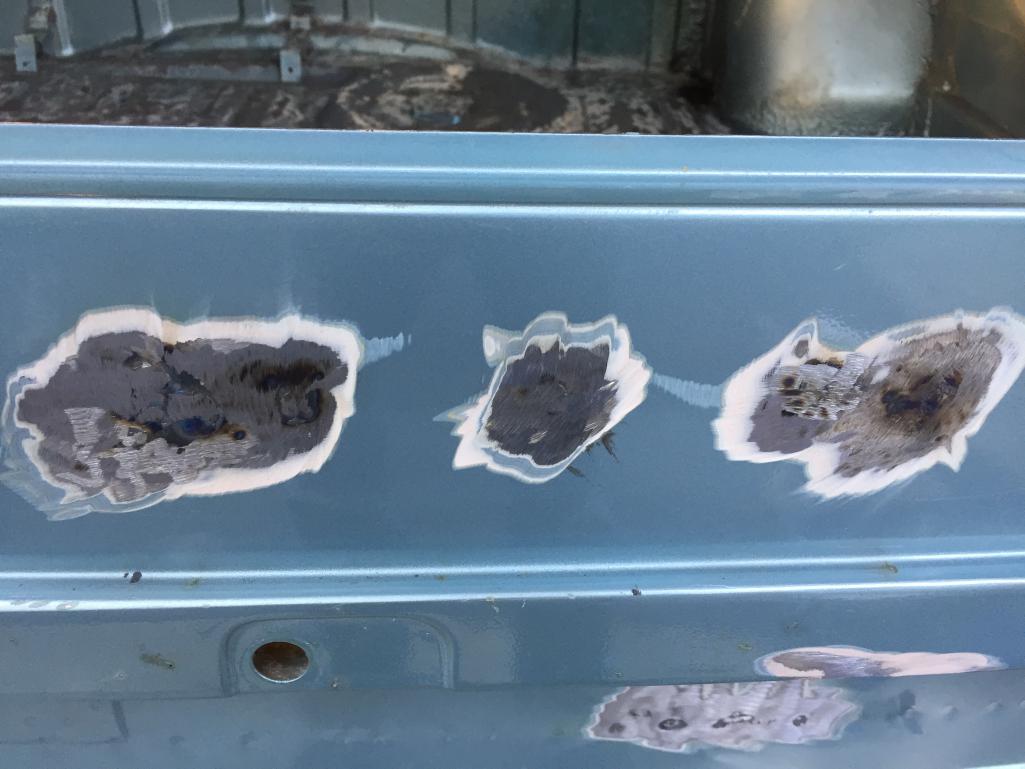
|
| Dion |
 Jun 17 2017, 12:17 PM Jun 17 2017, 12:17 PM
Post
#118
|
|
RN     Group: Members Posts: 2,922 Joined: 16-September 04 From: Audubon,PA Member No.: 2,766 Region Association: MidAtlantic Region 

|
Some fresh paint for these items.
Added some "lightness" for the wiper arms ala "Colin Chapman" style for laughs. Attached thumbnail(s) 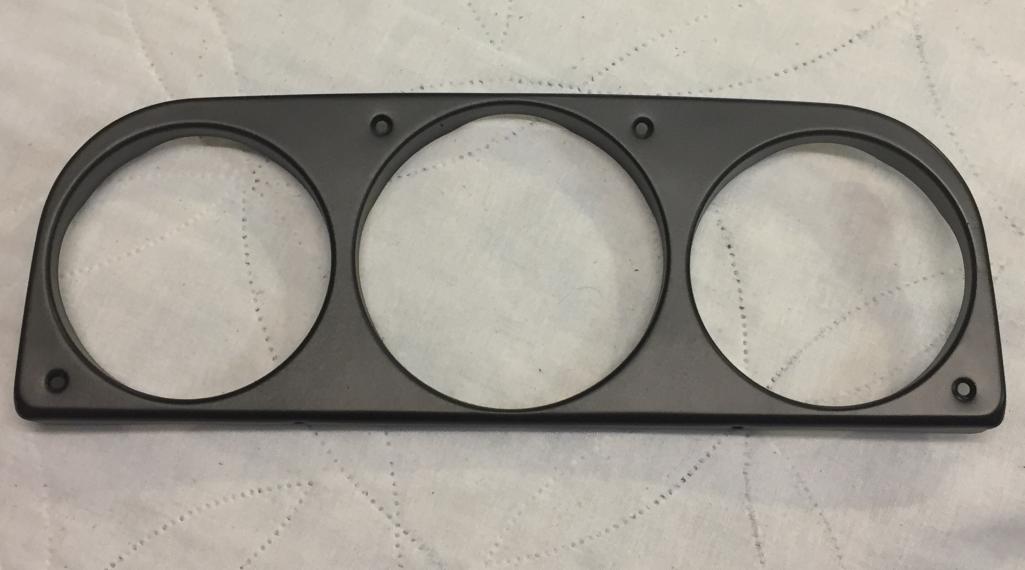 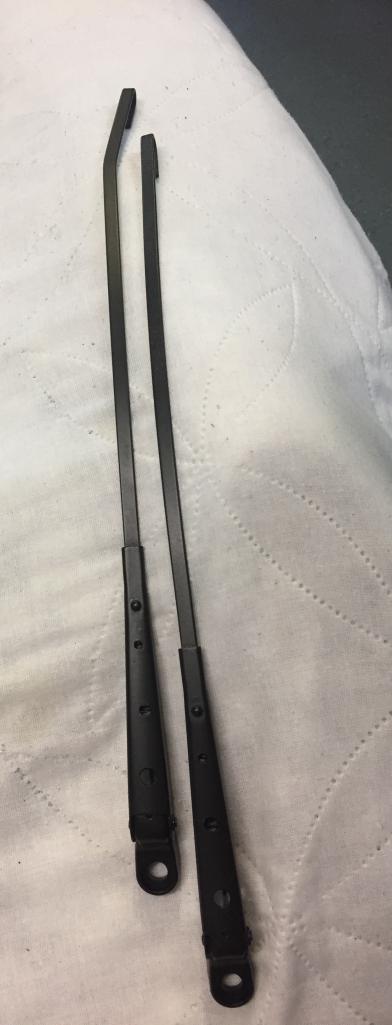
|
| mb911 |
 Jun 17 2017, 02:43 PM Jun 17 2017, 02:43 PM
Post
#119
|
|
914 Guru      Group: Members Posts: 7,716 Joined: 2-January 09 From: Burlington wi Member No.: 9,892 Region Association: Upper MidWest 
|
Grinder skills will improve with time but blend down a biy more and it won't look as apparent of a repair area. I teach this for a living at the college level..
|
| mb911 |
 Jun 17 2017, 02:44 PM Jun 17 2017, 02:44 PM
Post
#120
|
|
914 Guru      Group: Members Posts: 7,716 Joined: 2-January 09 From: Burlington wi Member No.: 9,892 Region Association: Upper MidWest 
|
Finish with a blending wheel or a softpack with 120 grit.
|
  |
1 User(s) are reading this topic (1 Guests and 0 Anonymous Users)
0 Members:

|
Lo-Fi Version | Time is now: 25th January 2026 - 01:35 AM |
Invision Power Board
v9.1.4 © 2026 IPS, Inc.


