|
|
|
Porsche, and the Porsche crest are registered trademarks of Dr. Ing. h.c. F. Porsche AG.
This site is not affiliated with Porsche in any way. Its only purpose is to provide an online forum for car enthusiasts. All other trademarks are property of their respective owners. |
|
|

  |

| 914dave |
 Aug 1 2017, 12:40 PM Aug 1 2017, 12:40 PM
Post
#141
|
|
914 Addict  Group: Members Posts: 730 Joined: 19-October 03 From: Willow Grove Pa. Member No.: 1,262 Region Association: North East States |
Chris and Dion, enough talk about stone chips!!!! Hahaha
|
   |

 
|
| Dion |
Aug 1 2017, 01:22 PM
Post
#142
|
|
RN Group: Members Posts: 2,922 Joined: 16-September 04 From: Audubon,PA Member No.: 2,766 Region Association: MidAtlantic Region |
QUOTE(914dave @ Aug 1 2017, 10:40 AM)  Chris and Dion, enough talk about stone chips!!!! Hahaha (IMG:style_emoticons/default/slap.gif) (IMG:style_emoticons/default/beerchug.gif) (IMG:style_emoticons/default/beer3.gif) |
|
|
|
| Dion |
Aug 13 2017, 02:43 PM
Post
#143
|
|
RN Group: Members Posts: 2,922 Joined: 16-September 04 From: Audubon,PA Member No.: 2,766 Region Association: MidAtlantic Region |
Rear "boot" repair part 2
Went back to rear trunk repair to seal up pin holes from welding. Upon grinding more metal away found some more weak metal. Repairs ensued. Cut, removed and replaced the original patch panel. Followed that with an adjacent area repair. Used "all metal" for the pinholes I could not seal up. Still working on sanding technique. But it's a trunk floor. Not concours worthy but rust free and strong. I'll add seam sealer later when the primer dries. Working on smoothing the bottom of this area next. Attached thumbnail(s) 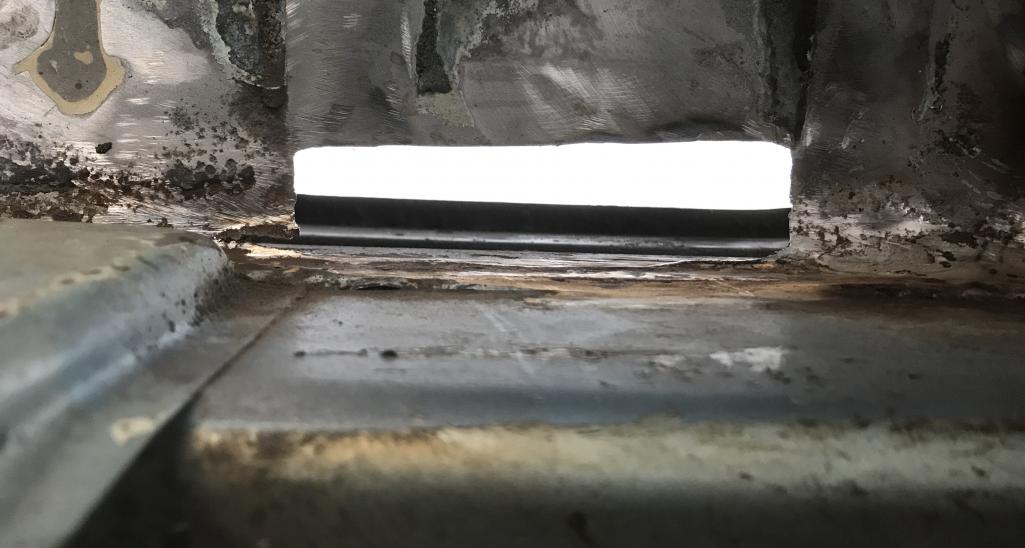 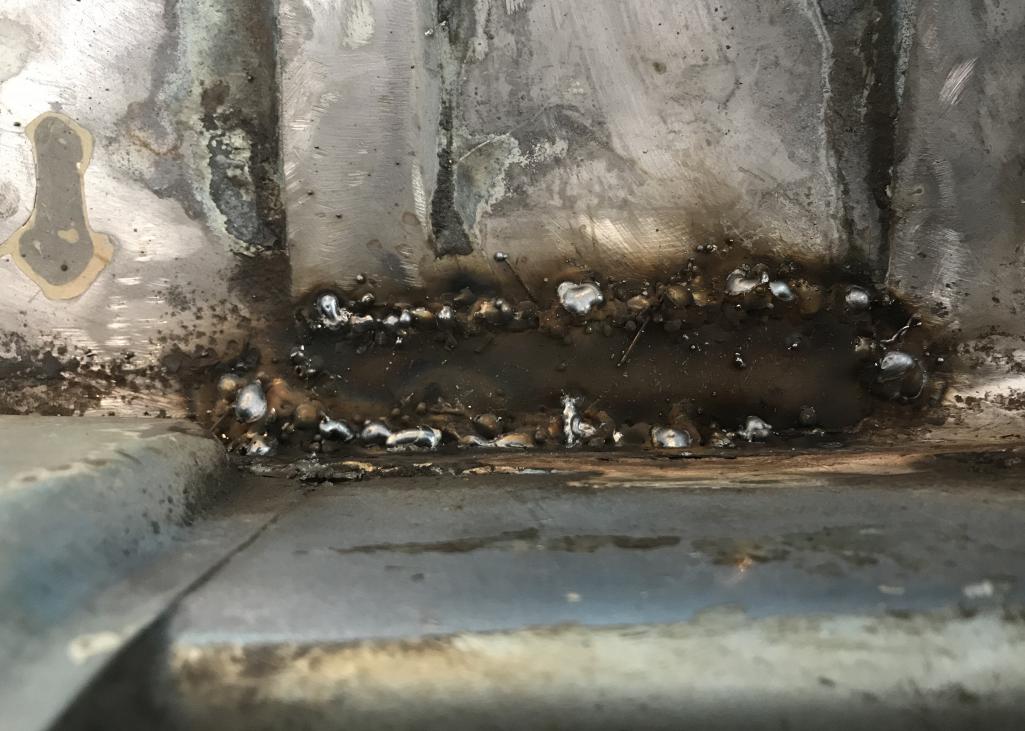
|
|
|
|
| Dion |
Aug 13 2017, 02:44 PM
Post
#144
|
|
RN Group: Members Posts: 2,922 Joined: 16-September 04 From: Audubon,PA Member No.: 2,766 Region Association: MidAtlantic Region |
Pic
Attached thumbnail(s) 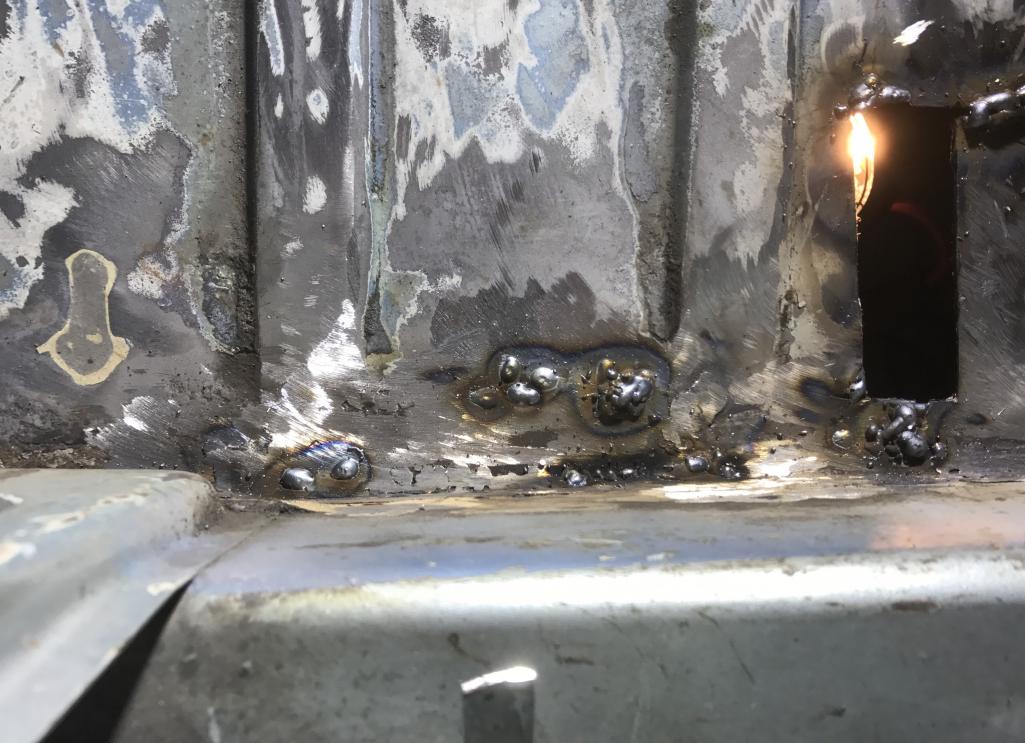 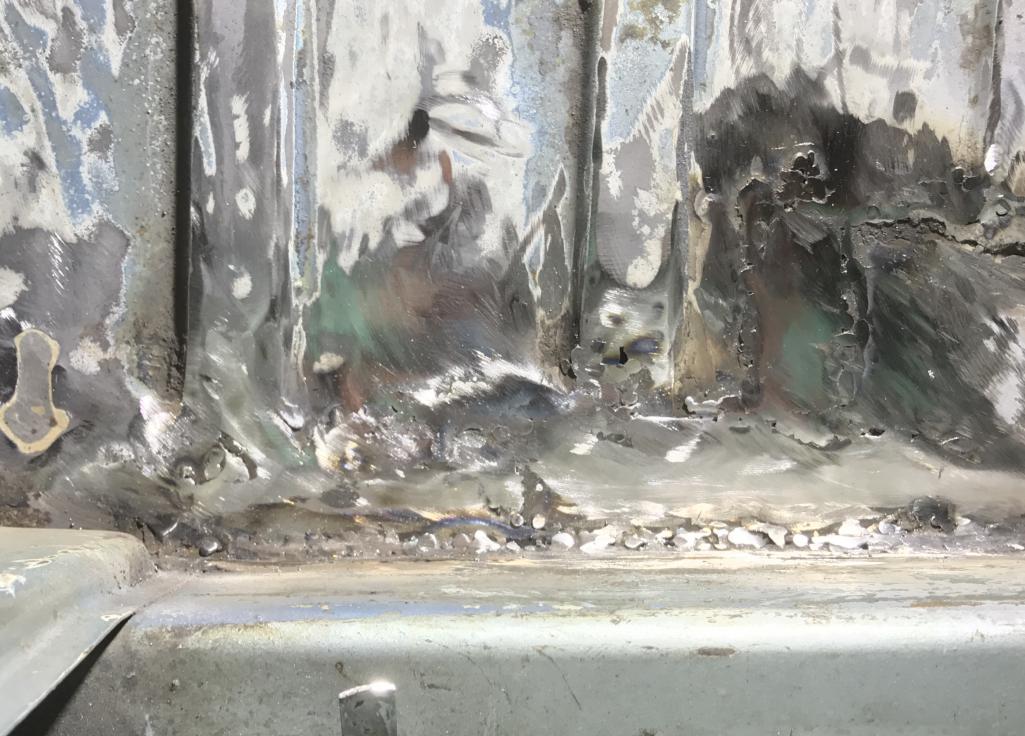
|
|
|
|
| Dion |
Aug 13 2017, 02:45 PM
Post
#145
|
|
RN Group: Members Posts: 2,922 Joined: 16-September 04 From: Audubon,PA Member No.: 2,766 Region Association: MidAtlantic Region |
Pic
Attached thumbnail(s) 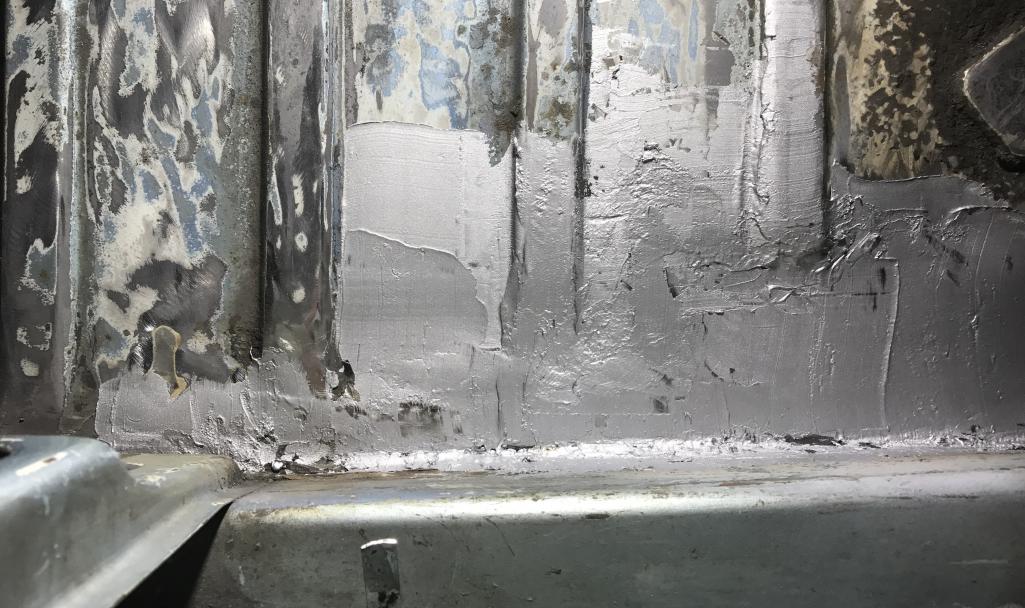
|
|
|
|
| Dion |
Aug 13 2017, 02:46 PM
Post
#146
|
|
RN Group: Members Posts: 2,922 Joined: 16-September 04 From: Audubon,PA Member No.: 2,766 Region Association: MidAtlantic Region |
Pic
Attached thumbnail(s) 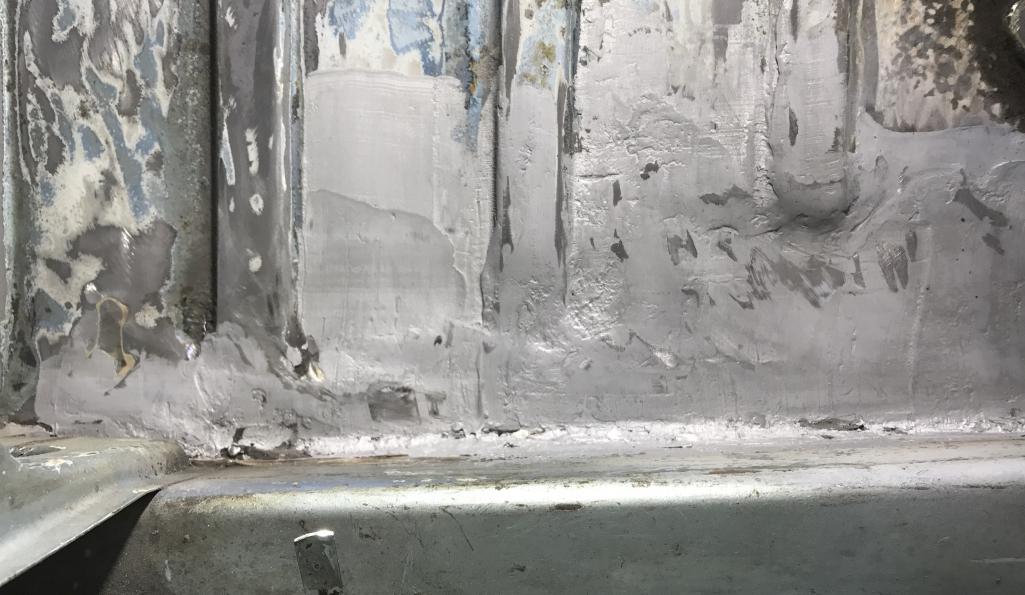 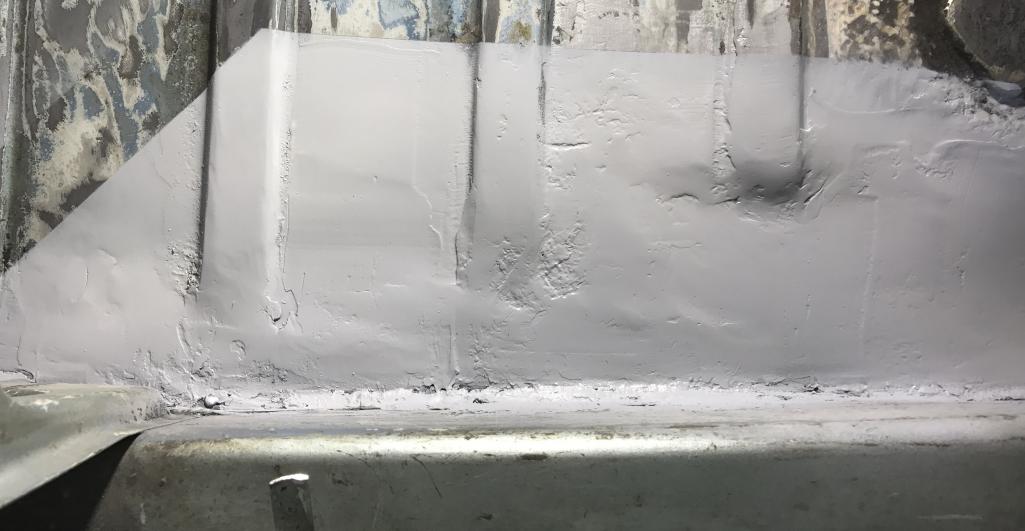
|
|
|
|
| Dion |
Aug 15 2017, 07:32 PM
Post
#147
|
|
RN Group: Members Posts: 2,922 Joined: 16-September 04 From: Audubon,PA Member No.: 2,766 Region Association: MidAtlantic Region |
Primer & seam sealer for trunk patch area. Topside and muffler side.
Onwards and upwards. Slowly getting the hang of this. Unbelievable how many items one needs to purchase to complete certain tasks. Didn't really know how many grades of sandpaper existed until I entered this realm of bodywork. It's far from the best repair. Constantly learning from experience of what is proper and what was a bad decision as most things in life. One obvious lesson is be patient!!! Don't rush things. Thanks for looking in. Attached thumbnail(s) 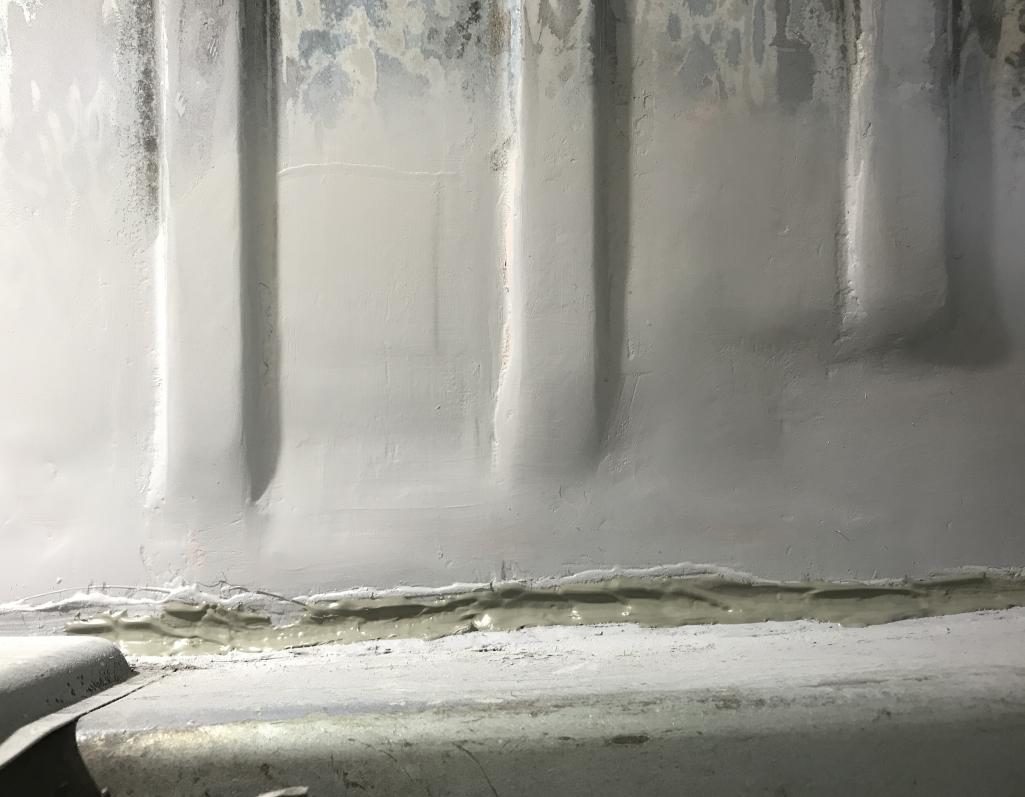 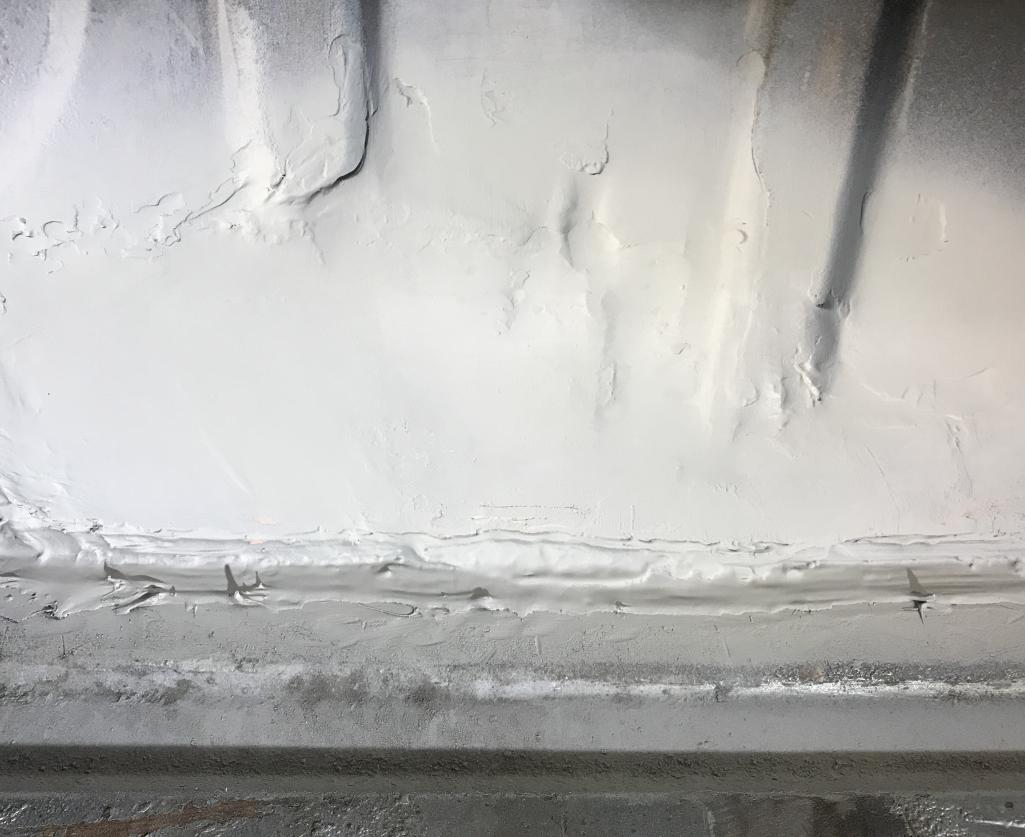
|
|
|
|
| Dion |
Aug 31 2017, 07:12 PM
Post
#148
|
|
RN Group: Members Posts: 2,922 Joined: 16-September 04 From: Audubon,PA Member No.: 2,766 Region Association: MidAtlantic Region |
Ok here's an update for August. Obviously not going to make it for the
deadline of 9-14. I must admit I have been a bit distracted as I just sold my 1992 VW GTi of which I owned since new on BaT. So that will fund the rest of this resto. Sad to see it go but I can't afford to maintain a fleet. Especially with my daughter in college. Ok I digress. I worked on the left long that had a hairline crack in it and also a hole that was adjacent to the seat rail on drivers side rear. Trying to heed advice from the experts here. I'm getting there! Slowly but getting there. I ground the welds down and then smoothed them a bit with the "all metal" aluminum "bondo". Will coat with primer next. Attached image(s) 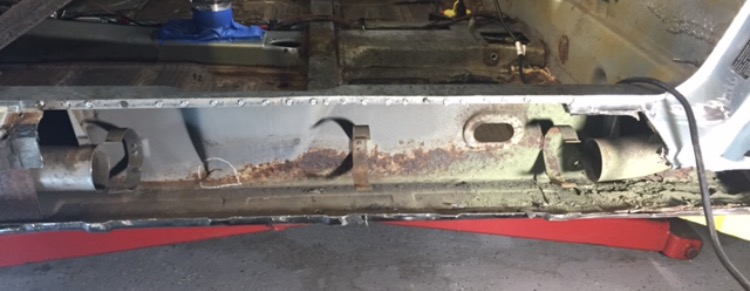 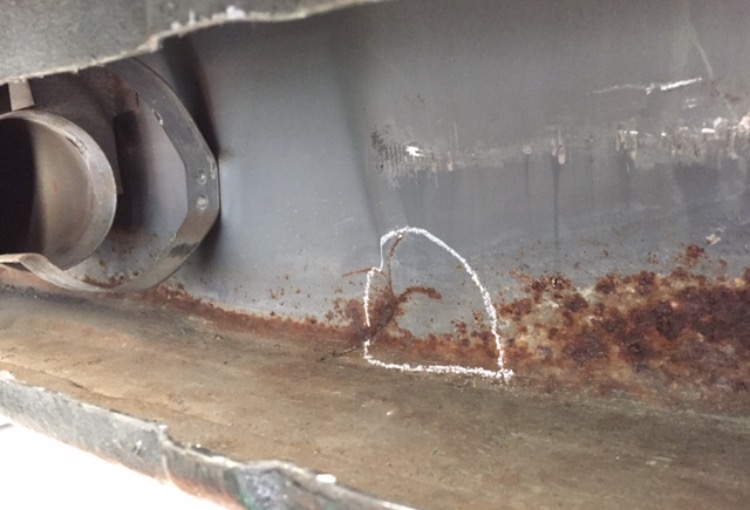 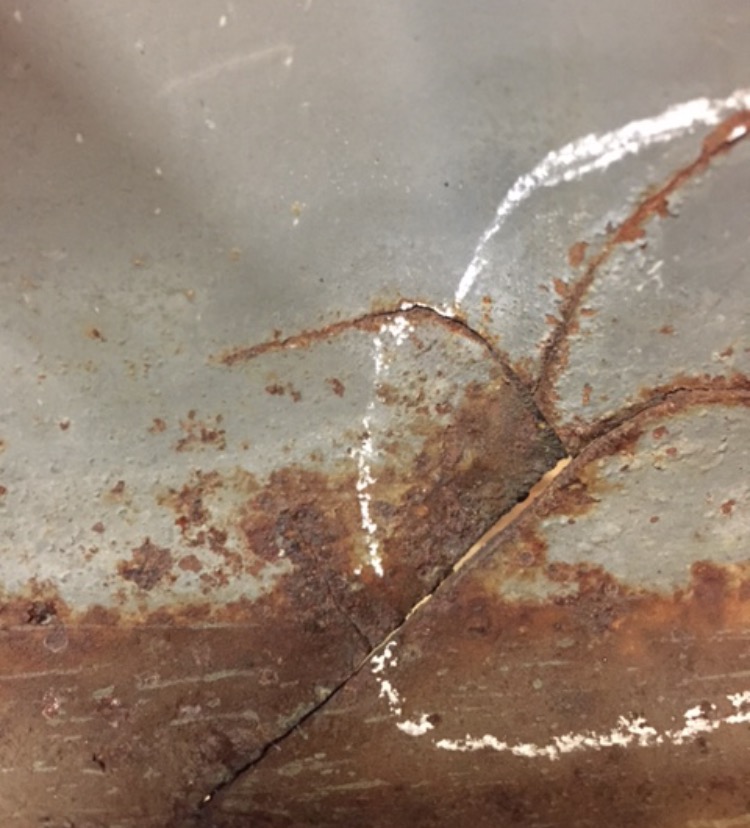
|
|
|
|
| Dion |
Aug 31 2017, 07:14 PM
Post
#149
|
|
RN Group: Members Posts: 2,922 Joined: 16-September 04 From: Audubon,PA Member No.: 2,766 Region Association: MidAtlantic Region |
Pix
Attached thumbnail(s) 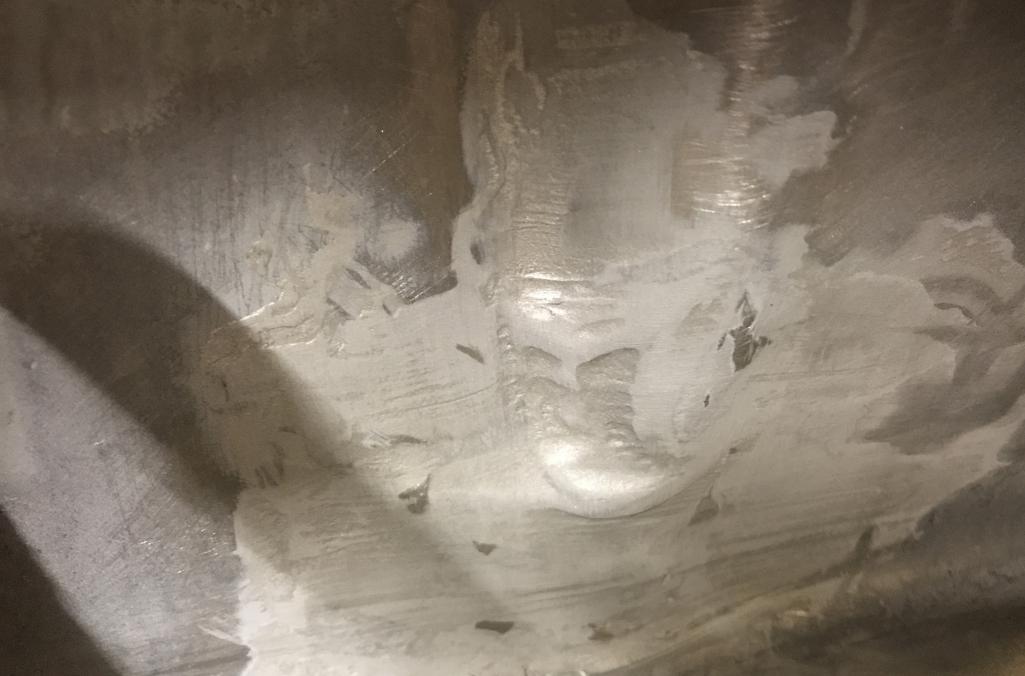
|
|
|
|
| Dion |
Aug 31 2017, 07:16 PM
Post
#150
|
|
RN Group: Members Posts: 2,922 Joined: 16-September 04 From: Audubon,PA Member No.: 2,766 Region Association: MidAtlantic Region |
Seat rail area, sorry pics loaded in reverse order.
Attached thumbnail(s) 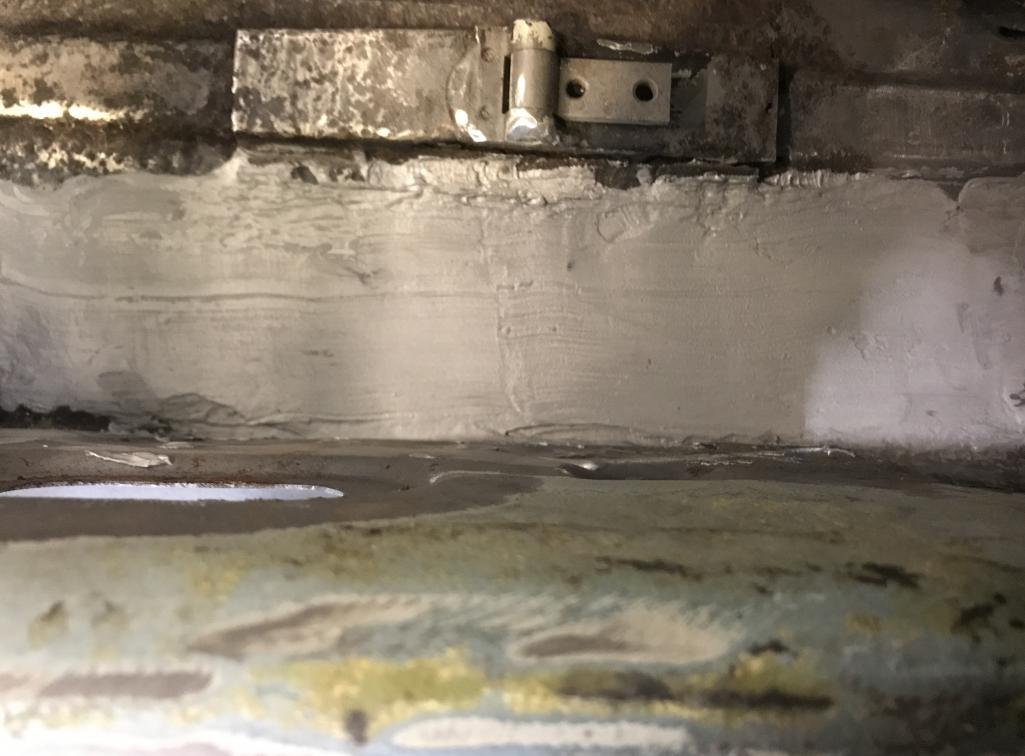 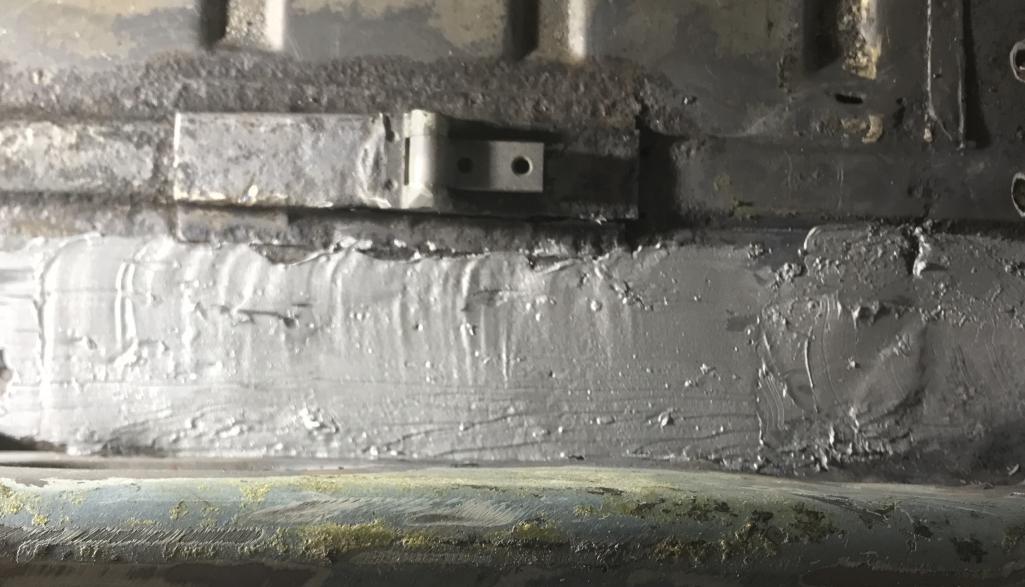 Attached image(s)  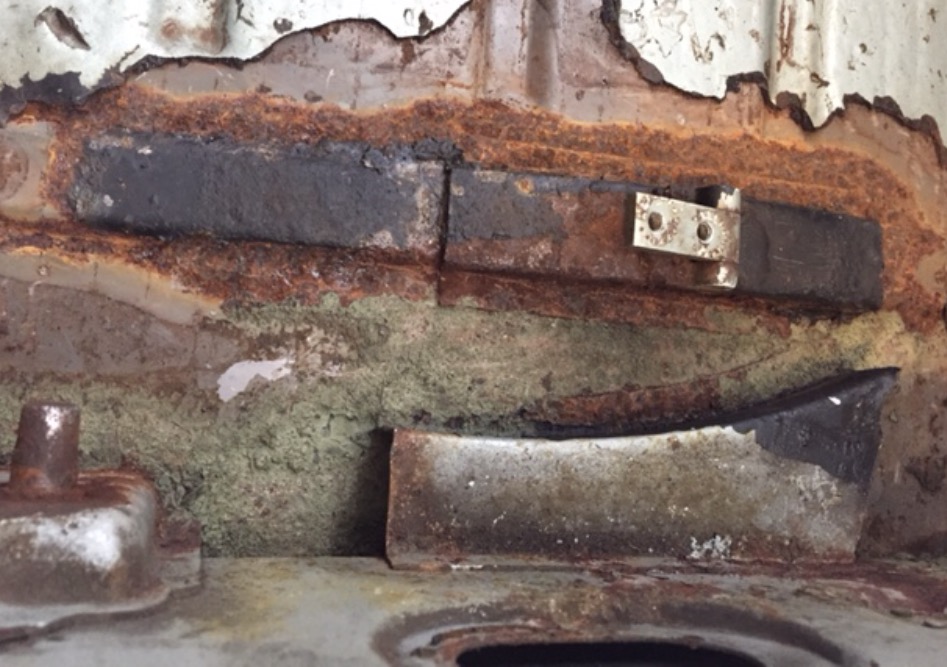
|
|
|
|
| Dion |
Sep 13 2017, 06:21 AM
Post
#151
|
|
RN Group: Members Posts: 2,922 Joined: 16-September 04 From: Audubon,PA Member No.: 2,766 Region Association: MidAtlantic Region |
Well it's the day before 9-14-17 challenge.
Figure I'd update today as I'm nowhere near done. Worked on removing rear brakes & trailing arms. Attached thumbnail(s) 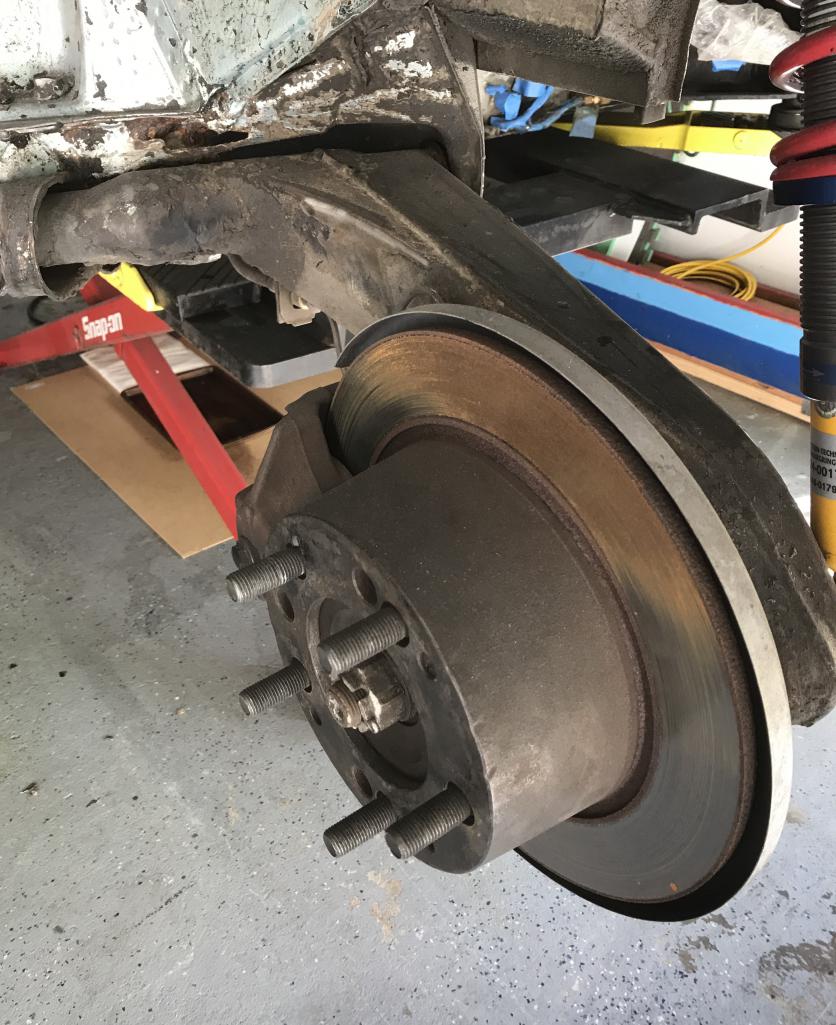
|
|
|
|
| Dion |
Sep 13 2017, 06:22 AM
Post
#152
|
|
RN Group: Members Posts: 2,922 Joined: 16-September 04 From: Audubon,PA Member No.: 2,766 Region Association: MidAtlantic Region |
Pic
Attached thumbnail(s) 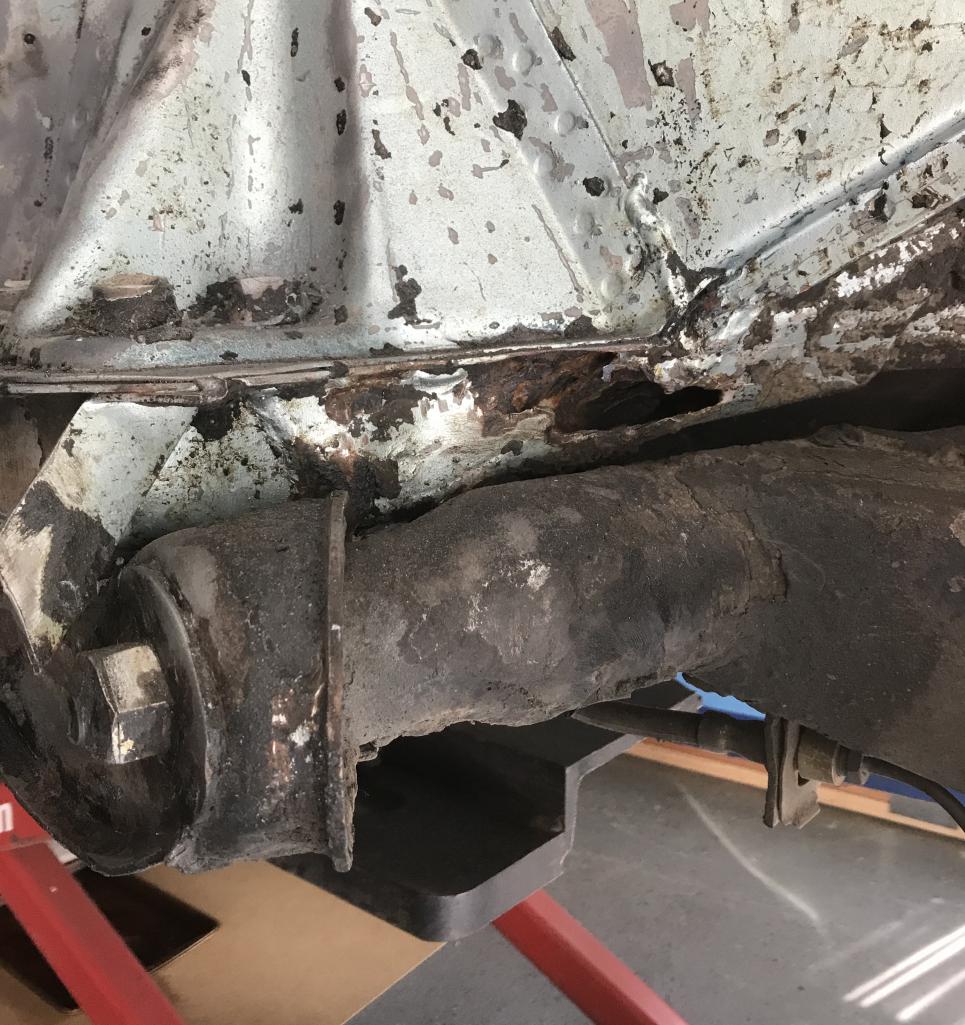
|
|
|
|
| Dion |
Sep 13 2017, 06:24 AM
Post
#153
|
|
RN Group: Members Posts: 2,922 Joined: 16-September 04 From: Audubon,PA Member No.: 2,766 Region Association: MidAtlantic Region |
Rear console will be cut out and replaced.
Attached thumbnail(s) 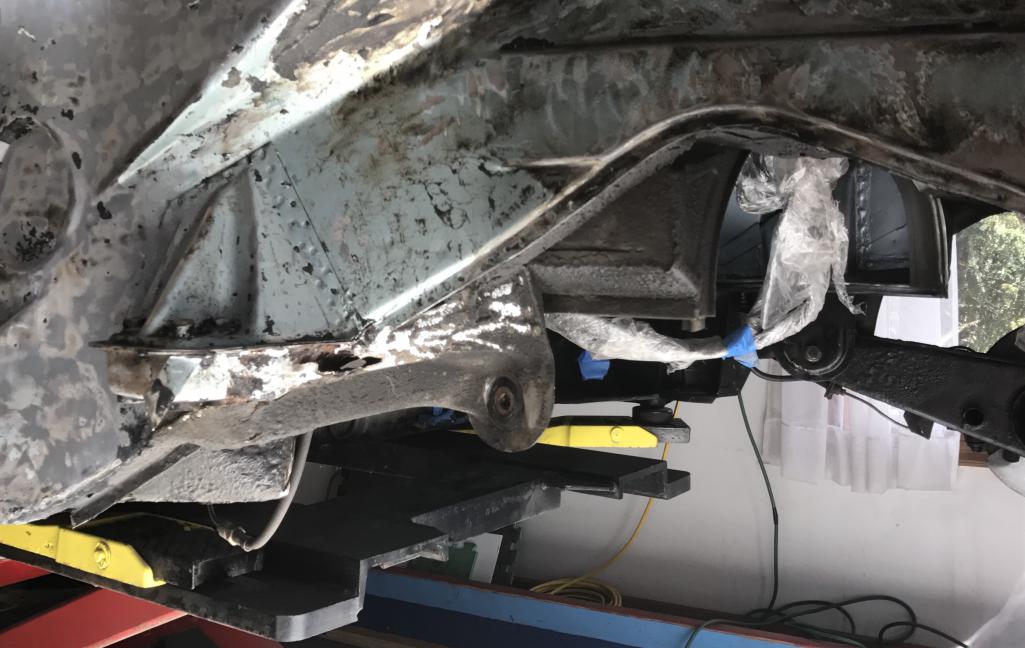 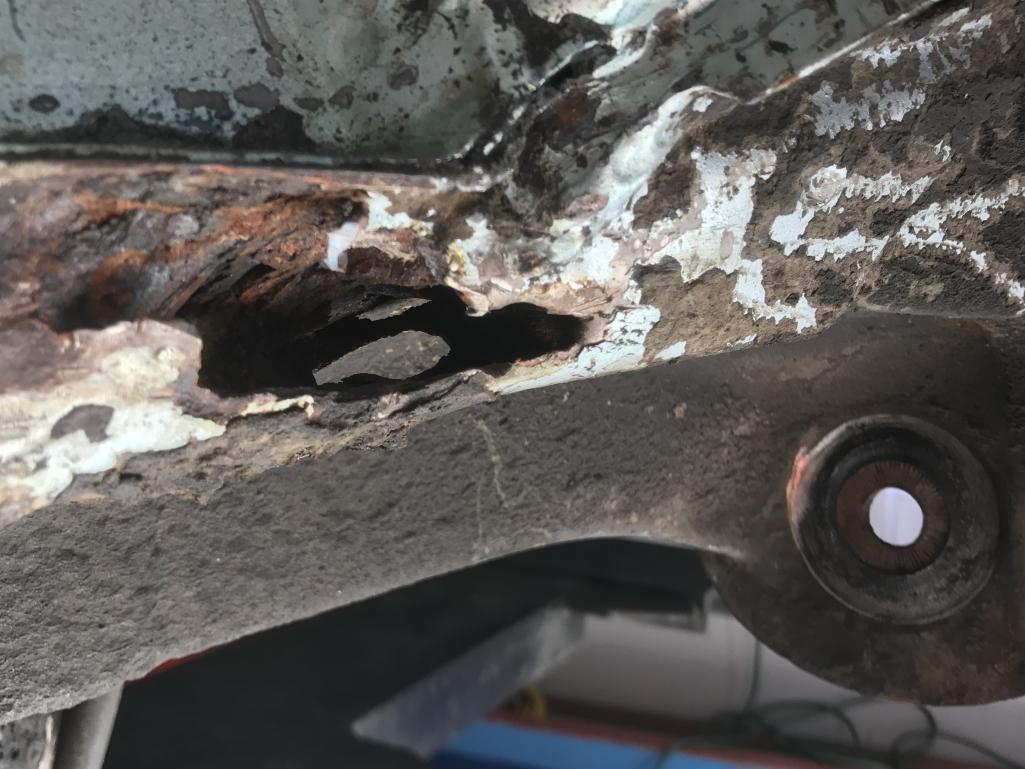
|
|
|
|
| Dion |
Sep 13 2017, 06:27 AM
Post
#154
|
|
RN Group: Members Posts: 2,922 Joined: 16-September 04 From: Audubon,PA Member No.: 2,766 Region Association: MidAtlantic Region |
Engine bay side is nice and clean (rust free?)
Reconditioned arms courtesy of Jayman. Attached thumbnail(s) 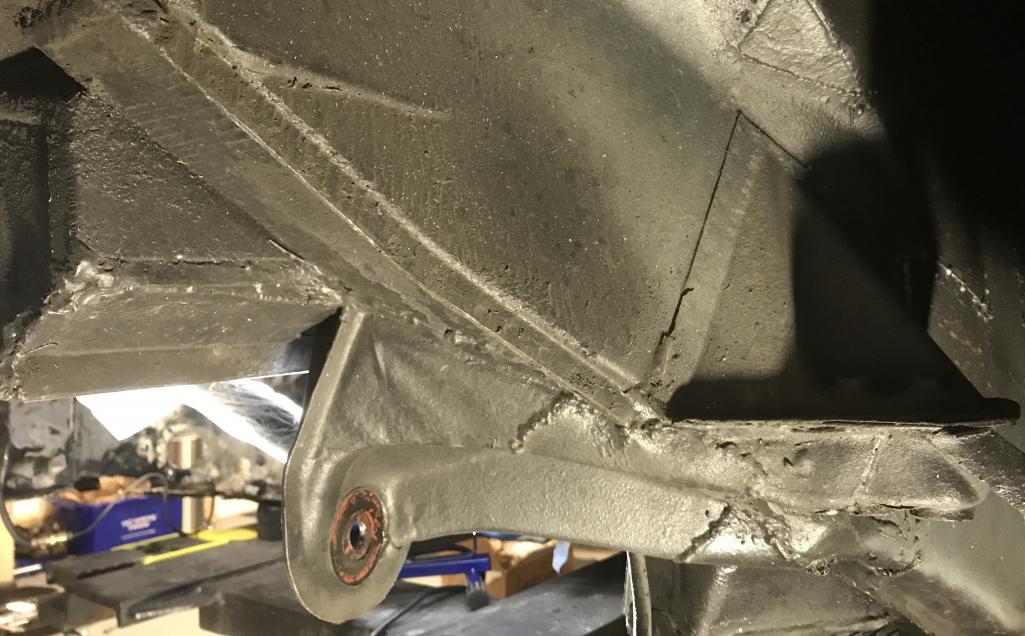 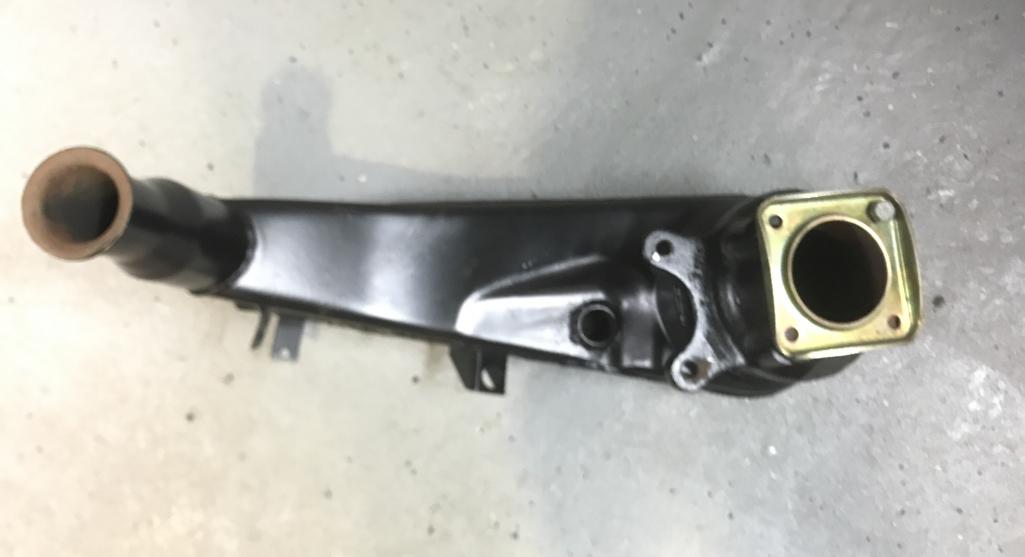
|
|
|
|
| Dion |
Sep 13 2017, 06:33 AM
Post
#155
|
|
RN Group: Members Posts: 2,922 Joined: 16-September 04 From: Audubon,PA Member No.: 2,766 Region Association: MidAtlantic Region |
After the work on Sat. had a visit from Dave (914Dave) on Sunday.
Hopefully the good karma from his car will transfer to my U-boat. He needed a "more flat" floor than his garage had to set up camber/caster measurements. Before he goes to a final setting at a "pro" shop. His car is stunning. Attached thumbnail(s) 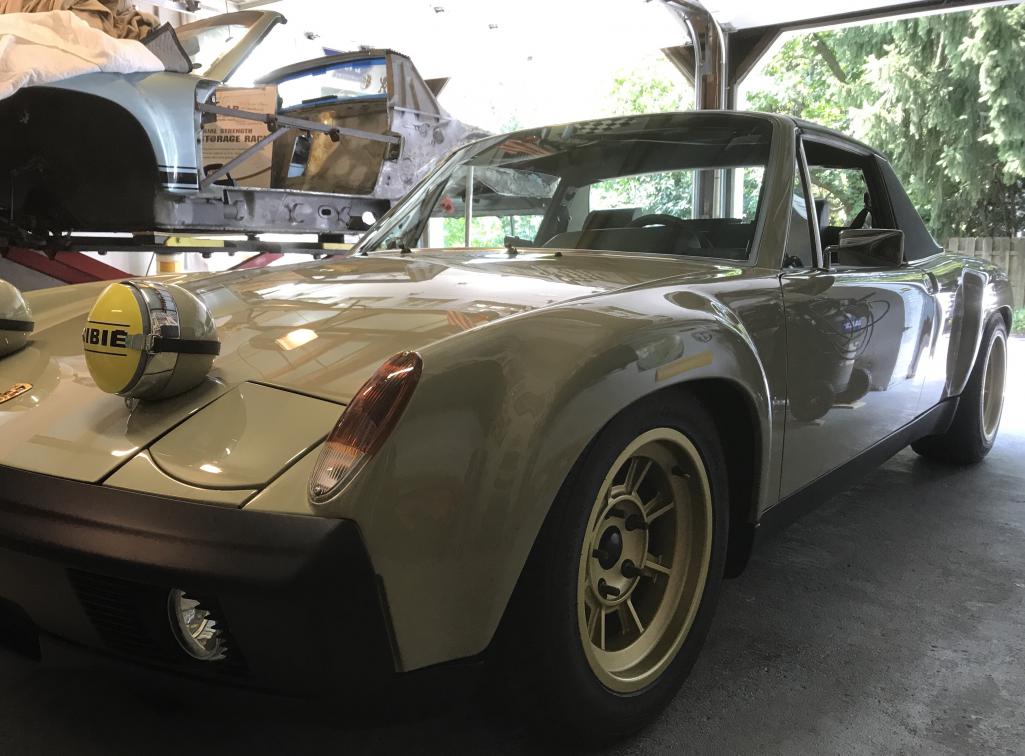
|
|
|
|
| jmitro |
Sep 13 2017, 10:10 AM
Post
#156
|
|
Senior Member Group: Members Posts: 713 Joined: 23-July 15 From: Oklahoma Member No.: 18,986 Region Association: None |
that's awesome; what size wheels/tires in the rear?
|
|
|
|
| Dion |
Sep 13 2017, 10:25 AM
Post
#157
|
|
RN Group: Members Posts: 2,922 Joined: 16-September 04 From: Audubon,PA Member No.: 2,766 Region Association: MidAtlantic Region |
Hey Joseph, 225/50/15. 8 up front, 9 in the back.
Daves rims are repops from Group4 of the Campagnolo rims. Just like the Lancia Stratos ran. They're very,very cool. |
|
|
|
| Dion |
Sep 25 2017, 07:00 PM
Post
#158
|
|
RN Group: Members Posts: 2,922 Joined: 16-September 04 From: Audubon,PA Member No.: 2,766 Region Association: MidAtlantic Region |
Right so Build off challenge is on the simmer. I actually feel less
pressure working on this car now. Changed gear from body work to working on mechanical bits. First up removing rear brake lines and "ABS" device. Will send that bugger of to PMB for an overhaul along with the front S calipers. Attached thumbnail(s) 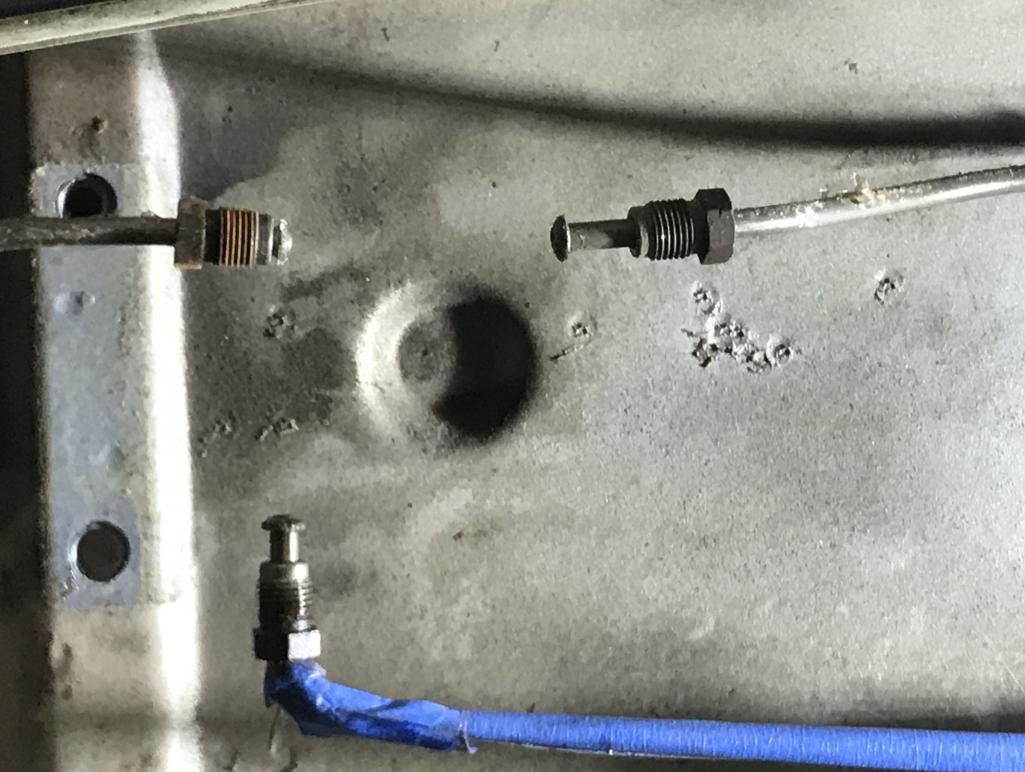 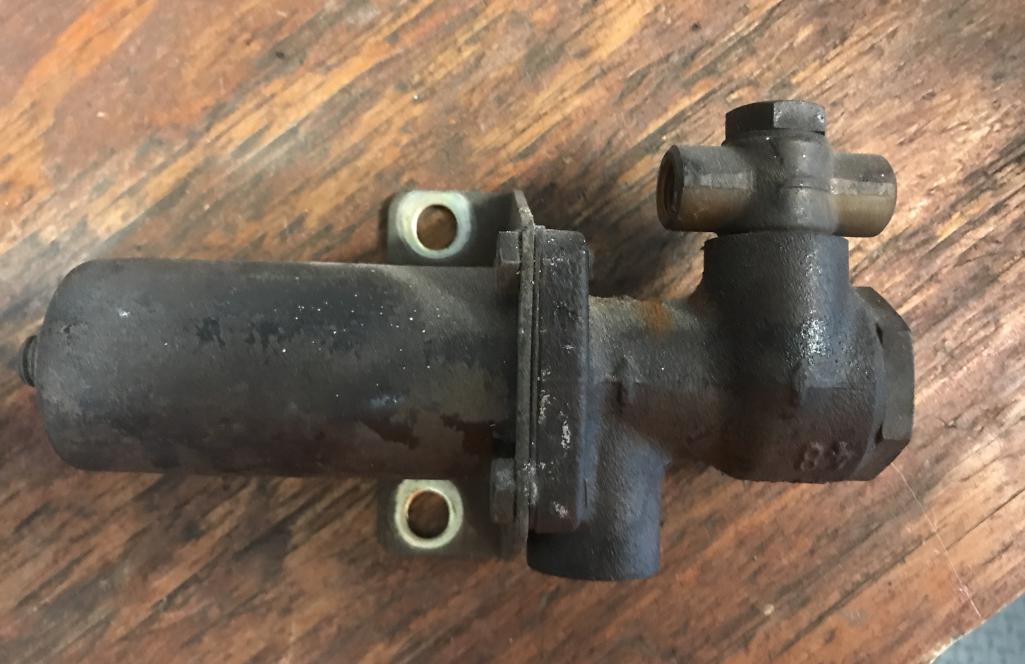
|
|
|
|
| Dion |
Sep 25 2017, 07:01 PM
Post
#159
|
|
RN Group: Members Posts: 2,922 Joined: 16-September 04 From: Audubon,PA Member No.: 2,766 Region Association: MidAtlantic Region |
Brake line layout
Attached thumbnail(s) 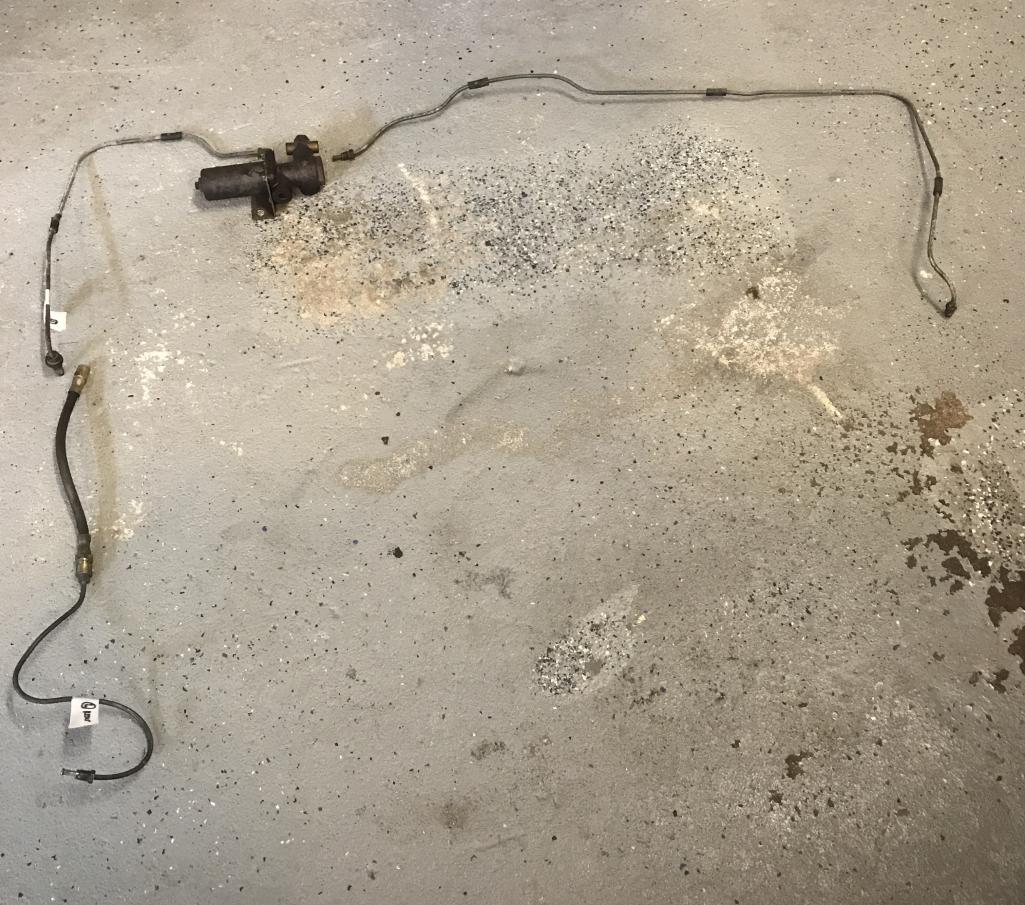
|
|
|
|
| Dion |
Sep 25 2017, 07:07 PM
Post
#160
|
|
RN Group: Members Posts: 2,922 Joined: 16-September 04 From: Audubon,PA Member No.: 2,766 Region Association: MidAtlantic Region |
This evening removed front control arms to replace all the bushings
and give it a good cleanup. The rust that poured from the torsion tubes, unreal. Makes no sense to have fresh brakes and lines and not freshen the front end. Taking those arms off was a bugger of a job. Took the whole assembly out and used the "heavy" lift to keep all still while a nice sized hammer helped tap out the arms from cross member. Felt good to make mechanical progress. Attached thumbnail(s) 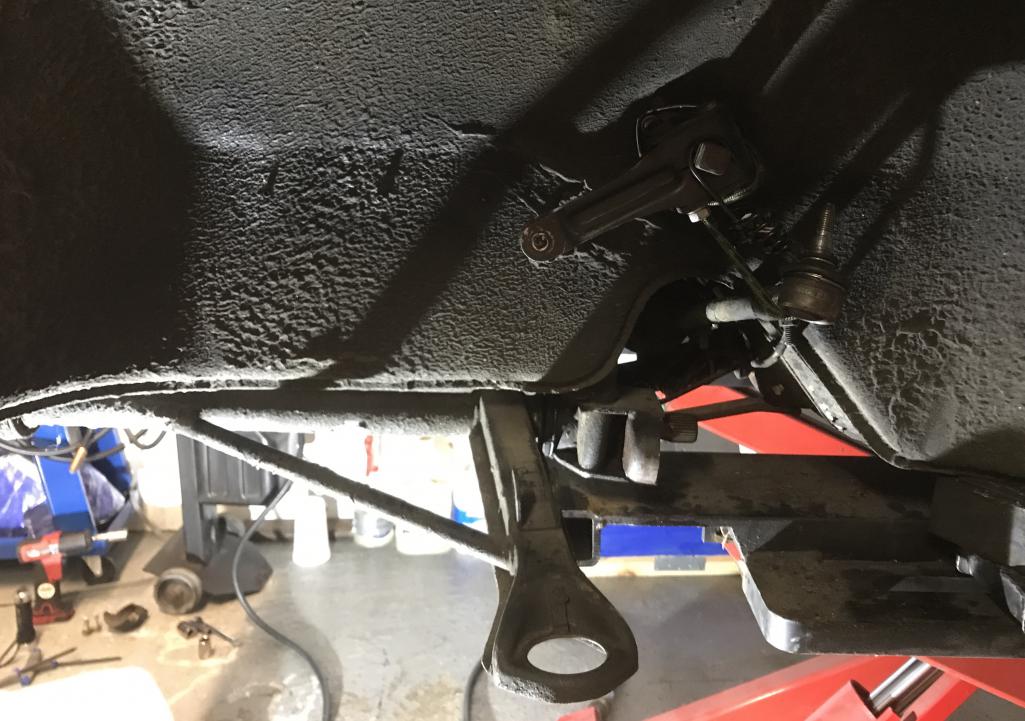 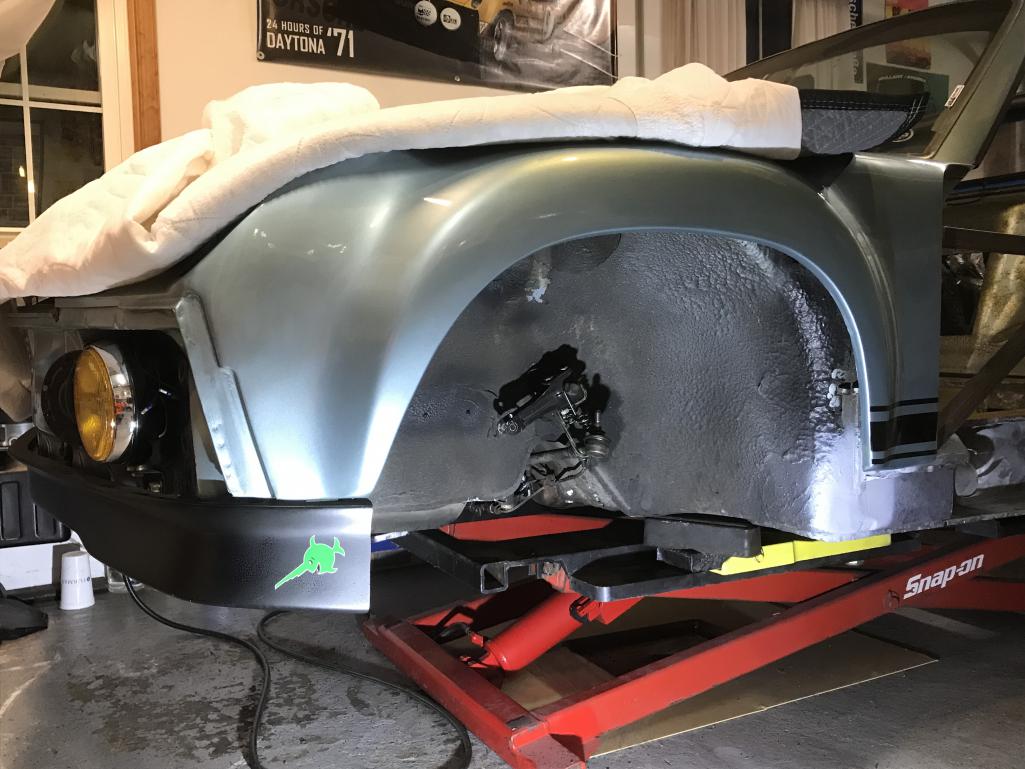
|
|
|
|
|
1 User(s) are reading this topic (1 Guests and 0 Anonymous Users)
0 Members:

|
Lo-Fi Version | Time is now: 25th January 2026 - 03:01 AM |
Invision Power Board
v9.1.4 © 2026 IPS, Inc.