|
|
|
Porsche, and the Porsche crest are registered trademarks of Dr. Ing. h.c. F. Porsche AG.
This site is not affiliated with Porsche in any way. Its only purpose is to provide an online forum for car enthusiasts. All other trademarks are property of their respective owners. |
|
|

  |

| thesey914 |
 Jun 23 2003, 12:09 PM Jun 23 2003, 12:09 PM
Post
#1
|
|
Senior Member  Group: Benefactors Posts: 1,155 Joined: 1-January 03 From: Staffordshire -England Member No.: 66 |
Is it possible to remove this bezel to repaint it or do I have to leave it with the correct patina on?
Attached image(s) 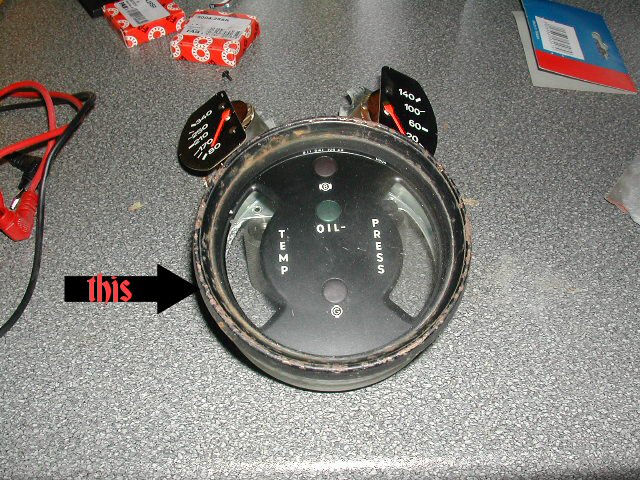
|
   |

 
|
| SirAndy |
Jun 23 2003, 12:13 PM
Post
#2
|
|
Resident German Group: Admin Posts: 41,634 Joined: 21-January 03 From: Oakland, Kalifornia Member No.: 179 Region Association: Northern California |
yes, you have to use a flat screwdriver and carefully pry open the metal on the back. you can then remove the ring and glass.
Andy |
|
|
|
| Demick |
Jun 23 2003, 12:18 PM
Post
#3
|
|
Ernie made me do it! Group: Benefactors Posts: 2,312 Joined: 6-February 03 From: Pleasanton, CA Member No.: 257 |
If painting the bezel is the only thing you want to accomplish, I would recommend just painting it in place. Removing the bezel is a real pain, and you are more likely to do damage to it when are removing it or re-crimping it back on. Of course, if you also want to get inside for other reasons, then that's a different story.
Demick |
|
|
|
| thesey914 |
Jun 23 2003, 12:20 PM
Post
#4
|
|
Senior Member Group: Benefactors Posts: 1,155 Joined: 1-January 03 From: Staffordshire -England Member No.: 66 |
Cheers Andy....to quote H.J.Simpson...." what an age we live in"
An intant reply from one side of the globe to another!! (IMG:style_emoticons/default/smilie_pokal.gif) |
|
|
|
| Bleyseng |
Jun 23 2003, 12:45 PM
Post
#5
|
|
Aircooled Baby! Group: Members Posts: 13,034 Joined: 27-December 02 From: Seattle, Washington (for now) Member No.: 24 Region Association: Pacific Northwest |
It's very easy to pry off the bezel with a very small flat screwdriver. Sand and paint it with SatinBlack paint to have it look Factory again. Clean and polish the glass (looks like its a glass unit in the pic) and carefully crimp the edges back with a small piece of wood or plastic. The rubber ring covers any imperfections when its installed.
Geoff |
|
|
|
| Dave_Darling |
Jun 23 2003, 03:28 PM
Post
#6
|
|
914 Idiot Group: Members Posts: 14,984 Joined: 9-January 03 From: Silicon Valley / Kailua-Kona Member No.: 121 Region Association: Northern California |
Or just use a black Sharpie on it. "Ghetto gauge repair." (IMG:style_emoticons/default/wink.gif)
--DD |
|
|
|
| Lawrence |
Jun 23 2003, 07:17 PM
Post
#7
|
|
Senior Member Group: Benefactors Posts: 1,661 Joined: 5-February 03 Member No.: 244 Region Association: None |
A small screwdriver or pen knife can take the bezels off easily. Go slow, don't try to take it off on your first time around, and it'll work out well.
You can do it while watching Seinfeld and drinking a beer. By the end of the episode, you'll have the bezel off and you'll be feeling good. (IMG:style_emoticons/default/smile.gif) -Rusty (IMG:style_emoticons/default/smoke.gif) P.S. While you're in there, consider repainting the INSIDE bezel silver. |
|
|
|
| thesey914 |
Jun 24 2003, 03:51 AM
Post
#8
|
|
Senior Member Group: Benefactors Posts: 1,155 Joined: 1-January 03 From: Staffordshire -England Member No.: 66 |
Silver? What does that look like?.....I actually just wanted to get the glass out to polish & clean it as the inside had got all foggy.....but now I've reassembled it I feel it needs re-painting.....still the glass is clean
Attached image(s) 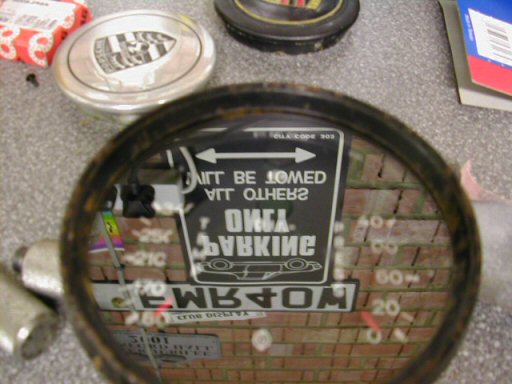
|
|
|
|
| abm914 |
Jun 24 2003, 05:54 AM
Post
#9
|
|
Newbie Group: Members Posts: 19 Joined: 9-May 03 From: Surrey, UK Member No.: 670 |
James
What's the gauge off & do you have a separate fuel gauge aswell? Let me know as I have a VDO 60mm Fuel gauge that I might be willing to part with!! (IMG:style_emoticons/default/biggrin.gif) Adam |
|
|
|
| thesey914 |
Jun 24 2003, 06:25 AM
Post
#10
|
|
Senior Member Group: Benefactors Posts: 1,155 Joined: 1-January 03 From: Staffordshire -England Member No.: 66 |
Hello Adam, (see the pic of your car I posted) -Yep I do need a fuel gauge -I have my eye on a few on EvilBay. Can you mail me a pic of it? (what car is it off?)
The temp/pressure gauge pictured is 911. Wish it was metric increments instead of deg F and lbs/"2 |
|
|
|
| SirAndy |
Jun 24 2003, 09:47 AM
Post
#11
|
|
Resident German Group: Admin Posts: 41,634 Joined: 21-January 03 From: Oakland, Kalifornia Member No.: 179 Region Association: Northern California |
QUOTE(thesey914 @ Jun 24 2003, 05:25 AM) Wish it was metric increments instead of deg F and lbs/"2 yeah, always throws me off too. around here, everyone thinks "metric" is something to drink (IMG:style_emoticons/default/laugh.gif) Andy |
|
|
|
| abm914 |
Jun 24 2003, 04:06 PM
Post
#12
|
|
Newbie Group: Members Posts: 19 Joined: 9-May 03 From: Surrey, UK Member No.: 670 |
James
Below is the fuel gauge that I have and below that is the combi gauge that I'd like but it's about $400! Adam (IMG:http://muchos.co.uk/members/godber/vdogauge.jpg) (IMG:http://muchos.co.uk/members/godber/3GAUGE.JPG) (IMG:style_emoticons/default/lol2.gif) |
|
|
|
| Lawrence |
Jun 24 2003, 04:48 PM
Post
#13
|
|
Senior Member Group: Benefactors Posts: 1,661 Joined: 5-February 03 Member No.: 244 Region Association: None |
This is what gauges with silver bezels look like.
Attached image(s) 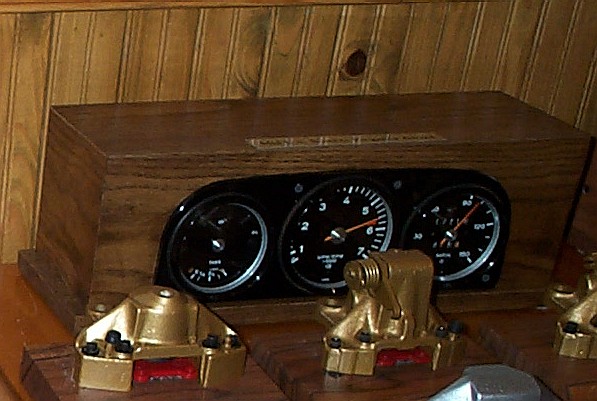
|
|
|
|
| SirAndy |
Jun 24 2003, 04:54 PM
Post
#14
|
|
Resident German Group: Admin Posts: 41,634 Joined: 21-January 03 From: Oakland, Kalifornia Member No.: 179 Region Association: Northern California |
was there a factory Tach with a black center bezel AND 2 lights for the turn signals?
if so, what year ??? Andy |
|
|
|
| thesey914 |
Jun 25 2003, 03:32 AM
Post
#15
|
|
Senior Member Group: Benefactors Posts: 1,155 Joined: 1-January 03 From: Staffordshire -England Member No.: 66 |
QUOTE(Lawrence @ Jun 24 2003, 02:48 PM) This is what gauges with silver bezels look like. Lawrence...Some might say that you have wayyy too much time on your hands (not me)-I love the mounted dials and callipers -better than deer antlers anyday! -How did you get the needle to stay on the red line? Adam -Your pics haven't displayed for some reason...I'll bet you're after one of those triple gauges? |
|
|
|
| thesey914 |
Jun 25 2003, 03:48 AM
Post
#16
|
|
Senior Member Group: Benefactors Posts: 1,155 Joined: 1-January 03 From: Staffordshire -England Member No.: 66 |
QUOTE(SirAndy @ Jun 24 2003, 02:54 PM) was there a factory Tach with a black center bezel AND 2 lights for the turn signals? if so, what year ??? Andy Andy..saw this on the 'Bay -is this what you mean? http://cgi.ebay.com/ebaymotors/ws/eBayISAP...item=2420899005 |
|
|
|
| 914Timo |
Jun 25 2003, 04:05 AM
Post
#17
|
|
******* Group: Members Posts: 743 Joined: 13-January 03 From: Finland Member No.: 137 Region Association: Europe |
QUOTE Wish it was metric increments instead of deg F and lbs/"2 Oh, now I understand. I noticed that we are on the same side of the big water. Nice to see that there are others than Jeroen and me from europe. (IMG:style_emoticons/default/wavey.gif) I scanned my F and lbs gauge faces (oh yes, they are not very common here, but when I needed them I couldnt find any euro model). Then I converted them to metric and printed to sticker paper. Here are my new faces as JPG. Send me e-mail if you need them in some other format. I did them with Adobe Illustrator. Attached thumbnail(s) 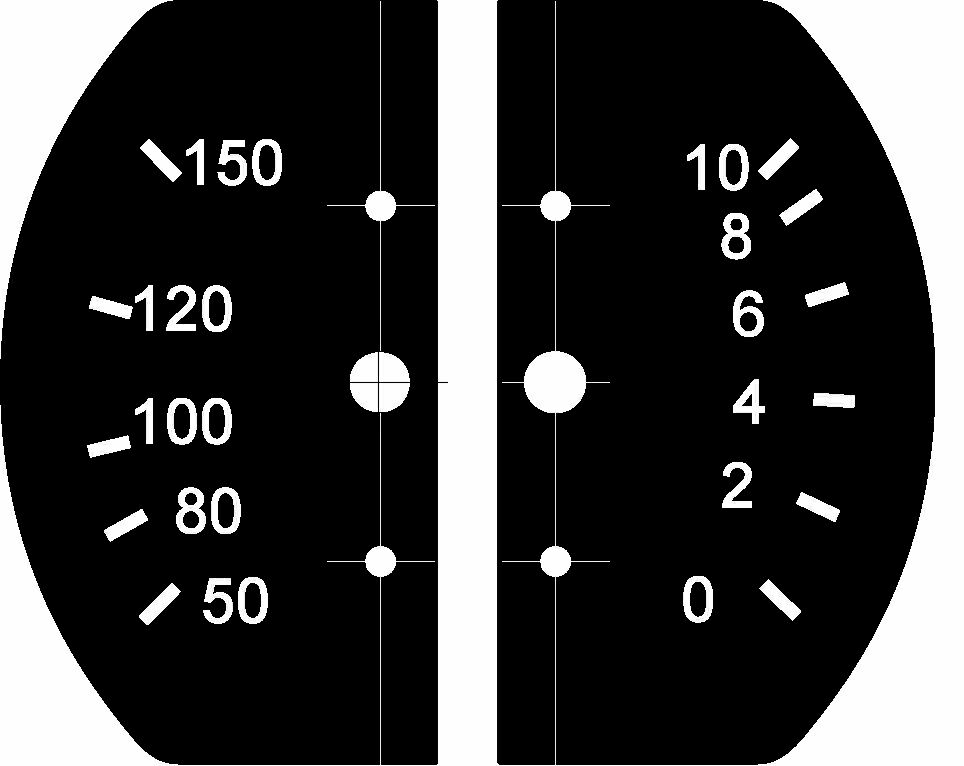
|
|
|
|
| thesey914 |
Jun 25 2003, 05:12 AM
Post
#18
|
|
Senior Member Group: Benefactors Posts: 1,155 Joined: 1-January 03 From: Staffordshire -England Member No.: 66 |
Hey Timo, that's ingenious! I'm well impressed and thanks for sharing it! Do you know what measurements I need to make it fit?
If not I'll have to stop being lazy and go out and measure it for my self (IMG:style_emoticons/default/biggrin.gif) Cheers -James The temp increments are obviously deg C ..is the pressure measured in BAR ? or KG per whatever squared? |
|
|
|
| thesey914 |
Jun 25 2003, 05:39 AM
Post
#19
|
|
Senior Member Group: Benefactors Posts: 1,155 Joined: 1-January 03 From: Staffordshire -England Member No.: 66 |
It needs to be 6.45mm in height (IMG:style_emoticons/default/smilie_pokal.gif)
|
|
|
|
| 914Timo |
Jun 25 2003, 05:46 AM
Post
#20
|
|
******* Group: Members Posts: 743 Joined: 13-January 03 From: Finland Member No.: 137 Region Association: Europe |
QUOTE Do you know what measurements I need to make it fit? The distance between those two screw holes is 30mm. The height is about 65mm and the width of one gauge face is about 37mm. I have couple of variations from those gauge fases. I converted them all to pdf format. You wil find it HERE. |
|
|
|
|
1 User(s) are reading this topic (1 Guests and 0 Anonymous Users)
0 Members:

|
Lo-Fi Version | Time is now: 12th May 2024 - 09:58 PM |
Invision Power Board
v9.1.4 © 2024 IPS, Inc.