|
|
|
Porsche, and the Porsche crest are registered trademarks of Dr. Ing. h.c. F. Porsche AG.
This site is not affiliated with Porsche in any way. Its only purpose is to provide an online forum for car enthusiasts. All other trademarks are property of their respective owners. |
|
|

  |

| TroyVB |
 Oct 3 2016, 07:04 AM Oct 3 2016, 07:04 AM
Post
#1
|
|
Newbie  Group: Members Posts: 17 Joined: 21-July 16 From: Northwest IA Member No.: 20,214 Region Association: None |
I have started with the first panel replacement. I have an RD panel to fix this spot. the new panel extends over the support. Not sure that I want to cut into the support.
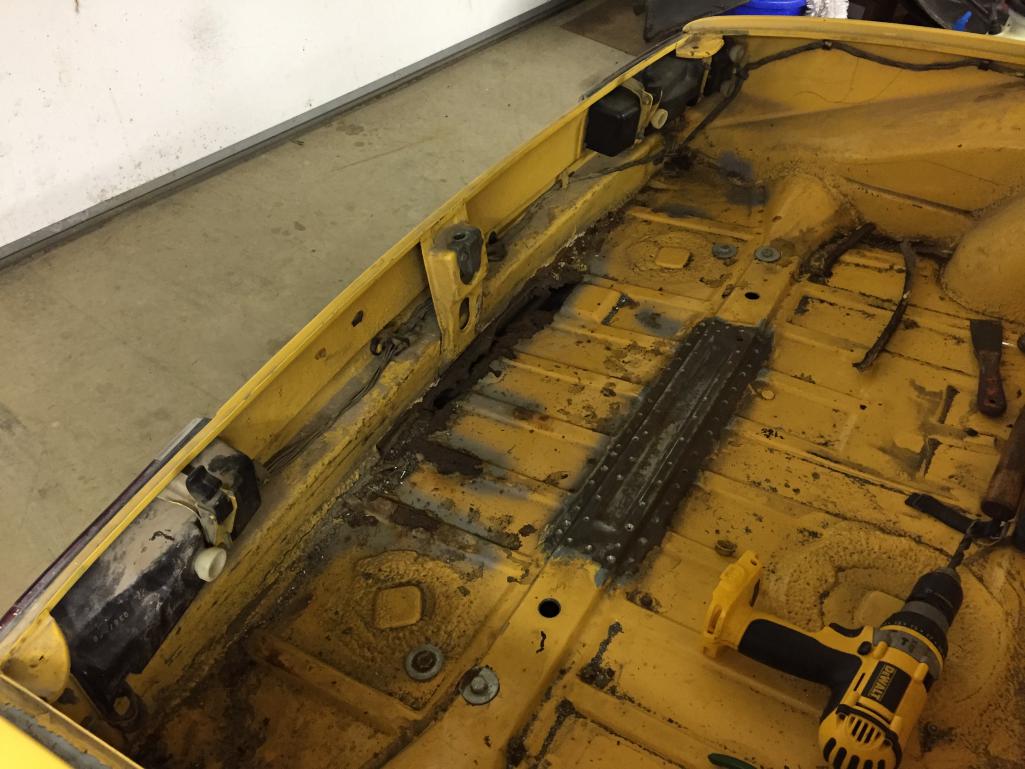 2 Questions: Can I cut the rusty trunk panel so that I leave the top half of the support as is? I would essentially follow the support flange and then drill holes in the new panel, plug welding it to the flange on the support. My worry is the extra layer created by leaving the trunk panel spot welded to the support. The rot is contained to the middle of the trunk area. Only surface rust near the support and under the reinforcement. Also, is there a special spot weld drill bit I should be using? I removed the center reinforcement with a standard drill bit, but I worry that I am drilling too far into the panel underneath. Thanks for all the help. I have another panel to fill in the factory air holes in the front trunk and will need to do a passenger rear floor pan. That seems like an easier job and may do it first. |
   |

 
|
| cary |
Oct 3 2016, 08:18 AM
Post
#2
|
|
Advanced Member Group: Members Posts: 3,900 Joined: 26-January 04 From: Sherwood Oregon Member No.: 1,608 Region Association: Pacific Northwest |
I'd remove all the seam sealer along the taillight panel before you make any decisions. Especially in the corners where the seam sealer is really laid in thick.
My .02c for this am. |
|
|
|
| TroyVB |
Oct 3 2016, 05:25 PM
Post
#3
|
|
Newbie Group: Members Posts: 17 Joined: 21-July 16 From: Northwest IA Member No.: 20,214 Region Association: None |
Not much help today with the rear trunk so I tackled the front. So I did this instead
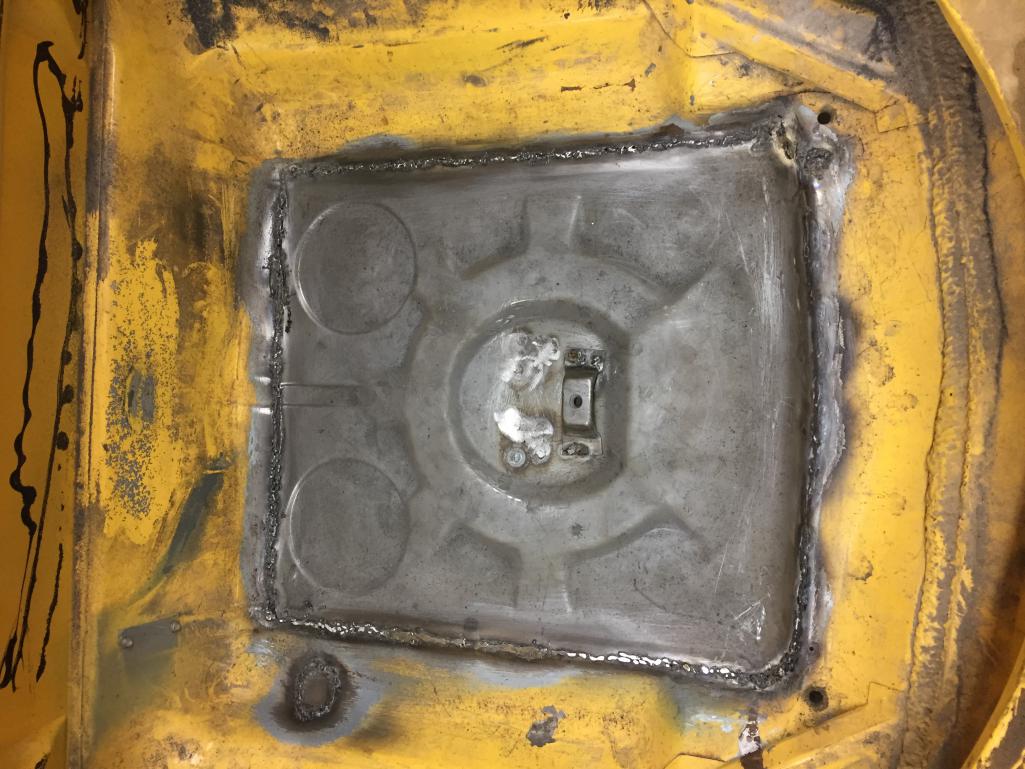 Not real happy with the welds. Any advice on settings for a Lincoln 100? Seemed either too hot (burn through) or cold (bubble gum). |
|
|
|
| 76-914 |
Oct 3 2016, 06:16 PM
Post
#4
|
|
Repeat Offender & Resident Subaru Antagonist Group: Members Posts: 13,502 Joined: 23-January 09 From: Temecula, CA Member No.: 9,964 Region Association: Southern California |
There are cutters for the weld spots. Be careful not to remove the lower layer in the process. Some of our body Gurus use a regular bit as you did and a hammer/chisel to split the seam and pull apart the remaining metal pieces that were partially drilled. When I replaced my trunks rear section I sawzall'd the trunk floor out but left the flanges in place. It was easier to see the layers and peel 'em apart with a clear side view. (IMG:style_emoticons/default/beerchug.gif)
|
|
|
|
| cary |
Oct 3 2016, 09:55 PM
Post
#5
|
|
Advanced Member Group: Members Posts: 3,900 Joined: 26-January 04 From: Sherwood Oregon Member No.: 1,608 Region Association: Pacific Northwest |
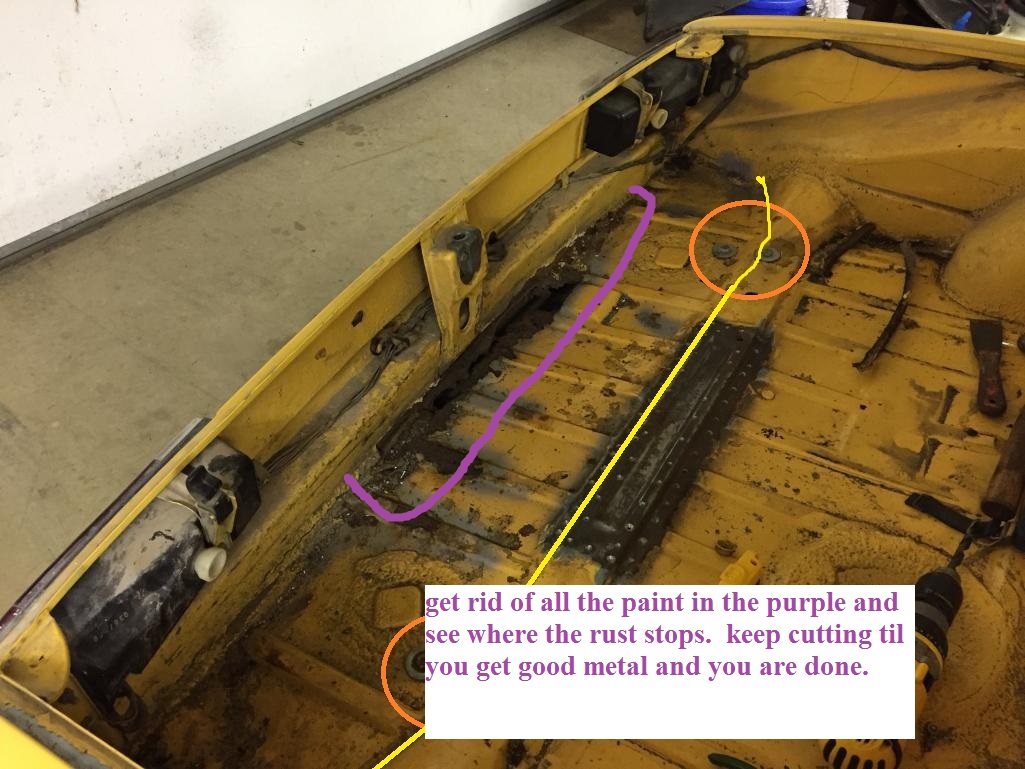
Ok, my 02c for the evening.
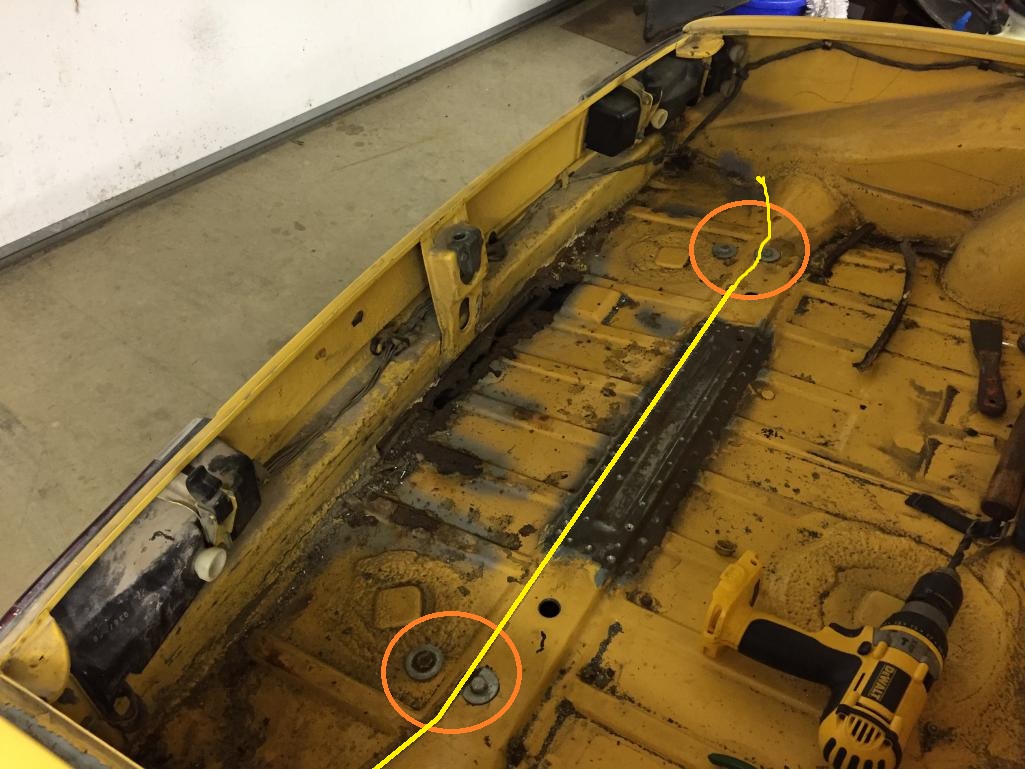 Orange : What's with the bolts ? Yellow : The yellow line is my preferred cut. I'm not seeing a reason to replace the center support. |
|
|
|
| bretth |
Oct 3 2016, 10:33 PM
Post
#6
|
|
Senior Member Group: Members Posts: 899 Joined: 23-June 15 From: Central TX Member No.: 18,882 Region Association: Southwest Region |
Make sure your metal is clean for welding. Strip all paint down to clean rust free metal going back at least an inch or more. Rust/paint can increase chances of burn through, the arc will be less stable. Your welder should show you approximate settings for the thickness of metal your welding.
Brett |
|
|
|
| Garland |
Oct 3 2016, 10:37 PM
Post
#7
|
|
Restoration Fanatic Group: Members Posts: 1,329 Joined: 8-January 04 From: ......Michigan...... Member No.: 1,535 Region Association: Upper MidWest |
The bolts look like they are for aftermarket sway bar mounts.
Check out my build link Michigan Build, 2016 Build-Off lots of pictures. 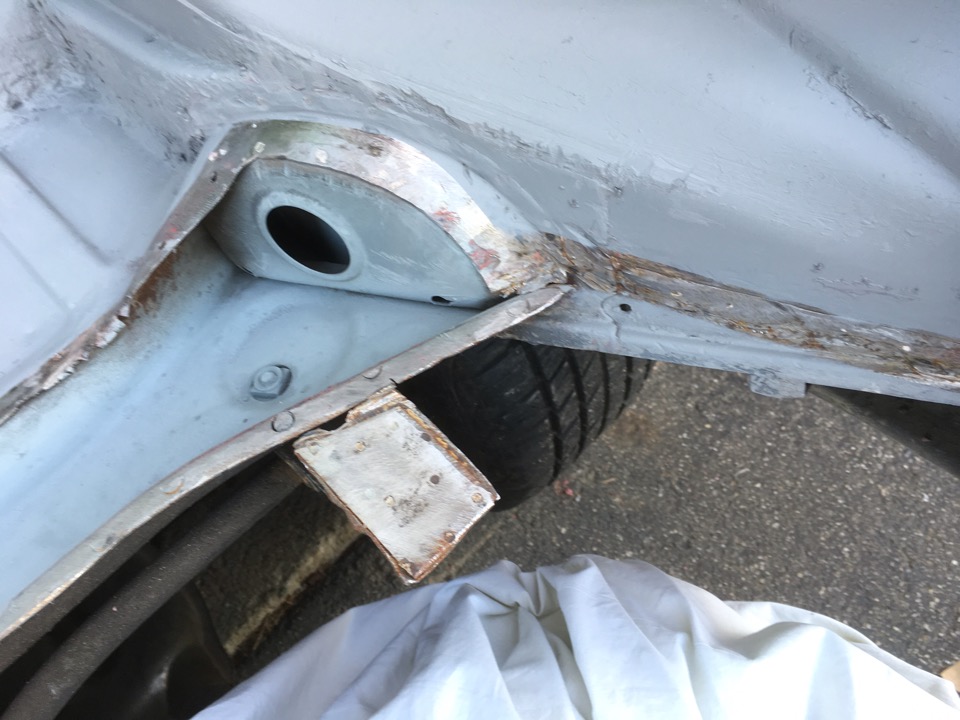 |
|
|
|
| TroyVB |
Oct 4 2016, 06:19 AM
Post
#8
|
|
Newbie Group: Members Posts: 17 Joined: 21-July 16 From: Northwest IA Member No.: 20,214 Region Association: None |
That's correct Garland the bolts are sway bar mounts. I have seen that some have weld on mounts. Is that to be preferred? Not sure what brand these are. I see in the picture that the panel you replaced was removed all the way over the support. Do you think my car needs that? I want to do it correctly, but I don't want to needlessly cut away the original metal.
Cary- Thanks for the line on the picture that's where I was thinking to cut. I did dig out seam sealer to corner. No rot outside of the center 18 inches. |
|
|
|
| barefoot |
Oct 4 2016, 06:49 AM
Post
#9
|
|
Senior Member Group: Members Posts: 1,274 Joined: 19-March 13 From: Charleston SC Member No.: 15,673 Region Association: South East States |
I did not use the entire repair panel and butt welded all around, you can see how much I used ( some other pieces were cut out for hell hole spots)
I cut out the tabs for the muffler heat shield so I could save those tabs, then SS pop riveted the heat shield back on 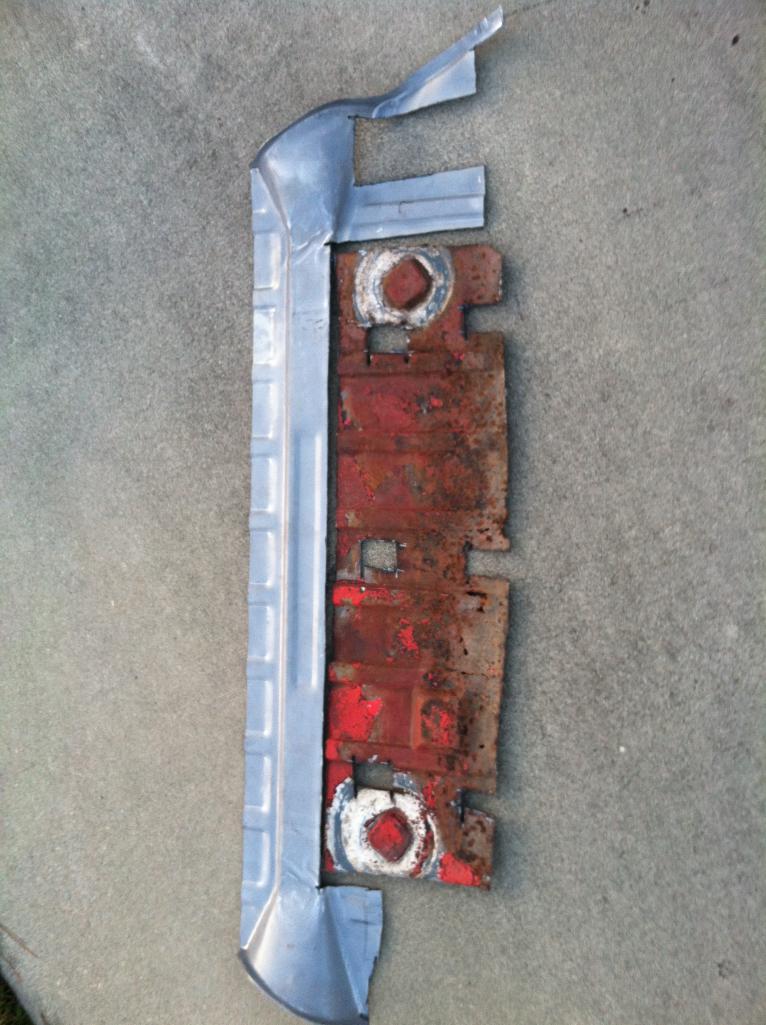 Finished 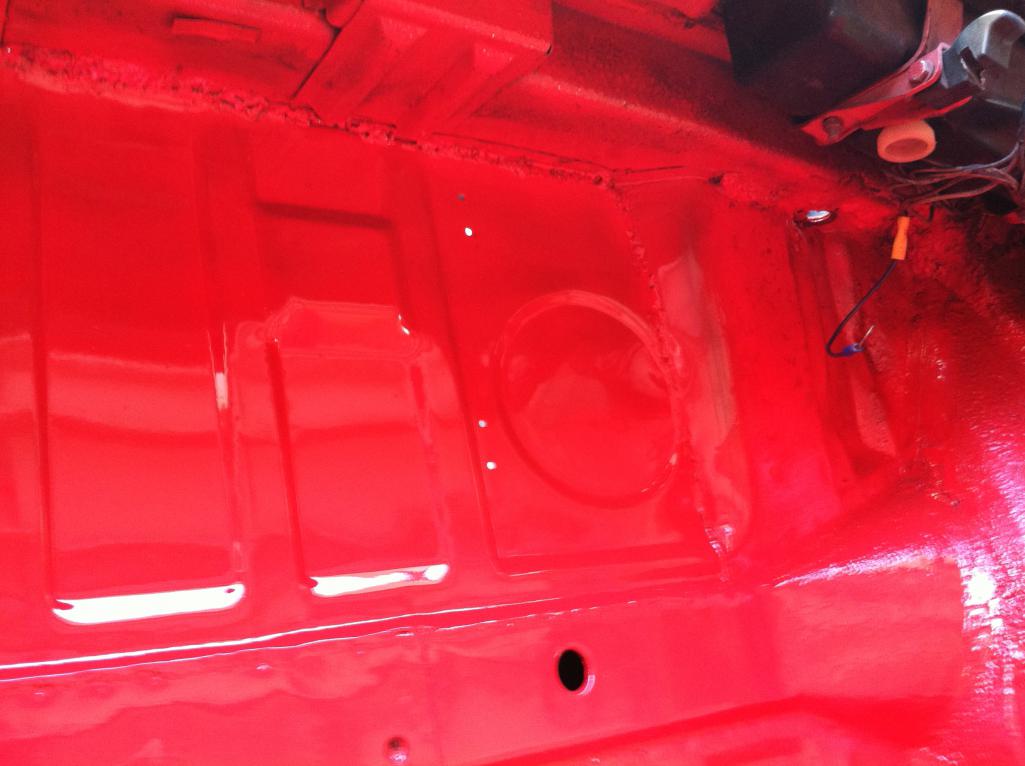 |
|
|
|
| TroyVB |
Oct 4 2016, 10:15 AM
Post
#10
|
|
Newbie Group: Members Posts: 17 Joined: 21-July 16 From: Northwest IA Member No.: 20,214 Region Association: None |
QUOTE(bretth @ Oct 3 2016, 11:33 PM)  Make sure your metal is clean for welding. Strip all paint down to clean rust free metal going back at least an inch or more. Rust/paint can increase chances of burn through, the arc will be less stable. Your welder should show you approximate settings for the thickness of metal your welding. Brett Thanks for the tips. I thought that the chart on my welder may have been wrong. I probably did not have the metal clean enough. Unstable arc was definitely a problem. I got the tow hook and the spare tire mount on with quality welds and they were clean and coated with weld through primer. |
|
|
|
| TroyVB |
Oct 4 2016, 10:20 AM
Post
#11
|
|
Newbie Group: Members Posts: 17 Joined: 21-July 16 From: Northwest IA Member No.: 20,214 Region Association: None |
QUOTE(barefoot @ Oct 4 2016, 07:49 AM) I did not use the entire repair panel and butt welded all around, you can see how much I used ( some other pieces were cut out for hell hole spots) I cut out the tabs for the muffler heat shield so I could save those tabs, then SS pop riveted the heat shield back on Finished Thanks for the help. I was wondering if anyone had done this. I have good material on the car to do it. I planned to weld the heat shed back on, never thought of using pop rivets. |
|
|
|
| malcolm2 |
Oct 4 2016, 11:45 AM
Post
#12
|
|
Advanced Member Group: Members Posts: 2,745 Joined: 31-May 11 From: Nashville Member No.: 13,139 Region Association: South East States |
one option an old welder told me was to cut as small an opening as I could get away with. You need to then match the panel to the hole you cut. Even Barefoot's picture is a bigger cut than I might have done. You could just cut the holes out to good metal. Put 5 or 6 patches in there. It is up to you.
If you are not overlapping, you need to butt weld the old edge to new edge. If you overlap (several inches all around), drill some holes to make new spot welds. Are you using a spot weld drill bit, tuff to tell from the picture. It sure makes the job easier. A 2nd option it to cut the spot welds on the complete panel. That is probably what a concourse guy would want to do. And that would be the easiest way to match the panel to the hole. |
|
|
|
| malcolm2 |
Oct 4 2016, 11:55 AM
Post
#13
|
|
Advanced Member Group: Members Posts: 2,745 Joined: 31-May 11 From: Nashville Member No.: 13,139 Region Association: South East States |
To add to my 2 cents. Not knowing what those corners look like, I would start small removing paint and seam sealer.
 |
|
|
|
|
1 User(s) are reading this topic (1 Guests and 0 Anonymous Users)
0 Members:

|
Lo-Fi Version | Time is now: 17th May 2024 - 02:12 PM |
Invision Power Board
v9.1.4 © 2024 IPS, Inc.