|
|
|
Porsche, and the Porsche crest are registered trademarks of Dr. Ing. h.c. F. Porsche AG.
This site is not affiliated with Porsche in any way. Its only purpose is to provide an online forum for car enthusiasts. All other trademarks are property of their respective owners. |
|
|

  |

| tygaboy |
 Jul 26 2019, 01:21 PM Jul 26 2019, 01:21 PM
Post
#1761
|
|
914 Guru  Group: Members Posts: 5,680 Joined: 6-October 15 From: Petaluma, CA Member No.: 19,241 Region Association: Northern California |
With the engine all set to go, it's time to run all the systems. Here's the engine side view of the removable bulkhead panel. Fuel supply and return on the right, clutch and brake on the left, throttle cable and battery supply.
The space that's still available is for a bulkhead electrical connector that will support the wiring for oil temp, oil pressure, water temp, tach and the rear Infinity Box Power Cell. Attached thumbnail(s) 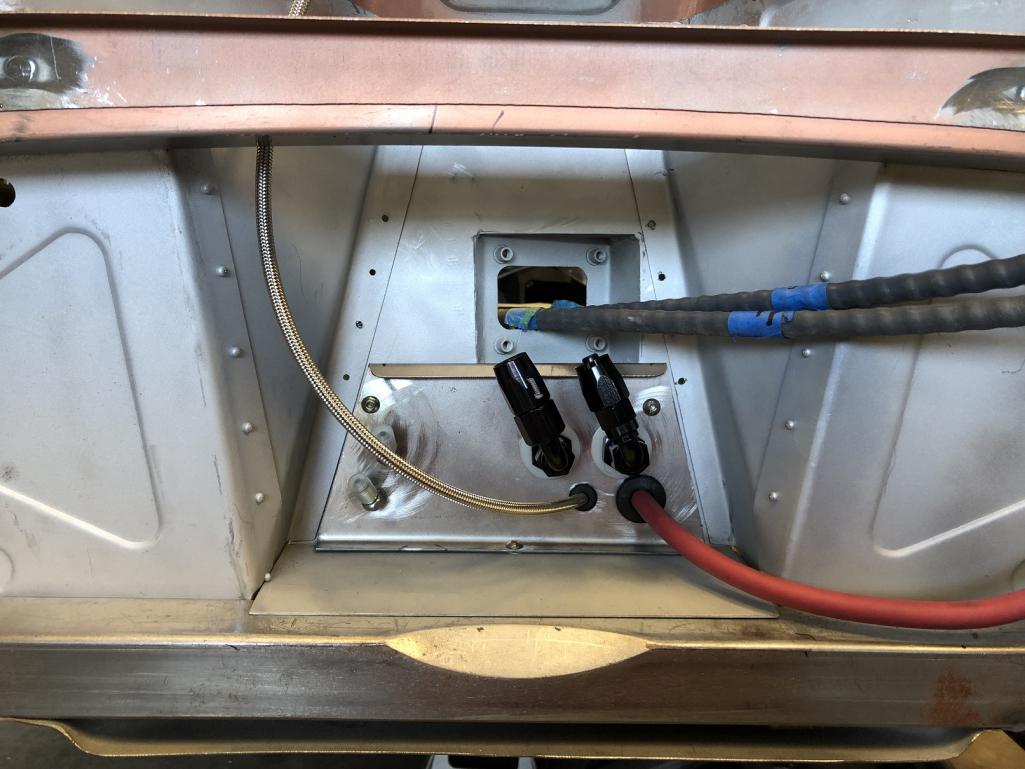
|
   |

 
|
| Cairo94507 |
Jul 26 2019, 01:41 PM
Post
#1762
|
|
Michael Group: Members Posts: 10,485 Joined: 1-November 08 From: Auburn, CA Member No.: 9,712 Region Association: Northern California |
|
|
|
|
| 87m491 |
Jul 26 2019, 02:14 PM
Post
#1763
|
|
Member Group: Members Posts: 331 Joined: 29-July 12 From: Portland, the original! Member No.: 14,731 Region Association: North East States |
I love the ordered uniformity of all the Clecos but isn't a good part of their usefulness that you don't have to use them on every hole in a string, especially when they are that close together. Though if you own stock, or just a ton of them I get it.
QUOTE(Andyrew @ Jul 22 2019, 04:40 PM)  QUOTE(tygaboy @ Jul 22 2019, 04:29 PM) I reshaped the corner radius on the new dog house upper panel then marked and drilled the doghouse for rivets. My wife was quite funny when she saw all this in process. Her comment: "Well, you sure know the drill..." (IMG:style_emoticons/default/lol-2.gif) @Andyrew , I hope you got that Cleco stock! (IMG:style_emoticons/default/drooley.gif) I think you should leave them in there permanently! |
|
|
|
| tygaboy |
Jul 26 2019, 02:20 PM
Post
#1764
|
|
914 Guru Group: Members Posts: 5,680 Joined: 6-October 15 From: Petaluma, CA Member No.: 19,241 Region Association: Northern California |
QUOTE(87m491 @ Jul 26 2019, 01:14 PM) I love the ordered uniformity of all the Clecos but isn't a good part of their usefulness that you don't have to use them on every hole in a string, especially when they are that close together. Though if you own stock, or just a ton of them I get it. QUOTE(Andyrew @ Jul 22 2019, 04:40 PM) QUOTE(tygaboy @ Jul 22 2019, 04:29 PM) I reshaped the corner radius on the new dog house upper panel then marked and drilled the doghouse for rivets. My wife was quite funny when she saw all this in process. Her comment: "Well, you sure know the drill..." (IMG:style_emoticons/default/lol-2.gif) @Andyrew , I hope you got that Cleco stock! (IMG:style_emoticons/default/drooley.gif) I think you should leave them in there permanently! Fair enough, I don't need them in every hole, but I have them, so... That said, there can be very minor movement in the panel, if there are too few. Not that it's that big a risk, but I'm all about overkill. (IMG:style_emoticons/default/laugh.gif) |
|
|
|
| tygaboy |
Jul 27 2019, 01:07 PM
Post
#1765
|
|
914 Guru Group: Members Posts: 5,680 Joined: 6-October 15 From: Petaluma, CA Member No.: 19,241 Region Association: Northern California |
Today I designed, fabbed and installed the Infinity Box power distribution block mount.
Those four red wires each terminate on the upper part of each of the blocks, then the battery power mounts to one location on the lower section of one of the blocks. They are all tied together with a bus bar. I used rubber isolation mounts that also provide clearance for the rivnuts. Yet another example of a part that'll never be seen once things are assembled. Attached thumbnail(s) 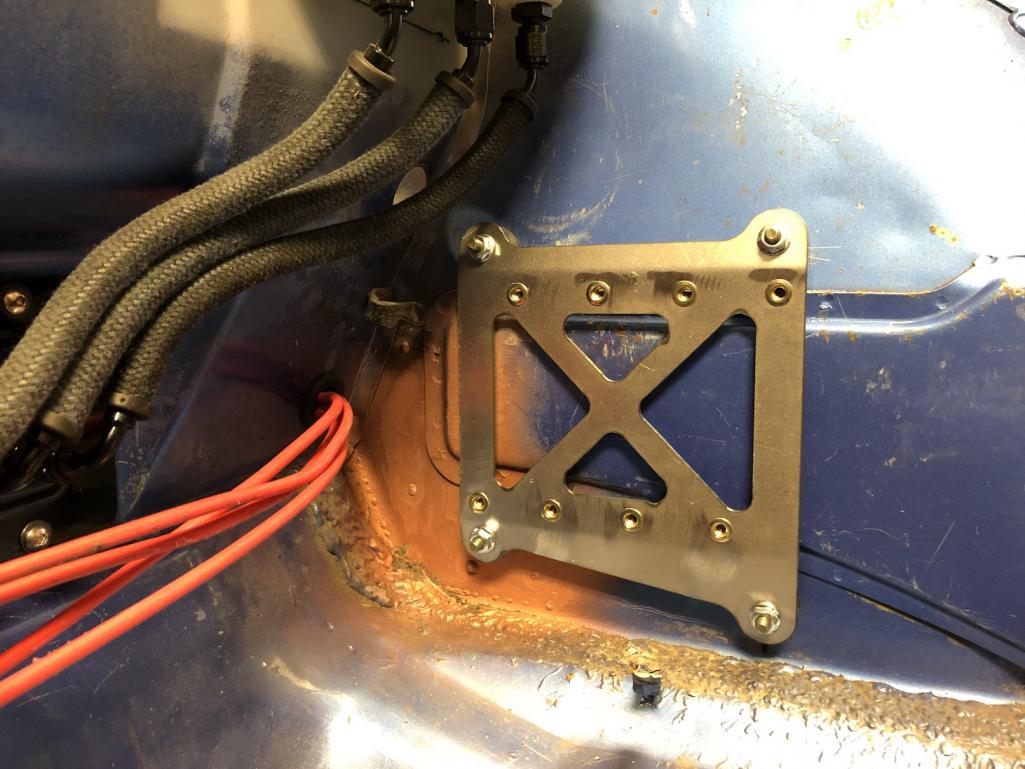 
|
|
|
|
| tygaboy |
Jul 27 2019, 01:11 PM
Post
#1766
|
|
914 Guru Group: Members Posts: 5,680 Joined: 6-October 15 From: Petaluma, CA Member No.: 19,241 Region Association: Northern California |
I had a feeling I might use some of the real estate on the reservoir line bulkhead plate and I was right! The main power to the starter routes nicely through it.
It's a big change moving from the fab stuff to installation. It's forcing me to finalize a number of things - something I've not had to do til now. But I'm happy with how things are coming together, at least so far! (IMG:style_emoticons/default/happy11.gif) Attached thumbnail(s) 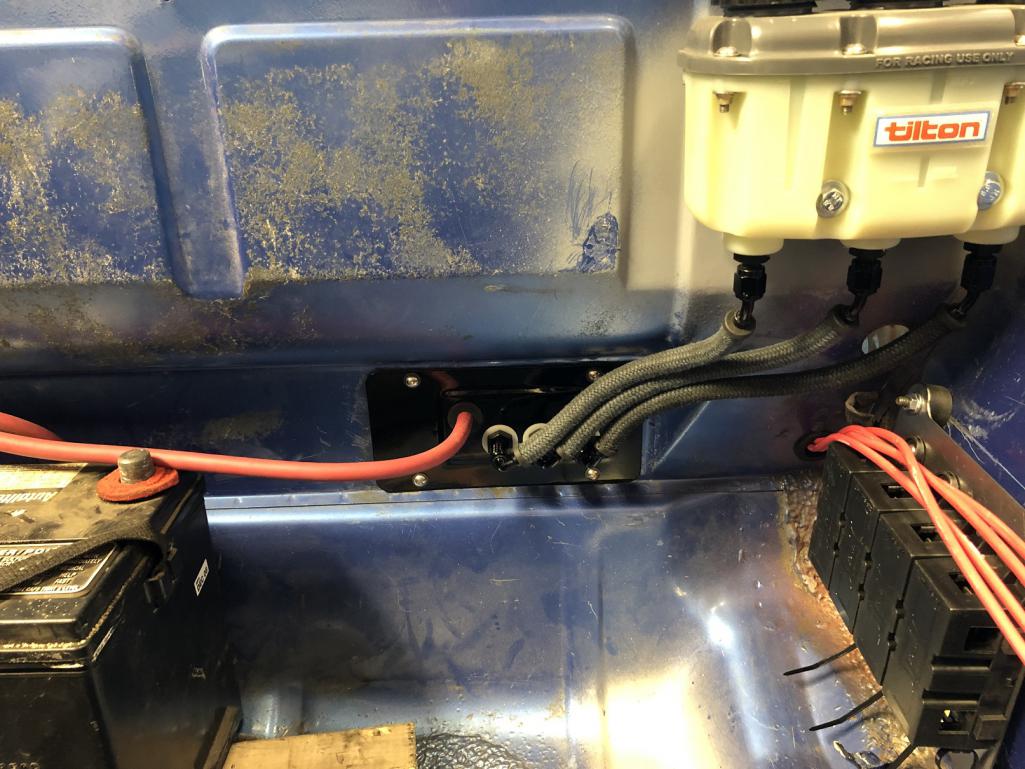
|
|
|
|
| sixnotfour |
Jul 27 2019, 03:40 PM
Post
#1767
|
|
914 Wizard Group: Members Posts: 11,017 Joined: 12-September 04 From: Life Elevated..planet UT. Member No.: 2,744 Region Association: Rocky Mountains |
might as well start thinking about it now, unless you already have one,,,l know you like choices so... (IMG:style_emoticons/default/beer.gif)
Attached image(s)     
|
|
|
|
| bbrock |
Jul 27 2019, 05:05 PM
Post
#1768
|
|
914 Guru Group: Members Posts: 5,269 Joined: 17-February 17 From: Montana Member No.: 20,845 Region Association: Rocky Mountains |
QUOTE(sixnotfour @ Jul 27 2019, 03:40 PM) might as well start thinking about it now, unless you already have one,,,l know you like choices so... (IMG:style_emoticons/default/beer.gif) (IMG:style_emoticons/default/av-943.gif)  |
|
|
|
| sixnotfour |
Jul 27 2019, 08:45 PM
Post
#1769
|
|
914 Wizard Group: Members Posts: 11,017 Joined: 12-September 04 From: Life Elevated..planet UT. Member No.: 2,744 Region Association: Rocky Mountains |
Attached image(s) 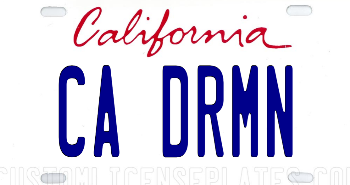
|
|
|
|
| sixnotfour |
Jul 27 2019, 08:45 PM
Post
#1770
|
|
914 Wizard Group: Members Posts: 11,017 Joined: 12-September 04 From: Life Elevated..planet UT. Member No.: 2,744 Region Association: Rocky Mountains |
prob. long gone..but (IMG:style_emoticons/default/aktion035.gif)
|
|
|
|
| tygaboy |
Jul 27 2019, 09:40 PM
Post
#1771
|
|
914 Guru Group: Members Posts: 5,680 Joined: 6-October 15 From: Petaluma, CA Member No.: 19,241 Region Association: Northern California |
(IMG:style_emoticons/default/bootyshake.gif) (IMG:style_emoticons/default/happy11.gif) (IMG:style_emoticons/default/shades.gif)
Attached image(s)    
|
|
|
|
| FL000 |
Jul 27 2019, 09:58 PM
Post
#1772
|
|
Member Group: Members Posts: 476 Joined: 31-January 12 From: Lancaster, CA Member No.: 14,076 Region Association: Southern California |
QUOTE(tygaboy @ Jul 27 2019, 12:07 PM) Today I designed, fabbed and installed the Infinity Box power distribution block mount. Those four red wires each terminate on the upper part of each of the blocks, then the battery power mounts to one location on the lower section of one of the blocks. They are all tied together with a bus bar. I used rubber isolation mounts that also provide clearance for the rivnuts. Yet another example of a part that'll never be seen once things are assembled. That system sounds pretty slick. Every time I add an additional electrical doodad I find it harder and harder to keep the installation clean. I'm guessing having power distribution to different parts of the car helps with that issue. |
|
|
|
| Rand |
Jul 28 2019, 09:54 AM
Post
#1773
|
|
Cross Member Group: Members Posts: 7,413 Joined: 8-February 05 From: OR Member No.: 3,573 Region Association: None |
This car will draw enough valid admiration that a vanity plate would only cheapen it.
|
|
|
|
| Cracker |
Jul 28 2019, 10:34 AM
Post
#1774
|
|
Advanced Member Group: Members Posts: 2,148 Joined: 2-February 10 From: Atlanta (area) Member No.: 11,316 Region Association: South East States |
QUOTE(Rand @ Jul 28 2019, 11:54 AM) This car will draw enough valid admiration that a vanity plate would only cheapen it. (IMG:style_emoticons/default/agree.gif) In a rare move I'm with... T |
|
|
|
| tygaboy |
Jul 30 2019, 01:51 PM
Post
#1775
|
|
914 Guru Group: Members Posts: 5,680 Joined: 6-October 15 From: Petaluma, CA Member No.: 19,241 Region Association: Northern California |
You know, those plate suggestions really are quite accurate! I brought them on myself, after all. (IMG:style_emoticons/default/lol-2.gif)
And to continue with my "redo it - again!" trajectory, I rethought the location of the power block and moved it out of the frunk to what will be behind a foot rest. @bbrock , you win again. This is V6 of this panel! Anyway, the move de-clutters the frunk, shortens the wiring runs (which no longer run through multiple body panels) and means I can service essentially all the key electronics from inside the car. Sharp eyes will notice this panel holds five power blocks. There's a fifth that supports an electrically (electronically?) controlled battery disconnect. Again, mounting it here, right near the other blocks simplifies the wiring. You'll see it as I get that gizmo mounted. Attached thumbnail(s) 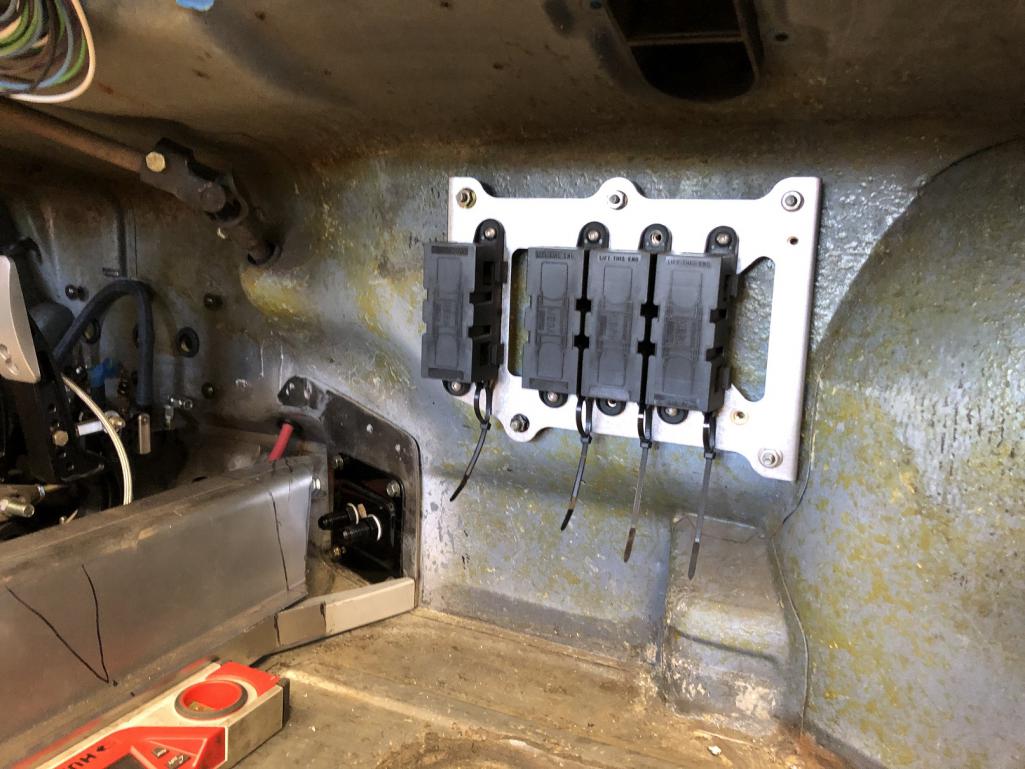 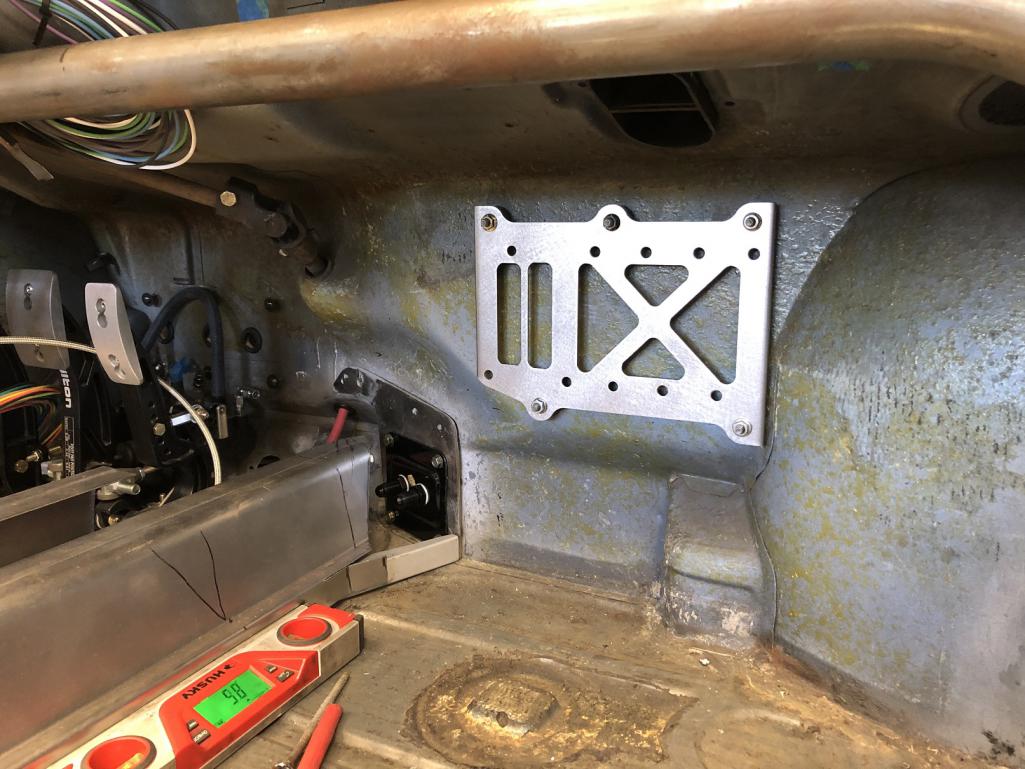
|
|
|
|
| sixnotfour |
Jul 30 2019, 02:29 PM
Post
#1776
|
|
914 Wizard Group: Members Posts: 11,017 Joined: 12-September 04 From: Life Elevated..planet UT. Member No.: 2,744 Region Association: Rocky Mountains |
(IMG:style_emoticons/default/14.gif) way better (IMG:style_emoticons/default/popcorn[1].gif)
|
|
|
|
| tygaboy |
Jul 30 2019, 04:46 PM
Post
#1777
|
|
914 Guru Group: Members Posts: 5,680 Joined: 6-October 15 From: Petaluma, CA Member No.: 19,241 Region Association: Northern California |
Major milestone: The very first wires are in! I'm new to all this wiring stuff so this should be interesting and "fun". A learning experience, at the very least.
That cylinder thing under the power blocks, works in conjunction with the InfinityBox brain to constantly monitors battery voltage - when the ignition is off. If the system voltage gets too low, this setup actively "disconnects" the battery, preserving the remaining voltage. There's also a manual button that I can use to "disconnect" the battery. Push it again and it "reconnects" the battery. I'll hide that somewhere and claim it's part of the security system! Attached thumbnail(s) 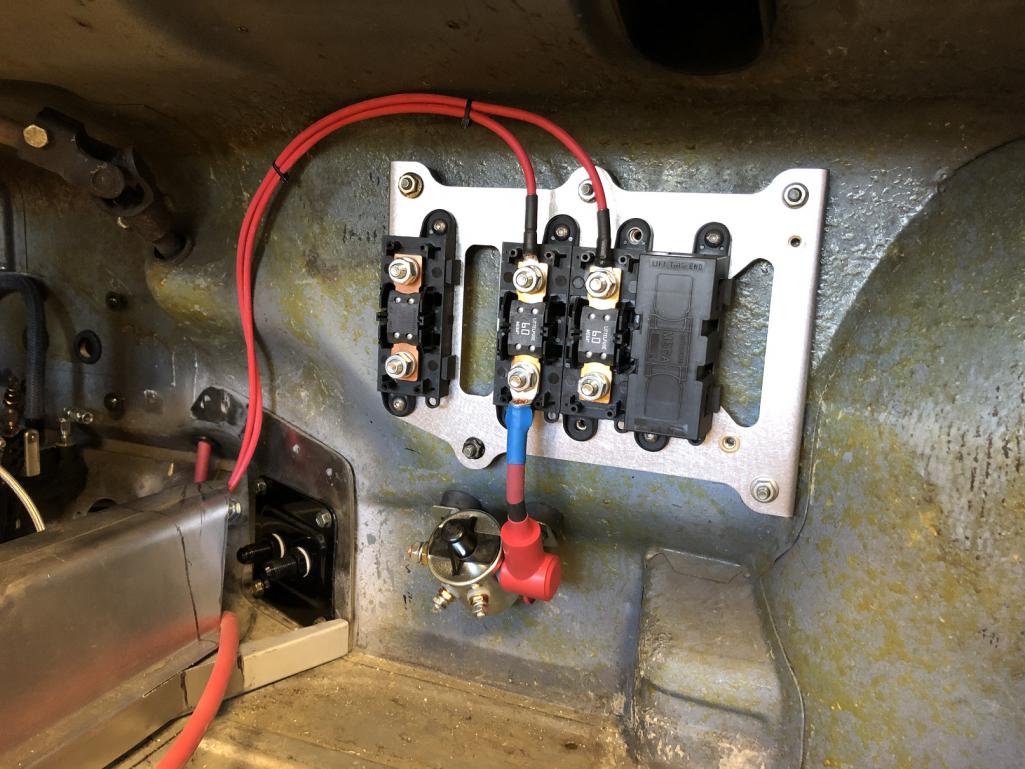
|
|
|
|
| tygaboy |
Aug 6 2019, 02:36 PM
Post
#1778
|
|
914 Guru Group: Members Posts: 5,680 Joined: 6-October 15 From: Petaluma, CA Member No.: 19,241 Region Association: Northern California |
I needed to narrow the driver-side front area of the console cover to provide necessary foot room - so I started on that today.
Again, it would have been far simpler if all of the planes of this cover were 90 degrees to one another, but no, I opted for a 78 degree inward tip of the vertical wall. (IMG:style_emoticons/default/dry.gif) It certainly looks better but it makes it way more work to cut and fit the needed angles. Here, I've got one transition all but metal finished and the other silicon bronze TIG'd. Attached thumbnail(s) 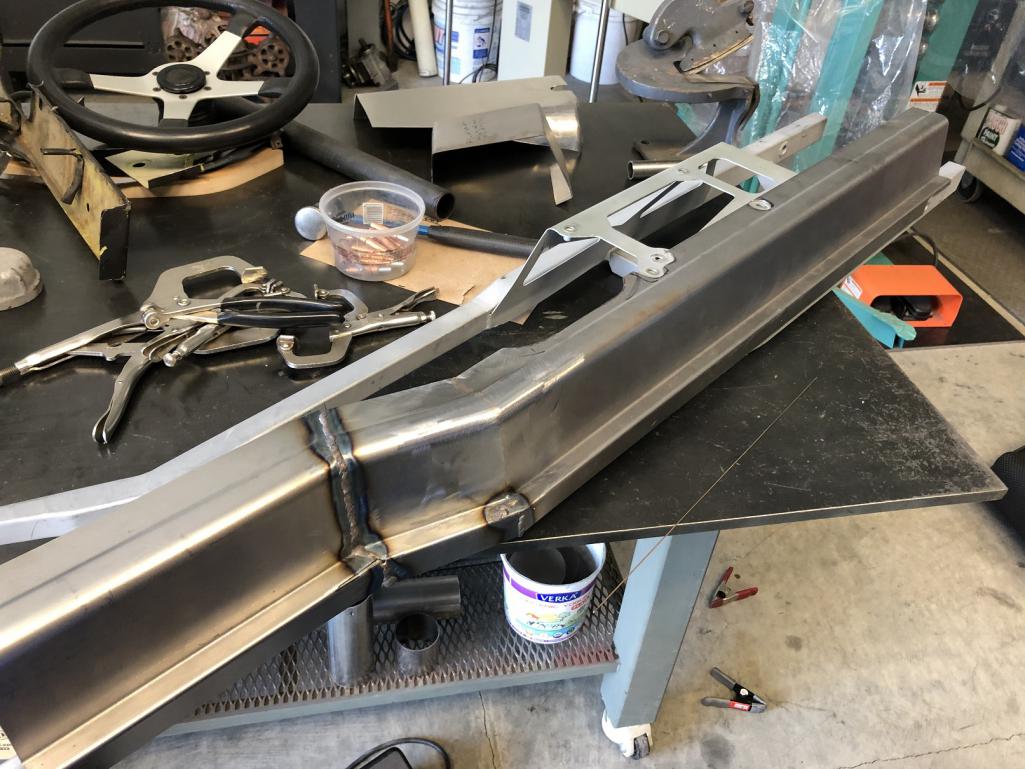
|
|
|
|
| tygaboy |
Aug 6 2019, 02:53 PM
Post
#1779
|
|
914 Guru Group: Members Posts: 5,680 Joined: 6-October 15 From: Petaluma, CA Member No.: 19,241 Region Association: Northern California |
Then ClecoBoy made an appearance and got the front top cover ready for rivets. (IMG:style_emoticons/default/happy11.gif)
I also primed things as handling the raw metal was starting to create rust spots. Attached thumbnail(s) 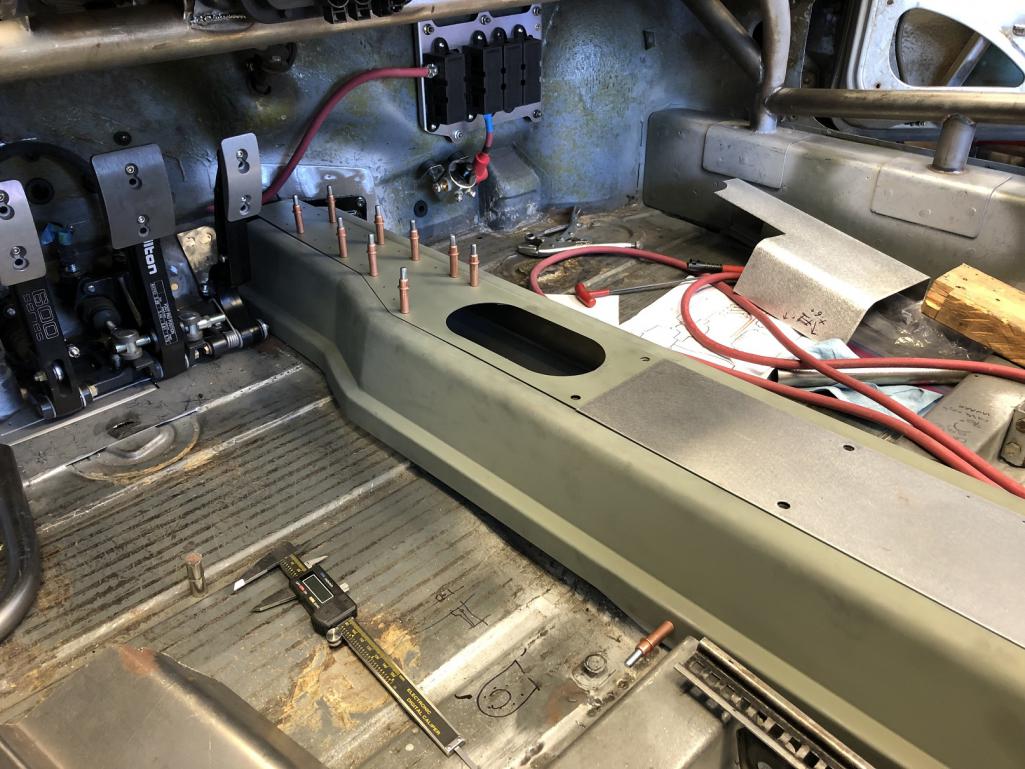
|
|
|
|
| tygaboy |
Aug 6 2019, 02:54 PM
Post
#1780
|
|
914 Guru Group: Members Posts: 5,680 Joined: 6-October 15 From: Petaluma, CA Member No.: 19,241 Region Association: Northern California |
More
Attached thumbnail(s) 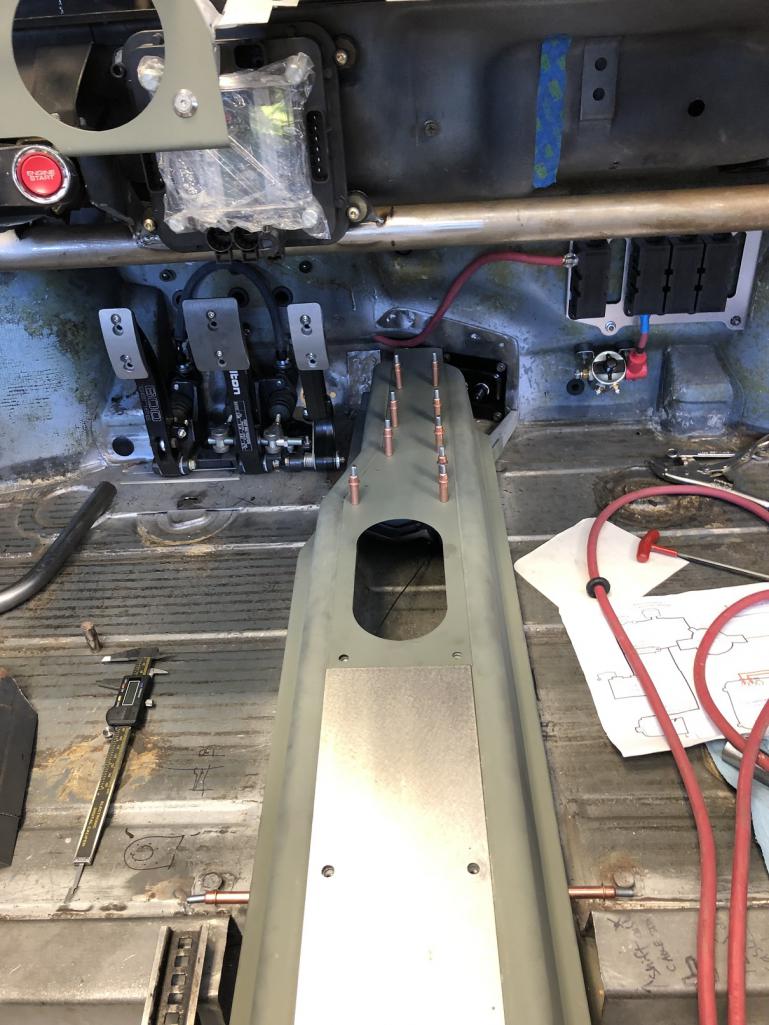
|
|
|
|
|
4 User(s) are reading this topic (4 Guests and 0 Anonymous Users)
0 Members:

|
Lo-Fi Version | Time is now: 5th November 2025 - 05:39 AM |
Invision Power Board
v9.1.4 © 2025 IPS, Inc.