|
|
|
Porsche, and the Porsche crest are registered trademarks of Dr. Ing. h.c. F. Porsche AG.
This site is not affiliated with Porsche in any way. Its only purpose is to provide an online forum for car enthusiasts. All other trademarks are property of their respective owners. |
|
|

  |

| watsonrx13 |
 Apr 20 2005, 05:44 PM Apr 20 2005, 05:44 PM
Post
#1
|
|
Advanced Member  Group: Members Posts: 2,734 Joined: 18-February 03 From: Plant City, FL Member No.: 312 Region Association: South East States |
Well, I've been working steadily for the last several weekends getting the front trunk prepped. I've had to fill about a dozen holes left over from the dealer installed A/C system. I also replaced the front trunk floor. Here's the before shot of the trunk floor.
1 of 8 Attached image(s) 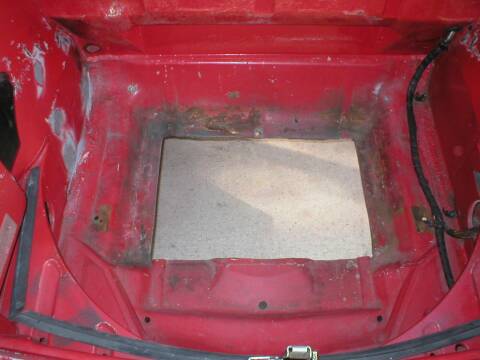
|
   |

 
|
| watsonrx13 |
Apr 20 2005, 05:44 PM
Post
#2
|
|
Advanced Member Group: Members Posts: 2,734 Joined: 18-February 03 From: Plant City, FL Member No.: 312 Region Association: South East States |
After installation, prep and primer
2 of 8 Attached image(s) 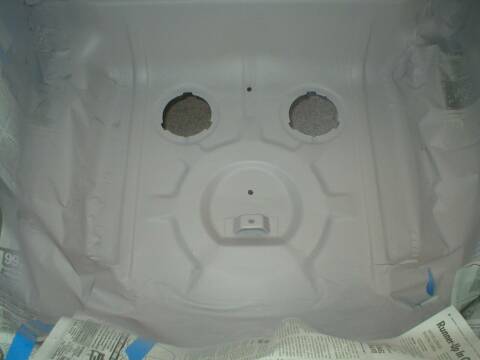
|
|
|
|
| watsonrx13 |
Apr 20 2005, 05:45 PM
Post
#3
|
|
Advanced Member Group: Members Posts: 2,734 Joined: 18-February 03 From: Plant City, FL Member No.: 312 Region Association: South East States |
I also prepped the front fenderwells. I didn't remove the front sway bar.
3 of 8 Attached image(s) 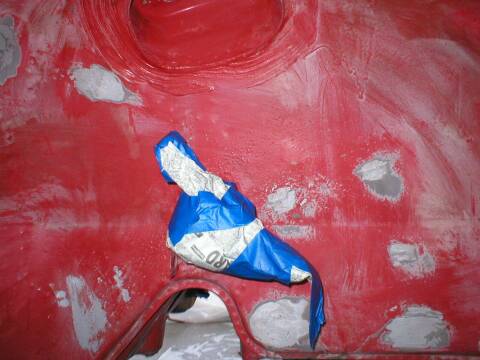
|
|
|
|
| watsonrx13 |
Apr 20 2005, 05:45 PM
Post
#4
|
|
Advanced Member Group: Members Posts: 2,734 Joined: 18-February 03 From: Plant City, FL Member No.: 312 Region Association: South East States |
After primer
4 of 8 Attached image(s) 
|
|
|
|
| watsonrx13 |
Apr 20 2005, 05:46 PM
Post
#5
|
|
Advanced Member Group: Members Posts: 2,734 Joined: 18-February 03 From: Plant City, FL Member No.: 312 Region Association: South East States |
Here's the area underneath the fuel tank, before.
5 of 8 Attached image(s) 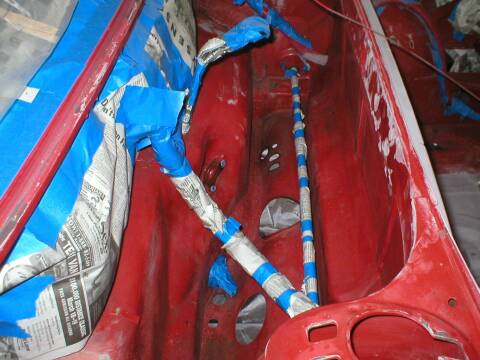
|
|
|
|
| watsonrx13 |
Apr 20 2005, 05:46 PM
Post
#6
|
|
Advanced Member Group: Members Posts: 2,734 Joined: 18-February 03 From: Plant City, FL Member No.: 312 Region Association: South East States |
After primer
6 of 8 Attached image(s) 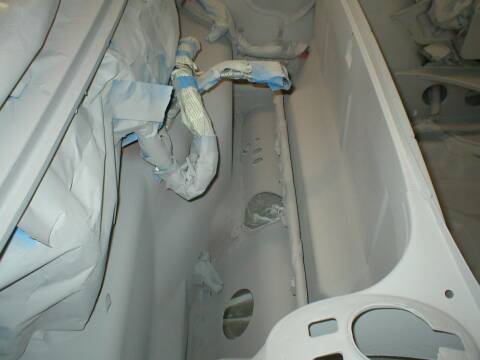
|
|
|
|
| watsonrx13 |
Apr 20 2005, 05:47 PM
Post
#7
|
|
Advanced Member Group: Members Posts: 2,734 Joined: 18-February 03 From: Plant City, FL Member No.: 312 Region Association: South East States |
Here's the front trunk/headlight area, before
7 of 8 Attached image(s) 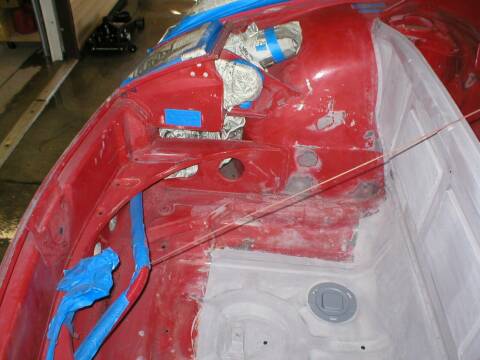
|
|
|
|
| TonyAKAVW |
Apr 20 2005, 05:47 PM
Post
#8
|
|
That's my ride. Group: Members Posts: 2,151 Joined: 17-January 03 From: Redondo Beach, CA Member No.: 166 Region Association: None |
Very nice! Looks a whole lot nicer than the front trunk repair I did this past weekend... Also known as Learning How To Weld 101.
-Tony Attached image(s) 
|
|
|
|
| watsonrx13 |
Apr 20 2005, 05:48 PM
Post
#9
|
|
Advanced Member Group: Members Posts: 2,734 Joined: 18-February 03 From: Plant City, FL Member No.: 312 Region Association: South East States |
Attached image(s) 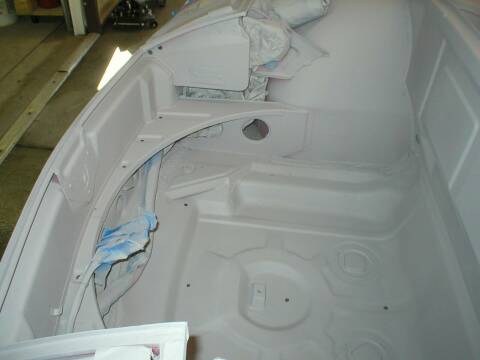
|
|
|
|
| TravisNeff |
Apr 20 2005, 06:02 PM
Post
#10
|
|
914 Guru Group: Members Posts: 5,082 Joined: 20-March 03 From: Mesa, AZ Member No.: 447 Region Association: Southwest Region |
Great, great job. I am very impressed! (IMG:http://www.914world.com/bbs2/html/emoticons/pray.gif)
|
|
|
|
| watsonrx13 |
Apr 20 2005, 06:09 PM
Post
#11
|
|
Advanced Member Group: Members Posts: 2,734 Joined: 18-February 03 From: Plant City, FL Member No.: 312 Region Association: South East States |
Thanks guys for the compliments.
Tony, you're doing great. Keep at it and you'll learn new techniques that will help you in the future projects. Check out the link I posted for some more details of how I've solved somethings. |
|
|
|
| Rand |
Apr 20 2005, 06:17 PM
Post
#12
|
|
Cross Member Group: Members Posts: 7,409 Joined: 8-February 05 From: OR Member No.: 3,573 Region Association: None |
Rob: Thanks for sharing pix! Nice work.
Tony: I couldn't resist tweaking your avatar... (IMG:http://www.914world.com/bbs2/html/emoticons/biggrin.gif) (IMG:http://www.4nets.com/baldwinpowersports/images/napoleanavatar.jpg) "That's my ride" |
|
|
|
| TonyAKAVW |
Apr 20 2005, 06:22 PM
Post
#13
|
|
That's my ride. Group: Members Posts: 2,151 Joined: 17-January 03 From: Redondo Beach, CA Member No.: 166 Region Association: None |
Randy: that is SWEEEEEETTTTTT Thats like the best avatar I've ever seen!
I just spent a few minutes looking through your awesome collection of project pictures and descriptions. I am REALLY impressed. That site contains a wealth of useful information. I'm going to refer to that both for inspiration and information. Nicely done! Now if only I didn't live in an apartment and had space to do body work without having to rush. -Tony |
|
|
|
| xsboost90 |
Apr 20 2005, 07:02 PM
Post
#14
|
|
Senior Member Group: Members Posts: 1,393 Joined: 2-August 04 From: cincinnati Member No.: 2,432 |
very nice job. I have whats called ADD and i prevents me from spending too much time on projects like....hey check out this picture!
Attached image(s) 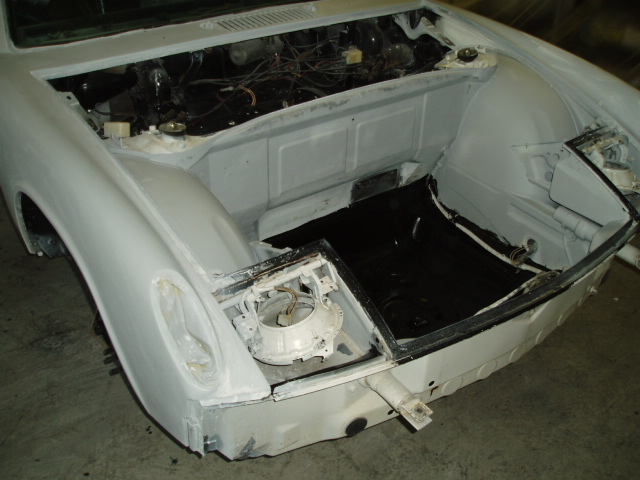
|
|
|
|
| Joe Ricard |
Apr 20 2005, 07:09 PM
Post
#15
|
|
CUMONIWANNARACEU Group: Members Posts: 6,811 Joined: 5-January 03 From: Gautier, MS Member No.: 92 |
Rob your car is soooo going to ROCK!!!!!
|
|
|
|
| 914GT |
Apr 20 2005, 09:35 PM
Post
#16
|
|
Senior Member Group: Members Posts: 1,100 Joined: 11-October 04 From: Tucson Member No.: 2,923 Region Association: Southwest Region |
Hi Rob,
Great work! When you're ready to do your painting, one thing I'd recommend - don't use newspaper for your masking but use some good quality masking paper. |
|
|
|
| watsonrx13 |
Apr 21 2005, 04:34 AM
Post
#17
|
||
|
Advanced Member Group: Members Posts: 2,734 Joined: 18-February 03 From: Plant City, FL Member No.: 312 Region Association: South East States |
Guy, thanks for the comments.... Can I use the newspaper for the small parts being covered? Are you recommending the masking paper for only the large body coverings? I'm planning to repaint the exterior after I get the car put back together. |
||
|
|
|
||
| msglaigaie |
Apr 21 2005, 09:08 AM
Post
#18
|
||
|
msglaigaie Group: Members Posts: 210 Joined: 14-March 05 From: Bellingham, Washington Member No.: 3,761 Region Association: Pacific Northwest |
Maybe it's me, but this reminds me of my first wife, Jabba the Slut. MSG L |
||
|
|
|
||
| andys |
Apr 21 2005, 09:26 AM
Post
#19
|
|
Advanced Member Group: Members Posts: 2,165 Joined: 21-May 03 From: Valencia, CA Member No.: 721 Region Association: None |
watsonrx13,
Can you share with us how and what you used to prep the surface, and exactly what kind of primer you used? Thanks, Andy |
|
|
|
| 914GT |
Apr 21 2005, 10:30 AM
Post
#20
|
||||
|
Senior Member Group: Members Posts: 1,100 Joined: 11-October 04 From: Tucson Member No.: 2,923 Region Association: Southwest Region |
I've found that newspaper has a lot of loose fibers that get kicked up in the air and settle on your topcoats, causing dust nibs. Good quality masking paper does not have this problem, and it's more resistant to paint bleeding through. You can use aluminum foil to wrap up small parts and wiring too, and it doesn't have the same problem as newsprint. Also, remove all masking you used for primering and remask. Primer dust and particles can dislodge from the old masking and blow off into your new fresh paint. |
||||
|
|
|
||||
|
1 User(s) are reading this topic (1 Guests and 0 Anonymous Users)
0 Members:

|
Lo-Fi Version | Time is now: 12th May 2024 - 04:15 AM |
Invision Power Board
v9.1.4 © 2024 IPS, Inc.