|
|
|
Porsche, and the Porsche crest are registered trademarks of Dr. Ing. h.c. F. Porsche AG.
This site is not affiliated with Porsche in any way. Its only purpose is to provide an online forum for car enthusiasts. All other trademarks are property of their respective owners. |
|
|

  |

| Perry Kiehl Clone |
 Oct 27 2016, 02:11 PM Oct 27 2016, 02:11 PM
Post
#1
|
|
Unregistered |
8 years ago I drove over to Kyser, WV to pick up this frame bench, it was about a 1500 mile 3 day banzai run. A little rough, but something to build on.
It had been sitting in another building of mine and we've done some cleaning and moving to make the space for it and the project on the rotisserie. This thing is big and h e a v y! We've take the casters off the left side to clean them and glue the poly tires on the aluminum wheels. Attached thumbnail(s) 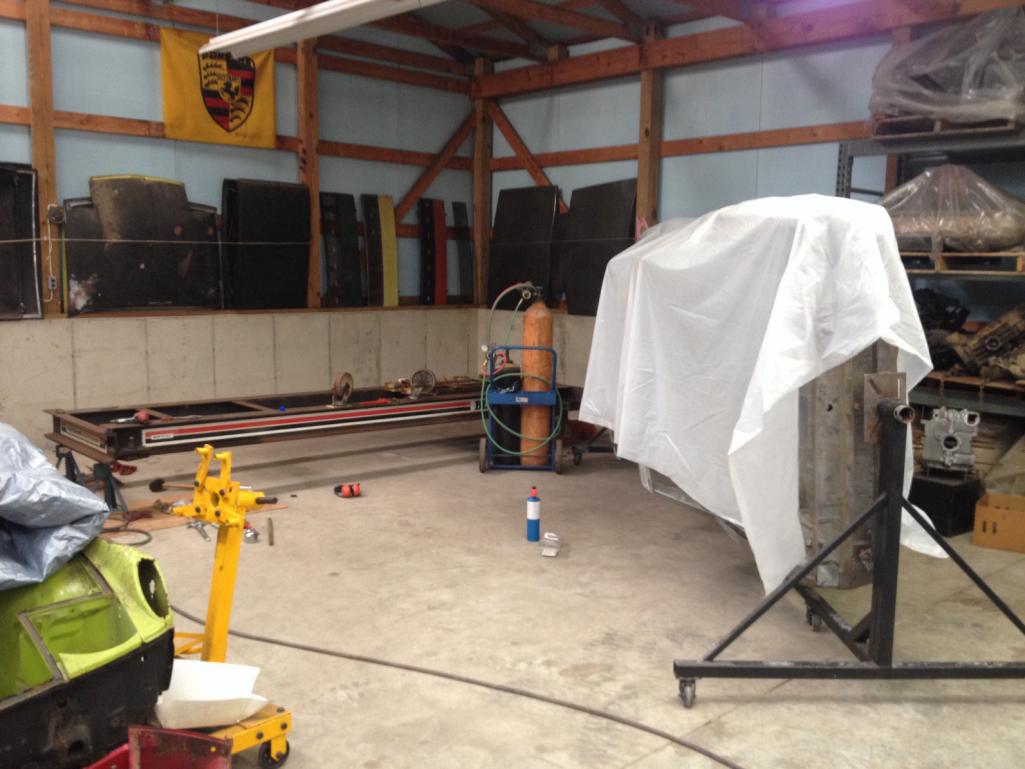
|

 
|
|
| Perry Kiehl Clone |
Oct 27 2016, 02:20 PM
Post
#2
|
|
Unregistered |
 The casters have ball bearings in the swivels, and roller bearing on the wheel shafts. They were totally gunked with dead grease. So we totally removed and disassembled the casters. 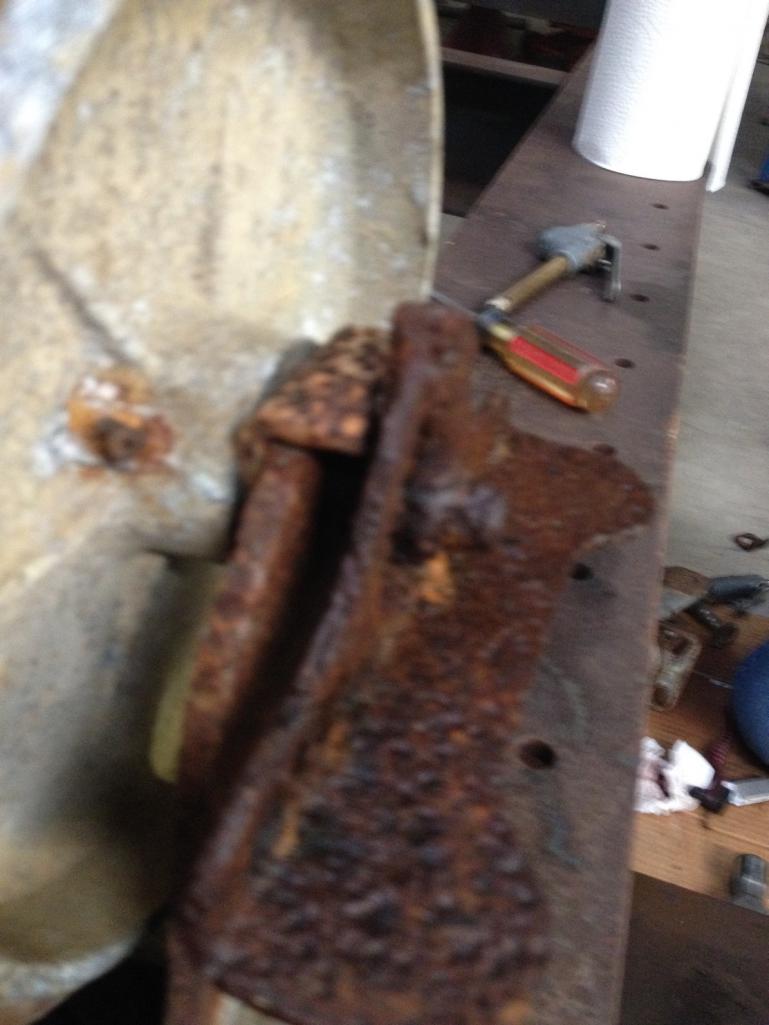 Sorry for the blurry pic. The brake was rusted to the point of not working 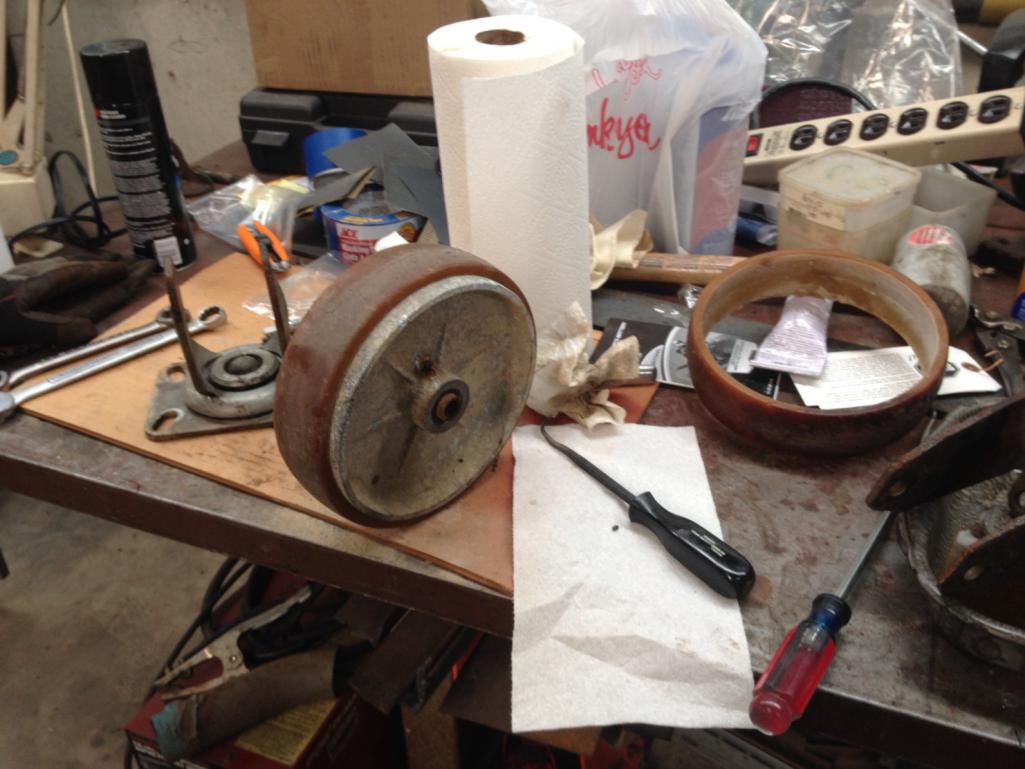 The poly tires were loose and wouldn't stay on the aluminum wheels Attached thumbnail(s) 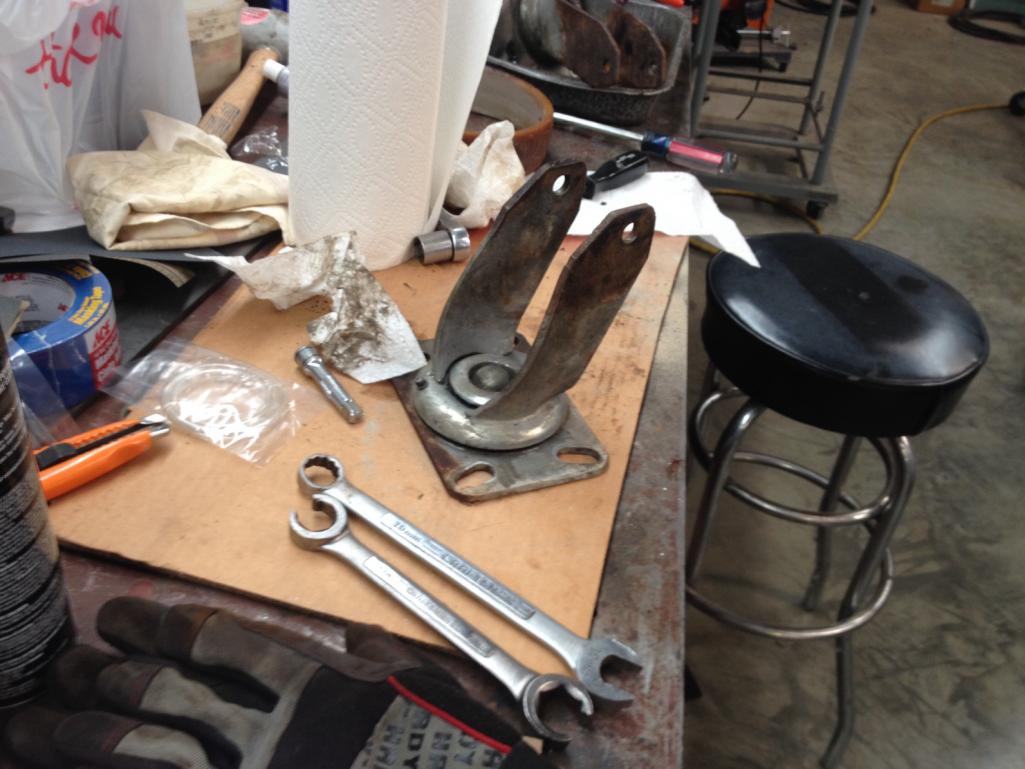
|
|
|
|
| Perry Kiehl Clone |
Oct 27 2016, 02:28 PM
Post
#3
|
|
Unregistered |
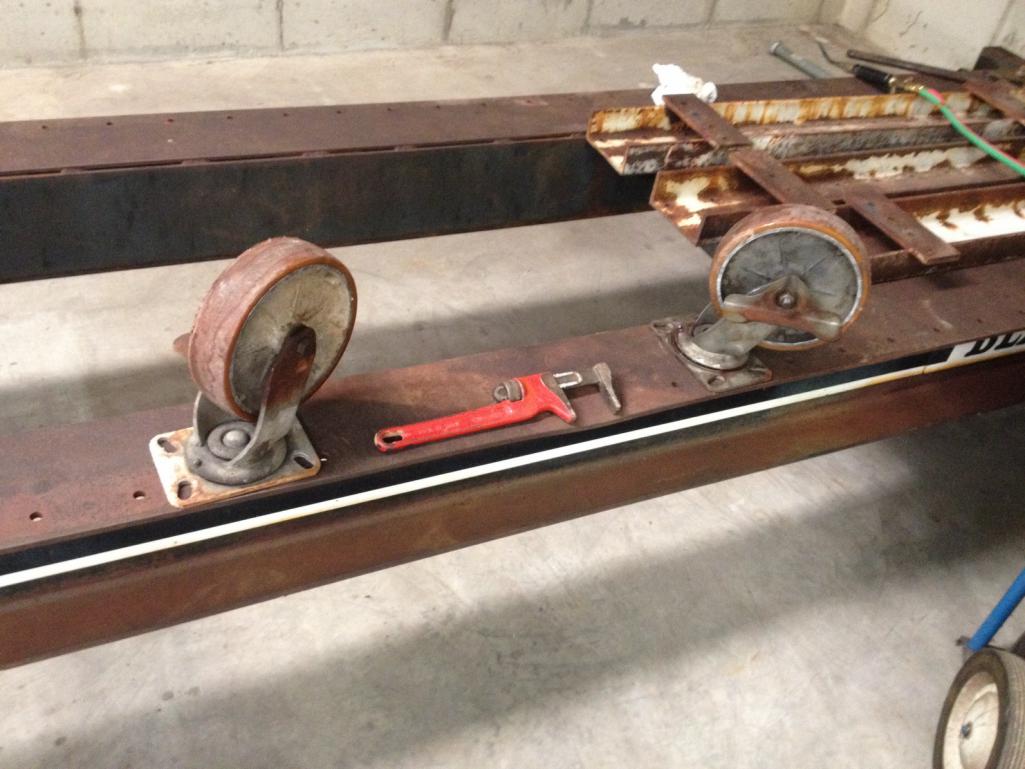
There are two leveling adjusters that were a little stuck. We had to resort to the acetylene torch, the little propane torch wasn't enough
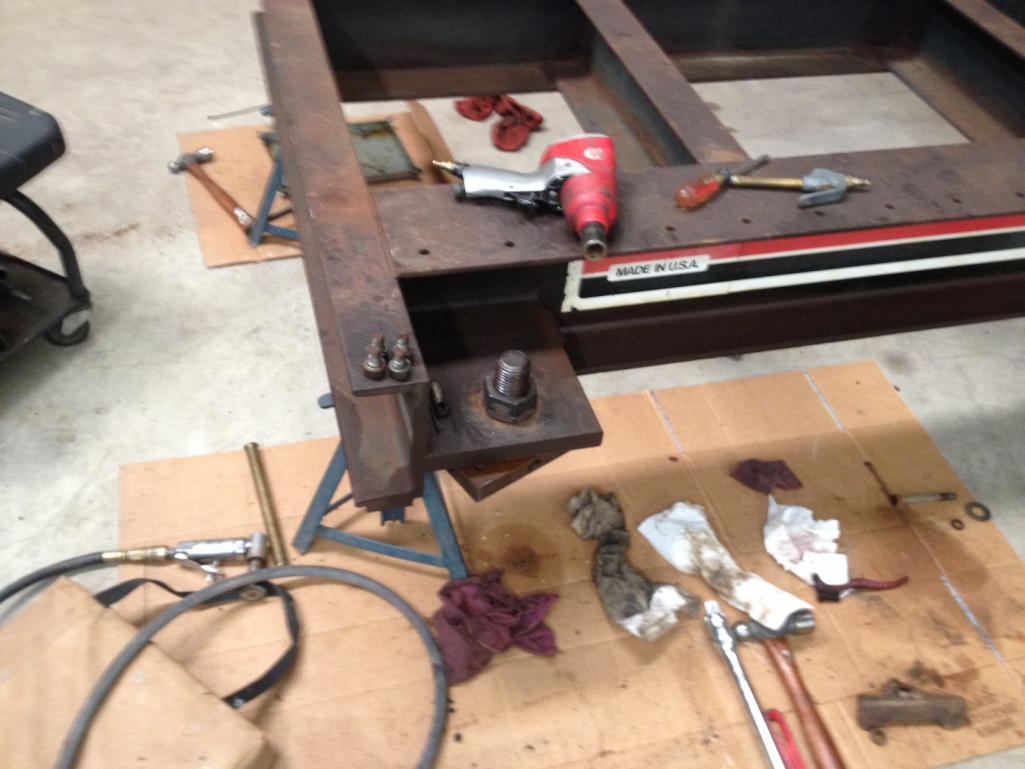 Anyone got a 2 3/16" wrench?? 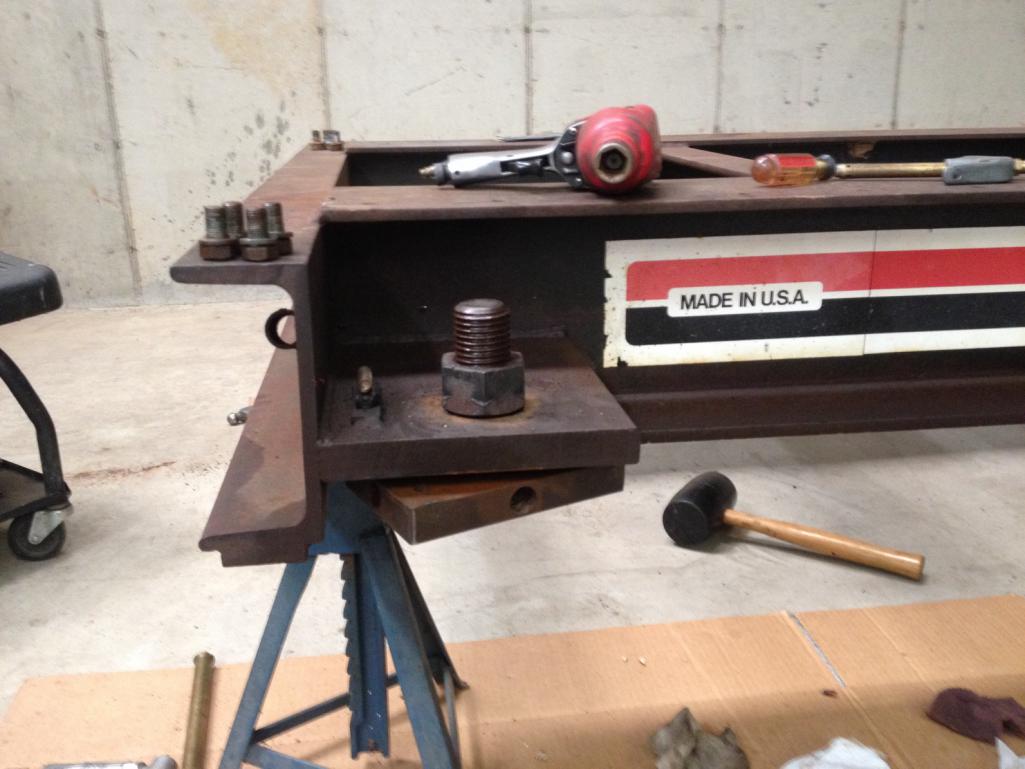 You can see the witness marks left by my 2 3/16 socket. This one wasn't too far down the thread, so we could use the impact. The other adjuster was bottomed out, so it took a 18" adjustable wrench to loosen it; a 16" isn't big enough |
|
|
|
| whitetwinturbo |
Oct 27 2016, 10:19 PM
Post
#4
|
|
Honey, does this wing make my ass look fat?  Group: Members Posts: 1,391 Joined: 22-October 11 From: Newport Beach/Kalefornya/USA Member No.: 13,704 Region Association: Southern California |
(IMG:style_emoticons/default/beer.gif) (IMG:style_emoticons/default/beer.gif) serious bench
|
   |
|
| r_towle |
Oct 27 2016, 10:53 PM
Post
#5
|
|
Custom Member Group: Members Posts: 24,705 Joined: 9-January 03 From: Taxachusetts Member No.: 124 Region Association: North East States |
Cool, I am still in the lead. 8 years and you are just cleaning up the frame bench (IMG:style_emoticons/default/smile.gif) I got plenty of time.
|
|
|
|
| rick 918-S |
Oct 28 2016, 05:28 AM
Post
#6
|
|
Hey nice rack! -Celette Group: Members Posts: 21,008 Joined: 30-December 02 From: Now in Superior WI Member No.: 43 Region Association: Northstar Region |
|
|
|
|
| 11tenths |
Oct 28 2016, 09:34 AM
Post
#7
|
|
Ve get too soon old, und too late schmart Group: Members Posts: 142 Joined: 11-October 12 From: Islip, Long Island, NY Member No.: 15,026 Region Association: North East States |
I've got those same jackstands under my project.
For three years. - Harry |
|
|
|
| sixnotfour |
Oct 28 2016, 12:56 PM
Post
#8
|
|
914 Wizard Group: Members Posts: 10,905 Joined: 12-September 04 From: Life Elevated..planet UT. Member No.: 2,744 Region Association: Rocky Mountains |
Perry , judging by your pallet shelves you must have a fork lift..
I was lucky to get a UNIC strong arm lift with my caroliner bench,, and ya Ive had mine for a few years .. did a bunch of pulls on my six though. Attached image(s) 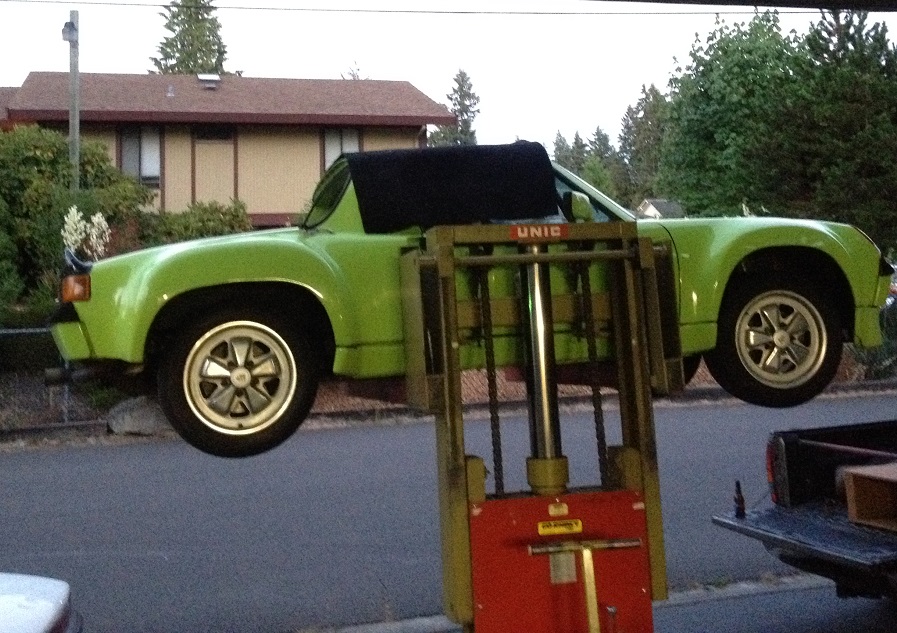
|
|
|
|
| Mueller |
Oct 28 2016, 01:13 PM
Post
#9
|
|
914 Freak! Group: Members Posts: 17,155 Joined: 4-January 03 From: Antioch, CA Member No.: 87 Region Association: None |
Am I the only one that sees some humor in the fact that you have to restore and fix the bench before you can in order to restore and fix a car.
Can you get new rubber for the wheels? What kind of adhesive are you using? |
|
|
|
| rick 918-S |
Oct 28 2016, 01:48 PM
Post
#10
|
|
Hey nice rack! -Celette Group: Members Posts: 21,008 Joined: 30-December 02 From: Now in Superior WI Member No.: 43 Region Association: Northstar Region |
QUOTE(sixnotfour @ Oct 28 2016, 01:56 PM)  Perry , judging by your pallet shelves you must have a fork lift.. I was lucky to get a UNIC strong arm lift with my caroliner bench,, and ya Ive had mine for a few years .. did a bunch of pulls on my six though. I used to have a UNIC lift when I had my shop. I have this low buck version i built now. Attached thumbnail(s) 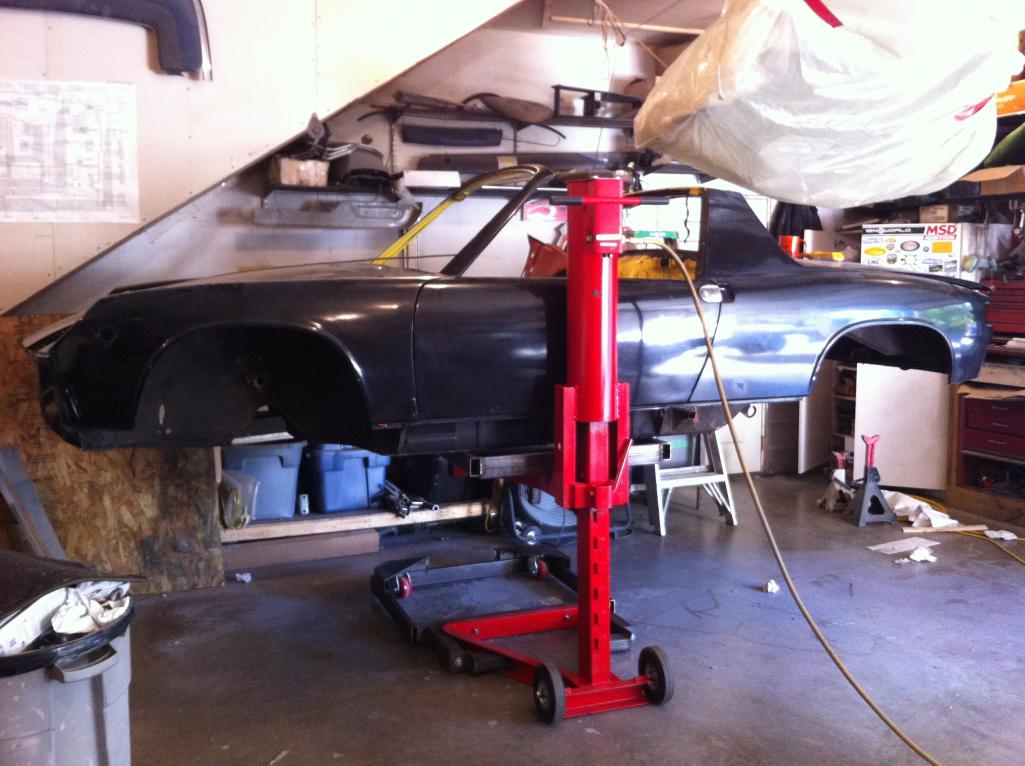
|
|
|
|
| IronHillRestorations |
Oct 29 2016, 06:44 AM
Post
#11
|
|
I. I. R. C. Group: Members Posts: 6,824 Joined: 18-March 03 From: West TN Member No.: 439 Region Association: None |
I have a early 70's Hyster H25E which has been a little tank since we got it in 1989.
Mike, I did a cursory search and couldn't easily find tires for the casters so I got a flexible 1 part adhesive that's a lot like "Shoe Goo" It seems to have worked pretty good. |
 |
|
| skier2.0 |
Nov 26 2016, 11:24 AM
Post
#12
|
|
Newbie Group: Members Posts: 34 Joined: 30-May 14 From: United States Member No.: 17,422 Region Association: MidAtlantic Region |
Brings back memory's,I was a Blackhawk distributes in the NE in the 90's. The best way to repair a car on the bench (Blackhawk or Cellette) with fixtures. Do you have the cross beams? or the pulling arm?
|
|
|
|
| IronHillRestorations |
Nov 26 2016, 06:00 PM
Post
#13
|
|
I. I. R. C. Group: Members Posts: 6,824 Joined: 18-March 03 From: West TN Member No.: 439 Region Association: None |
I have three cross beams, and 40' of 6" x 2" U channel to make more cross beams. I'm also building fixtures. I don't have a pulling arm. I don't intend to be using it for collision repair.
|
|
|
|
| IronHillRestorations |
Feb 8 2017, 01:51 PM
Post
#14
|
|
I. I. R. C. Group: Members Posts: 6,824 Joined: 18-March 03 From: West TN Member No.: 439 Region Association: None |
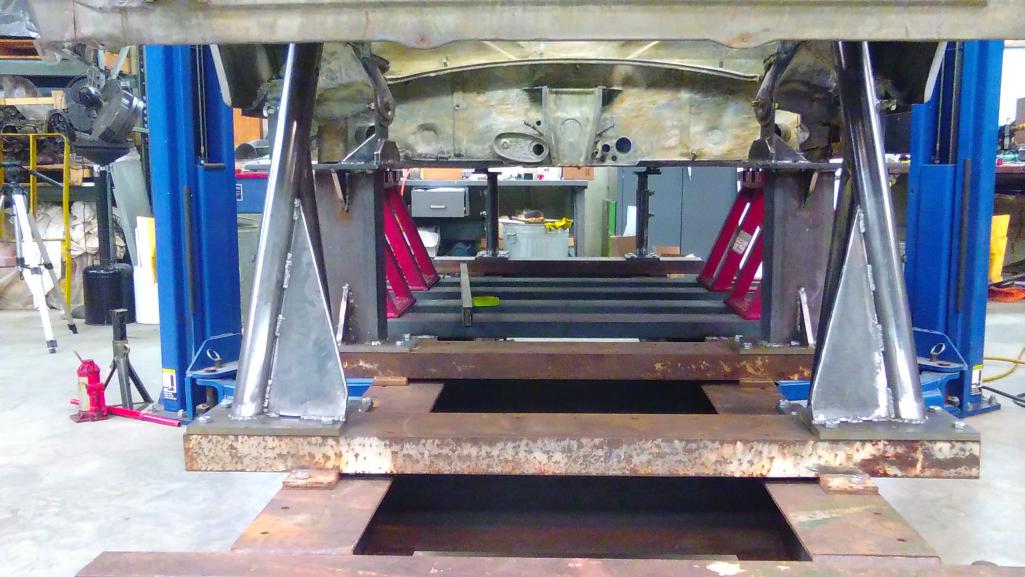
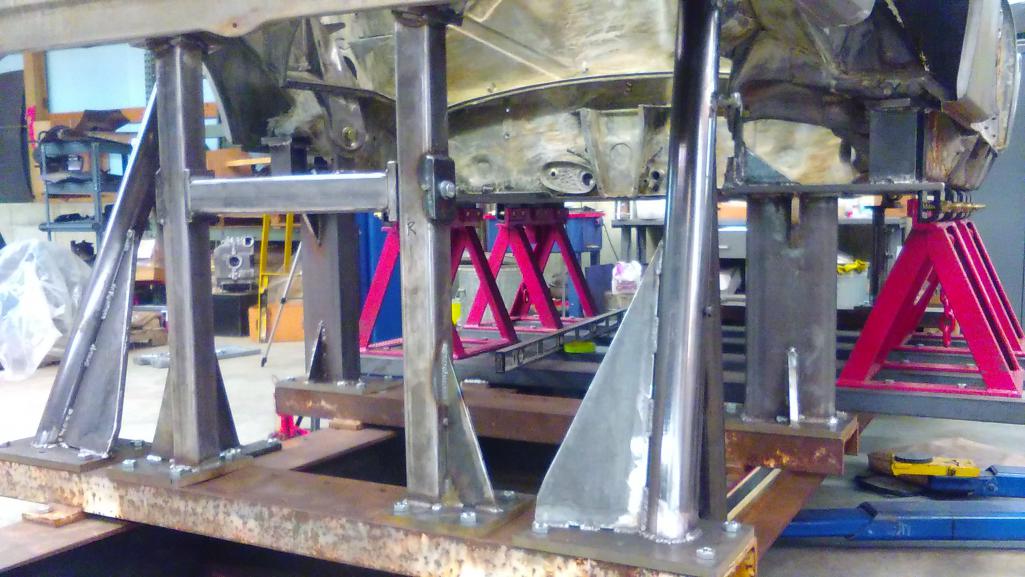
Four frame stands are the starting point. I went back, forth, and all around on how to to this. I used 2 x 6 U channel, which isn't really flat on the top, but I was able to get the stands to level out. I didn't want to make it this wide, but this has worked out well.
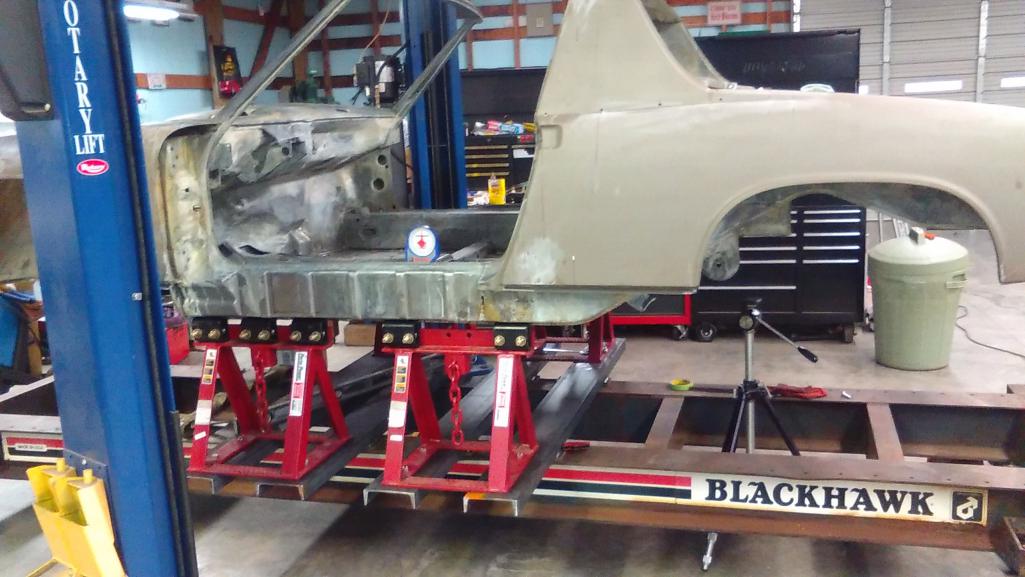 Although rusty on the right long, and hell hole, as well as a tap in the door post, this 6 chassis is perfectly straight at all the measurements. 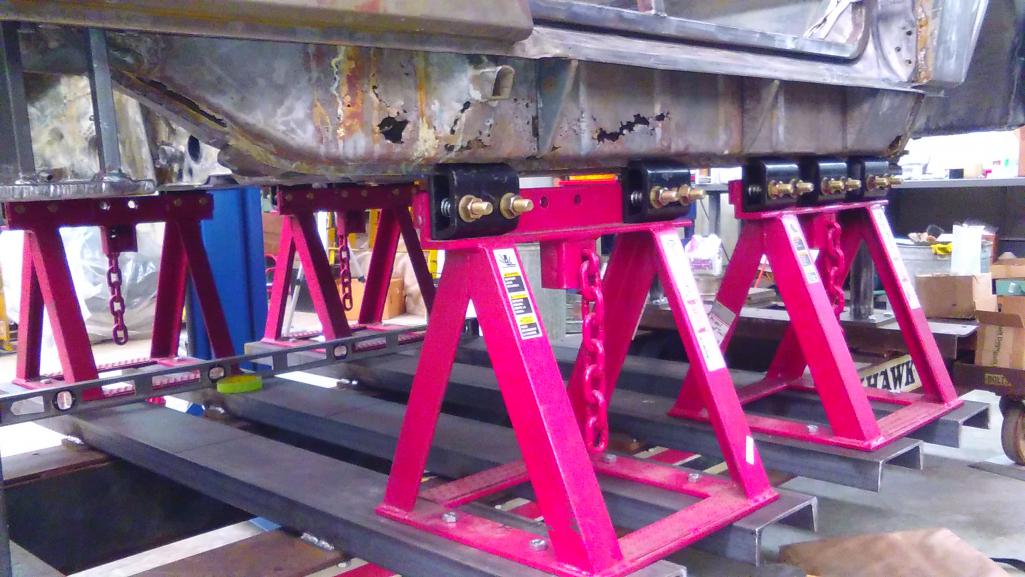 Attached thumbnail(s) 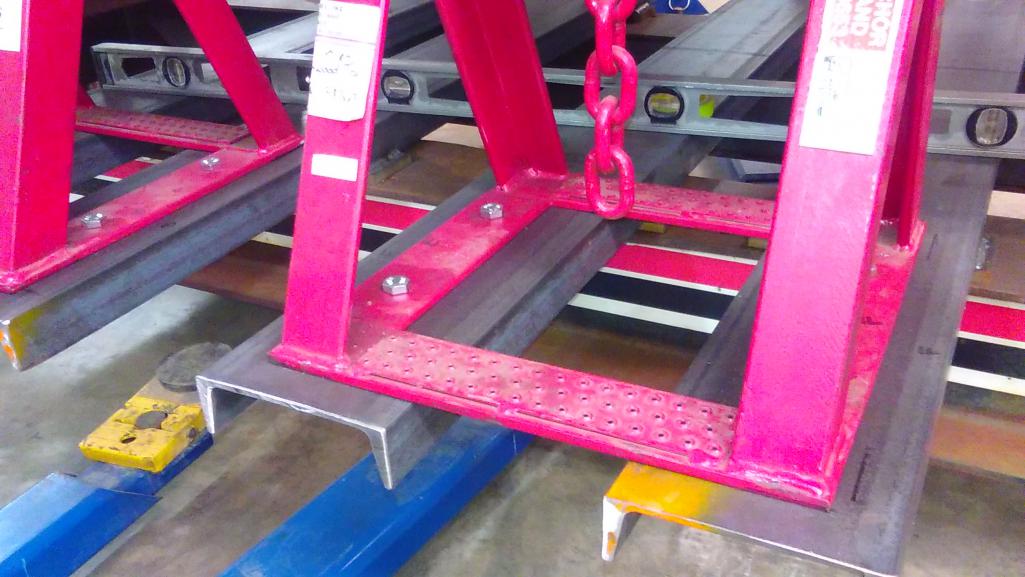
|
|
|
|
| IronHillRestorations |
Feb 8 2017, 01:58 PM
Post
#15
|
|
I. I. R. C. Group: Members Posts: 6,824 Joined: 18-March 03 From: West TN Member No.: 439 Region Association: None |
More of the right side
Front pinch weld clamp 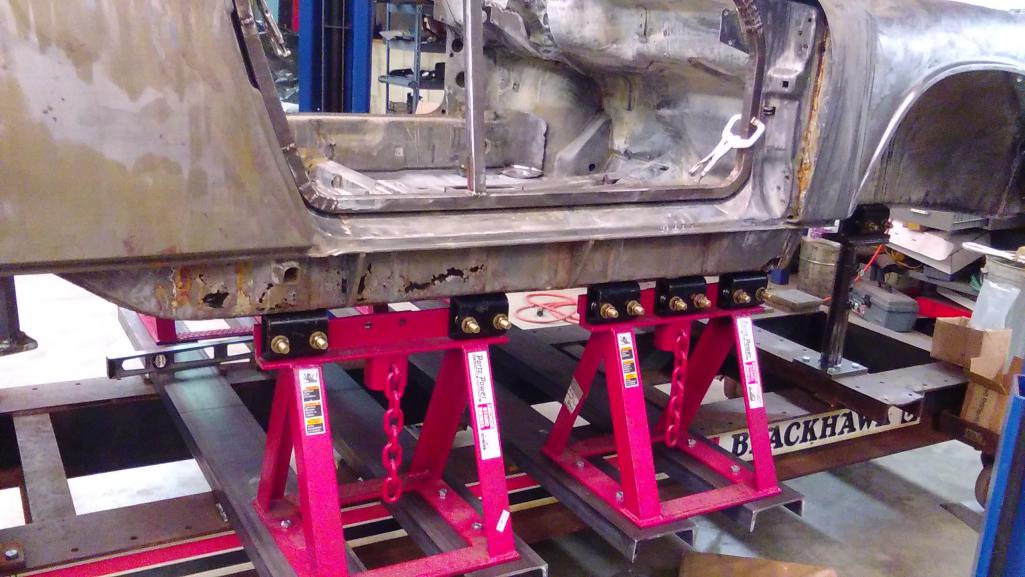 Both sides 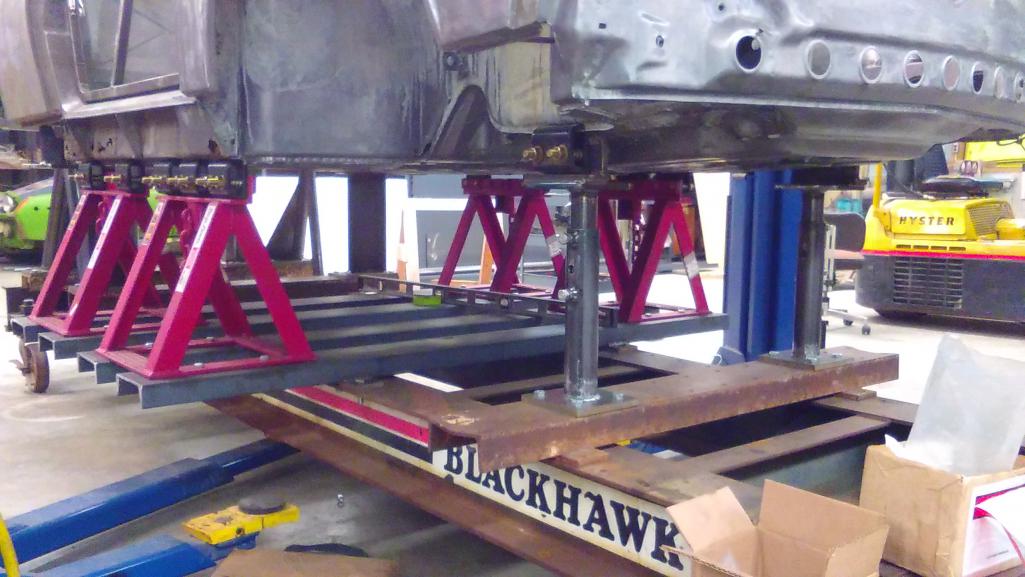 Attached thumbnail(s) 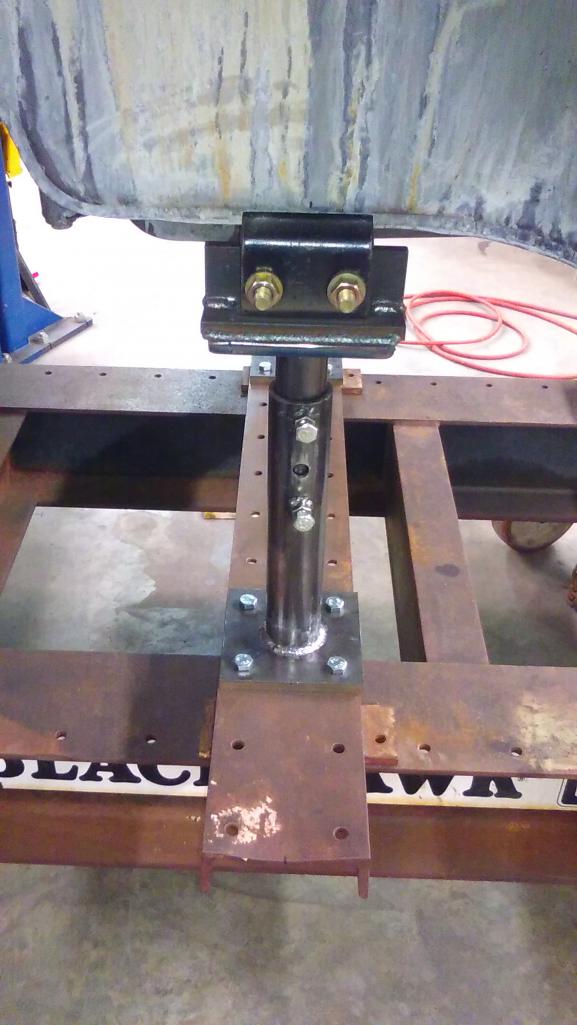
|
|
|
|
| IronHillRestorations |
Feb 8 2017, 02:05 PM
Post
#16
|
|
I. I. R. C. Group: Members Posts: 6,824 Joined: 18-March 03 From: West TN Member No.: 439 Region Association: None |
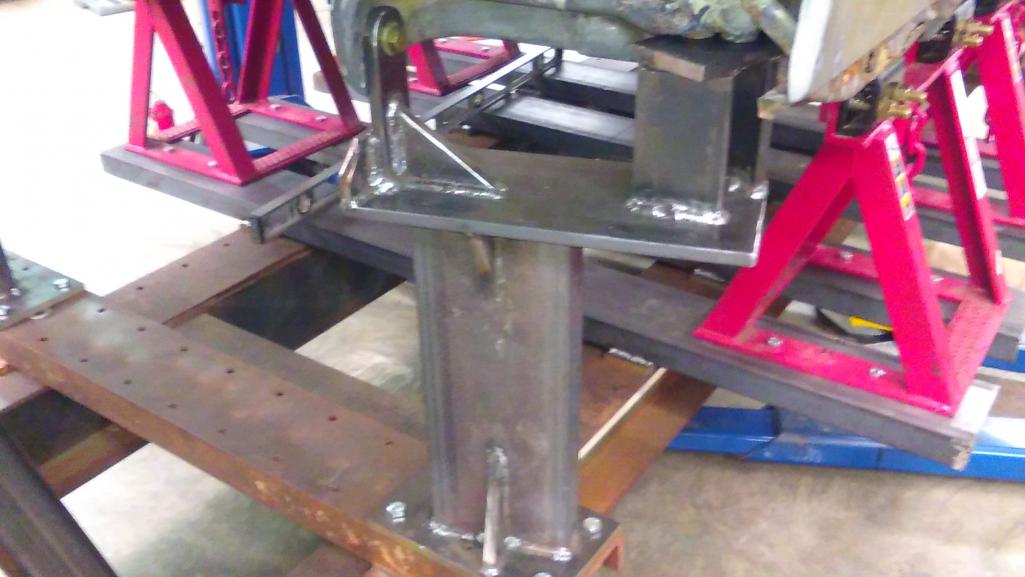
Left and right railing arm mount brackets
  |
|
|
|
| IronHillRestorations |
Feb 8 2017, 02:10 PM
Post
#17
|
|
I. I. R. C. Group: Members Posts: 6,824 Joined: 18-March 03 From: West TN Member No.: 439 Region Association: None |
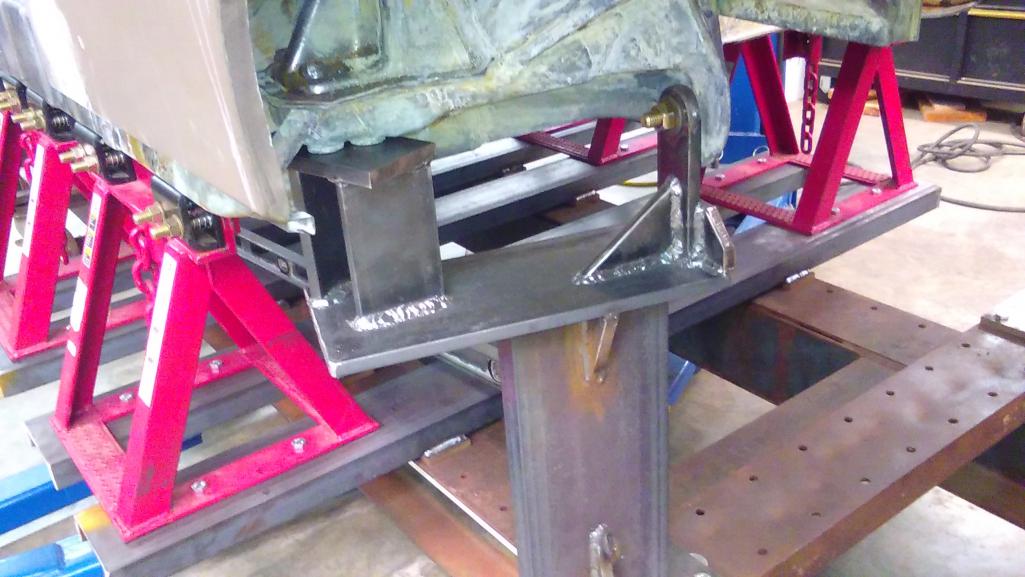
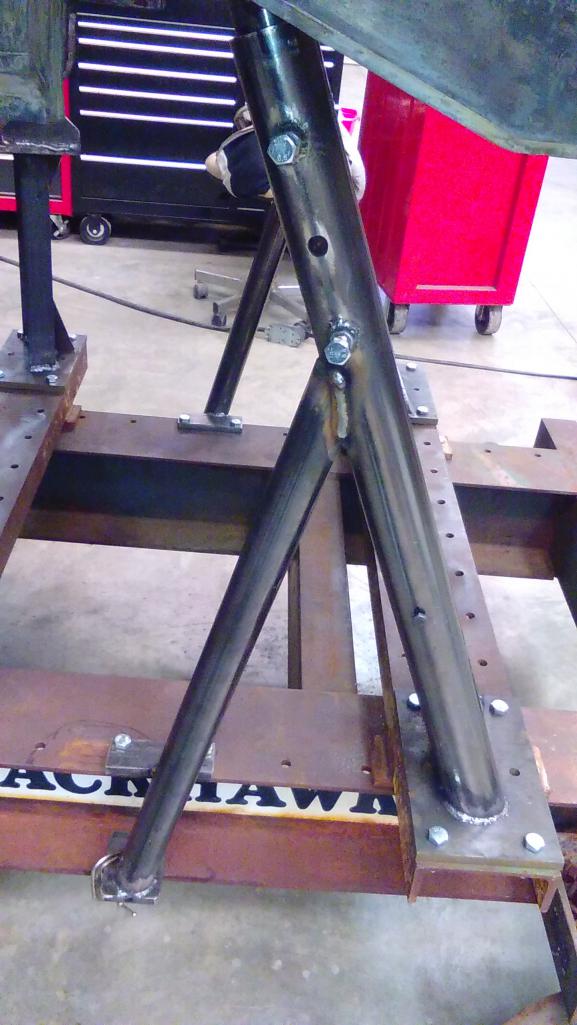
Rear shock tower brackets
   |
|
|
|
| IronHillRestorations |
Feb 8 2017, 02:14 PM
Post
#18
|
|
I. I. R. C. Group: Members Posts: 6,824 Joined: 18-March 03 From: West TN Member No.: 439 Region Association: None |
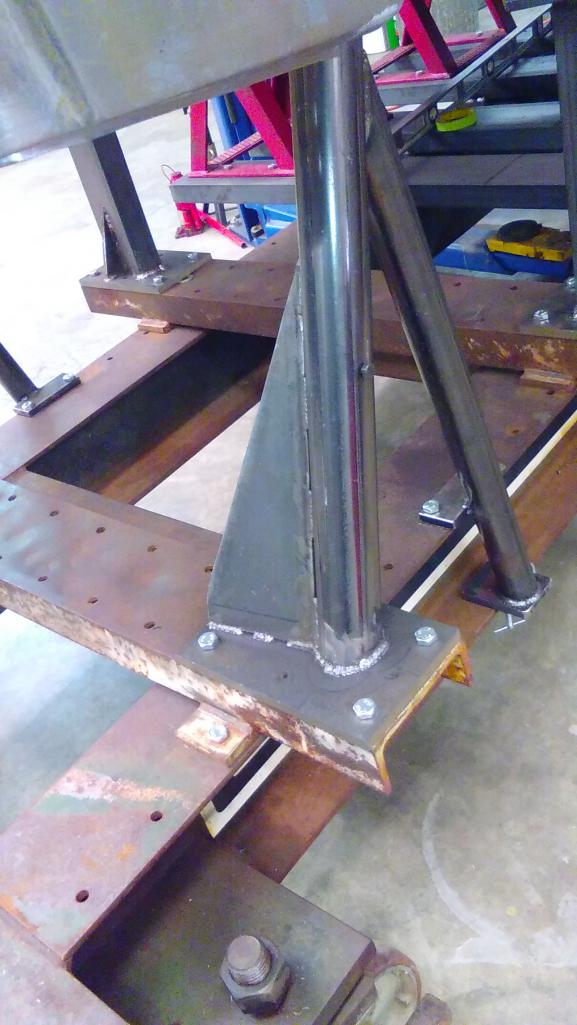
Rear cross member bracket
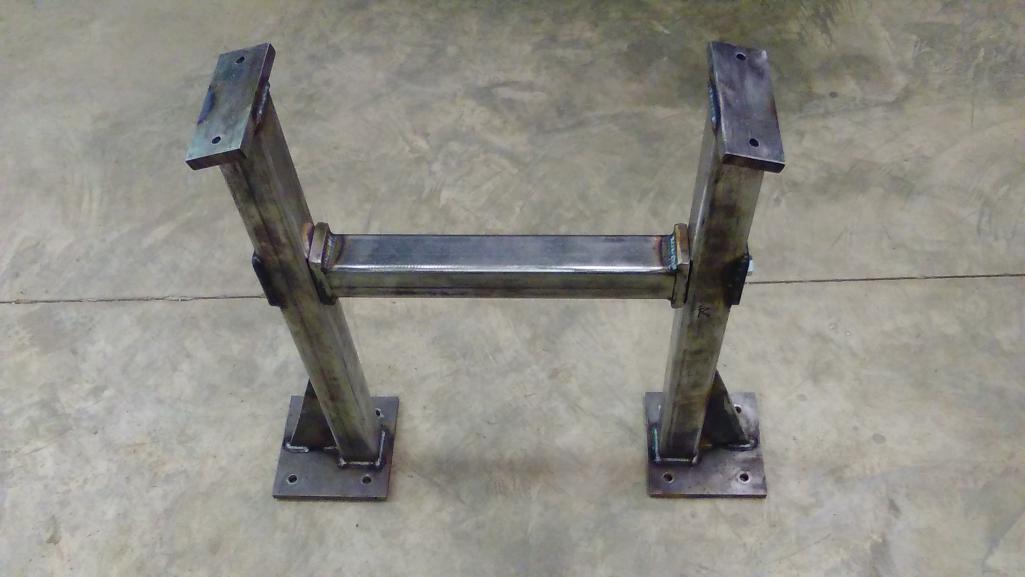  I made the cross bar removable for access |
|
|
|
| IronHillRestorations |
Feb 8 2017, 02:17 PM
Post
#19
|
|
I. I. R. C. Group: Members Posts: 6,824 Joined: 18-March 03 From: West TN Member No.: 439 Region Association: None |
Next on the build list is a cross member for the frame bench, and then brackets for the steering rack mounting points. (IMG:style_emoticons/default/sawzall-smiley.gif) (IMG:style_emoticons/default/welder.gif) (IMG:style_emoticons/default/sawzall-smiley.gif) (IMG:style_emoticons/default/welder.gif) (IMG:style_emoticons/default/sawzall-smiley.gif) (IMG:style_emoticons/default/welder.gif)
|
|
|
|
| 76-914 |
Feb 8 2017, 02:20 PM
Post
#20
|
|
Repeat Offender & Resident Subaru Antagonist Group: Members Posts: 13,735 Joined: 23-January 09 From: Temecula, CA Member No.: 9,964 Region Association: Southern California |
That's very nice. There were some hours invested, eh? (IMG:style_emoticons/default/beerchug.gif)
|
|
|
|
|
1 User(s) are reading this topic (1 Guests and 0 Anonymous Users)
0 Members:

|
Lo-Fi Version | Time is now: 4th July 2025 - 01:03 PM |
Invision Power Board
v9.1.4 © 2025 IPS, Inc.