|
|
|
Porsche, and the Porsche crest are registered trademarks of Dr. Ing. h.c. F. Porsche AG.
This site is not affiliated with Porsche in any way. Its only purpose is to provide an online forum for car enthusiasts. All other trademarks are property of their respective owners. |
|
|

  |

| cary |
 Sep 1 2018, 11:02 PM Sep 1 2018, 11:02 PM
Post
#101
|
|
Advanced Member  Group: Members Posts: 3,900 Joined: 26-January 04 From: Sherwood Oregon Member No.: 1,608 Region Association: Pacific Northwest |
Finally getting back to Taylor's project. Next part going is the lower portion of the fuel tank / shock tower panel.
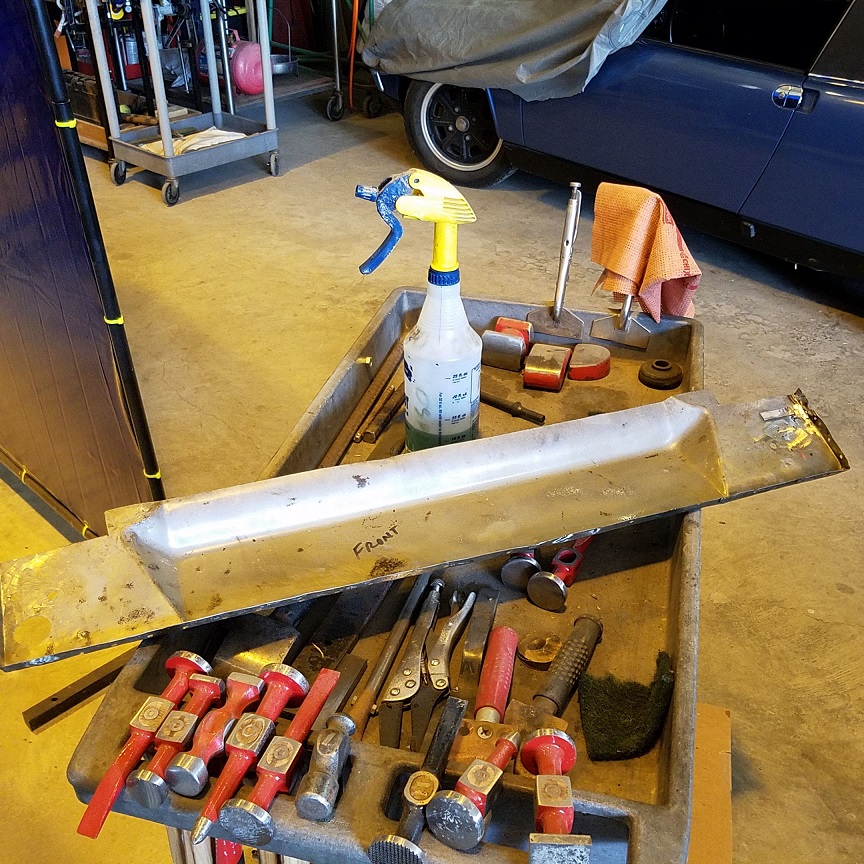 After all the trimming and fiddling it's ready to go in. But there's always something. The left side lines up perfect. The right side not so much. It will need some creative tuning.  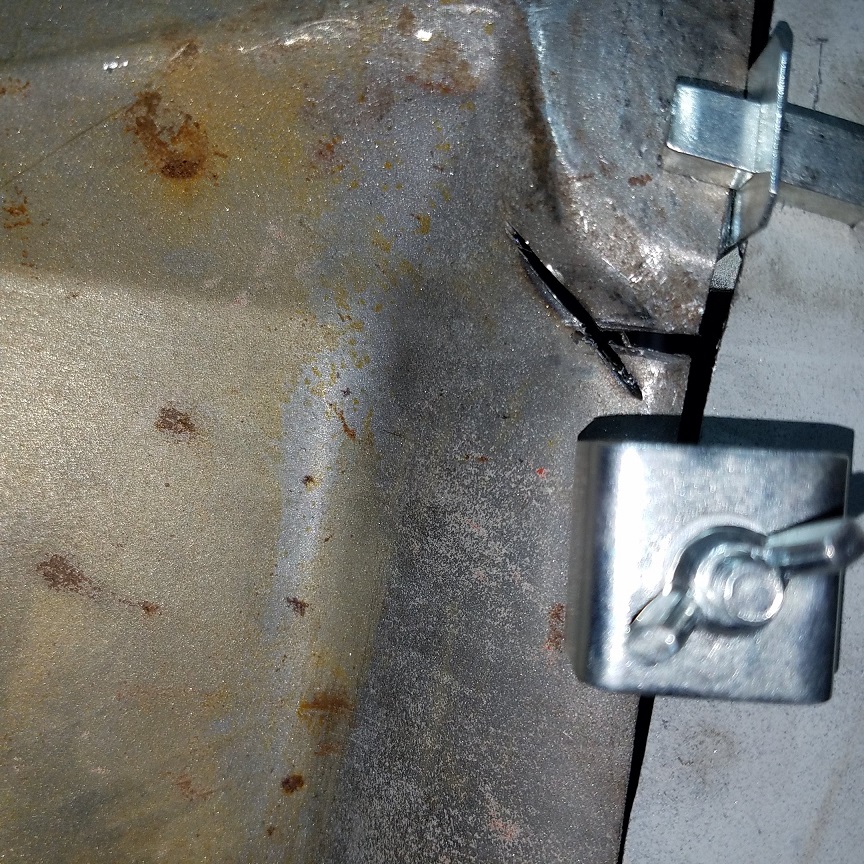 At quitting time the bottom flange is rosette welded in. And the center section is seam welded, smoothed and polished. 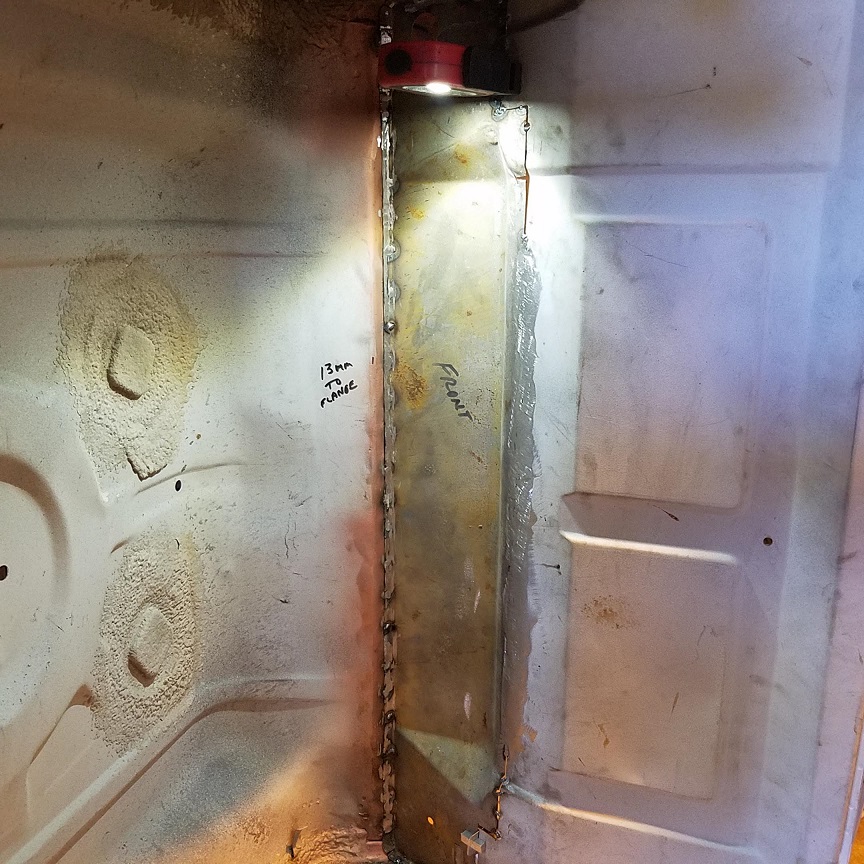 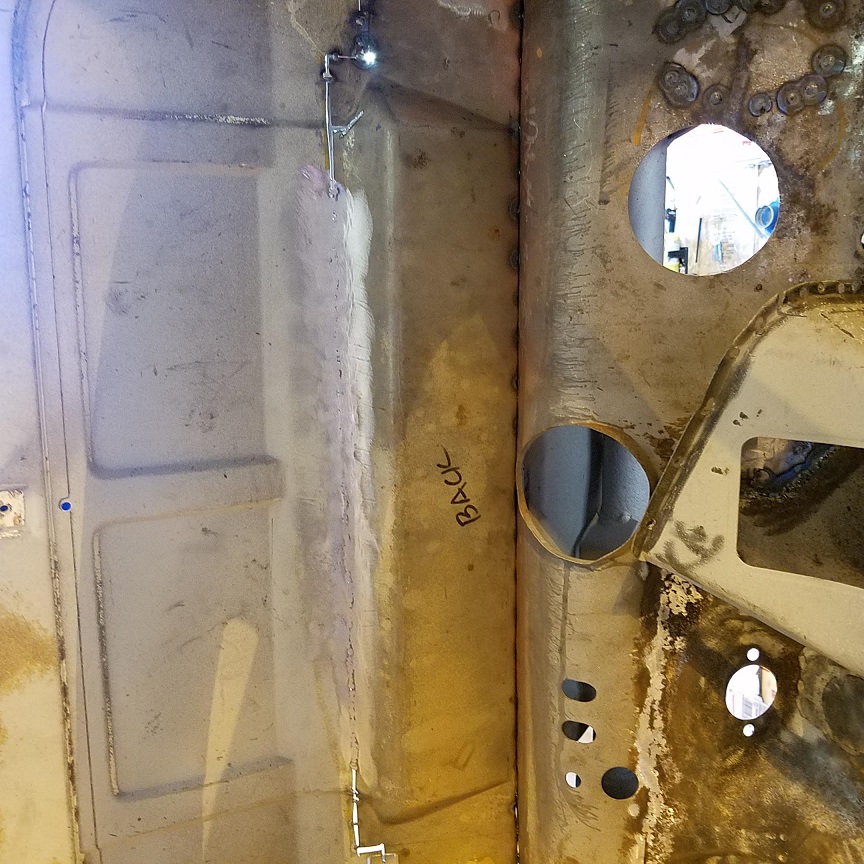 Bottom flange got pretty beat up from spot weld removal. It's not really meant to be removed |
   |

 
|
| cary |
Sep 9 2018, 07:27 PM
Post
#102
|
|
Advanced Member Group: Members Posts: 3,900 Joined: 26-January 04 From: Sherwood Oregon Member No.: 1,608 Region Association: Pacific Northwest |
Finally have the front firewall / fuel tank support welded into place. I did have to cut out an additional thin section and patch it up.
    |
|
|
|
| cary |
Sep 9 2018, 07:33 PM
Post
#103
|
|
Advanced Member Group: Members Posts: 3,900 Joined: 26-January 04 From: Sherwood Oregon Member No.: 1,608 Region Association: Pacific Northwest |
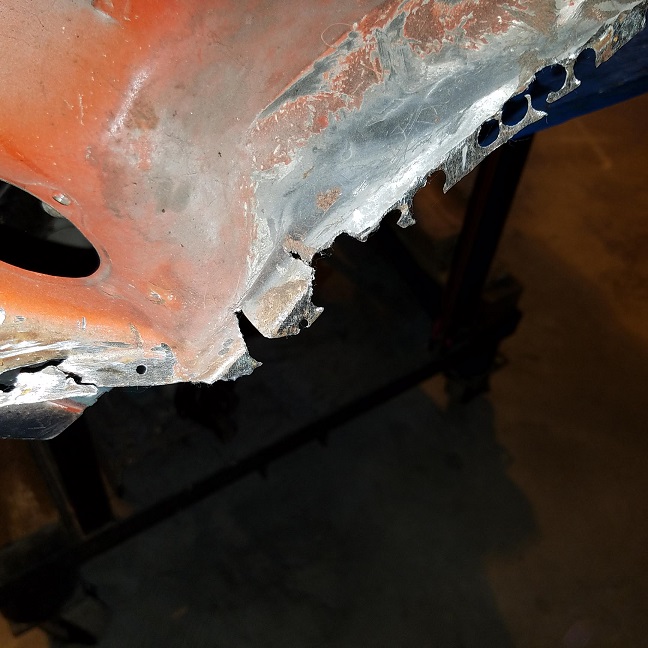
Next, the big kahuna. The front bulkhead under the dash. It's going to be some tough work. The side flanges need some serious repairs.
   |
|
|
|
| bbrock |
Sep 9 2018, 09:41 PM
Post
#104
|
|
914 Guru Group: Members Posts: 5,269 Joined: 17-February 17 From: Montana Member No.: 20,845 Region Association: Rocky Mountains |
You've got guts. That is an intimidating piece you are tackling there. (IMG:style_emoticons/default/pray.gif)
|
|
|
|
| Mikey914 |
Sep 10 2018, 10:21 AM
Post
#105
|
|
The rubber man Group: Members Posts: 12,782 Joined: 27-December 04 From: Hillsboro, OR Member No.: 3,348 Region Association: None |
Might be a good time to relocate he fuel pump to the front?
Nice to see some progress. Cary I'll catch up with you later this week. Mark |
|
|
|
| cary |
Sep 14 2018, 08:40 PM
Post
#106
|
|
Advanced Member Group: Members Posts: 3,900 Joined: 26-January 04 From: Sherwood Oregon Member No.: 1,608 Region Association: Pacific Northwest |
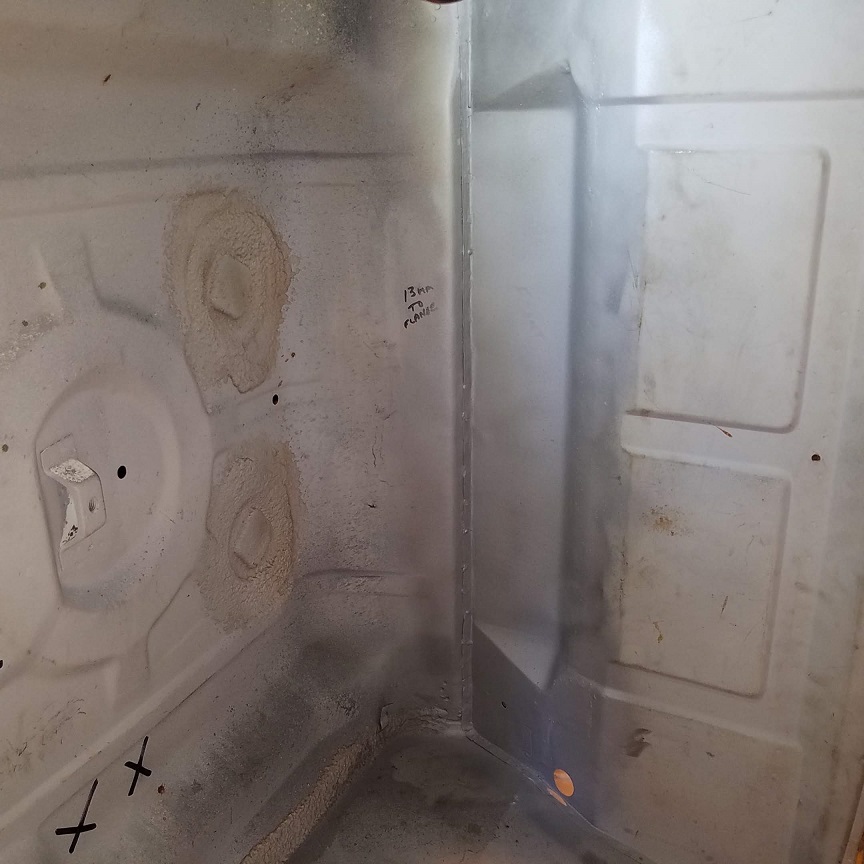
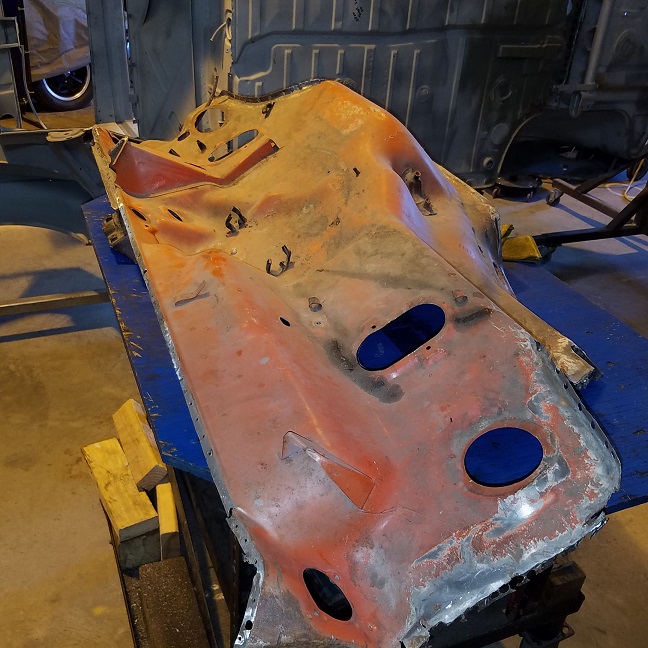
1st order of business today. Test fitting the donor front cockpit bulkhead. It's got some twists and turns. But it went into the hole. (IMG:style_emoticons/default/biggrin.gif)
  |
|
|
|
| cary |
Sep 14 2018, 09:34 PM
Post
#107
|
|
Advanced Member Group: Members Posts: 3,900 Joined: 26-January 04 From: Sherwood Oregon Member No.: 1,608 Region Association: Pacific Northwest |
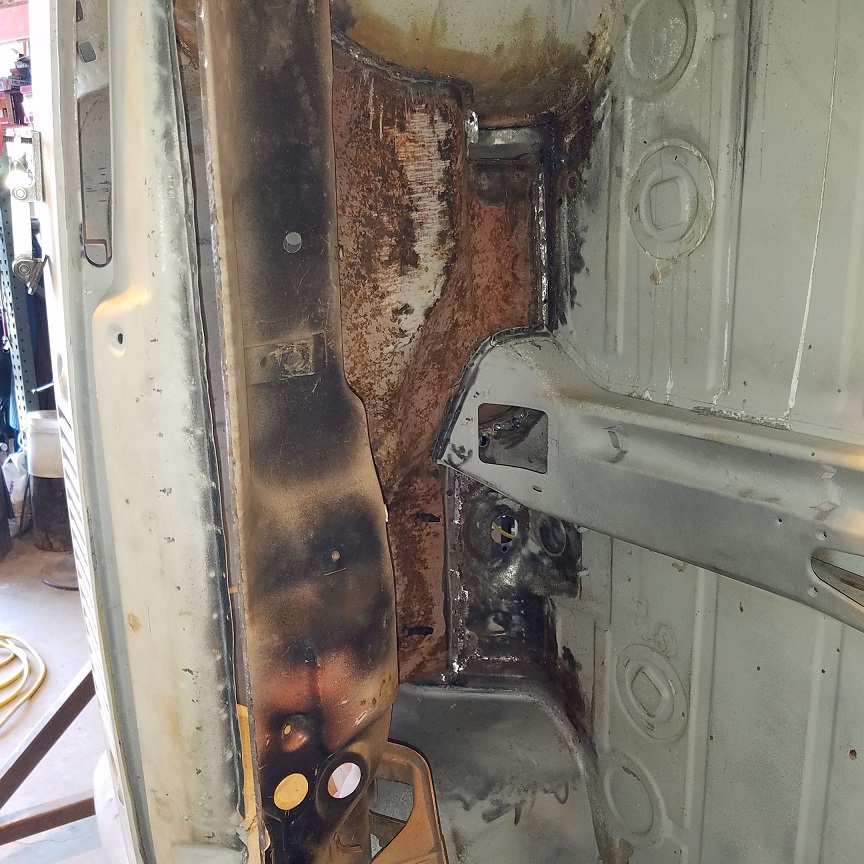
Decided to take on the tunnel issues first.
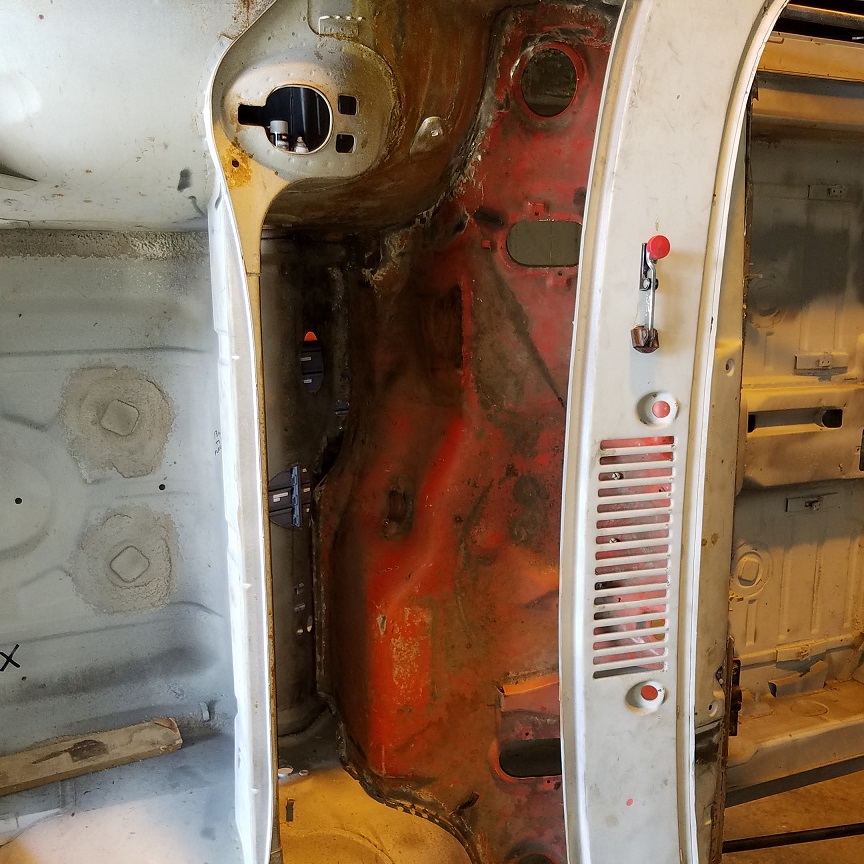
The clutch tube is disconnected in all 3 locations. The firewall, the shifter guide loop and the tunnel wall in front of the shifter. (IMG:style_emoticons/default/sad.gif) Here's the firewall strap. 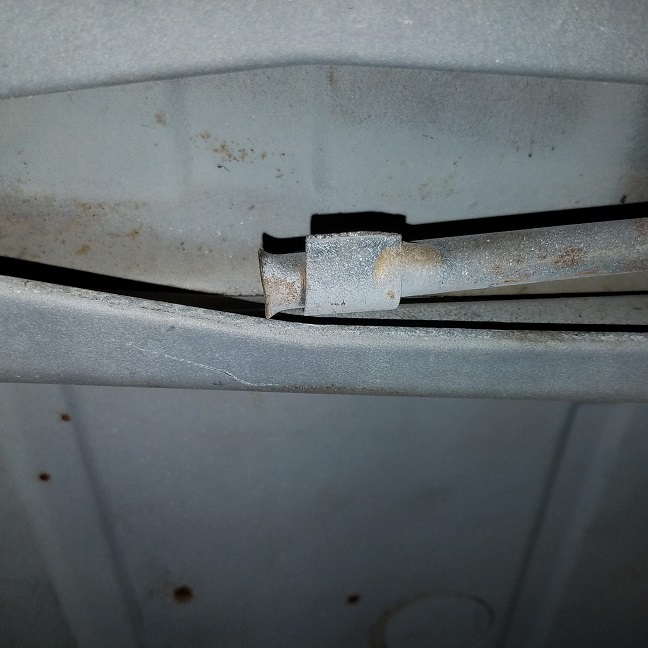 Here's the ripped out section. 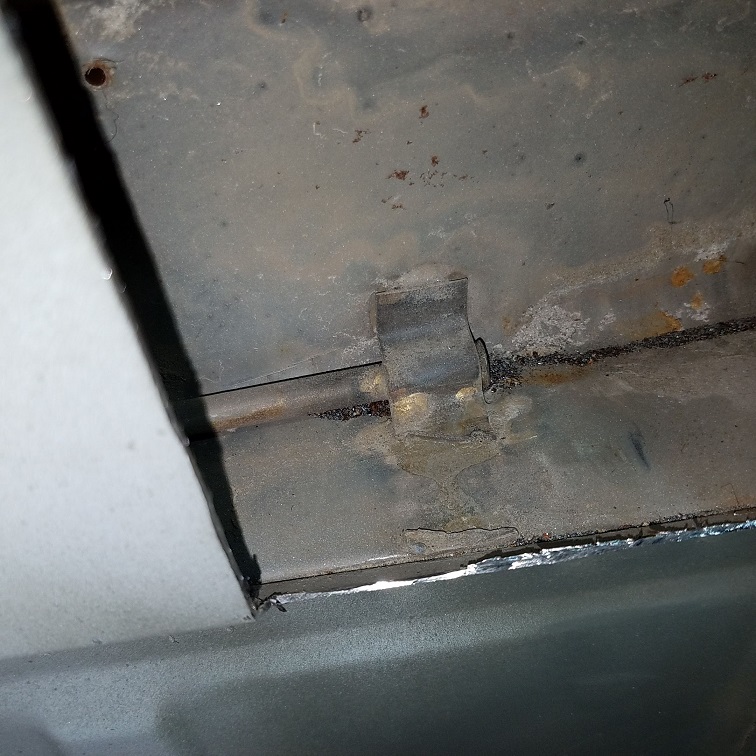 Here's what the shifter guide loop should look like ............... minus the rust LOL  Here's Taylor's guide loop in pieces. 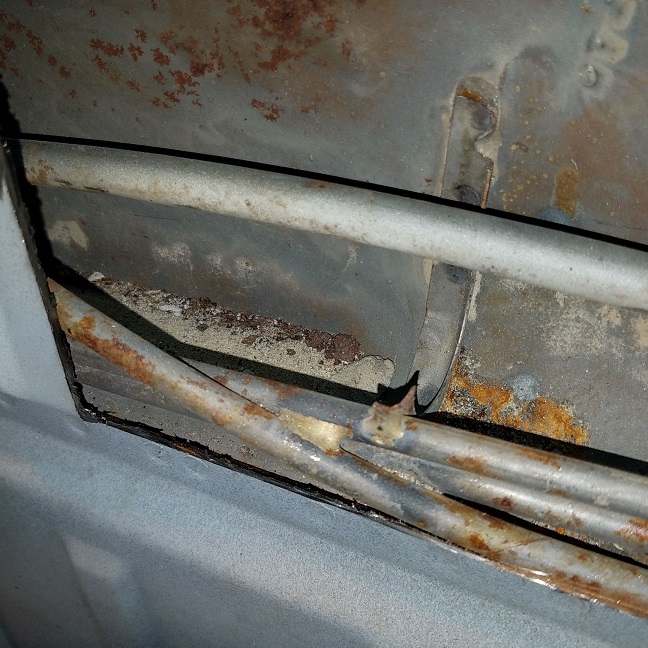  Here's Taylor's engine fire wall. 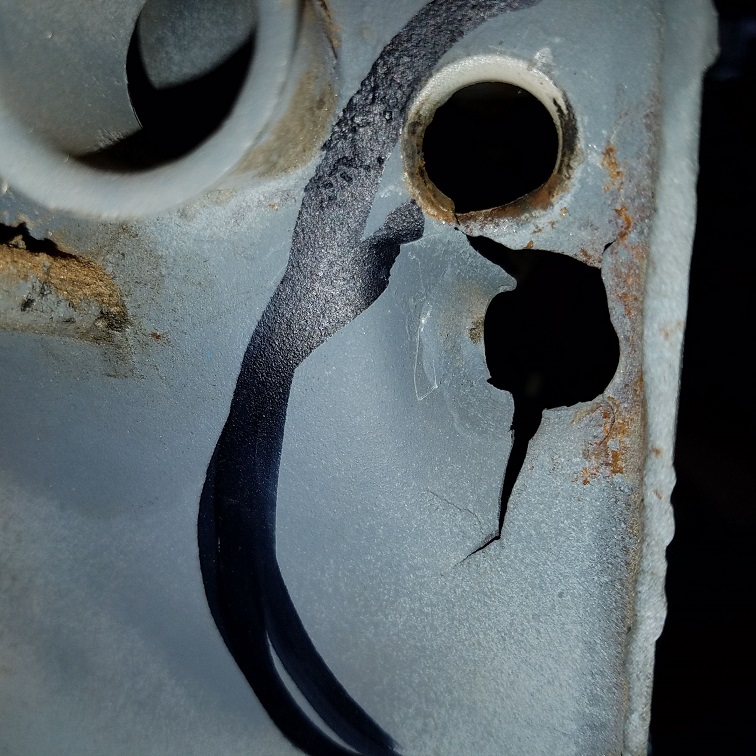 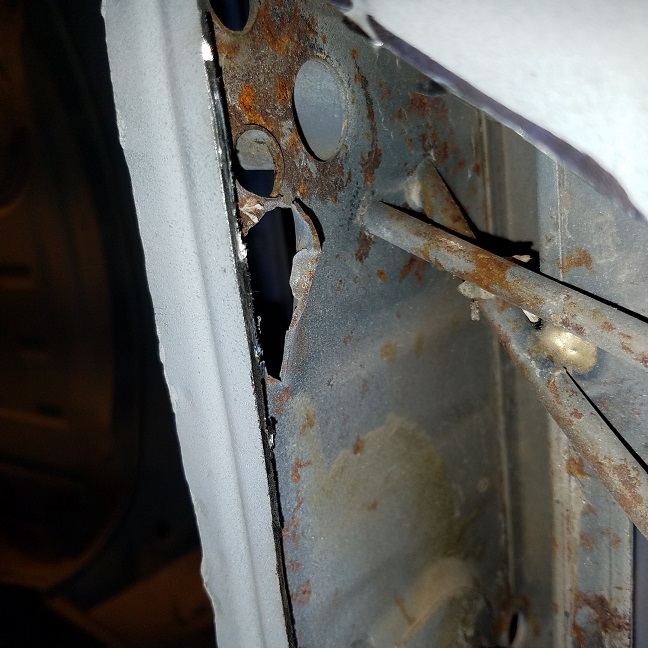 |
|
|
|
| cary |
Sep 14 2018, 09:48 PM
Post
#108
|
|
Advanced Member Group: Members Posts: 3,900 Joined: 26-January 04 From: Sherwood Oregon Member No.: 1,608 Region Association: Pacific Northwest |
We'll start with the firewall first.
After a little work with some hammers, blocks and re-bar.  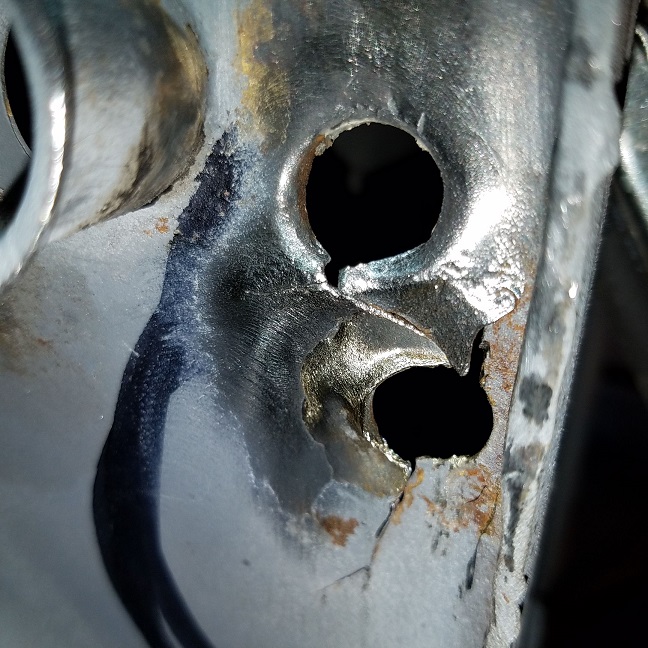 After some low power welding with my little 110 welder. 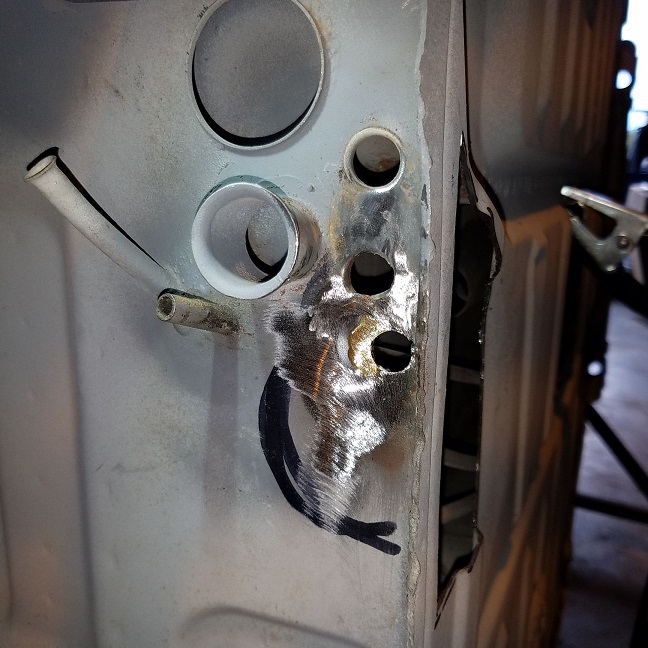 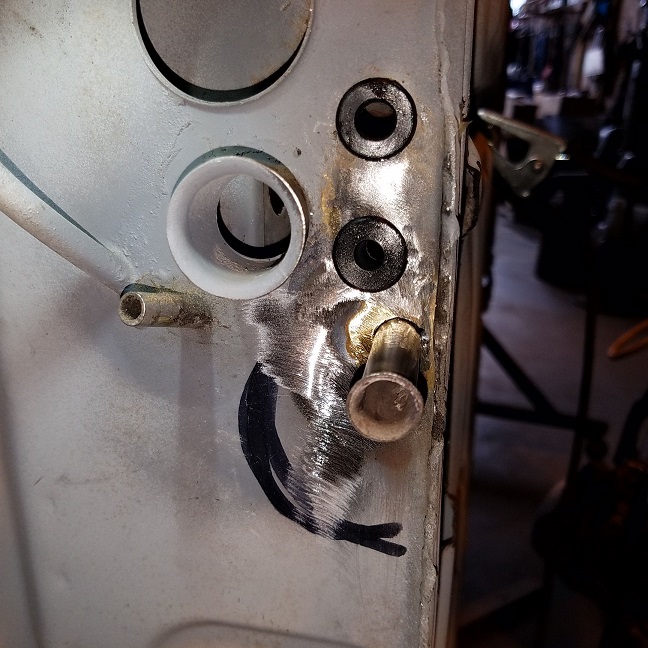 Test fitting the MiddleMotors firewall stiffener. The 72's that we've used it on before had the clutch tube hole in a higher location. 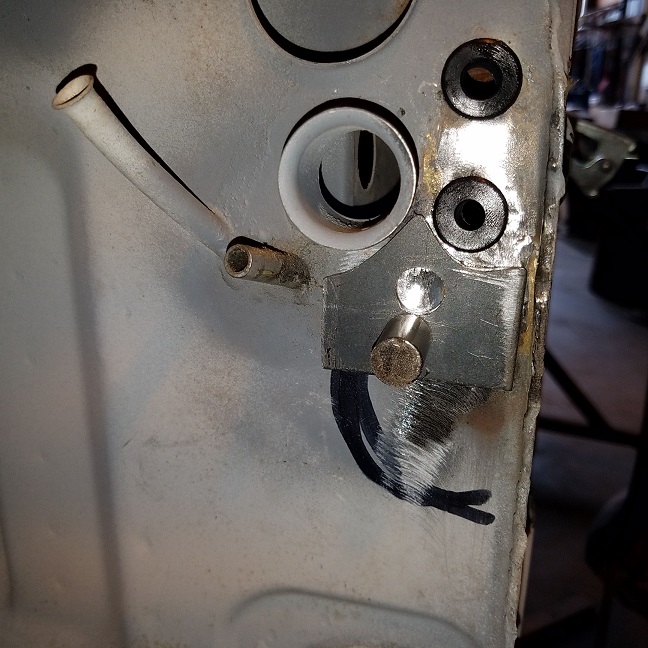 |
|
|
|
| cary |
Sep 14 2018, 09:55 PM
Post
#109
|
|
Advanced Member Group: Members Posts: 3,900 Joined: 26-January 04 From: Sherwood Oregon Member No.: 1,608 Region Association: Pacific Northwest |
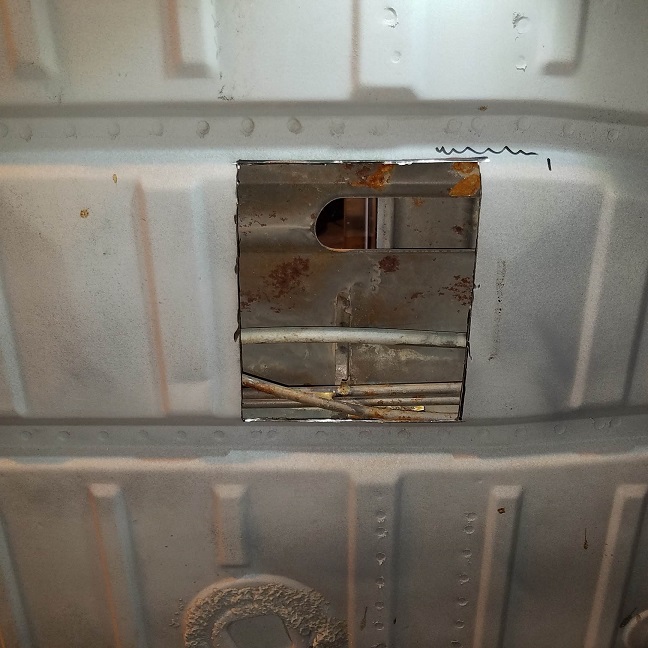
Cut open the tunnel in 3 spots ........................
   |
|
|
|
| cary |
Sep 15 2018, 05:14 PM
Post
#110
|
|
Advanced Member Group: Members Posts: 3,900 Joined: 26-January 04 From: Sherwood Oregon Member No.: 1,608 Region Association: Pacific Northwest |
Another short day .................
Re installed clutch cable tube. Started with installing Jack's shift loop replacement piece. 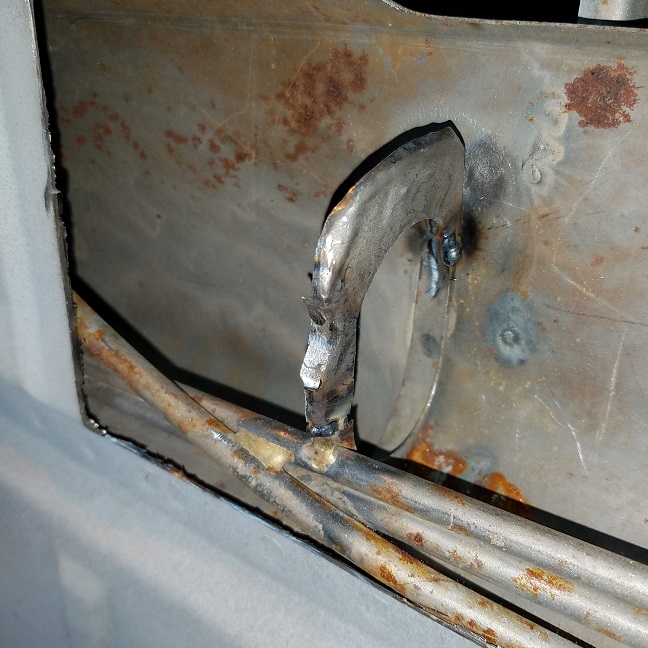 Tidied up the front strap area in front of the shifter. 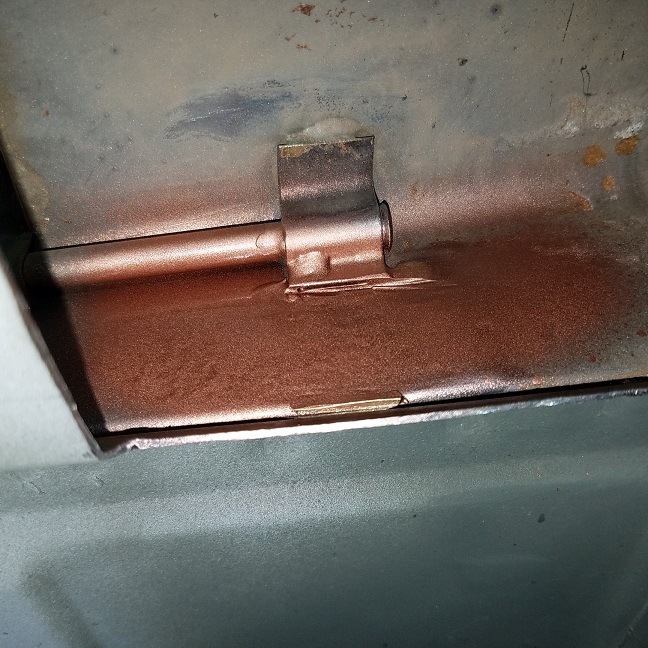 Installed the clutch tube.   Time to fire up the torch. Brazed in with the Mapp torch. Could have been a bit hotter and faster. But didn't feel like breaking out the oxy torch. 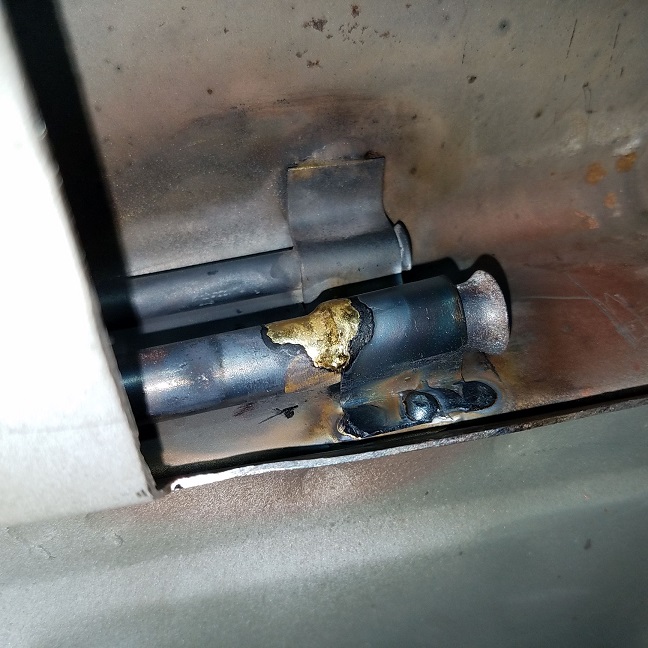  Attached image(s) 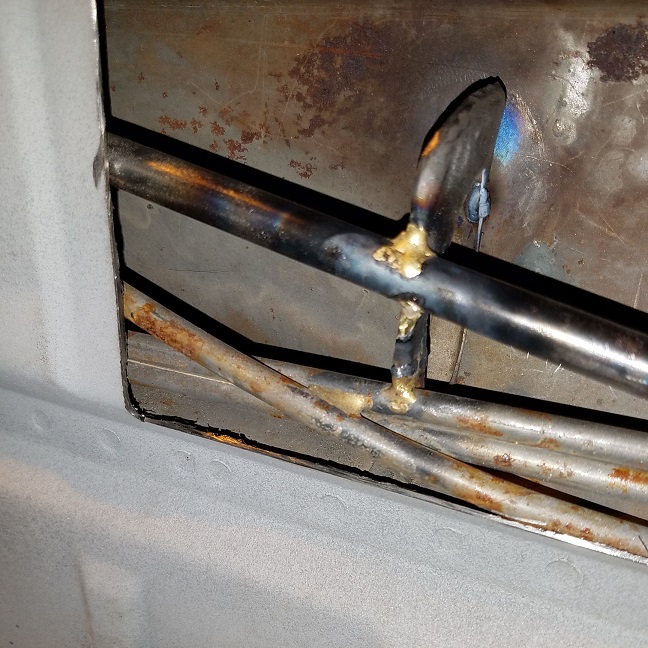
|
|
|
|
| cary |
Sep 15 2018, 05:20 PM
Post
#111
|
|
Advanced Member Group: Members Posts: 3,900 Joined: 26-January 04 From: Sherwood Oregon Member No.: 1,608 Region Association: Pacific Northwest |
Next onto the engine firewall. Even though I repaired the firewall I added the MiddleMotors firewall stiffener.
    |
|
|
|
| cary |
Sep 18 2018, 09:03 AM
Post
#112
|
|
Advanced Member Group: Members Posts: 3,900 Joined: 26-January 04 From: Sherwood Oregon Member No.: 1,608 Region Association: Pacific Northwest |
Next ......
I figured I'd get the trunk rail repaired before the bulkhead goes in. Easier to weld and much easier to add OSPHO and primer for long term protection. 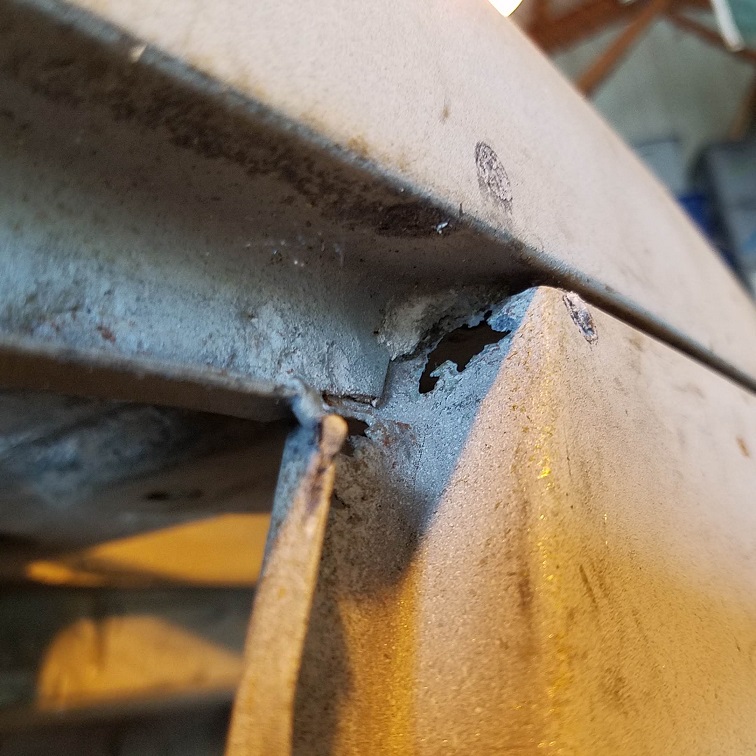 |
|
|
|
| cary |
Sep 19 2018, 08:39 AM
Post
#113
|
|
Advanced Member Group: Members Posts: 3,900 Joined: 26-January 04 From: Sherwood Oregon Member No.: 1,608 Region Association: Pacific Northwest |
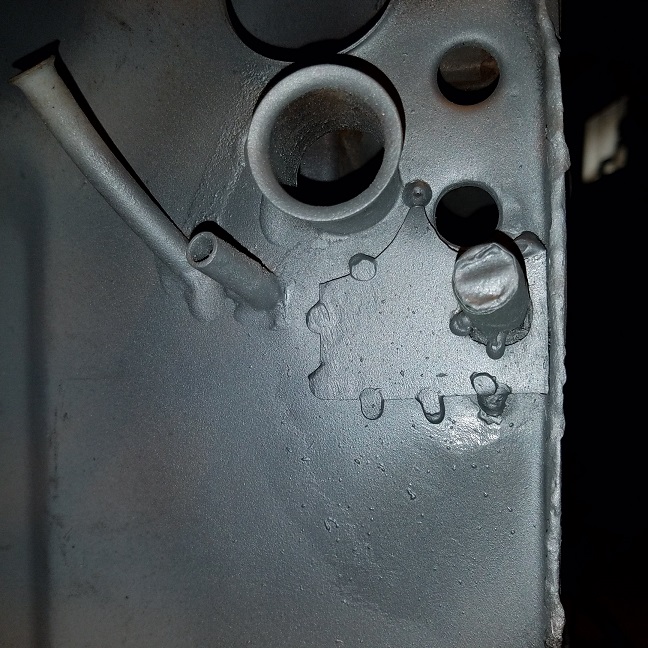
The smaller hole(s) on the flat portion I welded closed. The new 141 lets me really make a small weld.
 The vertical portion got a patch piece. Lots of trips back on forth to the sander to get a nice tight fit for easy welding. 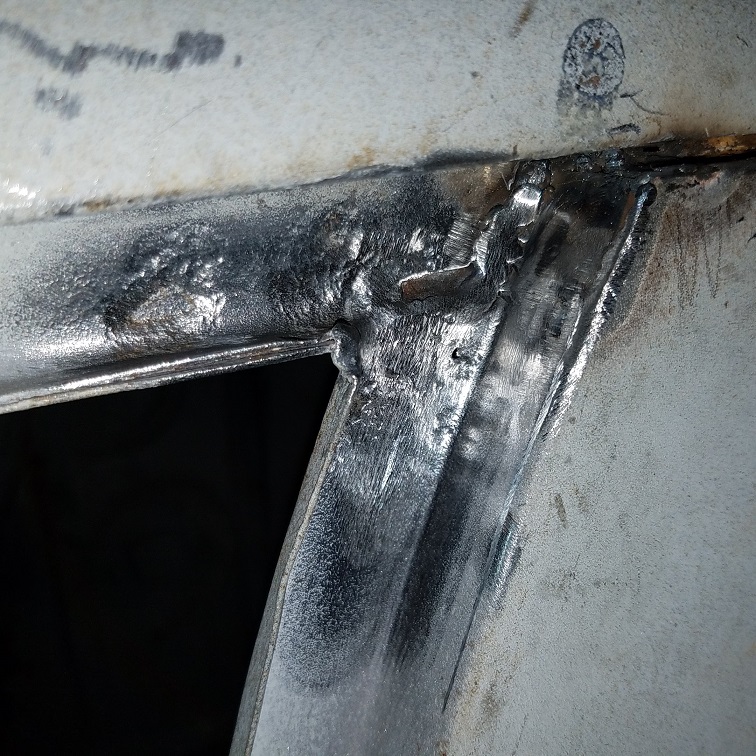 I'm not going to over finish. Both of these corners will get sealed up with JB Weld or All Metal. Left side will be a little more complicated. Damage goes into the piping slot. But having the dash and bulkhead out gives me good access to the back side. 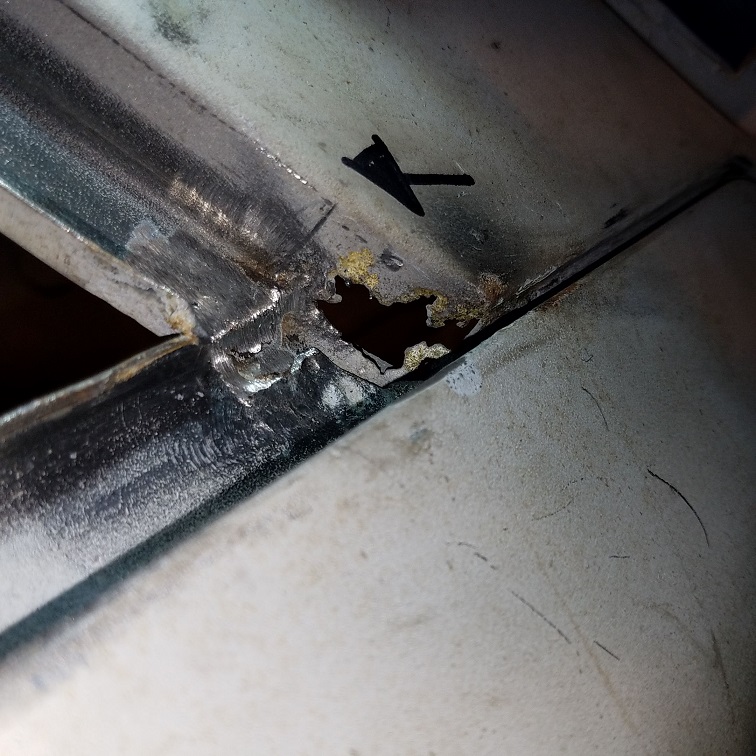 |
|
|
|
| cary |
Sep 20 2018, 09:24 AM
Post
#114
|
|
Advanced Member Group: Members Posts: 3,900 Joined: 26-January 04 From: Sherwood Oregon Member No.: 1,608 Region Association: Pacific Northwest |
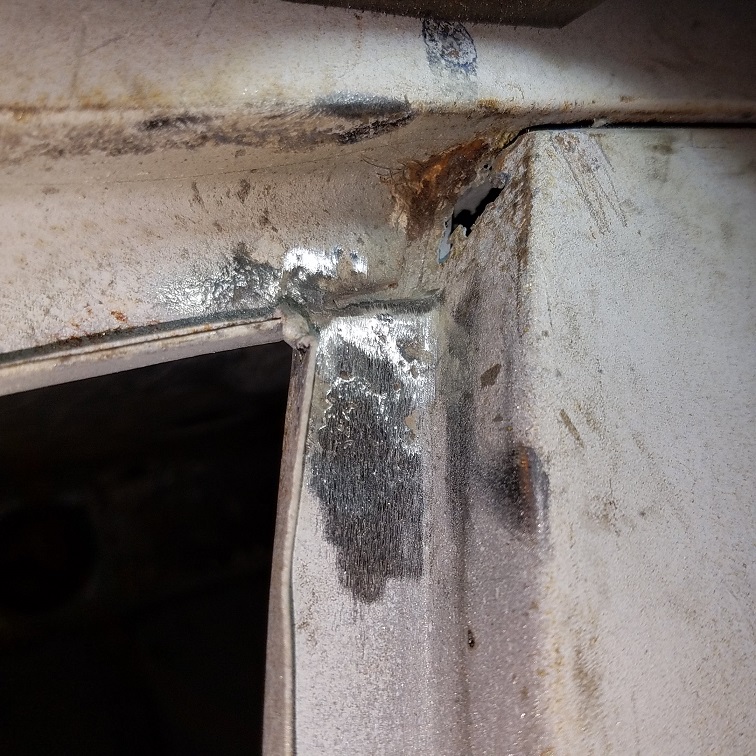
Finished up the other trunk/cowl/fender corner. I'm going to look at adding some additional Dremel bits to my tool assortment.
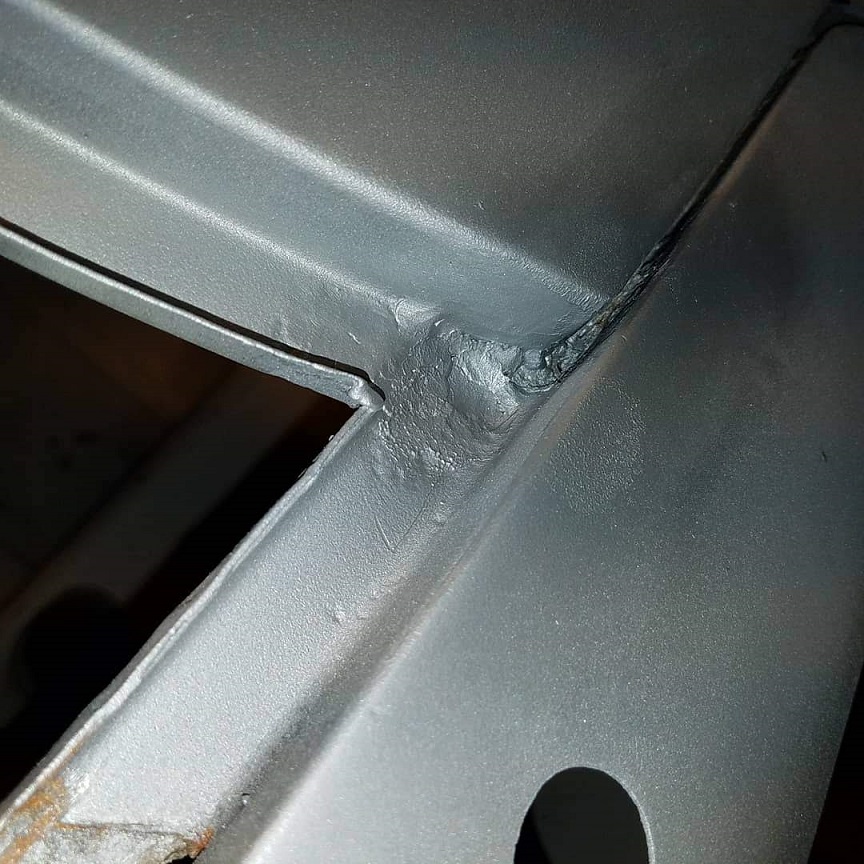 Backside. No bulkhead or dash. Makes it much easier. 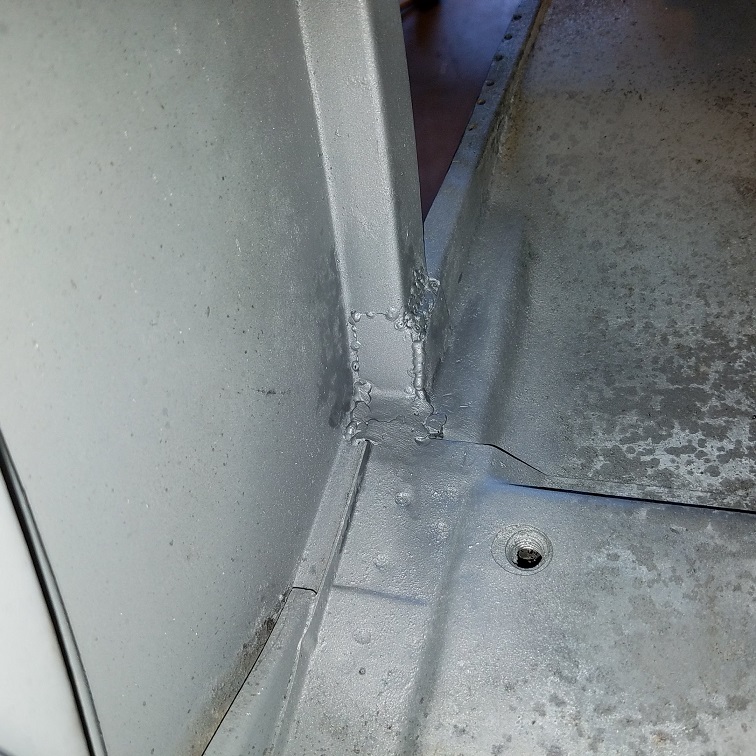 Using the Millermatic Mode on my 141. Really lets me dial it in. It gets pretty tricky some time with old metal and hidden seal sealer. |
|
|
|
| cary |
Sep 20 2018, 09:34 AM
Post
#115
|
|
Advanced Member Group: Members Posts: 3,900 Joined: 26-January 04 From: Sherwood Oregon Member No.: 1,608 Region Association: Pacific Northwest |
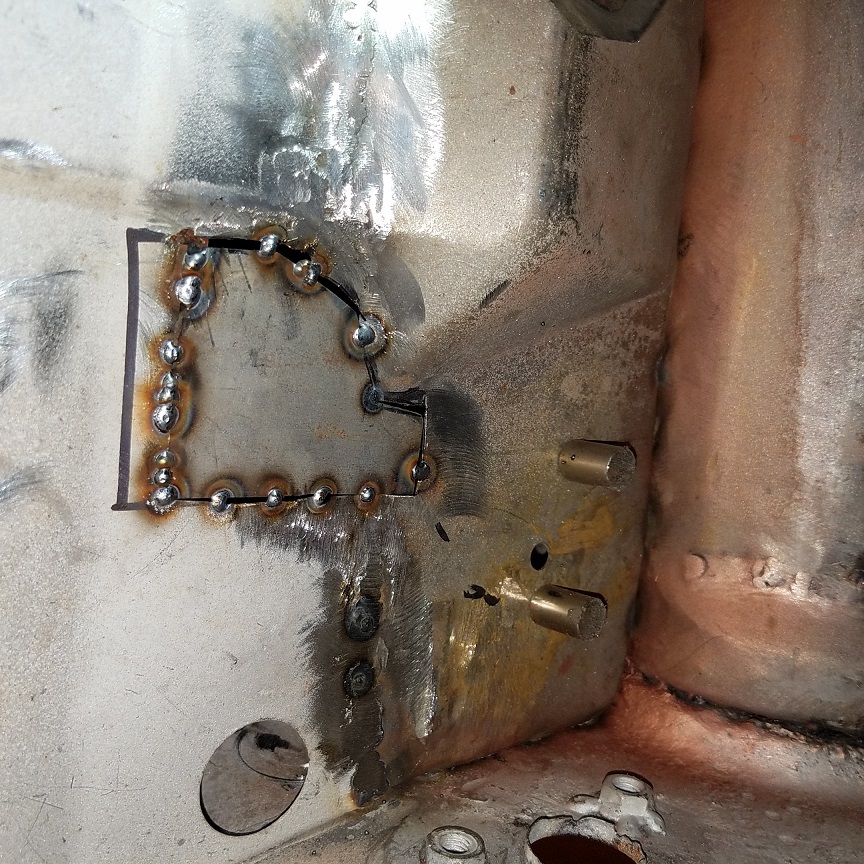
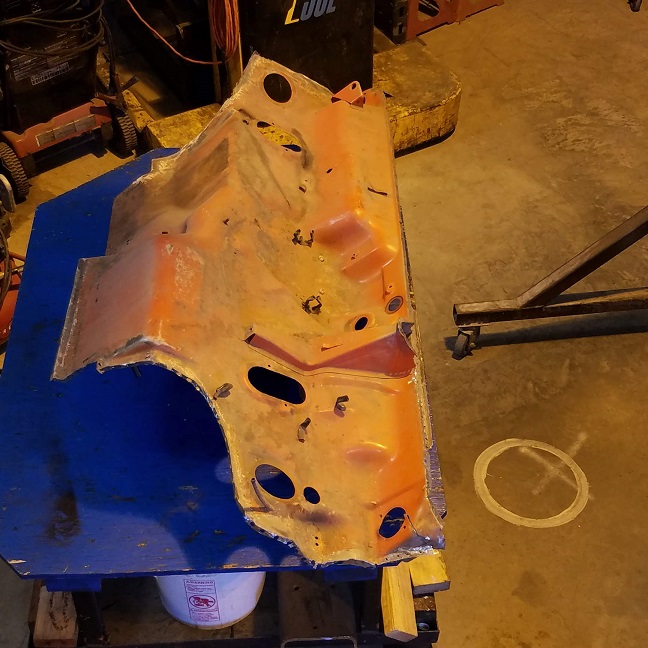
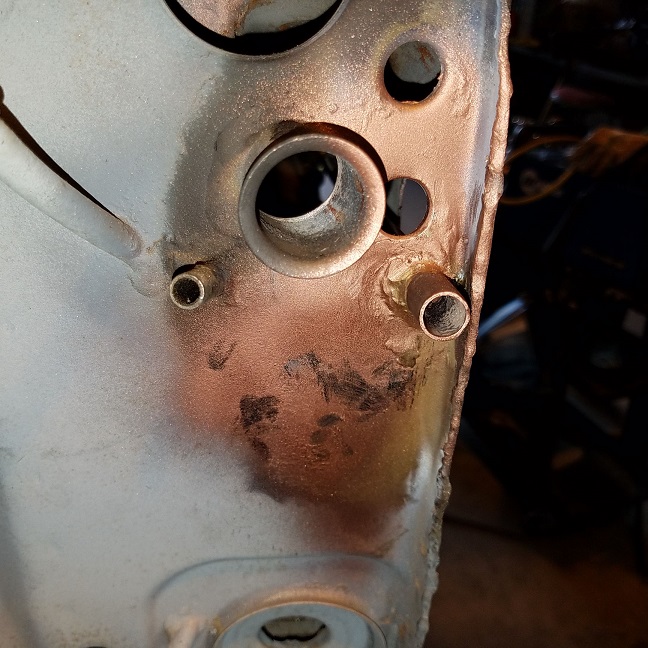
Now on to the dreaded bulkhead. Lots of spot weld cutter holes to build back up for a
new 1/4" hole. I'll ring them. Then sand/grind down. Then drill a new hole. Plus it strengthens the flange during the need for going in and out for fitting. 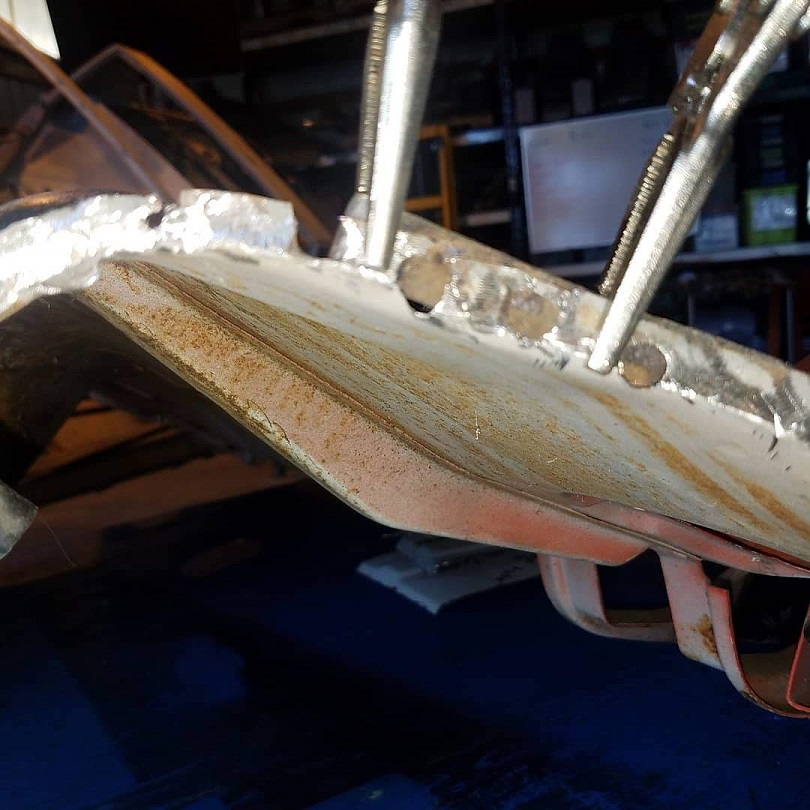 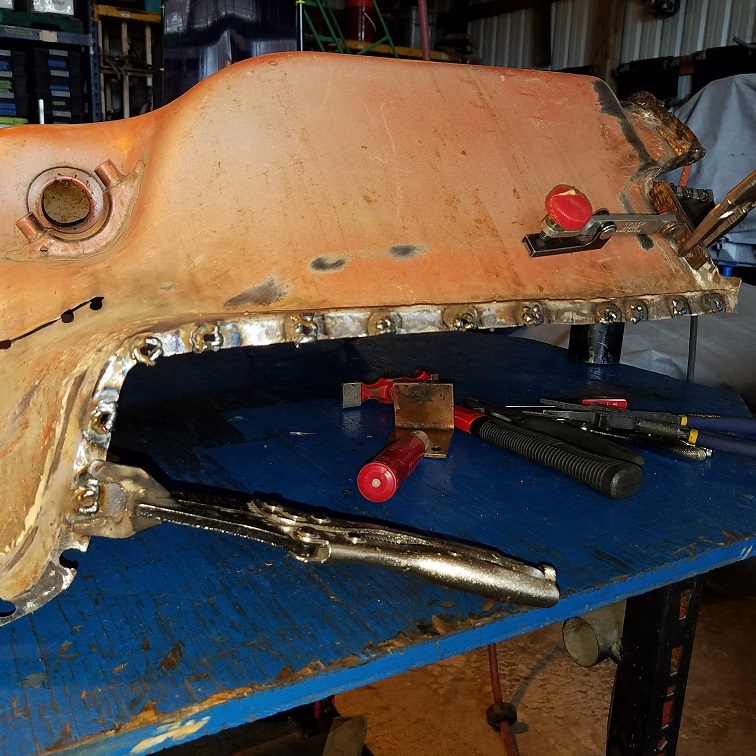 While I'm doing that Jack is creating some patterns for the hard sections that got tore up during removal. 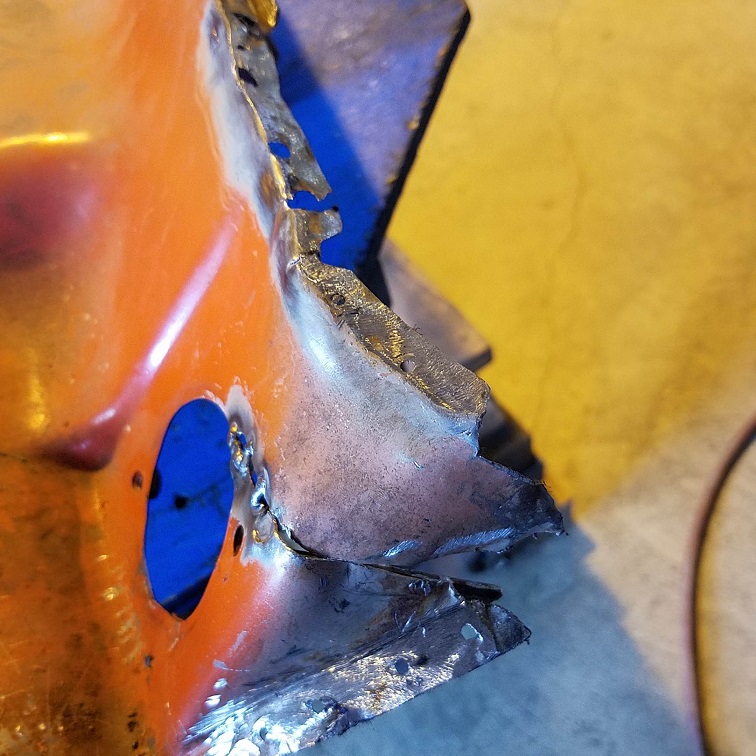 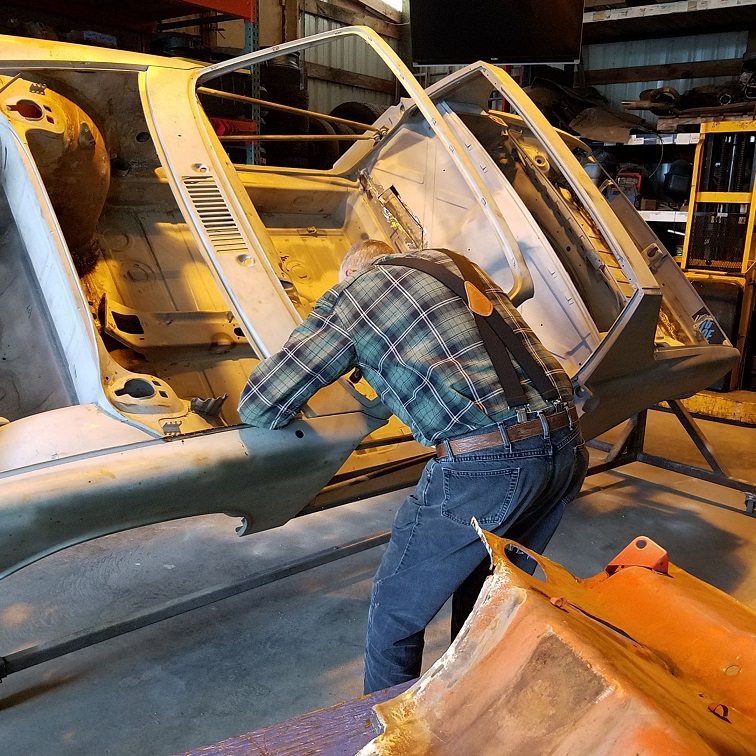 |
|
|
|
| cary |
Oct 14 2018, 08:49 PM
Post
#116
|
|
Advanced Member Group: Members Posts: 3,900 Joined: 26-January 04 From: Sherwood Oregon Member No.: 1,608 Region Association: Pacific Northwest |
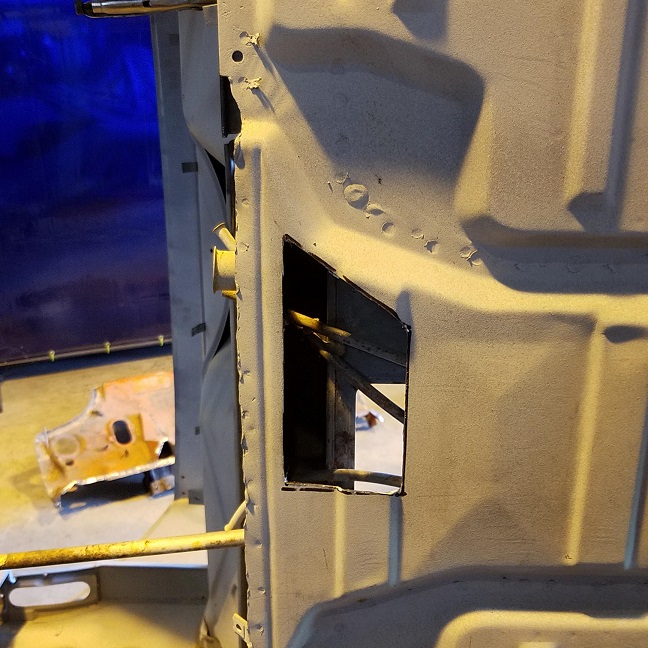
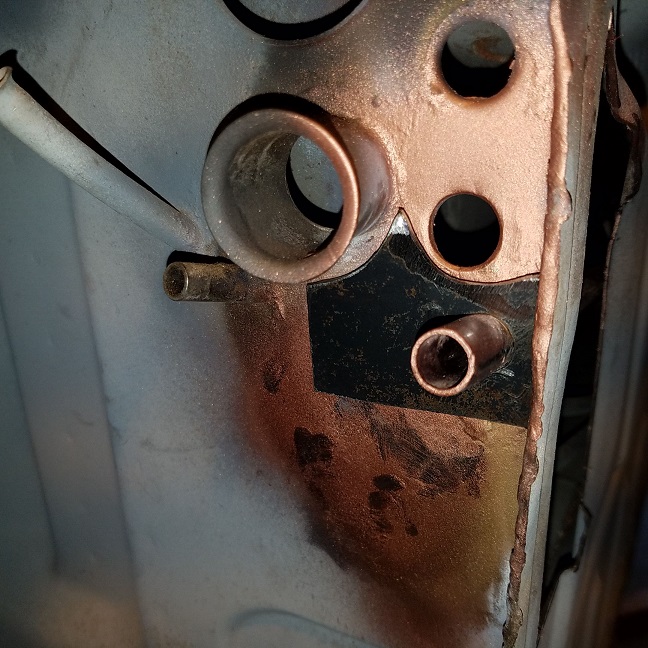
I forgot to post the continuation of the flange repairs to the front bulk head.
Numerous sections have to be removed and replaced. 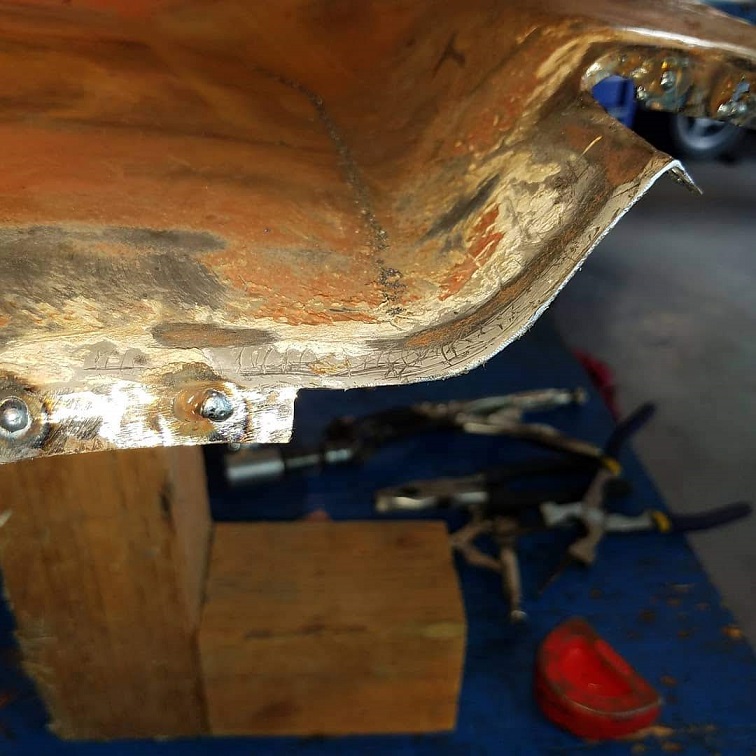 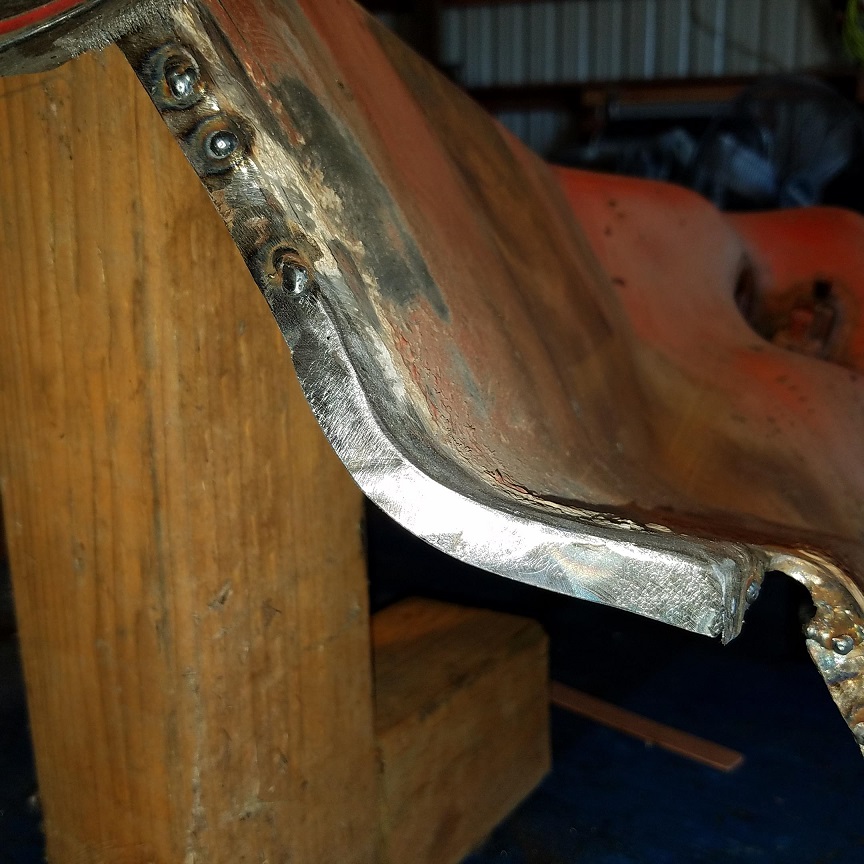 Cut outs continue. 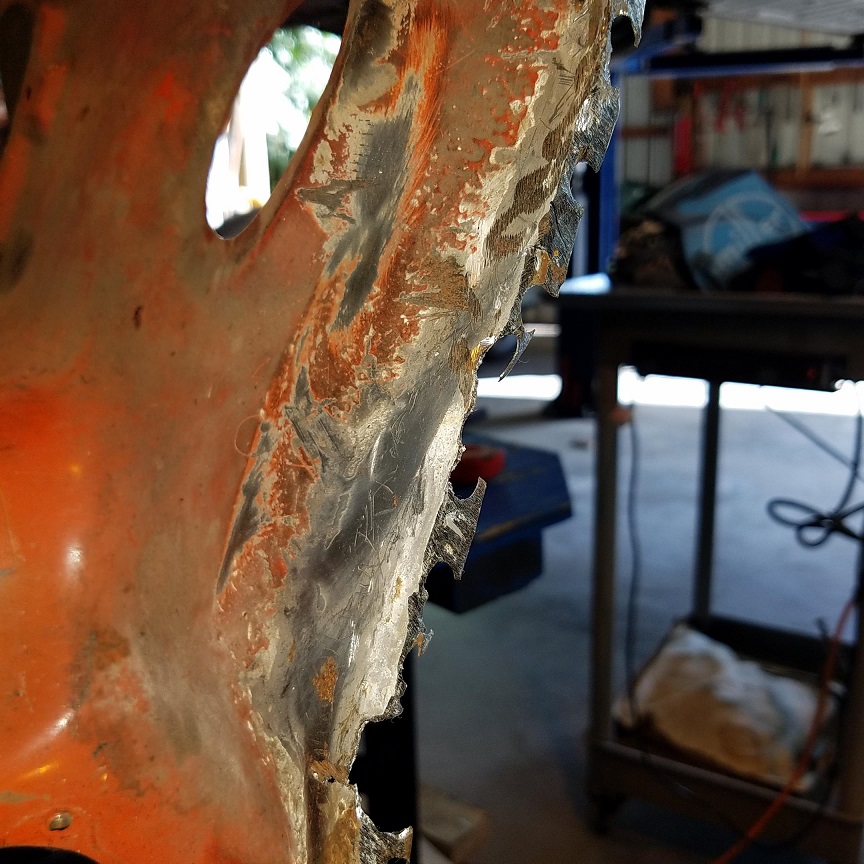 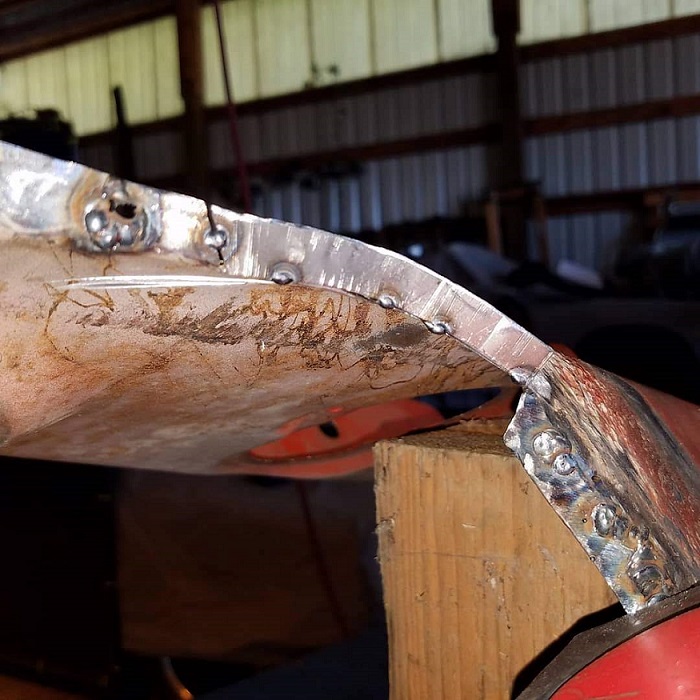 |
|
|
|
| cary |
Oct 15 2018, 08:14 AM
Post
#117
|
|
Advanced Member Group: Members Posts: 3,900 Joined: 26-January 04 From: Sherwood Oregon Member No.: 1,608 Region Association: Pacific Northwest |
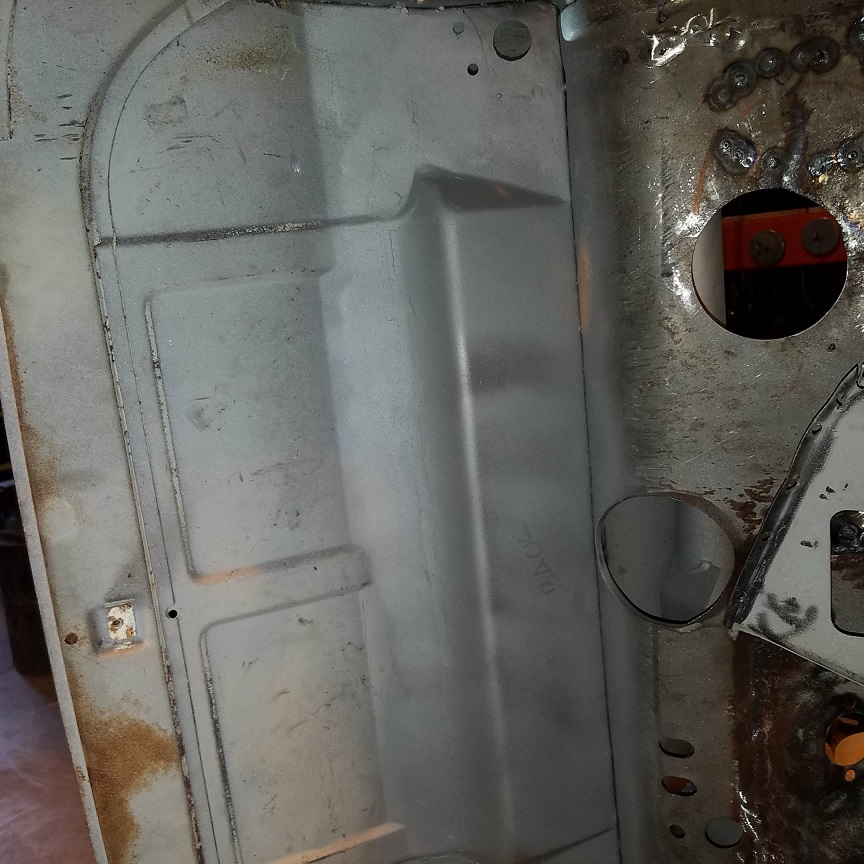
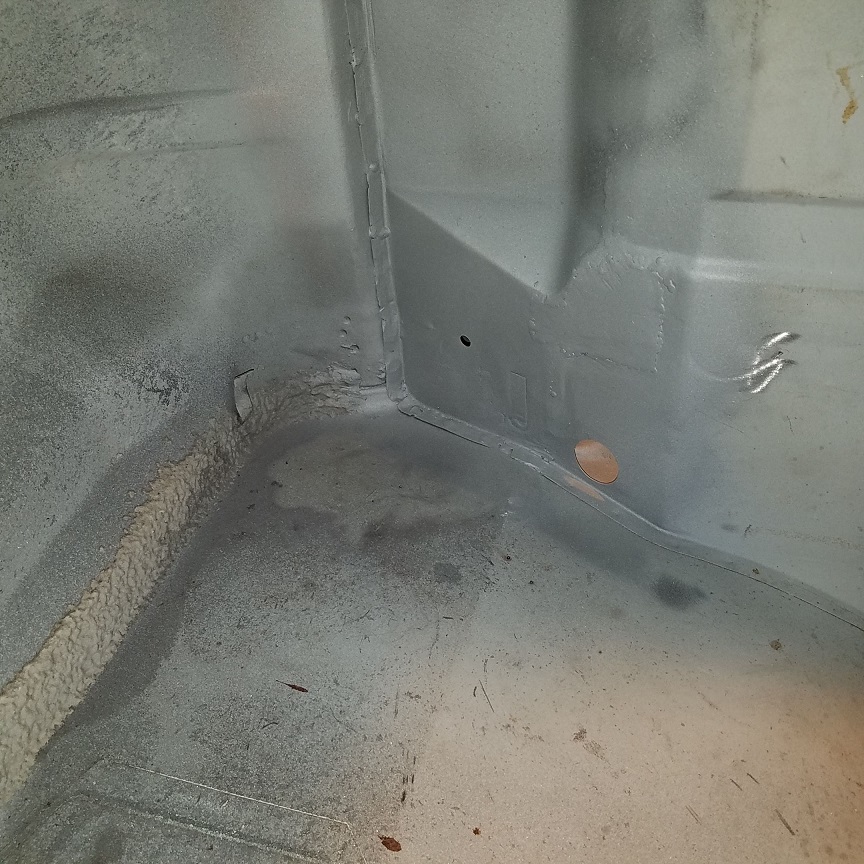
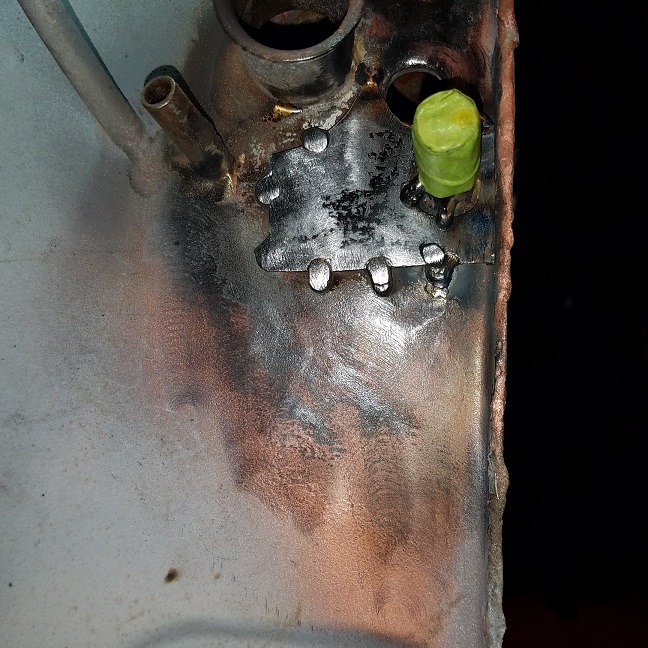
Decided to repair and install the chassis ties to get a better test fit of the bulk head. They would need to go in first anyway. But they too were pretty tore up so I'd been holding off.
More of the same on the flange repairs. Some hole filling, some cut out and replacement. But we got it tuned up and she got a nice coat of cold galvanizing on the inside. 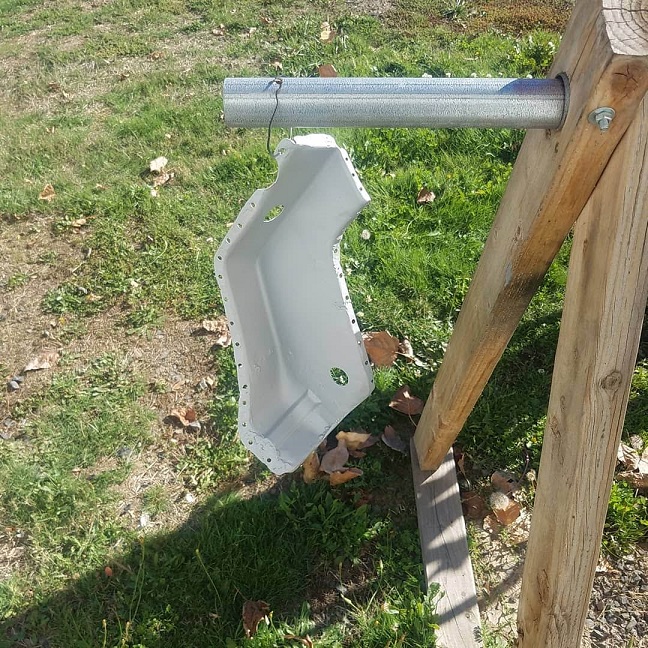 Here's where she goes. 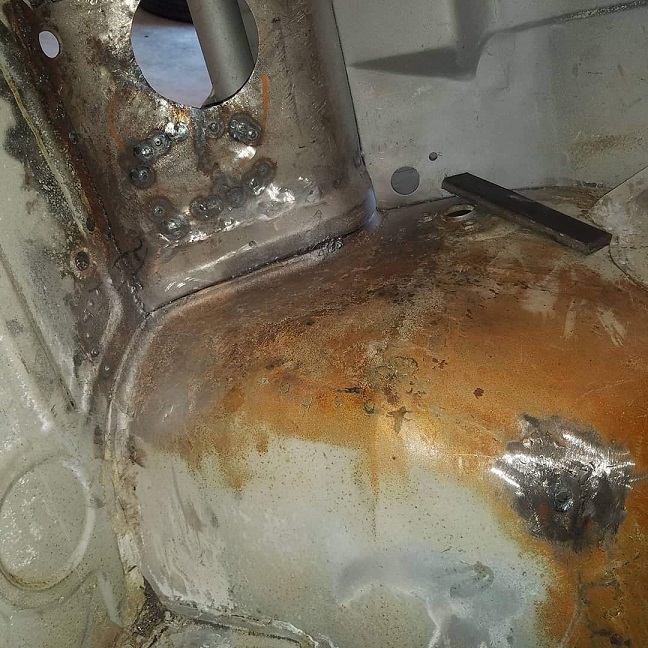 Test fitted and ready for screws. 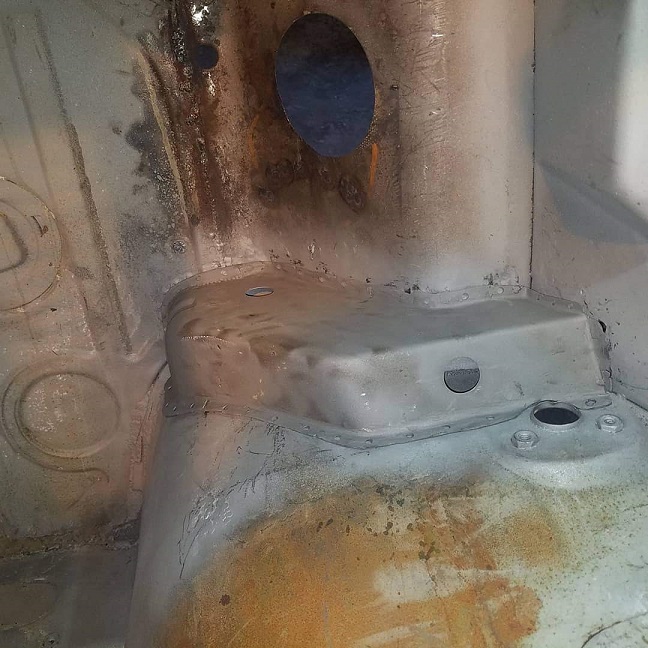 About 1/2 way welded in. Short day, heading out for dinner with the wife. Plus an oil change on the daughters car first thing this am. 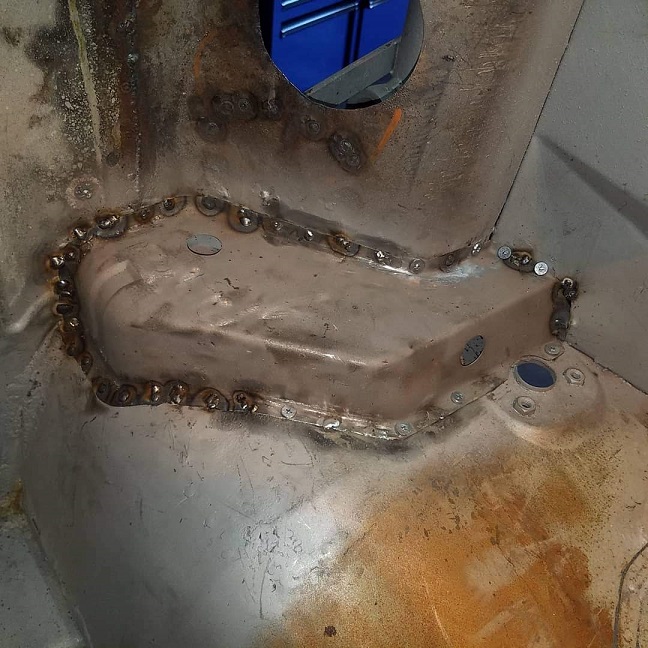 |
|
|
|
| mepstein |
Oct 15 2018, 08:21 AM
Post
#118
|
|
914-6 GT in waiting Group: Members Posts: 20,778 Joined: 19-September 09 From: Landenberg, PA/Wilmington, DE Member No.: 10,825 Region Association: MidAtlantic Region |
Cary - I have to applaud you for the way you save these cars. (IMG:style_emoticons/default/beerchug.gif)
|
 |
|
| Mikey914 |
Oct 15 2018, 10:54 AM
Post
#119
|
|
The rubber man Group: Members Posts: 12,782 Joined: 27-December 04 From: Hillsboro, OR Member No.: 3,348 Region Association: None |
I know Taylor appreciates it. This is much deeper than we 1st thought when we got into this. The idea was Taylor wanted to get some hands on in the metal department. He got a whole lot more than he bargained for.
Hoping this winter we can get this to paint, but still a ways to go. Let Taylor drive my 72 when we went to lunch, I know he misses it. (IMG:style_emoticons/default/driving.gif) |
|
|
|
| wes |
Oct 15 2018, 01:19 PM
Post
#120
|
|
wes Group: Members Posts: 1,613 Joined: 8-December 07 From: Ukiah Ca Member No.: 8,436 Region Association: Northern California |
Amazing work Cary! I’m quite sure Taylor will respect and care for that car far longer than if it were just bought in good condition. Plus gold metal memories of the intire project.
|
|
|
|
|
1 User(s) are reading this topic (1 Guests and 0 Anonymous Users)
0 Members:

|
Lo-Fi Version | Time is now: 23rd June 2026 - 08:31 PM |
Invision Power Board
v9.1.4 © 2026 IPS, Inc.