|
|
|
Porsche, and the Porsche crest are registered trademarks of Dr. Ing. h.c. F. Porsche AG.
This site is not affiliated with Porsche in any way. Its only purpose is to provide an online forum for car enthusiasts. All other trademarks are property of their respective owners. |
|
|

  |

| cary |
 Oct 20 2018, 08:26 AM Oct 20 2018, 08:26 AM
Post
#121
|
|
Advanced Member  Group: Members Posts: 3,900 Joined: 26-January 04 From: Sherwood Oregon Member No.: 1,608 Region Association: Pacific Northwest |
Jack is off with one of his Federal Highway buddies so I was all by myself.
A couple shots of the right tie brace all finished up. 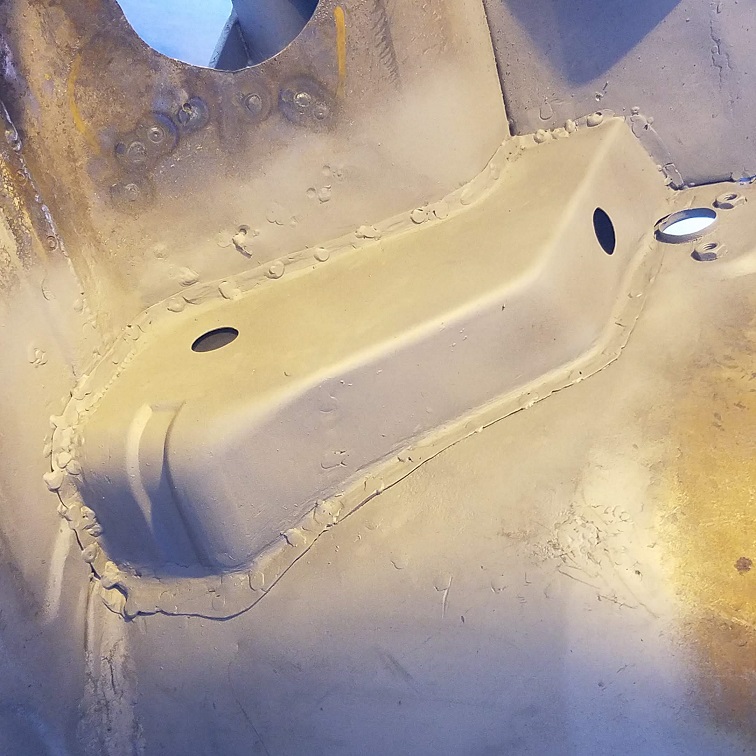 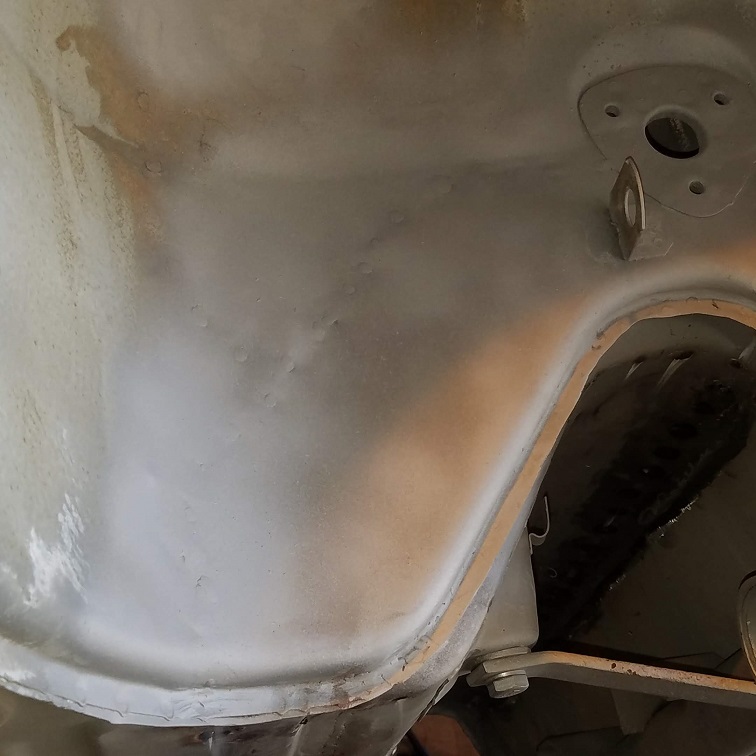 I didn't over grind the spot welds. It will get sprayed with seam sealer. Probably should changed out more of the flange to get a smoother and flatter surface. Or maybe I could have used the Lenco panel spot welder. I decided I'd leave rebuilding the flnges on the other brace to Jack. I'll start checking things off the list. First order of business is welding in the patch panels Taylor cut out from a donor firewall. Test fit #1 on the left side panel. 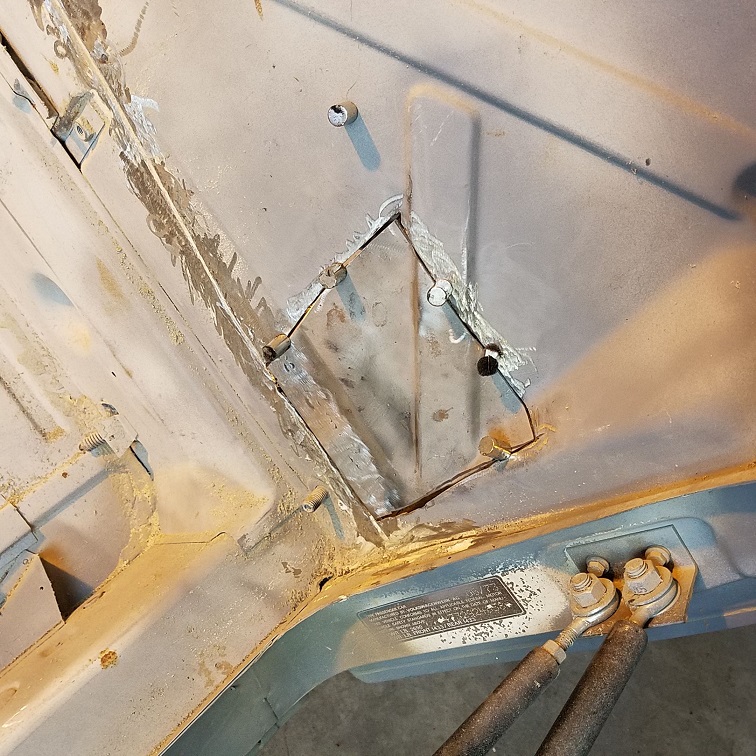 Bottom flange was junk so I cut off the bottom 1/2" and added on some new metal. 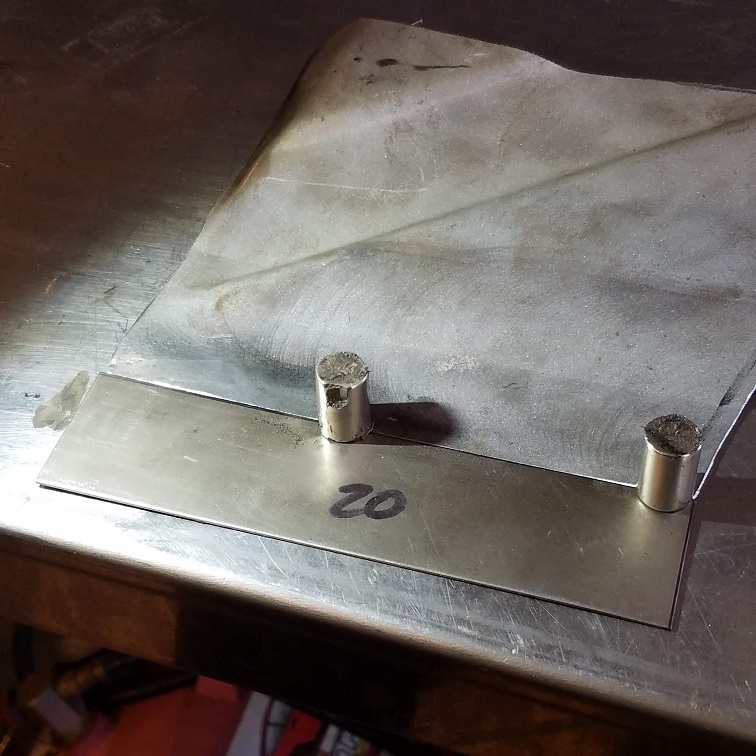 Tacked into place. But I did stop and fill the big gap in the corner before moving to the other and harder patch. 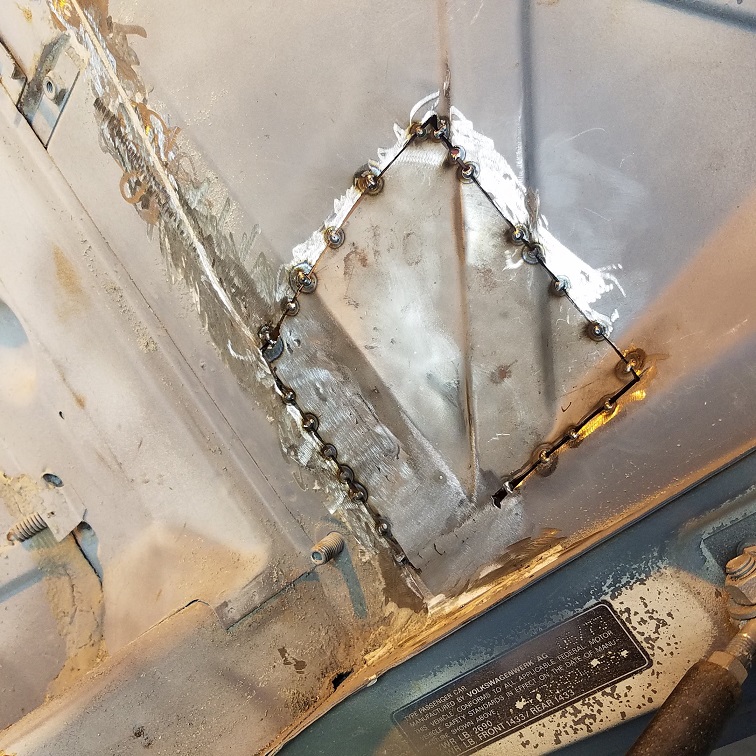 |
   |

 
|
| cary |
Oct 20 2018, 08:45 AM
Post
#122
|
|
Advanced Member Group: Members Posts: 3,900 Joined: 26-January 04 From: Sherwood Oregon Member No.: 1,608 Region Association: Pacific Northwest |
Now on to the more difficult patch. In Taylor's defense the front shots don't tell all the story. Not only was he matching up the front. We're carrying the engine shelf on the backside with us. More photos tomorrow.
The starting point. 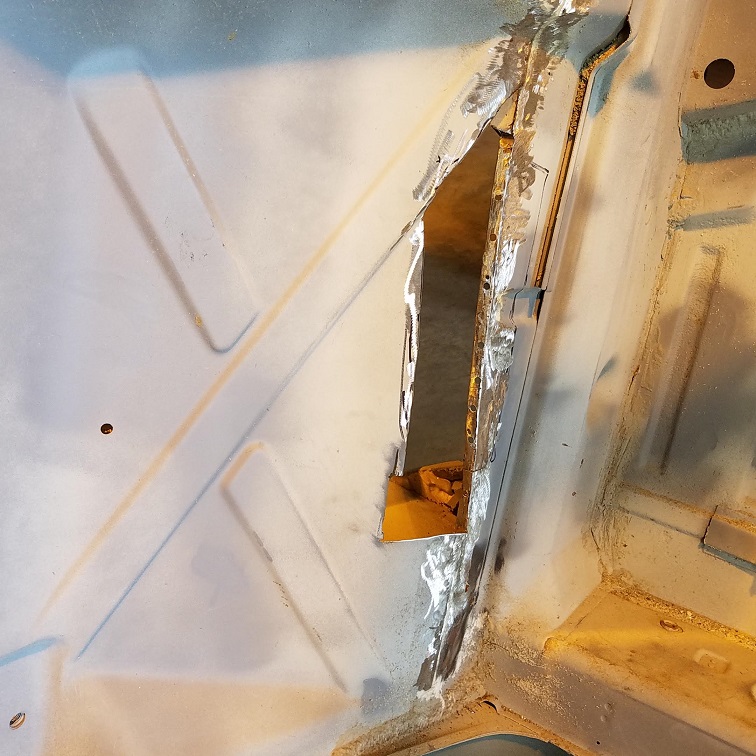 Test fit. 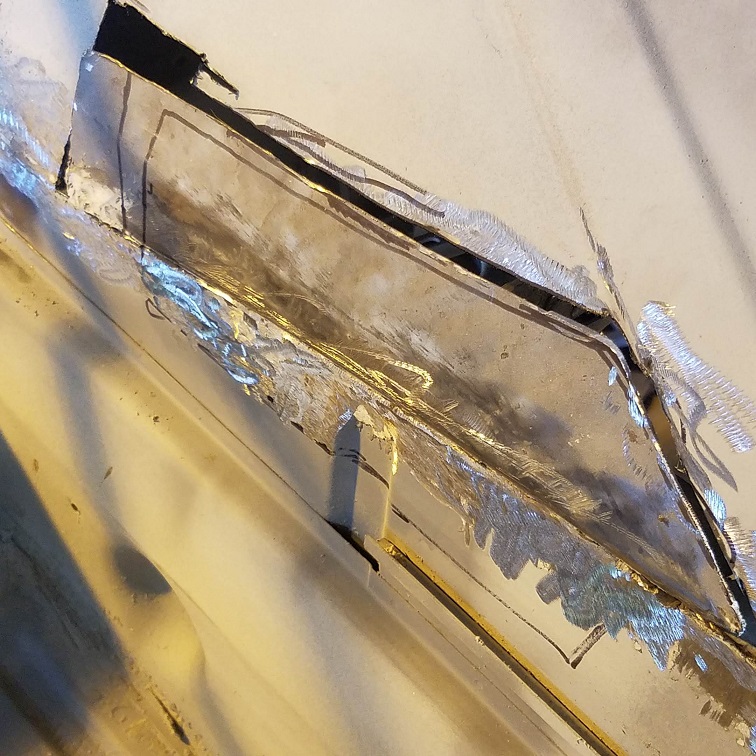 Trimmed and locked in. Added a flange to the outer right big hole. 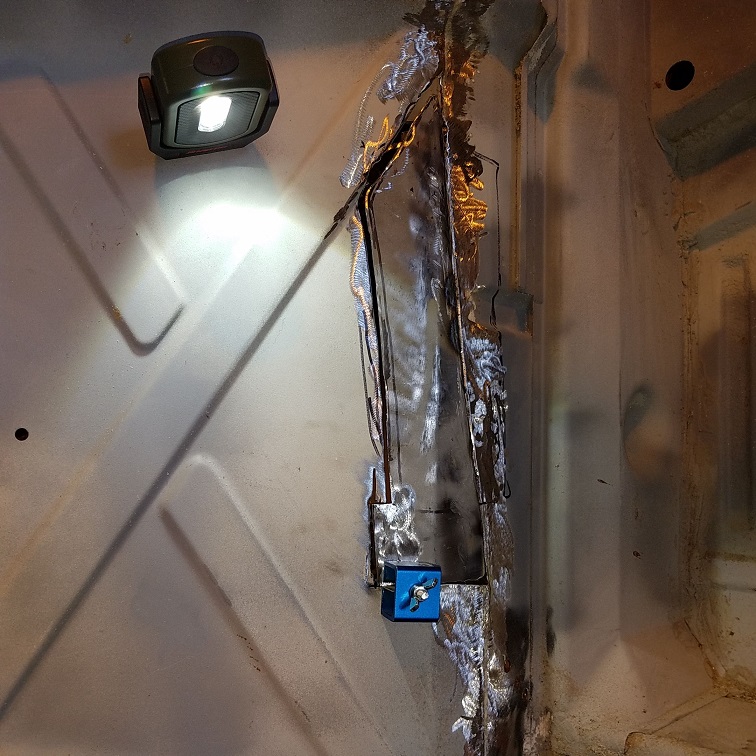 Welded in and heading home ............... I'll finish tomorrow. Won't over do it. Beings that this will be a fair weather driver and both sides will be covered up with 914 Rubber parts. Front side sprayed with seam sealer. 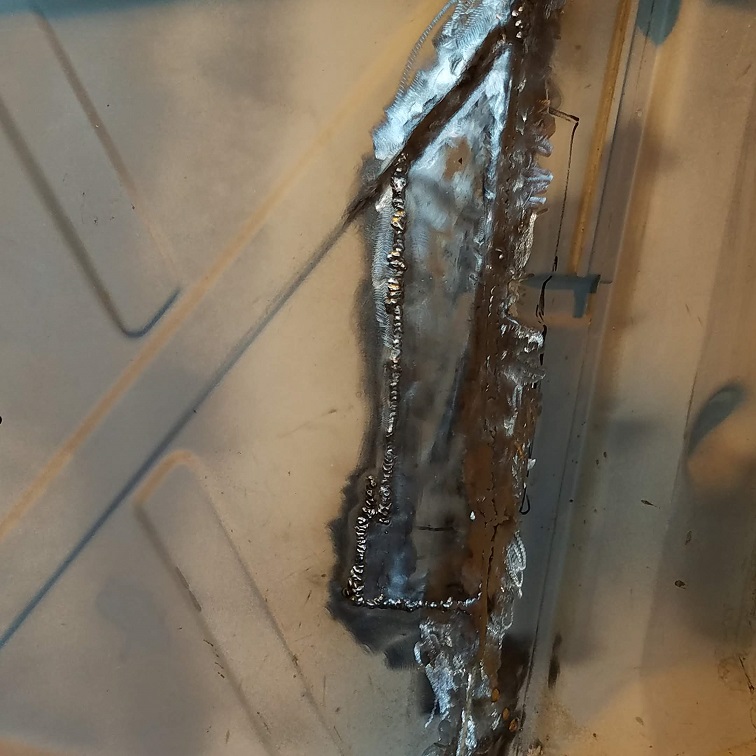  Almost out of gas, showing about 4%. Will probably have to steal the one off the 180. |
|
|
|
| cary |
Oct 22 2018, 09:23 PM
Post
#123
|
|
Advanced Member Group: Members Posts: 3,900 Joined: 26-January 04 From: Sherwood Oregon Member No.: 1,608 Region Association: Pacific Northwest |
Here's the left side all tidied up on the front side.
 Here's the right side with the welds all tuned up. Once again, it will be sprayed with seam sealer after it's primered. 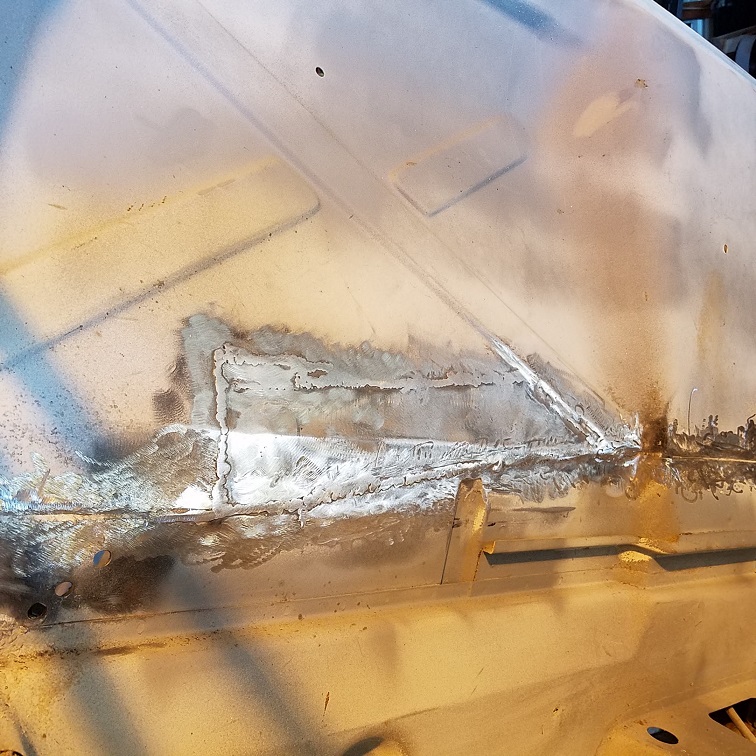 Back side of both patches. 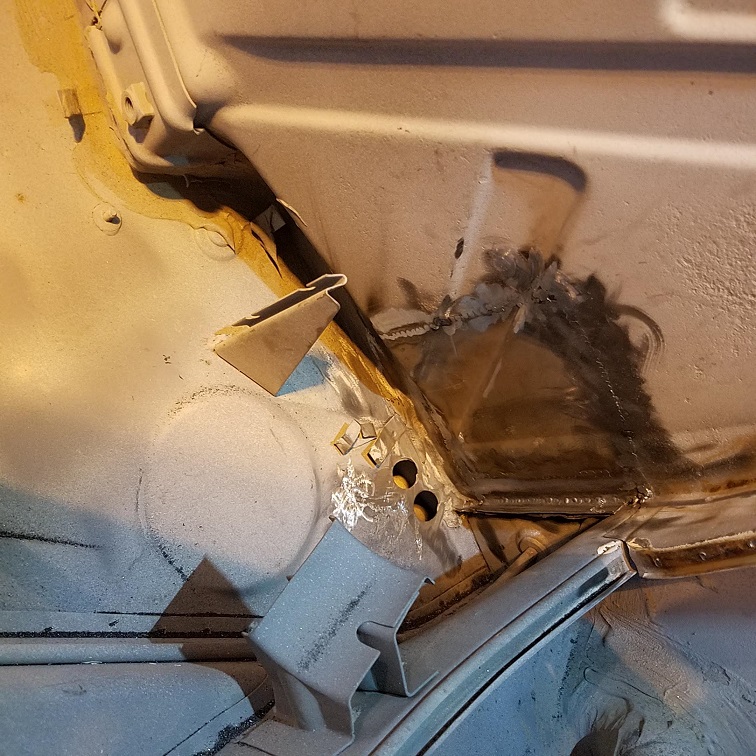 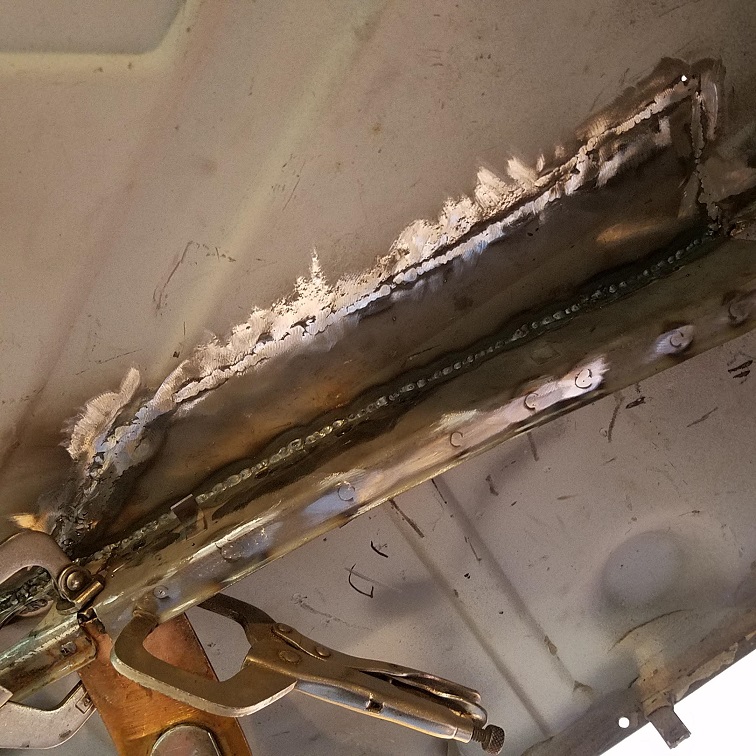 Next, onto filling the large gap in the engine shelf. 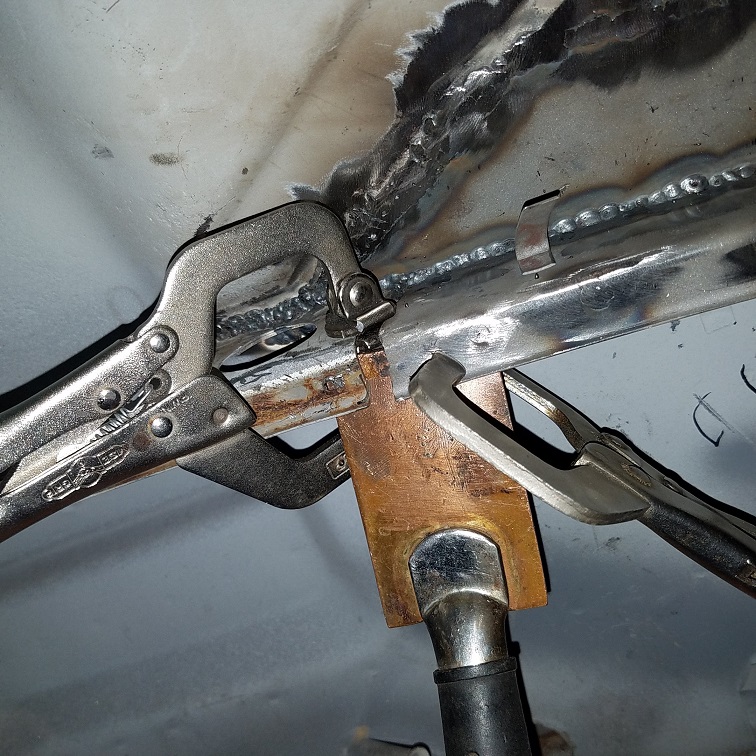 Here's where I was at after building up both sides twice. Then I cut down the welds to keep it from pilling up. 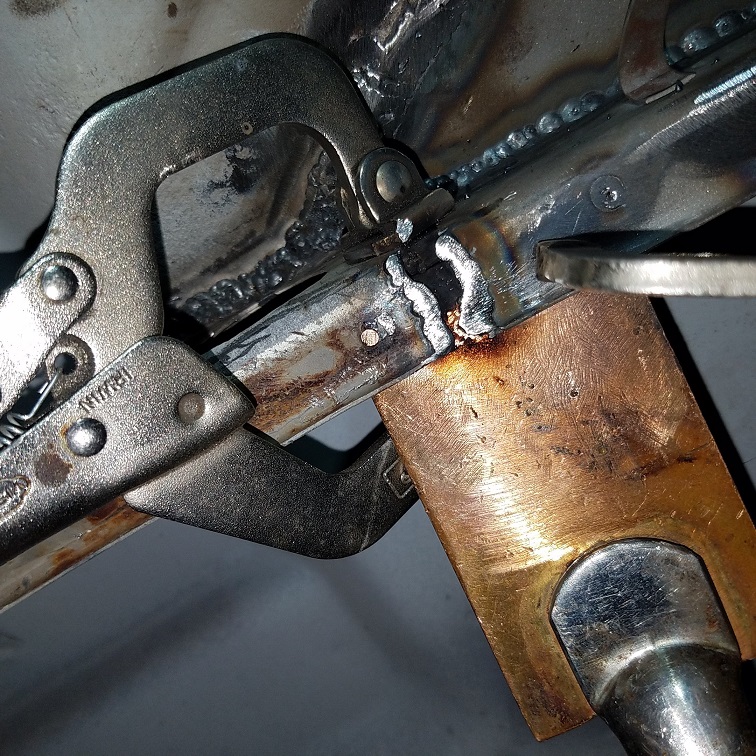 The front after a little tuning. 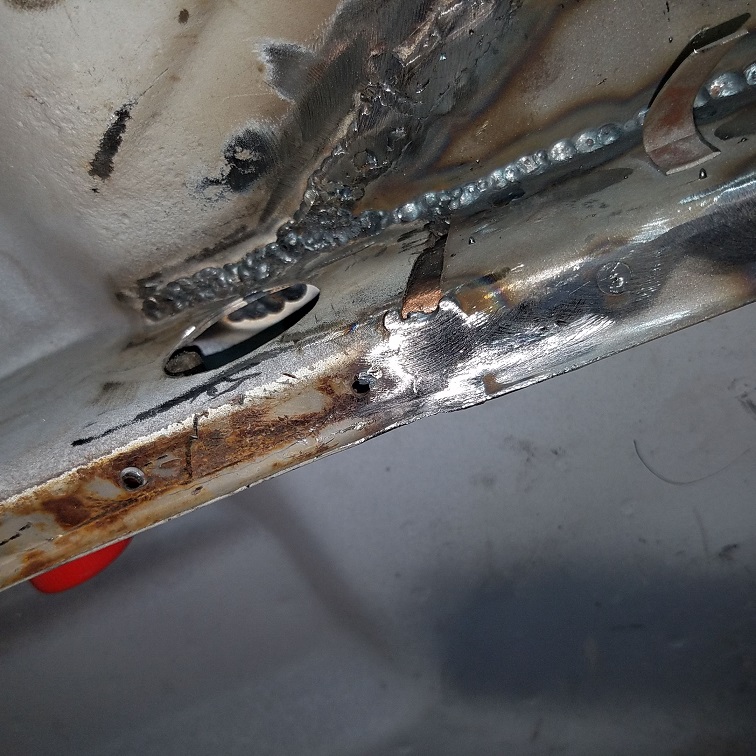 The under side of the engine tray after welding up the rosettes. 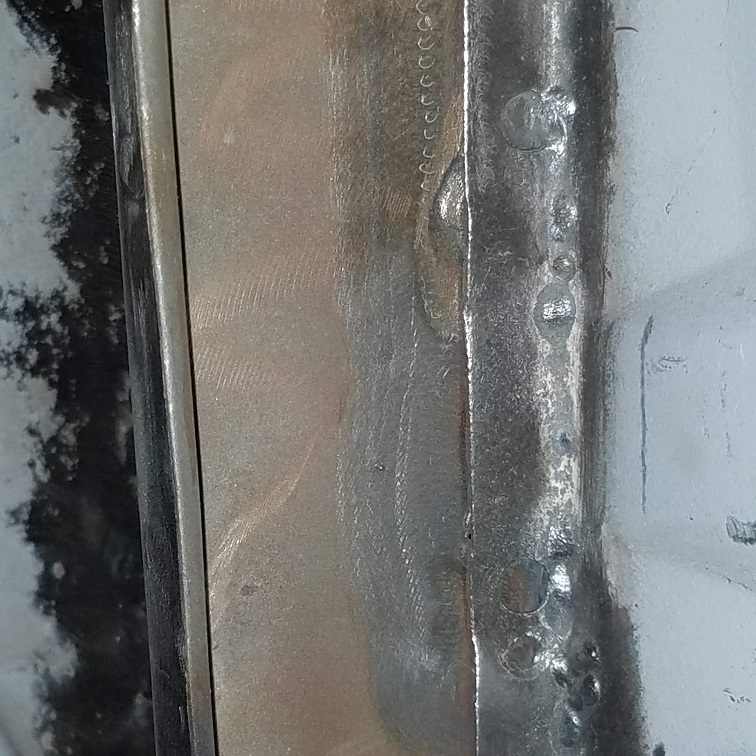 |
|
|
|
| dan10101 |
Oct 22 2018, 10:49 PM
Post
#124
|
|
TORQUE-o-holic Group: Members Posts: 1,140 Joined: 29-April 03 From: Eagle Point, Or Member No.: 626 Region Association: Pacific Northwest |
Looking good. Thanks for posting.
I have a bunch of sheet metal work to do and this really helps me with ideas! I need to find some copper scraps.... |
|
|
|
| cary |
Oct 23 2018, 08:14 AM
Post
#125
|
|
Advanced Member Group: Members Posts: 3,900 Joined: 26-January 04 From: Sherwood Oregon Member No.: 1,608 Region Association: Pacific Northwest |
I see it as my way of giving back for all the help I received over the years.
Here's a shot of the white board. We keep chipping away at it. While I'm working on the list Jack is rebuilding the left chassis brace / tie. 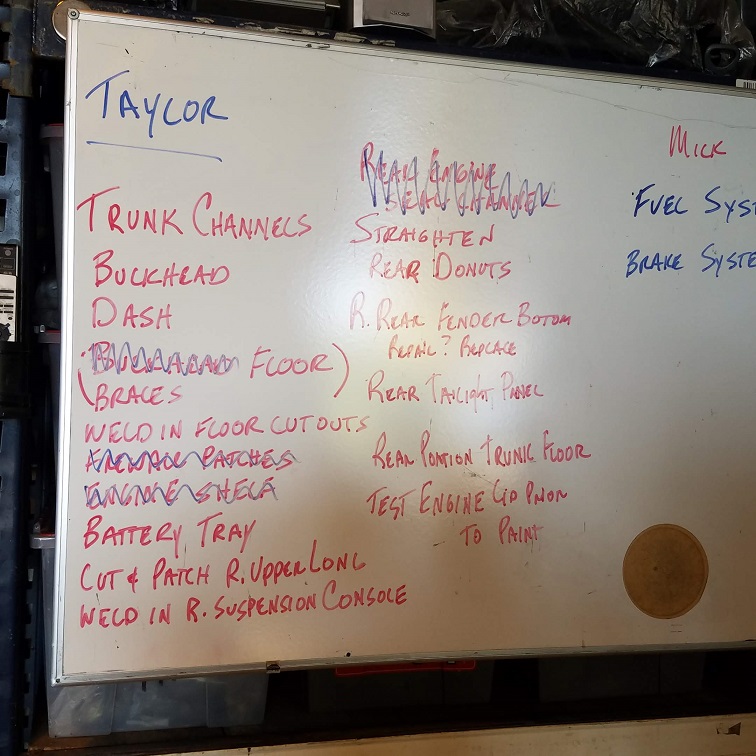 |
|
|
|
| cary |
Oct 23 2018, 08:18 AM
Post
#126
|
|
Advanced Member Group: Members Posts: 3,900 Joined: 26-January 04 From: Sherwood Oregon Member No.: 1,608 Region Association: Pacific Northwest |
While I'm going in and out from the engine bay with the car on the rotisserie I'm wearing the bump hat Mike (Warpig) gave to me.
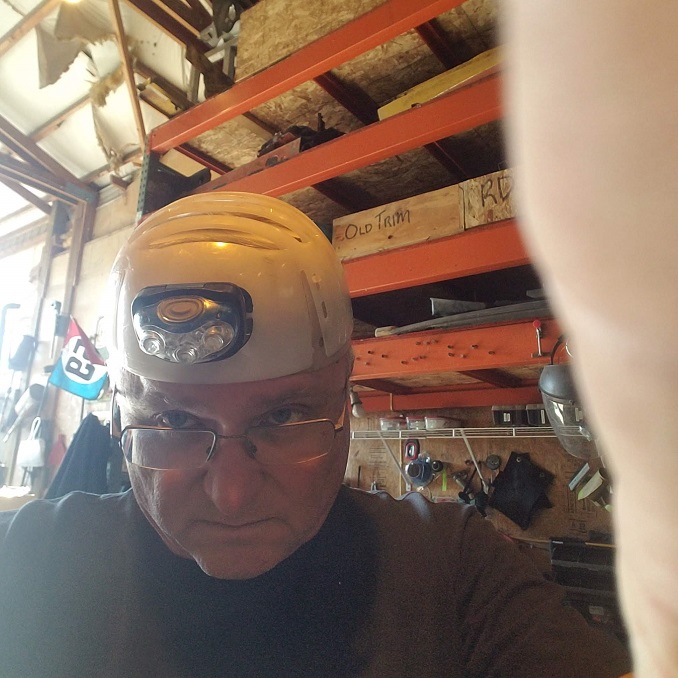 Lots of ugly thing to catch your head on. 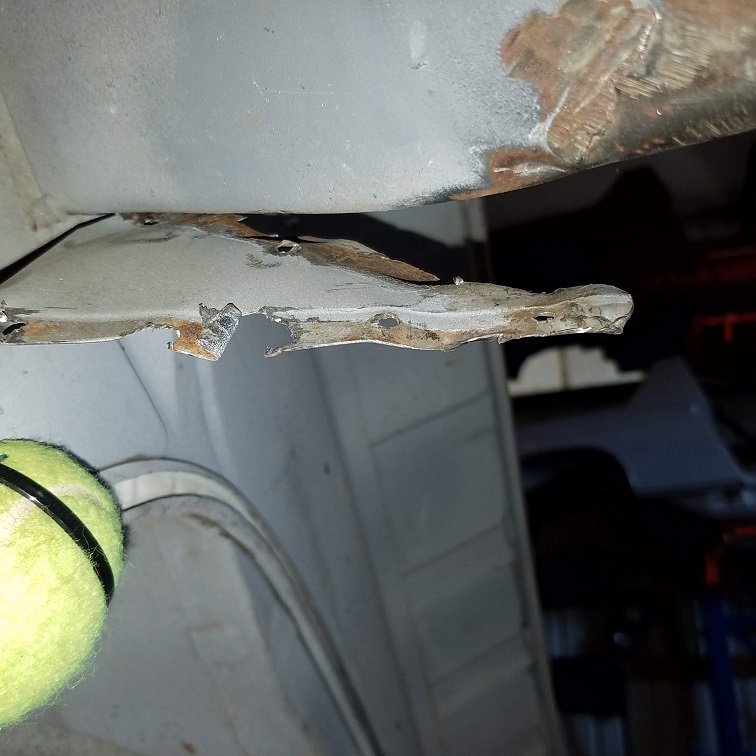 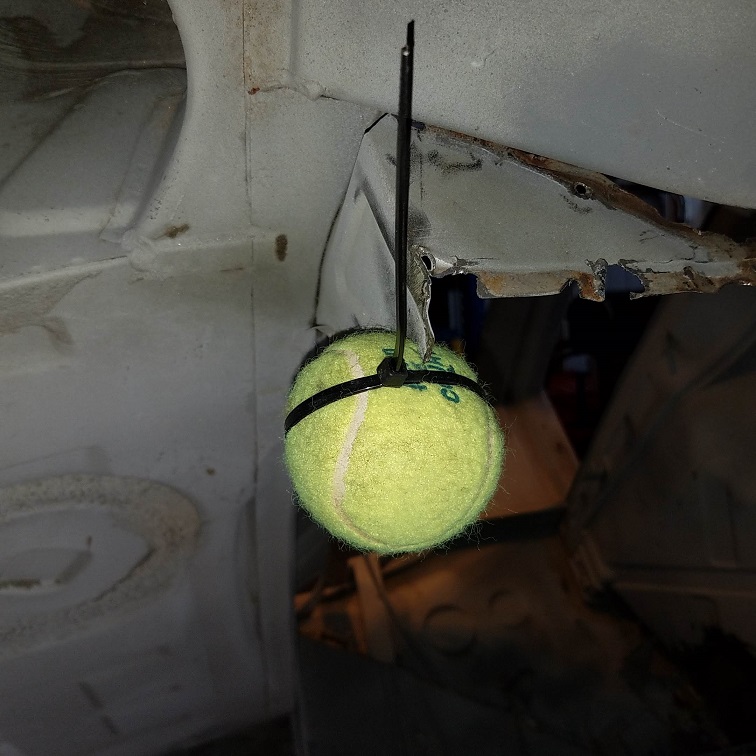 I've forgotten to mention .............. the sand keeps coming. 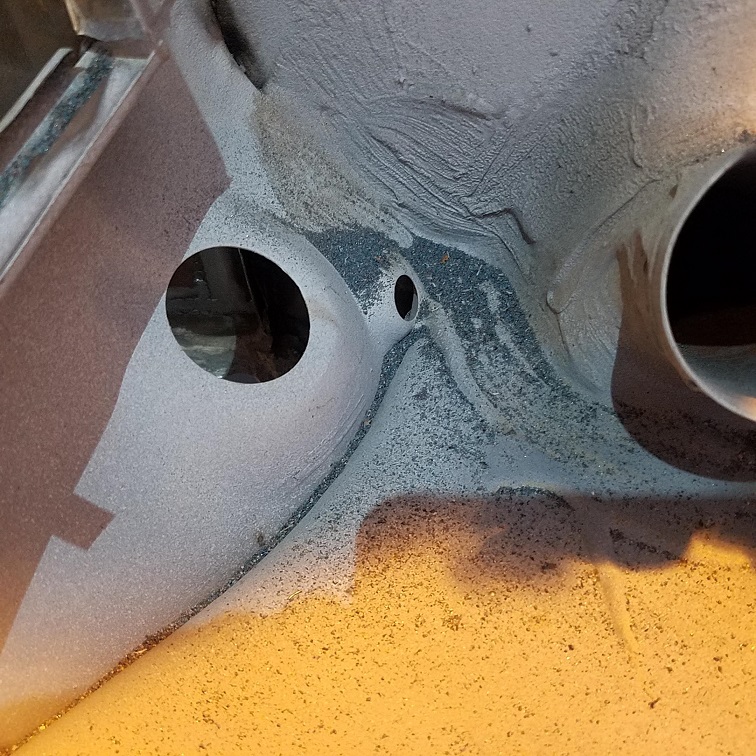 |
|
|
|
| cary |
Oct 23 2018, 08:21 AM
Post
#127
|
|
Advanced Member Group: Members Posts: 3,900 Joined: 26-January 04 From: Sherwood Oregon Member No.: 1,608 Region Association: Pacific Northwest |
Picked a couple new cans of Rustoleum cold galvanizing.
Here's a shot of the front of the right patch sealed up. 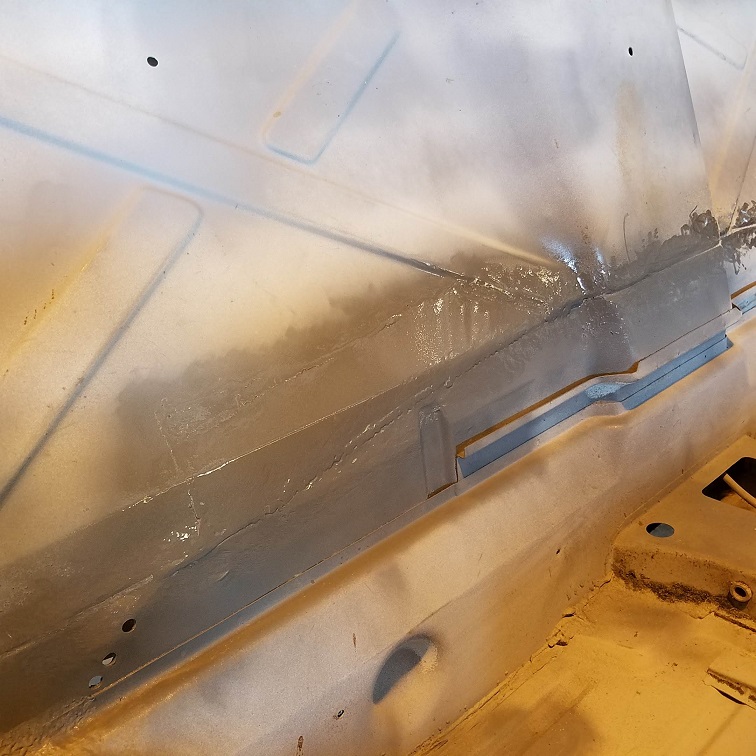 |
|
|
|
| bbrock |
Oct 23 2018, 08:30 AM
Post
#128
|
|
914 Guru Group: Members Posts: 5,269 Joined: 17-February 17 From: Montana Member No.: 20,845 Region Association: Rocky Mountains |
Oh boy do I need that hat! Cut my ear last night on the corner of the windshield frame as I backed out after installing sound deadener. That engine bay is nothing but a head gasher.
|
|
|
|
| cary |
Oct 23 2018, 08:30 AM
Post
#129
|
|
Advanced Member Group: Members Posts: 3,900 Joined: 26-January 04 From: Sherwood Oregon Member No.: 1,608 Region Association: Pacific Northwest |
On to the rear engine seal channel. Decided to go with the new one I had in stock.
We would be time, which is $$ ahead. Filled all the spot weld removal holes on the engine tray. 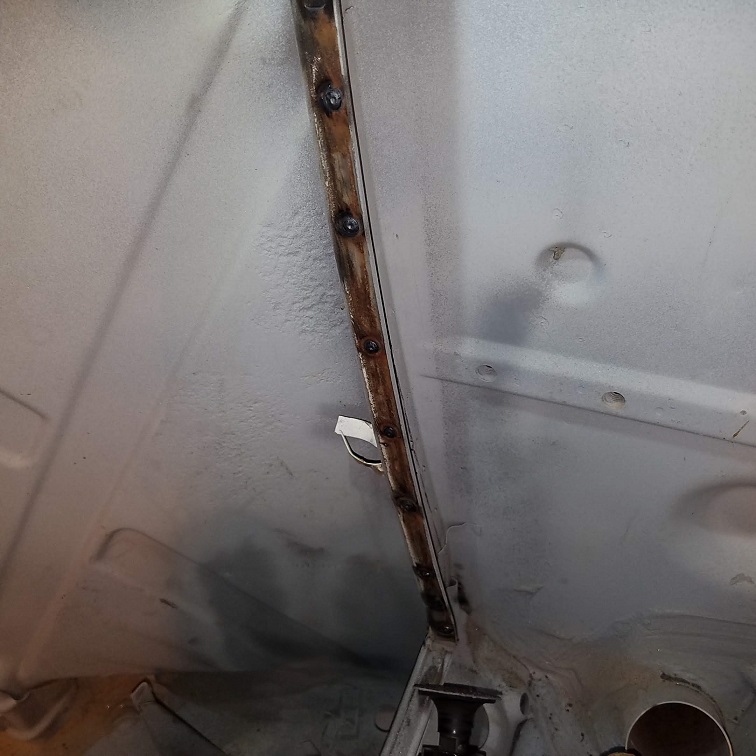 Then moved on to shaping the straight piece to the curved rear engine tray. Tried a couple different ways outside the car. No go. Wrinkled the rolled lip. So I started on the right end and clamped it down with a pair of 6R Vice Grips. Then heated it with the Mapp gas torch. Working about 2" at a time. Go my curve/shape then clamped it again. Rinse and repeat until I got to the other side. 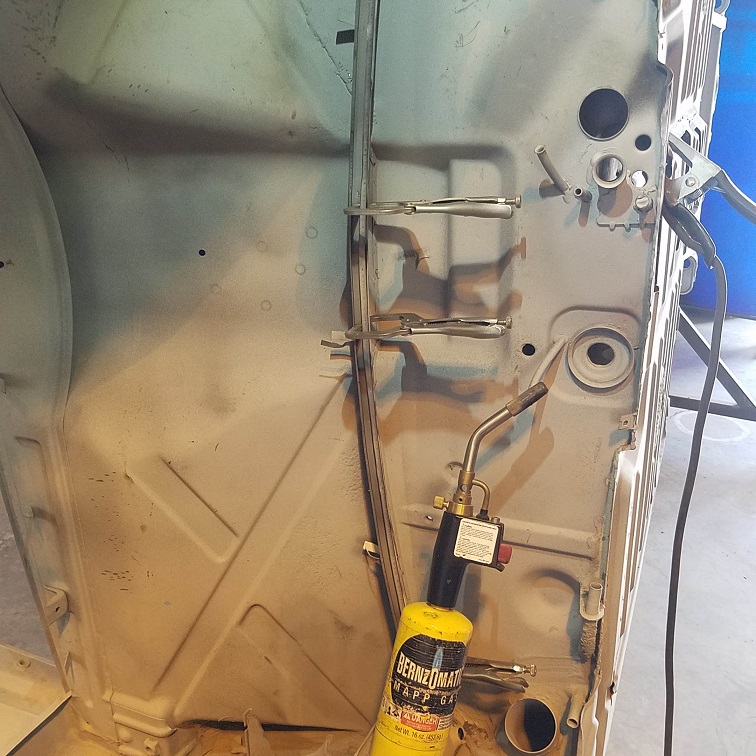 Drilled 5/32 holes every 2" and welded it into place. |
|
|
|
| cary |
Oct 24 2018, 08:23 AM
Post
#130
|
|
Advanced Member Group: Members Posts: 3,900 Joined: 26-January 04 From: Sherwood Oregon Member No.: 1,608 Region Association: Pacific Northwest |
Onto the rest of Monday's work. Waiting for powder coating at Rothsport.
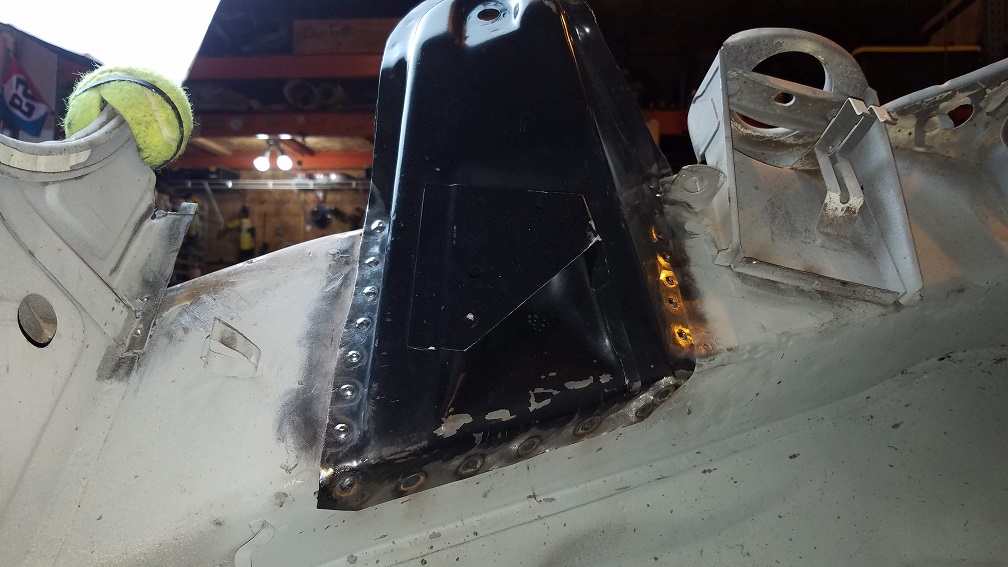
Staying in the engine bay. On to installing the right suspension mount. But first, doing a little patching on the upper long. 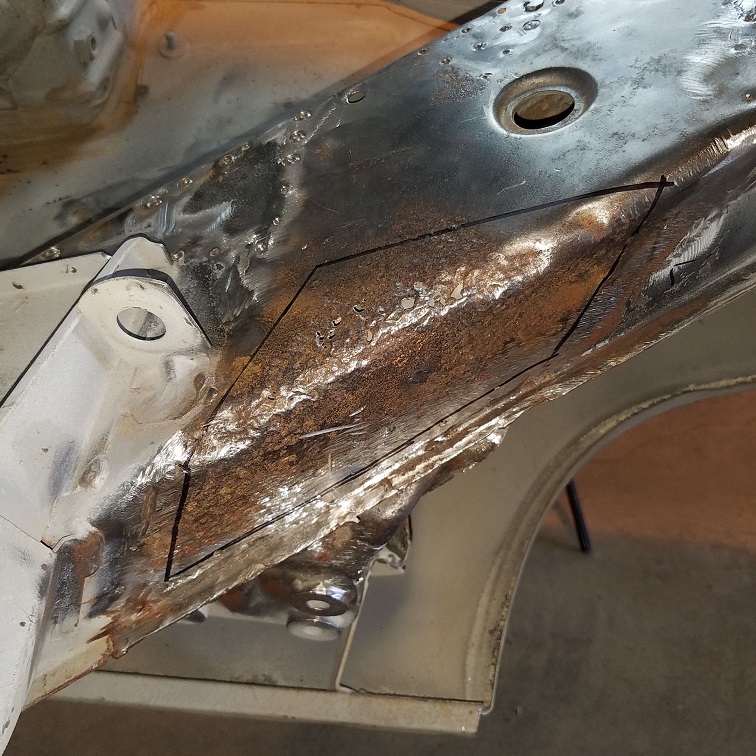 Hell hole is in relatively good shape. Just need to weld up the spot weld cutting holes from removing the right engine shelf. 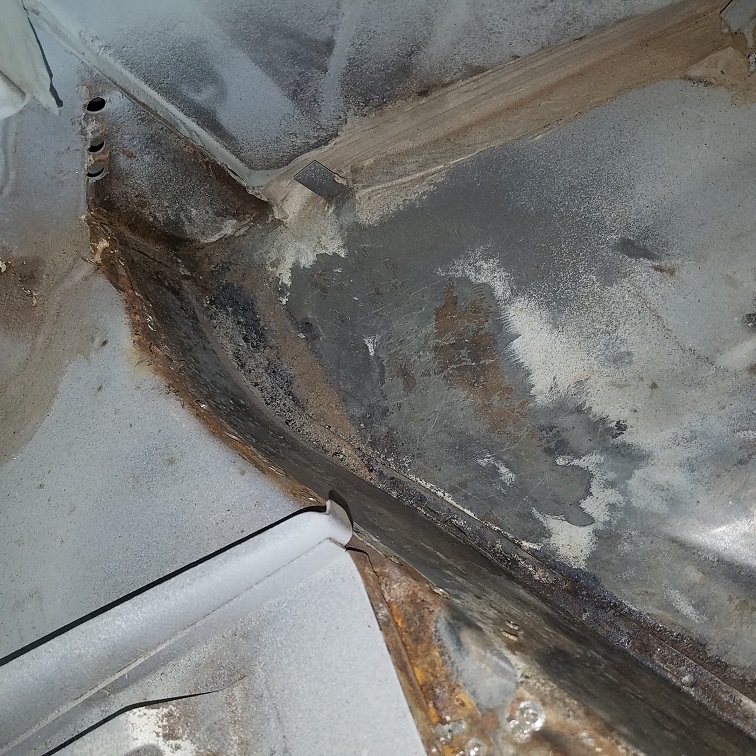 Scalpel ................ Cutting away the outer layer of the upper long. 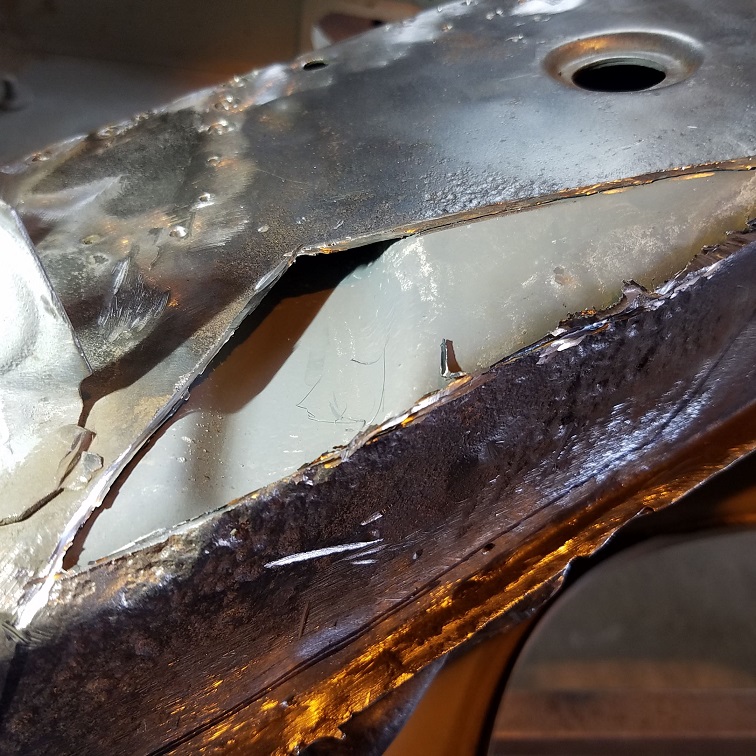 The inner box support look pristine. Next a little work with the lie detector (wire cup brush). Under suspension mount welded up. Hell hole ramp is a before shot. But its all done. 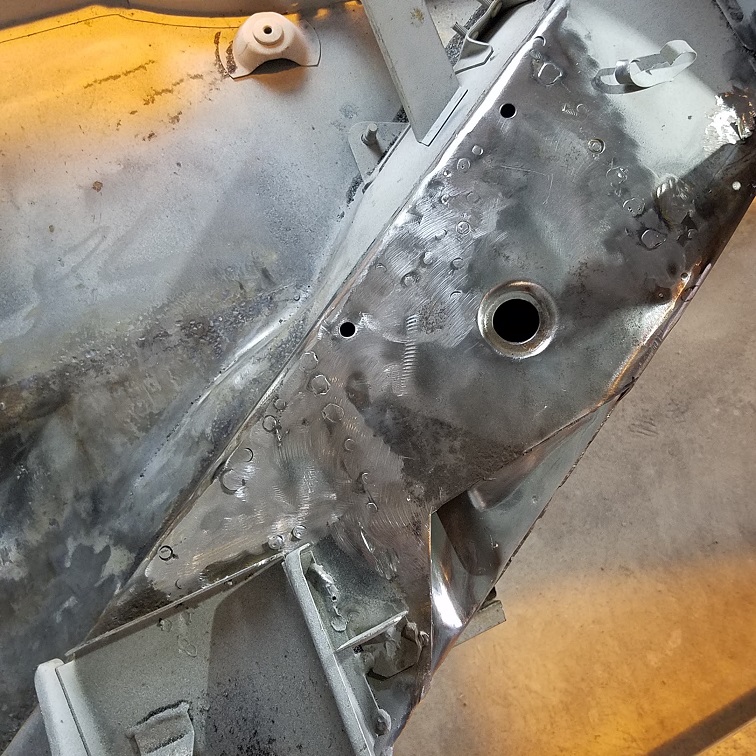 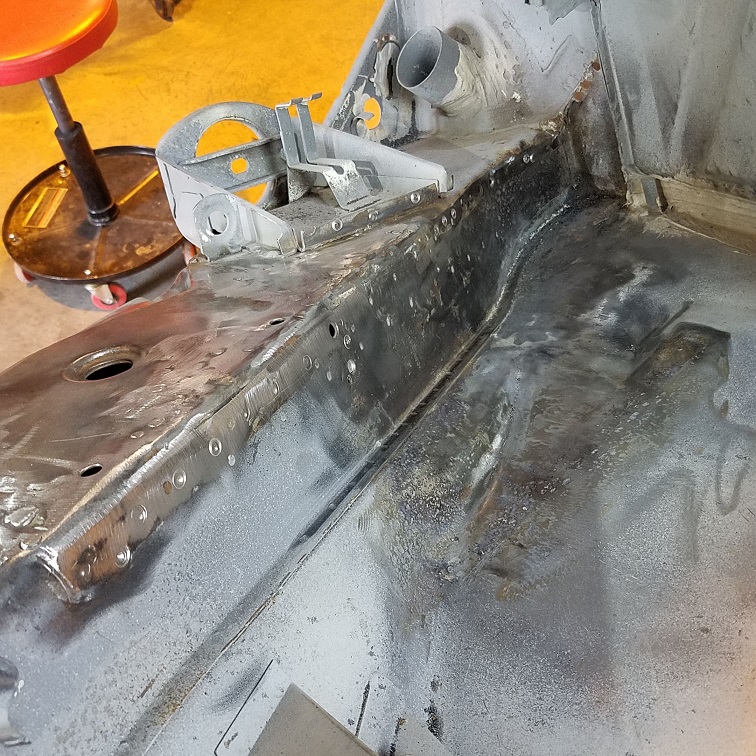 Patch all ready to go. Opened area sprayed with Weld Thru primer. 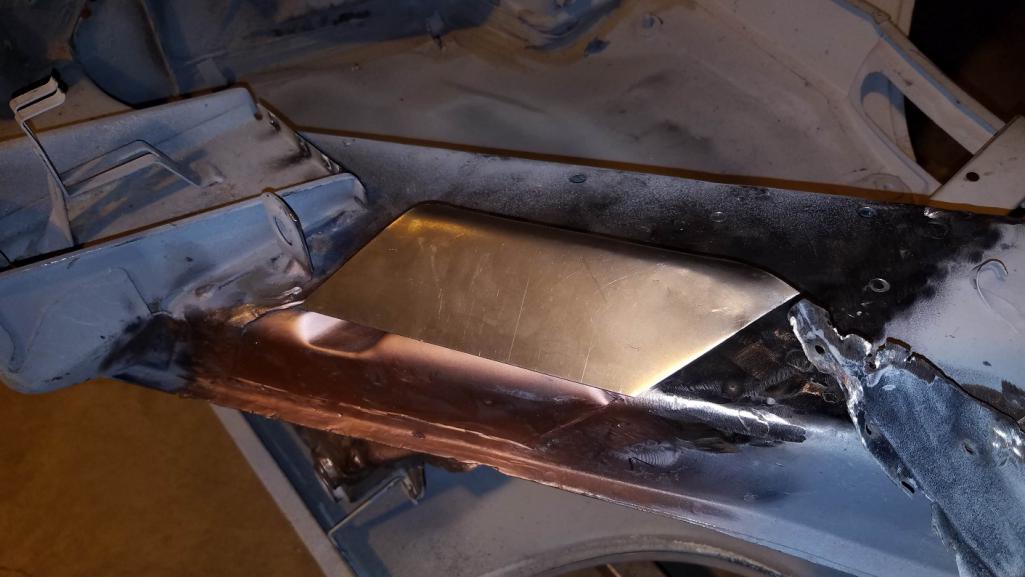 |
|
|
|
| cary |
Oct 27 2018, 08:47 PM
Post
#131
|
|
Advanced Member Group: Members Posts: 3,900 Joined: 26-January 04 From: Sherwood Oregon Member No.: 1,608 Region Association: Pacific Northwest |
Back to it. Welding in the patch left from Monday's work.
A few self tapping screws and a clamp. 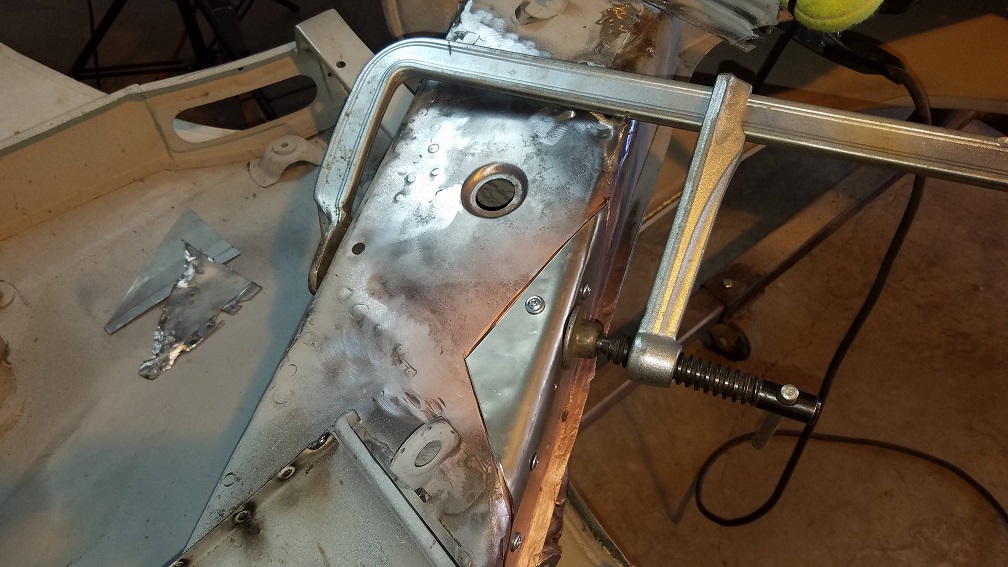 Blip, blip, blip. No real issues. 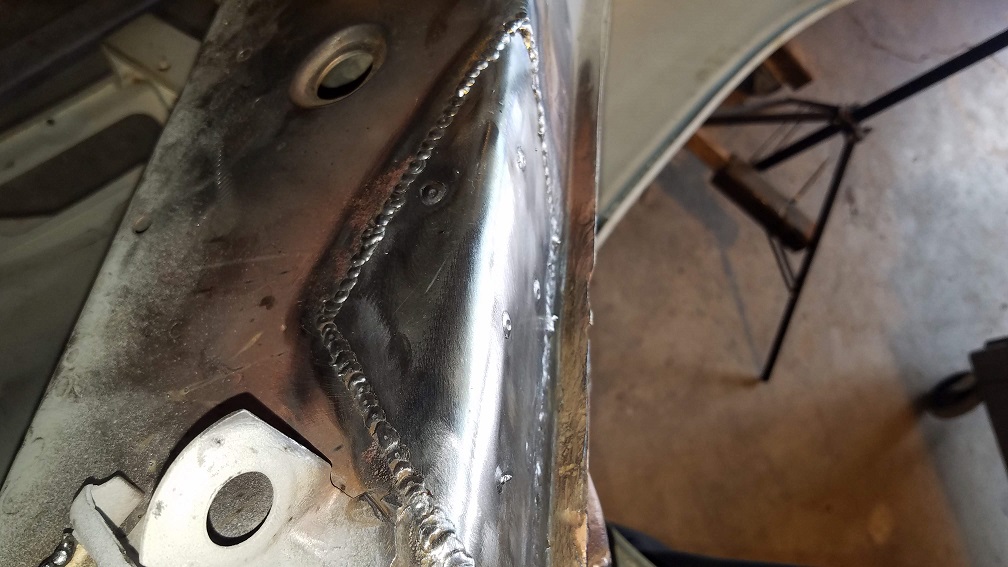 Ready for the suspension mount fitting. 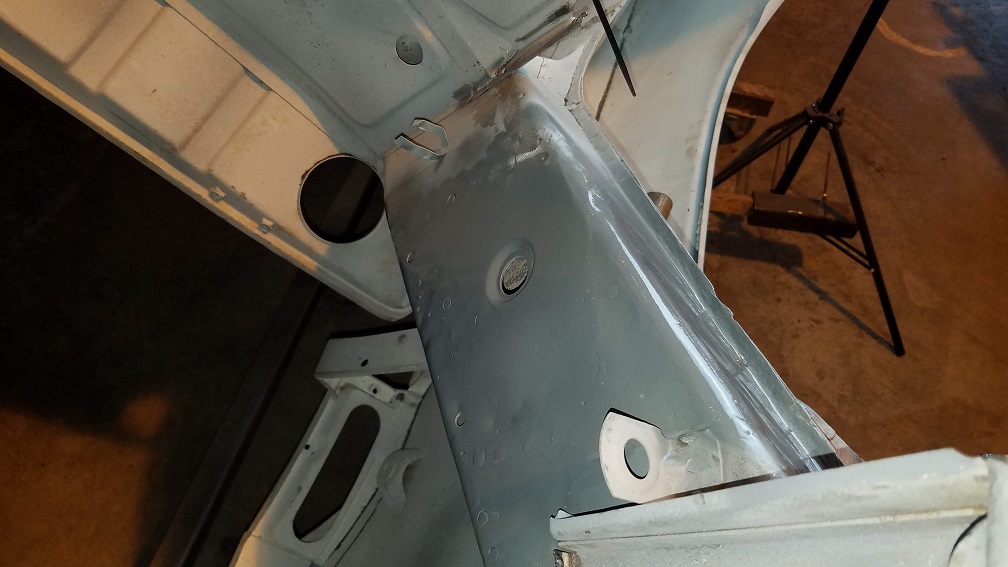 |
|
|
|
| cary |
Oct 27 2018, 08:57 PM
Post
#132
|
|
Advanced Member Group: Members Posts: 3,900 Joined: 26-January 04 From: Sherwood Oregon Member No.: 1,608 Region Association: Pacific Northwest |
Time for fitting the suspension mount.
1st issue, the bottom edge needs a little tuning. A little too long. 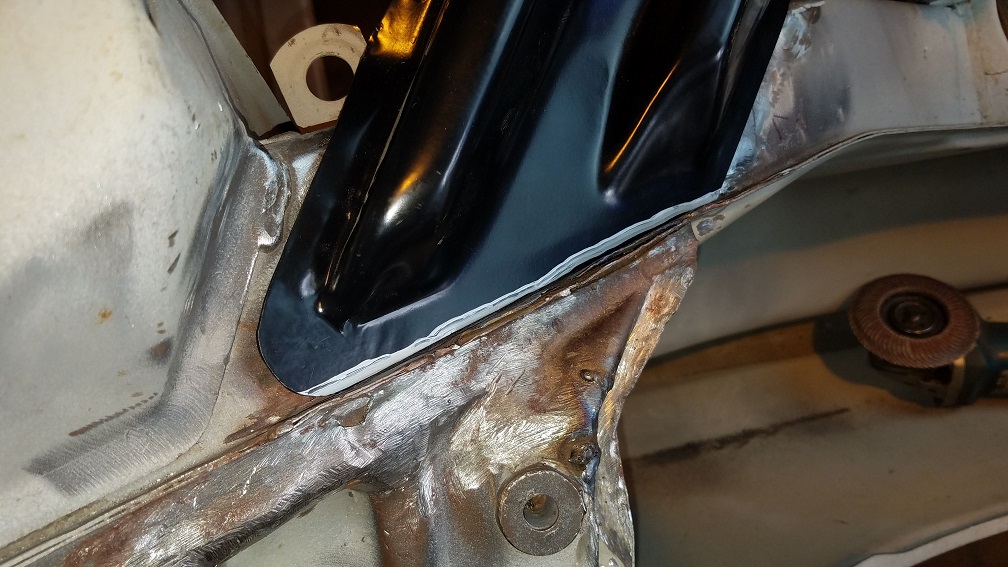 Here's the measurement points for the suspension mount. Hole in the center of firewall. 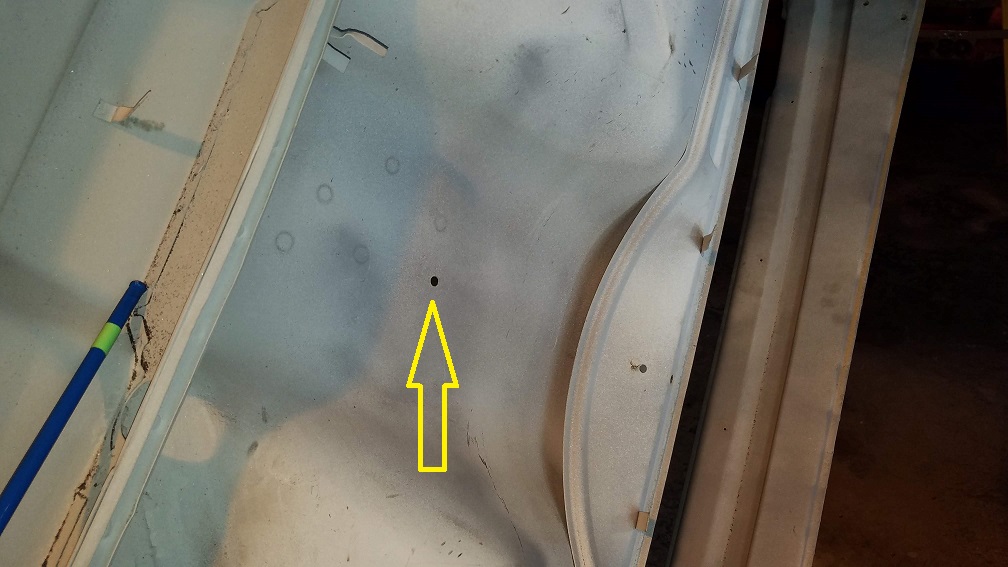 Here's 28.25"s from the measurement hole. I created a piece of brake line with a bubble flare for the hole end. And a 37 degree flare for the mount hole measurement. 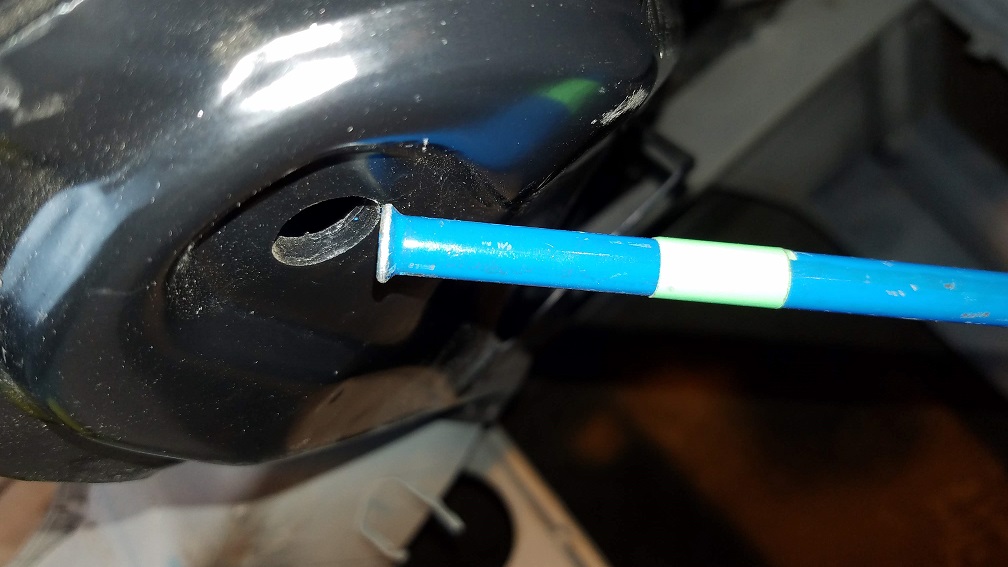 |
|
|
|
| cary |
Oct 27 2018, 09:05 PM
Post
#133
|
|
Advanced Member Group: Members Posts: 3,900 Joined: 26-January 04 From: Sherwood Oregon Member No.: 1,608 Region Association: Pacific Northwest |
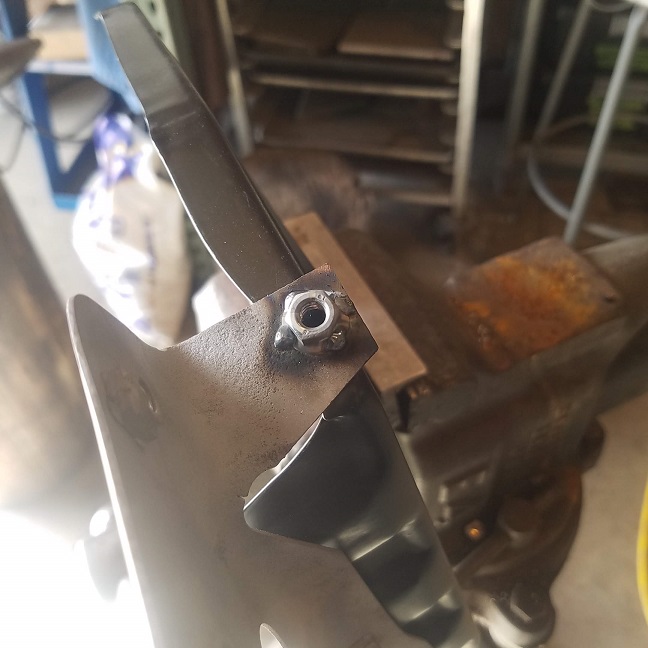
After a little welding ............... Right in place. Right & Tight.
 Welds and exposed metal covered with cold galvanizing. Ready for the right engine shelf. 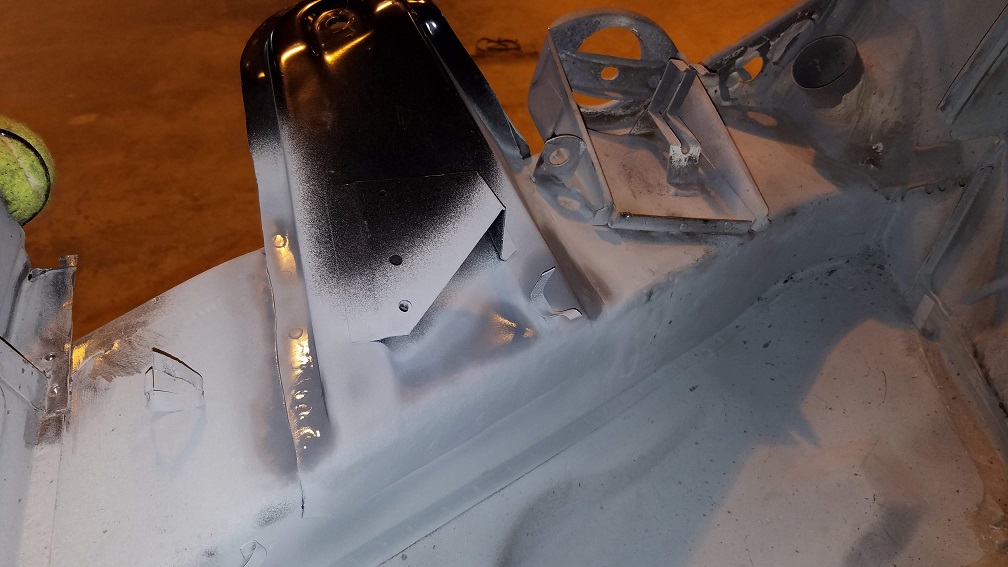 I think we'll strip off the black paint sometime in the future. This is the first P318 that came in black. As tough as it was to clean off the welding surfaces I'm thinking it was powder coated. |
|
|
|
| Mikey914 |
Oct 28 2018, 04:42 PM
Post
#134
|
|
The rubber man Group: Members Posts: 12,782 Joined: 27-December 04 From: Hillsboro, OR Member No.: 3,348 Region Association: None |
I'll ask, but if it's paint leave it.
|
|
|
|
| cary |
Oct 28 2018, 05:24 PM
Post
#135
|
|
Advanced Member Group: Members Posts: 3,900 Joined: 26-January 04 From: Sherwood Oregon Member No.: 1,608 Region Association: Pacific Northwest |
I'd planned on leaving that to you and Taylor and who's ever going to prime and paint it. Just documenting what I saw. I only removed what I needed to weld. Then coated that surface with weld thru primer.
|
|
|
|
| cary |
Nov 2 2018, 09:09 PM
Post
#136
|
|
Advanced Member Group: Members Posts: 3,900 Joined: 26-January 04 From: Sherwood Oregon Member No.: 1,608 Region Association: Pacific Northwest |
Pile of new parts ................ Thursday 11/1
 On to fitting and trimming the engine shelf. Took quite a bit of work on the sand bag to get the shape I wanted.  All welding surfaces prepped with weld thru primer. 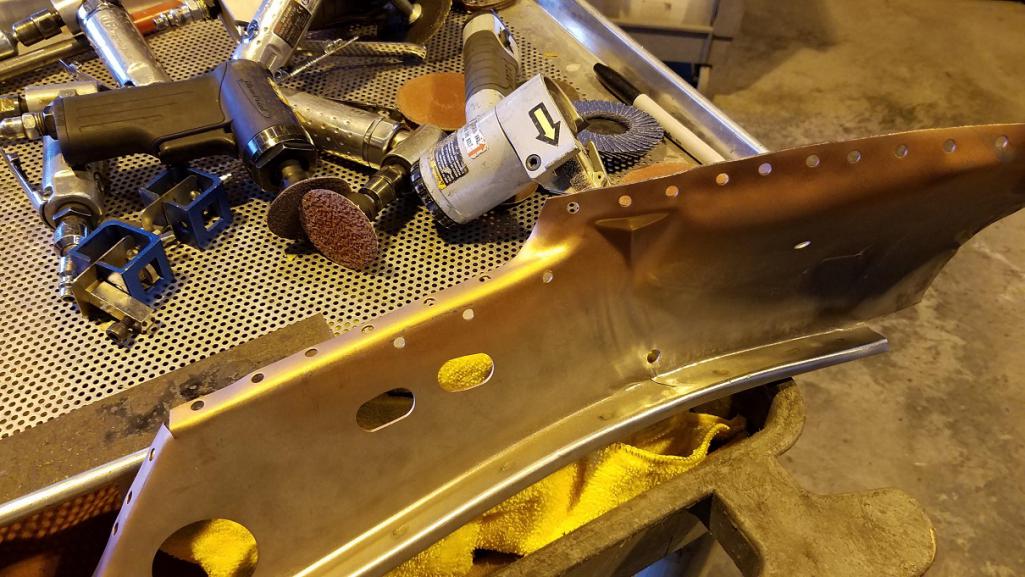 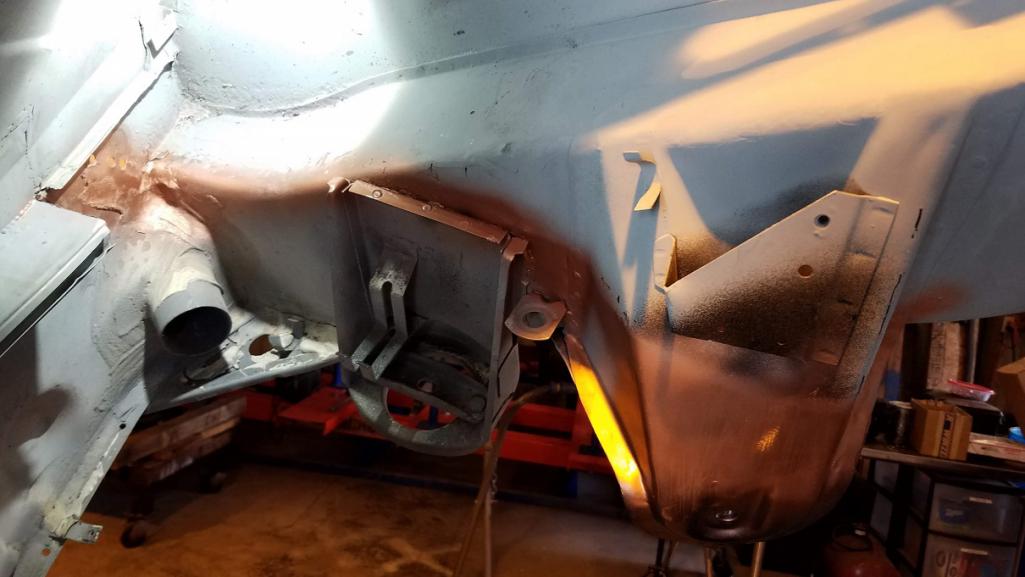 Welding in the small patch piece Jack whipped up. 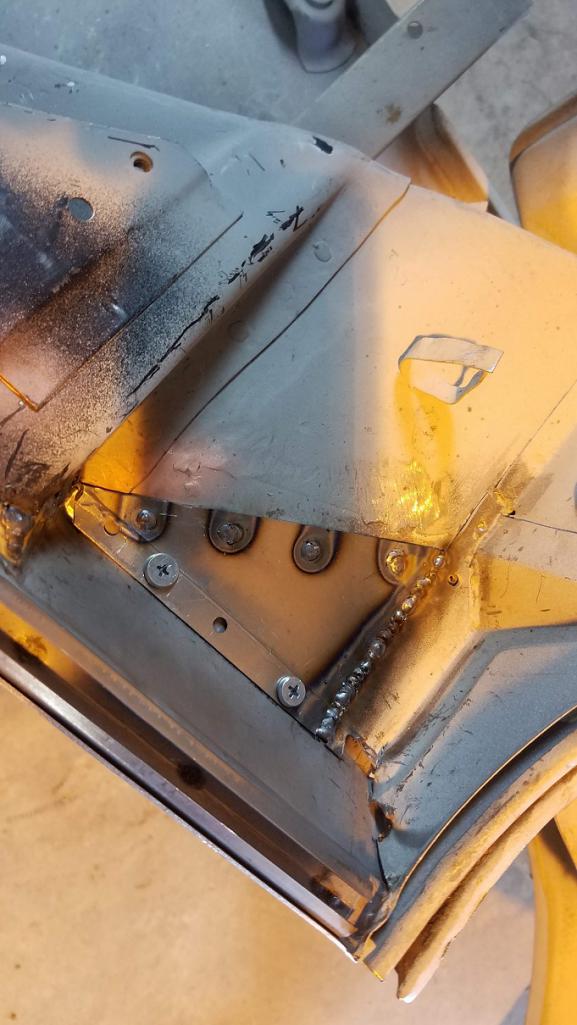 After welding and sanding. 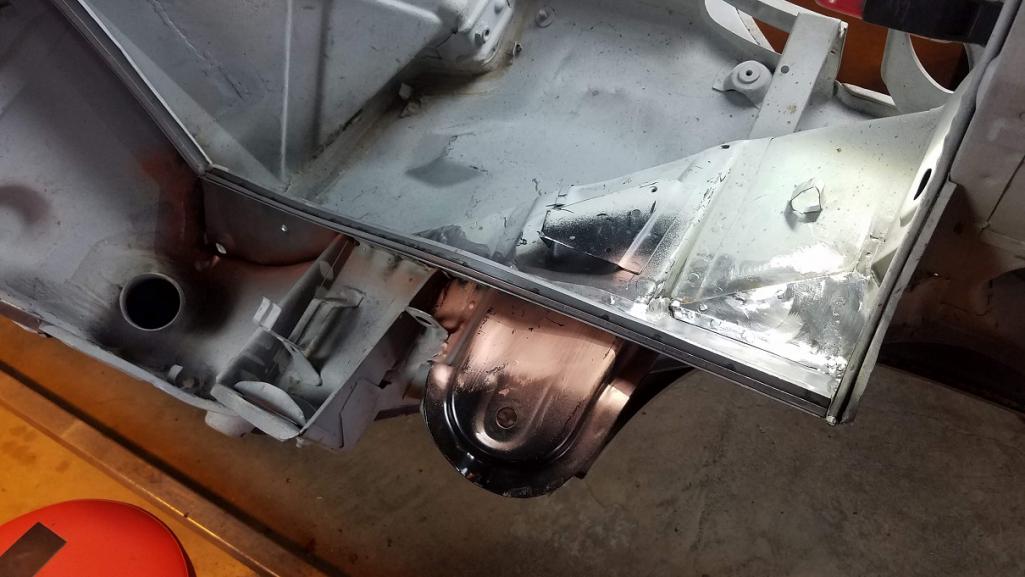 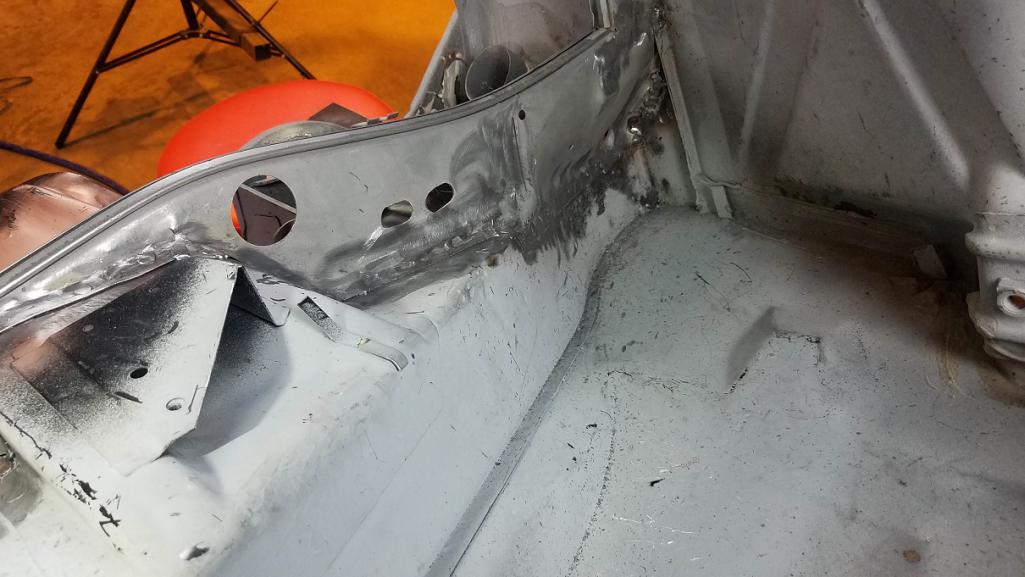 After cold galvanizing. 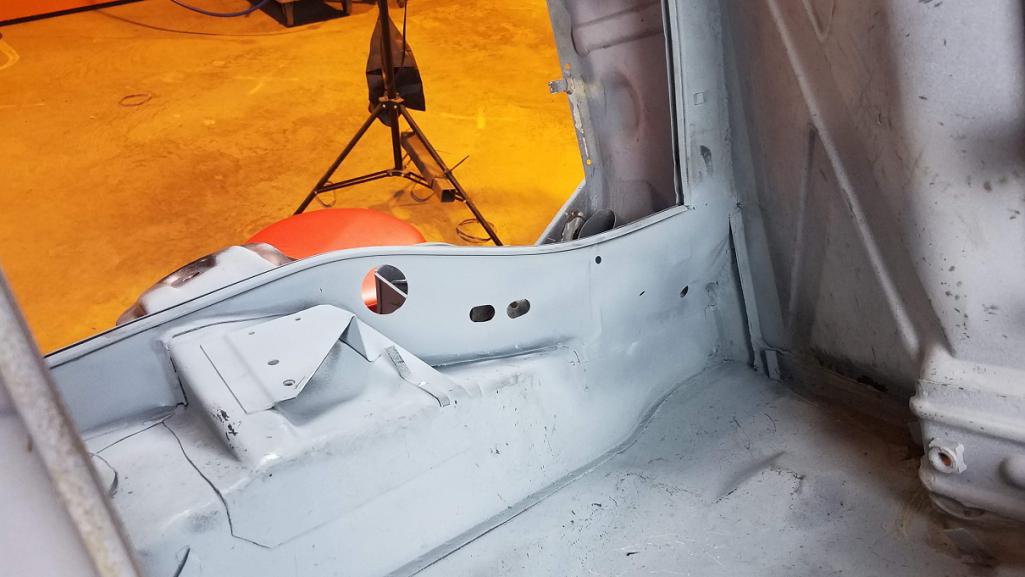 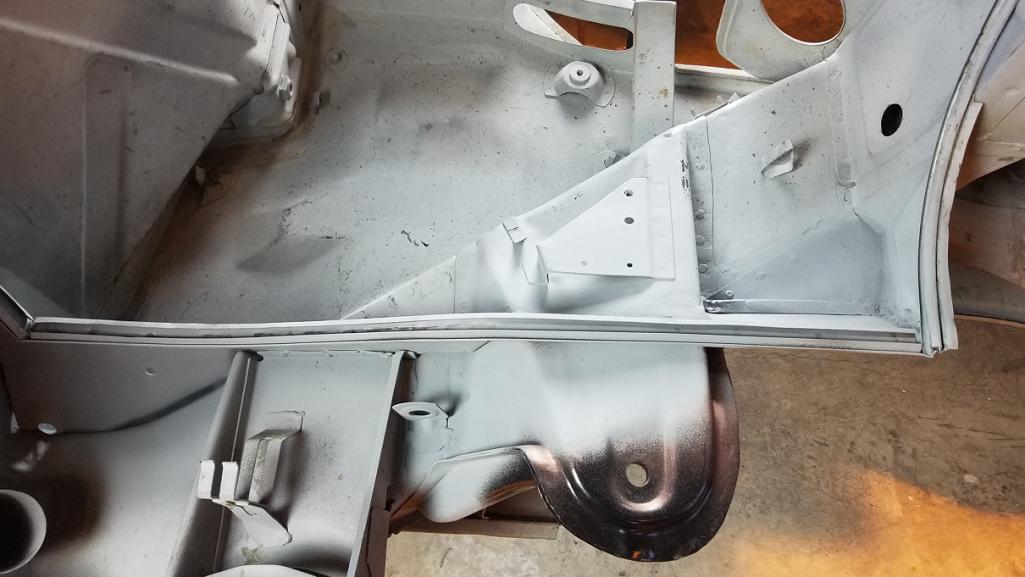 |
|
|
|
| cary |
Nov 3 2018, 08:57 AM
Post
#137
|
|
Advanced Member Group: Members Posts: 3,900 Joined: 26-January 04 From: Sherwood Oregon Member No.: 1,608 Region Association: Pacific Northwest |
Don't forget to drill your D-Jet bracket holes on your new Dansk battery tray before installation. Doing it in the car doesn't give you much angle of the dangle.
 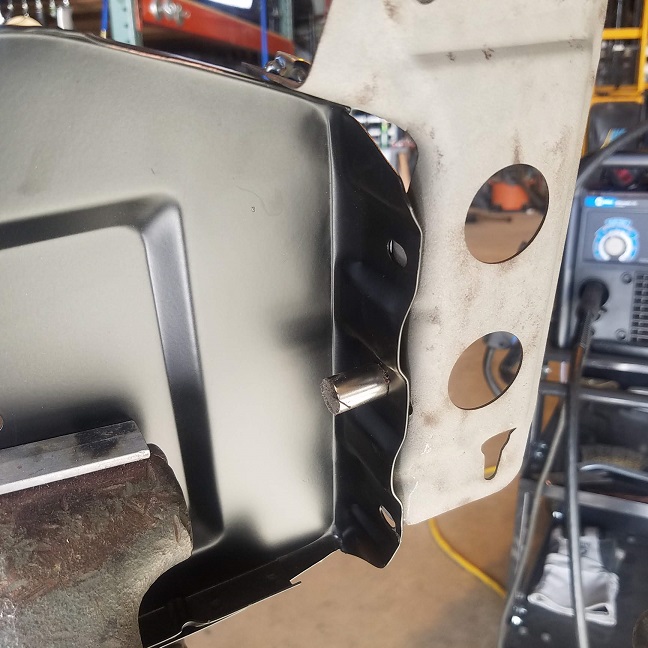 Plus don't forget to weld on your battery hold down nut. 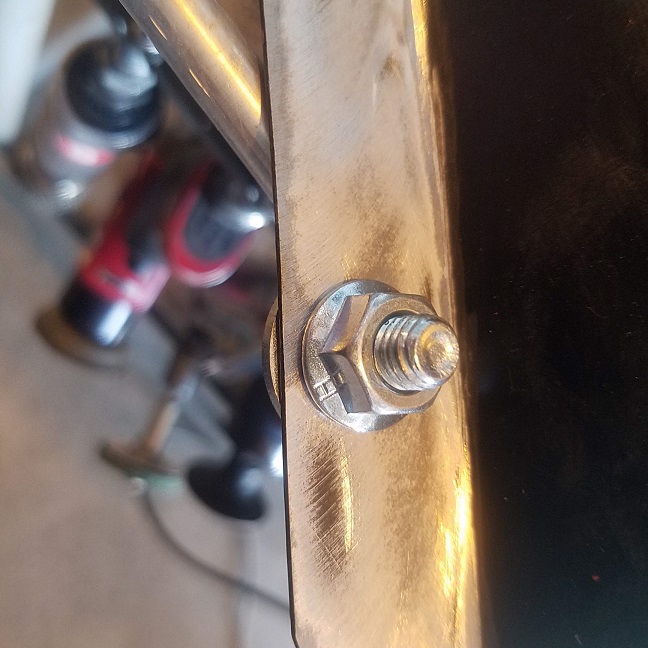 After some twisting, turning and tuning ................ 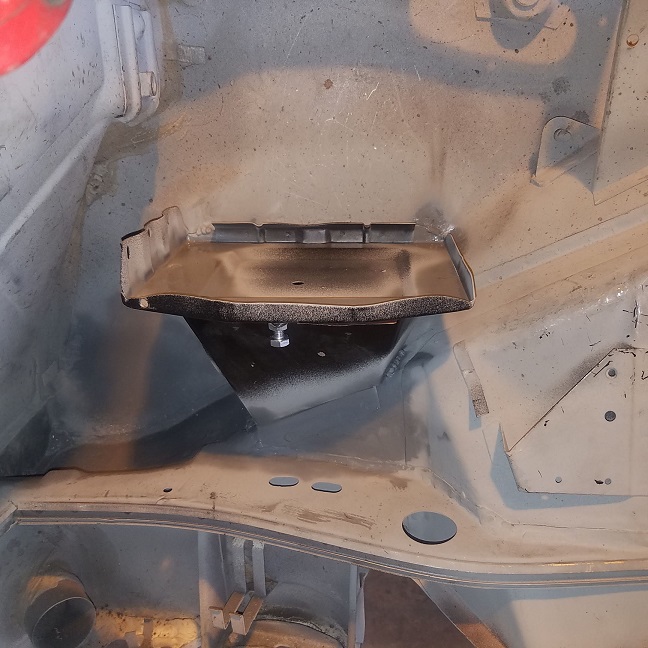 |
|
|
|
| cary |
Nov 3 2018, 09:12 AM
Post
#138
|
|
Advanced Member Group: Members Posts: 3,900 Joined: 26-January 04 From: Sherwood Oregon Member No.: 1,608 Region Association: Pacific Northwest |
Well Super In Law finished up the left chassis brace / tie so its time for me to install it.
I had to make a couple tweaks (like every part I install, new or old) before it was ready. Its all about a nice tight fit for nice flat welds. But then you run into thinner spots in the old metal, then thins sections of the new flange and seam sealer coming thru the joints and so on and so on. 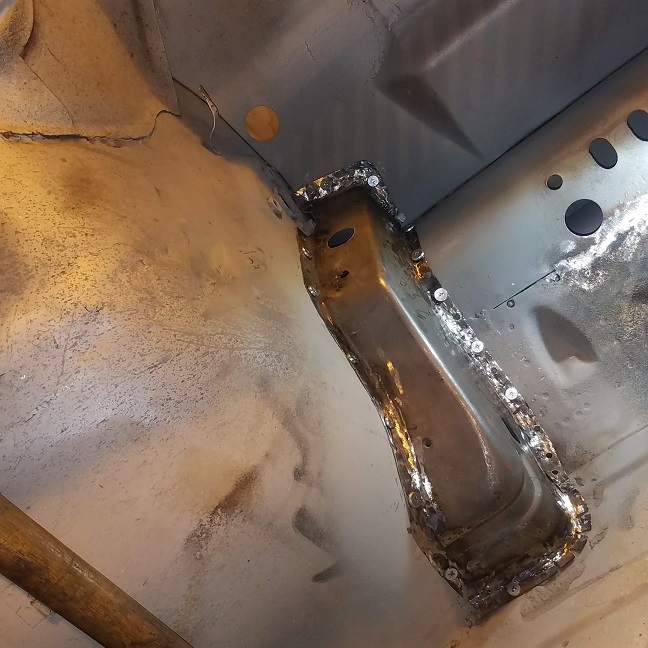 Screwed into position ............ Magic ...............  I'll notch the right brace access to the lower sway bar nut. So when it comes loose some time the next 50 years the holes ready to go. End of the day ...............  Tomorrow. Jack will pound out another set of suspension mount tie plates while I get back into the frunk seal channels. I wish there were 9 days a week. I have a 914-6 to totally disassemble and prepare for stripping next week at Rothsport. I'll send the VIN to SirAndy. Its' been in storage at Rothsport for 15 years. At the same time I'll climb up on the rack and get the serial # off a 914-6 engine up on another rack. |
|
|
|
| raynekat |
Nov 3 2018, 12:41 PM
Post
#139
|
|
Advanced Member Group: Members Posts: 2,171 Joined: 30-December 14 From: Coeur d'Alene, Idaho Member No.: 18,263 Region Association: Pacific Northwest |
Looking good there on all that fine rust repair work.
|
|
|
|
| FourBlades |
Nov 4 2018, 07:20 AM
Post
#140
|
|
From Wreck to Rockin Group: Members Posts: 2,056 Joined: 3-December 07 From: Brevard, FL Member No.: 8,414 Region Association: South East States |
Great work by your whole team! (IMG:style_emoticons/default/piratenanner.gif) I like the cold galvanizing spray, I have found it to be very rust resistant. Can you prime and paint over it or are you planning to remove it before the final paint? That always seems like an issue when you are repairing a car section by section. You need to put something over the sections as you finish them, but it is painful thinking you will need to remove it all before final paint. It is a lot of trouble to mix up and shoot two part epoxy primer for each little section and have to clean you gun afterwords. It is nice to just grab a can of something and spray it on. I used to use Eastwoods rust encapsulator, and the primer and paint I shot over it is still sticking well. I did this on interior and engine areas. On the outside of the car I stripped it down to bare metal for the final paint. John |
|
|
|
|
1 User(s) are reading this topic (1 Guests and 0 Anonymous Users)
0 Members:

|
Lo-Fi Version | Time is now: 23rd June 2026 - 07:37 PM |
Invision Power Board
v9.1.4 © 2026 IPS, Inc.